Scan
Scan Guide
The Scan function allows users to scan objects, places, and cars in the world with a massive database of item labels within a lens. It leverages Snap’s Scan technology to enable your Lens to recognize many different subjects.
The scanned result can be pulled with a custom script from the Scan Module, let's see how we can script interactions with scan!
The Scan function is a part of Lens Cloud, a collection of backend services, built on the same infrastructure that powers Snapchat.
To learn more about Lens Cloud and how to power a new generation of AR experiences that are more dynamic, useful, and interactive than ever before, please visit Lens Cloud Overview
Scripting with the Scan module
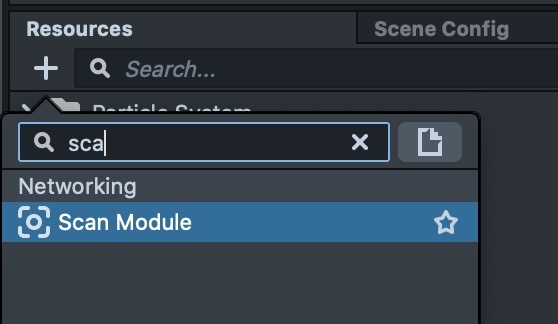
To create a scan module, go to Resources and select + then type Scan Module.
Then create an object in the scene with a script attached, and link the Scan Module object as a scripting reference to the script we just created. To create a reference to Scan Module, we'll type:
//@input Asset.ScanModule scanModule
Then to call the Scan Module, we'll call this function:
script.scanModule.scan(
  [ScanModule.Contexts.Objects],
  onScanComplete,
  onScanFailure
);
In this function, there are 3 variables being passed in the scan() function. The first is the scanned type. There are 4 types that we can choose from, and they are:
ScanModule.Contexts.Objects;
ScanModule.Contexts.Places;
ScanModule.Contexts.Cars;
See the list of detectable labels here. The list will continue to grow overtime!
Specifying different values for scanned type would return results in different categories of recognized objects in the corresponding response. Objects will be what we'll use for scanning daily objects.
The onScanComplete input refers to a custom function where returned data from the Scan Module will be passed as a JSON variable. In the onScanComplete function we'll script something like the following:
function onScanComplete(returnedJSON) {
  //parse returned json
  var jsonObj = JSON.parse(returnedJSON);
  //get results in the returned array
  var annotations =
    jsonObj['annotations'][ScanModule.Contexts.Objects]['annotations'];
  //check if array has elements
  if (annotations.length > 0) {
    for (var i = 0; i < annotations.length; i++) {
      //print out all scan results.
      print(annotations[i].name);
      //print out result's confidence score aka how 'close' the scanned item is to the returned label
      print(annotations[i].confidence);
    }
  }
}
Then in the onScanFailure failure the failed reason will be passed as a string, we can just print out the string:
function onScanFailure(failedReason) {
  print('Scan Failed For: ' + failedReason);
}
Now we got our script ready, let's put the scan function in a tap event, and then we'll see scanned result being returned every time we tap the screen!

Scan Rate Limit
The scan module works in a way that only one scan request is allowed at any given time, otherwise we'll get a network overload error. Therefore it is important to not send another scan request unless the last one has finished processing.
If we want to call scan in update. We'll do something like this
script.scanModule.scan([ScanModule.Contexts.Objects], onScanComplete, onScanFailure);
function onScanComplete(data){
  //code to run
  ...
  //call scan again once result is returned
  script.scanModule.scan([ScanModule.Contexts.Objects], onScanComplete, onScanFailure);
}
function onScanFailure(){
  script.scanModule.scan([ScanModule.Contexts.Objects], onScanComplete, onScanFailure);
}
Check out the scripting examples in the Scan Template to see in detail how this is implemented in examples!
Scan User Permission
Since Scan understands what’s in the scene by sending it to a server, the Snapchat user must accept permission to enter the Scan experience. Scan Module will not send data to or pull data from the remote server without having user accept the scan permission.
When first time using a lens with the Scan function, user will see this pop-up.

When the user presses Okay, this screen will disappear and your Lens experience will continue. If they press Cancel, the lens will be loaded but none of the functionality involving scan would work because there will be no data returned.
Once permission is accepted in the Snapchat app it will keep the setting. To reset permission please go to Settings > Lenses > Clear All Lenses
It is recommended to set up a hint for user when scan gets rejected to let them know that the lens is not running as usual and no scan data will return.
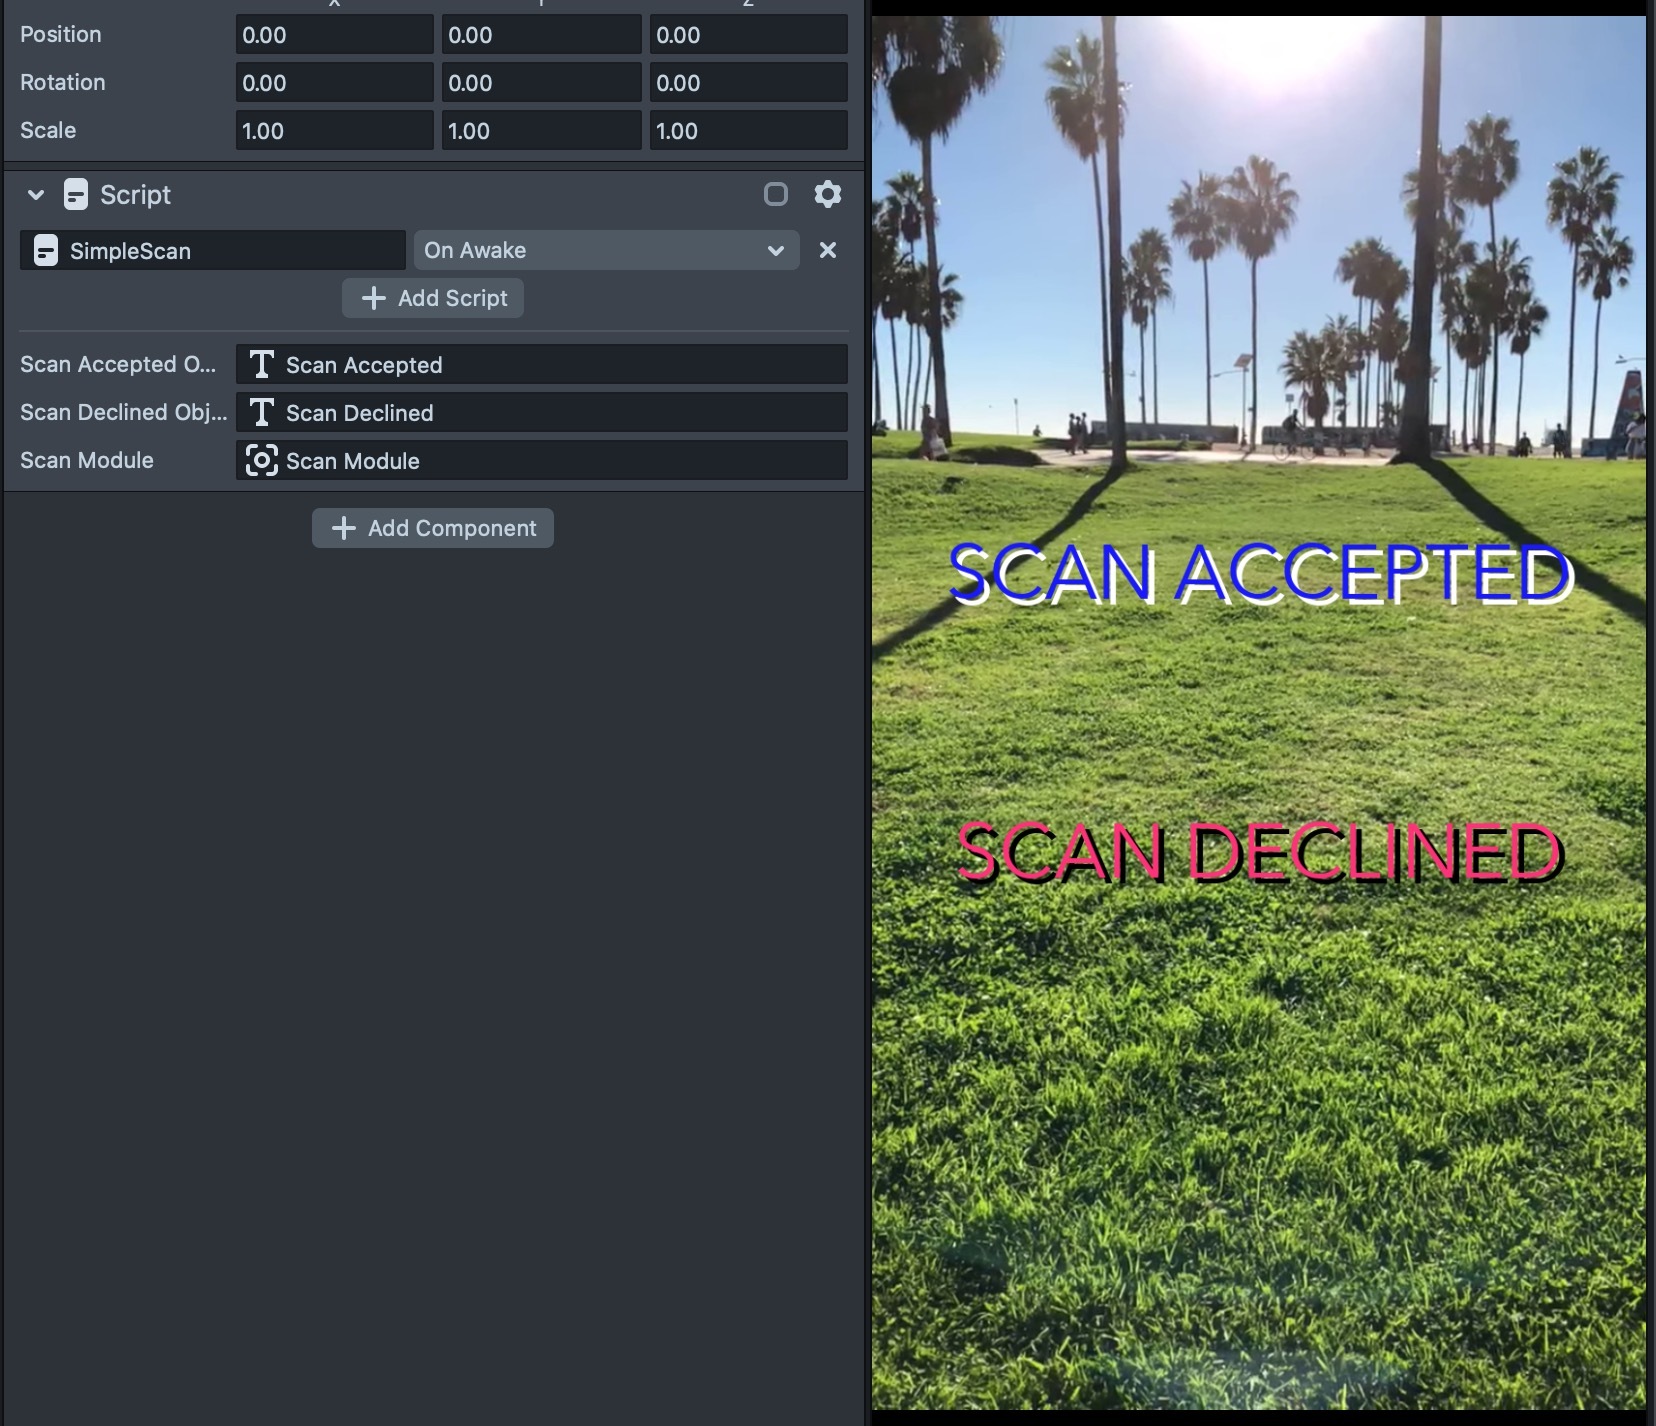
As an example, we can create 2 simple screens in Lens Studio, one will pop up when scan permission is accepted and another will pop up when permission is declined. We can add 2 references to the scan script we created earlier. We can input any objects into these 2 fields, for this demo we'll create 2 Screen Text objects, but feel free to use any custom design for official lenses!
//@input SceneObject scanAcceptedObject
//@input SceneObject scanDeclinedObject
In our script, we'll create a function that toggles related object based on scanned response.
function setScanResultScreen(isAccepted) {
  script.scanAcceptedObject.enabled = isAccepted;
  script.scanDeclinedObject.enabled = !isAccepted;
}
In the onScanFailure function, we'll call the function passing a boolean value of false when failure string returns “The user has declined permission to send images to Scan".
function onScanFailure(failedReason) {
  print('Scan Failed For: ' + failedReason);
  // The user has declined permission to send images to Scan.
  if (failedReason.includes('declined permission')) {
    setScanResultScreen(false);
  }
}
Then in the onScanComplete function, we'll just put:
setScanResultScreen(true);
Try pushing this to the Snapchat app and see how it works!
Once permission is accepted in the Snapchat app it will keep the setting. To reset permission please go to Settings > Lenses > Clear All Lenses
That's it for this guide, check out the Scan Template page and the Scan Scavenger Hunt Game page to learn more about examples of using Scan in Lens Studio!