Asset Library Publishing Guide
This guide will walk you through the steps necessary to prepare your assets for publishing on the Lens Studio Asset Library, from formatting your files to ensuring that your assets meet our quality standards. By following these guidelines, you'll increase the chances that your asset will be approved for publishing and will be used by other creators to create amazing AR experiences.
Please note that by submitting your assets to the Lens Studio Asset Library, they will be published under your Snapchat account name.
What makes a good viable asset?
A good and viable asset is a versatile building block that can be used in various ways. Some examples are if you are creating a texture pack, please allow for several different example use cases. For materials, you should provide some customizable inputs so others can fine tune your materials to fit their needs. For 3D assets, you should allow for several variations or animations that would inspire and enable creators to work on their projects.
Preparing Object for Export
-
Create a descriptive and somewhat unique name for your asset. You should make sure it is obvious and describes the asset well.
-
Name your resources or/and scene objects accordingly.
-
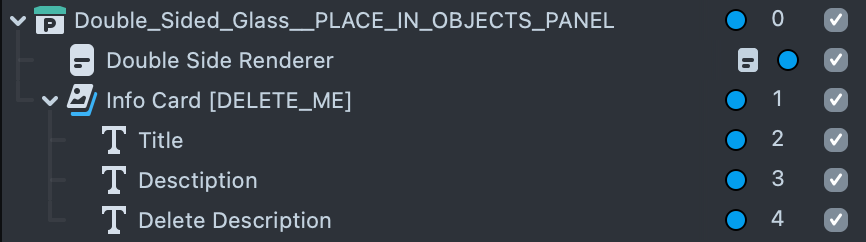
If you are exporting scene hierarchy, parent all related scene objects under one parent called _
Asset Name \_\_INSTRUCTION._Instructions are meant to provide short guidance on how to add this object to the scene. For example:__PLACE_IN_OBJECTS_PANEL__PUT_IN_ORTHO_CAM__PUT_UNDER_MAIN_CAM
-
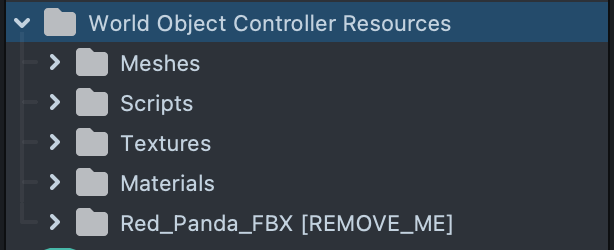
Create a new folder in the Resources panel and call it
_Asset Name Resources._- Create Subfolders as needed and place all the resources used inside this folder. For example:
More detailed instructions on each asset type can be found below.
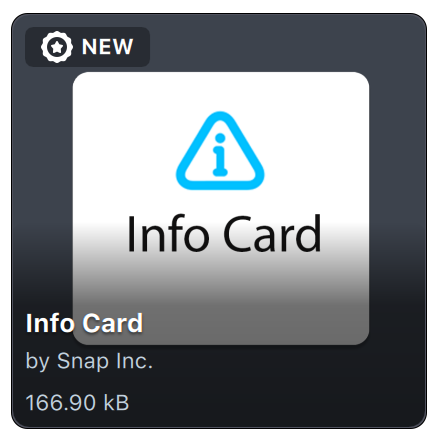
- If an asset needs a more detailed explanation, please include an Instruction card preset into your asset and parent it to the main scene object
Info Card asset is available in the Reference section of Asset Library
-
If using any third party resources, please include license information in a .js file
-
Export it in one of the following ways:
- Resource: Right click on the resource in the Resources panel and select Export. Another way to share multiple resources is to reference them in a scene and create an Object Prefab.
- Object Prefab: This is a most convenient way to share scene hierarchy. This way an asset is added to the Resources panel and does not immediately affect the Scene, but at the same time when added to Scene you are provided with a ready to go working setup. To export as Object Prefab; drag your scene object onto the Resources panel, right click and select Export.
- LSO: if your asset contains multiple cameras and Render Layers the best is to export it via LSO to preserve all information. Right click on the scene object in the Objects panel and select Export Object.
Open a new project and double check your asset before uploading it to make sure everything will be imported correctly.
Scripts
When using custom scripts consider that others should be able to read it.
Putting comments or JSDoc annotations is a great way to add affordance and help others use what you've built.
Make sure your script is versioned and attributed. Please use the following example header to your scripts:
// Script.js

// Version: 1.0.0

// Event: On Awake

// Description: [description here]
If using third party scripts or script modules, please make sure the license allows this. If unsure, please let us know when submitting.
Textures
All texture types that are supported by Lens Studio such as PNG, JPG, JPEG, GIF, T3d, Lensanim.
Please keep texture resolution under 2K.
If you are creating a texture pack, please add textures to the scene via Image or a Screen image. Parent them under one scene object and follow the Object Preset guidelines from there.
This will ensure all textures are packaged and can be distributed as a single importable file. It’s also easier for users to instantly see them in the Scene or Preview panel.
Materials
All materials used in the asset should be Graph materials. Please refer to the Material Editor guides for more information.
-
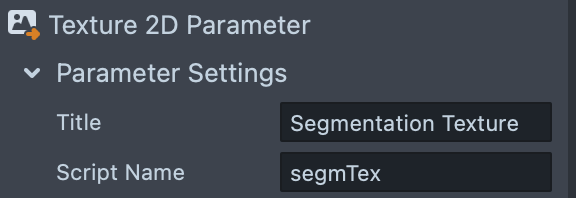
All material parameters should have meaningful Title and Script Name.

-
Make sure the material graph is readable and not tangled, use subgraphs or code nodes where possible.
-
Add comment node if needed to group nodes and explain what they do

-
Utilize Sticky Note for leaving longer multi line comments

VFX
Good VFX assets benefit from the same things that make a good Material, but with a few more things to consider:
- Use the least number of particles possible to achieve your goal. Try to never publish VFX assets with more than 50,000 max particles.

- Make use of subgraphs and code nodes that go directly on the
Spawn,Update, andOutputcontainers to keep the graph area clean and readable. - Refer to the VFX Graph Optimization page for tips on how to keep your VFX systems running smoothly
3D models
The following file formats are supported:
- FBX
- OBJ
- GLTF
Please follow these general directions to prepare your 3D model for Asset Library:
- Try to keep your models under 100,000 triangles , or 60,000 triangles for meshes with joints/skinning for best performance.
- Name all you meshes and bones nicely and descriptively, merge meshes that can be merged to simplify.
- Place pivot to the object center or another point that would allow to easily manipulate object in scene panel.
- Reset or Apply all Transforms if possible.
- Make sure normals are facing the right direction.
- Meshes need to have a UV map and texture for use in Lens Studio.
- If you want to add additional detail to your model, it is recommended to use a normal map texture.
- For animation, configure your tool's time unit to be 30 FPS (frames per second) and make sure to export whole range of animation frames.
Machine Learning models
Lens Studio Supports next file formats for ML models:
- .dnn
- .onnx
- .tflite
Please provide the example that has a complete set-up that includes ML Component with its inputs and outputs configured.
You can learn more about ML Component here
Custom Components
Custom Components are a type of component within Lens Studio that is created from a script and includes all the resources needed in order for the script to work. This allows Lens Developers to bundle together script and resources in a convenient package.
This can be a convenient way to distribute and support versioning for your asset, please check out a detailed guide on how to make one in this guide.
Asset Thumbnail
Design a preview image of your asset that will be the user's first impression. Please make sure it is engaging, reflects your asset well and fits a colorful Asset Library aesthetic.
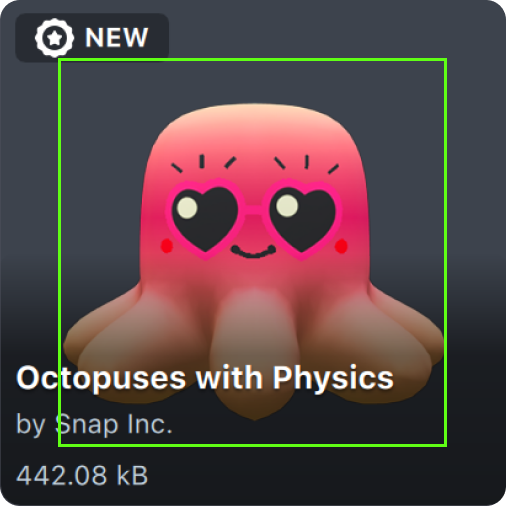
Please export your image as a 512 x 512 px png file preferably on a transparent background. Allow some space around the subject for UI elements.
Here are a couple additional references for you to use:
Custom Component Thumbnail Template
Script Module Thumbnail Template

Description
Provide a short description of your asset, for example;
"World Object Controller allows you to add a 3D object to the world that the user can walk towards and around. This tool gives you access to manipulation control which allows the user to move, scale and rotate the object."
Provide useful links that would provide some context for your asset (Guide, Template, etc)
Provide keywords that could be used to find your asset. If it consists of several elements, list out their names so they can be used for search.
Submission Form
Use My Lenses to submit your asset. The Lens Studio content team will review it, provide feedback if needed and publish it on the Asset Library.
Questions
If you have any questions or concerns about the asset submission process, please don't hesitate to contact our support team at lensstudio-support@snapchat.com