GPU Particles
You can emit particles in Lens Studio by using the Particles object. The Particles object is a shader based system that has many options, including, but not limited to: animated textures, velocity, gravity, and noise.
The Particles Template includes a number of preset particle systems such as rain, snow, smoke, and more.
Take a look at the VFX Editor to make more complex particle systems using a node-based editor, VFX vs Particle System to learn more about the difference and limitations.
Create the Particles
To create particles, in the Objects panel, select + -> Particles.
Configuring the Particles
To configure the particles, in your Resources panel, open the Particles folder and select the Particles Emitter Material. Then, in your Inspector panel, you can modify the properties of your particles.
For example, you can modify the texture of each particle by dragging and dropping your new texture into the Resources panel, and assigning it to the Textures -> Base Texture -> Texture field.
Refer to the Particle Material Options section below for detailed explanation of each setting.
Starting Particles on Event
By default, the particles object emits on start. You can modify this behavior by using the External Time option, and using a script to start the particles.
Enable External Time
To enable the External Time option, select the "Particles Emitter Material" in the Resources panel and in the Inspector panel, tick the box next to External Time.
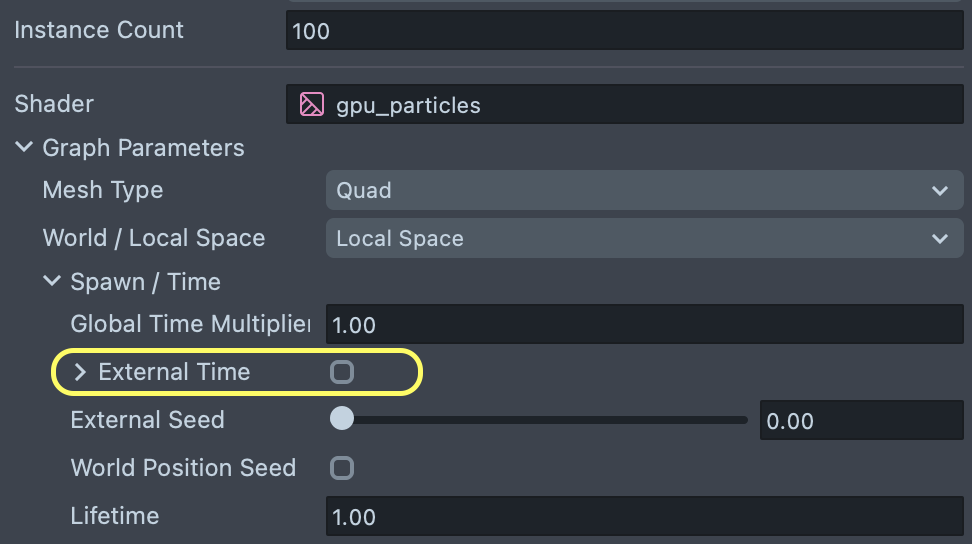
At this point you won’t see the particle emitting, this is normal.
The External Time option allows us to control at which point in time the particle simulation is in.
Script The Event
Next, add a script to pass in the time. In your Resources panel, press + -> Script. Then select your particle object, and drag the new script into the Inspector panel. We’ll run the script on Initialized since we need to bind a couple events: one to start the particles and one to update the particles over time.
Then in the Resources panel, select your new script and copy and paste the following in the Inspector panel:
// What event to trigger particle on
var triggerEventName = 'MouthOpenedEvent';
// Get the Particle's Mesh Visual
var meshVis = script.getSceneObject().getFirstComponent('Component.MeshVisual');
// Variable to store what time particle started
var startTime;
// Update the particle time every frame when needed
function update() {
  if (startTime) {
    // Calculate how many seconds have elapsed since we've triggered particles
    var particleTime = getTime() - startTime;
    // Pass it in to our Particle Material
    meshVis.mainPass.externalTimeInput = particleTime;
  }
}
var updateEvent = script.createEvent('UpdateEvent');
updateEvent.bind(update);
// On an event, store the time when particle is triggered
function startParticle() {
  startTime = getTime();
}
var particleTriggerEvent = script.createEvent(triggerEventName);
particleTriggerEvent.bind(startParticle);
In this case the script triggers the particle when the user opens their mouth. You can modify eventTriggerName to change this. For example: replacing MouthOpenedEvent with TouchStartEvent will start the particle when the user taps the screen instead. Take a look at the Script Event page to see different types of events.
If you are using Instant Spawn, you will need to utilize this script or similar to start the particle.
Stopping Particles on Event
In some cases you may want to stop the particles from emitting. You can add an additional event to the script above to do this.
// What event to stop particle on
var stopEventName = 'TouchStartEvent';
// On an event, stop particle by setting particle time to 0
function stopParticle() {
  startTime = 0;
  meshVis.mainPass.externalTimeInput = 0;
}
var particleStopEvent = script.createEvent(stopEventName);
particleStopEvent.bind(stopParticle);
Particles Control Helper
Alternatively, you can import the ParticlesControlHelper script to help you control particle start and stop time. ParticlesControlHelper is a script that allows you to trigger an effect via the Inspector panel by giving you a drop down with a list of possible events. Additionally, there is an option to set an event to stop the particle.
To use it, download Particles Control Helper from the Asset Library, and drag the JavaScript file inside into your Resources panel. Then in your Objects panel, select your Particles object, and drag the script into the Inspector panel to add it. As above, make sure External Time is ticked in the Inspector panel of Particles Emitter Material.
Particles Material Options
Here we'll cover the features and parameters of the material that controls the particles. Each object that we treat as an emitter has a material applied to it for emitting particles.
Changing a materials parameters will apply across all objects with that material applied to it. If you want to create another emitter object with the same material but slightly different settings then make sure you duplicate the material first and then apply that to your new object.
You can script any property material by hovering over the property name to get its scriptable variable name. Then, you can modify the material's mainPass to change it!

Spawn / Time
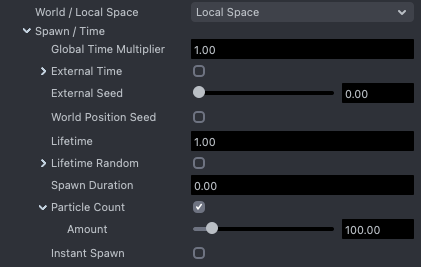
Spawn / Time controls lifetime of particles and particle count. You can customize these options to spawn particles over time of a burst of particles all at once.
- World / Local Space - Specifies the space in which rotation is applied
- Global Time Multiplier(float) - A multiplier of time across the entire effect which can be used to make the effect move faster or slower
- External Time (bool) - Enables the use of external time controlling the particle effect
- External Time Input (float) - The external time input from an outside source such as script
- External Seed (float) - Assigns a seed value to the effect which allows you to control the randomness of particles while still keeping them synced with other effects sharing the same seed value
- World Position Seed (bool) - Takes into account the world positions when using the seed value
- Lifetime Random (bool) - Enables random lifetime duration for each particle
- Lifetime Min/Max (float) - The range, in seconds, of each particle's lifetime is randomly assigned
- Particle Count (bool) - Enables definition of a maximum particle count for the emitter
- Amount (float) - When "Particle Count" is enabled, defines the maximum particle count
- Instant Spawn (bool) - When enabled will "burst" entire particle count on the first frame the particle system is emitted. You must also enable "External Time", and pass in the time through script. Refer to the Starting Particles on Event section above for information on passing in time to particles.
Spawn Location/Shape

Spawn location allows you to define the area in which particles will spawn. You can control this by defining the dimensions of the volume in which the particles will emit from.
- Initial Location / Spawn Location (bool / vec3) - When enabled allows you to define the initial location where an effect will spawn offset from the origin of the object which the material as applied to
- Initial Box Spawn / Spawn Box (bool / vec3) - When enabled will allow you to define the dimension of the box volume in which particles will spawn
- Initial Sphere Spawn / Spawn Sphere (bool / vec3) - When enabled will allow you to define the dimension of the sphere volume in which particles will spawn
Textures
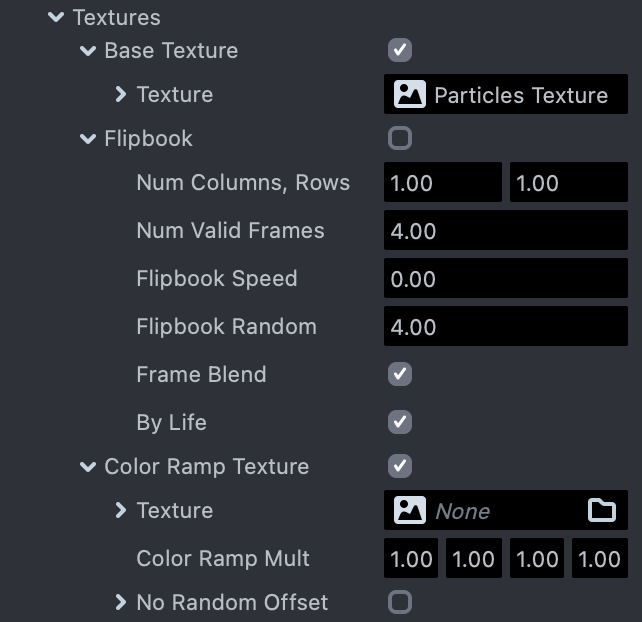
Textures allow you to define custom color and alpha textures you’ll apply to each particle. You can define a flipbook texture to play animated image sequences per particle. You can also define a ramp texture to control fading particle or add a gradient of color to particles over their lifetime. This is great for fiery smoke effects.
- Base Texture / Texture (bool / texture) - Allows you to specify a texture to apply to each particle
- Flipbook (bool) - Enables use of a flipbook (sprite sheet) texture to animate on each particle over its lifespan
- Num Columns, Rows (vec2) - Sets the flipbook texture atlas grid size. x is the number of columns, y is the number of rows in the atlas
- Num Valid Frames - Number of valid animation frames. May be set to at most columns*rows. May be set to less if there are unused frames at the end of the grid
- Flipbook Speed (float) - Controls the playback speed of the flipbook animation
- Flipbook Random (float) - Controls a random value between 0 and the number you define to randomize the flipbook
- Frame Blend (bool) - Will "fade" the images of the flipbook between each other to create a smooth transition
- By Life (bool) - When enabled will animate the flipbook sequence over the lifespan of the particle
- Color Ramp Texture (bool / texture) - Unlocks a texture to multiply the color and alpha on top of your particles over their lifespan
- Color Ramp Mult (color) - Color that is multiplied against the "Color Ramp Texture"
- No Random Offset - Color that is multiplied against the "Color Ramp Texture"
Color / Alpha
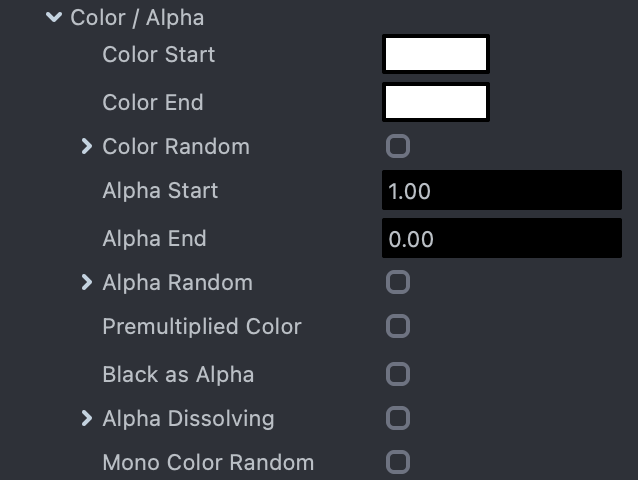
These parameters control color being applied to your particles and the alpha values. You can specify random color and alpha values for each particle as it’s spawned.
- Color Random (bool) - Enables a random color applied to each particle
- Color Min/Max Start (color) - The start of the color range used to randomly assign each particle's color
- Color Min/Max End (color) - The end of the color range used to randomly assign each particle's color
- Alpha Random (bool) - Enables a random alpha applied to each particle
- Alpha Min Start/End (float) - The minimum value of the range used to randomly assign each particle's alpha
- Alpha Max Start/End (float) - The maximum value of the range used to randomly assign each particle's alpha
- Premultiplied Color (bool) - Enabled will multiply the color values against the Base Texture if one is defined so that the particles will look correct in premultiplied alpha mode
- Black as Alpha (bool) - Enabled will treat the black value of the Base Texture as the alpha value for each particle
- Alpha Dissolving (bool / float) - Allows you to "erode" the alpha of particle over their lifespan
- Mono Color Random (bool) - Keeps random color values within the expected spectrum based on the color picker otherwise the random values lean more towards random mathematical values
Noise
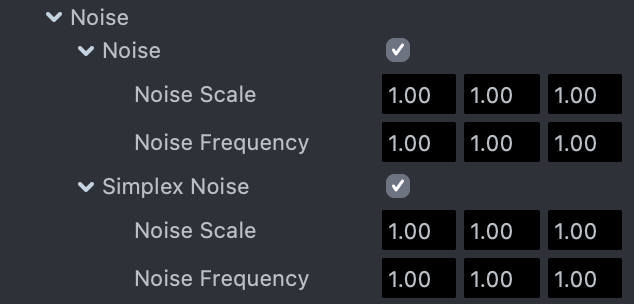
Noise allows you to control how much random movement you’d like to add to your particles.
- Noise (bool) - Enables the noise functionality
- Noise Scale (vec3) - Defines the 3D intensity of the noise applied
- Noise Frequency (vec3) - The 3D frequency of the noise
- Simplex Noise (bool) - Enables the simplex noise functionality which can be used as a cheaper alternative to standard noise and can also act as a second layer of noise for added detail
- Simplex Noise Scale (vec3) - Defines the 3D intensity of the simplex noise applied
- Simplex Noise Frequency (vec3) - The 3D frequency of the simplex noise
Velocity
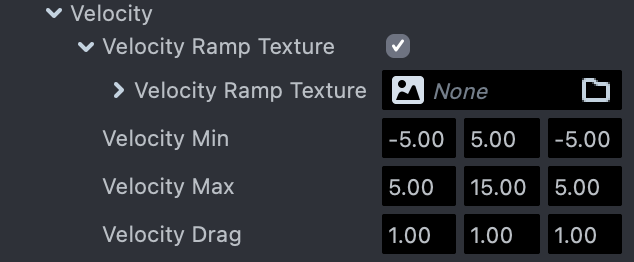
Velocity controls the movement speed of your particles. You can specify random 3 dimensional directions to apply to your particles.
- Velocity Ramp Texture (bool/texture)- Enables use of a texture to define the change in velocity
- Velocity Min (vec3)- Defines the minimum of the range from which each particle's velocity is randomly assigned
- Velocity Max (vec3)- Defines the maximum of the range from which each particle's velocity is randomly assigned
- Velocity Drag (vec3)- Defines the amount of drag applied to each particle's velocity over time
Rotation
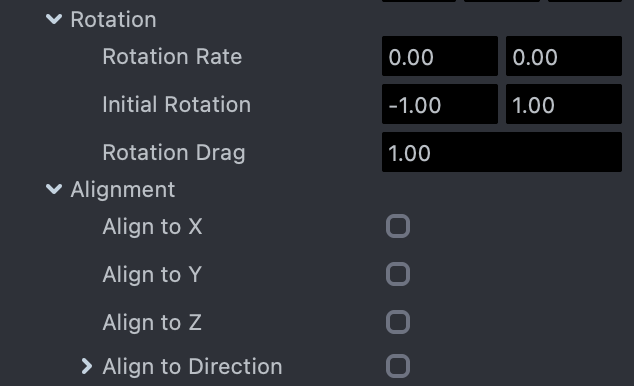
Rotation will control the amount of random rotation applied to your particles. Rotation is applied around the center of the particle. The values you specify are random ranges to rotate around this center point.
- Rotation Rate (vec2) - The min and max rotations in radians each particle will have rotate over their life
- Initial Rotation (vec2) - The min and max rotations in radians each particle will have at birth
- Rotation Drag (float) - The power applied to the rotation rate on each particle
- Align to X/Y/Z (bool) - Each axis you'd like to force the particle to face where most particles usually face "Z"
- Align to Direction (bool) - This aligns particle to their velocity direction
- Align to Direction (float) - Velocity stretch multiplier
Scale
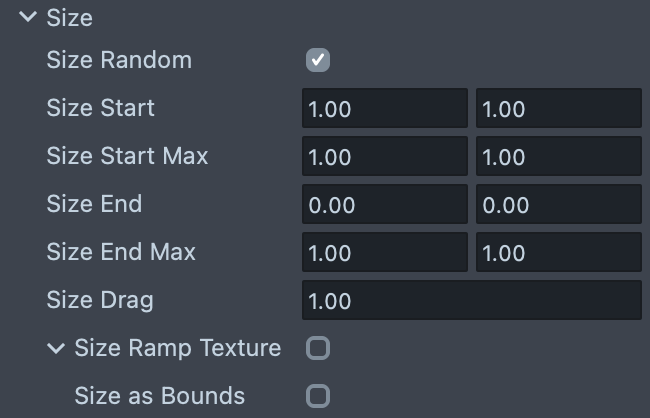
Scale controls the size applied to each particle between a random range of values.
- Size Start (vec2) - The size of each particle at the start of its life
- Size End (vec2) - The size of each particle at the end of its life
- Size Drag (float) - The power of the Size applied to the particles which can be used to "ramp" up the scale of particles at birth
- Size Random (vec2) - Enables definition of random size ranges for both the start and end of each particle's life
- Size Ramp Texture (texture) - Enables use of a texture to describe change in size over time (not available on low-end devices)
Force / Gravity
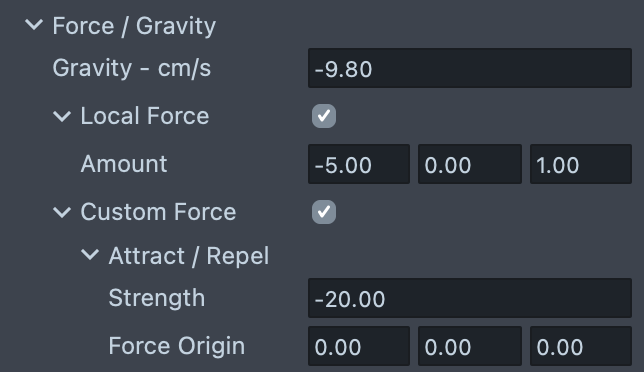
Force / Gravity controls the amount of gravity applied to your particles. A negative value sends particles toward the ground and positive values send the particles into the air.
- Gravity (float) - The force of gravity applied to particles which is usually represented as -9.8
- Local Force (bool) - When enabled allows you to define a specific axis that gravity will respect else it assumes global Y-Up
Related Guides
Please refer to the guides below for additional information: