Custom Location AR Template
With Custom Location AR, you can map any location of your choosing, upload it to Lens Studio, and author AR content at that specific location. The template provided will guide you through the steps needed to create your own Custom Location AR Lenses in a quick and easy process.
Custom Location AR are a part of Lens Cloud, a collection of backend services, built on the same infrastructure that powers Snapchat.
To learn more about Lens Cloud and how to power a new generation of AR experiences that are more dynamic, useful, and interactive than ever before, please visit Lens Cloud Overview.
Currently, Lens Cloud Features cannot be used in Sponsored Lenses.
Guide
Before you start working with the Custom Location AR template, you will need a Location ID on hand in order for the content to work properly. You can get the Location ID by scanning a Custom Location using a provided Lens to get the Location ID. To learn more about how to Scan and get the Location ID, please visit the Custom Location Creator Lens Guide.
This feature is currently targeted for use with structures up to three meters in height. For best practices, avoid any objects that can move and objects that have a large amount of shiny or reflective surfaces.
The Custom Location AR template has four steps that need to be followed to create a Custom Location AR Lens.
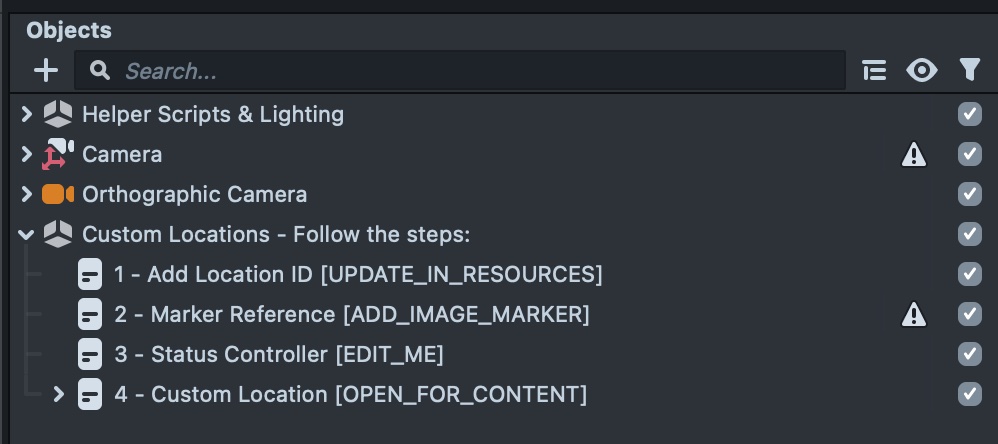
1 - Add Location ID
Select the 1 - Add Location ID [UPDATE_IN_RESOURCES] object in the Objects panel.
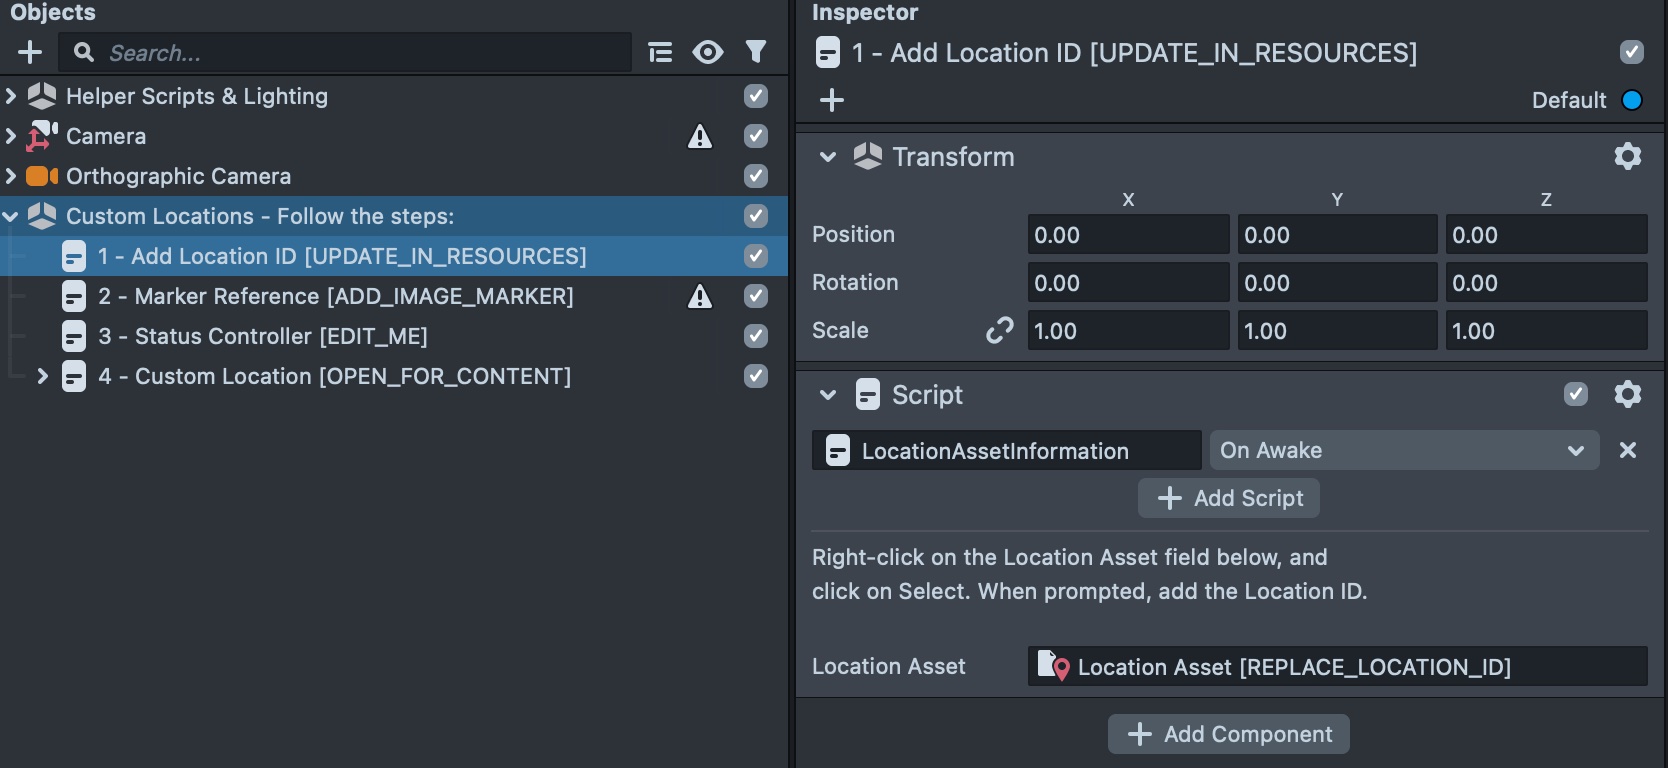
If you take a look at the Inspector panel, you will see that each step comes with a small set of instructions.
You will need to add teh Location ID to the Location Asset in the project.
- Right-click on the Location Asset field in the Inspector panel and left-click on Select.
- Alternatively, you can simply select it in the Resources panel.
- With the Location Asset selected, enter the Location ID you want to use.
Once the Location ID has been entered, you will be able to see your scanned Location Mesh in the Lens Studio viewport.
If you do not see your mesh, verify that the Location ID is valid and to double-check your viewport to see if it has been placed away from origin.
With the Location ID set, you will need to set up a Marker Reference.
2 - Marker Reference
In order to submit a Custom Location AR Lens, you will need to provide a picture of the Custom Location and assign the image as an Image Marker. This process helps the Quality Assurance team to make sure that all content is safe for all of our users.
Failure to provide an image marker of the Custom Location AR may result in your Lens being rejected for publishing.
-
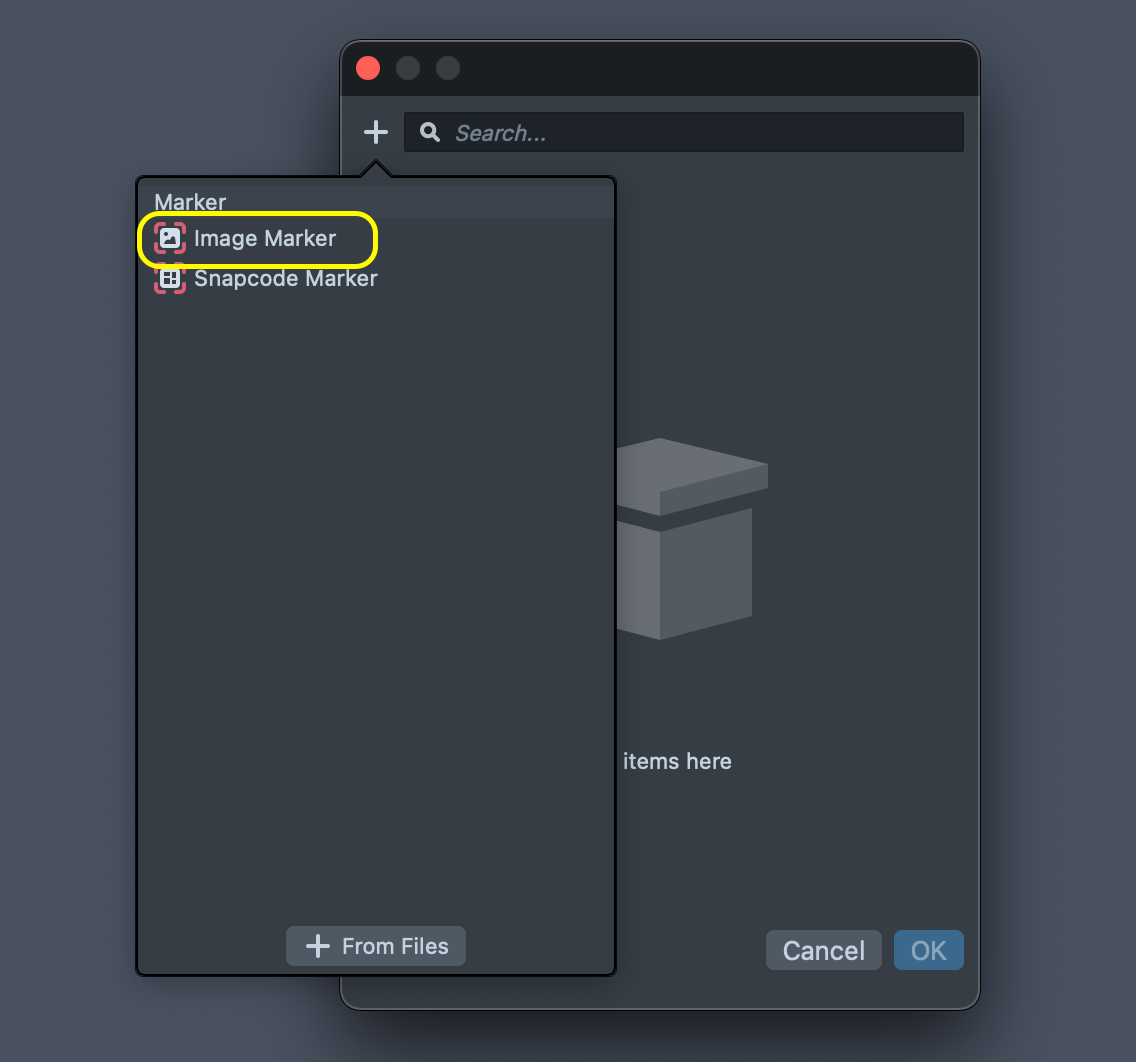
In the Inspector panel, click on the Marker input field.

-
This will open up a new window where you can create an Image Marker by selecting the + button.
-
Select the Image Marker option.
-
Select a file that has an image that you took from the Custom Location and select the OK button to create an Image Marker.
To learn more about the Marker tracking, please visit the Marker Tracking Guide.
3 - StatusController
The StatusController controls all the different hints that will guide users when interacting with Custom Location AR Lenses. You can view its properties by selecting the 3 - StatusController [EDIT_ME] Scene Object in the Objects panel and customize the hint in the Inspector Panel.
- Set the Locations’s Name in the Location Name input field.
- Create an icon that best describes the Location and place it in the Location Icon.
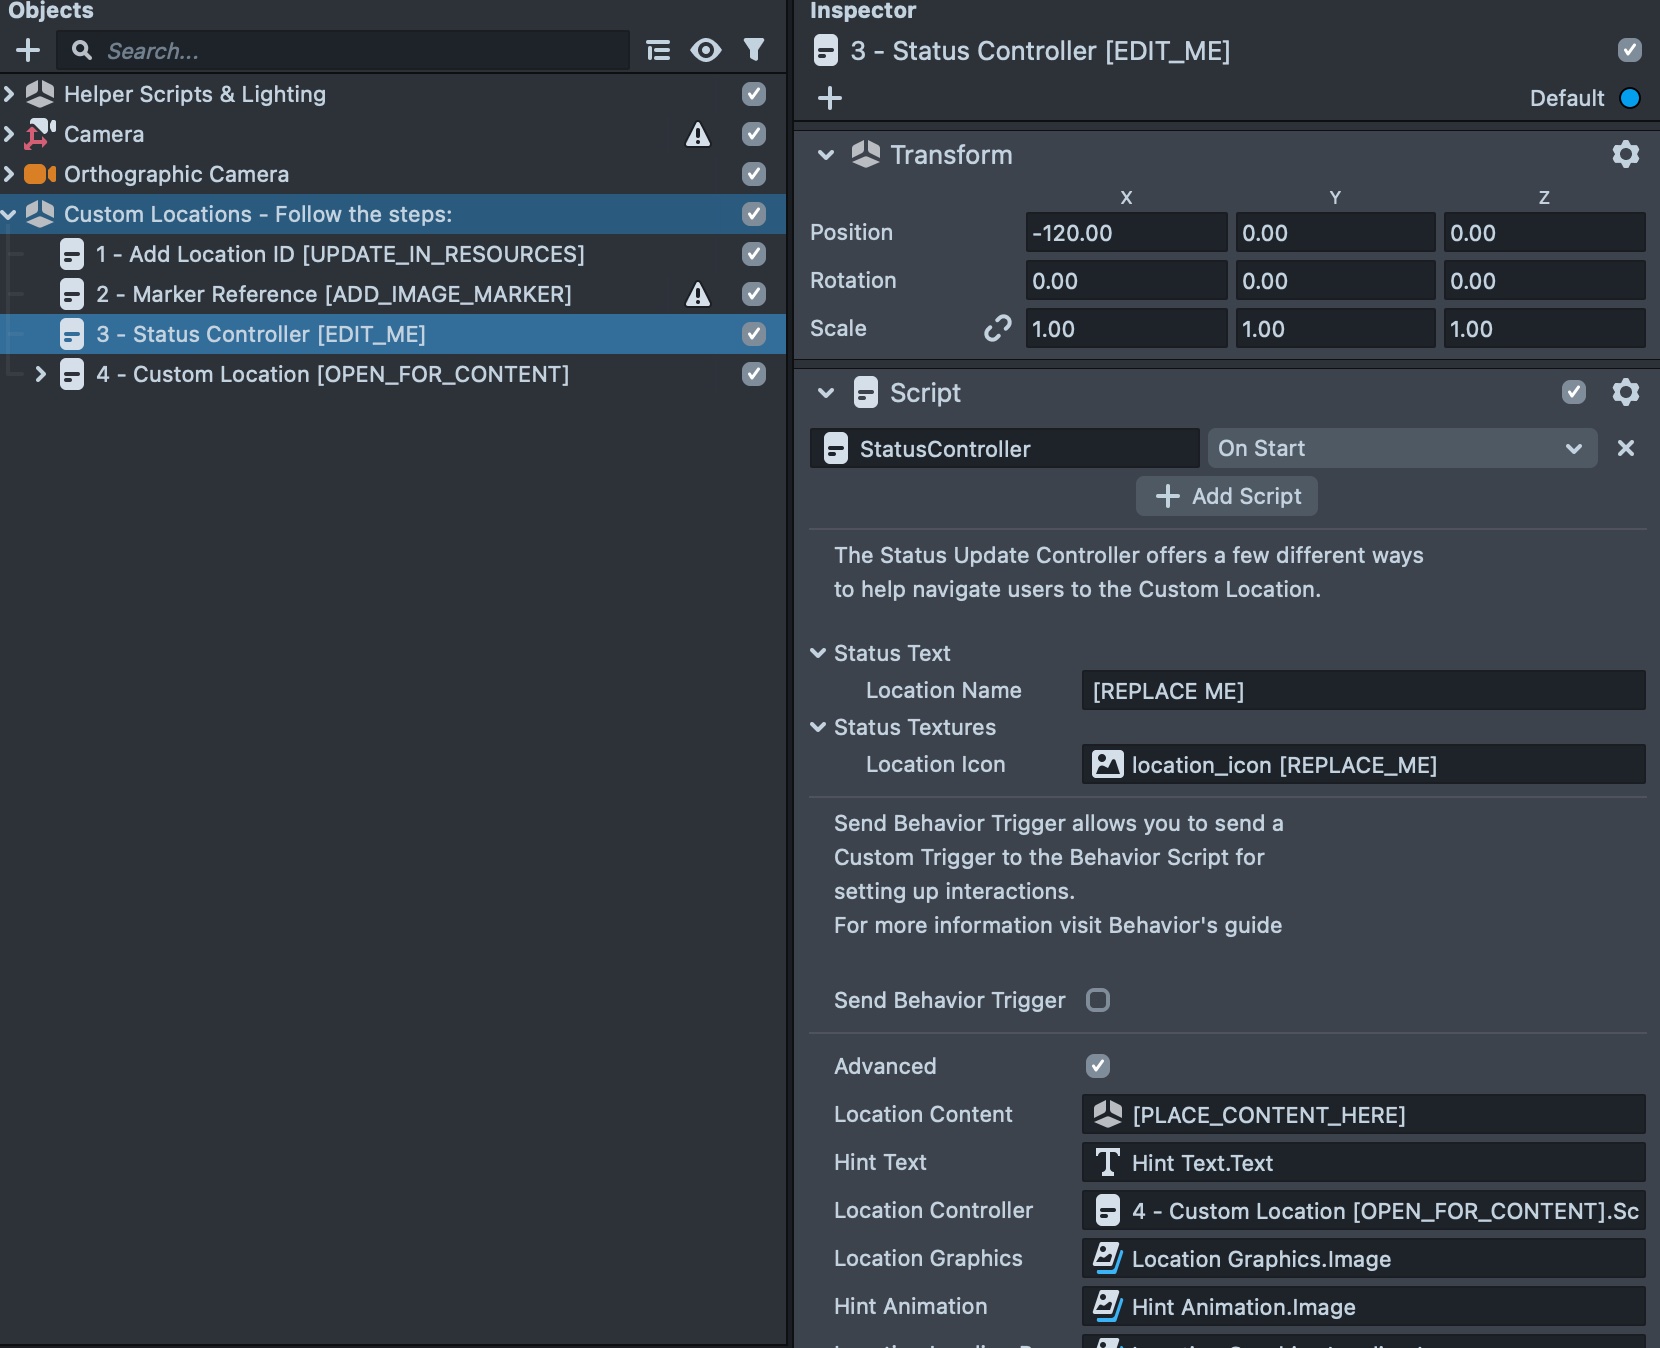
By configuring the 3 - StatusController [EDIT_ME] Scene Object properly, it will help users to easily understand what they should look for when looking at a Location.
Now that you have set up the hints for your Custom Location AR, you will see how you can view the hint in Lens Studio.
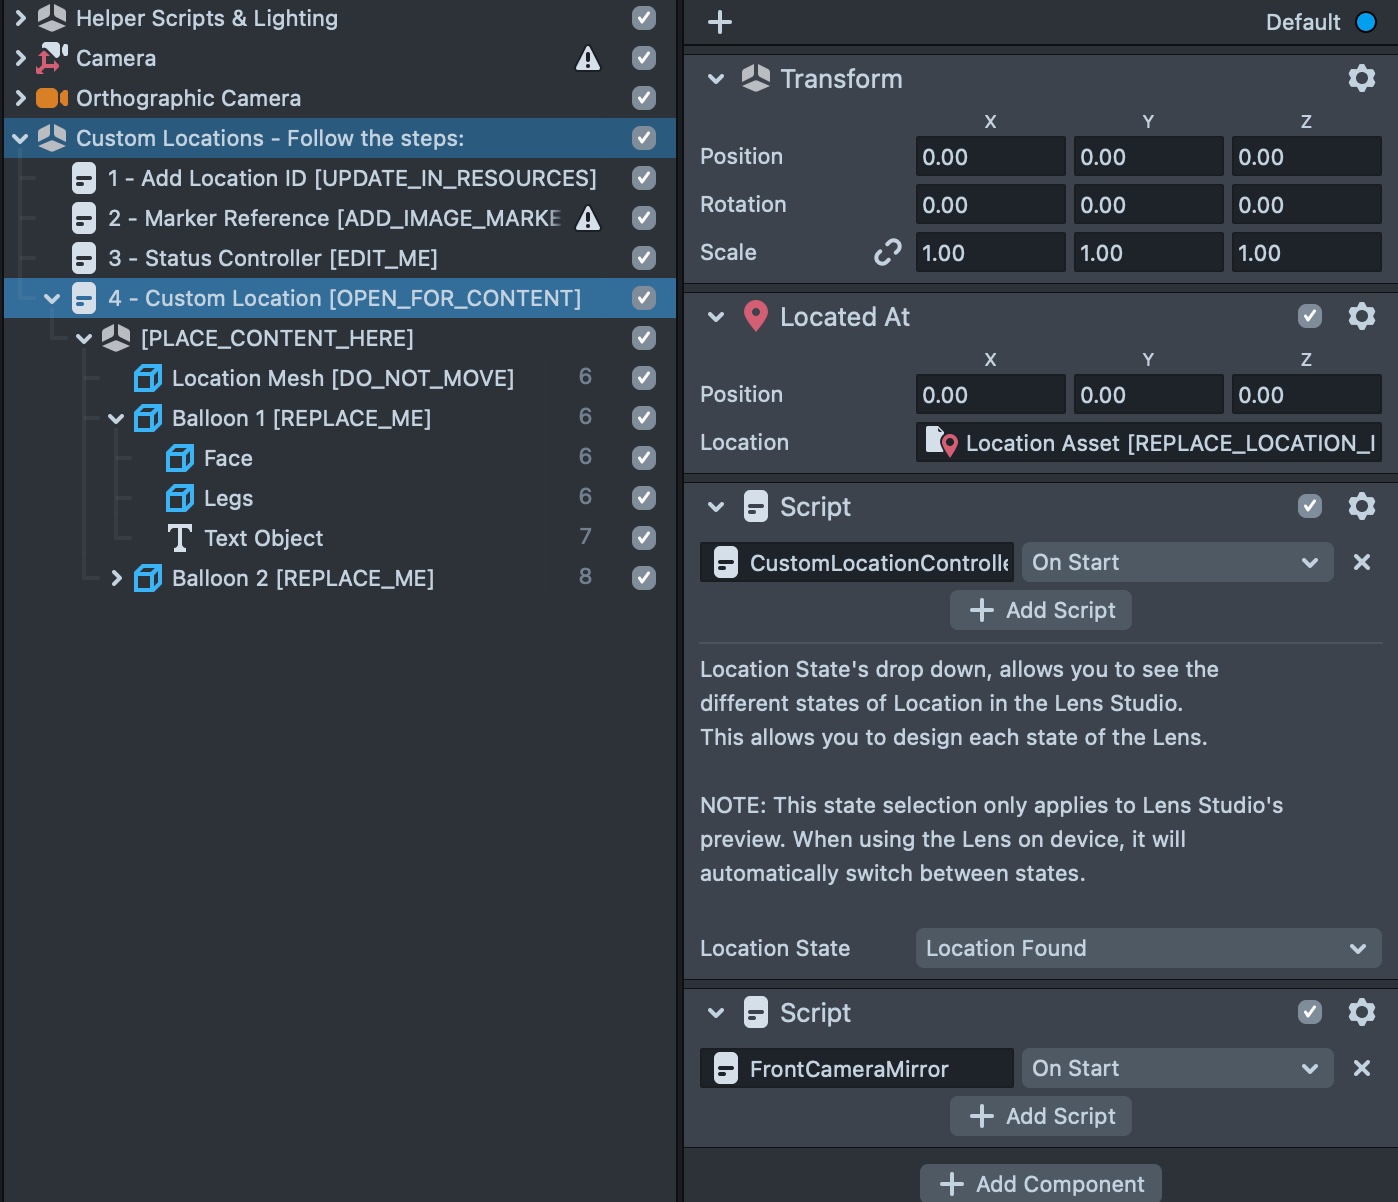
4 - Custom Location
Now that we have all the steps ready, it is time to create the Location Lens experience. Select the 4 - Custom Location [PLACE_CONTENT_HERE] Scene Object in the Objects panel.
Each Location Lens has five different states that we need to make sure that it works correctly.
These states can be simulated in the Lens Studio by changing the values in the Location State drop down.
These hint texts are localized which means based on the user's device language, the text will be translated to the user’s language. To learn more about Localization, please refer to Localization Guide.
| Location Is Near | The Location Is Near hint is displayed when the user is close enough to see the Location, but is not looking directly at it. You can change the hint texture as well as the text hint using the Hint Controller. |
| Location Is Far | The Location Is Far hint is displayed if the user is too far away from the Location. |
| Location Is Loading | When the Lenses start, a loading hint is displayed. |
| Location Failed To Load | If any error occurs while downloading and loading the Custom Location AR data, this error will be shown on the screen. |
Location Found
The Location Found state happens when the user is looking at the Custom Location AR. In this mode all the objects that are set as a child of the 4 - Custom Location[PLACE_CONTENT_HERE] will be visible around the Custom Location AR. You will use this mode to design the content around the Custom Location.|
To better view the Custom Location AR content, it is recommended to switch the Lens Studio Preview mode to Interactable Preview.
-
In the Preview panel’s top bar, Left-click on the Interactive Environment button.
In this mode, you can easily view the Custom Location Mesh as well as your content in the Preview panel.
Adding Custom Content
To add your own content to the Location, you will need to import your 2D or 3D assets into Lens Studio.
- Import your 2D or 3D content into Lens Studio.
- Once your content is imported, Left-click and drag one of your assets and place it under the 4 - Custom Location [PLACE_CONTENT_HERE].
- Position your content relative to the Location reference model.
The template comes with a few example assets for your use and can be deleted if you do not want to use them.
Do not move, scale or change the rotation of the Location Mesh [DO_NOT_MOVE] Scene Object. This is due to the object being represented in the world transform, and manipulating the transform values will cause a misalignment for the Lens experience.
To create an immersive feel to your Lens, you can add an occluder material to allow the Custom Location AR to block digital and physical objects.
Now that you have completed all the steps, your Lens is ready to be previewed on the device.
Adding Multiple Custom Locations
With Lens Studio 4.55, the Custom Location AR Template has been updated to easily accommodate multiple Custom Location. To add additional Custom Locations, you can do the following;
- Duplicate the LocationAsset resource.
- You should rename it in order to provide more clarity.
- In the new LocationAsset resource, enter in a different LocationID value.
- Duplicate the CustomLocation SceneObject.
- You should rename it in order to provide more clarity.
- Connect the new LocationAsset resource to the Located At Component as mentioned in the Adding Custom Content section.
Behavior Trigger
The template also is compatible with the behavior script. This means each of the states explained above can send a Custom Trigger if the Send Behavior Trigger is checked on. With the help of behavior triggers, you can create custom interaction for each state of the Lens.
To learn more about the Behavior, please visit the Behavior Guide.
Previewing Your Lens
You’re now ready to preview your Lens experience. To preview your Lens in Snapchat, follow the Pairing to Snapchat guide.
Related Guides
Please refer to the guides below for additional information: