Dual Camera
The Dual Camera feature provides the capability to render both front and rear cameras at the same time, enhancing creative possibilities within your Lens.
Unlock More
With the Tracking Scope feature in Lens Studio 5.8 and newer, you're no longer limited to applying tracking just to the main camera feed. You can now extend powerful features like face and body tracking to custom textures, including the reverseCameraTexture or even images and videos from the camera roll. This opens up exciting possibilities, such as creating different effects for front and back cameras simultaneously or tracking objects in pre-recorded media.
ARKit & World Tracking:
- The dual camera feature is not compatible with World tracking.
- If World tracking is active on the rear camera, the front camera cannot be accessed through the dual camera system.
Warning: For Lens Studio < 5.8
Tracking was typically only available on one camera at a time (either front or rear). For example, face tracking could generally only be applied to a single camera.
The reverseCameraTexture did not support tracking features. Technologies like face tracking, 3D body tracking, segmentation, and other ML-based features worked primarily with the deviceCameraTexture.
Usage
To use the Dual Camera feature without the custom component, simply add the Reverse Camera Texture from the Asset Browser panel. However, the primary function of the custom component is to allow adjustment of the fallback state, as many devices do not support dual-camera technology. Because of this limitation, it is recommended to use the feature with the custom component to ensure a better experience across all devices.
Additionally, the Reverse Camera Texture will not be displayed in the editor's preview and is only visible on a device, which may make setup more challenging.
Installation
- Locate the Dual Camera custom component in the Asset Library.
- Click the
Installbutton to add it to your project. Once installed, the component can be attached to a Scene Object.
Adding Placeholders
You can assign placeholders for the Reverse Camera Texture by adding objects with mesh visuals (e.g., Images, Meshes) to the Placeholders field.
These placeholders will be used to display the dual camera texture. During testing in Lens Studio, mock dual camera textures will be displayed. Once you push the Lens to a device, the reverse camera texture will replace the mock texture.
Configuring Textures
By default, the custom component will look for the baseTex property in the material assigned to the placeholders. If you are using a custom material with a different property name for the texture, you must manually configure the Reverse Camera Texture by following these steps:
- Unpack the custom component.
- Locate
Reverse Camera Texture. - Manually insert the texture into the materials of your placeholders.
Configuring Fallback
Since the Dual Camera feature is not supported on all devices, fallback states ensure a seamless experience for all Snapchatters.
Available Fallback Modes
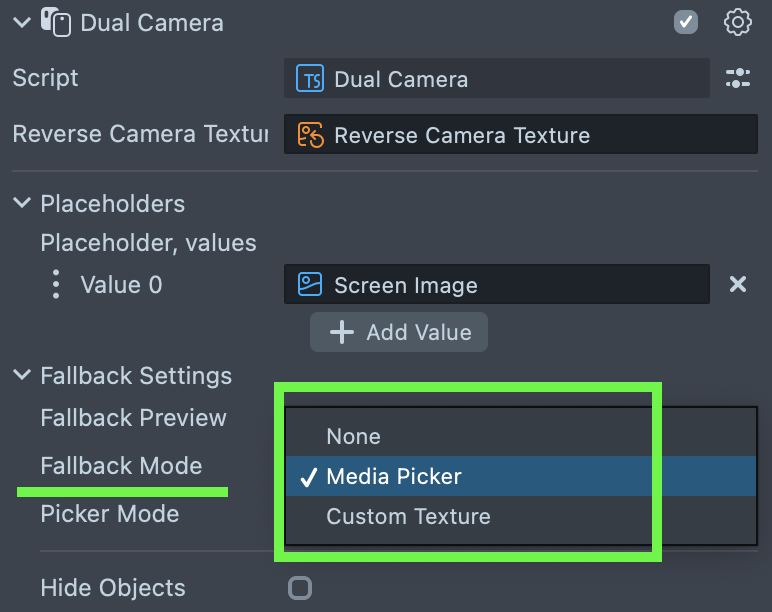
None: If the device doesn’t support Dual Camera, all placeholders are disabled.Media Picker: Enables Snapchatters to use a media picker to select textures from their camera roll. These textures will then populate the placeholders. AdjustablePicker Modeoptions:All MediaOnly ImagesOnly Videos
Custom Texture: Allows you to specify a custom texture that will be displayed in placeholders when Dual Camera is unsupported.
To preview fallback behavior in Lens Studio, enable the Fallback Preview option (this only affects Lens Studio previews, not device performance).
API
isSupported: Promise<boolean>- Returns a boolean indicating whether Dual Camera is supported on the device.(read-only) mediaPickerProvider: MediaPickerTextureProvider- Provides the media picker texture to use in fallback mode if configured.
Testing on Device
To preview your Lens in Snapchat, follow the Pairing to Snapchat guide.
When you open any Lens that uses the Dual Camera feature, a loading screen (black screen with a loading animation) will appear initially. This indicates that the Dual Camera is being loaded.