Prefabs
When creating Lenses, you may encounter situations that call for the creation of multiple copies of the same Scene Object. While you could duplicate the object manually, you might find it inconvenient to update properties on the individual copies. Prefabs offer a convenient alternative to this process, allowing you to create reusable Scene Objects that share common properties.

The advantage to using a Prefab (rather than duplicating a SceneObject) is that you can modify the Prefab and immediately apply your changes to all instances of that Prefab. If you were to simply duplicate the object, you would have to manually apply any changes to all copies yourself.
Prefabs allow you to:
- Instantly propagate changes across several identical SceneObjects
- Dynamically instantiate Scene Objects via scripting
- Export and share a Scene Object across different Lens Studio projects
This guide will cover how to create, edit, and script with Prefabs, as well as how to export Prefabs from a Lens Studio project.
Example Prefab Use Cases
Some examples of where separating your Lenses might be helpful
- A try-on experience where you want the user to use one item at a time.
- A game with many levels, where the users may only play some levels.
- A loading/intermediate screen that you might want to reuse in different parts of the experience.
- An experience where you have a UI overlay that can be managed independently from the rest of the Lens.
- An experience where you might jump from section to section. By separating the experience into pieces, you can jump from one section to another easily.
- A common piece that you want to re-use in multiple Lenses.
If you have a Lens that is loading a lot of content, it is a great idea to use prefab, so that your Lens can open fast to entice users, before finally loading the full experience.
Creating a Prefab
You can create a Prefab from an existing Scene Object in your Lens Studio scene. To create a Prefab:
- In the
Scene Hierarchypanel, select the Scene Object you want to convert to a Prefab - Drag the Scene Object to the
Asset Browserpanel, and release it - A Prefab Resource with the same name as the Scene Object will be created
You can also create a prefab by right clicking an object in the Scene Hierarchy panel and selecting Save as Prefab
The Prefab you create will have the same Components, Transform properties, and Scene Object hierarchy (children) as the Scene Object you originally selected.
Note that the original Scene Object you selected has now been converted to an Instance of the Prefab. This is denoted in the Inspector panel by the addition of three new buttons, which you can see when the Scene Object is selected:
- Highlight: Selects the Prefab Resource in the
Asset Browserpanel - Apply: Apply any changes made to a Prefab Instance to the Prefab Resource
- Revert: Undo any changes made to a Prefab Instance, reverting to the state represented by the Prefab Resource

When you create a Prefab, the following properties will be saved in the Prefab Resource:
- Transform properties of every Scene Object that is a child of the root prefab object in the hierarchy
- Components and Component properties of every Scene Object in the hierarchy
A prefab is instantiated into a Lens in two general parts: Loading its content for use, and instantiating its content to be used in the Lens.
There are different methods of loading the contents of a prefab:
- On Lens Start: Load the contents of the prefab when the Lens first opens regardless of use.
- Lazy Load Assets: Load the contents of the prefab just before instantiating.
You can set how the contents are loaded by selecting the prefab in the Asset Browser panel.
In most cases you will want to use Lazy Loading to ensure the Lens can start as soon as possible and increase the likelihood of Snapchatters engaging with your Lens.

Using a Prefab
To include a Prefab in your scene:
- In the
Asset Browserpanel, select the Prefab Resource you want to add. - Drag the Prefab Resource from the
Asset Browserpanel to theScene Hierarchypanel, and release it. - A Scene Object with the same name as your Prefab Resource will be added to the Scene, and to the
Scene Hierarchypanel
The Scene Object created will have the same Components, Transform properties, and Scene Object hierarchy (children) as the Prefab you selected from the Asset Browser panel.
You can use prefabs dynamically: that is instantiate them in the Lens at run time. Take a look at the Scripting with Prefabs section, or take a look at Scene Manager to see how you can do this with no code!
Applying Changes to a Prefab
One of the key advantages to working with Prefabs is the ability to apply changes to all instances of a Prefab while editing only one instance of the prefab.
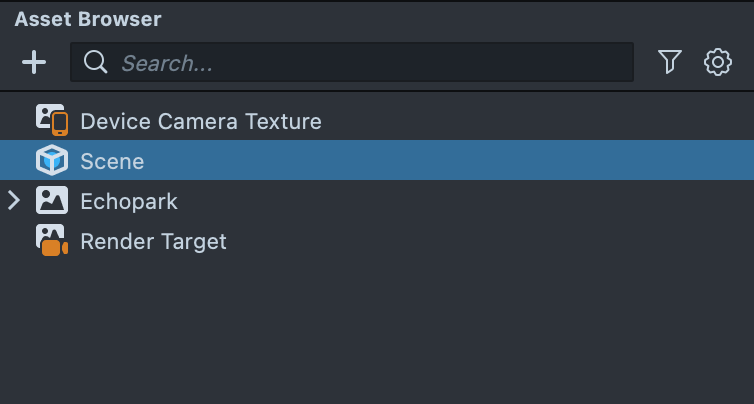
Double click on a prefab in the Asset Browser to edit it in isolation. This will open the prefab in its own Scene Hierarchy and Scene panel. Click “Apply” in the Inspector to save changes to the prefab and have them take effect in the project. To return to the main Scene Hierarchy / Scene, double click on the Scene asset in the Asset Browser.
To apply changes to a Prefab:
- Select an instance of the Prefab in your Scene
- Modify the selected Scene Object or its children
- In the
Inspectorpanel, selectApply
All instances of the Prefab in your scene will reflect the changes you made, with the following exceptions:
- Changes to position of the Prefab’s root Scene Object will only be applied to new instances. Existing instances will not change their position
- Changes to rotation of the Prefab’s root Scene Object will only be applied to new instances. Existing instances will not change their rotation
- Changes to scale of the Prefab’s root Scene Object will be applied to both new and existing instances
- Changes to position, rotation, and scale of the Prefab’s child Scene Objects will be applied to both new and existing instances
After you apply a change, you may need to press the Lens Reset button in the Preview panel to see it reflected there. This applies to nested Prefabs as well.
Reverting a Prefab
If you’ve made unwanted changes to an instance of a Prefab, you can undo them to prevent them from being applied to the Prefab Resource and other Prefab instances.
-
Select the Prefab instance you want to revert in the
Objectspan -
In the
Inspectorpanel, selectRevert
Any changes you made to the Scene Object will be reverted. Its state should reflect the state of its Prefab resource.
Highlighting a Prefab
You can find a Prefab instance’s Prefab resource. To do so:
- Select a Scene Object. If it's an instance of a Prefab, you should see the
Highlightbutton in theInspectorpanel. - Select the
Highlightbutton, and the Prefab Resource used to create the Scene Object will be automatically highlighted in theAsset Browserpanel.
Nesting Prefabs
You can nest object Prefabs to create complex Scene Objects composed of other Prefabs. The power of nested Prefabs is the ability to compose reusable Scene Objects that are themselves a collection of reusable Scene Objects.
A nested (child) Prefab keeps its own identity even while it lives inside another (parent) Prefab. In other words, a single Scene Object can be an instance of a child Prefab and, at the same time, part of a parent Prefab. This lets you edit the child Prefab once and have those changes appear everywhere it is used—including inside every instance of the parent Prefab.
Creating a Nested Prefab
To nest one Prefab inside another:
- In the
Scene Hierarchypanel, drag a Prefab instance onto another Prefab instance so that it becomes its child. - Select the parent Prefab instance and click
Applyin theInspectorpanel to save the nested child into the parent Prefab.
From then on, every instance of the parent Prefab includes an instance of the nested child, and any change you apply to the child Prefab is reflected in every parent instance that contains it.
Prefabs compose bottom-up only. You can drag an existing Prefab into another to nest it, but you cannot select an object that is already part of a Prefab's hierarchy and convert it into a new Prefab. Build and save your child Prefabs first, then nest them (see Nesting Limitations and Best Practices).
Reusing the Same Prefab Multiple Times
A parent Prefab can contain more than one nested child—either several instances of the same child Prefab or instances of different child Prefabs. Each nested instance is independent: because every instance keeps its own root transform, you can place the same child Prefab at different positions, rotations, and sizes inside the parent.
You can also duplicate a Prefab instance—or the whole parent—to reuse it. Each copy stays linked to its Prefab, so editing the Prefab updates every copy at once, while each copy keeps its own placement and per-instance overrides.
What Propagates Across Levels
Apply and Revert act on the level of your current selection—Lens Studio has no separate "apply to this level" control, so the level you select before pressing the button is the level that receives the change:
Parent root          ← select here, then Apply → saves to the parent Prefab
└─ Child root         ← select here, then Apply → saves to the child Prefab
   └─ Child's child   ← a change made here is saved to whichever level you select above
Each level of nesting tracks its changes independently. When you edit and apply a child Prefab:
- Components, component properties, and child objects propagate to every instance of that child Prefab, including the ones nested inside parent Prefabs.
- Adding or removing objects flows upward automatically, so parent instances that contain the child never fall out of sync.
- Overrides are measured against each Prefab separately. An override applied at the child level is compared only to the child Prefab, so the same property can still count as unchanged from the parent's point of view—a value can be customized at the child level while staying in sync at the parent level.
- The child's root transform is the exception—see Transform vs. Components below.
- Reverting is always safe, and it acts per level. Reverting an instance only affects that instance—never the Prefab Resource or any other instance. Because each level is measured against its own Prefab, reverting a nested child snaps it back to the child Prefab's prototype, not the parent's. If the same property was also overridden at the parent level, the child's
Applygreys out while the parent's stays active (and the reverse holds when you revert at the parent level).
Transform vs. Components
This is the most common surprise with nested Prefabs, so it is worth being explicit.
When you edit a child Prefab, its components and contents propagate to every nested instance, but its root transform (position, rotation, scale) does not. Each nested instance keeps its own placement, because a Prefab instance's root transform is treated as per-instance data rather than shared Prefab data.
For example, open a nested child Prefab, add an Image component, and change its scale, then apply: the Image component appears on every nested instance, but the scale change does not.
To change how a nested Prefab is positioned or sized, edit the transform on the nested instance from inside its parent (select the child within the parent, change its transform) and apply to the parent. Transform edits made this way are stored on the parent and appear in every instance of the parent.
Nesting Limitations and Best Practices
- Build from the inside out. Nested hierarchies are assembled bottom-up: create and save your child Prefabs first, then nest them and apply the parent. You cannot turn an object into a new Prefab if it is already acting as part of another Prefab's definition.
- No cyclic nesting. A Prefab cannot be nested inside itself, either directly or through a chain of other Prefabs. Lens Studio detects cyclic nesting and rejects it, treating the affected asset as a regular (non-nested) Prefab.
- No fixed depth limit, but watch performance. Lens Studio does not cap nesting depth, so you can nest as deeply as your content requires. Each extra level adds processing cost, so keep hierarchies only as deep as you need.
- A child Prefab's root transform is per-instance. Editing a child Prefab's position, rotation, or scale won't move or resize copies already nested inside a parent—change those from within the parent instead (see Transform vs. Components).
- Refresh Preview after applying. You may need to press
Lens Resetin thePreviewpanel to see nested changes reflected in Preview.
Prefab Variants
A Prefab Variant is a Prefab based on another Prefab. The variant begins as a copy of its base Prefab and can override any property, but it stays linked to the base: changes you make to the base Prefab automatically flow down into the variant and its instances, while changes you make only in the variant never affect the base.
Where nesting composes Prefabs vertically (a Prefab made of other Prefabs, like a parent and its children), variants relate Prefabs horizontally—several closely related versions that share a common foundation, like siblings.
Variants are useful when you want multiple versions of the same Prefab that differ only in a few details. For example, a base Button Prefab could have Primary, Secondary, and Disabled variants that share the same layout and behavior but differ in color and label. Updating the shared layout on the base updates every variant at once, while each variant keeps its own color.
Creating a Prefab Variant
You can create a variant in two ways:
- From a Prefab asset: right-click the Prefab in the
Asset Browserand selectCreate Prefab Variant. This creates a new<Prefab> Variantasset based on that Prefab. - From a Prefab instance in your Scene: right-click the instance in the
Scene Hierarchyand selectSave as Prefab Variant. This turns the selected instance into an instance of the new variant rather than the base Prefab. Any per-instance overrides already on that instance become the variant's starting differences from the base.
Once created, open the variant and edit it like any other Prefab—its changes stay isolated from the base, while base changes continue to flow in.
To inspect the Prefab a variant is based on, right-click the Prefab in the Asset Browser and select View Prefab Prototype (Read-Only).
How Variants Behave
- Base changes flow down. When you apply a change to the base Prefab, it cascades down through the variant chain to every variant and each of their instances.
- Variant changes stay local. Overrides you make in a variant never propagate back to the base or to sibling variants.
- Variant chains are allowed. A variant can itself be the base of another variant, to any depth.
Variants fail safe. If a base or intermediate Prefab is removed, its variants detach and behave like normal, standalone Prefabs—nothing inside them breaks. This is also handy when you want to port a variant to another project without bringing its base and siblings along. You can also detach a variant from its base manually, but that action is one-directional, so use it sparingly.
Variant Limitations
- Create variants from standalone Prefabs. As with nesting, a variant can only be created from an object that is not already part of another Prefab's definition—the same bottom-up assembly rule applies.
- Overrides are one-directional. A variant can diverge from its base, but there is no way to push a variant-only change back up to the base. For shared properties, applying a change to the base always wins.
Prefab Preview Environment
When you open a Prefab to edit it in isolation (by double-clicking it in the Asset Browser), Lens Studio displays it inside a preview environment—default lighting and scene context—so you can see how the Prefab looks in a realistic setting while you work on it.
The preview environment is an editing convenience only:
- It is never part of the Prefab, and it is never included in your exported Lens, package, or
.oprfbfile. - It has no effect on how the Prefab behaves at runtime—it only changes what you see in the editor while editing the Prefab.
This lets you preview a Prefab with proper lighting and context without adding lights or other helper objects to the Prefab itself.
Lens Studio adds the preview environment asset to your project once—a copy of the default lighting setup. As a normal asset, you can remove it, de-reference it from the scene, or replace it with your own preview environment. Either way, it never ships with your Lens.
Deep Dive: How Prefabs Work
You don't need this section for everyday use, but it explains the model behind Prefabs and makes the behavior above—especially apply, revert, and nesting—predictable.
Prototypes and instances
A Prefab stores a single prototype: a saved copy of a Scene Object hierarchy and its components. Every time you place that Prefab in a Scene—or nest it inside another Prefab—you create an instance of that prototype. An instance is a live copy that records only the properties where it diverges from the prototype (its overrides). Everything you haven't overridden keeps tracking the prototype.
This is why a single edit can update many objects: change the prototype (by applying), and every instance that hasn't overridden that property updates with it.
Under the hood, the prototype lives in the Prefab's .meta file rather than in the asset you select in the Asset Browser. That asset is itself another instance of the prototype, which is why editing a Prefab "directly" still requires an Apply to commit the change to the prototype. Storing the prototype in the .meta file is also what lets it survive reimport (see Surviving reimport). Editing the .meta prototype by hand is not recommended—use Apply instead.
Apply and revert
- Apply pushes an instance's changes into the prototype, then syncs them out to every other instance of that Prefab.
- Revert discards an instance's overrides and snaps it back to the prototype. It never touches the prototype or other instances, so it is always safe.
When apply runs, conflicts follow a local-over-incoming rule: if another instance has its own override on the same property, that instance keeps its value instead of being overwritten. Applying a change never silently destroys deliberate per-instance customizations elsewhere.
Per-instance properties (why transforms don't propagate)
A few properties belong to each individual instance rather than to the shared Prefab—most importantly an instance's name and its root transform (position, rotation, scale). These never propagate through apply and never register as changes. That's what lets you place, rotate, and scale each copy of a Prefab independently, and it's exactly why editing a child Prefab's root transform doesn't move copies already nested inside a parent.
Nested Prefabs
The model-level insight is that a nested object is two things at once: an instance of the child Prefab, and part of the parent Prefab's prototype. Each level tracks its overrides against its own prototype, which is why a property can read as changed relative to the child while unchanged relative to the parent—the propagation and acyclic rules described under What Propagates Across Levels all follow from this.
Variants
The equivalent insight for variants: a variant is a Prefab whose prototype is itself an instance of another (base) Prefab. That single fact explains the behavior described under How Variants Behave—base changes flow in through the instance side of the prototype while variant overrides stay on the prototype side, and the same duality lets variant chains extend to any depth.
Surviving reimport
For Prefabs created from imported assets (for example, a 3D model), the prototype is preserved independently of the source file. When you re-import an updated source, your Studio-side overrides are merged against the previous prototype instead of being lost—so source updates come through while your customizations survive.
Scripting with Prefabs
You can instantiate Prefabs with script to create more complex experiences--this will allow you to dynamically instantiate the prefab as you need it.
There are different methods of instantiating a prefab.
- Synchronously: blocks anything from happening while the prefab is instantiated.
- Asynchronously: load the prefab and get a callback when it’s done.
In most cases, when using prefabs as a container for different scenes in your Lenses, you will want to load your prefab with lazy loading, and asynchronously, to ensure that the prefab will only affect the Lens when you are using it.
Synchronous
The following example creates an instance of a Prefab every time the user touches the screen.
//@input Component.Camera camera
//@input Asset.ObjectPrefab myPrefab
script.createEvent('TouchStartEvent').bind(onTouchStart);
function onTouchStart(e) {
  if (script.camera) {
    var touchPosition = e.getTouchPosition();
    var worldPosition = script.camera.screenSpaceToWorldSpace(
      touchPosition,
      200
    );
    var mySceneObject = createObjectFromPrefab();
    mySceneObject.getTransform().setWorldPosition(worldPosition);
  }
}
function createObjectFromPrefab() {
  if (script.myPrefab) {
    var instanceObject = script.myPrefab.instantiate(script.getSceneObject());
    return instanceObject;
  } else {
    return undefined;
  }
}
This script makes use of the ObjectPrefab API to instantiate a Prefab defined by the user in the script's input properties. The key lines to focus on in the above example is adding the Asset.ObjectPrefab to the script inputs and then calling instantiate to create the new object.
//@input Asset.ObjectPrefab myPrefab
var instanceObject = script.myPrefab.instantiate(script.getSceneObject());
Prefabs can contain objects with scripts that will be run when the object is instantiated. That said, when instantiating prefabs in script, any script bound to the Lens Turned On event within the prefab will not be run because at that point, the Lens has already been turned on. If you want a script in a prefab to be run when you instantiate it, make sure to bind your logic to the Initialized event.
Asynchronous
Since the performance of a Lens is commonly correlated with its engagement, when possible, you will only want to load a prefab when you need it. This will ensure a Lens can start as soon as possible, and you’re doing everything you can to ensure a great experience for your users.
When working on a Large Lens project, you can use prefabs to break up your Lens into smaller pieces. This makes it more manageable to build, as well as allows you to load the Lens in pieces and improve its performance. Take a look at Scene Manager to see how you can do this with no code!
To instantiate asynchronously, as before we start by getting a reference to the prefab we want to instantiate:
// @input Asset.ObjectPrefab myPrefab
Next we will define what we want to do when we try to instantiate this prefab:
function onResolve(instantiatedObject) {
  Studio.log('We got the prefab!');
}
function onReject(error) {
  Studio.log(error);
}
function onProgress(percentage) {
  Studio.log(percentage);
}
In Lens Studio, the prefab will always load fast since it’s always in memory. You can see the big difference when you push it to the device!
Finally, we will instantiate the prefab asynchronously!
var parent = script.getSceneObject();
script.myPrefab.instantiateAsync(parent, onResolve, onReject, onProgress);
Take a look at Scene Manager to see how you can do this with no code!
Sharing Prefabs Across Projects
Prefab resources can be exported and shared across different Lens Studio projects, like any other Resource.
Changes made to an imported Prefab will not affect the Prefab in the project from which the Prefab was exported.
Exporting a Prefab
To export a Prefab:
-
In the
Asset Browserpanel, select the Prefab you want to export. -
Right-click on the Prefab and select
Export -
Select a location to save the
.oprfbfile and selectSave
Importing a Prefab
To import a Prefab:
- In the
Asset Browserpanel, select+ -> From Files - Navigate to the location of the
.oprfbfile, select it, and selectOpen - The Prefab resource should now be in your
Asset Browserpanel. To add it to your scene, you can drag it from theAsset Browserpanel to theScene Hierarchypanel
Prefab Pro-Tips
Prefabs are extremely powerful ways to make your Lens dynamic. Consider the tips below to ensure a great experience with Prefabs.
Destroy Created Objects
If your prefab create objects (or even more prefabs), they will not be automatically cleaned up when you delete your prefabs, unless they are a child of the prefab.
One way you can clean up any created objects is by destroying them onDestroyEvent of a script inside your prefab.
In the Asset Library, you can import the Destruction Helper that can help you do this.
With Destruction Helper imported, you can replace the createSceneObject line with the following:
var DestructionHelper = require('DestructionHelper');
var manager = new DestructionHelper(script);
var blurObject = manager.createSceneObject(null);
The Destruction Helper manager will then automatically destroy any scene object created under it when it is destroyed.