Overview
The Camera component is used to display the Scene in a Lens. Each Lens requires at least one Camera to render the Scene. Cameras will render everything on the selected Layers to the Render Target. This guide will introduce how to add a Camera, the types of Cameras, the Camera settings and how to work with multiple Cameras and Render Targets.
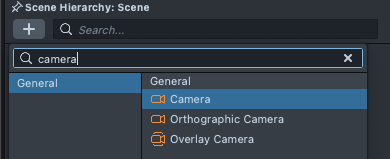
Add a Camera
You can add a Camera by using + -> Camera in the Scene Hierarchy panel.
The default projects already contains a camera used to render a scene. You only need to do this if you'd like to add more cameras to render your scene through.
Camera Types
Perspective Camera
The Perspective Camera simulates how perspective and depth-perception work in the real world. Objects appear smaller when they are further away. The Perspective Camera is useful for visualizing 3D models.
Orthographic Camera
The Orthographic Camera does not include perspective distortion. Parallel lines stay parallel no matter how far away they are. The Orthographic Camera is commonly used for 2D effects like Screen Image and Screen Text.
The Overlay Camera presets adds an Orthographic Camera, but which renders the result of the camera to a new Render Target, which is then used as the Overlay Render Target.
Camera Settings
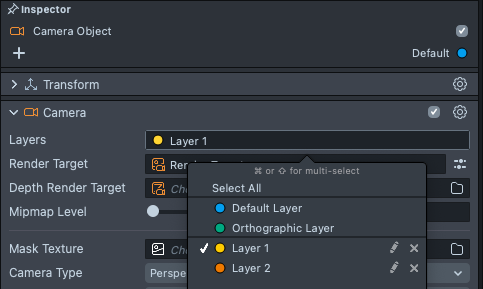
Select the Camera in the Scene Hierarchy panel, then in the Inspector panel under the Camera Component, you will see the settings for your Camera.
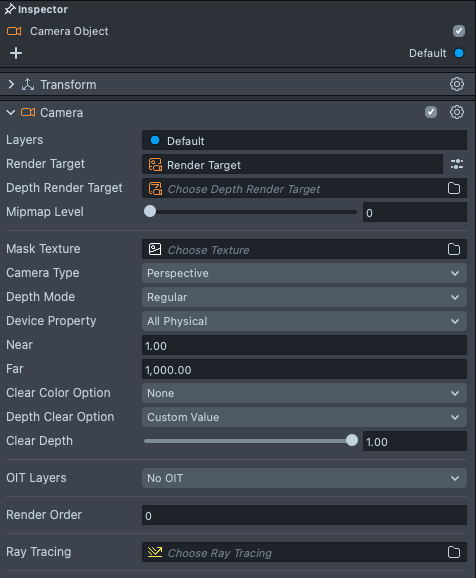
- Layers: The Camera renders all Objects that belong to the selected layers
- Render Target: Sets the render output of this Camera to a Render Target. More information about Render Target can be found below
- Render Order: Controls the render order within the Camera's Render Target. The lower the Render Order, the earlier that this camera's output texture will be added to the Render Target
- Mask Texture: Sets the opacity mask to apply to the Camera's output
- Camera Type: Choose between Perspective and Orthographic using the drop-down
- Depth Mode: Choose Between the regular depth mode and logarithmic mode
Regular depth mode has high depth precision on near objects and low depth precision on distant fragments. Logarithmic mode is the other way around with higher precision on far objects. Logarithmic mode works better when rendering scenes with far and big 3D objects
- Device Property: Choose from None, Physical Aspect, Physical Fov and All Physical using the drop down. When set to All Physical, the Camera will adopt the settings of the mobile device
- Aspect Preset: Controls the aspect ratio of the viewing frustum. Choose from the provided device aspects or set your own custom aspect
- Field of View: Perspective Camera Only. The viewing angle of the Camera
- Size: Orthographic Camera Only. The height of the viewing box of the Orthographic Camera
- Near: The closest distance the Camera can render
- Far: The furthest distance the Camera can render
- Clear Color: If enabled, the Render Target of this Camera will be filled by Input Texture if exist or plain color otherwise. Alpha is always 1
- Clear Depth: If enabled, depth buffer from previous Render Target will be cleared
The difference between the Orthographic and standard Camera preset are simply the settings on this component (for example the Camera Type and Near settings).
Render Target
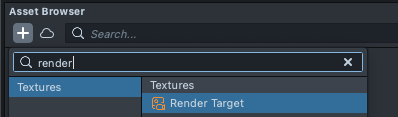
A Render Target is the output texture of a single camera or the combined output of multiple cameras. Each Camera has a Render Target associated with it and multiple cameras can share one Render Target. You can add a new Render Target by + -> Render Target from the Asset Browser panel.
For the common use case of having multiple cameras in a defined render order, it's recommended to have them all output to the same Render Target for performance reasons. Or put another way, less Render Targets generally equals better performance
Select the Render Target in the Asset Browser panel, then in the Inspector panel, you will see the settings for this Render Target.
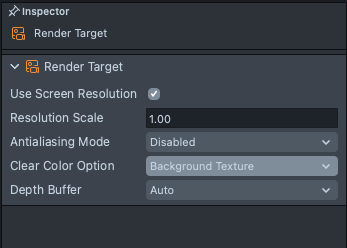
- Use Screen Resolution: Sets the render target resolution to the application's default rendering resolution if enabled, and can be scaled relative to that with Resolution Scale
- Antialiasing Mode:
- Disabled
- MSAA: Multisample Anti-aliasing is a hardware accelerated anti-aliasing method that is quite good at reducing jaggies on edges of polygons, but can not resolve shader aliasing inside polygons. Its performance overhead is relatively low.
- TAA: Temporal Anti-aliasing is a software based anti-aliasing method that reuses pixels over several frames. It is quite good at reducing jaggies on edges of polygons, and can resolve shader aliasing. Loading time and performance overhead can be noticeable. TAA currently only supports rigid transformations, so no skinning or other runtime vertex animation is supported (such support is coming in a future release). Non-rigid transformations, texture animations, and such may cause smearing artifacts.
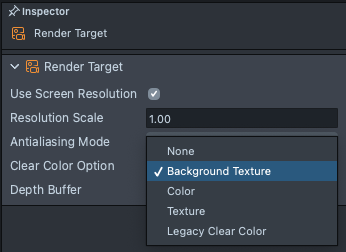
- Clear Color: Defines what is drawn before the scene is rendered every frame. The options are the following:
- None: The Render Target is not cleared and the scene will be drawn on top of the last frame
- Background: Uses Device Camera Texture as the texture to draw on every frame before you scene is rendered
- Color: Uses a plain color as the texture to draw on every frame before you scene is rendered
- Texture: Allows you to choose an
Input Texturewhich is drawn on every frame before you scene is rendered
- Depth Buffer: Choose from Auto, ForceOn and ForceOff. ForceOn will force depth buffer available for this Render Target while ForceOff turns it off
For the Render Target to render on top of the device's camera feed, use the Device Camera Texture as the Input of the Render Target.
Anti-aliasing details
Comparison of anti-aliasing modes: Disabled, MSAA and TAA
Note that MSAA is able to resolve polygon edge aliasing quite well, like the edge of the black quad, but can not resolve shader aliasing like the orange pattern within the black quad or specular shimmer on the veil. This is where TAA excels. Shader aliasing refers to color variation introduced by shader code within a polygon, as opposed to the stair stepped edges of polygons. As noted earlier, small, noisy specular highlights created by surface normal variation are an example of shader aliasing. A more explicit example is the sharp orange pattern on the black quad that is generated by procedural shader code. MSAA can not resolve shader aliasing, as it only affects polygon edges, not interiors.
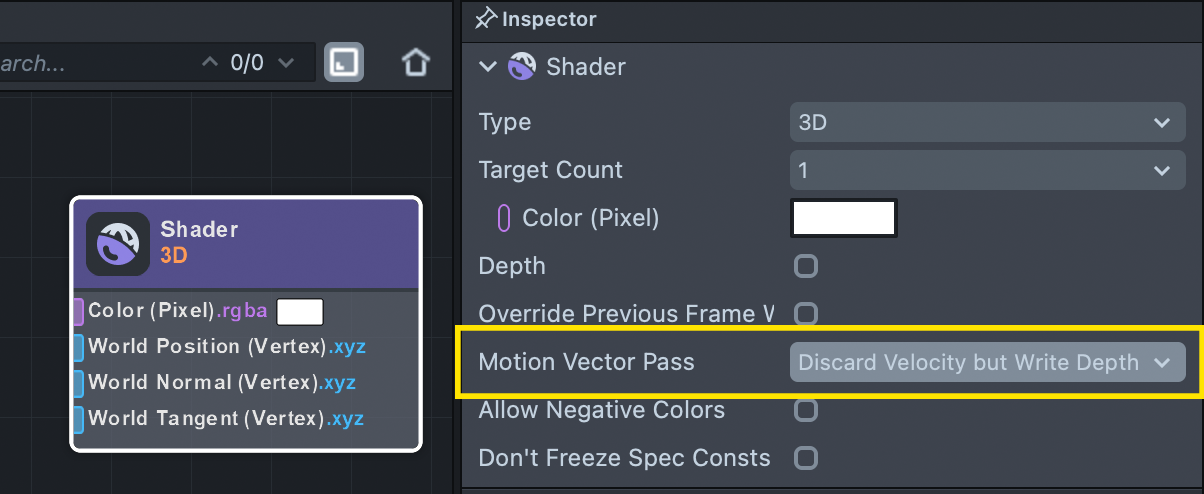
TAA and occluders: In certain situations, like on materials that don't write color, such as occluders, you also want to disable velocity write, otherwise face occluders for example can drag the user's face in the background video, resulting in an unnatural look. For these use cases velocity write should be disabled using the Discard Velocity But Write Depth option on the final Shader node in the material graph:
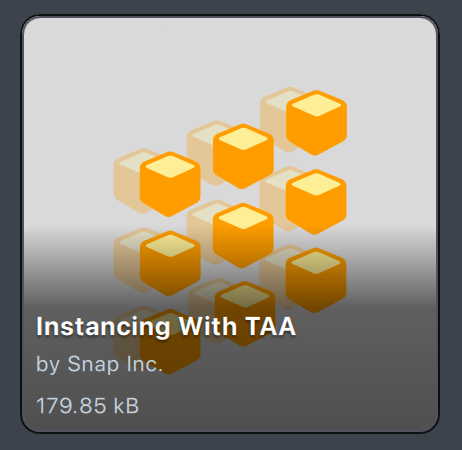
For use case examples, go to the Asset Library for Lens Studio version 5.13.0+ and download the Instancing With TAA example pack. This asset includes examples of discarding velocity and using the previous frame position to improve TAA quality.
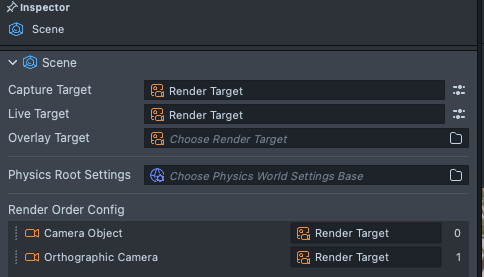
Scene asset
The Scene asset allows you to set the Live Target, the Capture Target, the Overlay Target, and quickly rearrange the camera render order. You can find the Scene asset in the Asset Browser panel, and edit it in the Inspector panel.
Live Target and Capture Target
Live Target sets the output Render Target that users will see in the live camera and during recording in Snapchat. Capture Target sets the output Render Target of the actual recorded snap. This is handy when you have UI elements or hints in the Lens that you want to hide in the final recorded snap, but still be present during the recording.
Check out the Soundboard Template for an example of using the Capture Target and Live Target fields.
You can set the Live Target and Capture Target in the Inspector panel of a Scene asset.
In the Preview panel, you can toggle the Capture Mode option under the Show UI options. Refer to the Previewing Your Lens guide for more information.
Lenses that don't have different content in live camera vs. post capture will have their Capture Target and Live Target fields set to the same Render Target.
In the Scene asset, you can drag the order of the camera's within a Render Target. You can also drag a camera to a different Render Target which will reassign the camera's Render Target field.
Render Target order becomes important when multiple effects might affect the same thing. For example, if you were using a segmentation to add a background, and a Face Liquify to modify the face--you will want to do the segmentation first, so that the Liquify effect would apply to the background as well!
Overlay Target
The overlay target is different than capture and live target, in that it is the only Render Target that renders at the device's native display resolution. This is useful if you are wanting to display text, or images, where you want the crispest rendering.
Take a look at the Pixel Accurate Rendering guide to learn more about using Overlay Render Target.
Overlay Target can not be added to the final captured Snap.
Layers
Assigning Layers
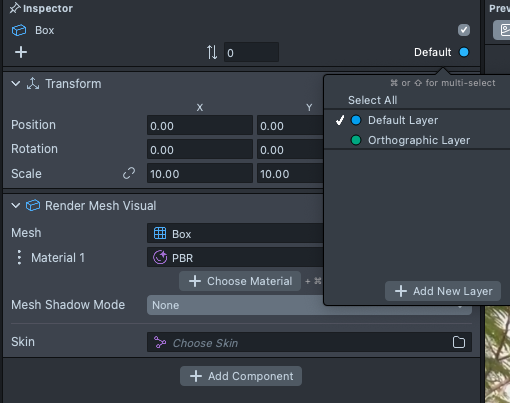
Understanding how Layers work is important to working with Cameras. For any object, you can choose the Layer which it will be rendered on by defining its Layers in the Inspector panel. You can also add a new Layer by clicking Add New Layer.
Layer is only relevant to objects with visual Components such as RenderMeshVisual and Image.
Camera's Layers
In a Camera's settings, all Objects that belong to the selected Layers will be rendered to the selected Render Target.
For example, if Cube A is on Layer 1 and Cube B is on Layer 2. And, Camera A's Layers is set to solely render Layer 1. Then, Cube B will not be rendered in Camera A's render target texture.
Multiple Cameras
You can have multiple Cameras in the Scene. A common use case would be a Perspective Camera for 3D objects and an Orthographic Camera for Screen Images. In this use case, the separate cameras should share the same Render Target and the order should render the Perspective Camera before the Orthographic Camera.
When you add a Screen Image or Orthographic Camera in the Scene Hierarchy panel, this setup will automatically be added.
For more complex use cases, you can chain multiple Cameras together by using the Render Target of one camera as the Input to another Camera's Render Target. For example if you use Camera A's render target as Input to Camera B's Render Target, Camera B will render its layers on top of Camera A's output texture.