Segmentation
The Background Image and Background Color assets let you easily segment a portion of the camera and replace it with an image, tiled image or post effect coloring. Multiple segmentation types are supported including portrait background, hair, sky and more.
Guide
Find Background Image and Background Color assets from the Asset Library and import them into your project. Click here to learn more about how to use asset in the Asset Library.
Background Image
Once you get the most relevant version of Background Image from Asset Library, it could be added to the Asset Browser panel by clicking on the + button. Then simply drag it to the Scene Object to create a new Scene Object with the Background Image Compoonent.
Or directly in Scene Object inspector by clicking on Add Component Button.
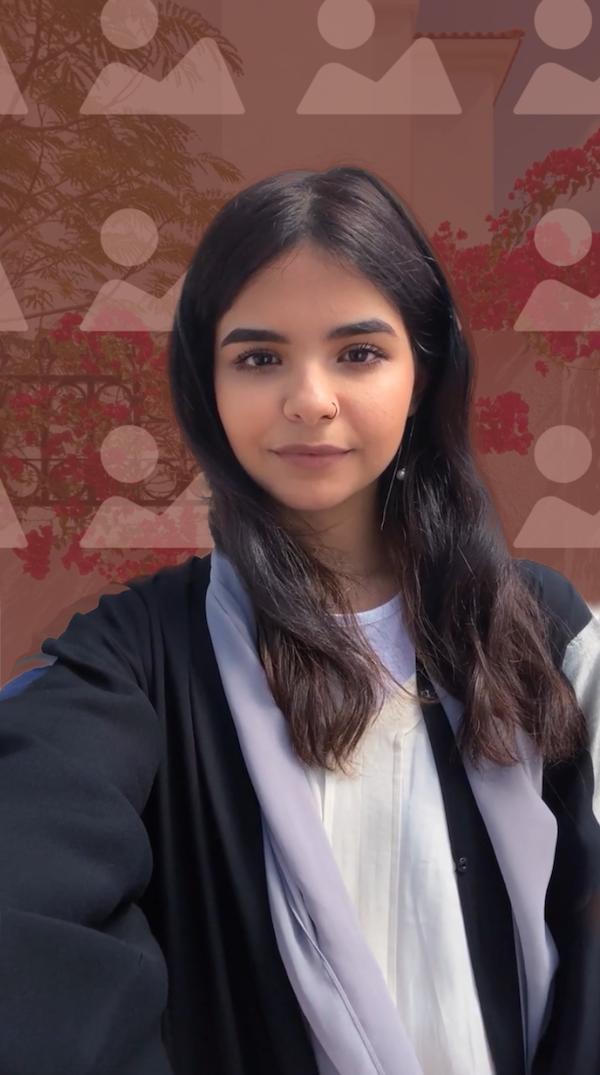
In the preview panel, you can see the example background image added behind the user.
Render Order
You can set the render order of background image with the option. For example, you can set background image in front of a 3D Object or behind it. Learn more about Render Order
Set Texture
After selecting you image type, you’ll want to assign the image texture. To add a texture to Lens Studio, drag and drop a PNG or JPG to the Asset Browser panel. Alternatively, select + -> Import Files from the Asset Browser panel. Then, click the Image Texture field and assign it to your newly imported texture.

Set Alpha
You have control for how transparent your image will be via the Alpha slider.

Non-Tiled
When the Tiled checkbox is not checked, your image texture will be used as a single background image. This image will be masked by your selected segmentation texture.
When using a non-tiled image, you can configure how the image fills the screen by selecting from the Fill Mode dropdown.

Tiled
When the Tiled checkbox is selected, your image is tiled. This tiled background will be masked by your selected segmentation texture.
The following options in the Inspector panel allow you to configure the tiling.
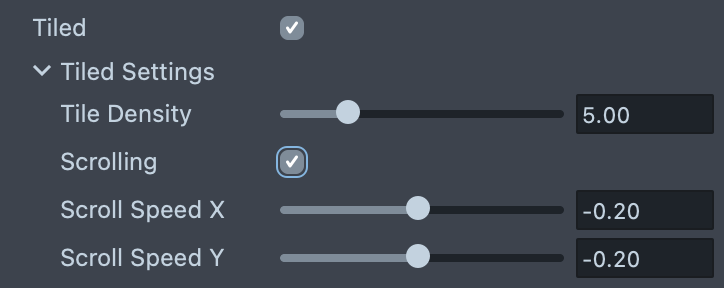
- Tile Density - How dense the tiled pattern is. Smaller number = smaller tiles. Bigger number = bigger tiles
- Scrolling - If enabled, the tile pattern will play a scrolling animation
- Scroll Speed X - How fast the tile pattern scrolls in the horizontal direction
- Scroll Speed Y - How fast the tile pattern scrolls in the vertical direction
Advanced
To modify what part of the image is segmented, modify the Segmentation Texture resource by checking the Advanced option. Click on the Segmentation Texture field and click on the plus buttion to create a new Segmentation Texutre. Choose Segmentation Texutre in the Asset Browser, and modify the options in the Inspector Panel.
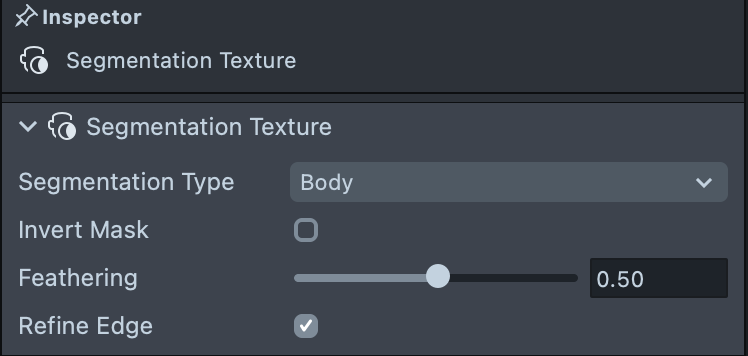
Modify the Type dropdown to select the part of the image that will be segmented. You can segment:
- Portrait Background
- Portrait Hair
- Portrait Skin
- Portrait Shoulder
- Portrait Face
- Portrait Head
- Sky
- Body
- Upper Garment
- Lower Garment
- Full Garment
- Footwear
All of the segmentation textures can be inverted by enabling the Invert checkbox.
You can change how the borders of the segmentation looks by modifying the Feathering and Refine Edge option.
Background Color
Once you get the most relevant version of Background Color from Asset Library, it could be added to the Asset Browser panel by clicking on the + button. Then simply drag it to the Scene Object to create a new Scene Object with the Background Color Compoonent. Or directly in Scene Object inspector by clicking on Add Component Button.
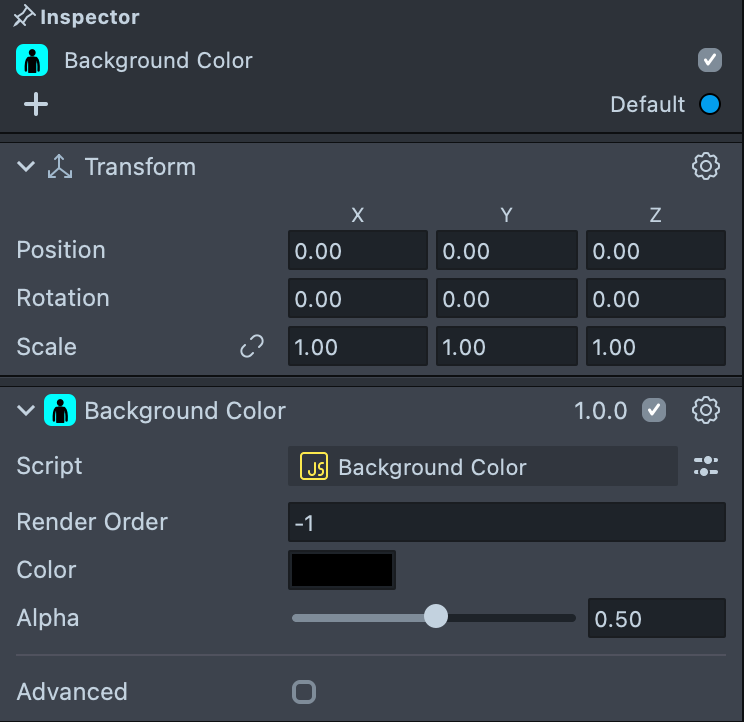
Render Order
You can set the render order of background color with the option. For example, you can set background image in front of a 3D Object or behind it. Learn more about Render Order
Color
You have control for the color via the Color slider.
Alpha
You have control for how transparent your background color will be via the Alpha slider.
Advanced
To modify what part of the image is segmented, modify the Segmentation Texture resource by checking the Advanced option. Click on the Segmentation Texture field and click on the plus buttion to create a new Segmentation Texutre. Choose Segmentation Texutre in the Asset Browser, and modify the options in the Inspector Panel.
Previewing Your Lens
You’re now ready to preview your Lens experience. To preview your Lens in Snapchat, follow the Pairing to Snapchat guide.