Face In Video
The Face In Video example allows you to attach your own content to a video using tracking data from After Effects. This example is great for building a Lens which tracks the user's face to content in a video. This guide covers how to export After Effects tracking data and sequences using a provided script, and how to use it to build a Lens in Lens Studio.

This example requires use of Adobe After Effects to export tracking data from a video.
Guide
Getting the Example
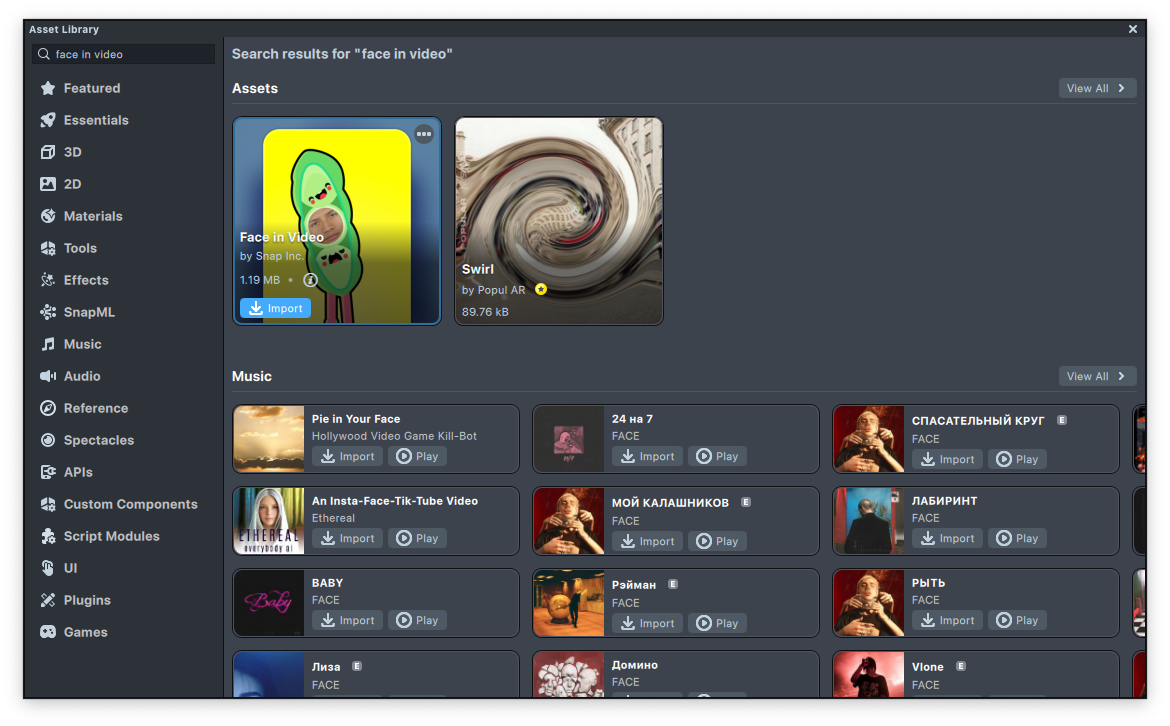
Find the Face In Video asset in the Asset Library and import it into your project. Click here to learn more about how to use assets in the Asset Library.
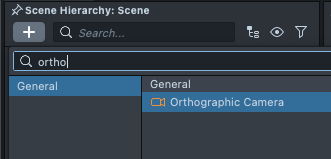
Once you import the asset from Asset Library, you can find the package in the Asset Browser. Notice that it says that it should be placed on an Orthographic camera. To do this: In the Scene Hierarchy panel, press the + button and choose Orthographic Camera.
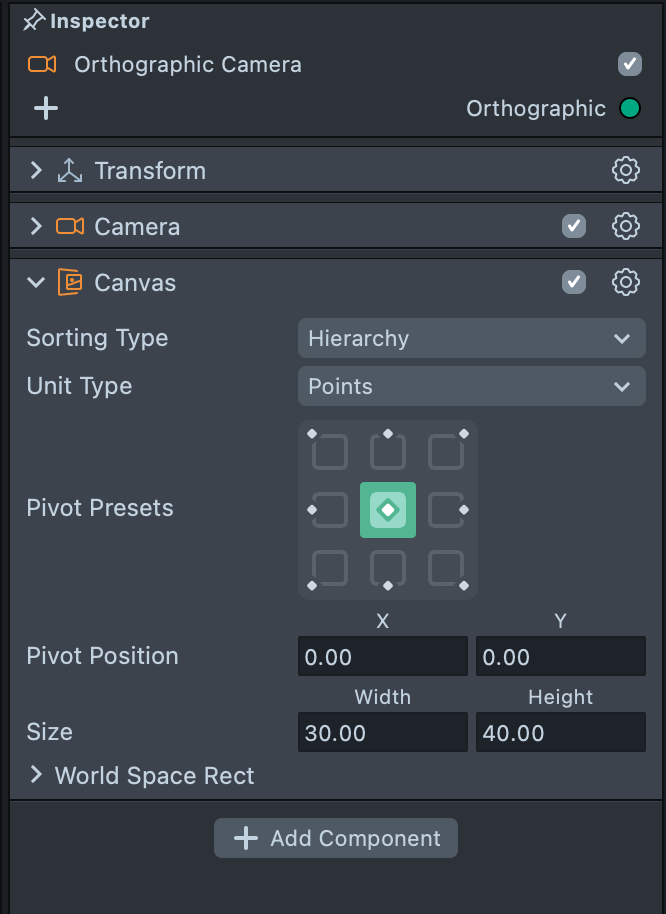
Next, on the camera, add the Canvas component, to set the units used by the camera. To do this, click the + Add Component button, and choose Canvas.
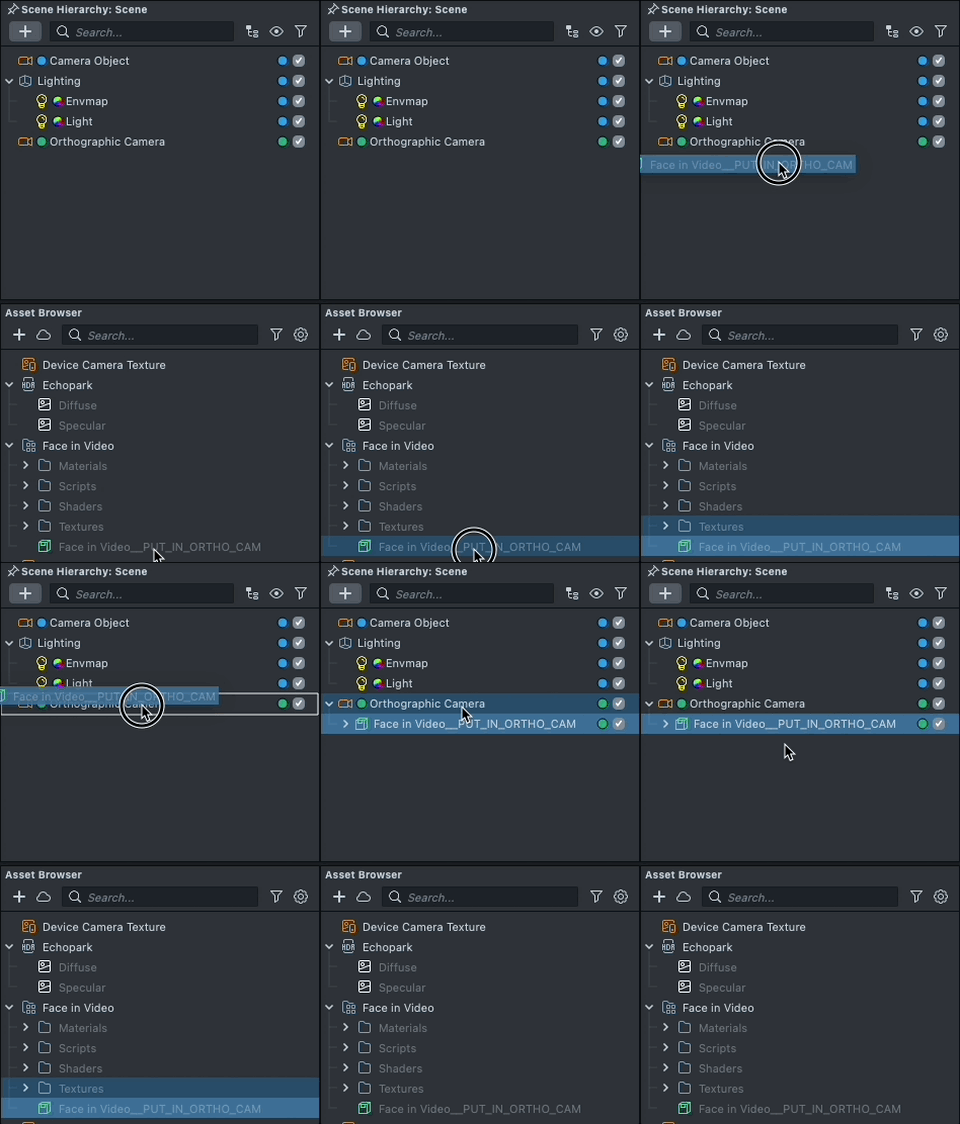
Now, follow the instructions and drag the prefab Face in Video into Scene Hierarchy panel under the Orthographic Camera to add it to your scene.
Finally, select the newly added Face in Video object, and click on the Camera field to point to your Orthographic Camera.
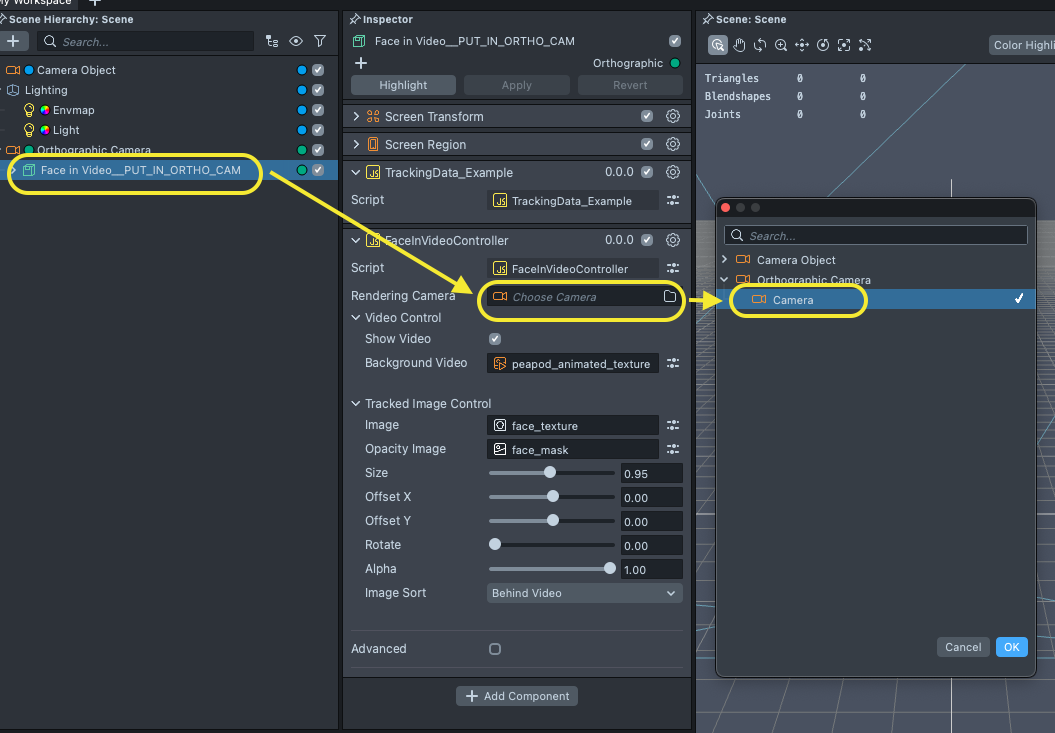
With the project ready, let's take a look at how we can generate the asset for it.
Generate the required assets using After Effects
After Effects to Lens Studio Script
The Face In Video example is used with an After Effects script that lets you export the position, scale and rotation keyframes of a layer to a file which you can use in Lens Studio to attach your own content to a video.
Installing the After Effects to Lens Studio script
After downloading the After Effects to Lens Studio script, copy the AEtoLensStudio.jsx into the After Effects ScriptUI Panels folder
- (Windows) Program Files\Adobe\Adobe After Effects<version>\Support Files\Scripts\ScriptUI Panels
- (Mac OS) Applications/Adobe After Effects<version>/Scripts/ScriptUI Panels

If you place a script in the ScriptUI Panels folder while After Effects is running, you must restart After Effects for the scripts to appear in your After Effects.
Load the After Effects to Lens Studio script
After installing the script, you can run the script by selecting the Window -> AEtoLensStudio.jsx in After Effects.

Now you should be able to see the AEtoLensStudio panel.

After Effects Sample Project File
Download this example After Effects project to follow along this guide.
Exporting To Lens Studio
To create a Face in Video Lens, you’ll need both a video and tracking data for that video.
Tracking data is a layer in After Effects which contains keyframes for:
- Position
- Scale
- Rotation

You can use After Effects' built-in tracking tool or Boris Effects Mocha to get the tracking data for your video.
When preparing your composition, make sure to note the following:
-
Your video resolution is the exact same as your comp resolution size
-
If your comp timeline has a beginning and end mark, make sure to trim the comp so you have a comp with no beginning and end mark

-
For the best user experience, a Lens should optimally be less than 2 MB in total file size (with a maximum of 8 MB). With this in mind, your video should have a length of less than 4-5 seconds
-
Creating a loopable video will result in a more seamless Lens experience
Once you have your After Effects tracking data, you can export your tracking data to Lens Studio by using the script from earlier. First select the tracking data layer and make sure it is selected and then click on Export Tracking Data button in the AEtoLensStudio’s panel.

If you are using the script for the first time, you’ll see a dialog box asking you to allow the script to write files onto your computer.

To allow scripts to write files, you need to give permission in the Scripting & Expressions section of your After Effects preferences. Click OK in the dialog box to open your After Effects preferences window. In the After Effects preferences window, check the Allow Scripts To Write And Access Network checkbox and then click OK.

With permission granted, you should now be able to export your tracking data. Select your tracking data layer, then click Export Tracking Data in the AEtoLensStudio’s panel.

Finally we need to export the movie as an animated sequence. First select the composition that you want to render, then click Export PNG Sequence in the AEtoLensStudio’s panel.

When exporting is done, you’ll see a Render Successfully Done message.

Importing Assets Into Lens Studio
Now that we have all the assets that we need, let’s import them into Lens Studio.
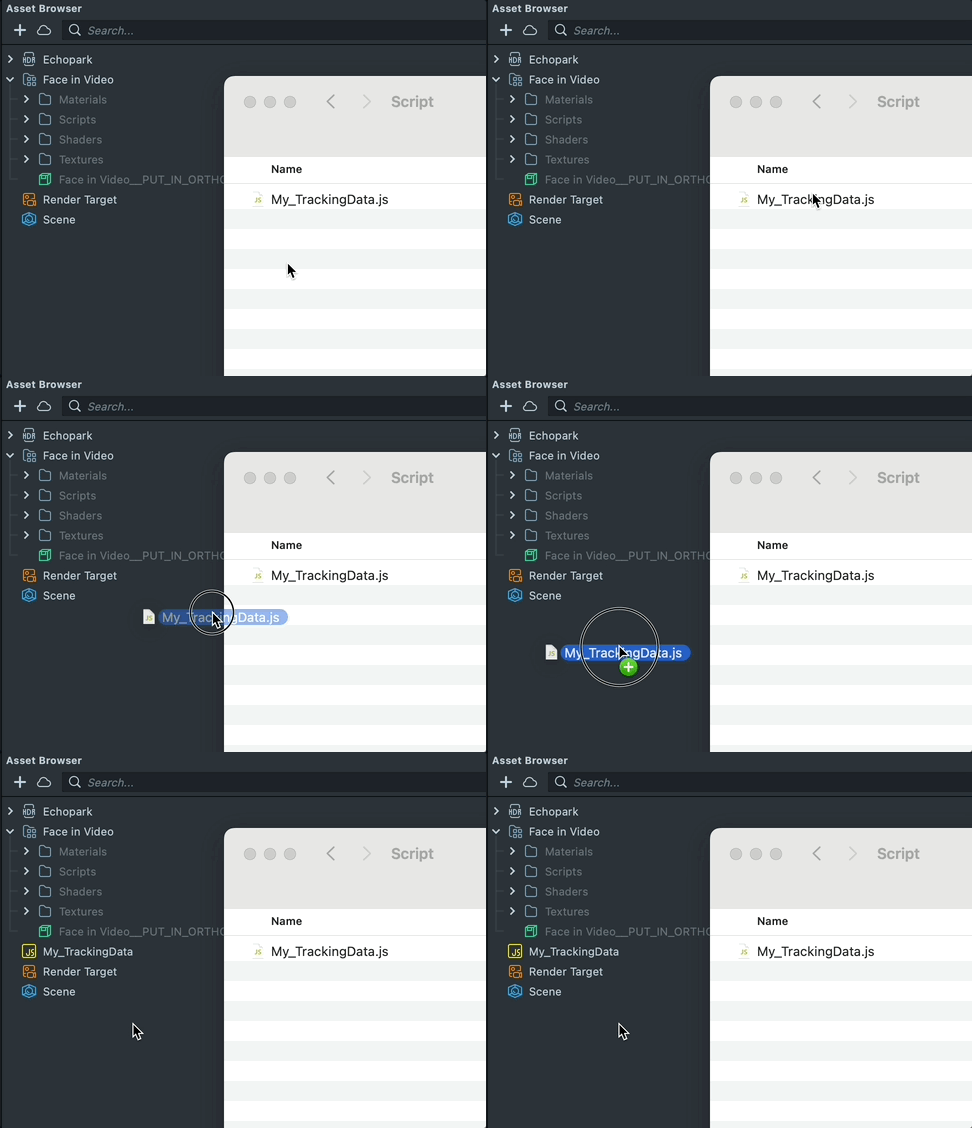
To import the tracking data, drag and drop the file from your computer into the Asset Browser panel.
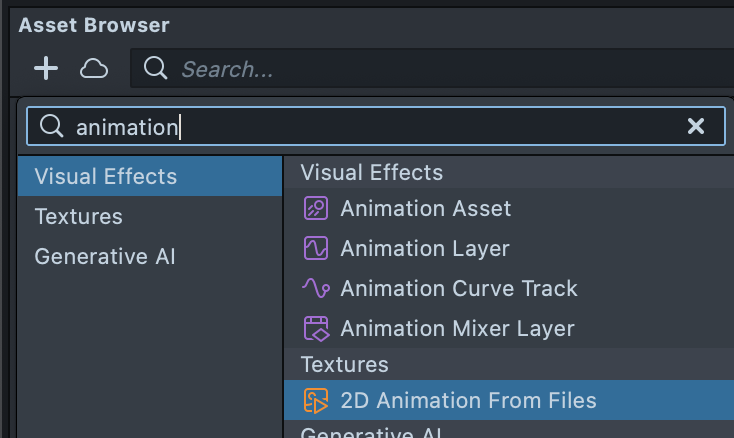
Next, we will import our video which was exported as a PNG sequence. In the Asset Browser panel select + -> 2D Animation From Files. Then, select all the images that were exported from After Effects and press OK.
Next, a new window will pop up that allows you to configure how your animation will be imported.
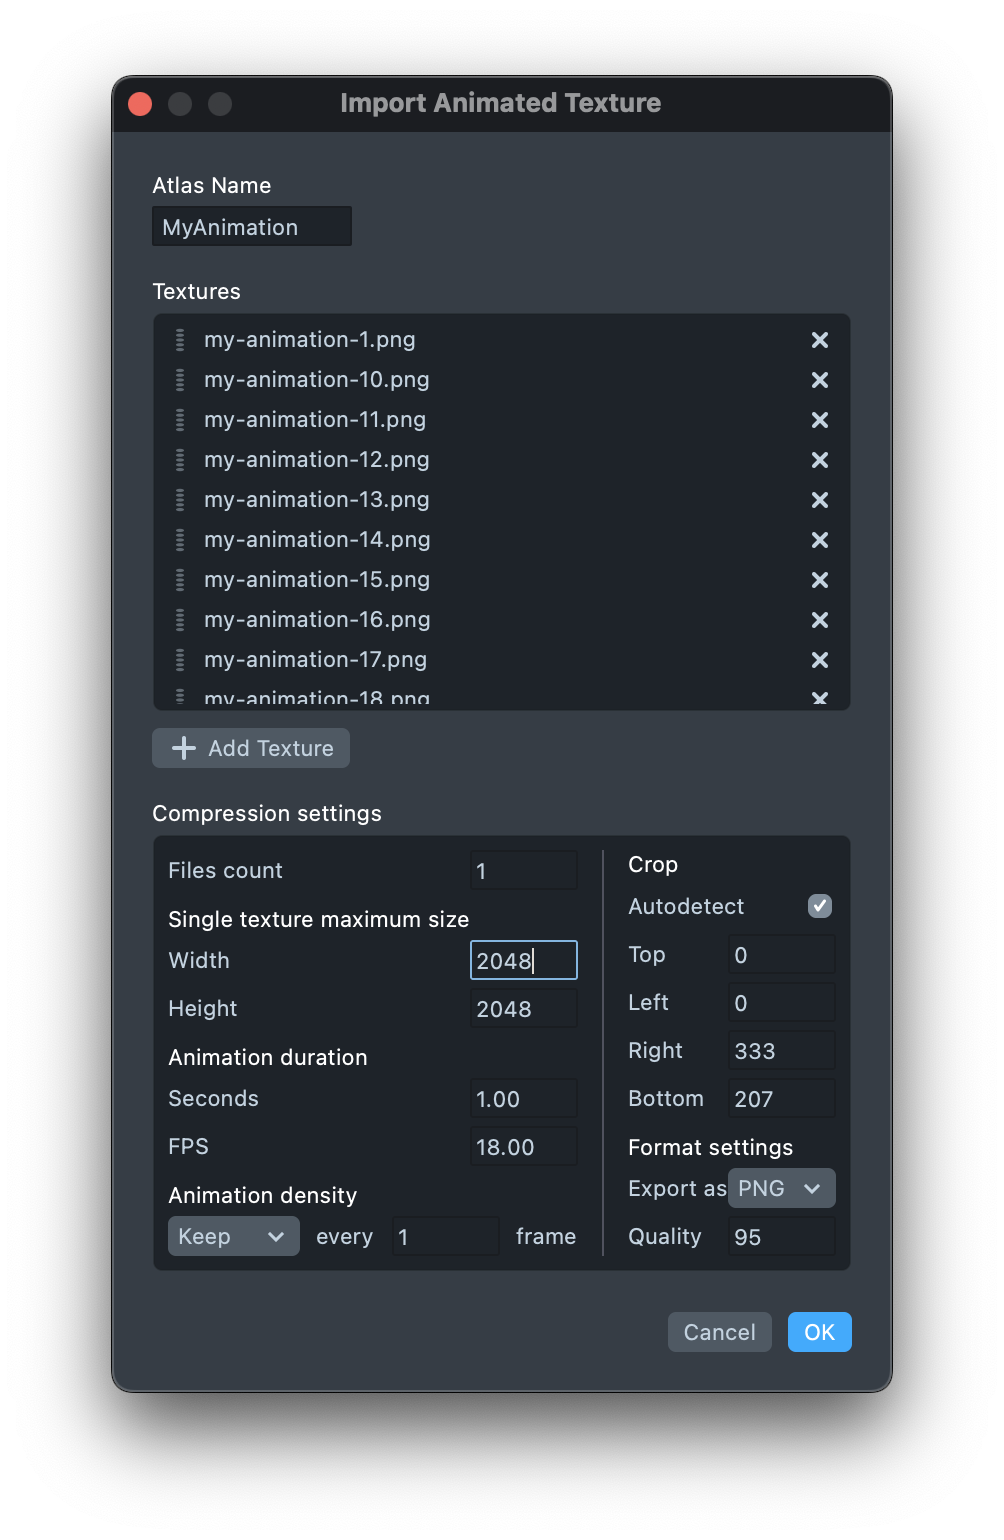
Please refer to 2D Animation Guide to learn more about animated textures.
Clicking OK will create a new animated texture in the Asset Browser panel.

Customize the Face In Video
Let’s use our newly imported resources. First, select the Face In Video object in the Scene Hierarchy panel.
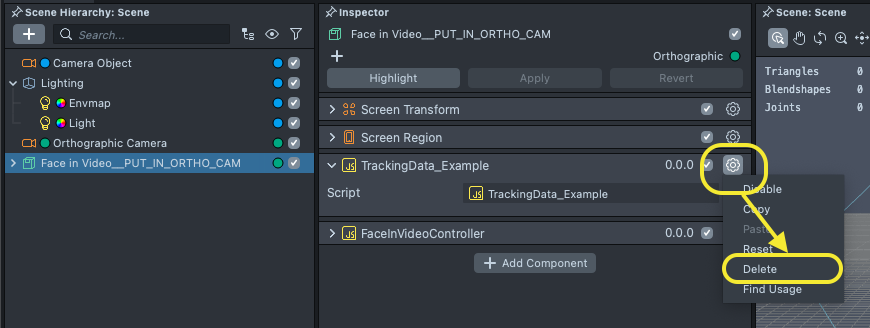
Then, in the Inspector panel, we'll remove the example Tracking Data script script. To do this, click on the Cog Wheel at the top right of the TrackingData_Example component, and choose Delete.
Next, we can add the one we imported earlier by pressing Add Component, and choosing the imported script from earlier.
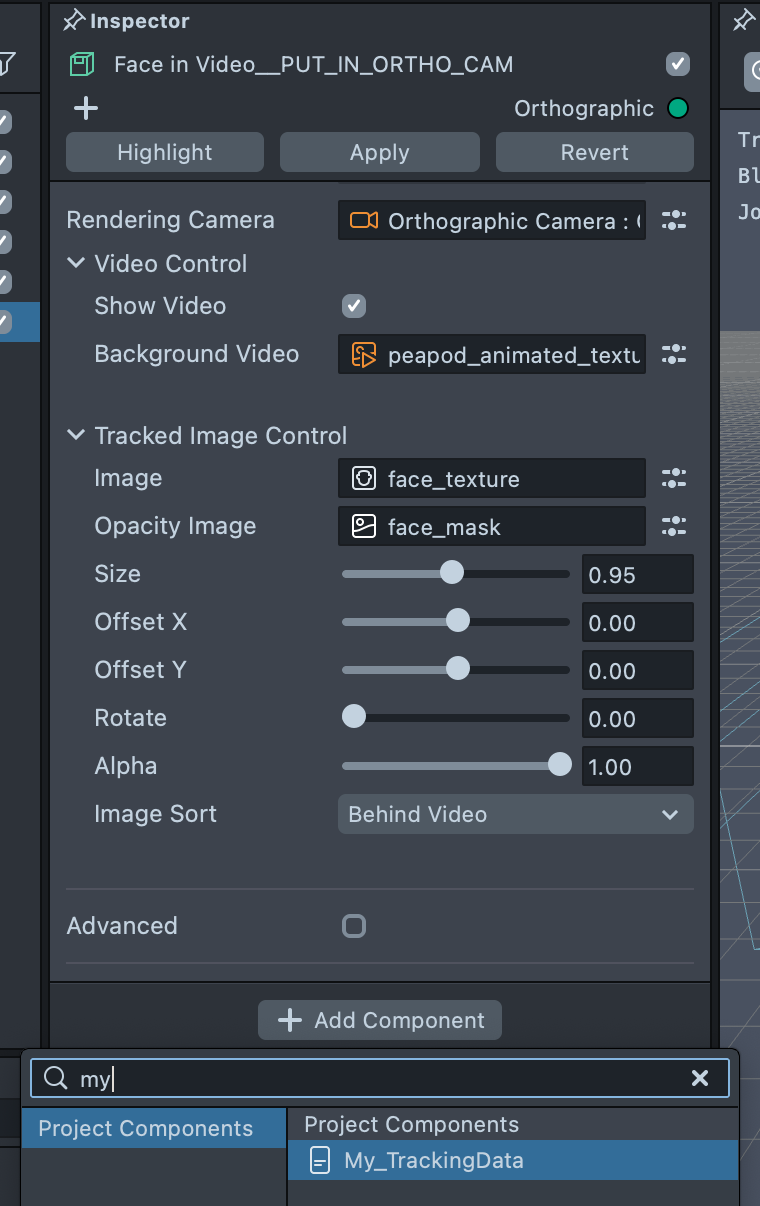
To set the background video, drag and drop the animated texture from Asset Browser panel into the Background Video input in the Inspector panel.

At this point you’ll see your animation paused with a red color overlay on the screen.
In this example, this means that there is some misconfiguration in our project. To see the issue, open the logger panel by pressing Window -> Panel -> Logger in the menu bar.

In this example it says that we need to set the duration of the animated texture to 0.967.

To set the animation duration, select your animated texture in the Scene Hierarchy panel, and in the Inspector panel set the duration field to the number shown in the logger. Then, refresh your Lens, and you should see your animation playing with an image attached to the video!
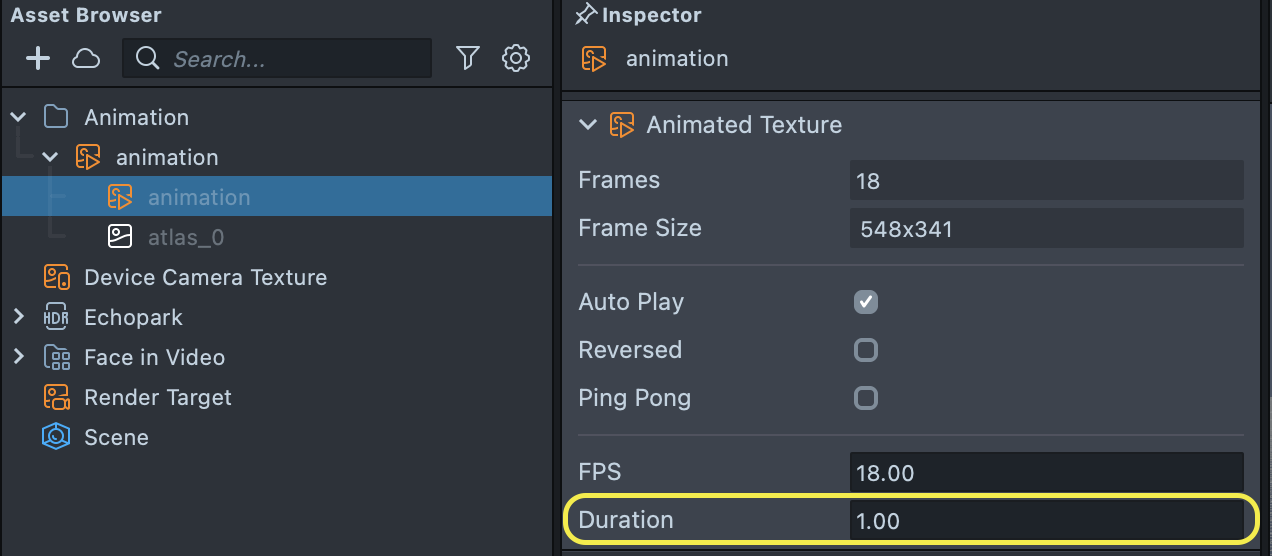
By default, Lens Studio import the animated texture with a duration of 1.
Toggle the background video
You can hide the background video by unchecking the Show Video checkbox.
This option will allow you to have any image animated by the data that we exported earlier.
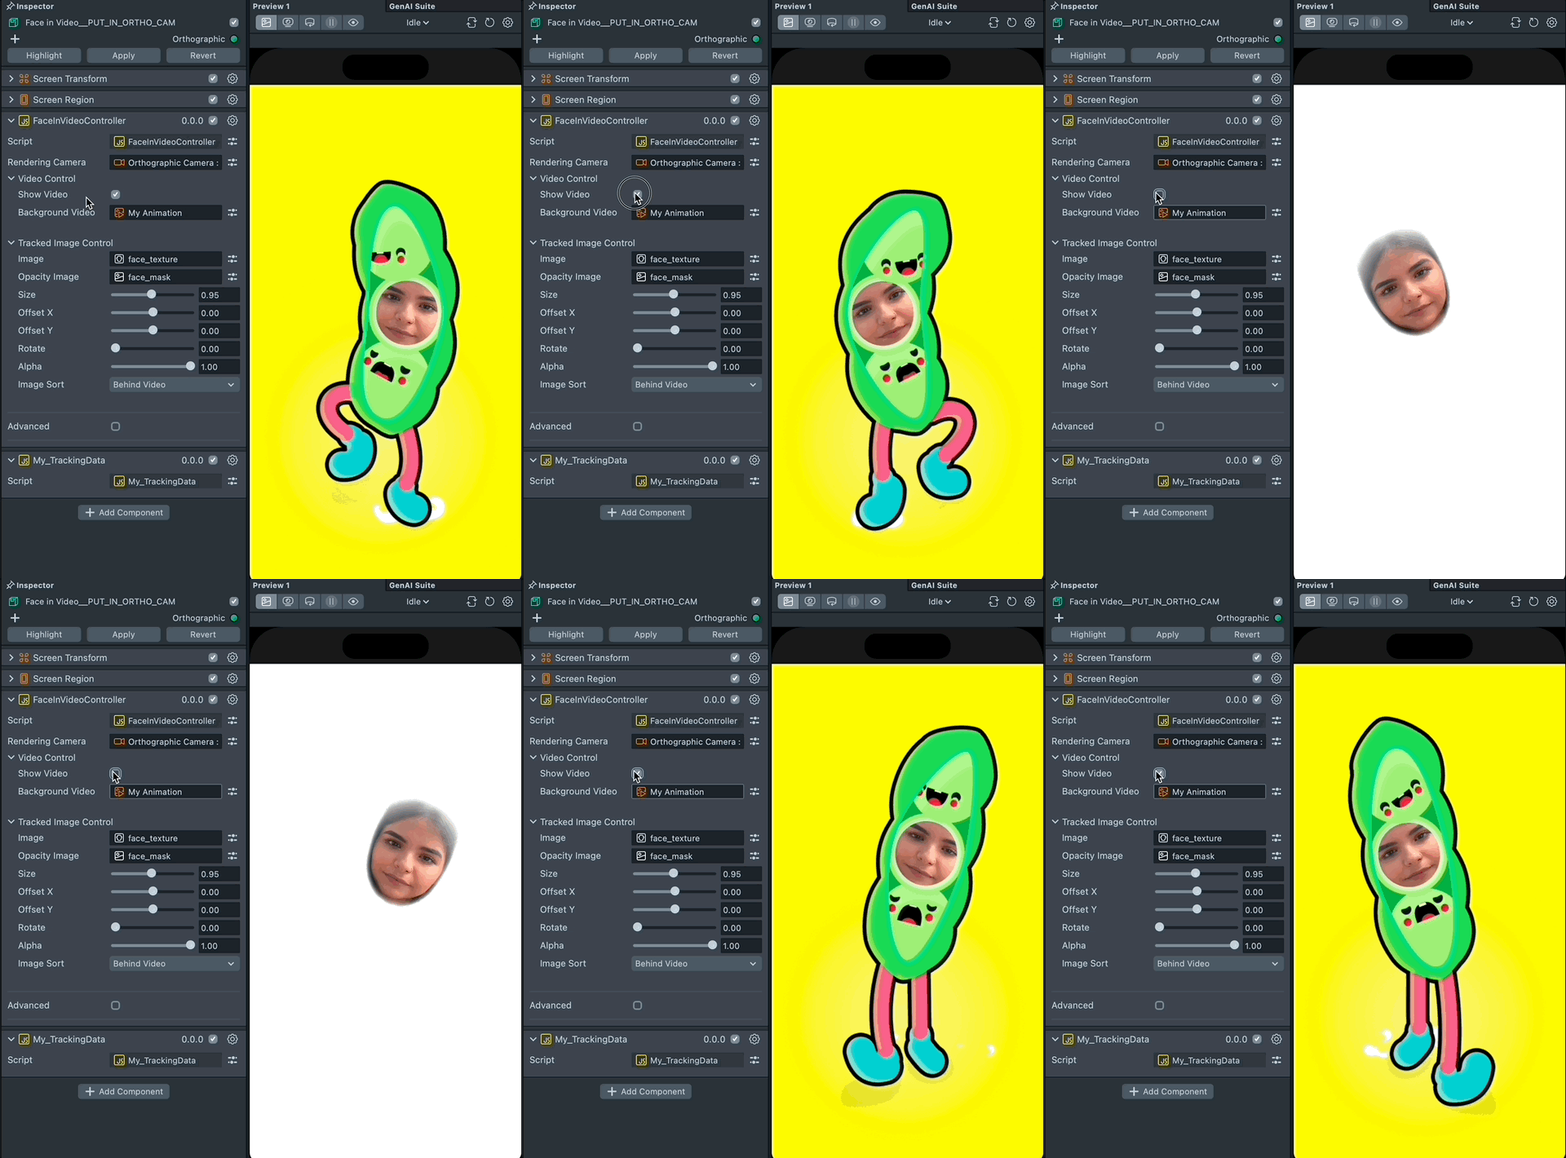
if you keep the Show Video option disabled, you can reduce the size of your Lens by clearing the Background Video’s texture input so that the video does not get exported as part of the Lens.
Changing the Image
A custom texture can be added to replace the face texture as well. You can change the texture by changing the Image property to a custom texture.
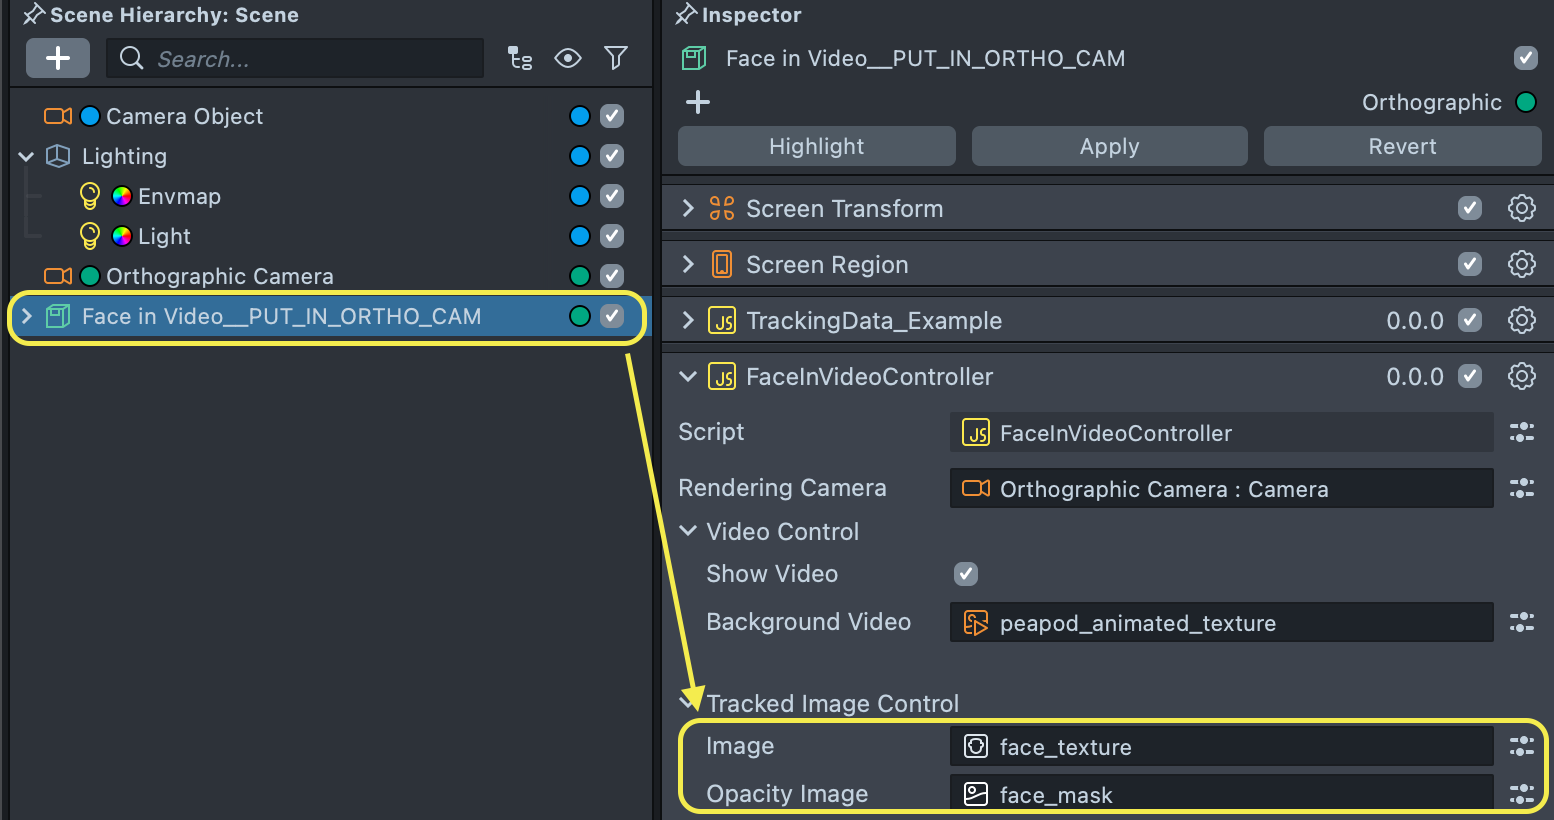
You can add an opacity image to your tracked image by changing the Opacity Image texture property. Take a look at the example face_mask texture in the Asset Browser panel for an example of an opacity mask.
Adjust the Image Size, Position and Rotation
The example also allows you to modify how your tracked content is displayed.
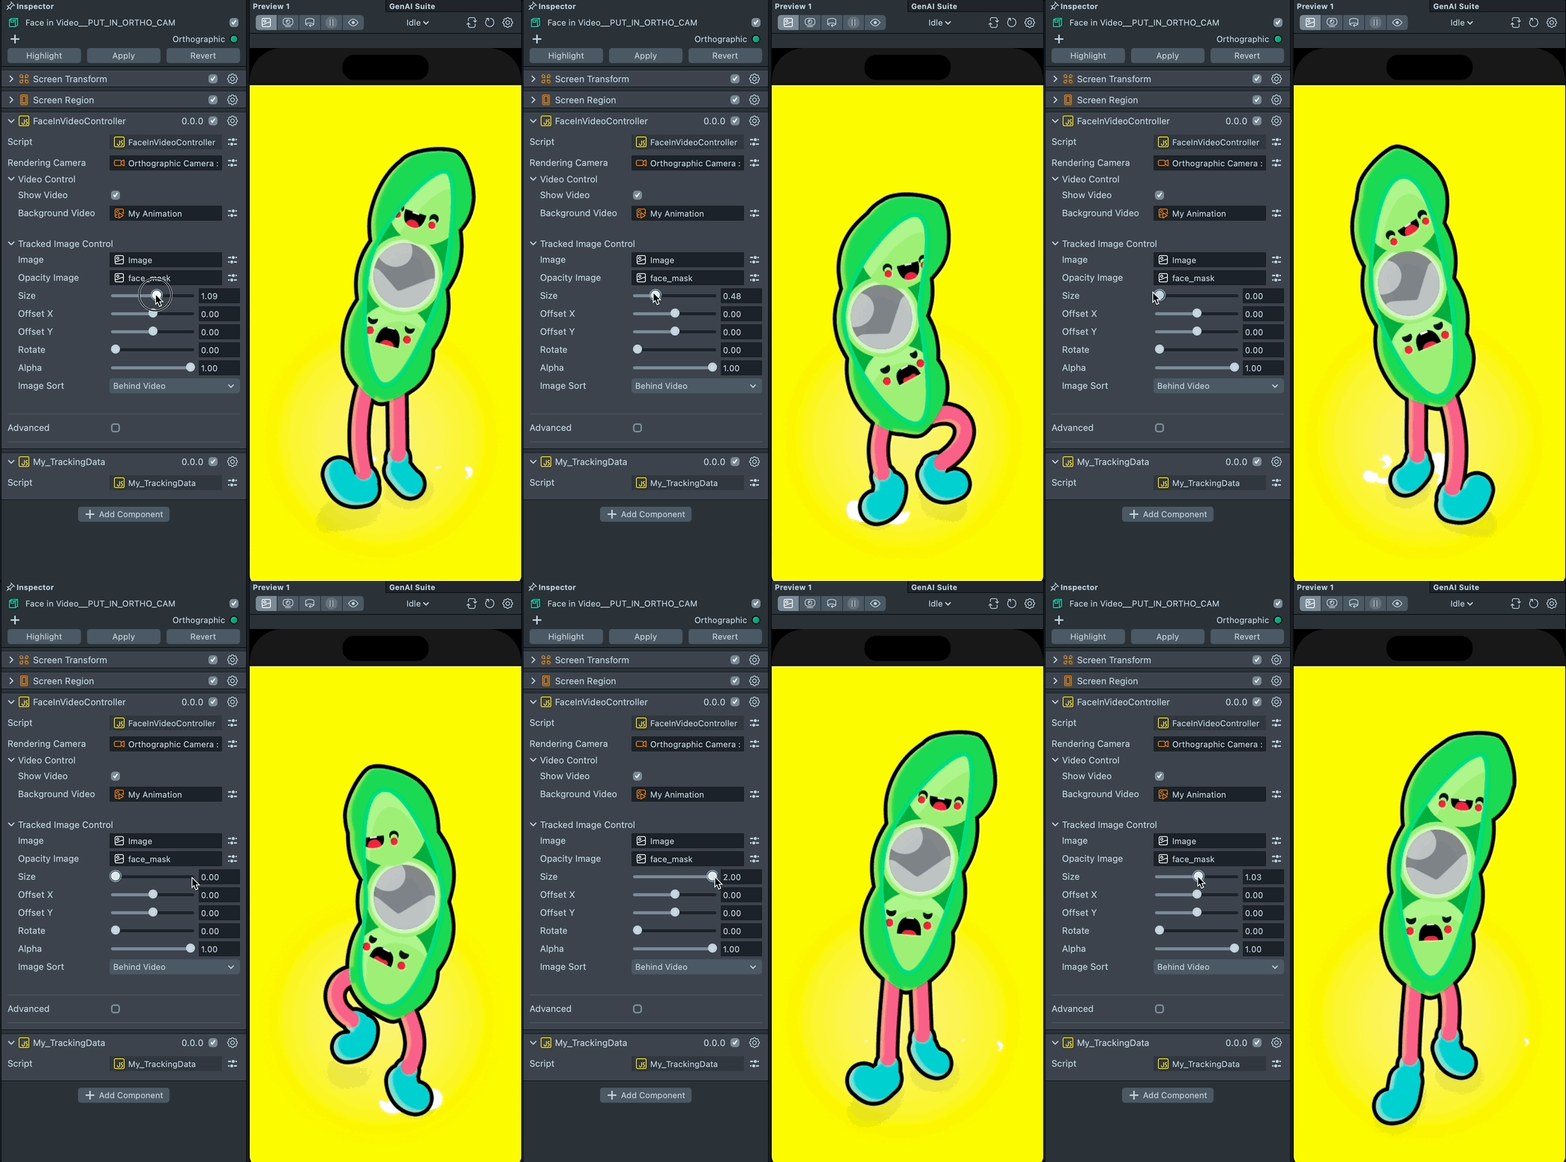
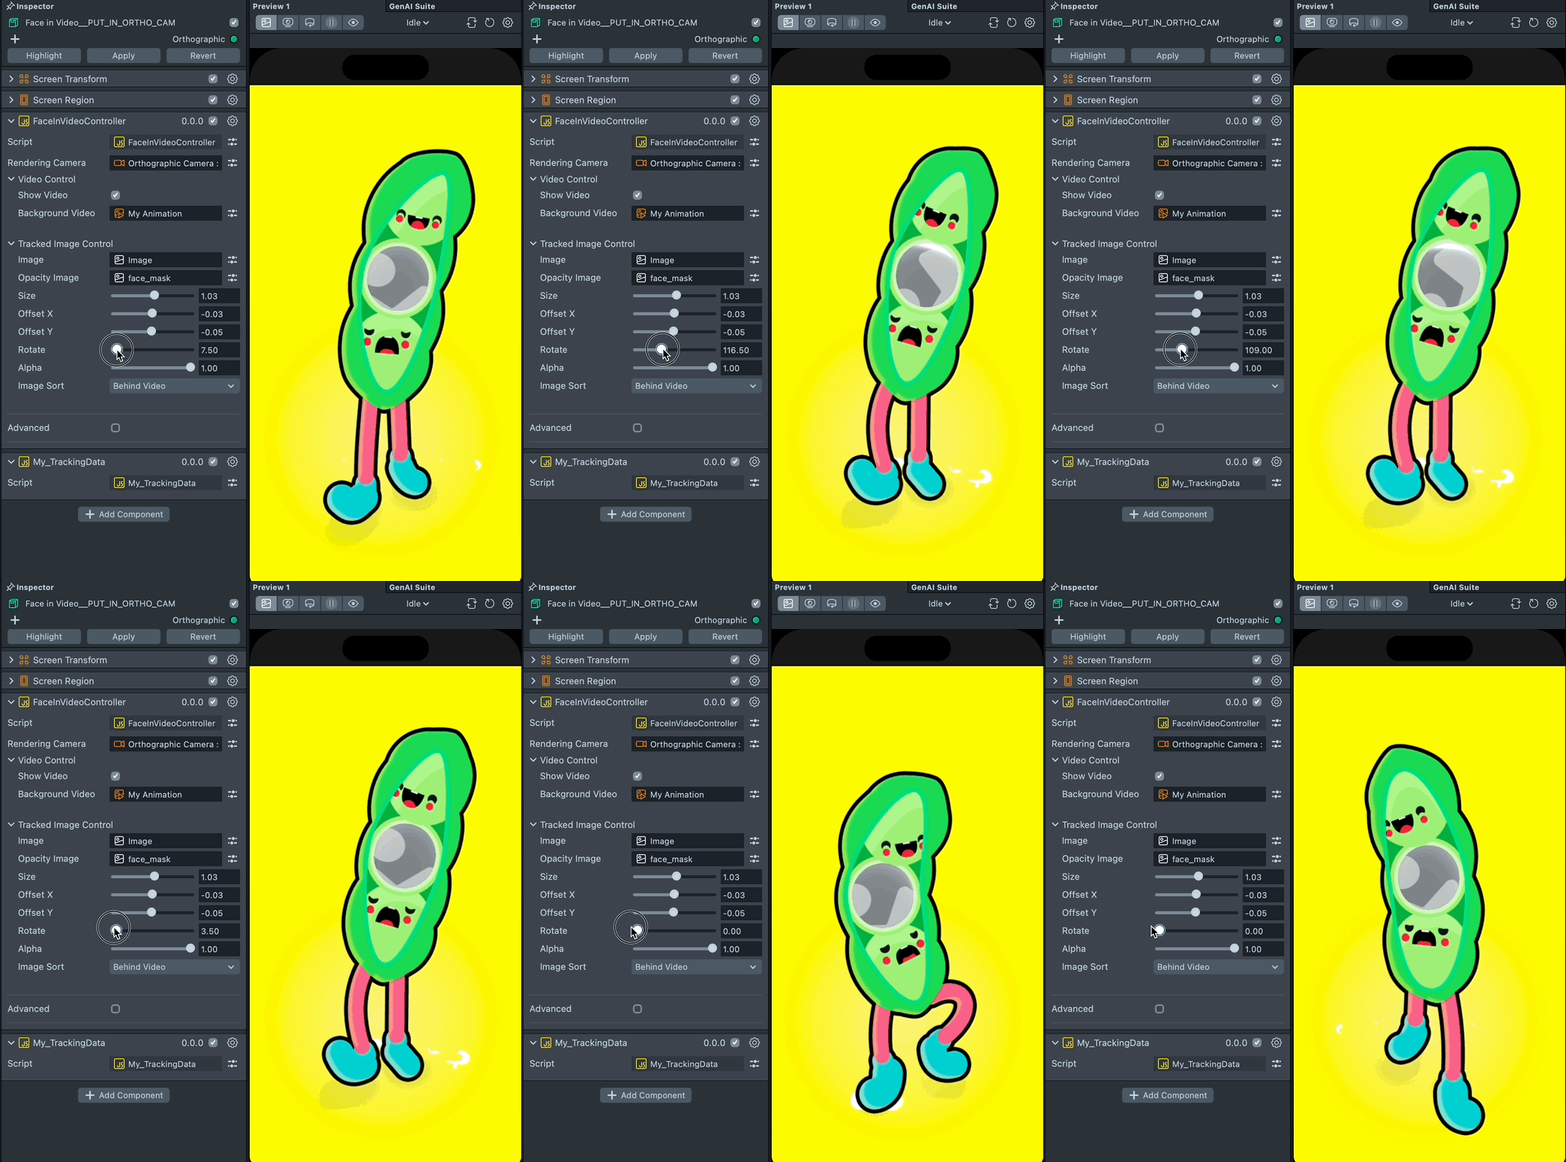
You can adjust the image size using the Size slider.
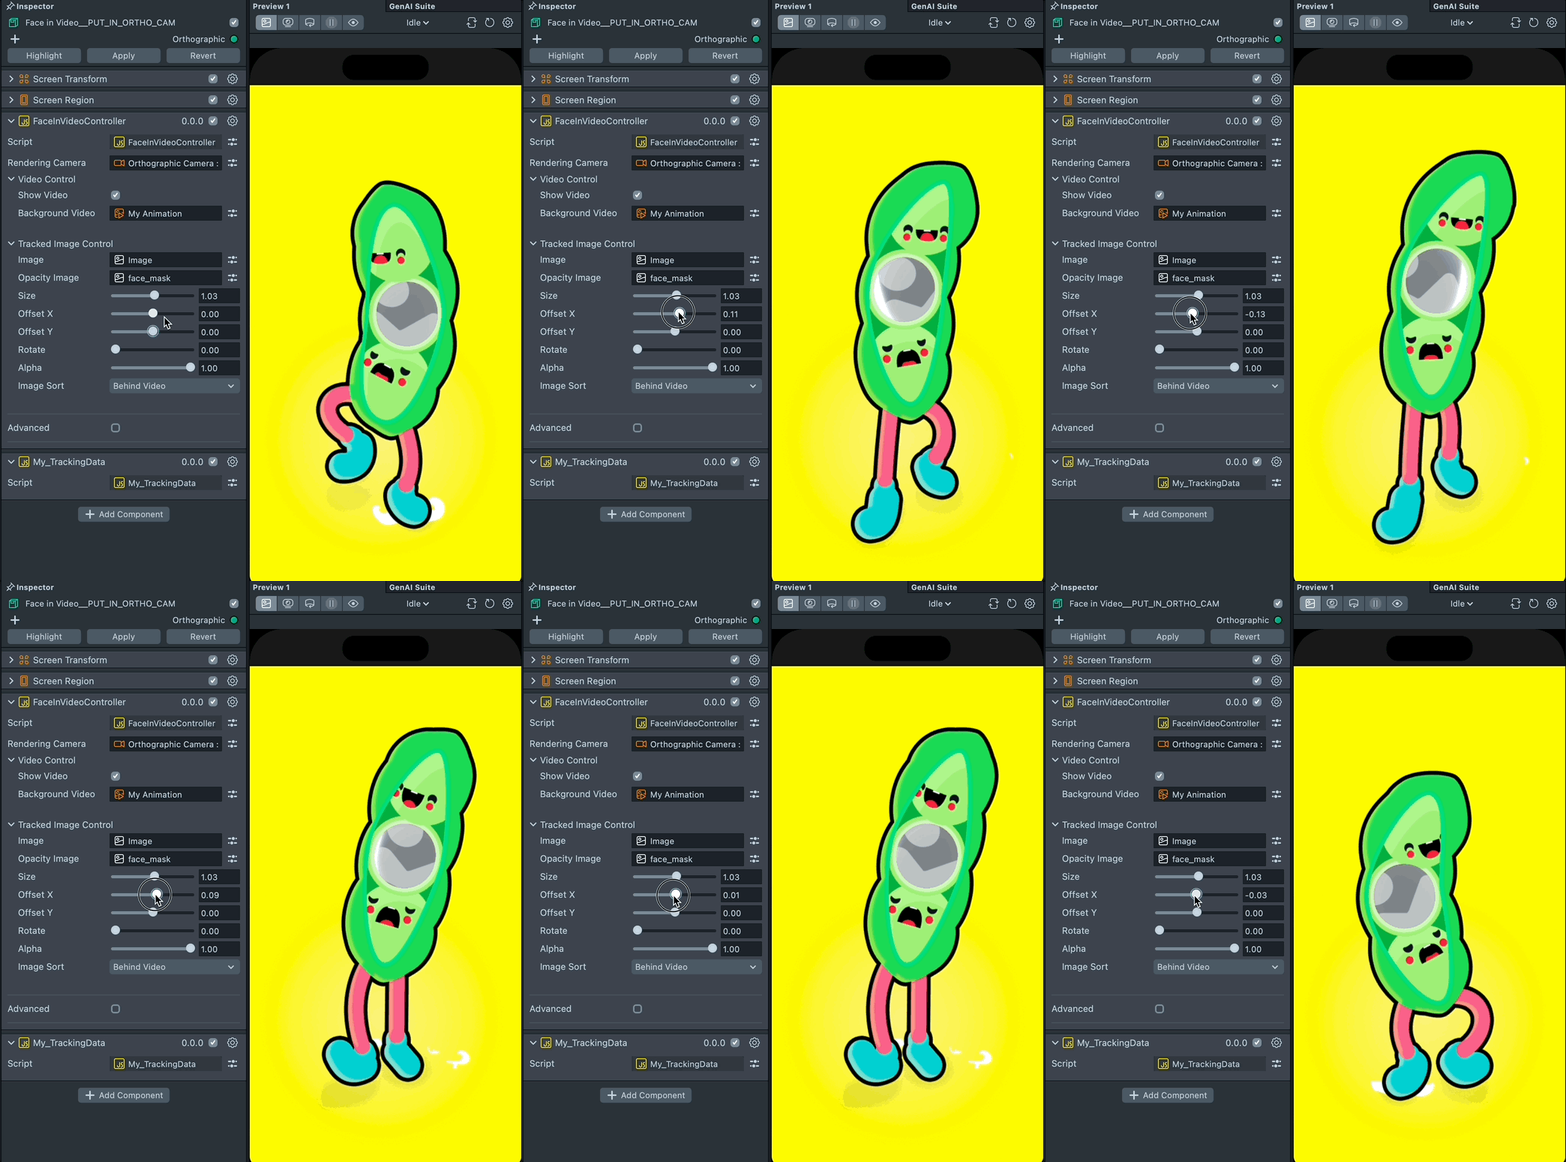
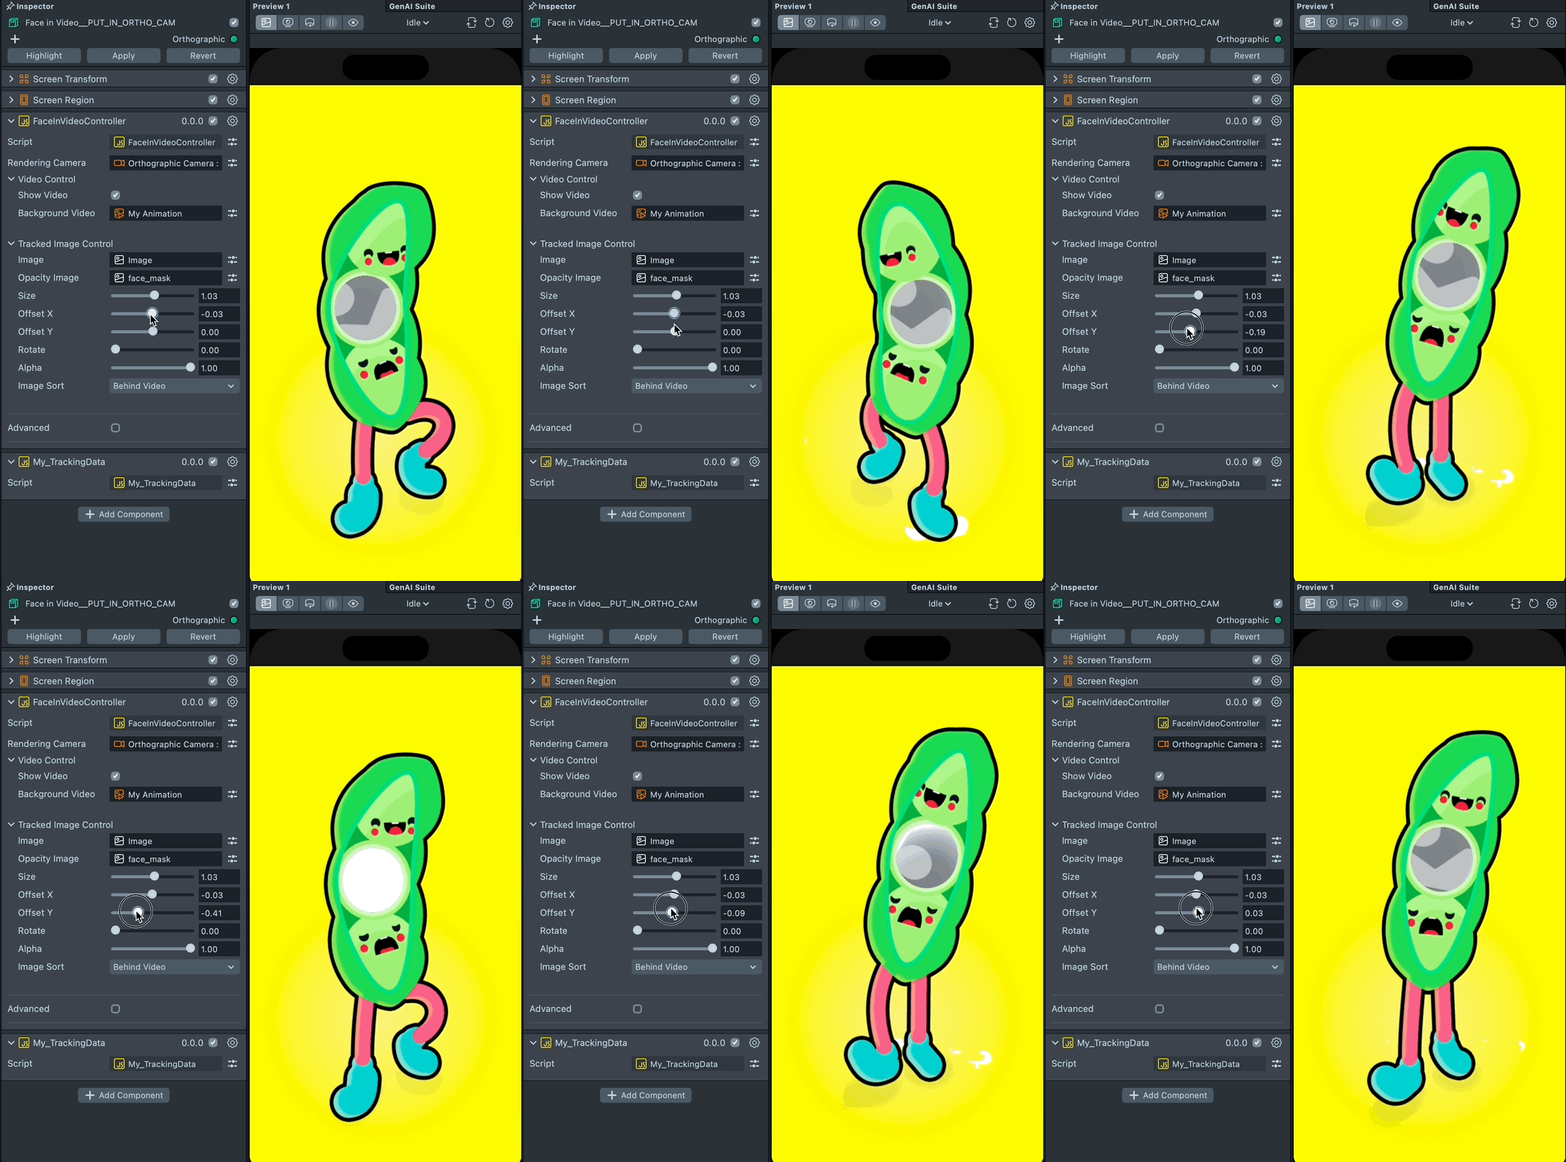
You can adjust the image position using the Offset X and Offset Y slider.
You can adjust the image rotation using the Rotation slider.
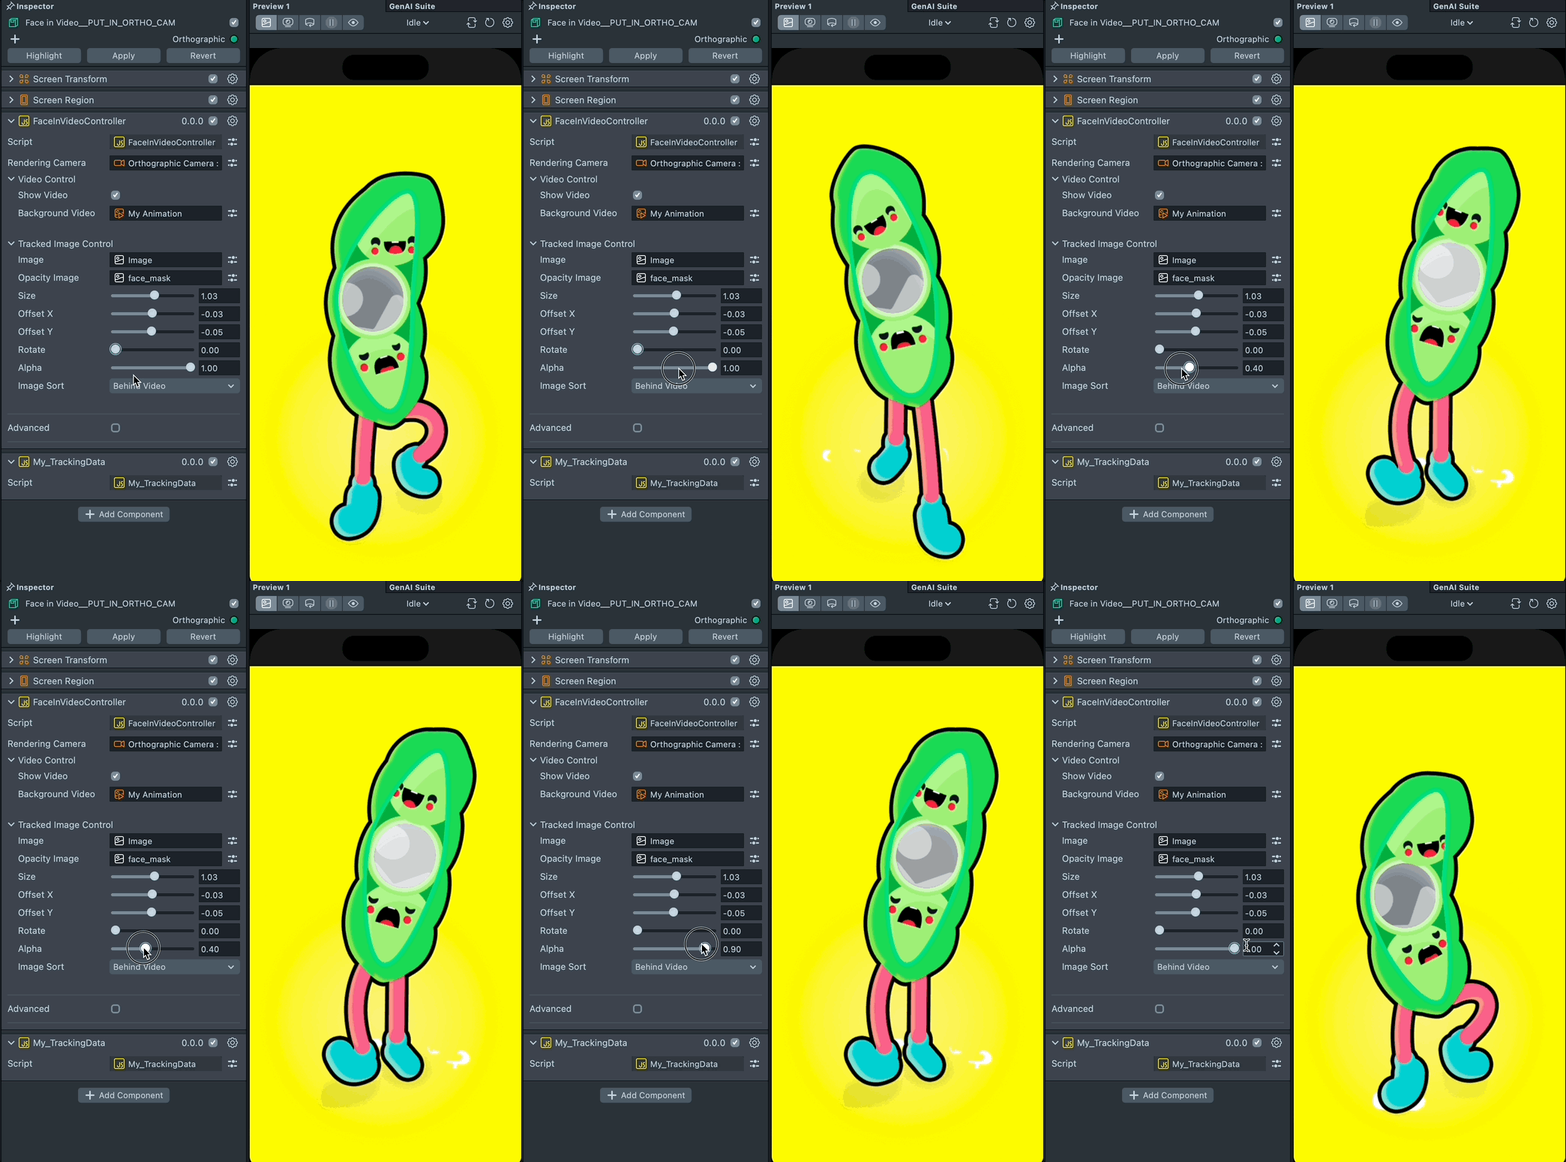
You can adjust the opacity of your image using the Alpha slider.
Adjust the Image Sort
If you want your image to be drawn on top of the video, change the Image Sort to In Front of Video.
You can also sort how your image is drawn using the Scene Hierarchy panel by setting the Image Sort to Manual.
Previewing Your Lens
You’re now ready to preview your Lens. To preview your lens in Snapchat, follow the Pairing to Snapchat guide.