Face Mesh
The Face Mesh assets demonstrates several different ways to use Face Mesh feature. The Face Mesh feature creates a 3D mesh that mimics the user’s face as it changes. The assets shows how you can use 2D or 3D content.
Guide
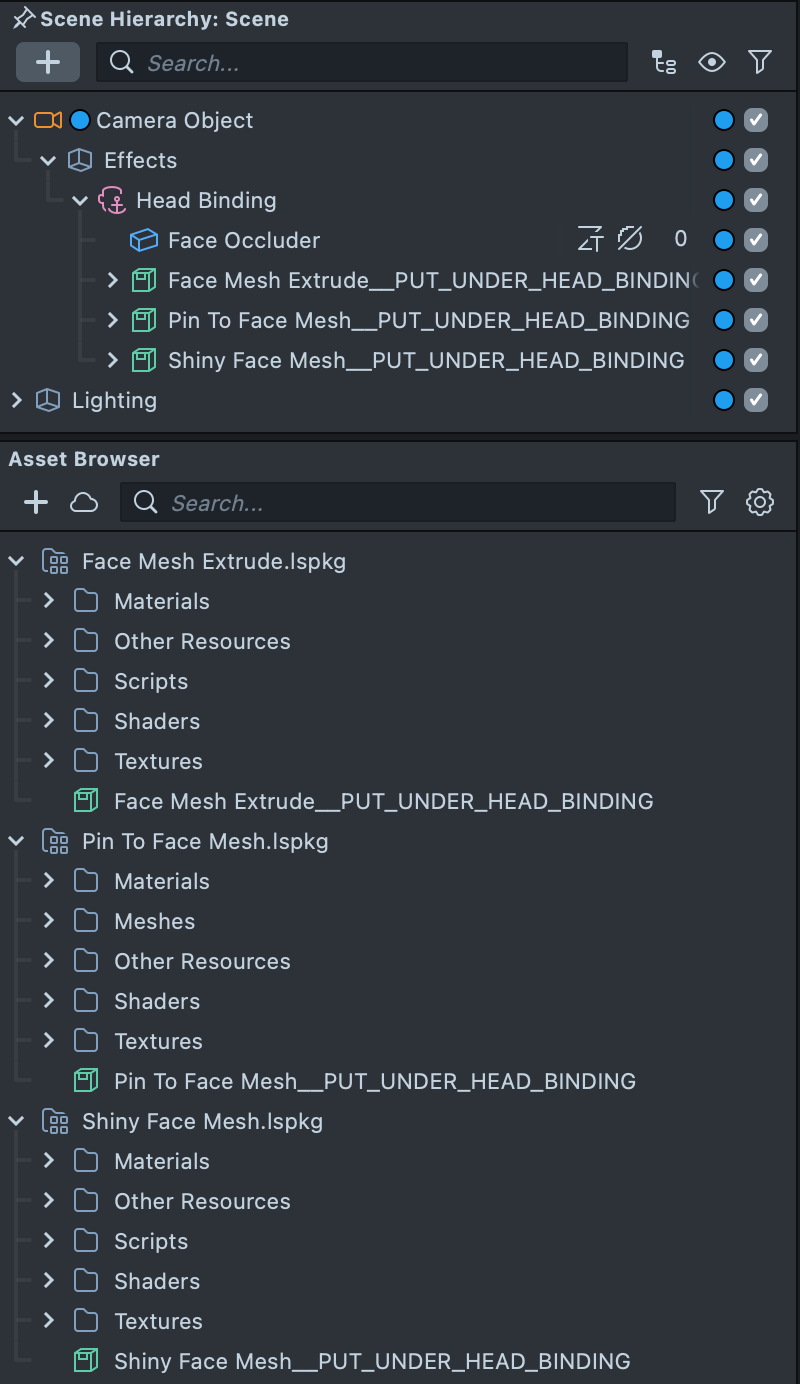
Find the Shiny Face Mesh, Pin to Face Mesh, and Face Mesh Extrude assets in the Asset Library and import it into your project. Click here to learn more about how to use assets in the Asset Library. Once you import the asset from Asset Library, you can find the package in the Asset Browser. Follow the instructions. In the Scene Hierarchy panel, + -> Head Binding and drag the prefab with PUT_UNDER_HEAD_BINDING tag into Scene Hierarchy under Head Binding to create a new Scene Object. You can right-click and select Unpack for Editing from the drop-down menu to unpack all assets stored in the bundle. Click here to learn more about Asset Packages. Once you unpack the package, you can then edit its content.
Face Mesh Extrude
The Extrude example allows you to create a 3D mask based on a 2D texture by simulating an extrusion effect by duplicating the Face Mesh multiple times.
The extrusion is done through the FaceMeshExtrude script which duplicates the Face Mesh in the specified direction.
To customize the script select the Face Mesh Extrudeobject in the Scene Hierarchy panel and adjust its settings in the Inspector panel.
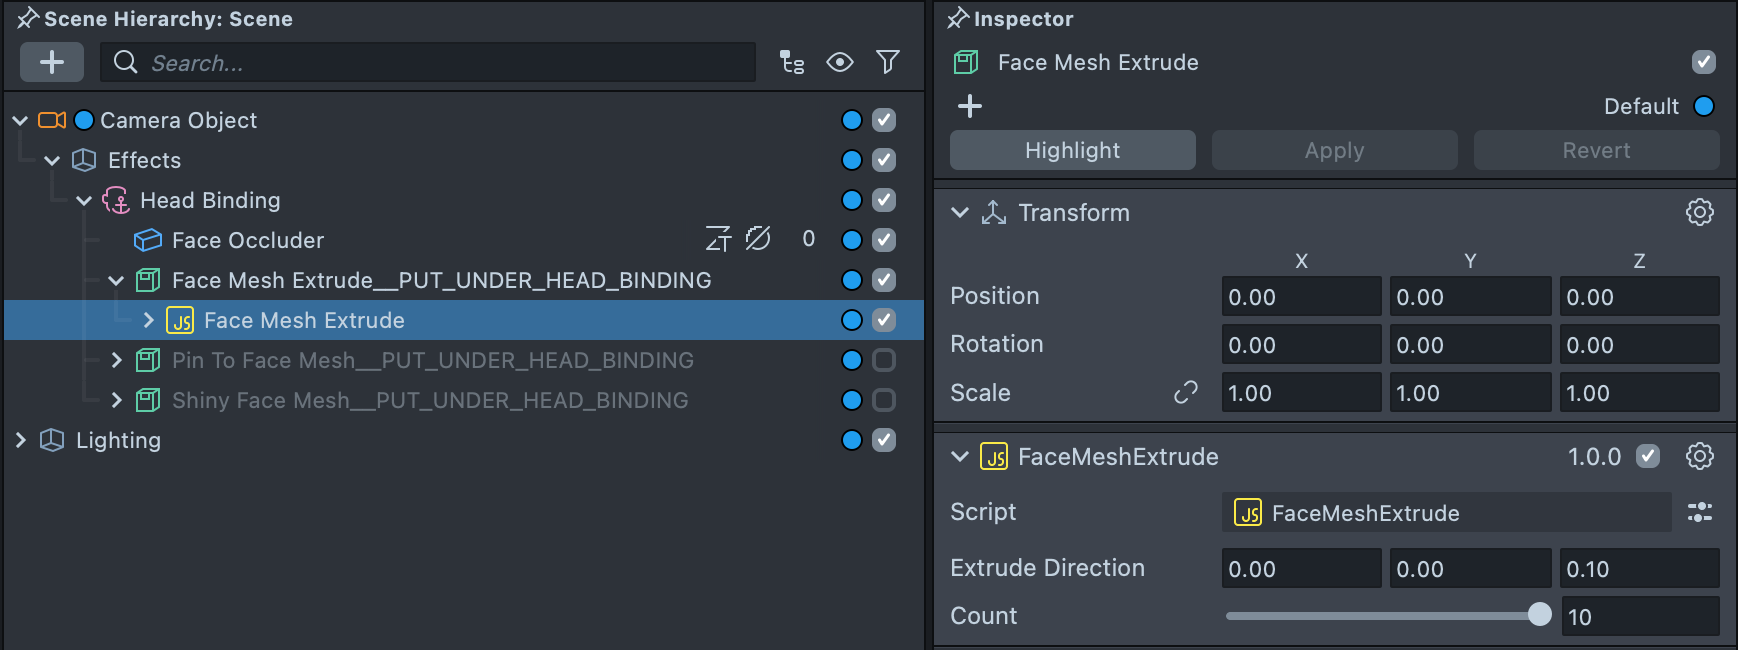
Extrude Direction
To specify the direction of the extrusion, modify the Extrude Direction values, where each parameter represents the x, y, z direction of the duplicates relative to the orientation of the Face Mesh.
Count
You can choose how many copies will be created by changing the Count slider.
Pin to Face Mesh
The Pin To Mesh example demonstrates how you can use the Pin To Mesh component to attach any object on to Face Mesh object which will react to the user’s facial movement.
You can see how the Pin To Mesh works by selecting the Pin To Mesh Left or Pin To Mesh Right object in the Scene Hierarchy panel.
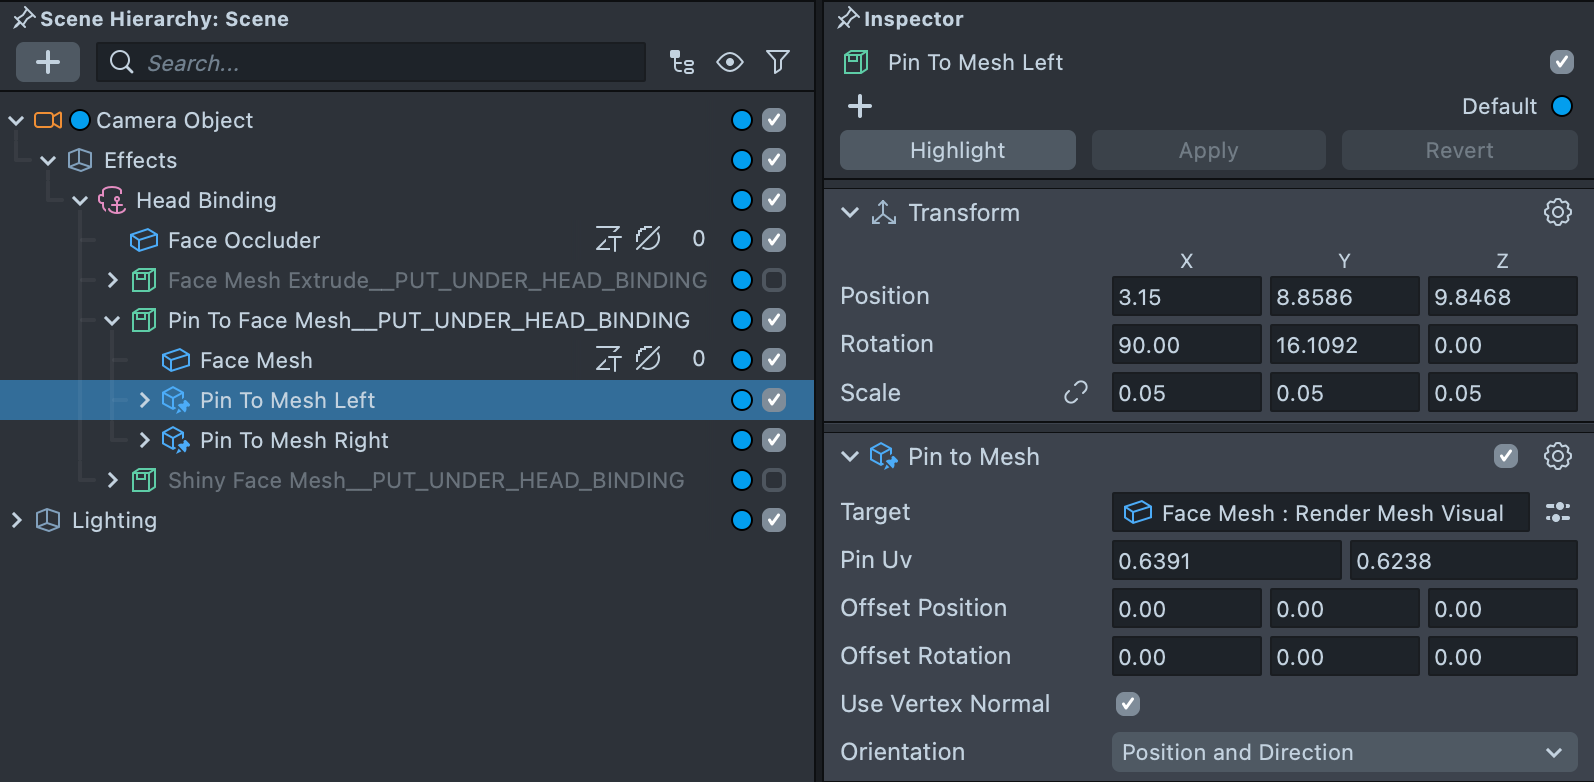
In the Inspector panel you can see the Face Mesh object is set as a Target on the Pin To Mesh object. You can modify where your object is pinned to the mesh by modifying the Pin UV parameters.
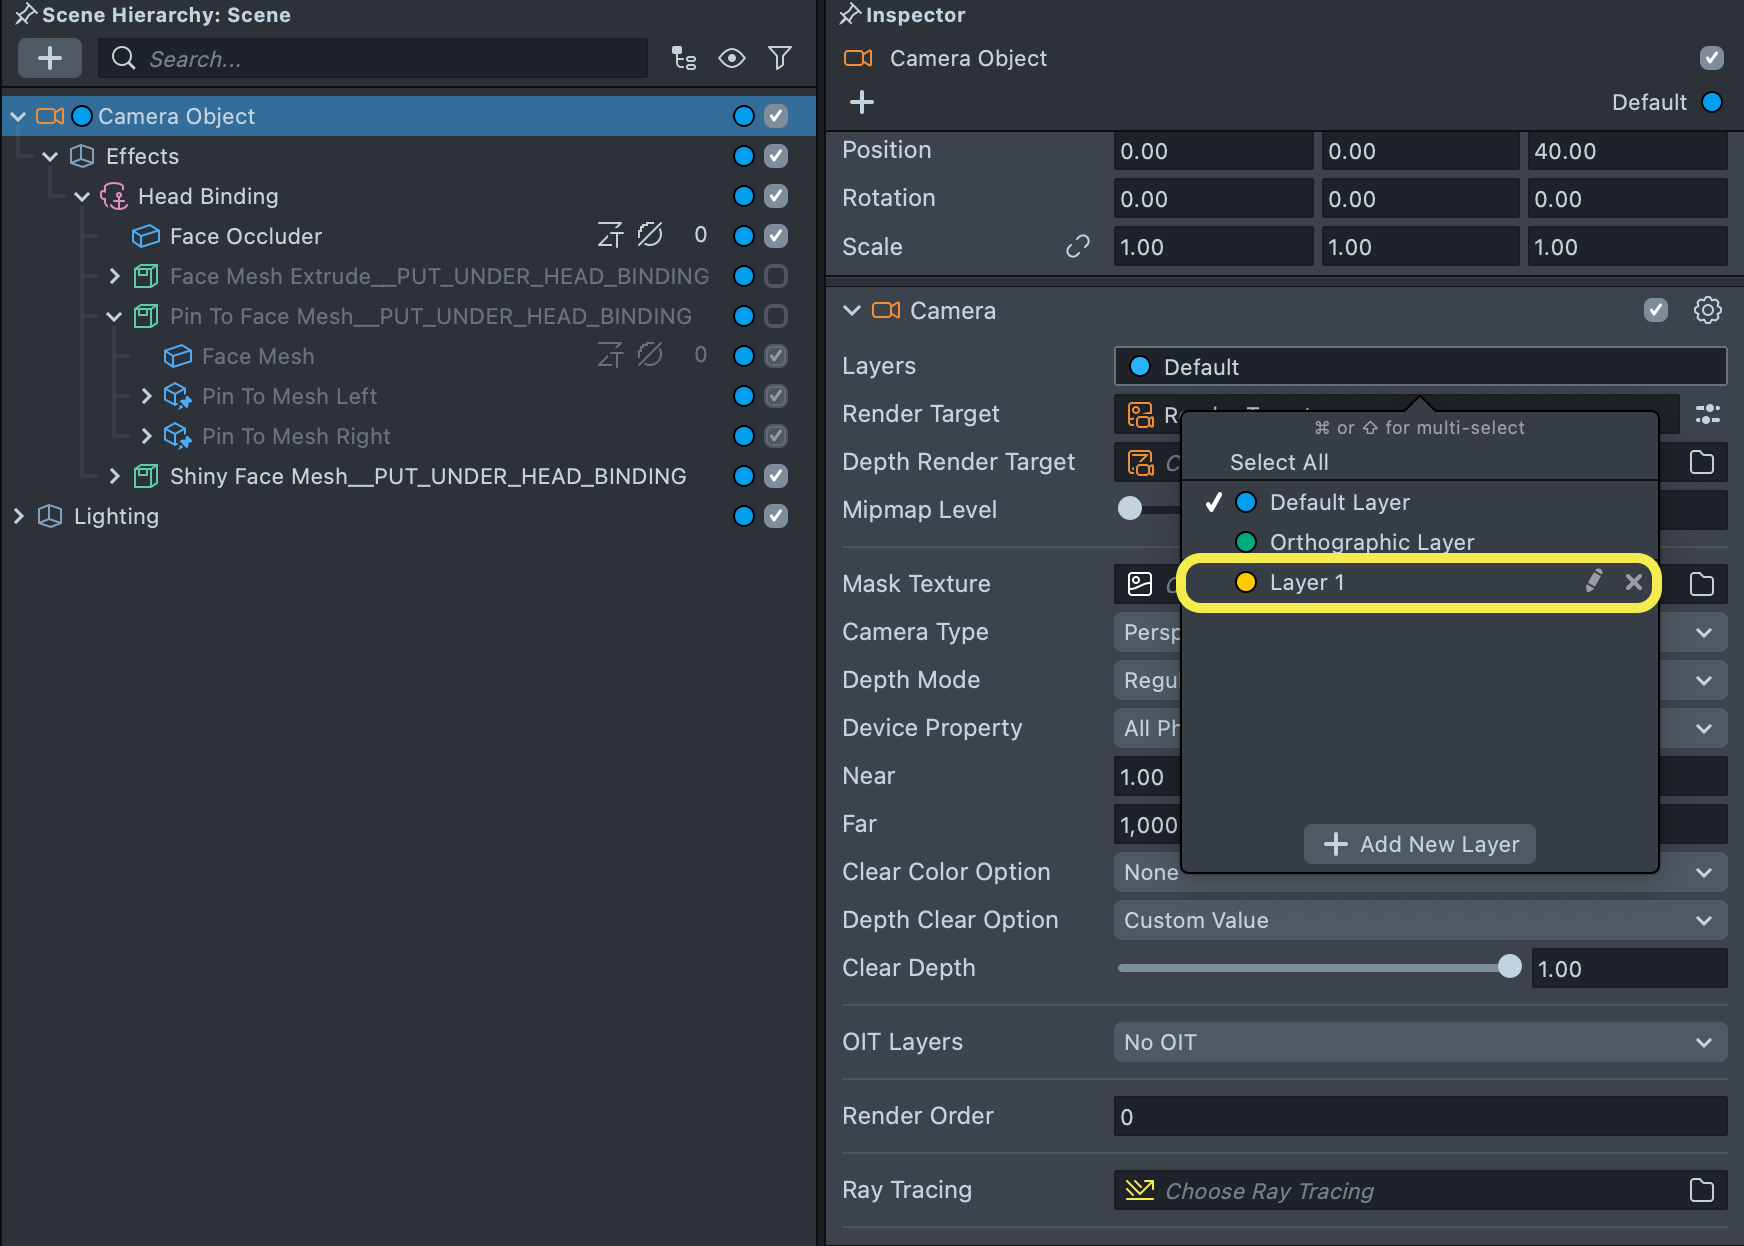
Shiny Face Mesh
The Shiny Face example uses the reflection of a material to create an effect on the user’s face.
Add render layer
Follow the instruction, add Layer 1 to Camera Layers.
Disable the default Envmap under the Lightning Object.

Click on the Shiny Face Envmap for Enviorment Map light settings.
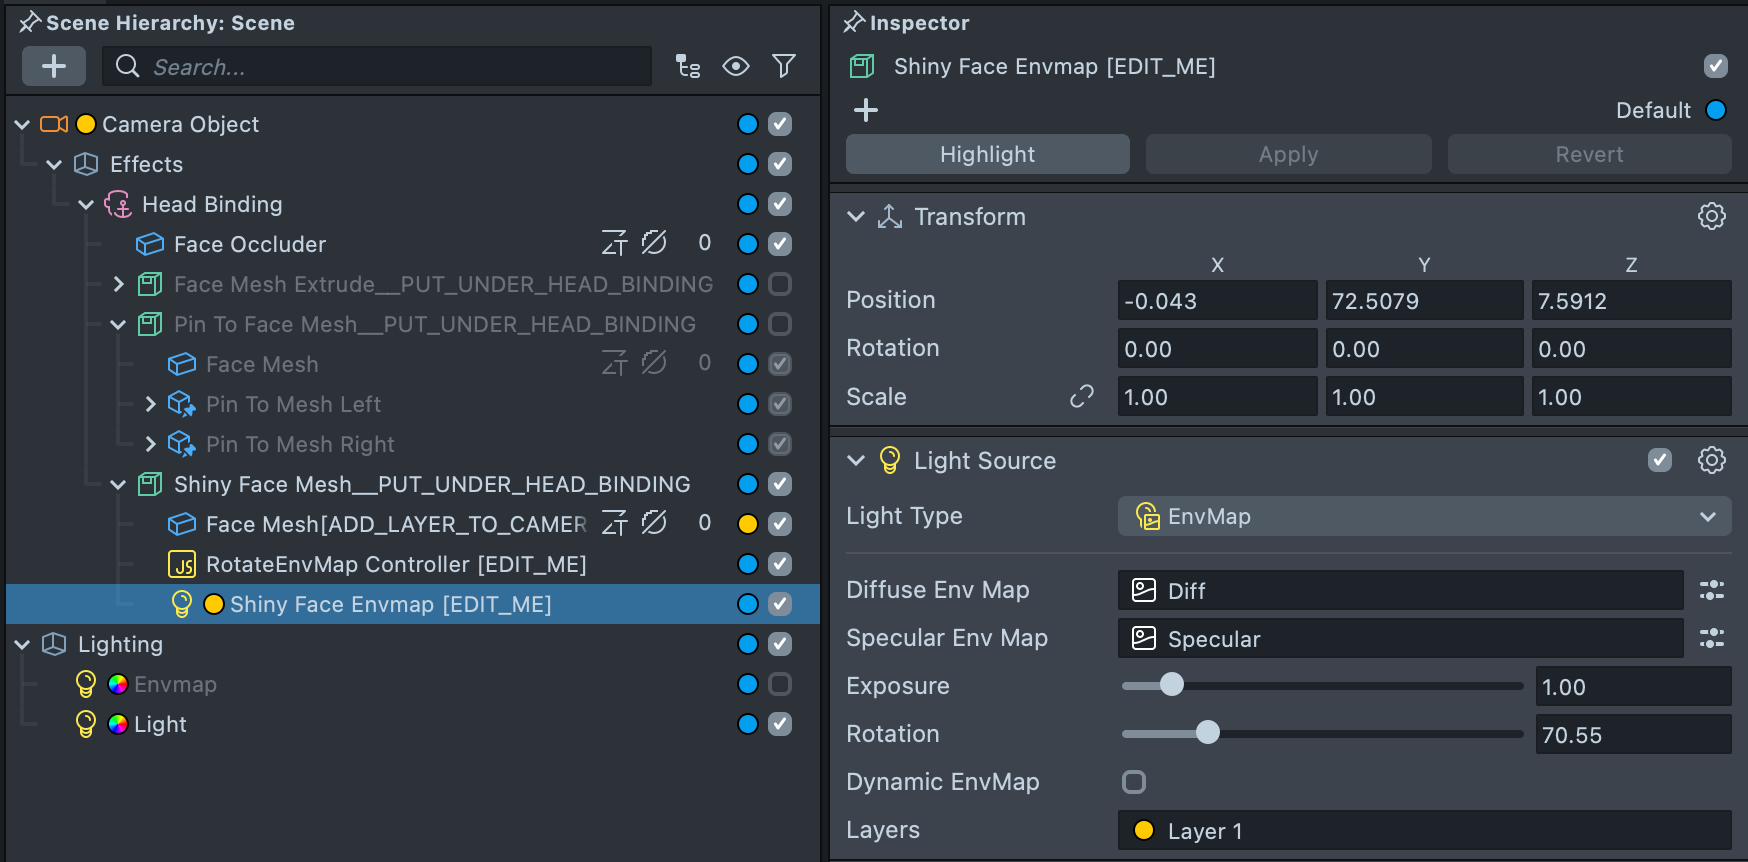
Take a look at the Lights and Shadow guide on the Lens Studio website to learn more about reflections and environment maps.
Animating Environment Maps
This example also contains a helper script which will rotate the environment map based on the time and loop count to animate the reflection.
To customize the rotation speed select the RotateEnvMap Controller EDIT_ME object in the Scene Hierarchy panel and adjust its settings in the Inspector panel.
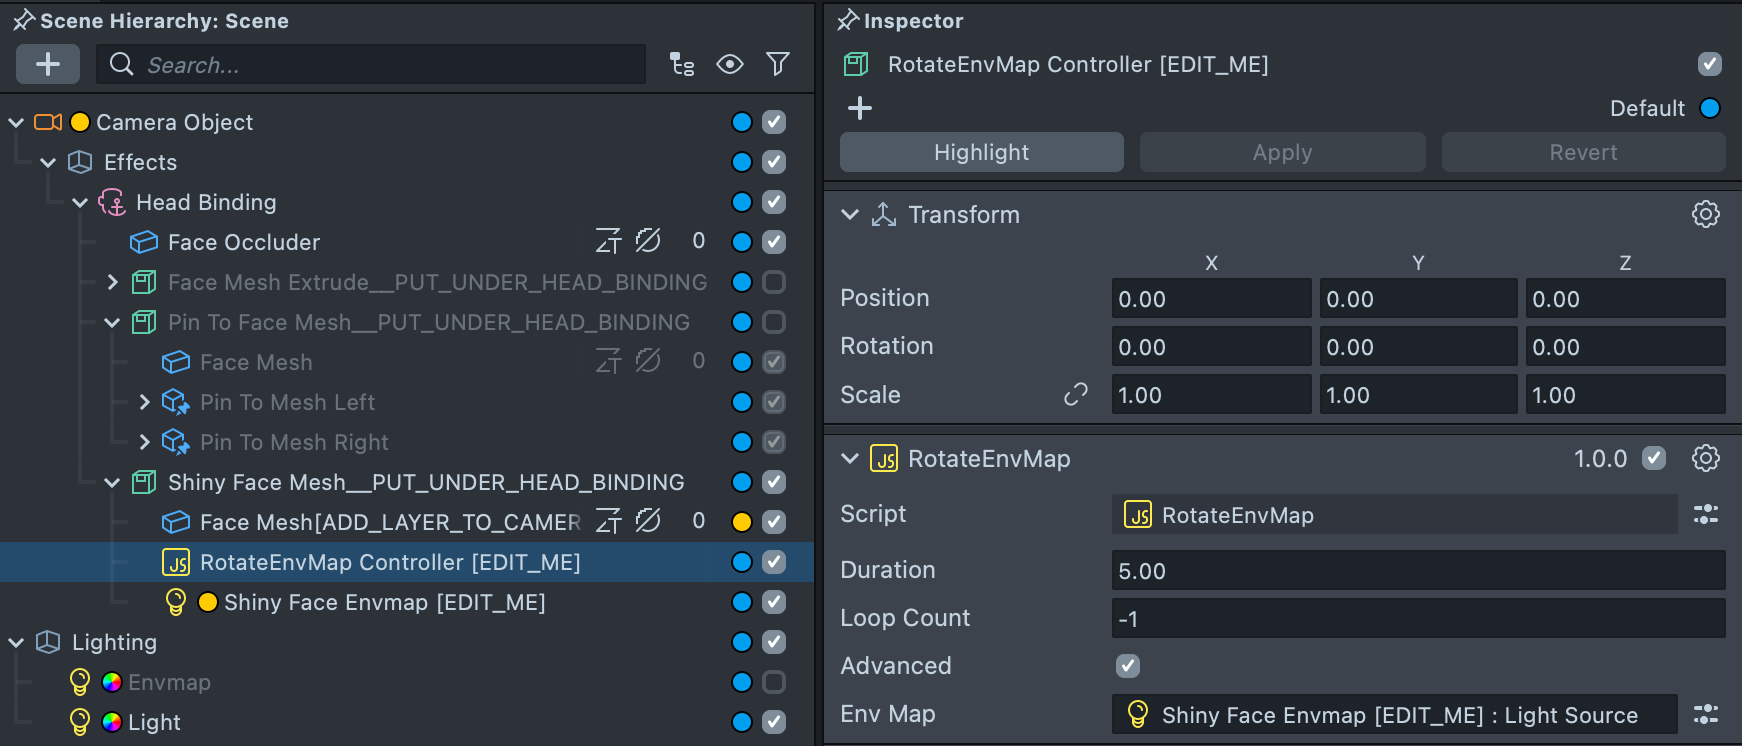
Duration
You can change the rotation speed by changing the Duration value.
Loop Count
You can change the number of times it loops by changing the Loop Count. If you wish to have an infinite loop, change the loop count to -1.
You can modify which part of the Face Mesh is visible using an Opacity Mask, as well as whether the eyes and mouth are filled in. Take a look at the Face Mesh guide for more information.
Previewing Your Lens
You’re now ready to preview your Lens! To preview your Lens in Snapchat, follow the Pairing to Snapchat guide.