Face in Picture
The Face In Picture asset allows you to fill a hole of a 2D image with the user’s face. Additionally, it shows you how to overlay facial features like the user’s eyes and mouth over an imported 2D image.
Find the Face In Picture asset in the Asset Library and import it into your project. Click here to learn more about how to use assets in the Asset Library. Once you import the asset from Asset Library, you can find the package in the Asset Browser.
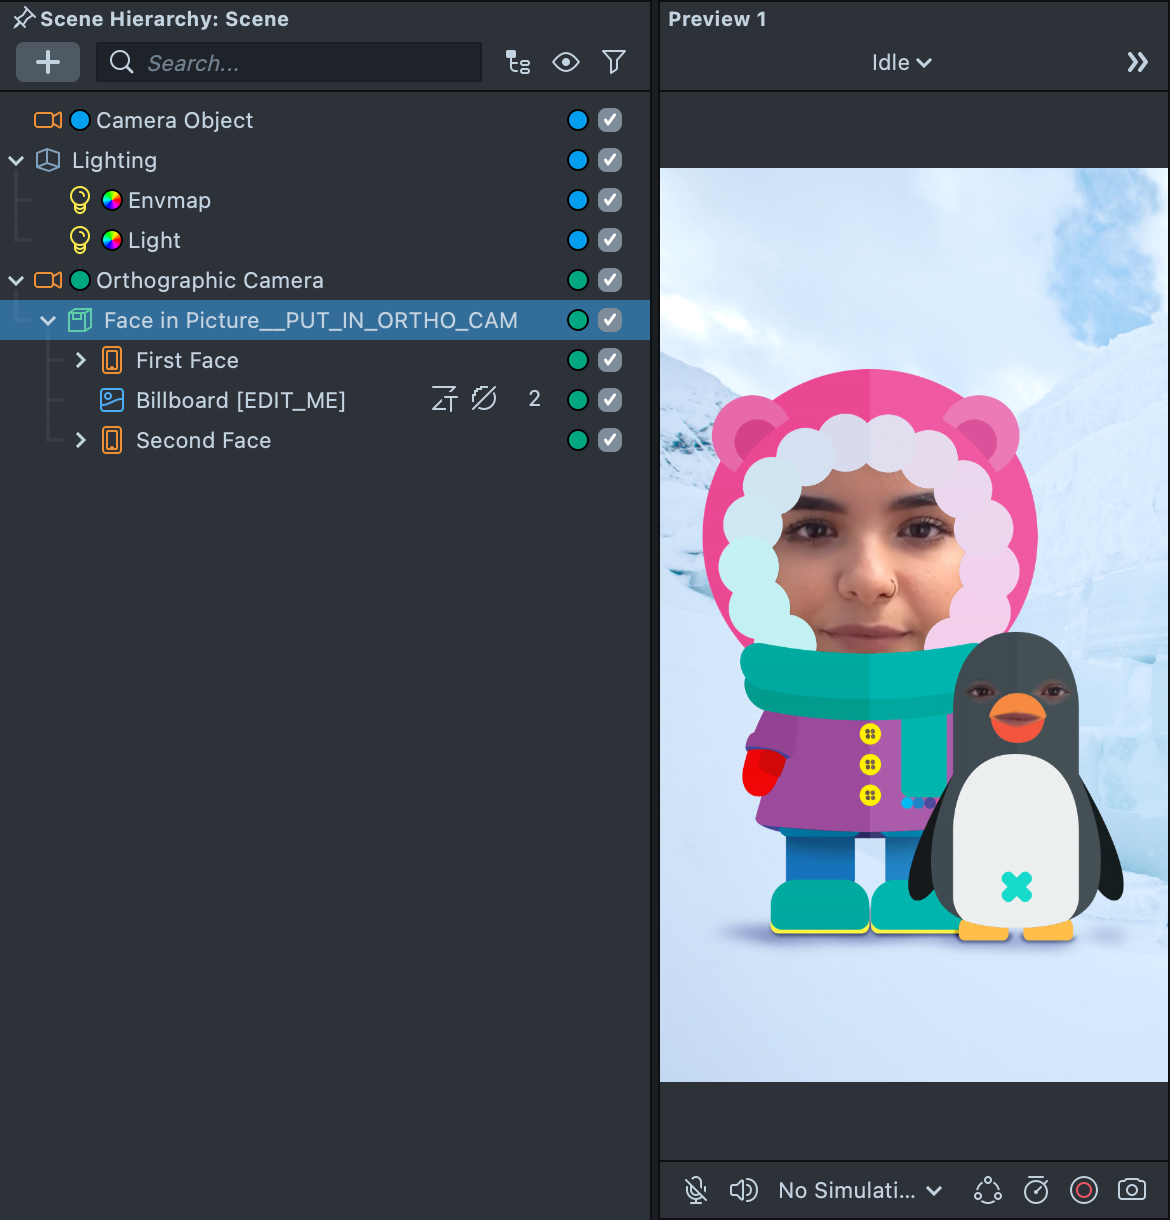
Follow the instructions. If your scene doesn't have an Orthographic Camera, you can create one by clicking the + button at the top left corner of the Scene Hierarchy panel, typing "Orthographic Camera" to find the Orthographic Camera object, and clicking on it to add it to the scene. Then drag the prefab Face in Picture__PUT_IN_ORTHO_CAM into Scene Hierarchy to create a new Scene Object under Orthographic Camera.
You can right-click and select Unpack for Editing from the drop-down menu to unpack all assets stored in the bundle. Click here to learn more about Asset Packages. Once you unpack the package, you can then edit its content.
Import your Custom Artwork
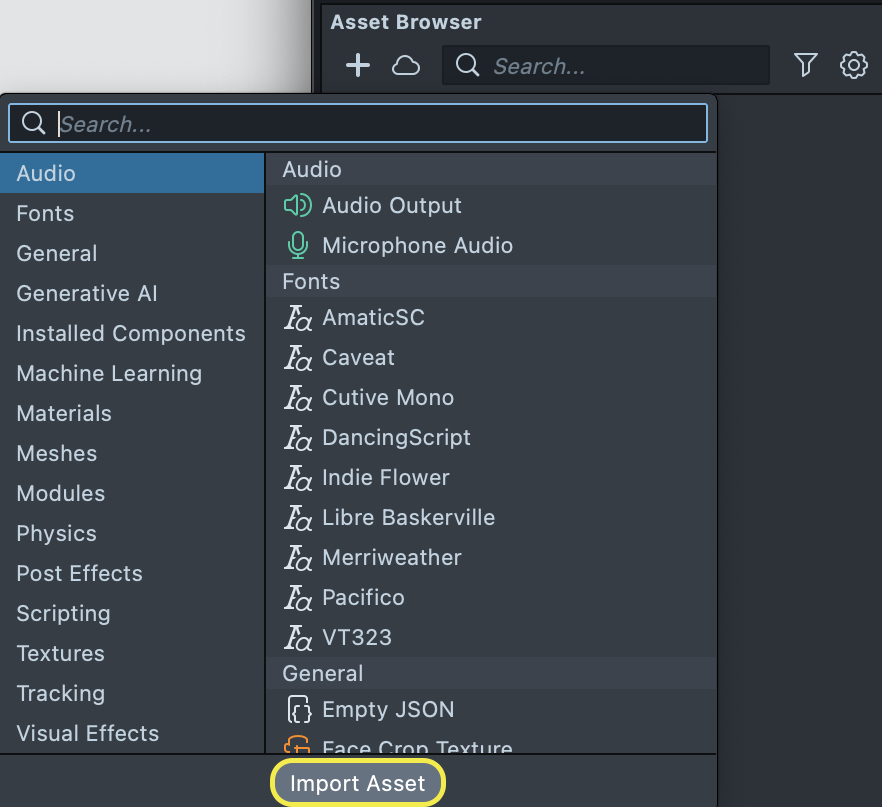
First, import your own custom 2D artwork into the template by clicking + in the Asset Browser panel followed by Import Asset. Alternatively you can drag and drop your 2D image into the Asset Browser panel.
Assign your Artwork
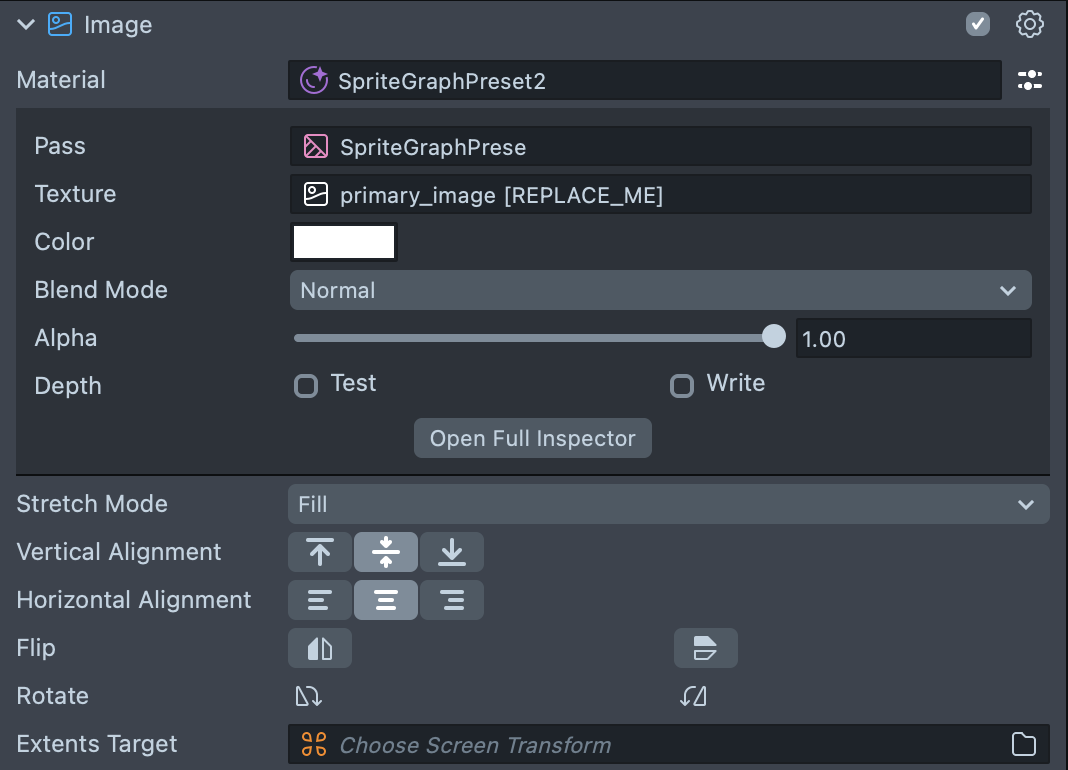
Next you will need to assign your artwork to the Screen Image object. Locate the object named Billboard [EDIT_ME] in the Scene Hierarchy panel and assign your texture to the Texture field of the Image component. It is recommended that you keep the Screen Image in Fill mode so that it fills the entire screen.
Background Image
There is an optional background image called Background [REMOVE_ME] you can replace or remove. Because it is behind everything, this object will appear if a face is not found or when a face is lost.
Positioning
Adjust the position of the Face Inset object called Face [EDIT_ME]. With the object selected, select the Move tool in Lens Studio’s toolbar (or press W), then drag the arrows in the Scene panel to position the face behind the hole in your artwork.
You can reorder any of the objects by dragging them up or down in the Scene Hierarchy panel. Their order will determine the order in which they are rendered.
It is recommended that you tune your Face Inset positions using a 16:9 preview image. All preview images that come with Lens Studio are 16:9. For some images that are very different resolutions, you might see snapping in the Preview panel. Press the refresh button in the Preview panel to see the true position of the Face Inset.
Supporting Multiple Faces
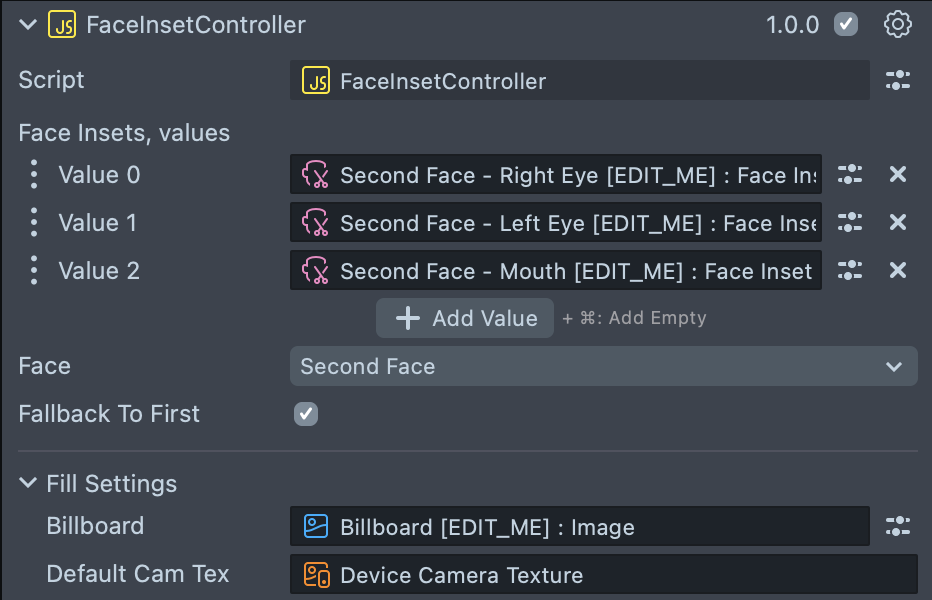
The asset includes a script called FaceInsetController which allows you to easily manage multiple faces. The script takes in a list of Face Inset objects. Then, a simple dropdown allows you to assign the inputted objects to the first or second face. Additionally, this script intelligently maintains the positions of the face insets in relation to the Screen Image when the Lens is used on different device resolutions.
If you delete the included Screen Image or want to use another one as reference, make sure to set the Screen Image parameter in this script.

When set to the second face, you have the option to enable Fallback To First. This will fallback to the first face if it can’t find a second face. If disabled, the face insets will only ever apply to the second face.
Previewing Your Lens
You're now ready to preview your world Lens experience. To preview your Lens in Snapchat, follow the Pairing to Snapchat guide.