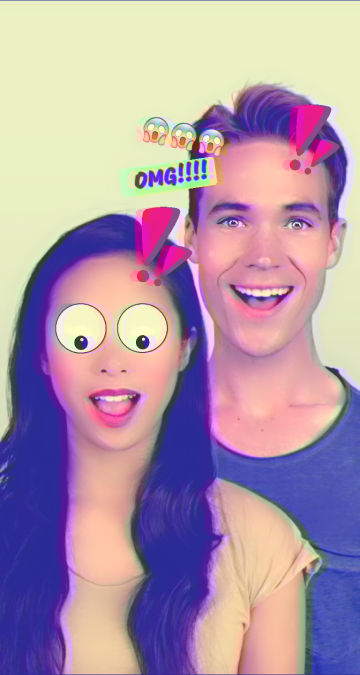
Face Stickers
The Face Sticker Controllers, Post Effect Controller, and Face Text Controller assets allow you to quickly build a face sticker Lens. With these asset, you can place any images or texts of your choice on positions relative to the face. The steps can be as easy as just a few clicks without any scripting.
Using the assets
Find the assets in the Asset Library and import it into your project. Click here to learn more about how to use assets from the Asset Library.
Once you import the asset from Asset Library, you can find the package in the Asset Browser.
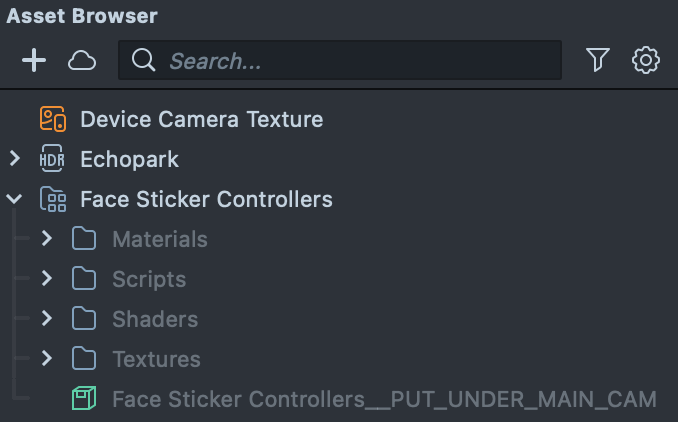
Follow the instructions and drag the prefab Face Sticker Controllers into Scene Hierarchy under the main Camera Object to create a new Scene Object.
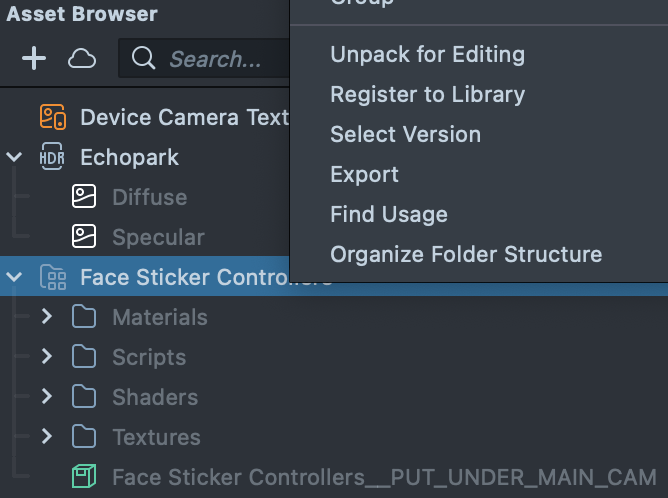
You can right-click and select Unpack for Editing from the drop-down menu to unpack all assets stored in the bundle. Click here to learn more about Asset Packages. Once you unpack the package, you can then edit its content.
The assets come with a few controllers that help you set up your face stickers with images, texts or emojis. You can find those controllers in the Scene Hierarchy panel. You can use one or multiple controllers to achieve a desired design for your face Lens.
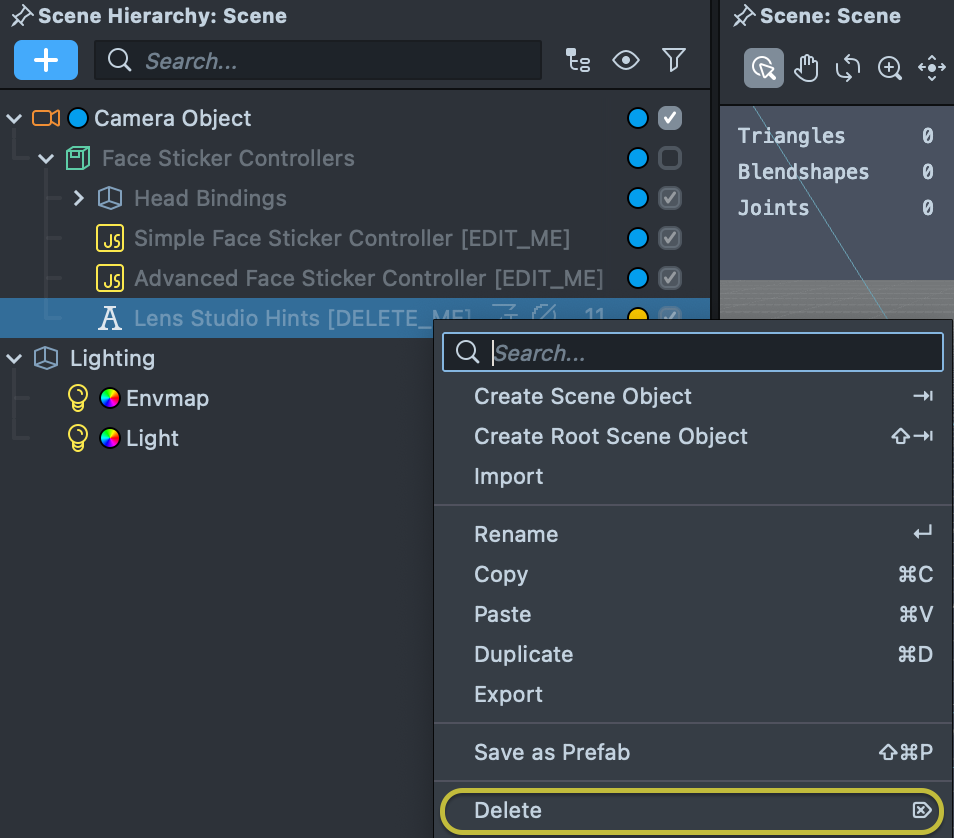
The assets contain some simple hints to get you started. After you read those, make sure to delete the Lens Studio Hints in the Scene Hierarchy panel so you can see your objects in the Scene panel clearly:
Configuring the assets
Face Sticker Controllers
The Face Sticker Controllers asset includes two main controllers:
Simple Face Sticker Controller
The Simple Face Sticker Controller allows you to add face stickers that are attached to selected points of the face. To add a face sticker with this controller, select it in the Scene Hierarchy panel. Then in the Inspector Panel, press the + Add Value button to add a new sticker.
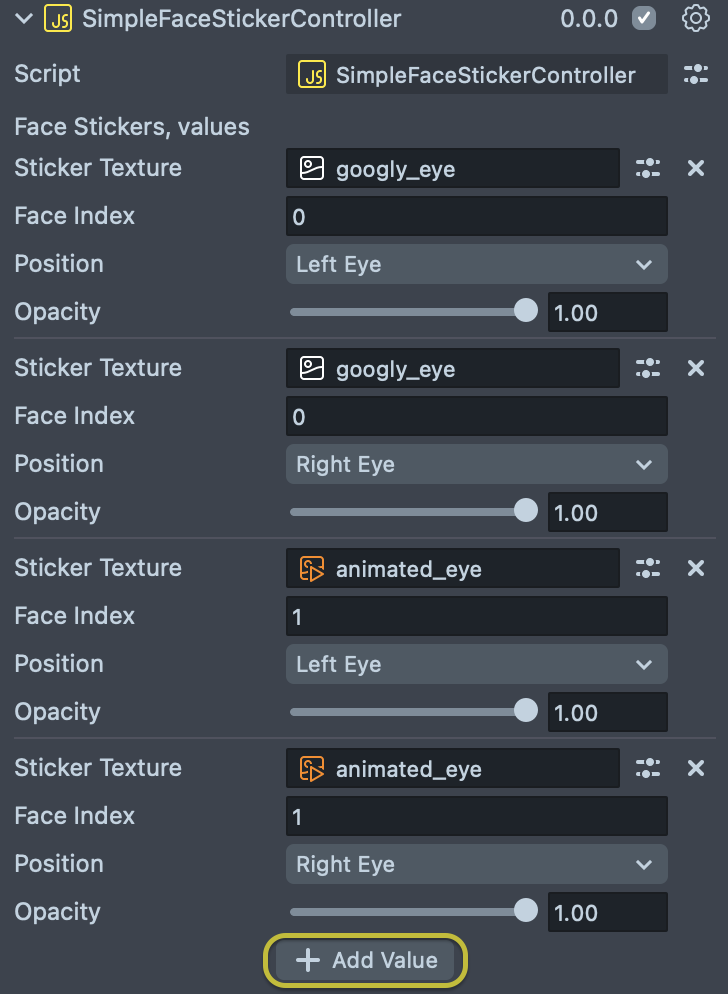
You can use any texture of your choice as the sticker texture. Simply drag a texture from the Asset Browser panel into the Sticker Texture input field to add that texture.
Then for Face Index, put in the index of the face you wish to place the sticker onto, starting from 0.
Index 0 refers to the first face, index 1 refers to the second face, and so on.
For Position, click on the dropdown menu to change the point to attach the sticker on the face.
Lastly, use the Opacity slider to change the alpha of the sticker image.
Advanced Face Sticker Controller
The Advanced Face Sticker Controller allows you to add face stickers to the face, and manually adjust their positions relative to the center of the face. To add a face sticker with this controller, select it in the Scene Hierarchy panel. Then in the Inspector Panel, press the + Add Value button to add a new sticker.
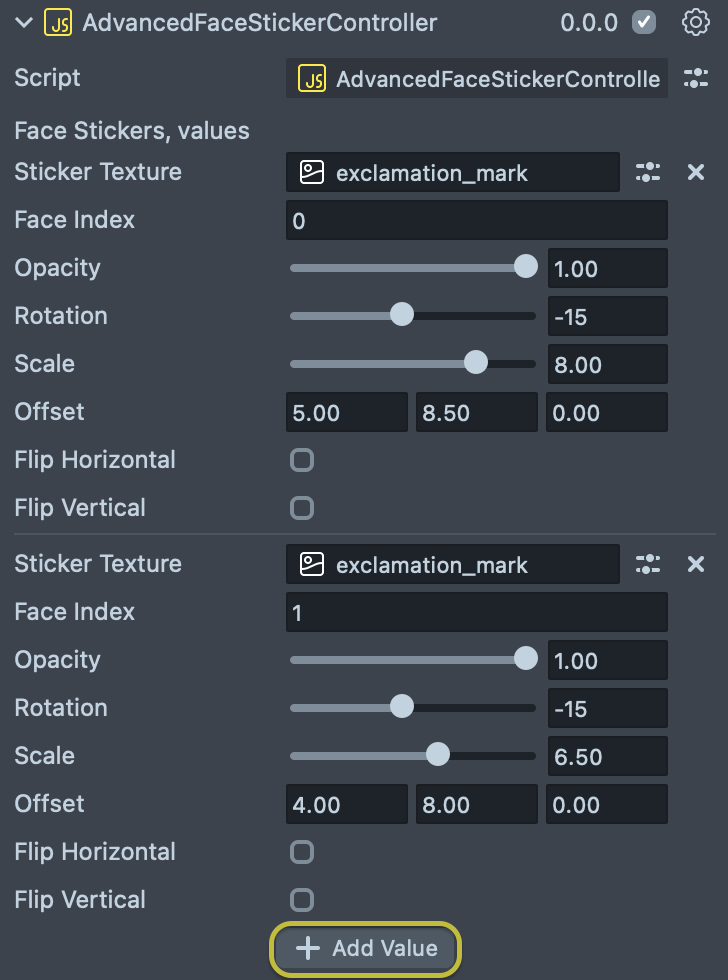
You can use any texture of your choice as the sticker texture. Simply drag a texture from the Asset Browser panel into the Sticker Texture input field to apply that texture.
Then you can play with the rest of the settings to adjust your face sticker. A few options are provided here:
- Face Index: which face you wish to attach the sticker to.
- Opacity: Alpha of the sticker image material.
- Rotation: Rotation of the sticker image, ranging from -180 to 180.
- Scale: Scale of the sticker image, ranging from 0 to 10.
- Offset: A vec3 representing the position offset of the sticker image relative to the face center.
- Flip Horizontal: Flip the sticker image horizontally / along the vertical axis.
- Flip Vertical: Flip the sticker image vertically / along the horizontal axis.
There might be cases when you wish to create a face sticker Lens in a different approach, for example, with a 3D face mesh. If you want to create a face sticker Lens using the face mesh, refer to the Face Mesh assets.
Face Text Controller
The Face Text Controller asset allows you to add text and emojis to the face, and manually adjust their positions related to the center of the face.
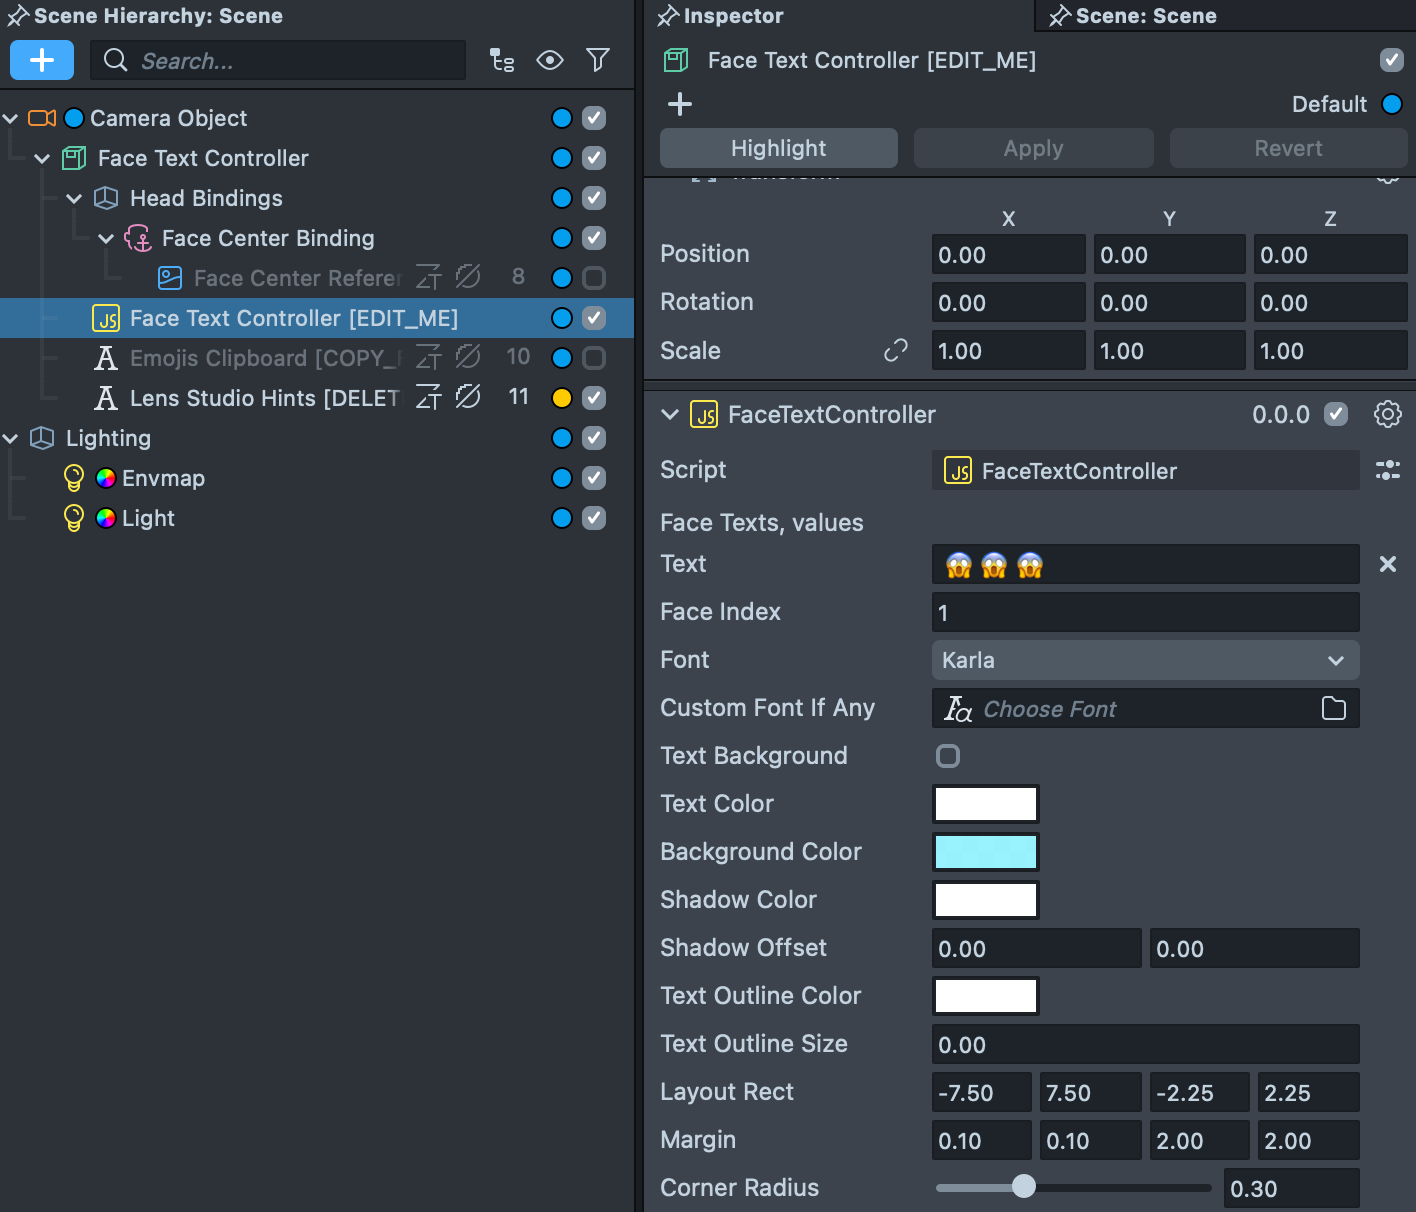
To add a face text, select this controller in the Scene Hierarchy panel. Then in the Inspector panel, press the + Add Value button to add a new text.
In the Text input field, type in the text you wish to place on the face.
In the Face Index input field, put in the index of the face you wish to place the sticker onto, starting from 0.
From the Font dropdown menu, select which font you wish to use for the face text.
If you want to use a custom font of your own choice, drag a custom font asset from the Asset Browser to overwrite the selection in the dropdown menu.
Use the Text Background checkbox to determine whether you want to use a background for the text.
Besides those main settings, there are some extra settings provided to help you customize the face text. Play with the other settings in Text Color, Text Outline Color, and Text Transform to change the look and placement of the text.
You can type emojis in the Text input field. You can copy and paste emojis from the Emojis Clipboard in the Scene Hierarchy panel.
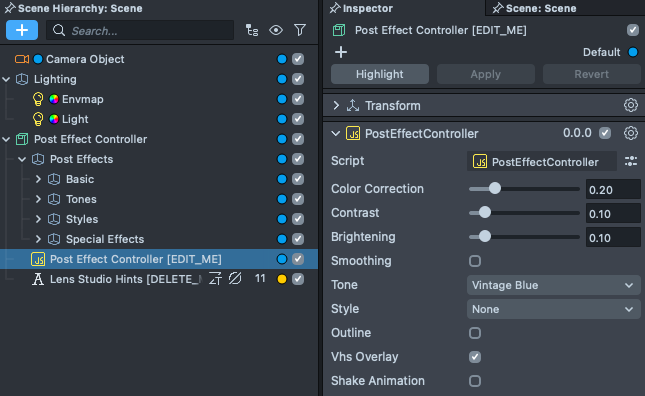
Post Effect Controller
The Post Effect Controller asset allows you to add post effects to the Lens. In the Inspector panel, play with the sliders, toggles and options in the dropdown menus to try various combinations of post effects.
Previewing your Lens
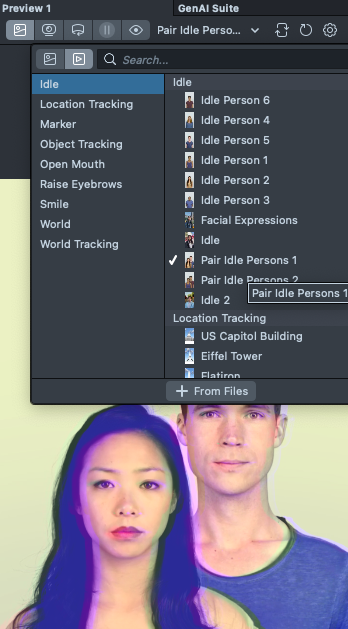
These assets support adding face stickers to multiple faces, so it is recommended that you preview them using previews with multiple faces.
In the Preview Panel, choose Pair Idle Persons previews to see two faces in the Lens.