Face Image Picker Texture
The Face Image Picker Texture is now deprecated. You should instead use Media Picker Texture which will allow you to get both images, images with faces, as well as videos from the device's camera roll.
The Face Image Picker Texture resource allows you to get an image from your device's camera roll centered around a face. It can be used to apply the face of a person saved to your camera roll to 3D objects in your Lenses. The texture is very similar to Face Texture but is driven by the device's camera roll instead of the live camera. In fact, if you have a project that's already using Face Texture, simply replacing that texture with a Face Image Picker Texture will upgrade it to a from camera roll experience.
As long as the Image Picker texture is being used in the scene, Snapchat can show an interface allowing the user to pick from their camera roll. If you want a texture from the device's camera roll not centered on a face, refer to the Media Picker Texture guide.
Create the Face Image Picker Texture
To create a Face Image Picker Texture resource, click "+" button in the Asset Browser panel and select Face From Image Picker

This will create a texture that you can now utilize like any other texture resource. It can be applied to a material texture field, added to a sprite, added to a Image and more.
You can add multiple Face Image Picker Textures which will allow you to use multiple textures for different parts of the one selected face.
Face Image Picker Texture Settings
With the Face Image Picker Texture resource selected, you'll see the following settings used to configure the resource in the Inspector panel:
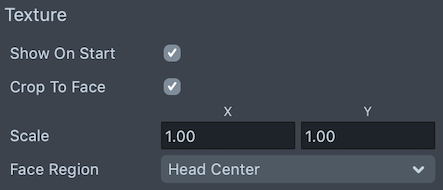
- Show On Start: If disabled, the UI for the Face Image Picker will not automatically appear and must be activated via script. Take a look at theAPI page for more information.
- Crop to Face - When enabled, the image will be cropped to the face in the photo. When disabled, the image will be the entire source image (not cropped)
- Face Region: The area of the face this texture is centered to
- Scale: The UV Scale of the face texture. You can decrease these values to zoom in on the face and increase these values to zoom out
Add the Face Image Picker Mesh
You can download the 3D mesh below to display the Snapchatter's picked face image on a 3D object.
You can download the Face Image Picker Mesh in the link provided here.
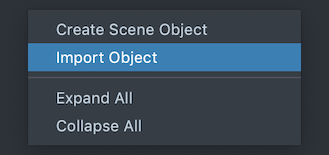
Once downloaded and unzipped, import the .lso into your project. To do this, right click in the Scene Hierarchy panel and select Import Object.
When imported, a FaceMesh object will appear in the Scene Hierarchy panel. Position, rotate and scale the FaceMesh so that it aligns with where you want your camera roll driven face.
If you have a character you'd like to add the face to, drag and drop the FaceMesh object to be a child of the character so that it moves with the character's movement.
The FaceMesh object that you imported is already setup with a Face Image Picker texture and material. If you're using this object, you don't need to create your own Face Image Picker Texture.
Preview Face Image Picker
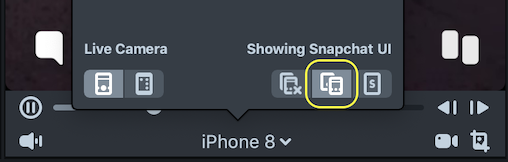
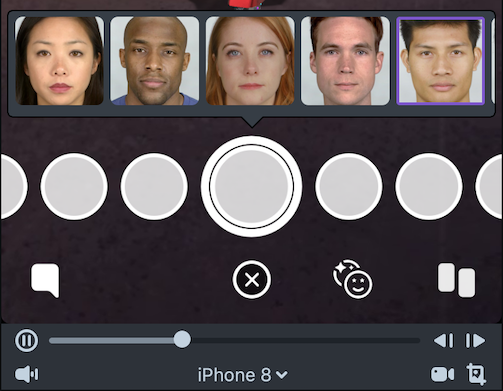
You can preview the UI for Face Image Picker within Lens Studio by enabling the Showing Snapchat UI button in the bottom of the Device Simulation panel. When enabled, you'll see the same face picker interface used in Snapchat pre-filled with the Lens Studio models.