Media Picker Texture
The Media Picker Texture asset allows you to use images or videos from your device's camera roll it as a texture in your Lens. You can have the picker show all images, all videos, all images with faces in them, or a combination of these options. You can use the texture anywhere you can use a regular imported texture: on an Image component, on a material, and elsewhere.
For the most common use case of applying a Media Picker asset, use the Green Screen Template or the Face Image Picker Template .
The Media Picker combines the Image Picker and Face Image Picker Texture to one convenient asset, and therefore should be used in place of them.
Create the Media Picker Texture
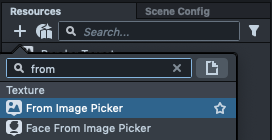
To create a Media Picker Texture asset, select + -> From Media Picker in the Resources panel.
This creates a texture you can now utilize like any other texture resource. You can add the resource to a material texture field, to an Image or Screen Image, and more.
Configuring the Media Picker Texture Settings
With the From Media Picker asset selected, note the following settings used to configure the resource in the Inspector panel:

- Show On Start - If disabled, the UI for the Face Image Picker does not automatically appear and must be activated via script. See the API page for more information. You must use the texture in the Lens for this option to have an effect.
- Images - Whether to show all images, only images with faces, or no images.
- Videos - Whether to show all videos or no videos.
Image Options
When showing images Only with Faces, you have additional settings to configure how the face is shown in the texture:

- Crop to Face - When enabled, the image is cropped to the face in the photo. When disabled, the image is the entire source image (not cropped).
- Scale - The UV Scale of the face texture. Decrease these values to zoom in on the face and increase them values to zoom out.
- Face Region - The area of the face this texture is centered on.
Previewing the Media Picker
If Show On Start is enabled in the Media Picker setting, in the Preview panel, you see a picker for the media based on your configuration.
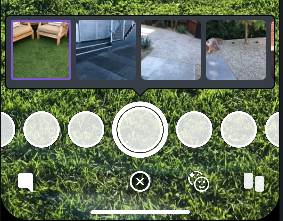
Lens Studio shows the usual images and videos found in the Preview panel as an example of what the user’s camera roll looks like.
Make sure you are showing Snapchat UI to display this picker:
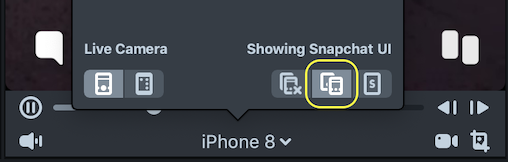
You can also use a script to pull the UI. See the API page for more information.
Displaying the Media
You can display the media anywhere a texture can be used in Lens Studio. Below are two examples:
Displaying the Media on the Screen
In the Objects panel, press + > Screen Image, then use the Media Picker Asset in the Image component’s Texture field.
Displaying only a 3D Mesh
You can also apply your media as a texture on a 3D object. For example, you can display a face image on your character. The example below shows how to display the face image on a 3D object based on the Face Image Picker template.
The texture is very similar to Face Texture but is driven by the device's camera roll instead of the live camera. If you have a project that's already using Face Texture, simply replace that texture with a Face Image Picker Texture to upgrade it to a ‘from camera roll’ experience.
Download: Face Image Picker Mesh
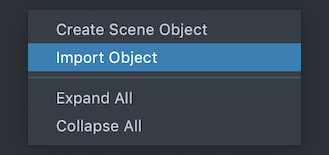
Once downloaded and unzipped, import the .lso into your project. To do this, right click in the Objects panel and select Import Object.
When imported, a FaceMesh object appears in the Objects panel. Position, rotate, and scale the FaceMesh so that it aligns with where you want your camera roll driven face.
If you have a character you'd like to add the face to, drag and drop the FaceMesh object to be a child of the character so that it moves with the character's movement.
The FaceMesh object that you imported is already set up with a Media Picker texture and material. If you're using this object, you don't need to create your own Media Picker Texture.