Hair Simulation
You can find this in the homescreen of Lens Studio.
The Hair Simulation sample project utilizes the Hair Component to simulate a wide range of beautiful and unique hairstyles with realistic lighting and physics.
Guide
In this guide we’ll cover:
- The Bald ML Component
- Hair Simulation
- Hair Blur Settings
- Optimization Controller and Optimization Tips
The Bald ML Component
The Back Orthographic Camera in the project contains the ML bald model, it is used to block off existing hair from users, creating a smooth look when combined with the hair component.
In the OptimizationController script, the ML Bald Layer will be toggled based on FPS and mlPerformanceIndex of the device, check out the section about Optimization below to learn more!
Hair Simulation

Everything related to hair simulation is placed under the Hair Camera with according layer. In here you’ll find the Head object that contains head and neck occluders and colliders, the Hairs object which contains all hairstyles, the Beards object which contains a few simulated beards, and all the main settings scripts.

Feel free to toggle and explore different hairstyles and beard styles included in this project!
Hair Blur Settings
The HairBlurController script is crucial for simulating smooth looking hairstyles. Most of these hairstyles would not look nearly as good without the HairBlurController script.
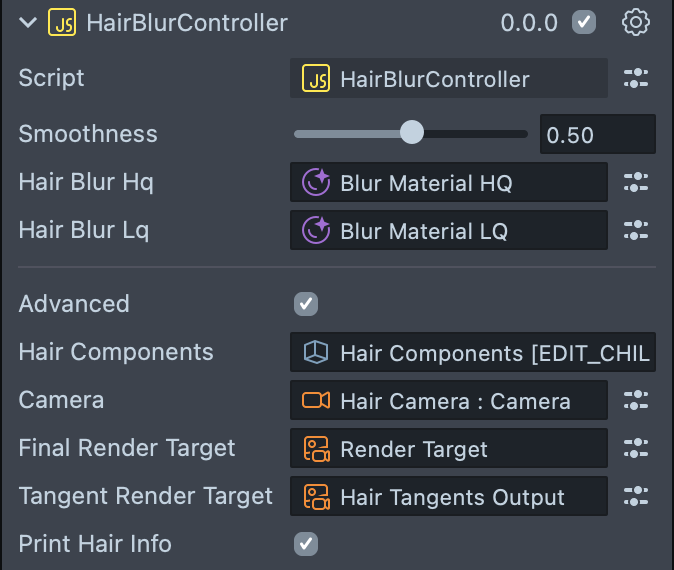
The script uses a special render target combined with a second render target on each material to apply a layer of smoothness catered to hair’s direction.
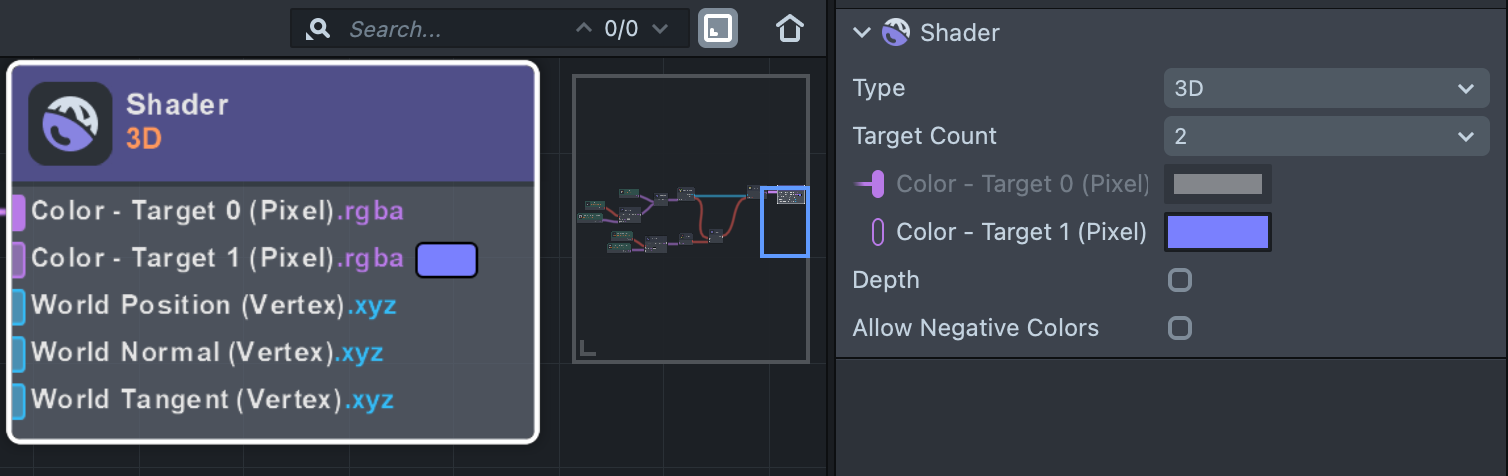
Because of this method of blurring, all other items to be used with the hair simulation project would either need to be placed in a separate camera, or would need to have a second render target with a special color in its material settings (check out the Shader node on all materials labeled xx_MRT). Otherwise the object will be blurred by the HairBlurController script!
Try adjusting the Smoothness parameter to see how blurriness affect the hairstyle!
You can also adjust hair smoothness with the Blur Multiplier parameter on each hair’s material, see detailed explanations under the Hair Materials section below!
Optimization Controller and Optimization Tips
The OptimizationController script sets up optimization levels for different devices.
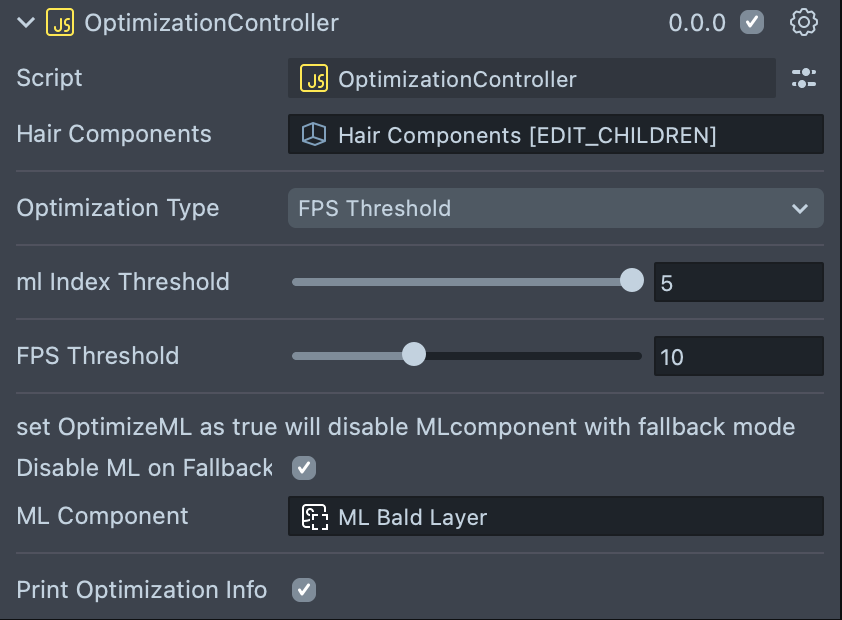
The OptimizationType variable determines the method of optimization being used.
Setting OptimizationType as MLDeviceIndex would turn on fallback mode and disable bald ML on devices determined by its value of global.deviceInfoSystem.performanceIndex.ml. Higher value of MLIndexThreshold would mean less devices to have fallback mode turned on when the lens is pushed to public. Check out the mlPerformanceIndex variable to learn more!
FPSThreshold means the lens would turn on fallback mode if fps is lower than the FPSThreshold regardless of type of the device.
Setting OptimizationType to Combined means it will use both methods in a way that only when a device has a global.deviceInfoSystem.performanceIndex.ml value higher than the MLIndexThreshold and also an fps higher than the FPSThreshold value.
Optimization Tips
The hair component can be quite performance heavy, especially for slower devices. To make sure your lens can run smoothly on most devices, here are some tips on keeping your hairstyle optimized:
Keeping low resolution for all hair textures
Make sure your hair alpha texture has a resolution that displays all the details without being unnecessarily big. Usually a resolution from 256 px to 512 px would suffice depending on the hairstyle. Feel free to go into the compression setting on the texture and choose Low Size to further optimize the texture.

All textures for hairstyle maps such as Lit Lookup map, Direction map and Intensity map can also have a bare minimum resolution of around 34x34 px in order to achieve a standard visual result.
Keep the Hair Resolution in a range of 5 to 20
The performance for lenses with the hair component is heavily influenced by the Hair Resolution number and amount of strands of the original hair model. Higher results of Hair Resolution multiplied by the amount of hair strands can cause laggy performance on some low-end devices.
We recommend keeping the Hair Resolution as low as possible. Depending on the hairstyle, some straight and short hair can have a very low resolution while maintaining its authentic look while some long curly hair might need to have a higher resolution.
Previewing Your Lens
You’re now ready to preview your Lens! To preview your Lens in Snapchat, follow the Pairing to Snapchat guide.