Photo
With Lens Studio you can easily create Face Lenses by importing an image of a face. This technique is perfect for creators who specialize in makeup, face painting, and other non-digital media. The Photo Template shows you how to import an image, align it to the face and make specific areas visible like just the lips.
If you are interested in adding Photo to your existing project, you can utilize the Photo asset in the Asset Library.
Photo Asset
Find the Photo asset in the Asset Library and import it into your project. Click here to learn more about how to use assets in the Asset Library.
Once you import the asset from Asset Library, you can find the package in the Asset Browser. Follow the instructions and drag the prefab Photo into Scene Hierarchy under Camera Object to create a new Scene Object. You can right-click and select Unpack for Editing from the drop-down menu to unpack all assets stored in the bundle.
Custmize Texture
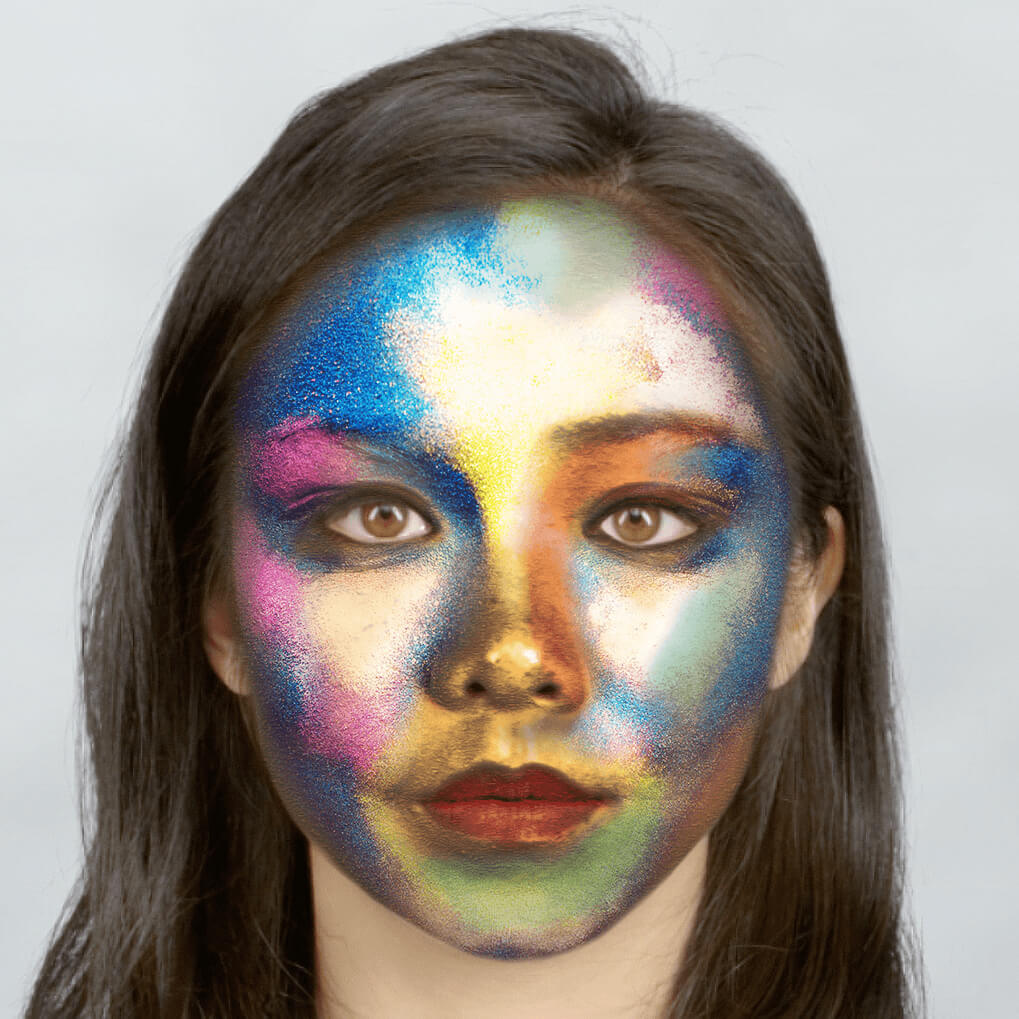
This tutorial assumes you have an image that contains a face. We will use the image below in this guide.
Importing your Texture
Once you have your image, you can import it into Lens Studio as a texture by dragging it into the Asset Browser panel.
Applying your Texture
Next, click Face Mask [EDIT_ME] in the Scene Hierarchy panel to select your face mask. Drag your texture into the Texture field in your Inspector panel.
You can also press the field next to Texture to open up the resource selector and select your texture.
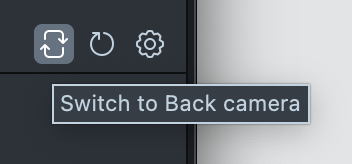
You can see your Lens in action by checking the Preview panel. If you don't see a face press the camera switch button to flip to the front camera.
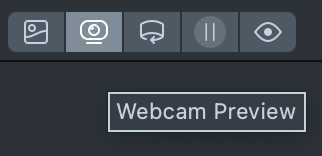
You can additionally use your webcam to preview your Lens on yourself by pressing the web camera button.
Aligning your Texture
To align your texture to the face, first select the Face Mask [EDIT_ME] object in the Scene Hierarchy panel. Then, in the 2D Scene panel, press the Command button to choose anchor points. Align the anchor points with face.
Aligning Details of your texture
If you need to, you can touch up the anchor points to fit more closely to your texture. Select any anchor point and you will be able to move it around. You can also select multiple anchor points, and move / resize multiple anchors simultaneously.
Applying an Opacity Texture
By default, Lens Studio will apply your texture to the whole face. You can choose to show only some parts of the face instead by pressing the field next to Opacity Texture and selecting a texture under the Opacity Textures folder. Opacity Textures show everything in the white regions of the texture and hide everything in the black regions of the texture.
Changing Blend Mode
You can change the blend mode of your texture to have it blend more with the face by clicking the Blend Mode drop down in the Face Mask component in the Inspector panel.
Changing Opacity
You can also modify an image’s opacity by moving the Alpha slider in the Face Mask component in the Inspector panel.
Previewing Your Lens
You're now ready to preview your Face Lens experience. To preview your Lens in Snapchat, follow the Pairing to Snapchat guide.