Face Morph
The Face Reprojection - Character and the Face Mesh Geometric Shapes assets demonstrate the External Face Mesh feature which allows you to bring in your own custom mesh which the Snapchatter’s Face Mesh can morph into.
These assets come with adjustable settings to change the strength of the effects.
Guide
The External Face Mesh feature allows you to morph between the face mesh to another custom mesh which has the same UV map as the standard Face Mesh.
Get the external face mesh example 3D model in the Face Mesh guide. You can modify it in the 3D editor software of your choice
Face Mesh Geometric Shapes
Find the Face Mesh Geometric Shapes asset in the Asset Library and import it into your project. Click here to learn more about how to use assets from the Asset Library.
Once you import the asset from Asset Library, you can find the package in the Asset Browser.

Select the Camera Object, click the + button in the Scene Hierarchy panel, then find and click on Head Binding to create a new Head Binding object under the camera.
Follow the instructions and drag the prefab Face Mesh Geometric Shape into the Scene Hierarchy to create a new Scene Object.
You can right-click and select Unpack for Editing from the drop-down menu to unpack all assets stored in the bundle. Click here to learn more about Asset Packages. Once you unpack the package, you can then edit its content.
In this asset, you will find two examples: Face Mesh Cube, and Face Mesh Sphere. Enable them one at a time to see how the face mesh changes to a different shape in the preview panel.
Each example contains two scene objects:
1- The Face Mesh Scene Object, where you can adjust how much the external face mesh is used by modifying the Weight slider in the Inspector panel.
2- The Reproject Face Texture to Mesh scene object, which includes the Face Reprojection script.
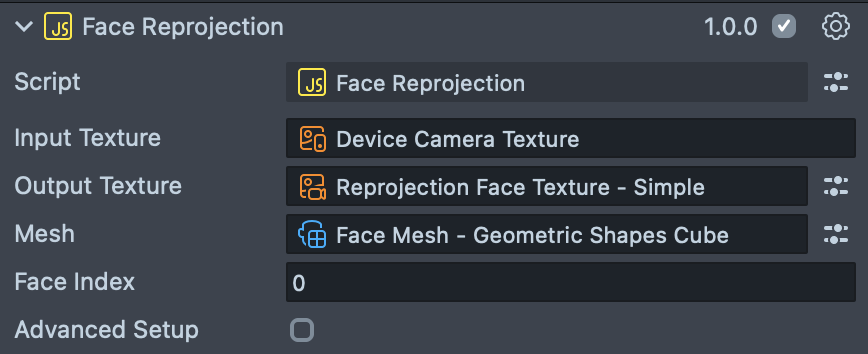
This script reprojects the texture of the face onto the specified Mesh. It takes in the following parameters:
Input Texture- The texture to get the face texture from.Output Texture- A standard Render Target resource which the reprojection texture will be rendered to.Mesh- The mesh which we want to reproject to.Face Index- The face to reproject--should be the same as the one on theHead Bindingcomponent.
Face Reprojection - Character
Find the Face Reprojection - Character asset in the Asset Library and import it into your project. Click here to learn more about how to use assets from the Asset Library.
Once you import the asset from Asset Library, you can find the package in the Asset Browser.
Follow the instructions and drag the prefab Face Reprojection - Character into the Scene Hierarchy to create a new Scene Object.
In this asset, the External Face Mesh is used with other features to create a new character. Try using what you learned before to modify this example. In addition, take a look at the following pieces that make this character transformation possible!
- Pin to Mesh is used to add the big eyes and ribbon to the character. Notice that the ribbon moves with the mesh as it transforms!
- Face Reprojection is used here as well, however it’s used in a material which can transition between the reprojected face texture, and the character’s skin.
- Expression Controller is used to make the character replicate the user's facial expressions. Click here to learn more about Face Expression.
You can map your mesh's texture on a different channel than the one used to map your mesh to the Face Mesh UV.
Previewing Your Lens
You're now ready to preview your Face Lens. To preview your Lens in Snapchat, follow the Pairing to Snapchat guide.