Portrait Particles
The Portrait Particles asset allows you to create a fun and simple face Lens with particles. The asset features multiple particle presets that you can add behind the user. For further customization, you can also use your own particles.
Find the Portrait Particles asset in the Asset Library and import it into your project. Click here to learn more about how to use assets in the Asset Library.
Import Asset
Once you import the asset from Asset Library, you can find the package in the Asset Browser.

Follow the instructions.
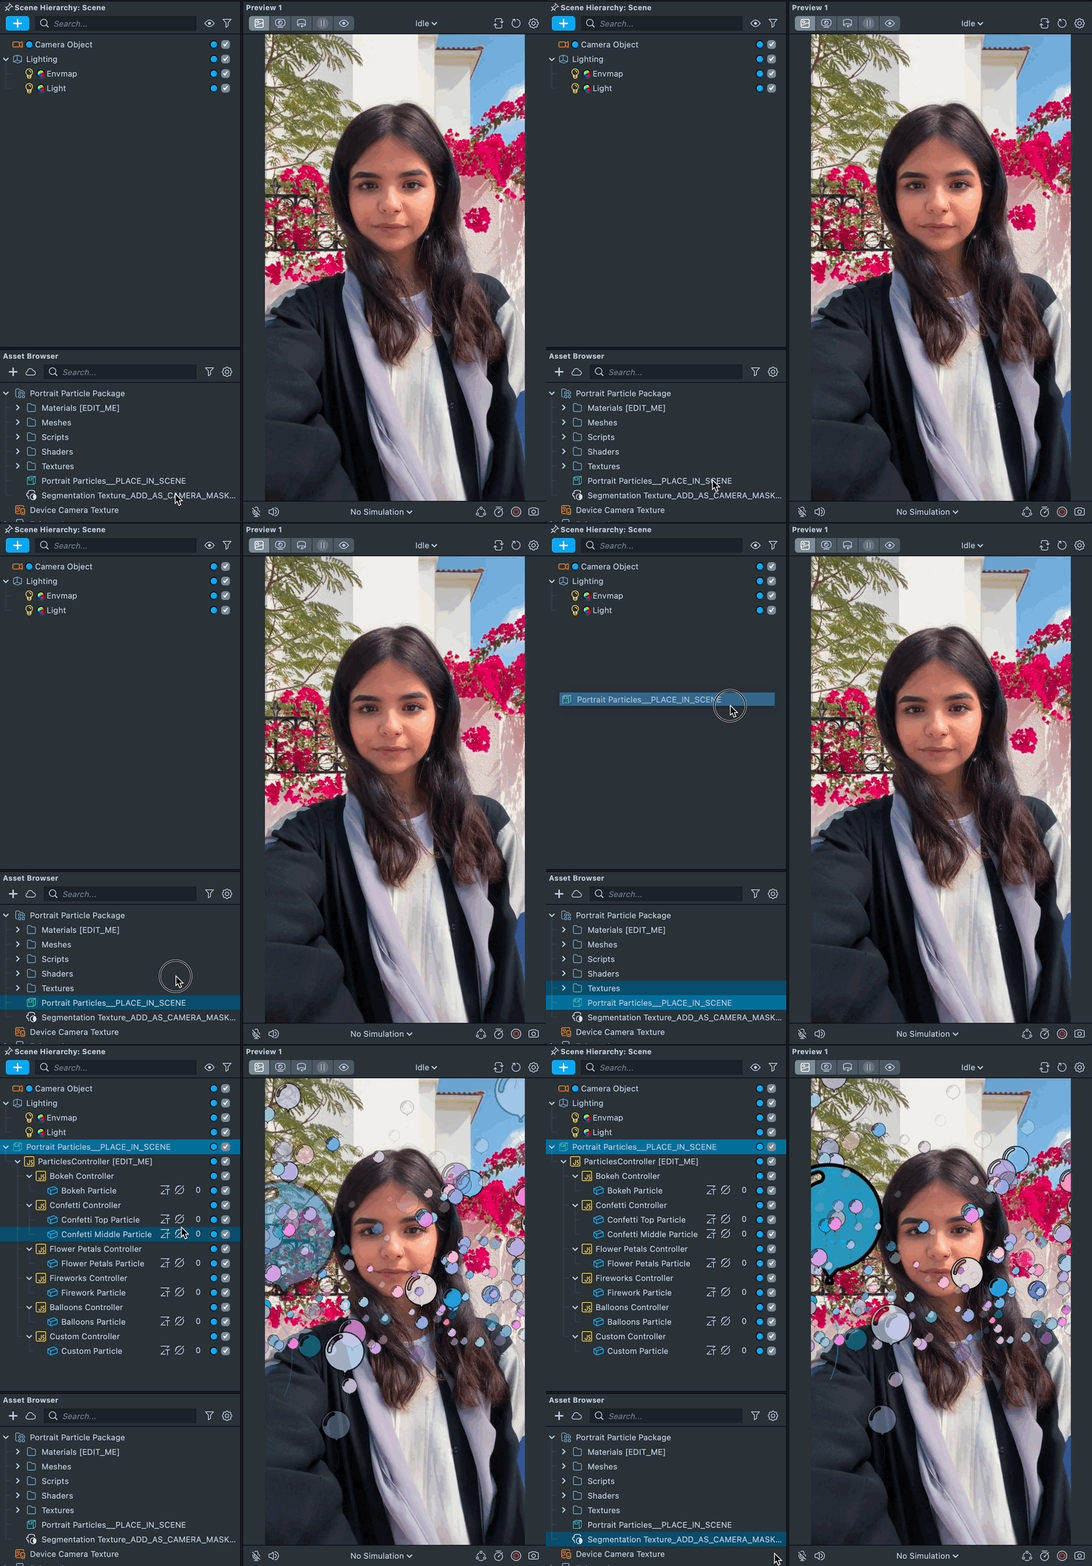
- Drag the prefab
Portrait Particles__PLACE_IN_SCENEinto Scene Hierarchy to create a new Scene Object.

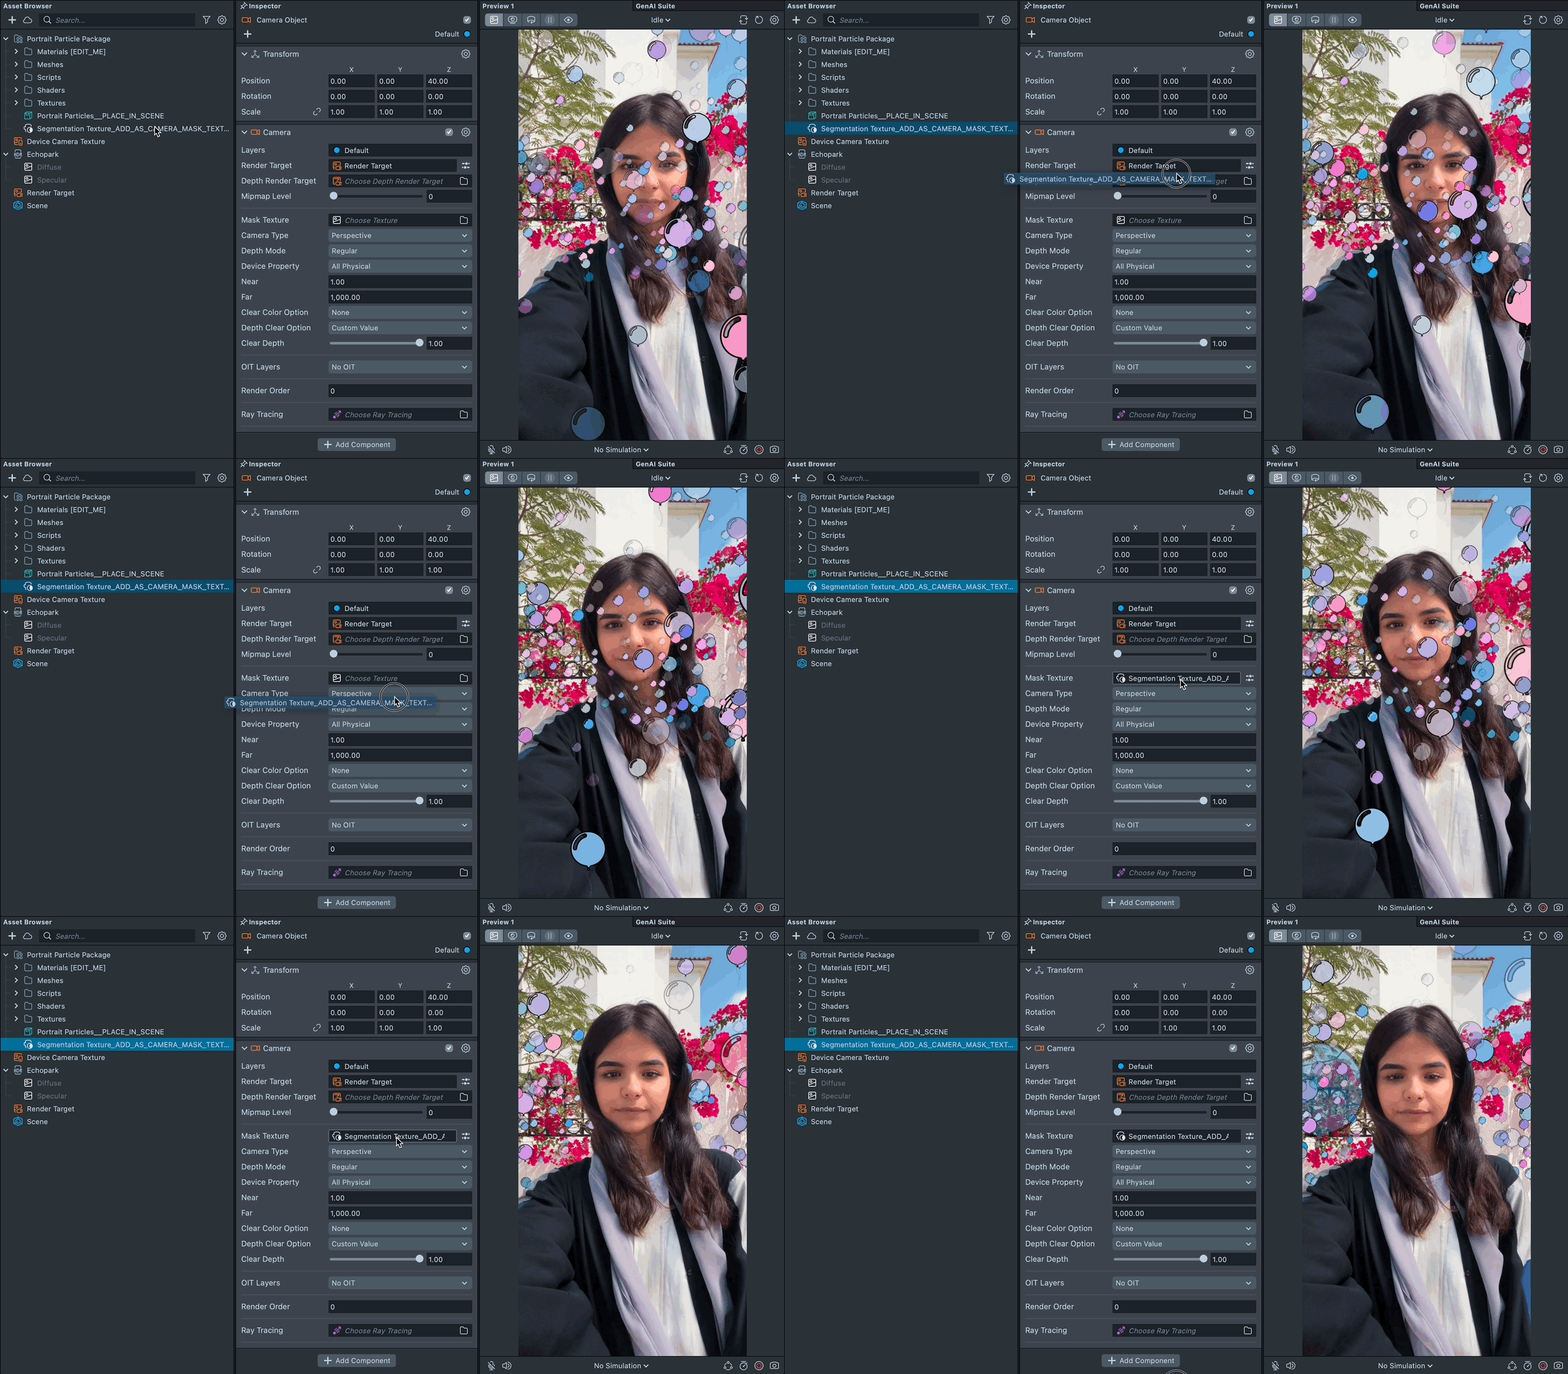
- Attach
Segmentation Texture_ADD_AS_CAMERA_MASK_TEXTUREto Camera Object Mask Texture field.

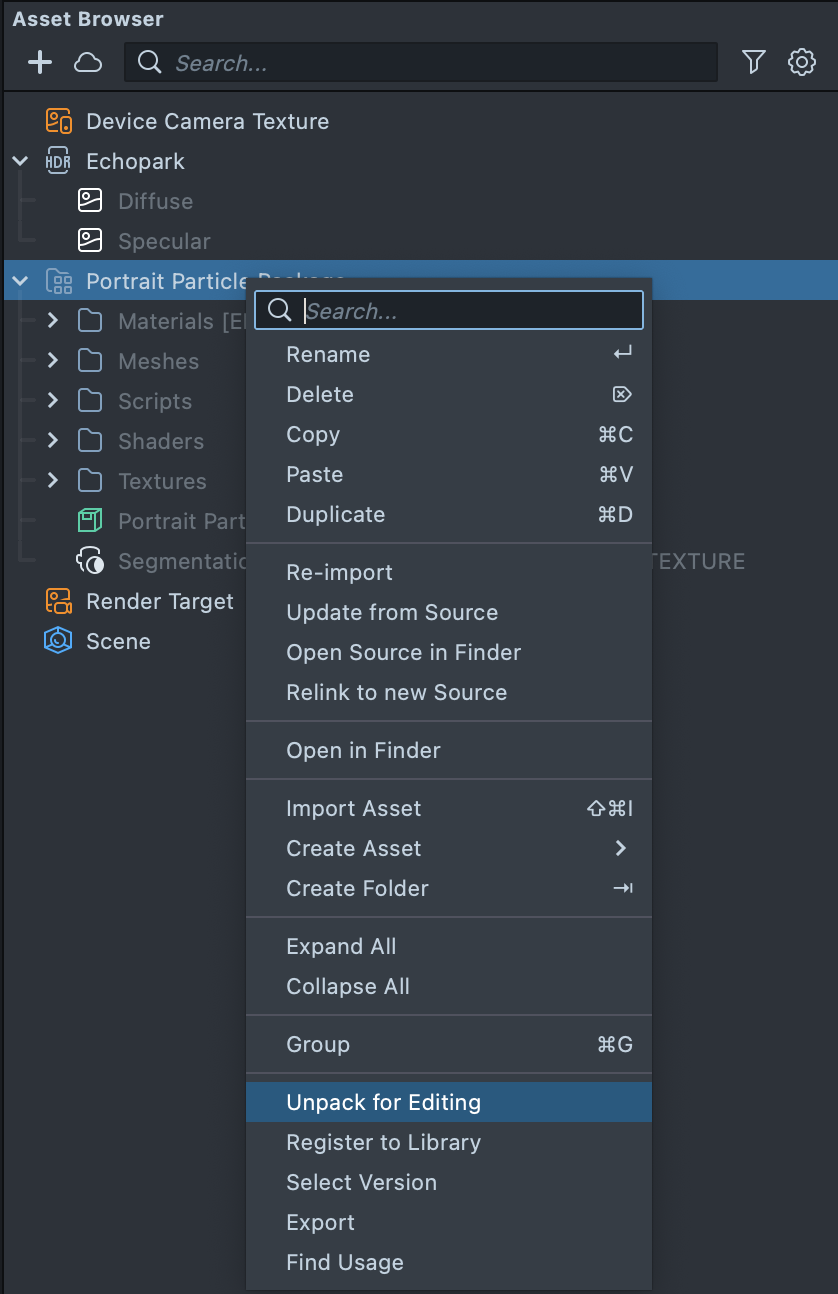
You can right-click and select Unpack for Editing from the drop-down menu to unpack all assets stored in the bundle. Click here to learn more about Asset Packages. Once you unpack the package, you can then edit its content.

Segmentation Texture
Click on the Segmentation Texture_ADD_AS_CAMERA_MASK_TEXTURE in the Asset Browser, and in the Inspector Panel modify parameters in the segmentation texture. Learn more about Segmentation Texture and Mask Texture for camera settings.
Particles Controller
To get started, select the ParticlesController [EDIT_ME]] in the Scene Hierarchy panel. You can adjust its settings in the Inspector panel to customize your Lens.
You can enable or disable the background particles by toggling the Particles checkbox.
To change the style of the particles, change the selection in the Particle dropdown menu.

You can adjust the active particles by tweaking the Intensity slider.
![]()
You can adjust each particle minimum and maximum amount with Simple GPU Particles Controller in each particle effect.
To edit the particles’ colors, select and edit the color properties named Color A and Color B.

You can adjust the transparency of the particles by tweaking the Alpha slider.
Previewing Your Lens
You’re now ready to preview your Lens. To preview your lens in Snapchat, follow the Pairing to Snapchat guide.