Face Landmarks
The Face Landmarks asset allows you to track 93 points on the face which we call Face Landmarks. The asset also provides additional functions to attach objects, check the distance between points to trigger an effect.
Guide
Find the Face Landmarks asset in the Asset Library and import it into your project. Click here to learn more about how to use assets from the Asset Library.
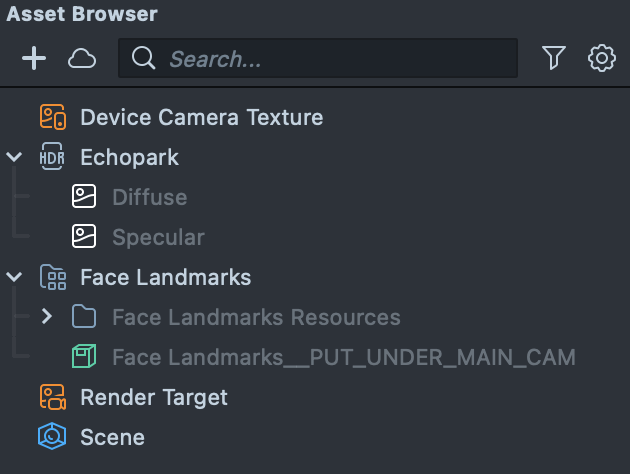
Once you import the asset from Asset Library, you can find the package in the Asset Browser.
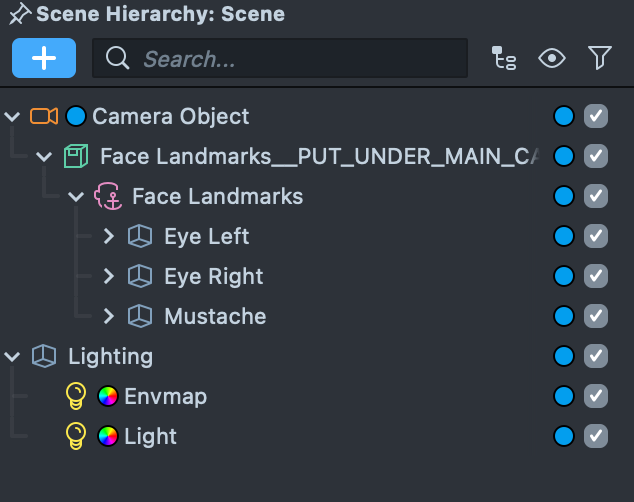
Follow the instructions and drag the prefab Face Landmarks into Scene Hierarchy under the main Camera Object to create a new Scene Object.
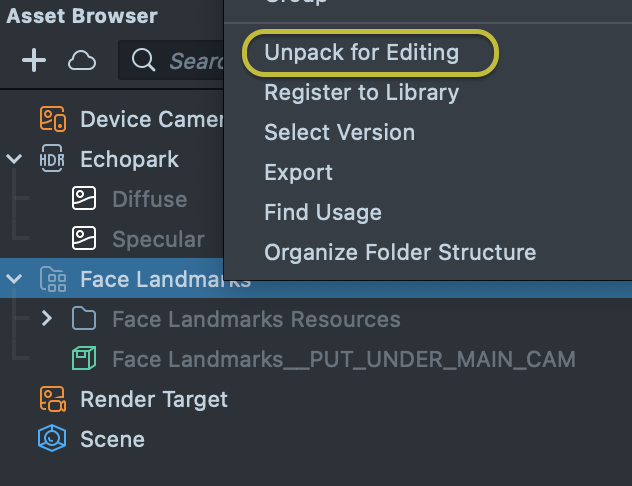
You can right-click and select Unpack for Editing from the drop-down menu to unpack all assets stored in the bundle. Click here to learn more about Asset Packages. Once you unpack the package, you can then edit its content.
This asset comes with several helper scripts to help you to attach your objects to a single point or the center of multiple points. You can also use the distance between the points to create different interactions.
Take a look below for a description of each helper and information about their settings.
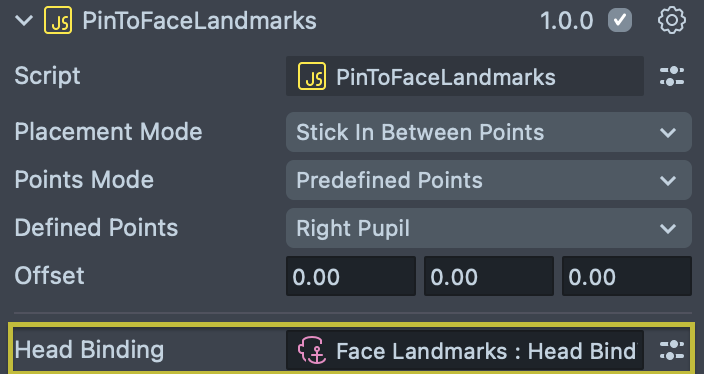
Pin To Face Landmarks
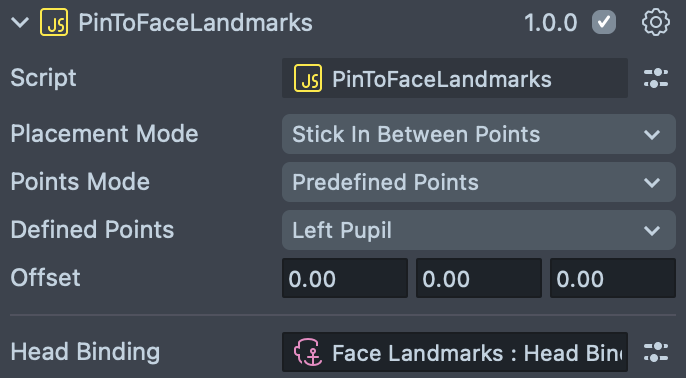
This is the main script of the asset which allows you to attach your object(s) to a single point or the center of multiple points.
Since Face Landmark uses 2D space to track the points on the face we need to get the depth of each point with the help of the Head Binding component.
This script gets the depth from Head Binding and then uses that to convert each point position from 2D transform into 3D transform. With that being said you need to always have a reference of Head Binding on the script.
If you want to learn more about how to convert 2D transform to 3D transform, please take a look at the Screen Transform API page.
To attach your objects to Landmarks, just place any content as a child of the PinToFaceLandmarks script in the Scene Hierarchy panel.
The sections below walk through each customizable setting in the PinToFaceLandmarks script.
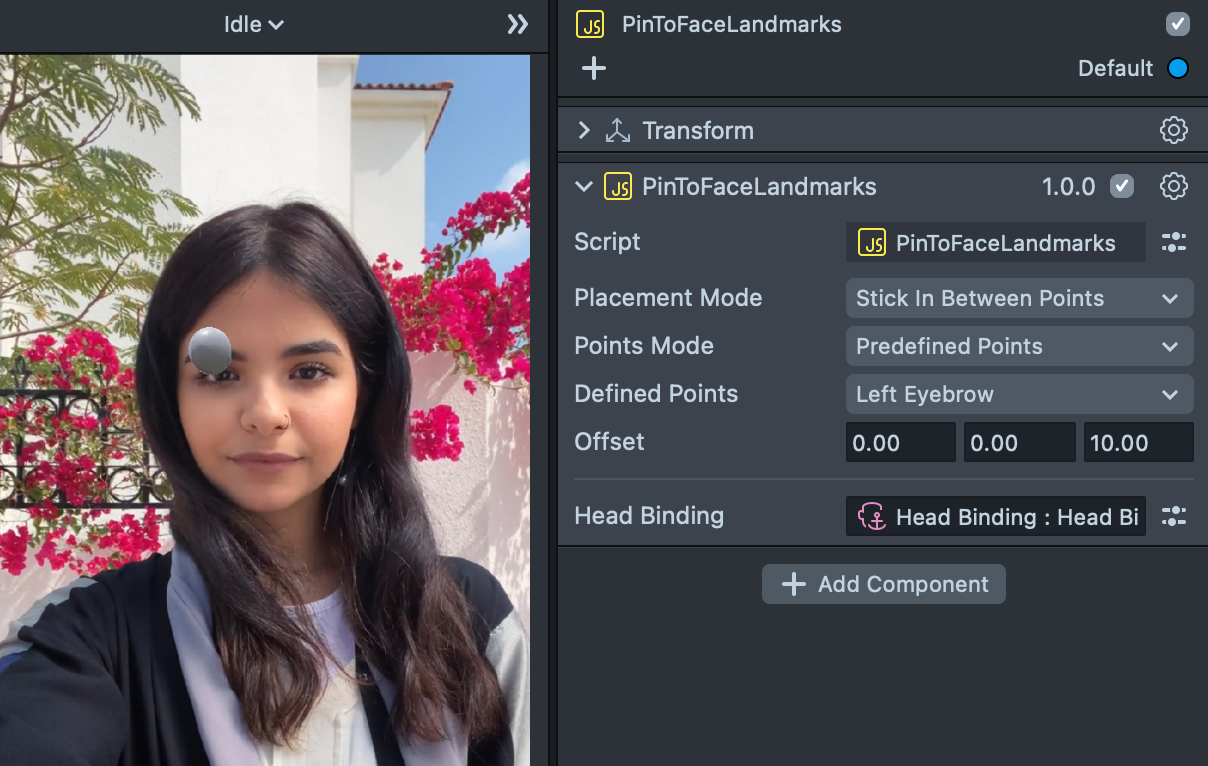
Placement Mode
There are two options available for placing the objects on the Landmarks.
Stick In Between Points: This option attaches all the child content of the script to a Face Landmarks position.
Spawn At Each Points: This option distributes the child objects along all the Face Landmarks points.
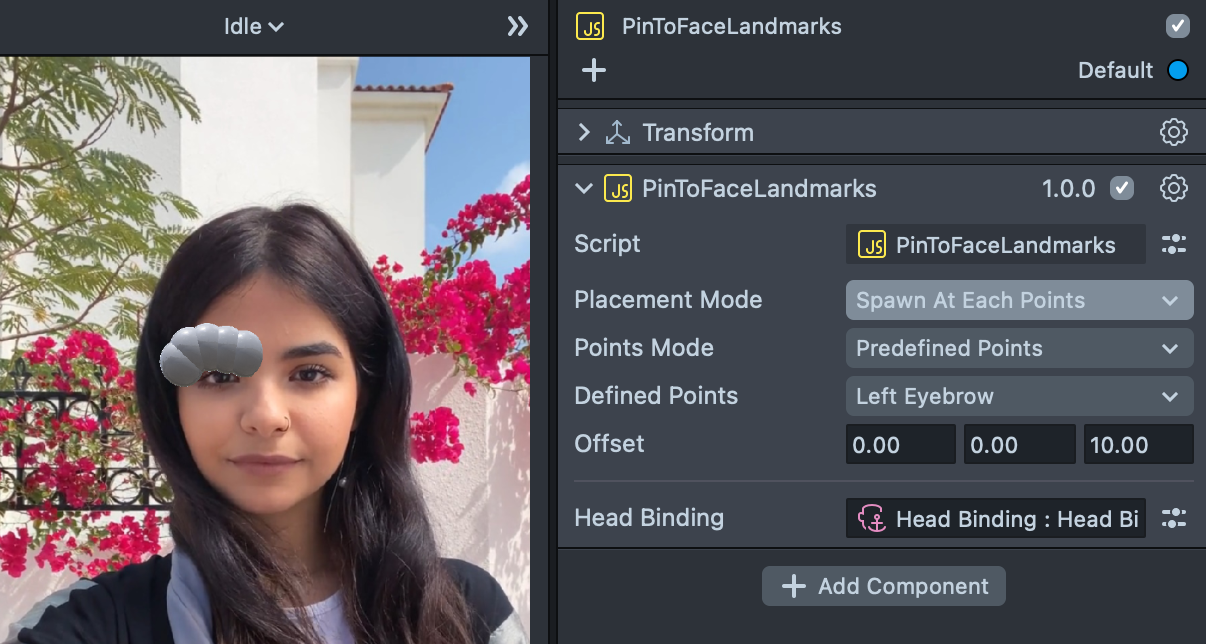
Points Mode
Points refers to each placement of the landmarks as you can see in the diagram below:

There are two options available for selecting point(s):
Custom Points: In this option you can specify a specific point(s) for the object to be attached to. Take a look at the Face Landmarks diagram to find a desired point(s) and then add the number into the Points array input.
If you put more than one point, it will find the center between points and place the content in the center.
Predefined Points: When predefined points are selected you will get a Defined Points dropdown. With this drop down menu, you can select one of the options to attach the content to a desired place.
Predefined points is just a short hand for a subset of the points available.
Offset
You can offset all of the child content from the Face Landmark point using the Offset input.
FaceLandmarksDistanceTrigger
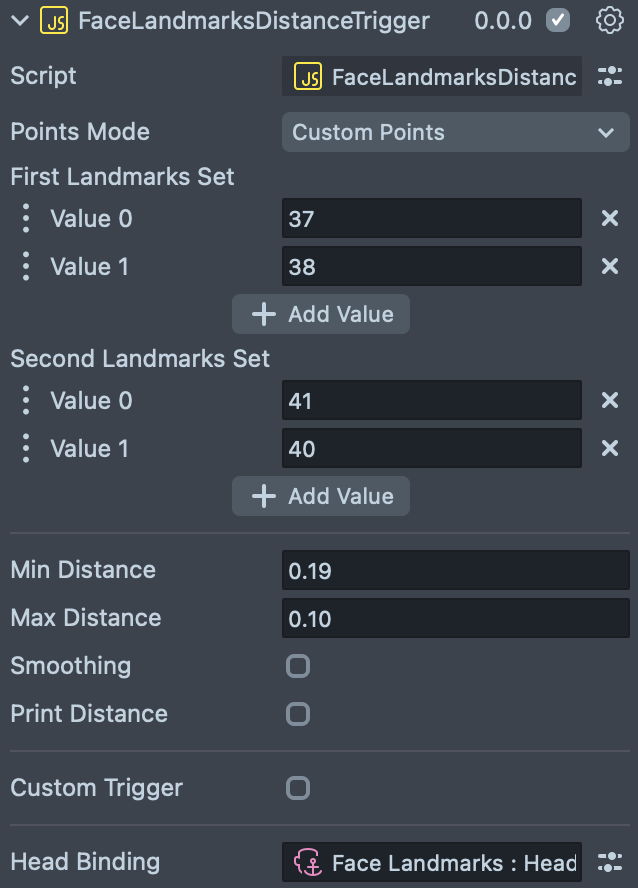
This is one of the helper scripts which allows you to trigger an action based on the distance of two points. You can use the output of the script to move, scale, rotate or change the opacity of an object. Additionally, you can also use it to create custom face events such as eye blink.
Like before, to use the script, we need to specify the Head Binding so the script can access the landmarks.
The sections below walk through each customizable setting in the FaceLandmarksDistanceTrigger script.
Getting Distance
The first thing we’ll do is define two sets of landmarks to calculate distance from. Like before, you can use the Points mode to select between predefined points or you can have custom points.
This option is the same as PinToFaceLandmarks scripts. To learn more about it please read the guide above in the PinToFaceLandmarks section.
Min Distance / Max Distance
With the two points specified, this script can provide raw values between two points.
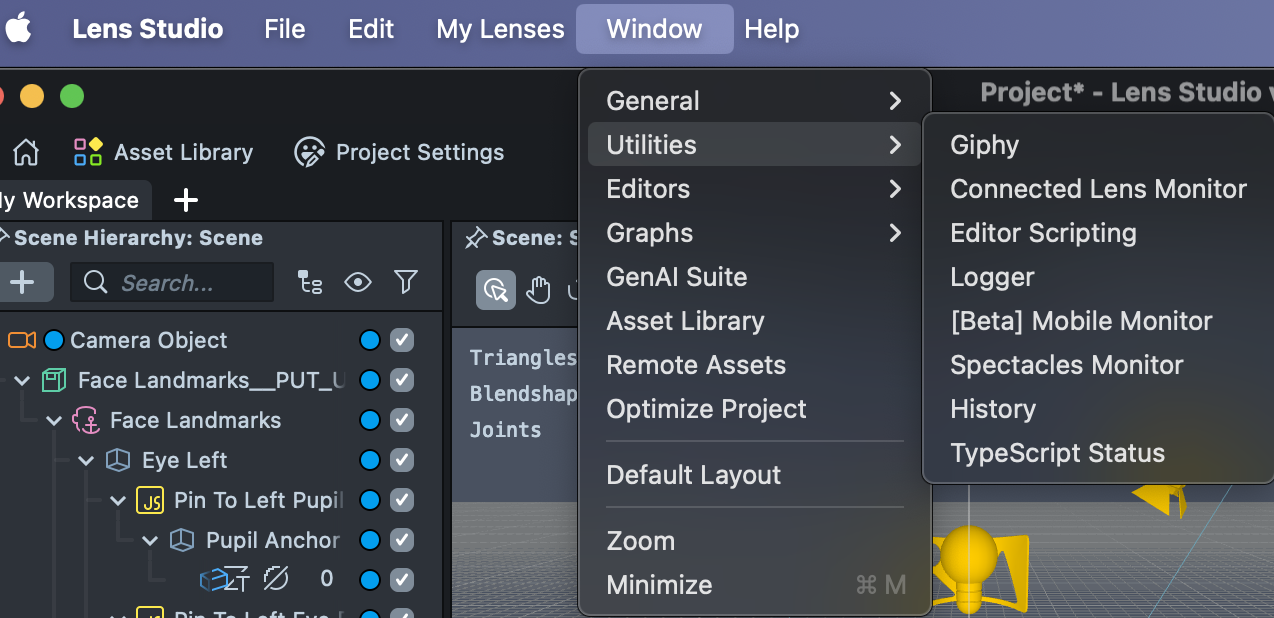
You can easily see the raw distance on each frame with use of the Print Distance checkbox. By checking the checkbox, you can see the value in the logger panel.
If you don't see your logger, go to the Windows menu in the main bar of Lens Studio, then select Utilities and click on Logger.
This value can be varied based on the points that you select. To make the values easier to use, we will convert the raw value to a value between 0 to 1 using the Min Distanceand Max Distance values.
Min distance is the minimum distance between two points that we specify. For example, to find a minimum distance between upper and lower lips is to close your mouth and see the Distance value in the logger. That value is your Min Distance value.
The same way works for Max distance as well. For example, to find the maximum distance between upper and lower lips, open your mouth and see the Distance value in the logger. That value is your Max Distance value.
This workflow is not only for lips and can be applied to eyelids and more.
Depending on the user using the Lens, these values might be different so don’t choose an extreme value.
Smoothing
By checking the Smoothing checkbox you can use the slider to make the value more smooth and less bumpy, but it may result in a delay.
Custom Triggers
You can enable the Custom Trigger option to specify a trigger that will occur when the distance hits the Min Distance, and when it hits the Max Distance.
You can use this custom trigger with Behavior script to create events and triggers that did not exist before in the Lens Studio! For example you can get the distance between two eyelids and create a blink trigger event.
You can choose a name for the Min Trigger to get called when the distance value is equal or less than the Min Distance number.
The same way also applies to Max Trigger which you can specify a name to get called when the distance value is equal or greater than the Max Distance that we explain earlier.
FaceLandmarksDistanceResponse
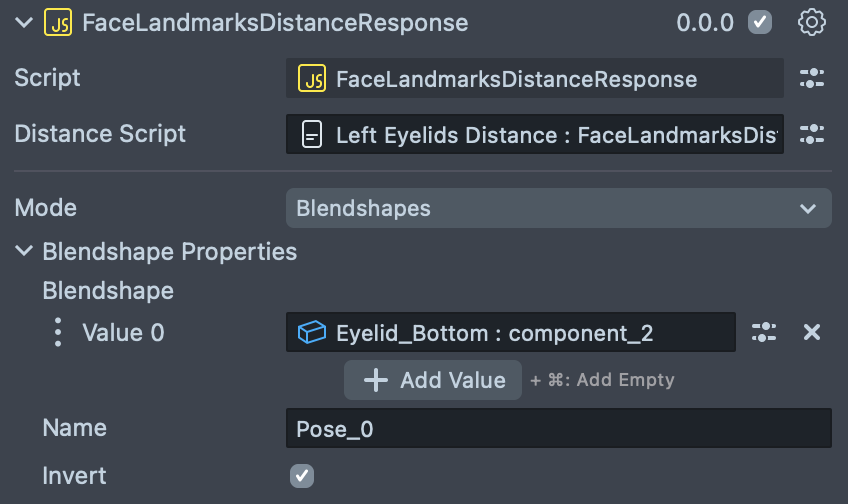
This script allows you to get data from the FaceLandmarksDistanceTrigger and convert that value so you can apply the value to Move, Rotate an object, drive blend shapes, or make an object disappear and appear.
you can add more features to this script since this is just a JavaScript file and expand the script based on your needs.
The sections below walk through each customizable setting in the FaceLandmarksDistanceResponse script.
Distance Script
To make the script work, you need to have a reference to FaceLandmarksDistanceTrigger so this script can receive the values from that.
Mode
There are three modes available.
Transform Mode:
This mode allows you to move or scale your object based on the values that received from the FaceLandmarksDistanceTrigger.
Blendshape Mode:
This mode allows you to drive a blendshapes based on the values from the FaceLandmarksDistanceTrigger.
Opacity Mode:
This mode allows you to make your object appear or disappear based on the values received from the FaceLandmarksDistanceTrigger.
Previewing Your Lens
You’re now ready to preview your Lens! To preview your Lens in Snapchat, follow the Pairing to Snapchat guide.