Combining AI Portraits with Custom Transition, Face Generator, Post Effects, Color Correction and Body Parallax
Introduction
In this tutorial, you’ll learn how to build a more advanced Lens by combining GenAI-powered components with traditional Lens Studio effects. We’ll start with AI Portraits as the core generation component, then enhance the result by customizing transition, applying post effect, adding the Face Generator, and introducing depth and motion using Body Parallax.
By the end of this guide, you’ll have a fully polished Lens that demonstrates how multiple AI and non-AI components can work together in a single, cohesive workflow.
You can watch the video tutorial for a guided overview, or continue with the detailed step-by-step guide below.
Step 1: Add AI Portraits to your Lens Studio project
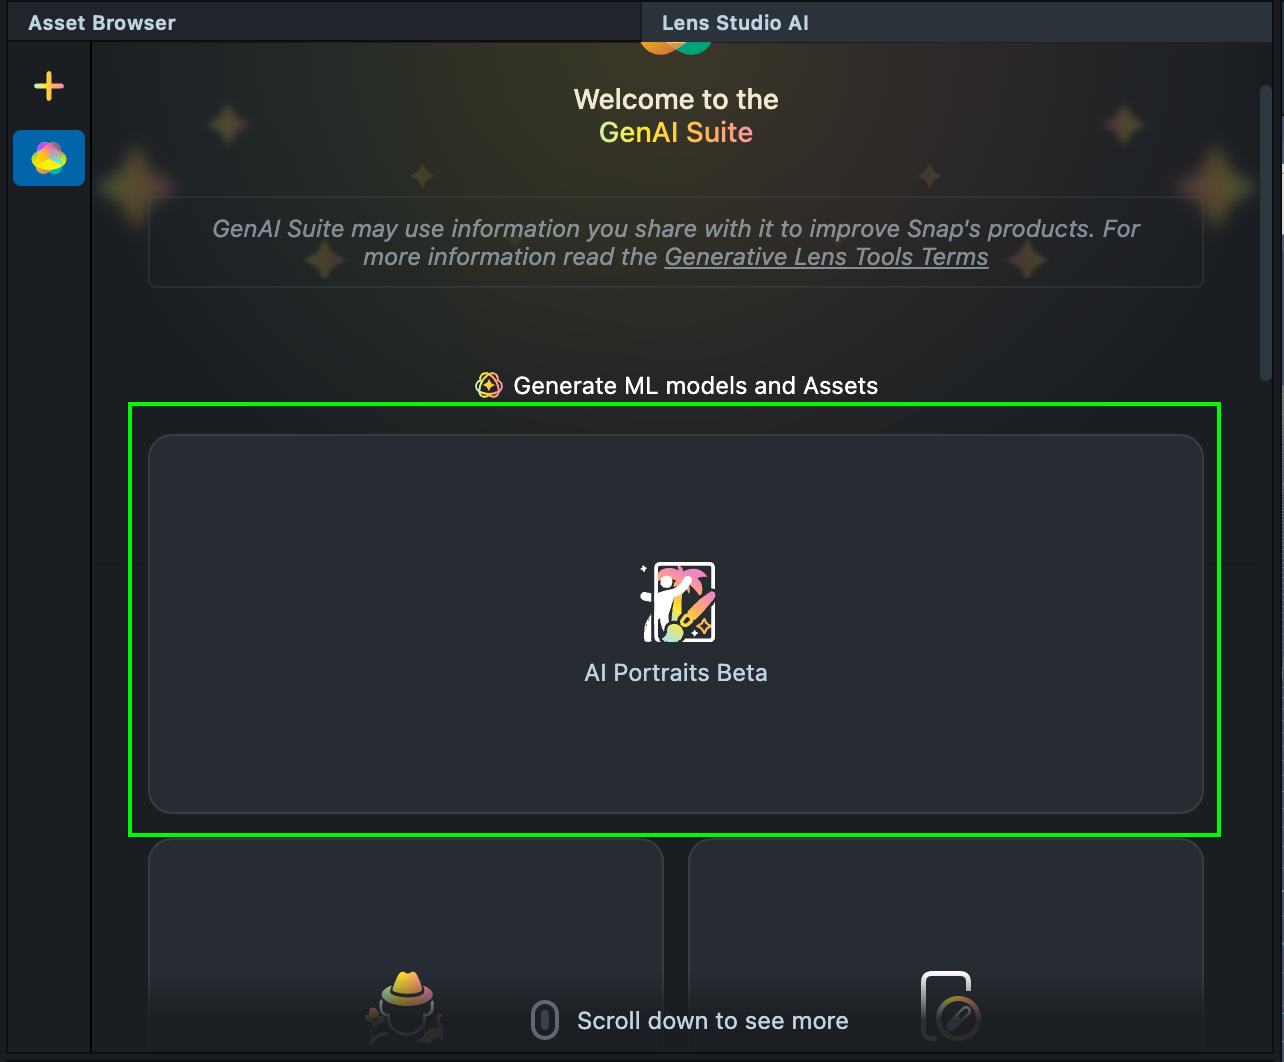
1.1. Navigate to the Lens Studio AI option in the top right corner of the Lens Studio. Then, click on the GenAI Home Page tab in the sidebar.

1.2. On the GenAI Home Page tab, you may need to scroll down to find AI Portraits.
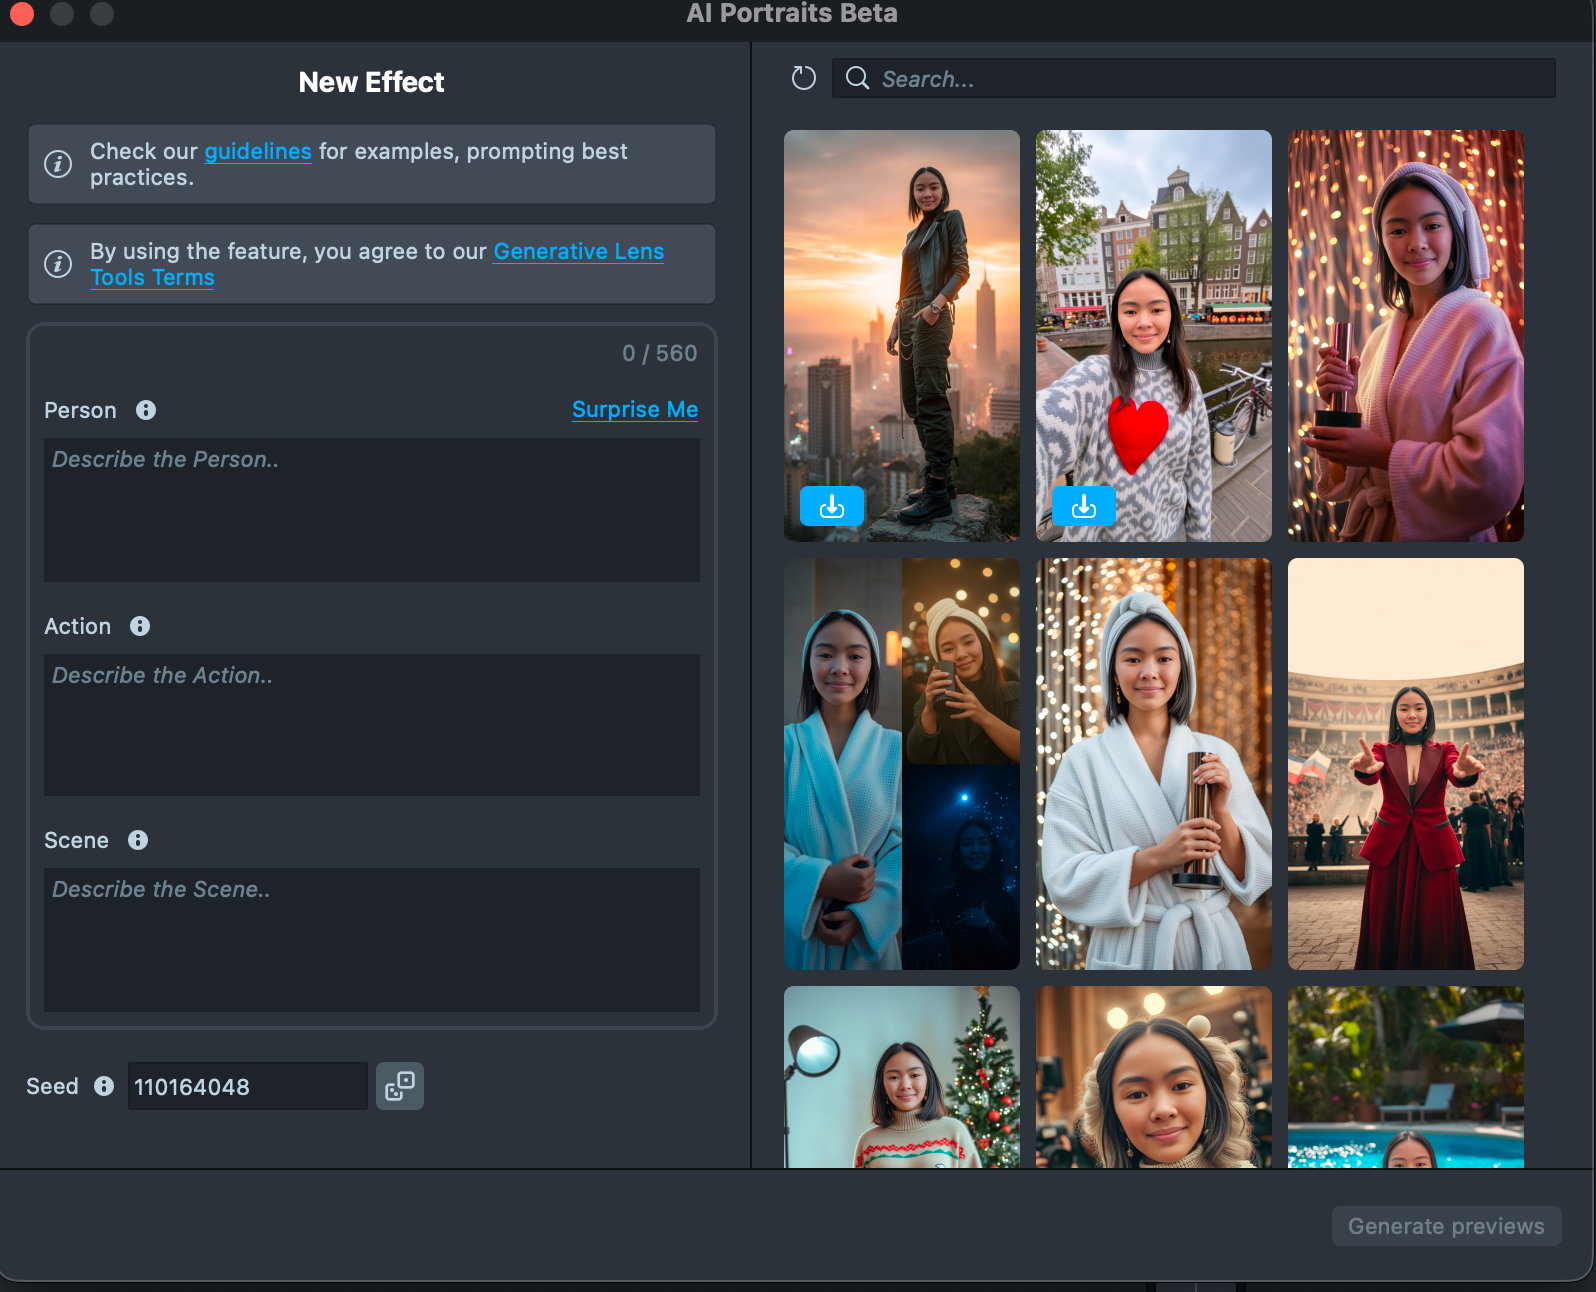
1.3. Generate an effect using text prompts, or select an existing one from the Gallery.
1.4. Once you click Import, the component is automatically added to your project and is ready for use.
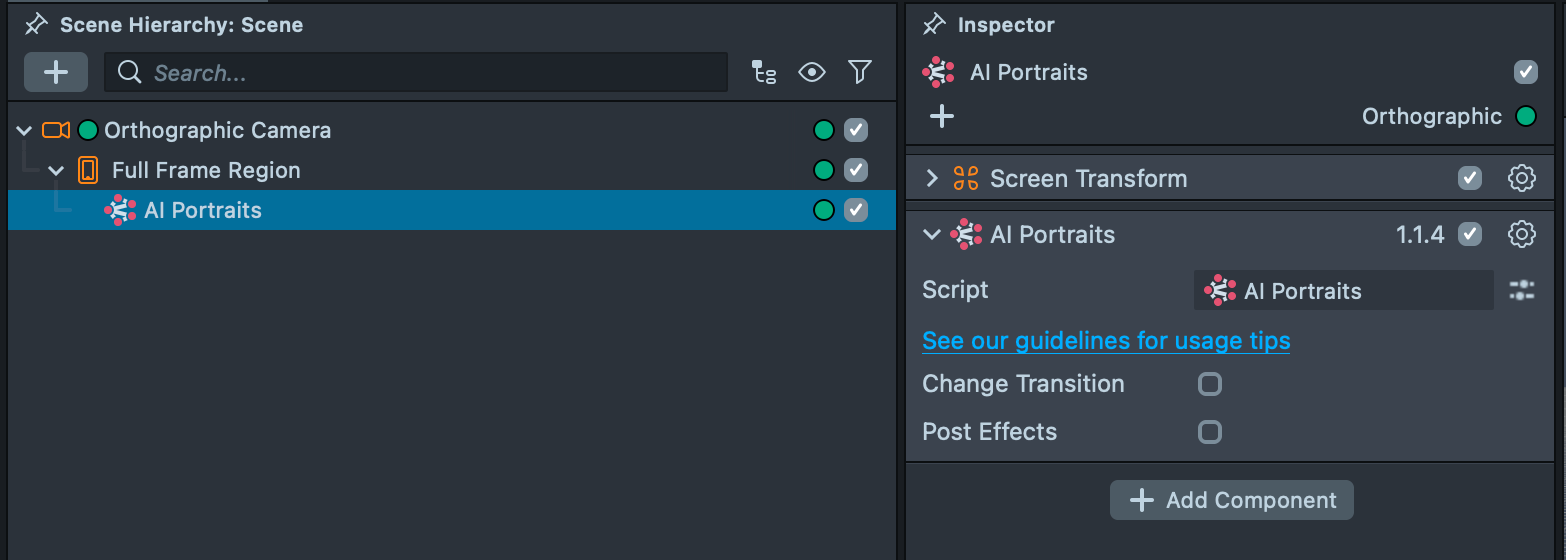
1.5. A tap on the Preview window triggers the generation process, and the result appears using the default transition.
1.6. If no further customization is needed, your Lens is already ready for publication. If you’d like to replace the transition and add post effects, continue with the next steps.
Step 2: Replacing the transition using the Transitions Library
2.1. The AI Portraits component allows you to replace the default transition.
2.2. Open the Transitions Library and choose a transition. Import it into your project by clicking the Import button. The transition components are automatically added to your project.
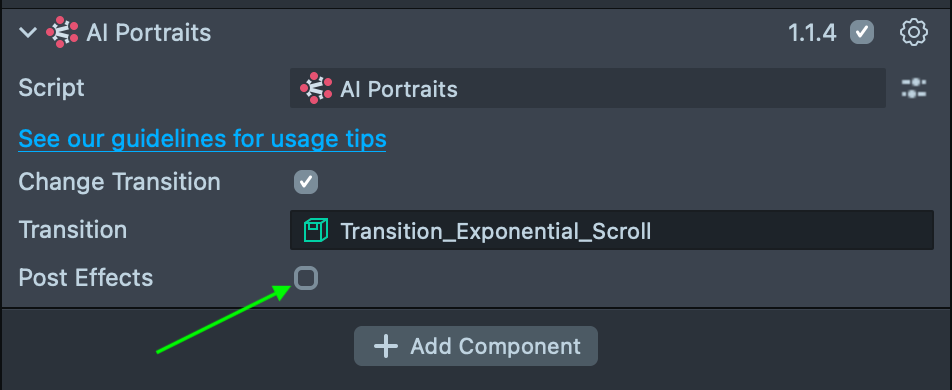
2.3. Enable the Change Transition checkbox in the AI Portraits component and link the transition’s parent object that you imported earlier.
2.4. The parent object’s name usually starts with "Transition_…". You can also drag and drop the transition’s parent object. The selected transition will now be applied to the Lens.
Step 3: Add Post Effects
3.1. The AI Portraits component allows you to apply a variety of post effects to the generated result by enabling the Post Effects checkbox.
3.2. Before enabling the Post Effects checkbox, add and configure the post effects in the Scene Hierarchy. Remove the default Camera Object along with Lighting, then add a dedicated Orthographic Camera for post effects. For better organization, rename it Post Effects Camera.
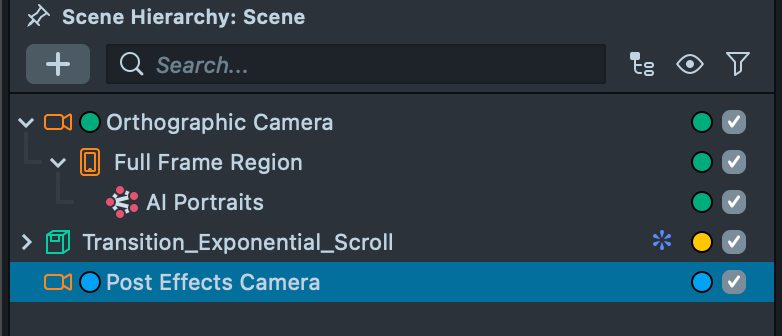
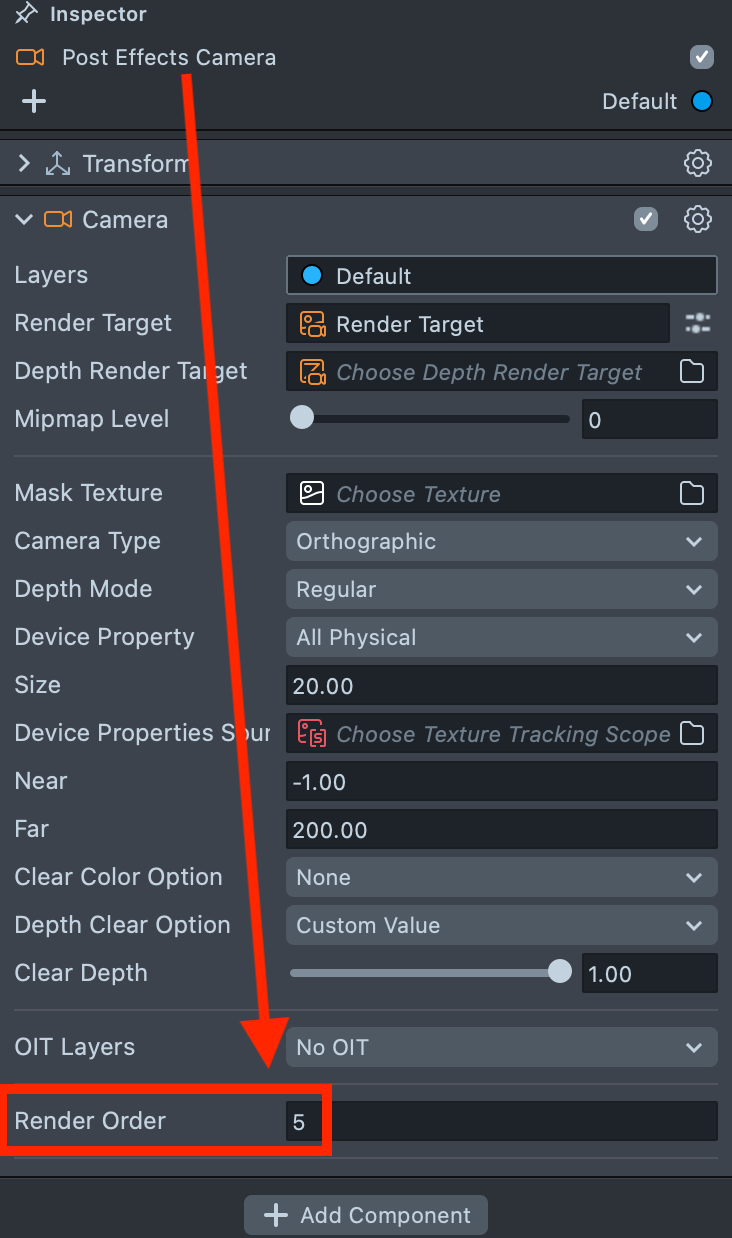
3.3. Assign the Default Render Layer to Post Effects Camera. Note that the layer must be assigned in two places: in the top-right dropdown and in the Layers field.

3.4. Set the Render Order of the Post Effects Camera higher than the previously added cameras to see the final result.
Step 4: Add a Face Generator component
4.1. Next, we’ll add the component from Lens Studio’s Face Generator plugin.
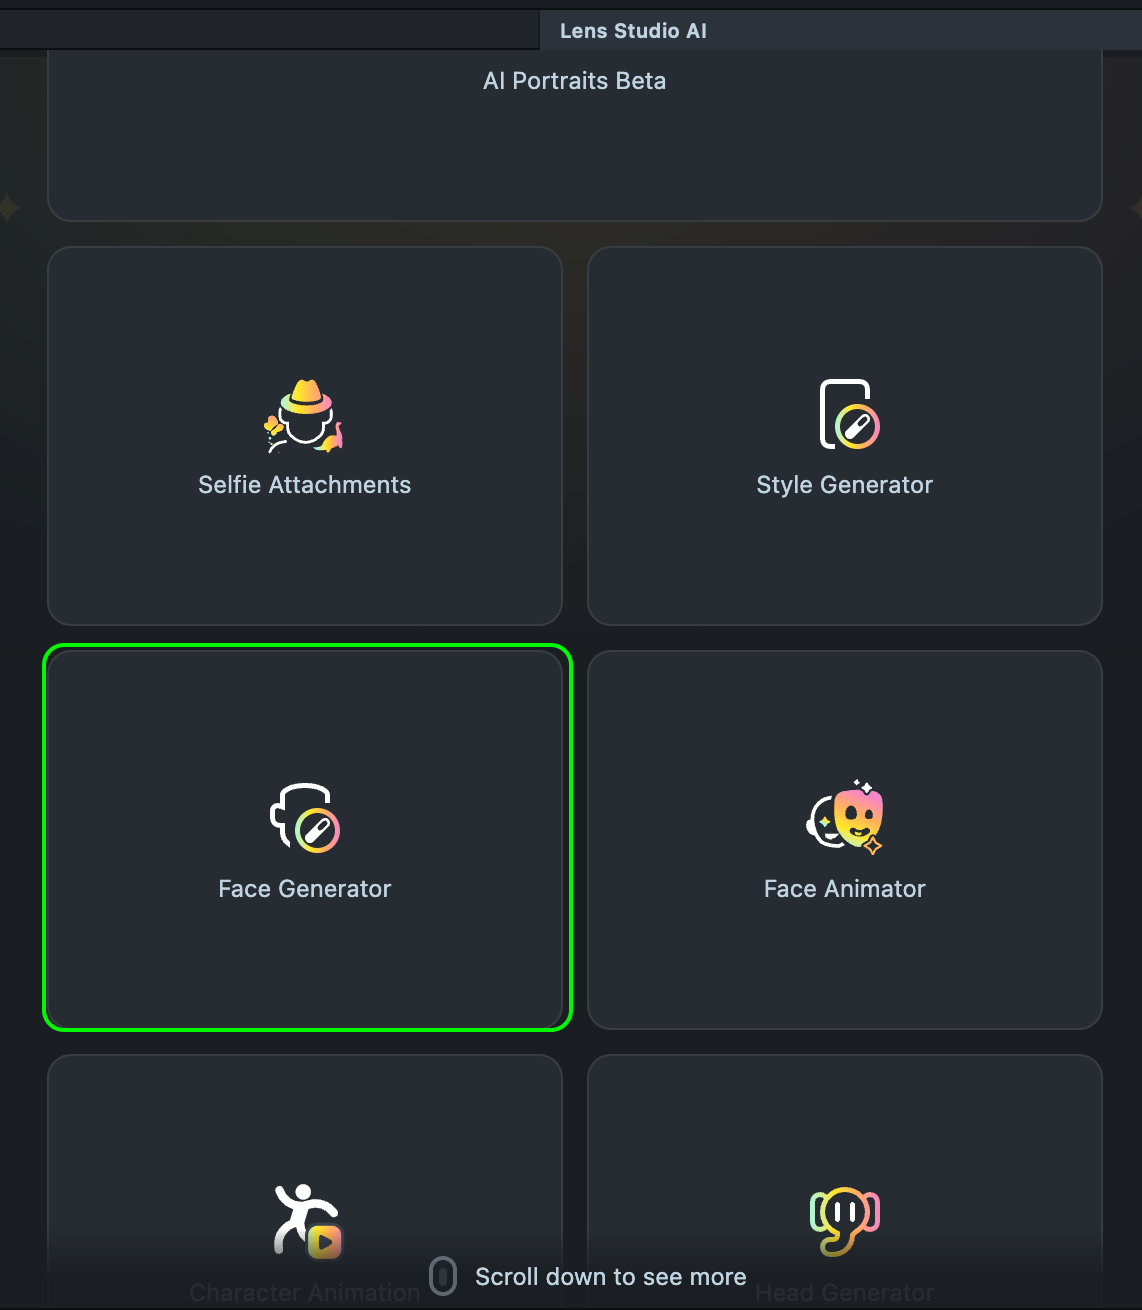
4.2. Import a pre-trained model from the Gallery.
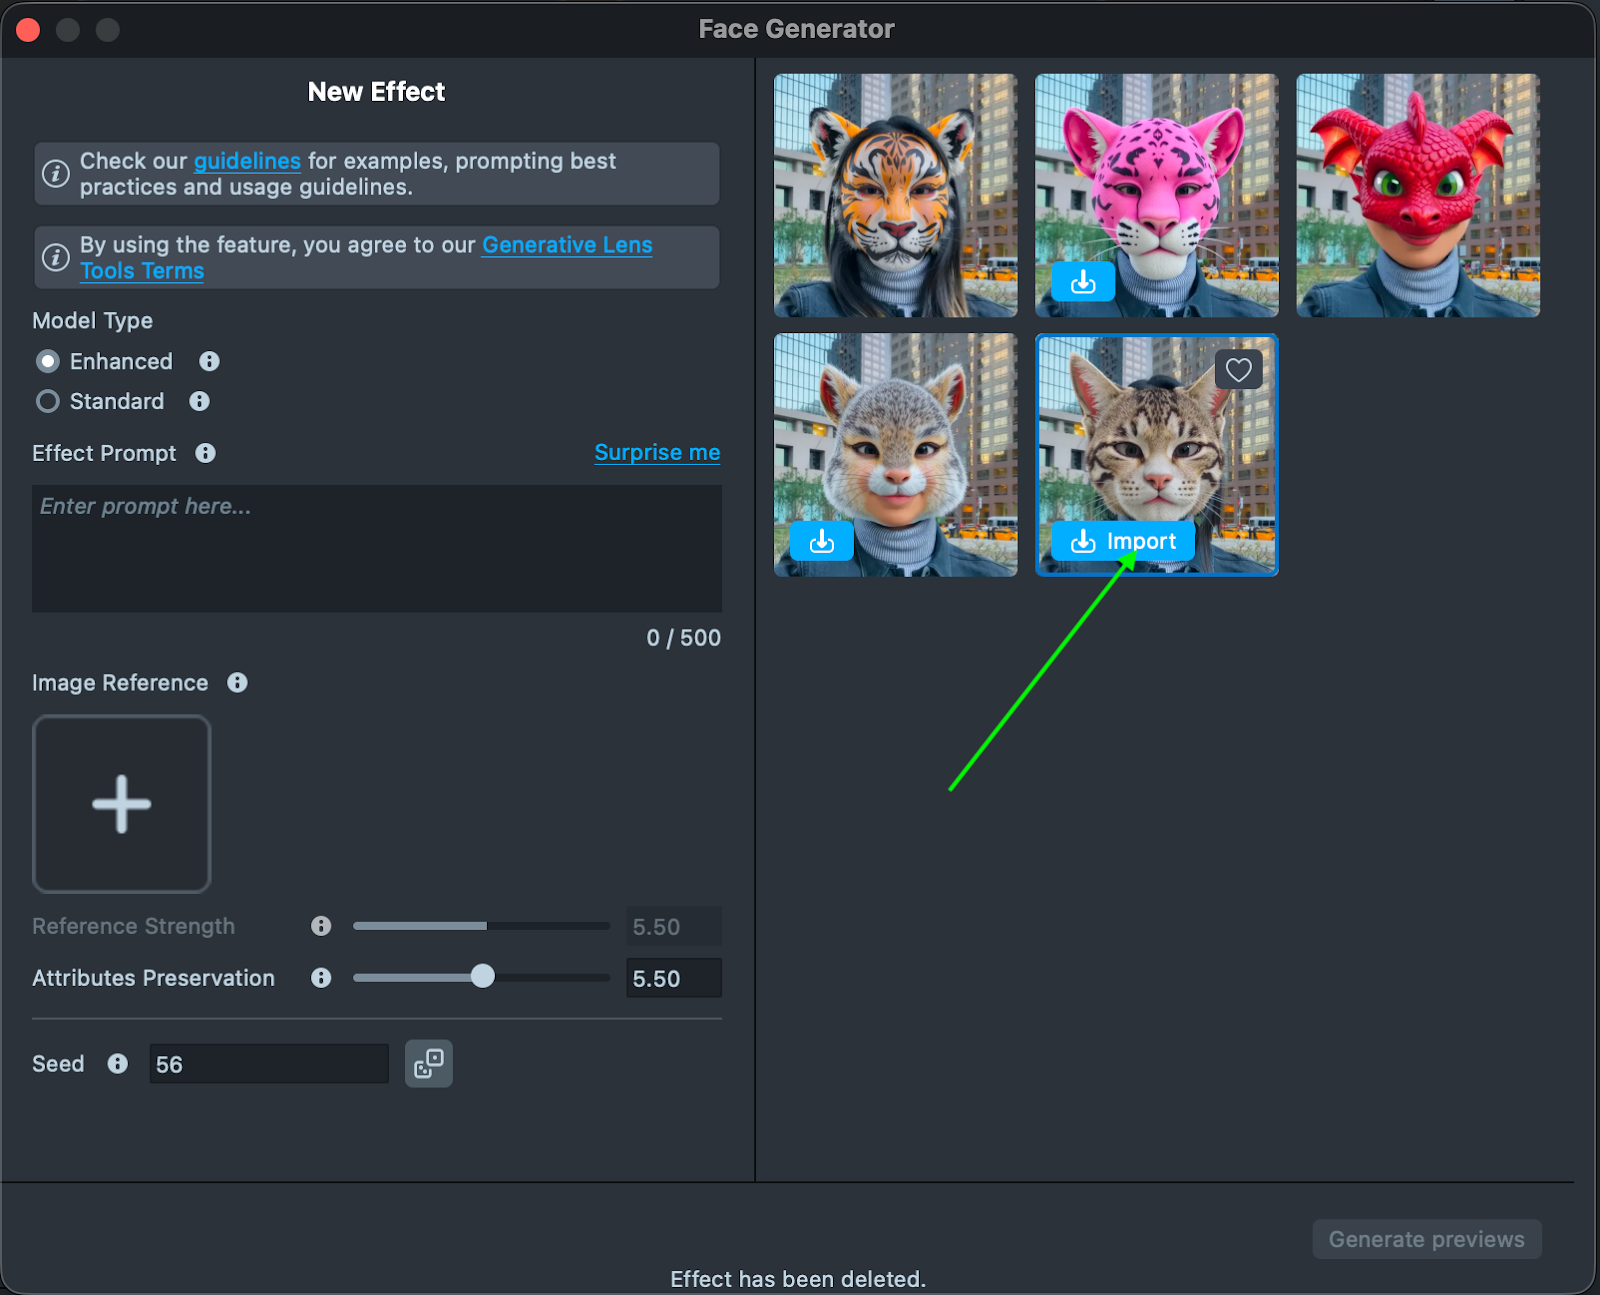
4.3. If you don’t have a pre-trained model, you can create one by following the prompts in the Face Generator plugin. Note that training a model can take several hours.
4.4. After clicking Import, the Face Generator will be automatically added to your project. If necessary, drag it into the Post Effects Camera and assign the correct layer.

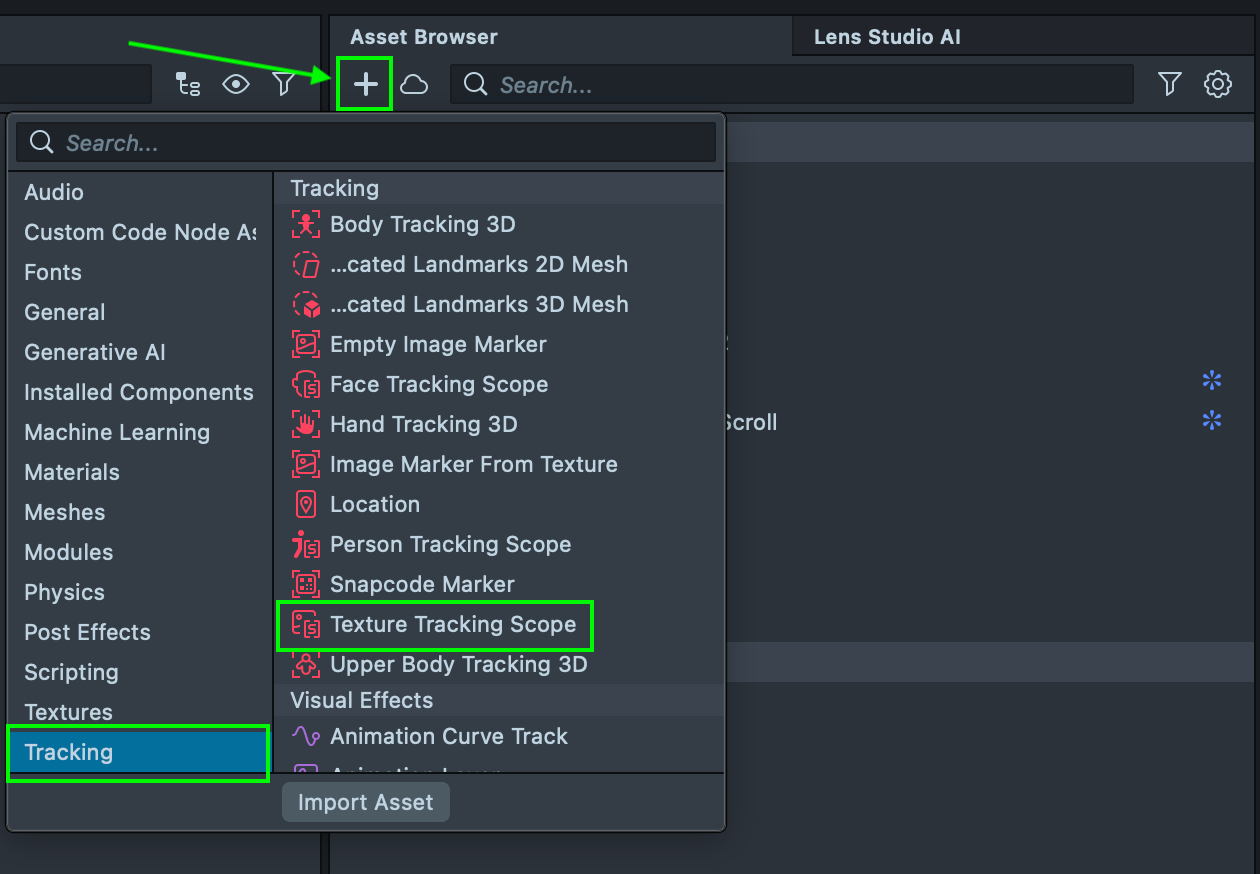
4.5. We also need to further configure the Face Generator to ensure it works correctly. To apply the Face Generator on top of the AI Portraits image, we must add an additional component to the project: the Texture Tracking Scope. To add it, click the + button in the Asset Browser, navigate to the Tracking category, and select Texture Tracking Scope. This is necessary for the tracking to function properly on the generated output.
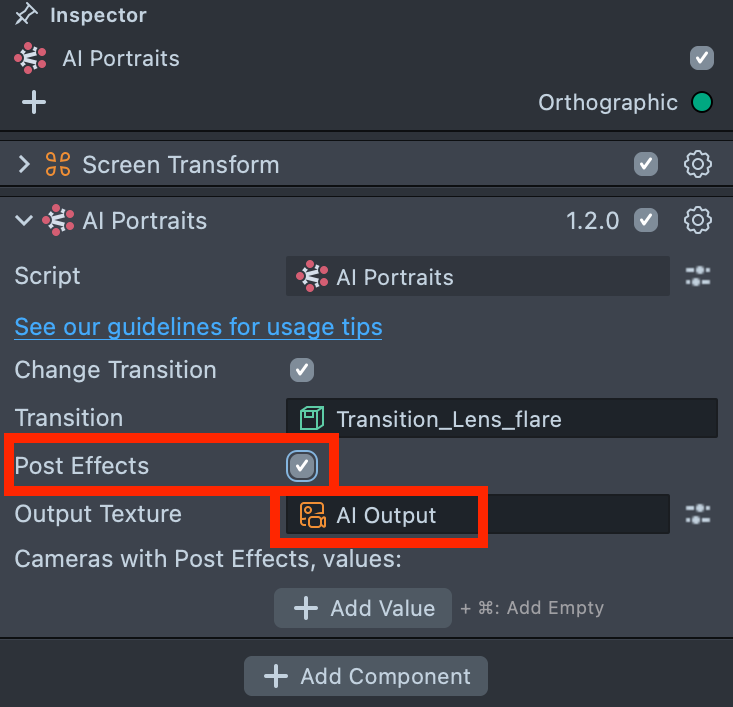
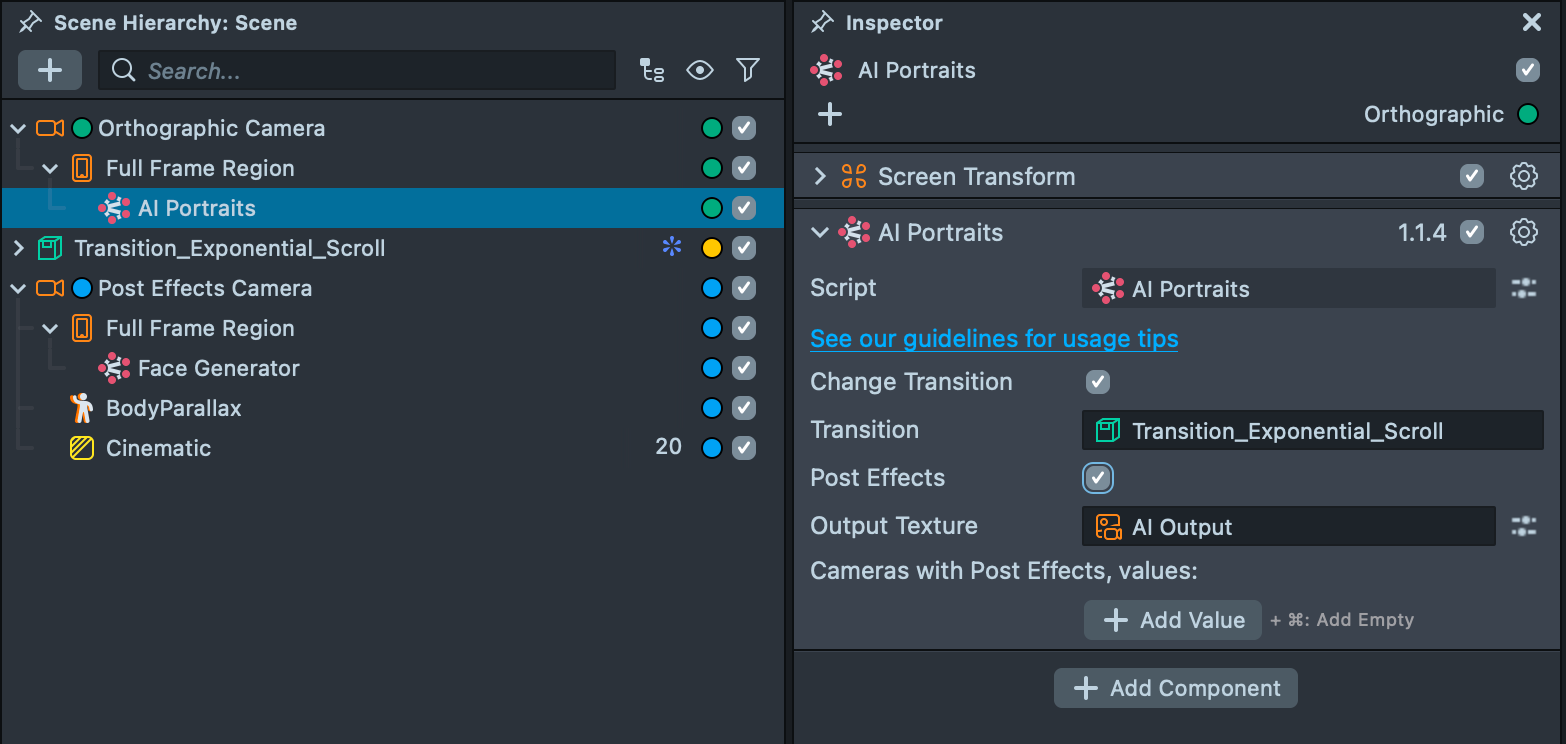
4.6. Next, locate the AI Output texture: in the Scene Hierarchy, select AI Portraits and enable the Post Effects checkbox in the AI Portraits component. This will reveal the AI Output texture.
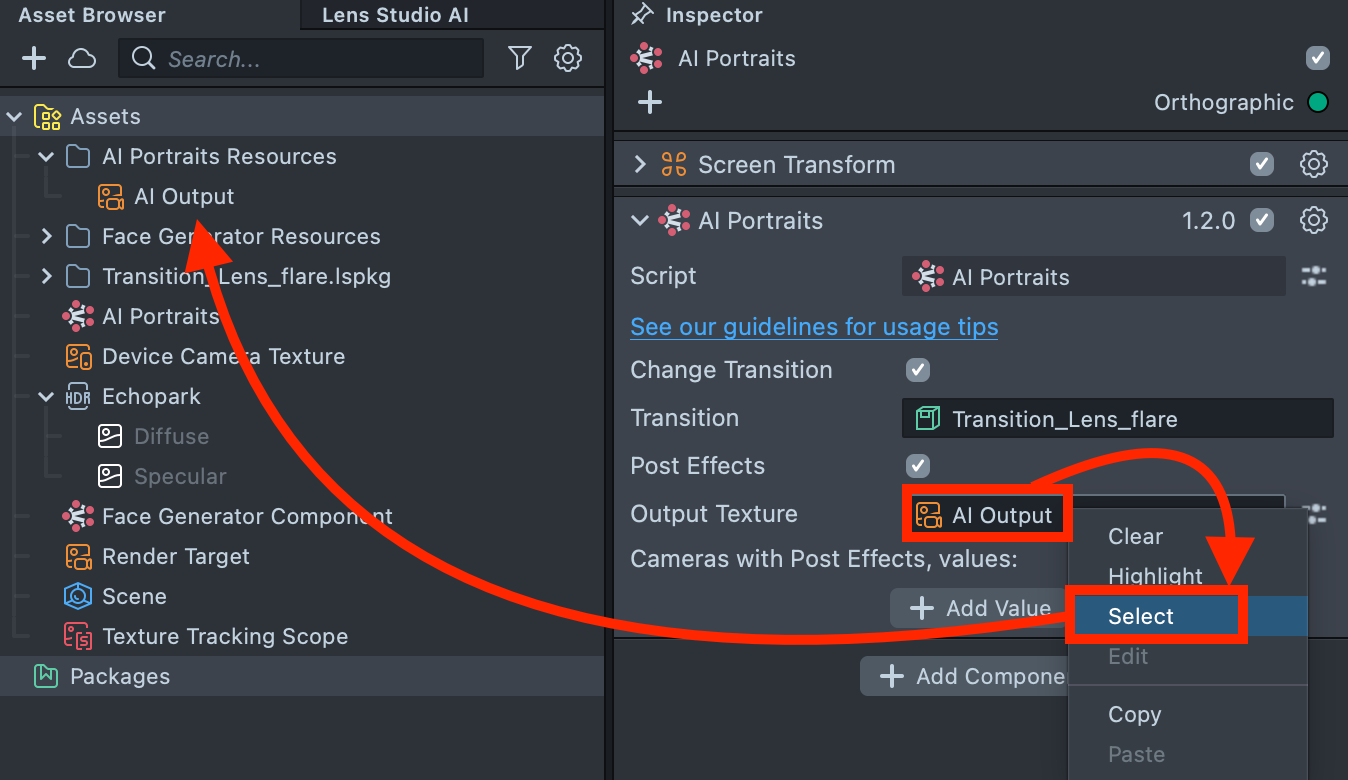
4.7. Right-click the AI Output texture field and select Select to highlight it in the Asset Browser. Take note of its location.
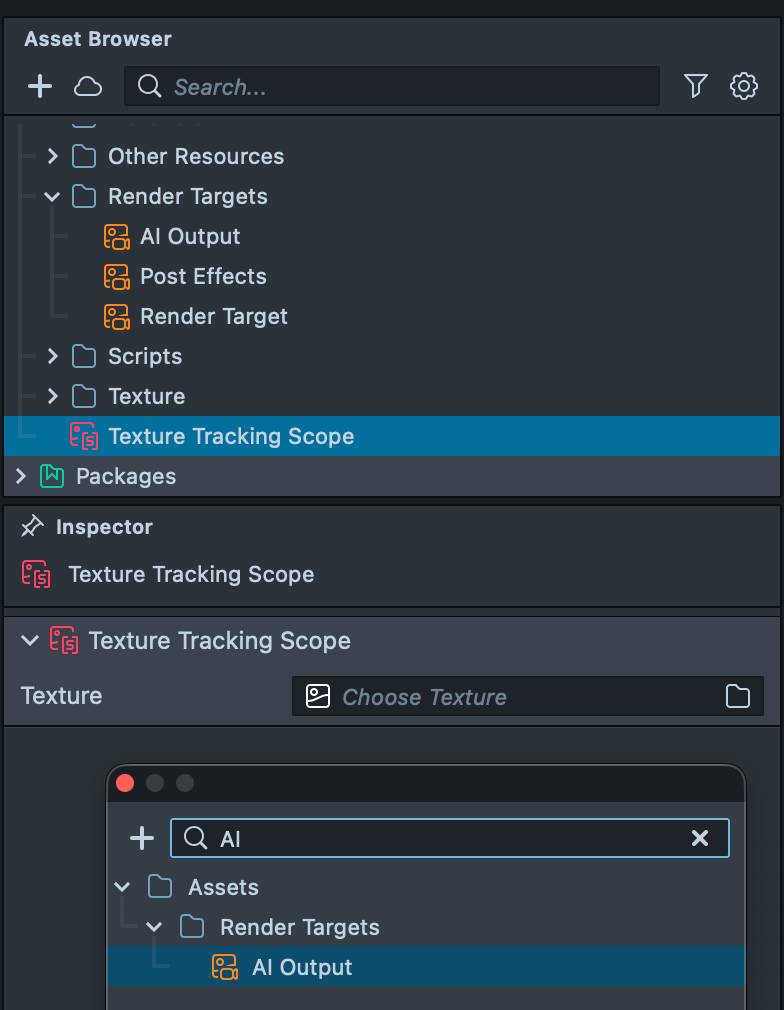
4.8. In the Asset Browser, select Texture Tracking Scope. The Texture field is currently empty: drag and drop the AI Output texture into this field.
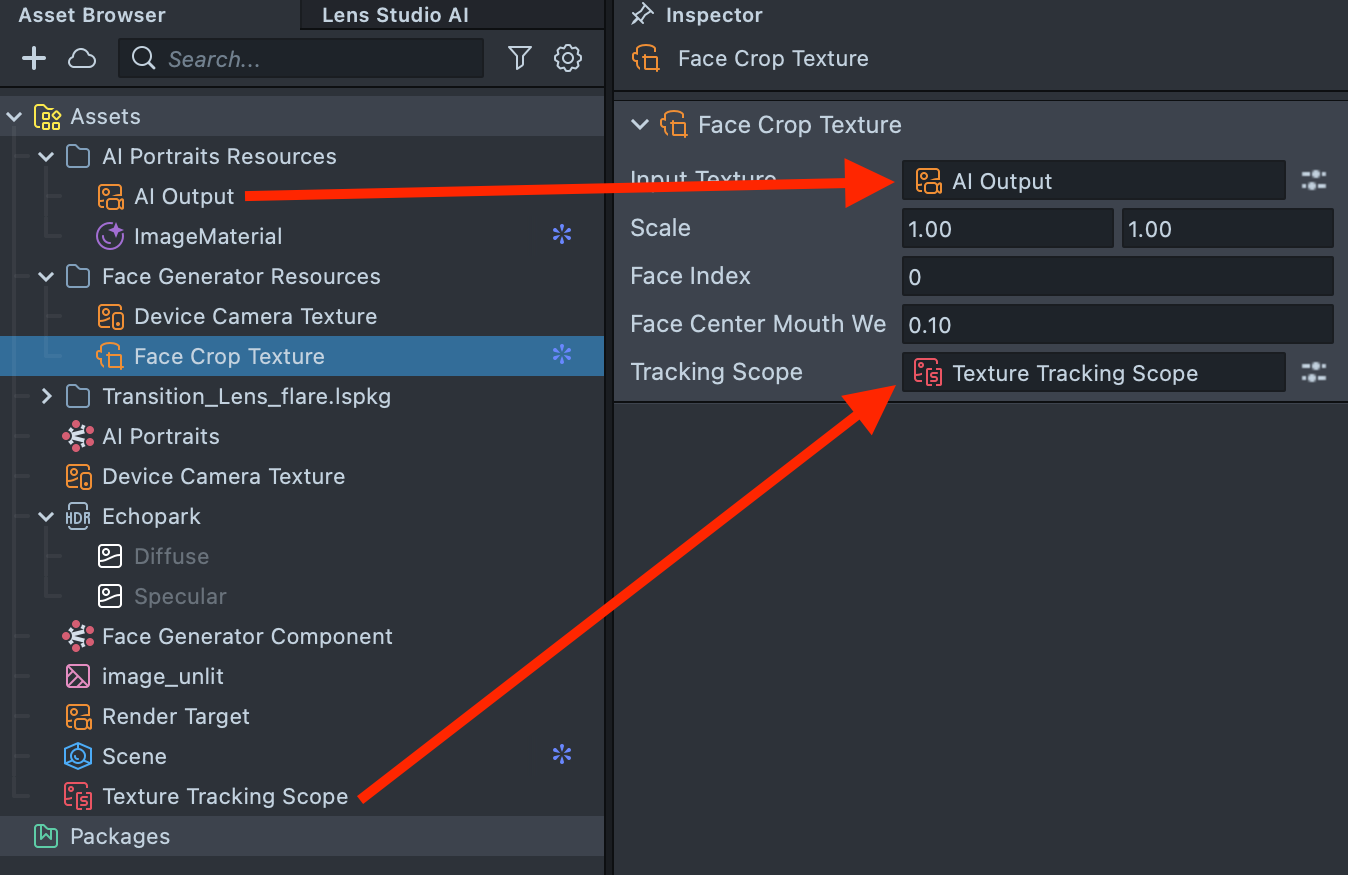
4.9. Open the Face Generator component and locate Face Crop Texture. Hover over it, right-click, and select Select.
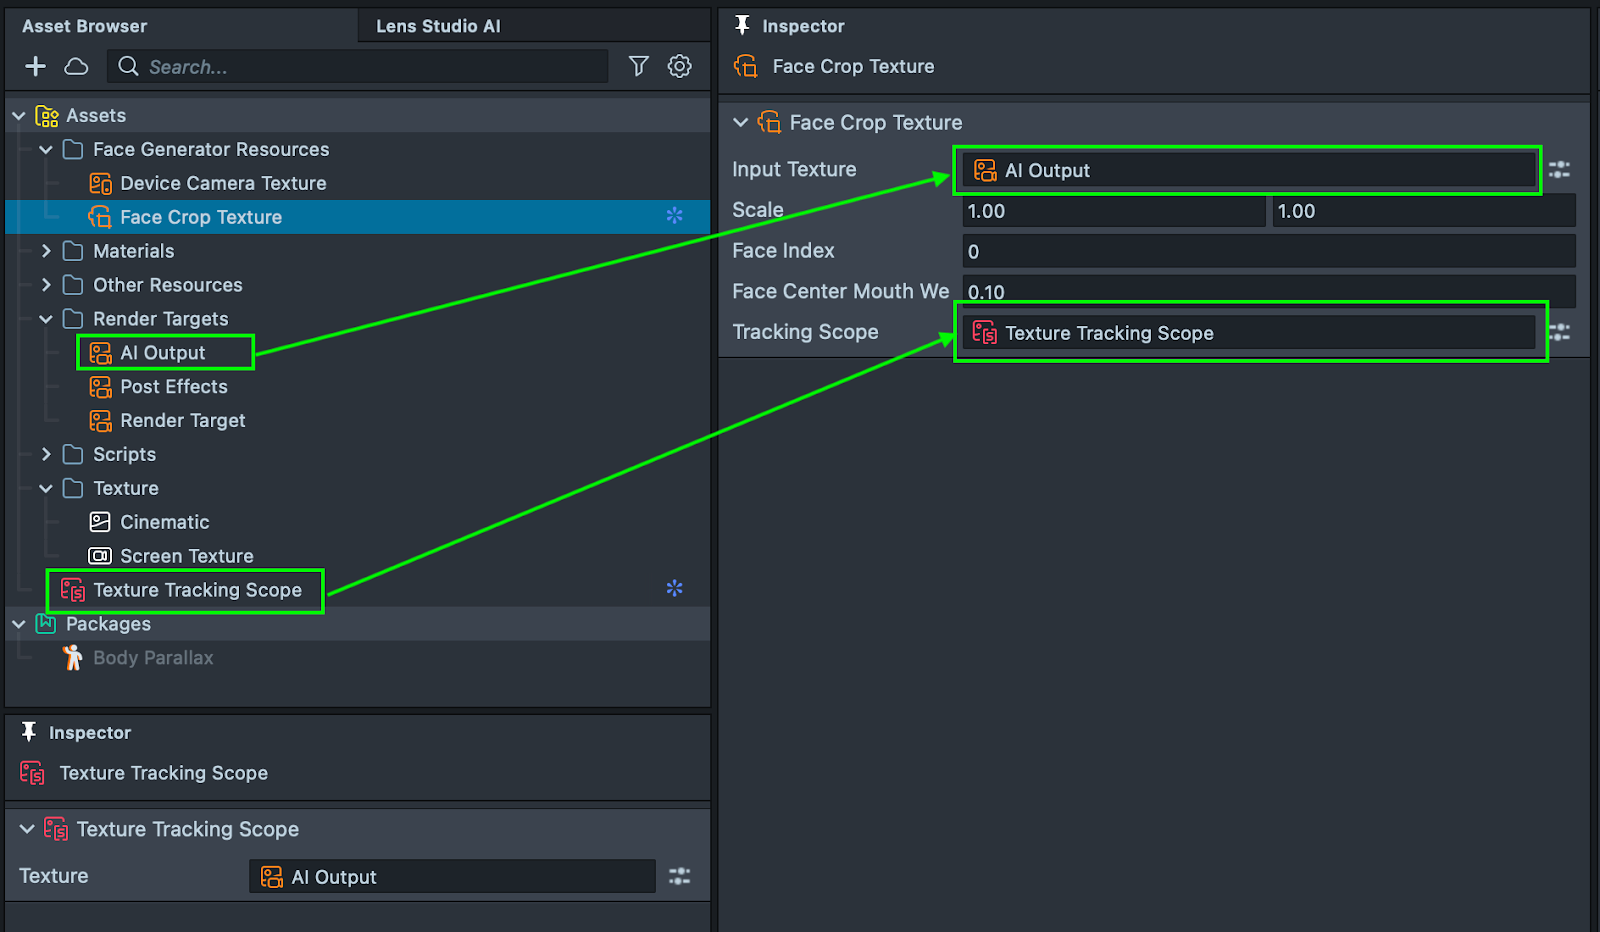
4.10. For the Face Crop Texture:
- Assign the AI Output as the Input Texture.
- Assign the Texture Tracking Scope as the Tracking Scope.
Step 5: Add Color Correction
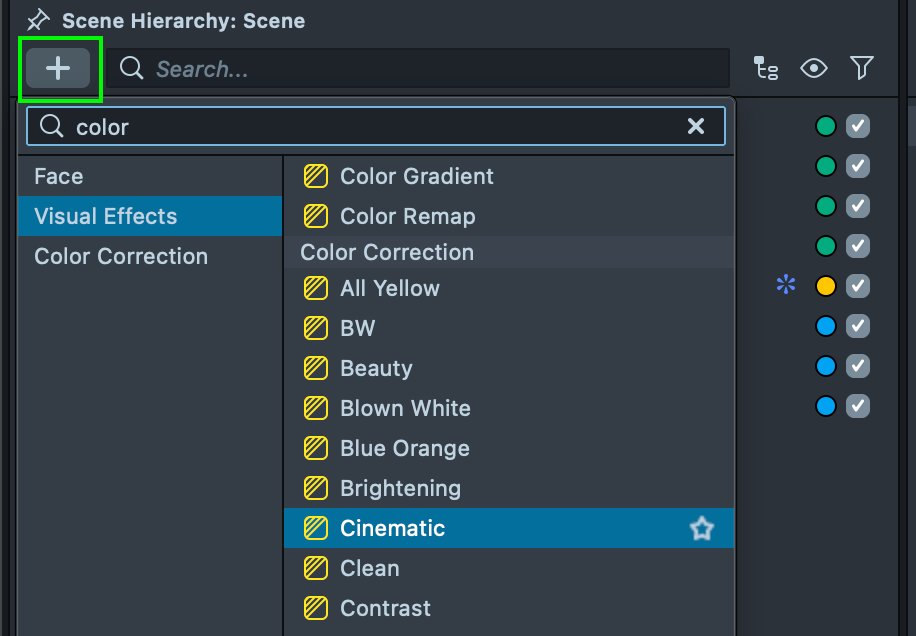
5.1. To give your Lens a more polished, finished look, add a Color Correction.
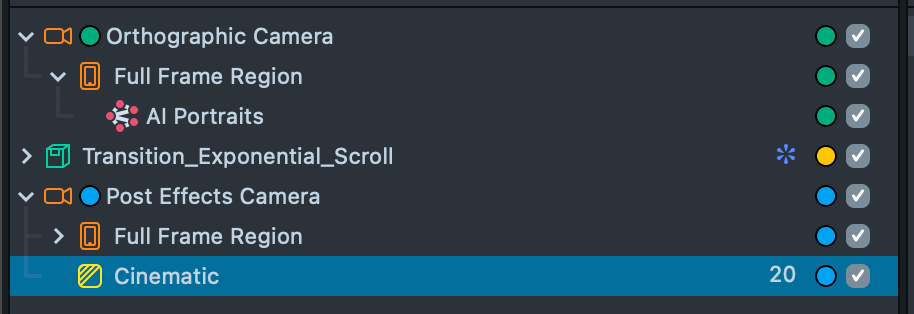
5.2. Move the Color Correction into the Post Effects Camera, then assign the appropriate Layer and Render Order.
Step 6: Add dynamics with Body Parallax
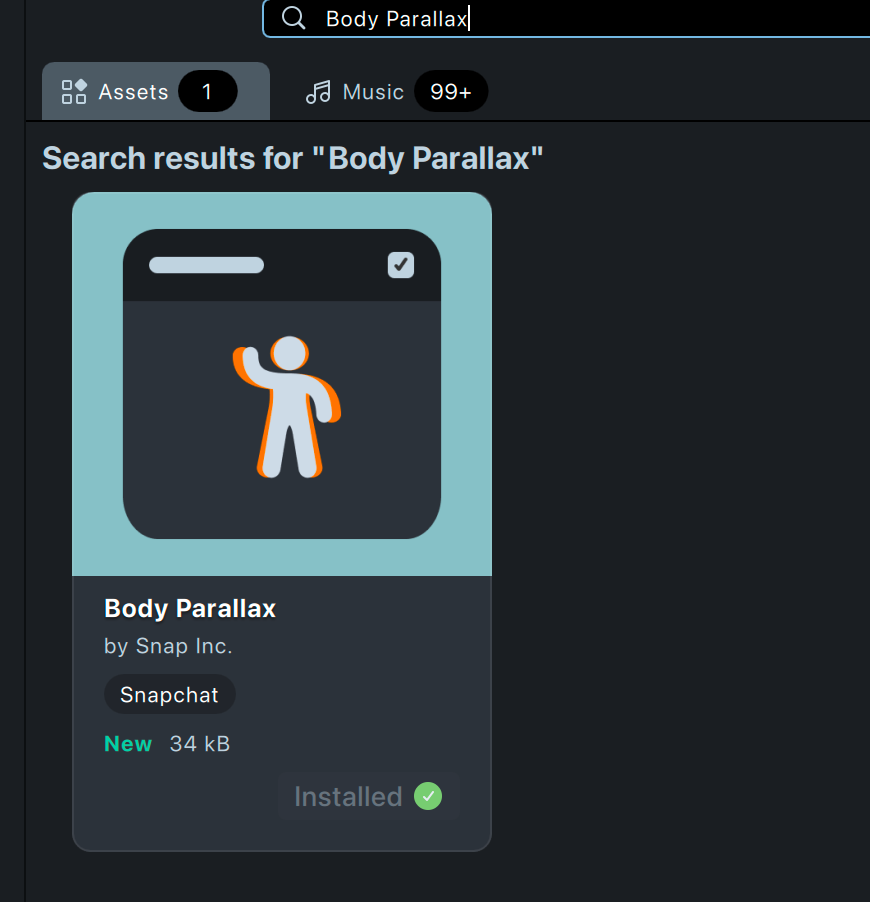
6.1. To make the generated AI Portraits output more engaging, add a Body Parallax effect to create a sense of depth and motion. Open the Asset Library, search for Body Parallax component, and click Install. The component will appear in both the Asset Browser and the Scene Hierarchy.
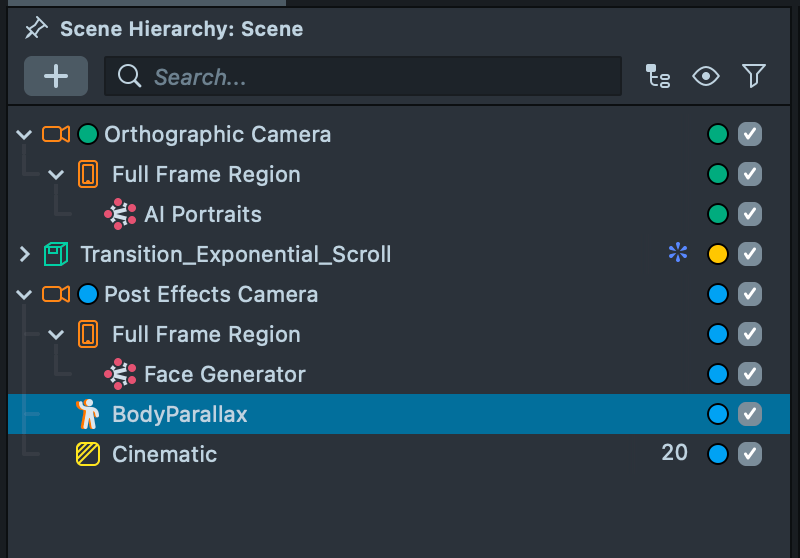
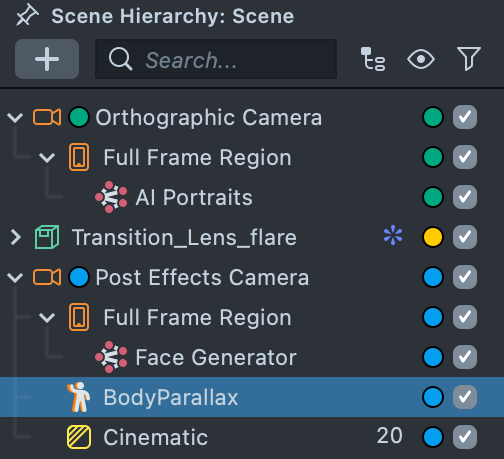
6.2. Move the Body Parallax into the Post Effects Camera.
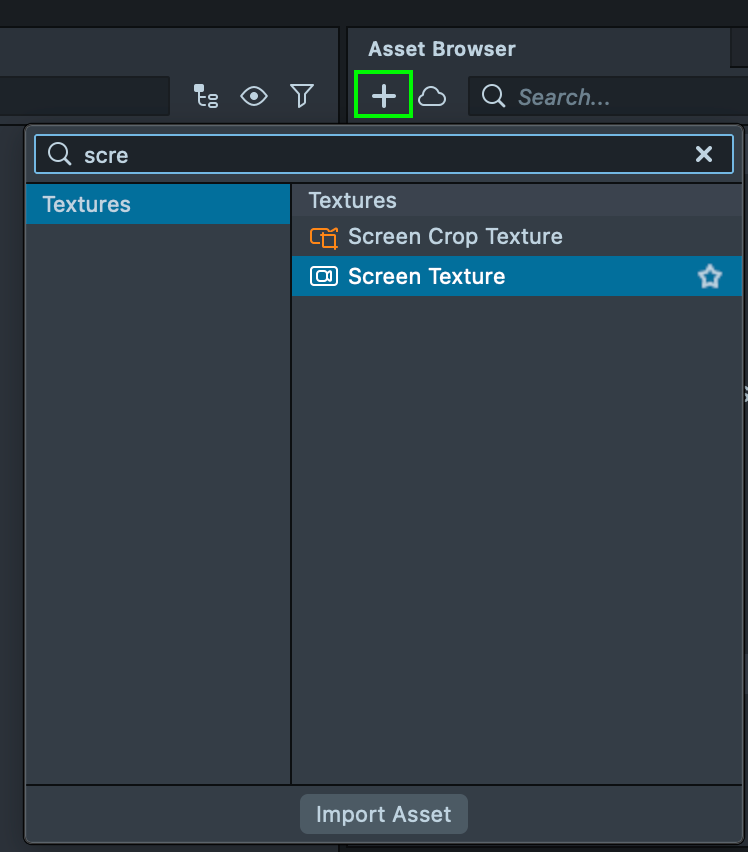
6.3. Add the Screen Texture by clicking the + button in the Asset Browser.
6.4. In the Scene Hierarchy, select Body Parallax and set Screen Texture as the Input Texture in the Inspector.
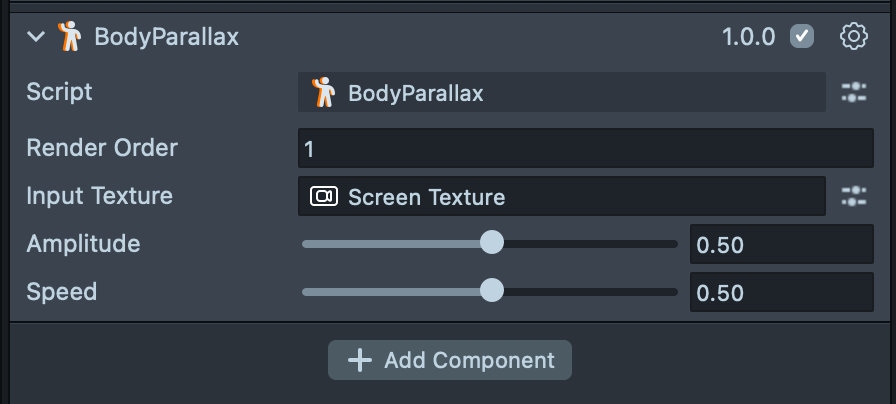
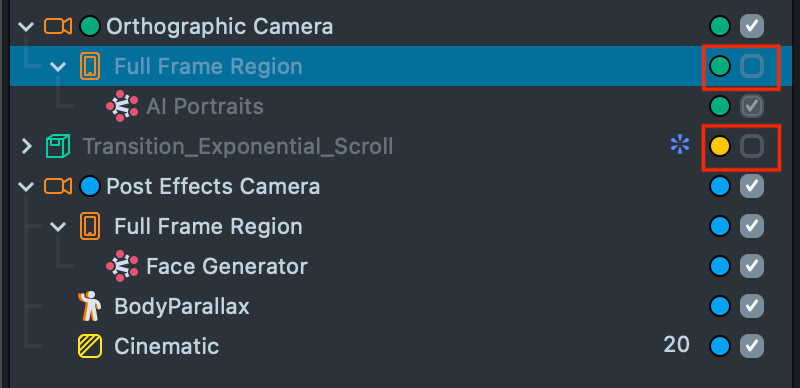
6.5. To preview the Body Parallax effect, temporarily disable the AI Portraits component and the transition, as they may interfere with the post-effects setup. You can then adjust the Speed and Amplitude sliders to control the intensity of the effect and observe the changes in the Preview panel. Be sure to re-enable the disabled components once you have finished adjusting the Body Parallax settings.
Step 7: Apply Post Effects to the AI Portraits Output
7.1. After adding and configuring your post effects, the next step is to apply them to the AI Portraits output. Earlier, you enabled the Post Effects checkbox in the AI Portraits component while locating the AI Output texture.
Now, link the previously created Post Effects camera by clicking the Add Value button in the Cameras with Post Effects field.
You can add as many cameras with post effects as you want.
7.2. The Post Effects camera and effects will be automatically added to the generated result. Click the Reset button to ensure the Preview reflects the correct result after applying all changes made in the previous steps.

Summary
Your Lens is now complete and ready for testing in Lens Studio and on a device. In this tutorial, we:
- Built a basic AI Portraits Lens
- Replaced the default transition
- Added a Face Generator component
- Applied Color Correction
- Added Body Parallax for depth and motion
- Applied Post Effects to AI Portraits output
To learn more about Render Targets, Render Layers, and camera configuration, see the Camera documentation.