Combining Style Generator with Face Generator, Face Animator and Garment
Introduction
In this tutorial, you’ll learn how to build a more advanced Lens by combining GenAI-powered components from the Style Generator plugin, Face Generator plugin, Face Animator plugin and Garment.
The main principle is to render each effect into its own separate Render Target and then use that Render Target as the input for the next effect and its camera. If you’d like to refresh your knowledge before diving into the tutorial, refer to the Camera documentation.
You can watch the video tutorial for a guided overview, or continue with the detailed step-by-step guide below.
Step 1: Import Effects
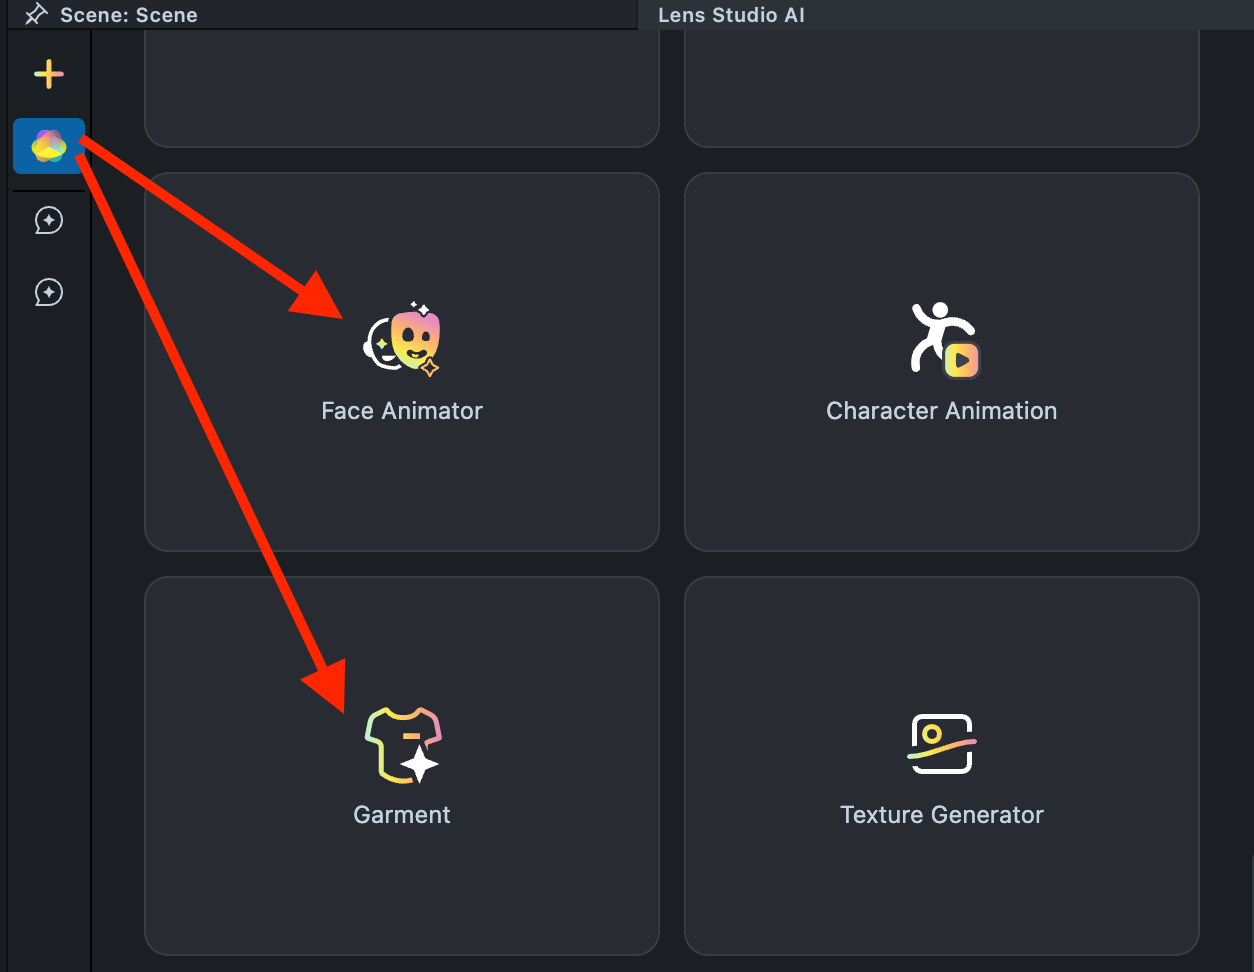
1.1. Navigate to the Lens Studio AI option in the top right corner of the Lens Studio. Then, click on the GenAI Home Page tab in the sidebar.

1.2. In the GenAI Home Page tab, locate the plugins we’ll be using.
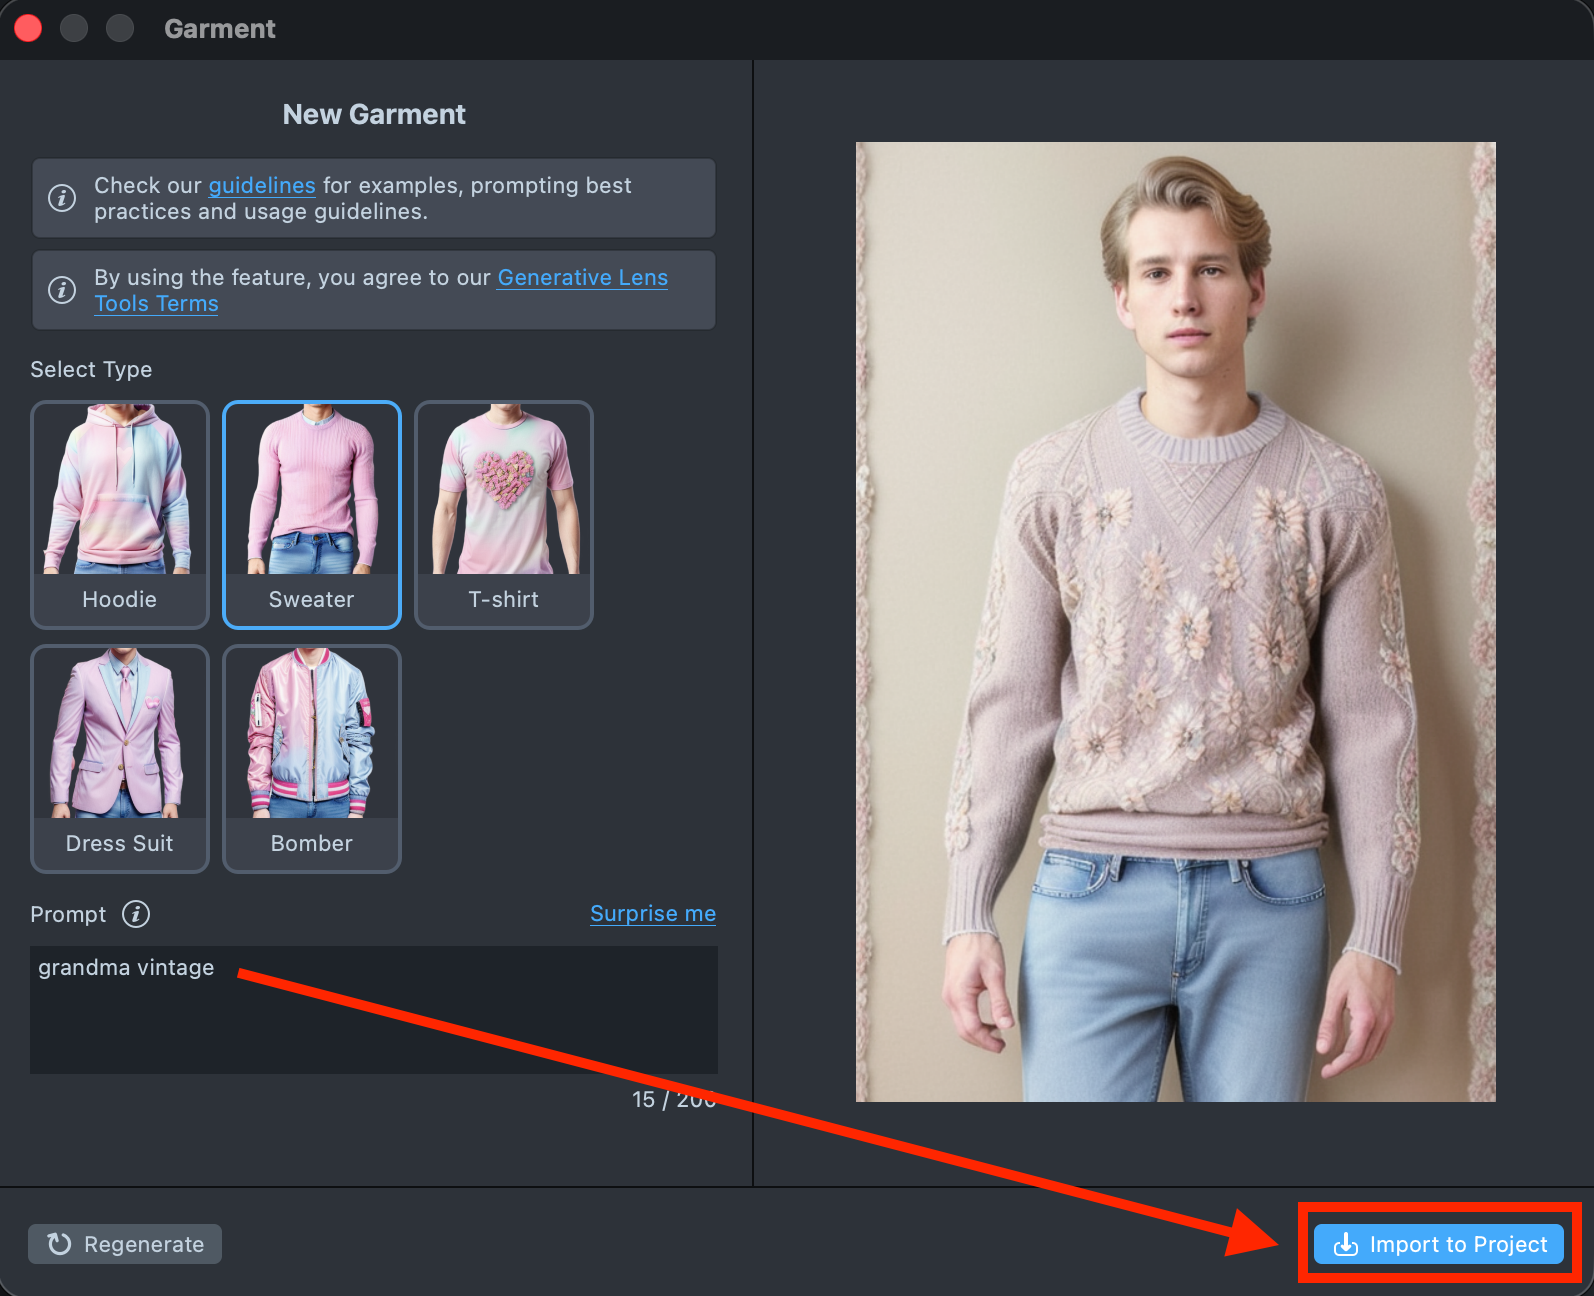
1.3. Open the Garment and import a generated effect into your project.
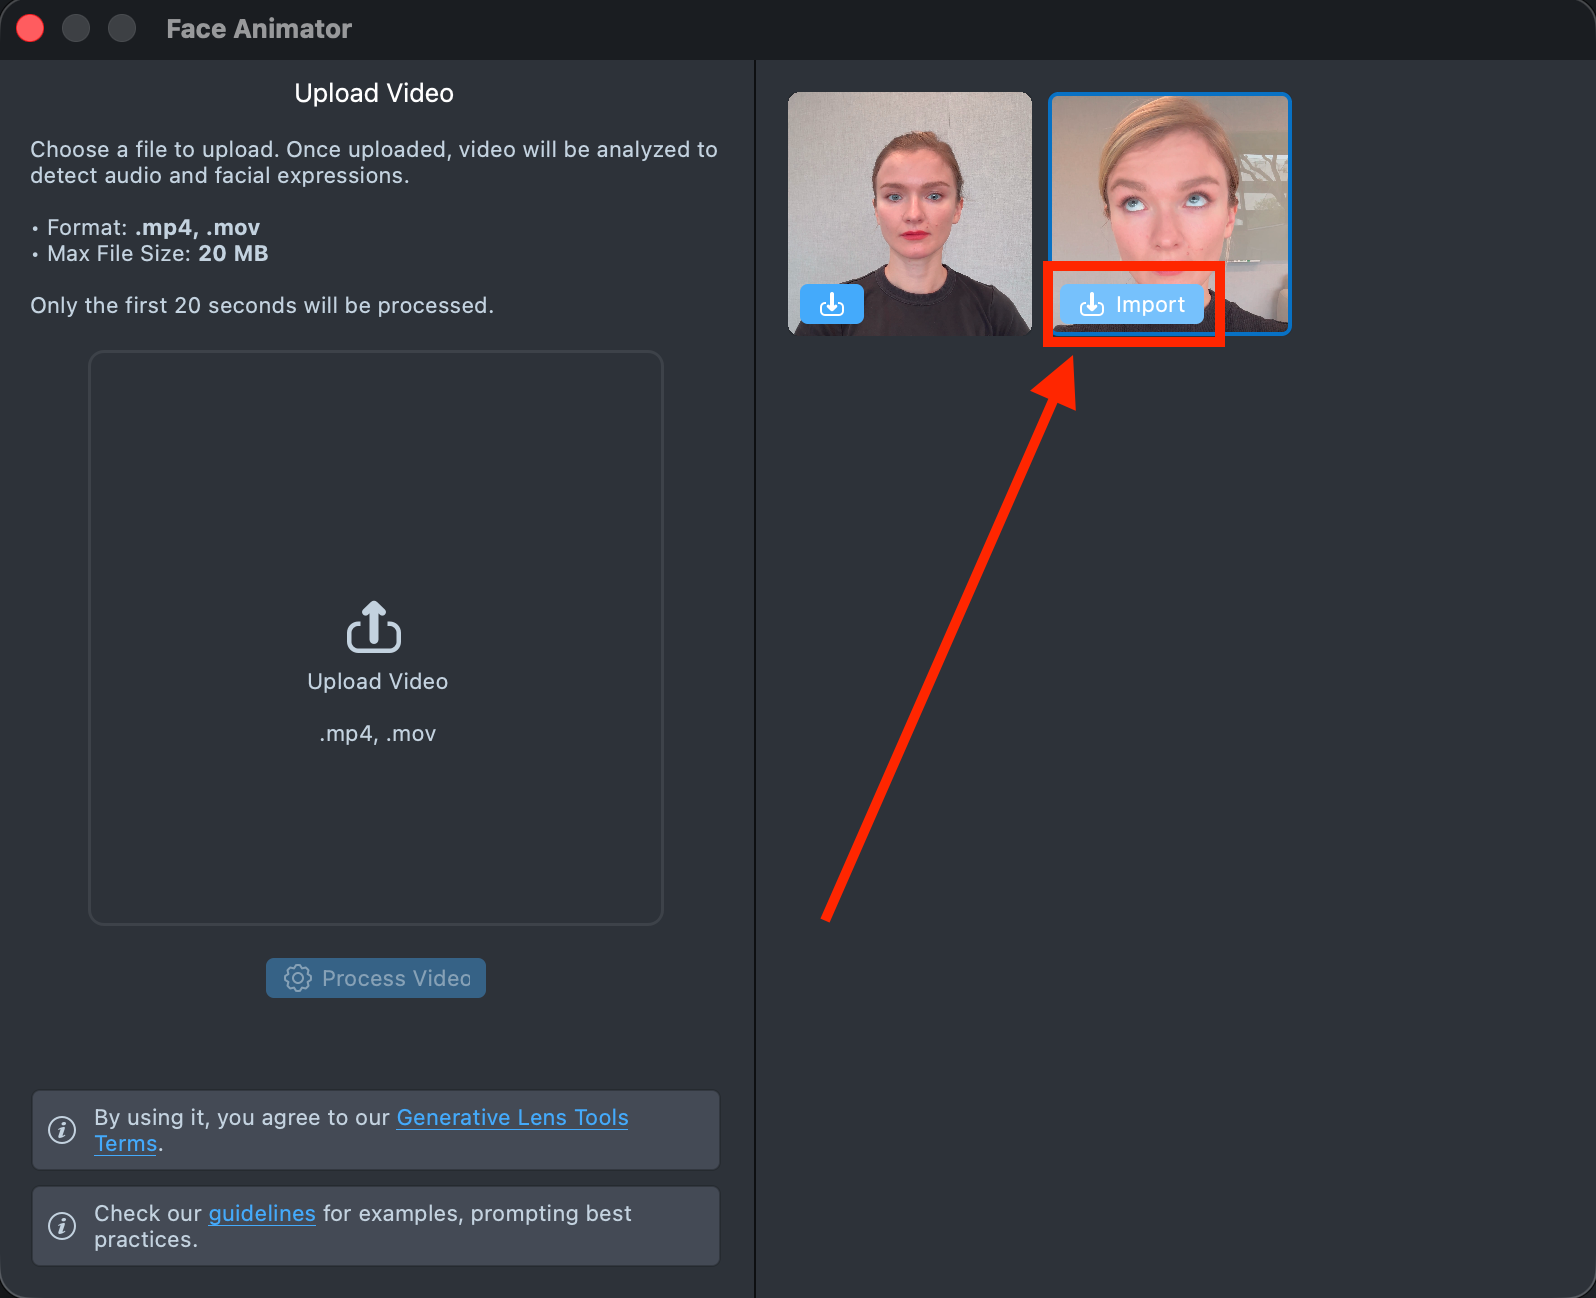
1.4. In the GenAI Home Page, find the Face Animator and import a generated effect into your project.
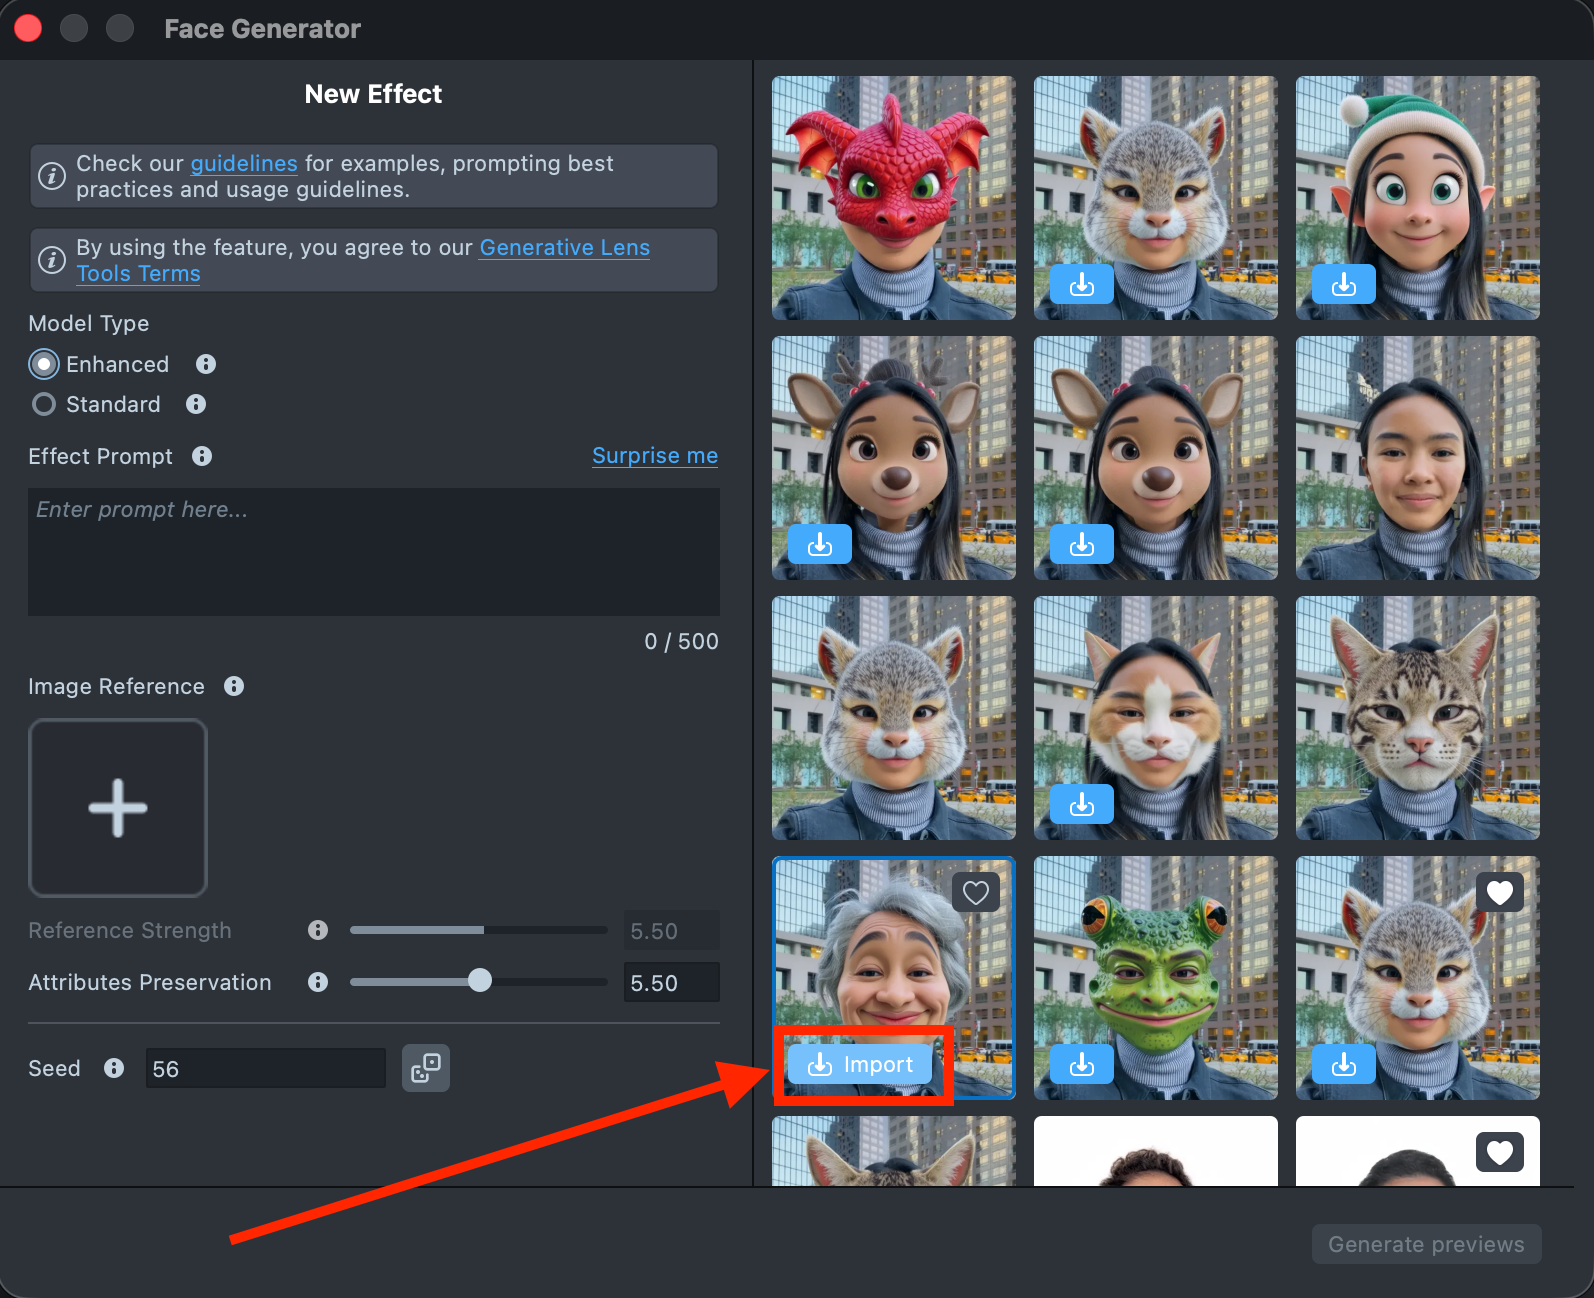
1.5. In the GenAI Home Page, find the Face Generator and import a generated effect into your project.
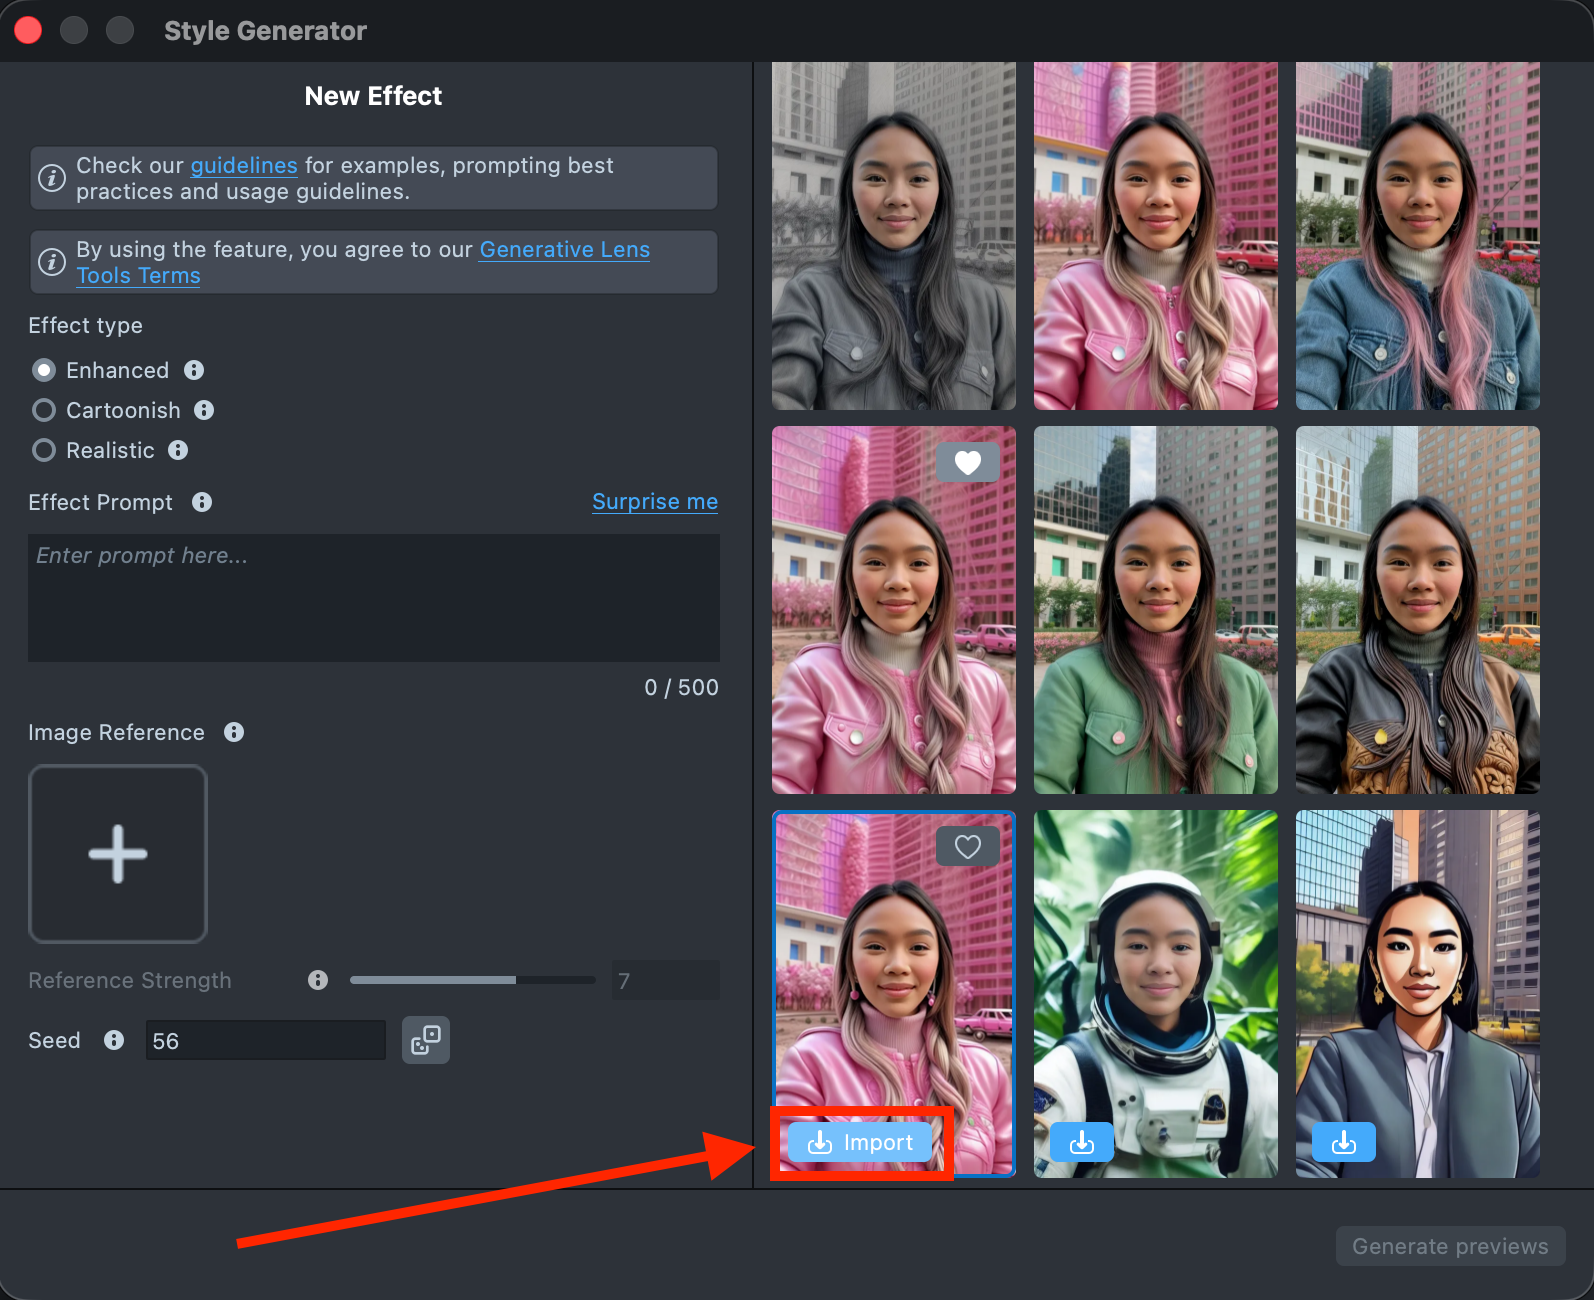
1.6. In the GenAI Home Page, find the Style Generator and import a generated effect into your project.
Step 2: Combine Components
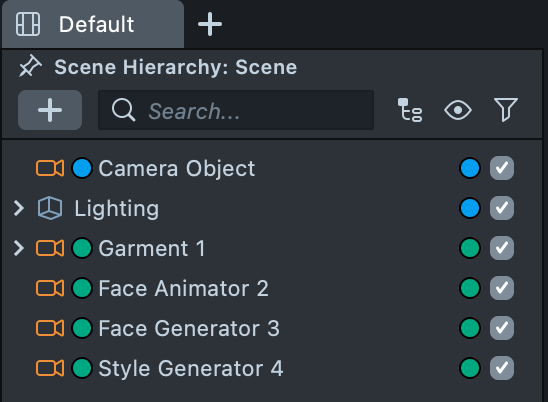
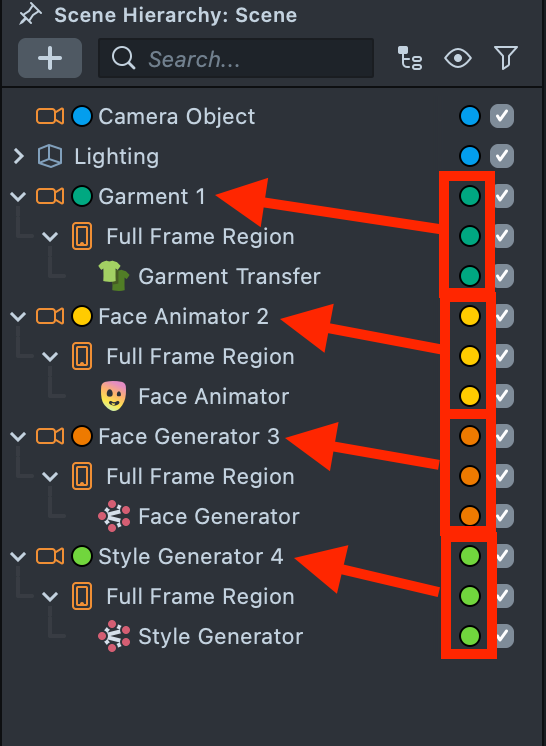
2.1. Create an Orthographic Camera for each effect and rename them as follows:
- Garment 1
- Face Animator 2
- Face Generator 3
- Style Generator 4
2.2. Create a Render Layer for each camera and name them accordingly: Face Animator, Face Generator, Style Generator (we will use the existing Orthographic Layer for the Garment effect).
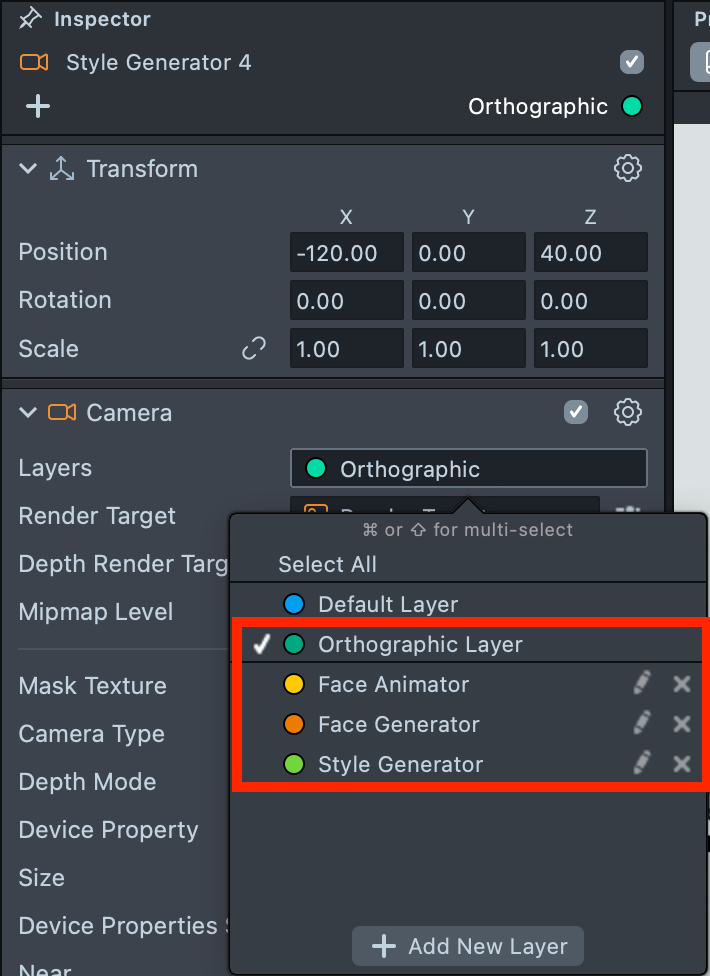
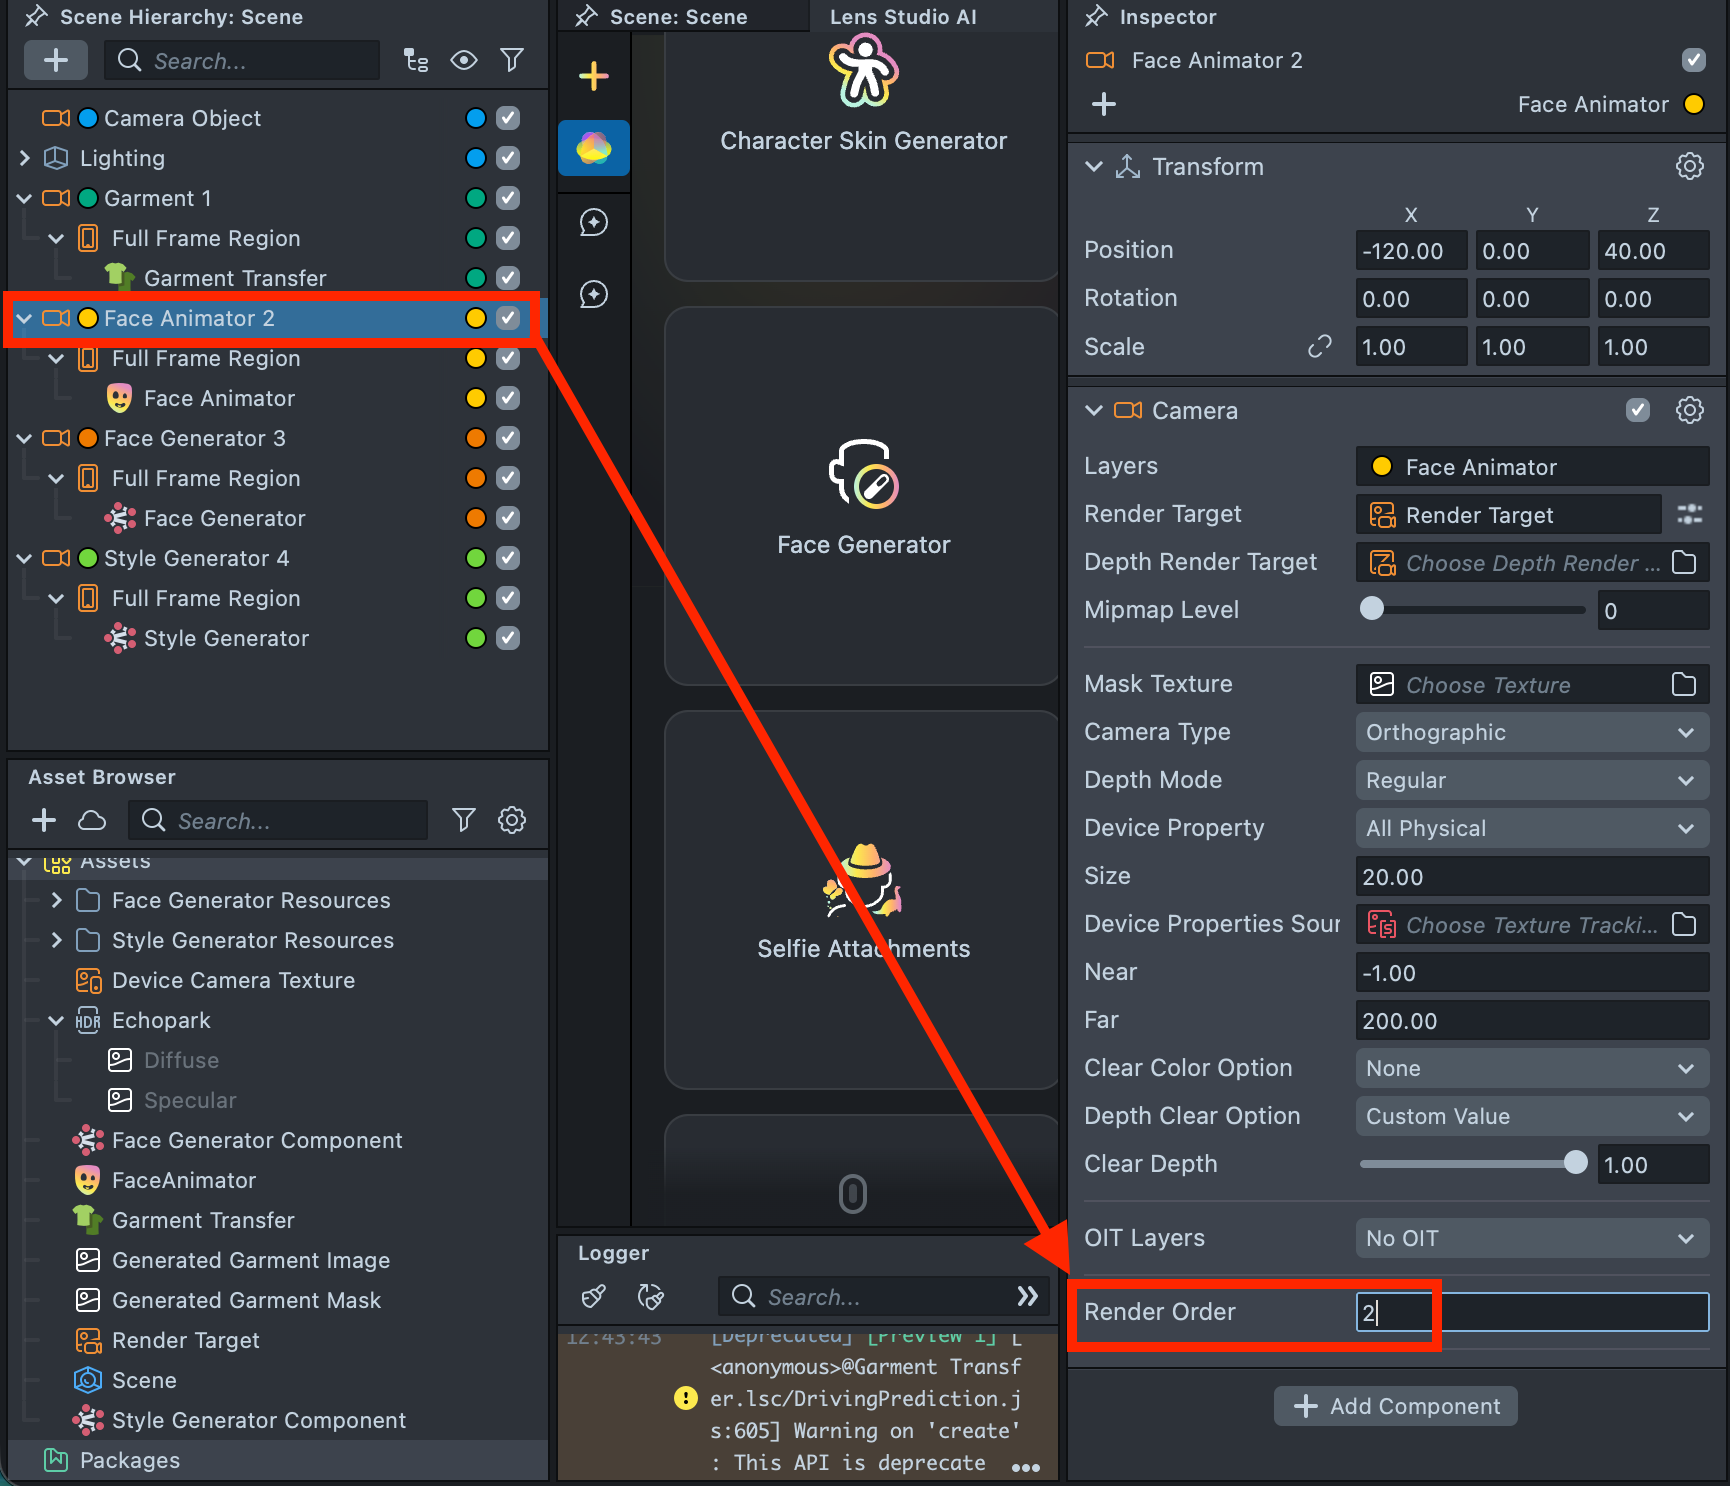
2.3. Assign the corresponding Render Layer to each camera. Note that the layer must be reassigned in two places: in the top-right dropdown and in the Layers field.
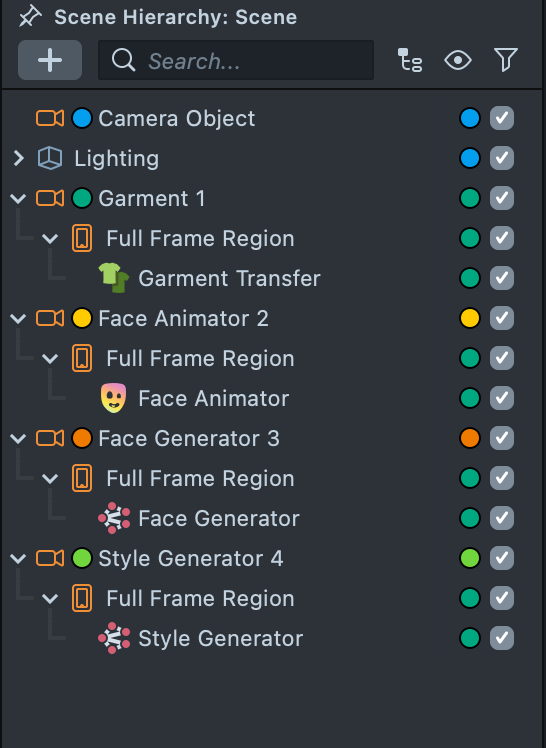
2.4. In the Scene Hierarchy, drag each effect into its corresponding camera (including their parent object, Full Frame Region).
2.5. For each effect, update its Render Layer to match the Render Layer of its camera.
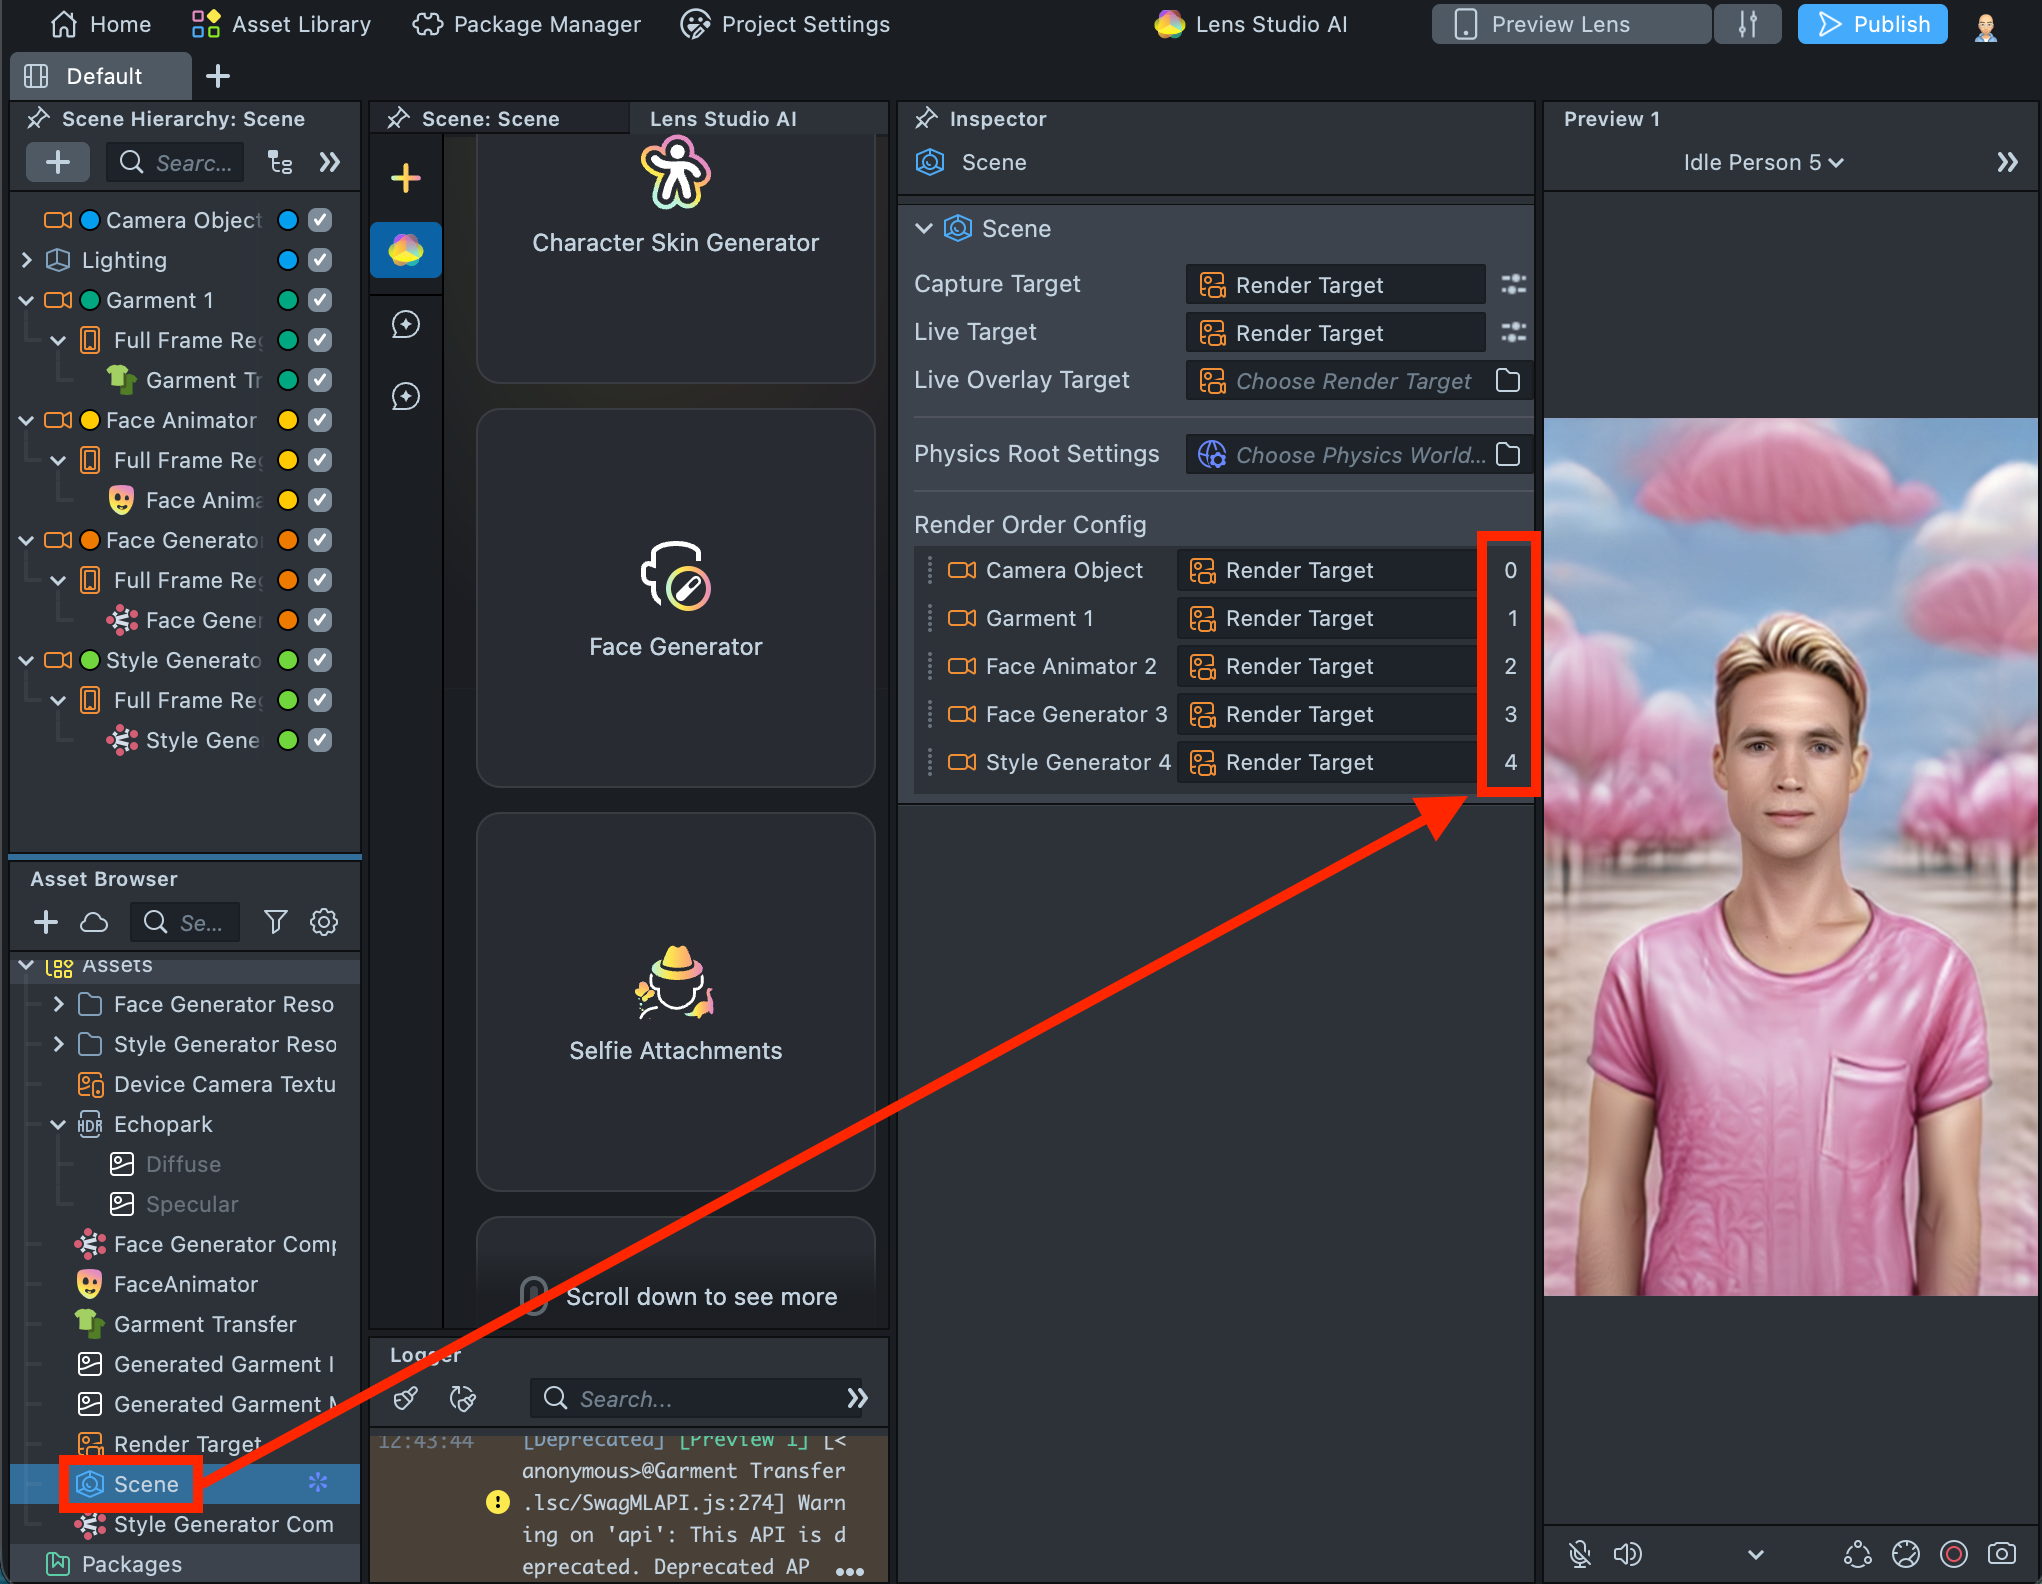
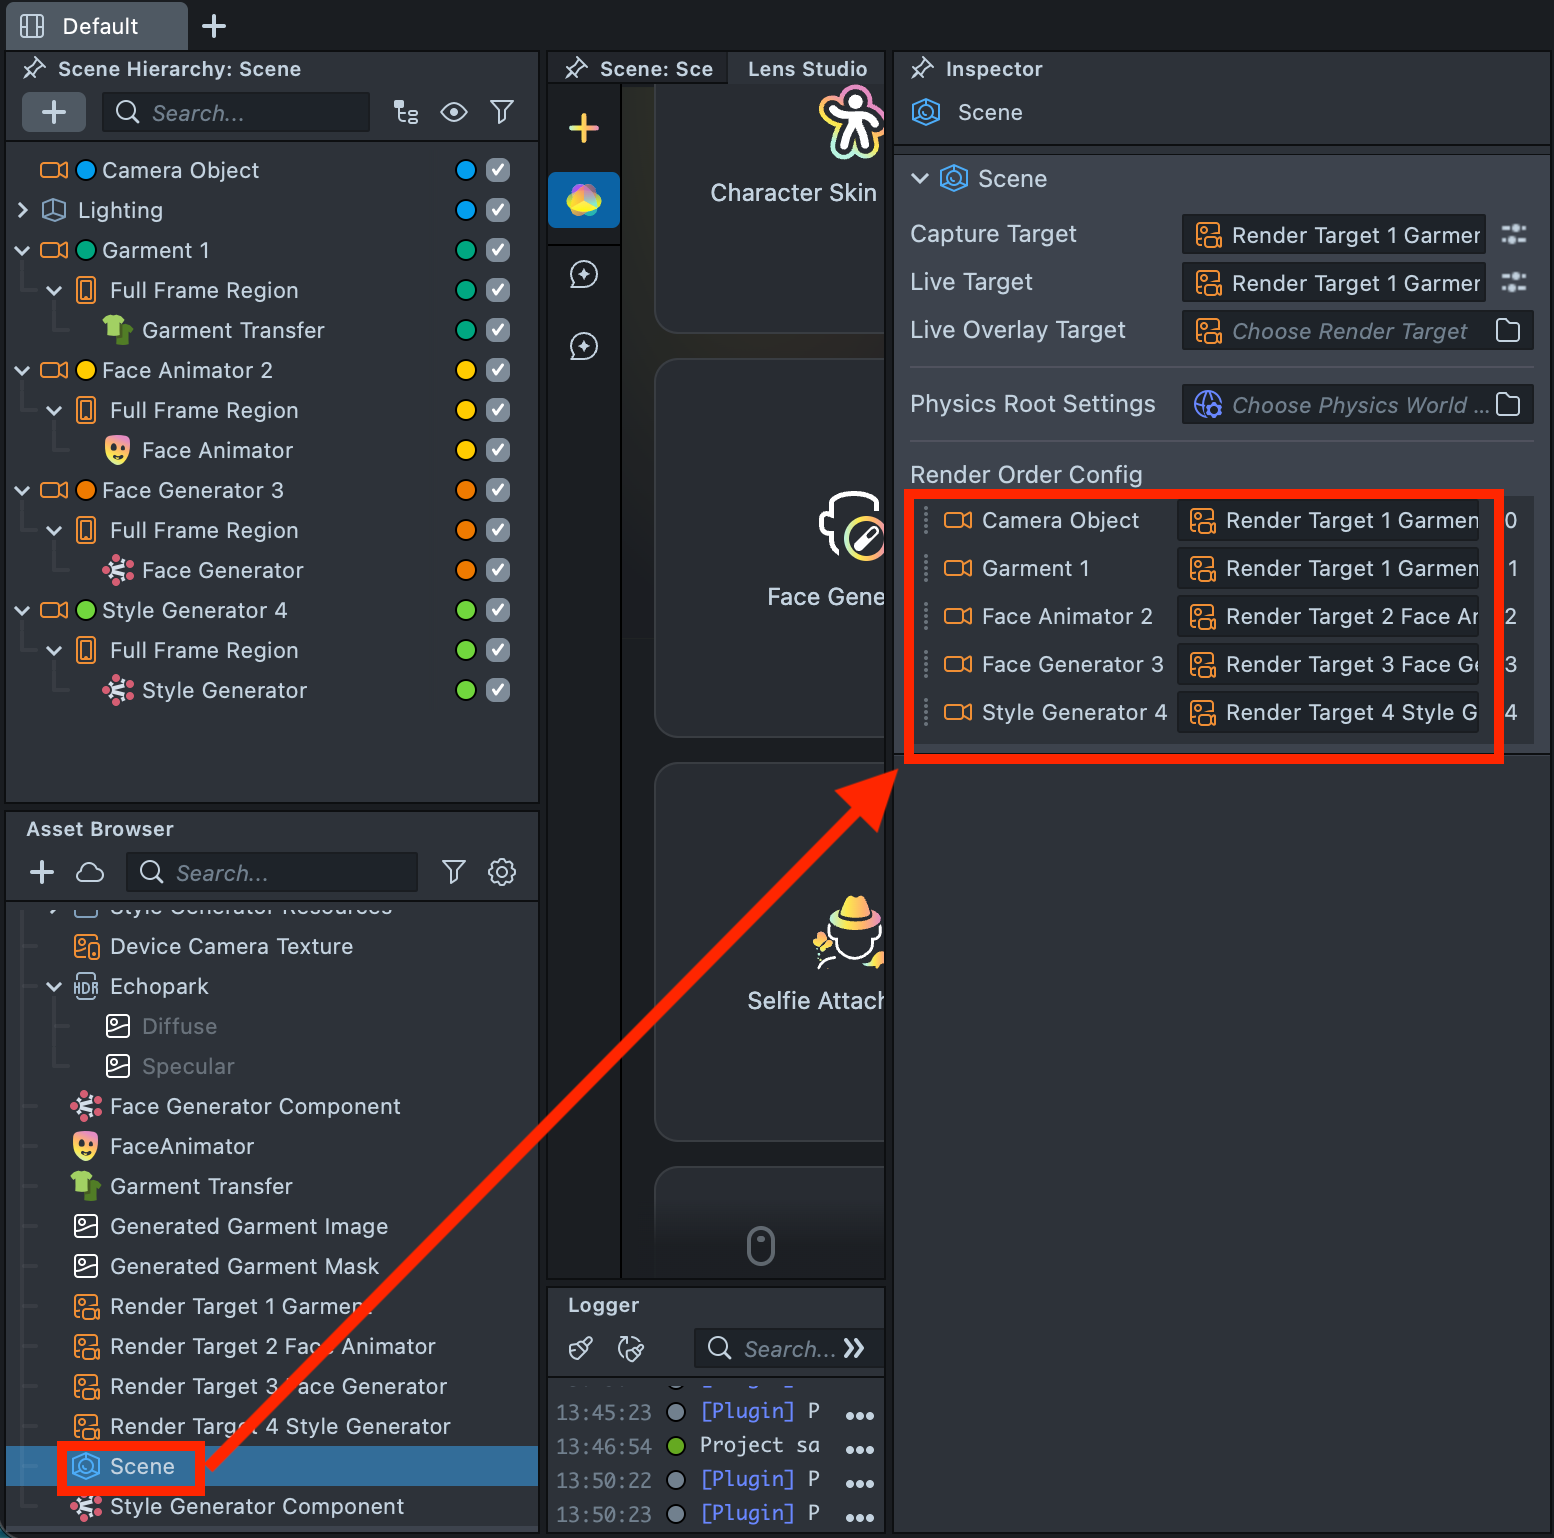
2.6. In the Scene Hierarchy, select each camera and set the Render Order sequentially, starting from 0 for Camera Object and ending with 4 for Style Generator 4.
2.7. Select Scene in the Asset Browser, then review the Render Order configuration in the Inspector to ensure the values are set sequentially.
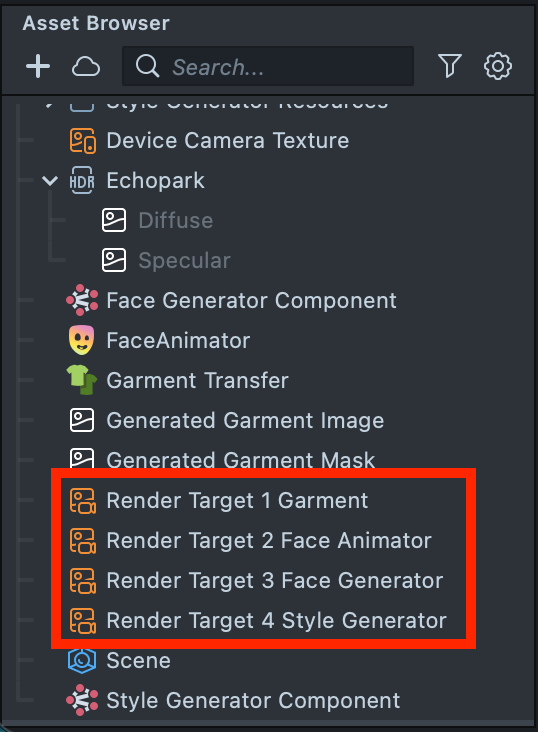
2.8. Create three additional Render Targets and rename all existing Render Targets according to their corresponding cameras:
- Render Target 1 Garment
- Render Target 2 Face Animator
- Render Target 3 Face Generator
- Render Target 4 Style Generator
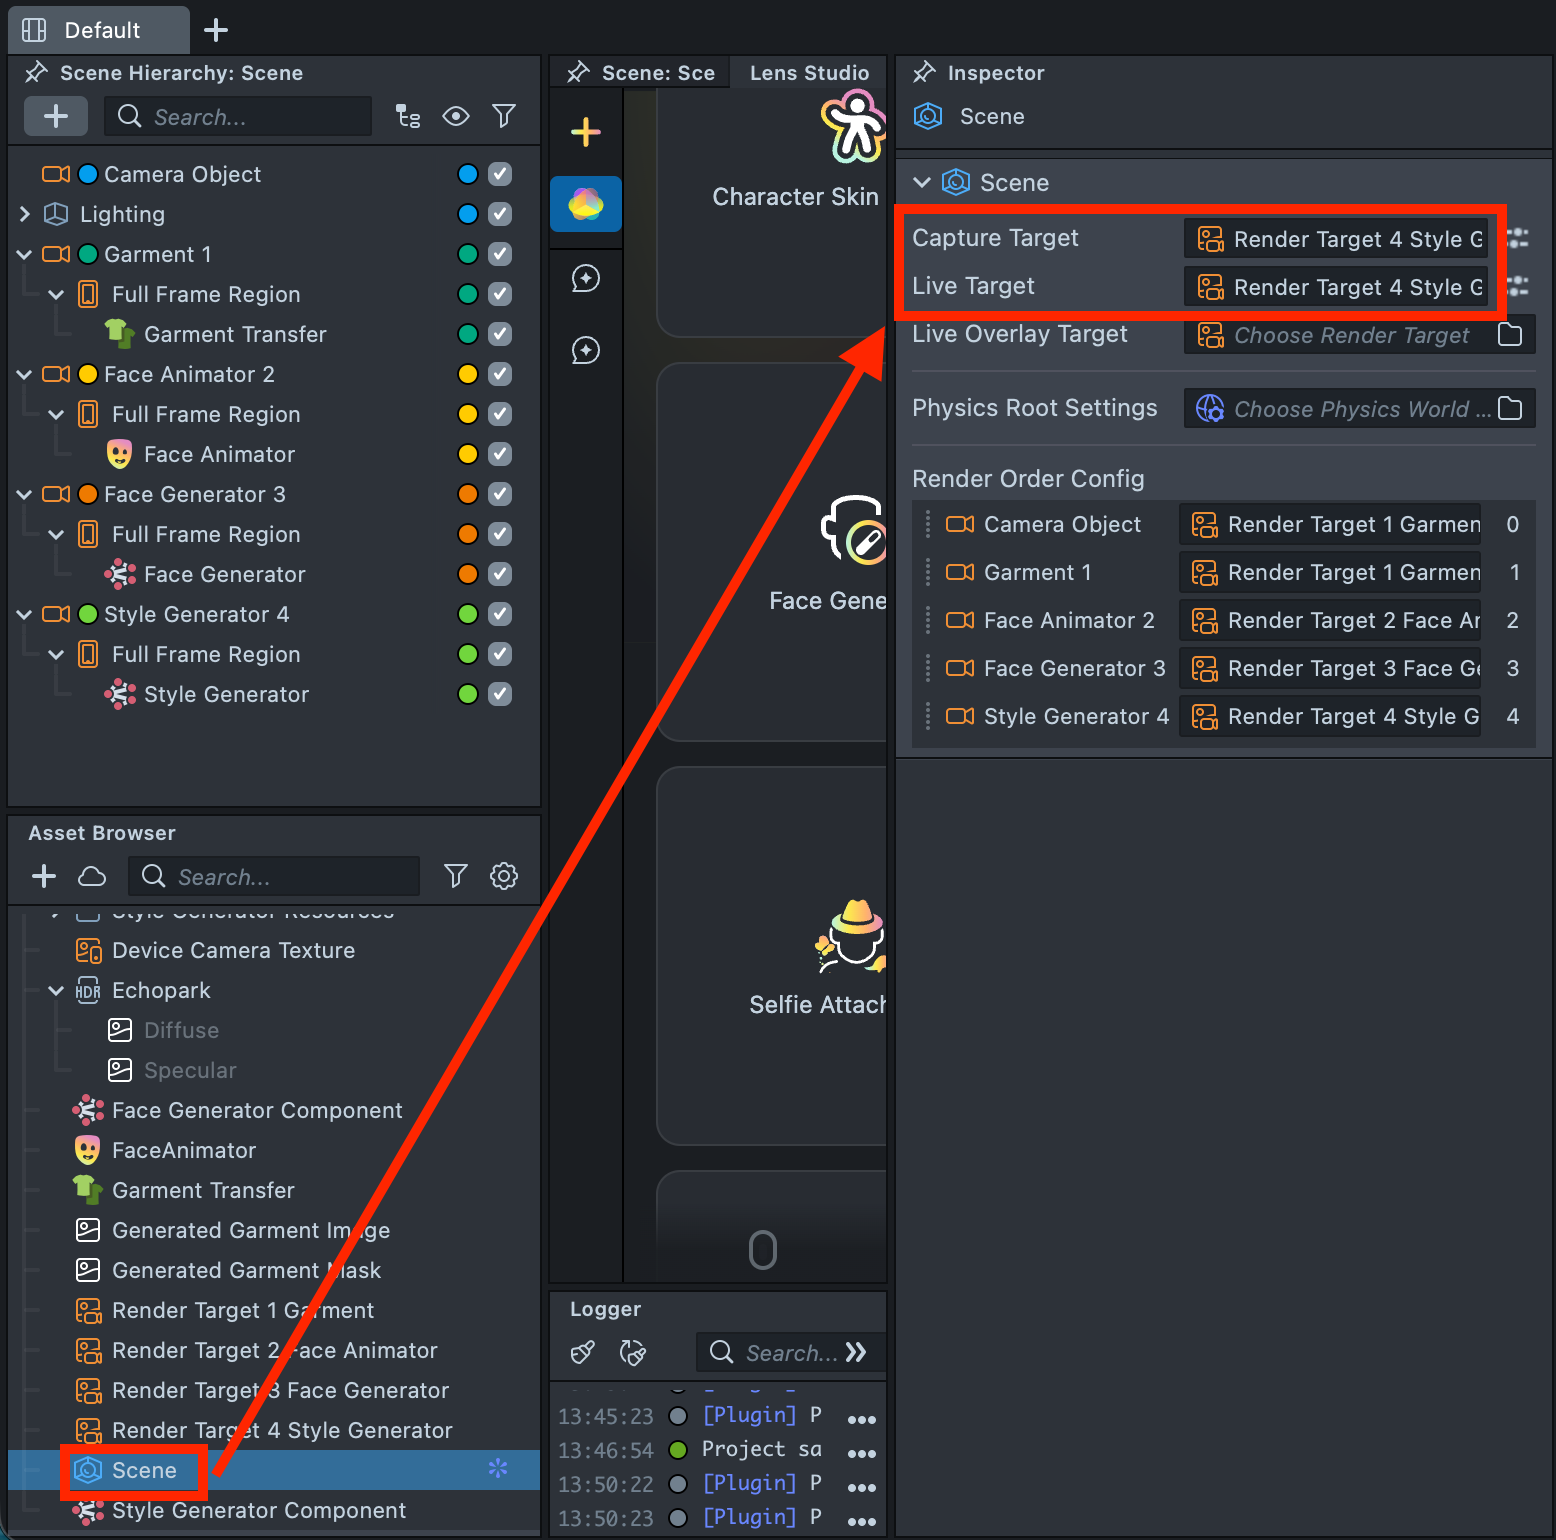
2.9. In the Scene Hierarchy, select each camera and assign its corresponding Render Target.
2.10. Select Scene in the Asset Browser, then verify the Render Target configuration in the Inspector to ensure each camera is assigned correctly.
2.11. Since Render Target 4 Style Generator is the final output containing all composited effects, assign it as both the Capture Target and Live Target.
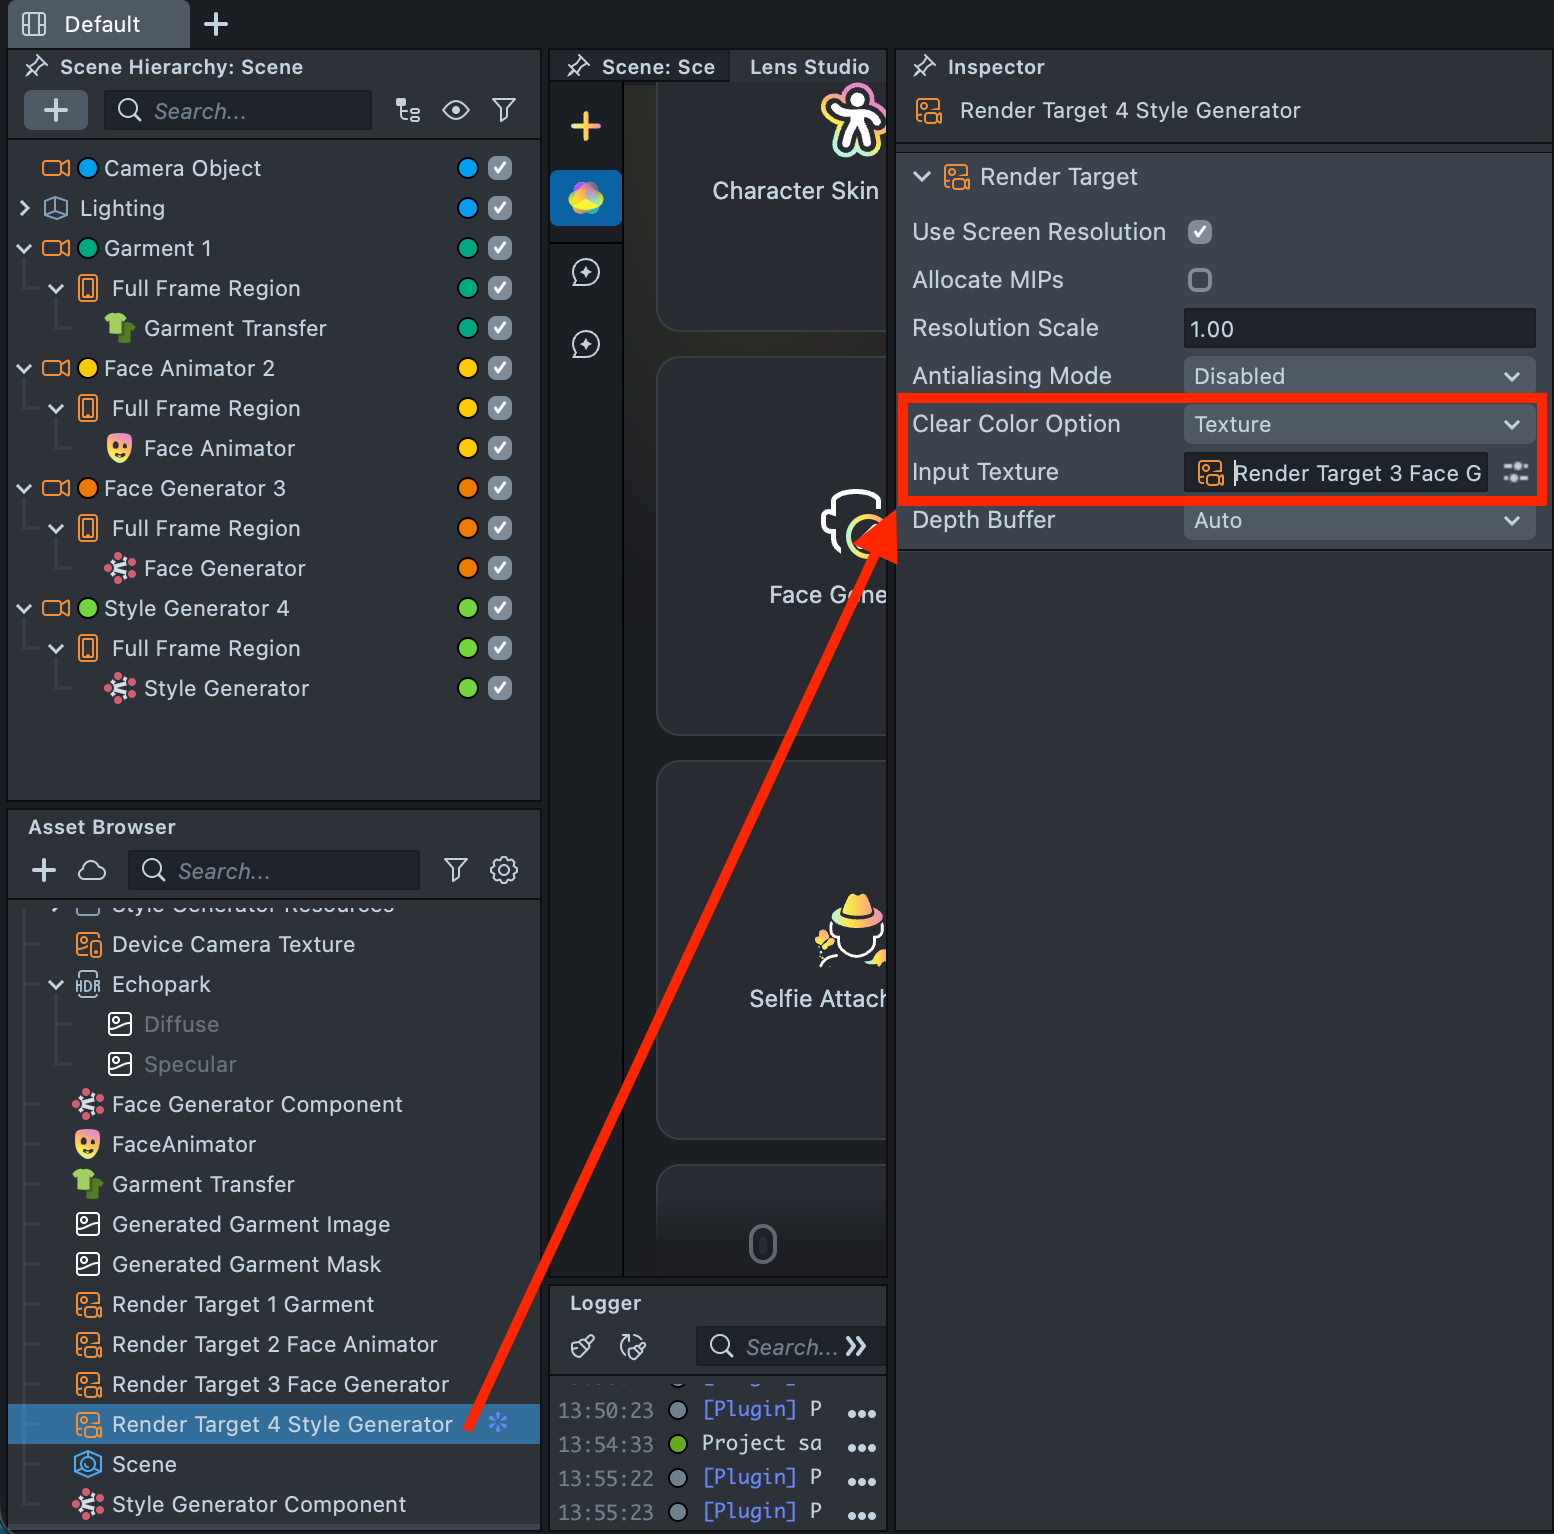
2.12. Next, configure Render Target 4 Style Generator so that it receives the output of the previous Render Target. Select Render Target 4 Style Generator in the Asset Browser. In the Inspector, under Clear Color Option, choose Texture, then set the Input Texture to Render Target 3 Face Generator.
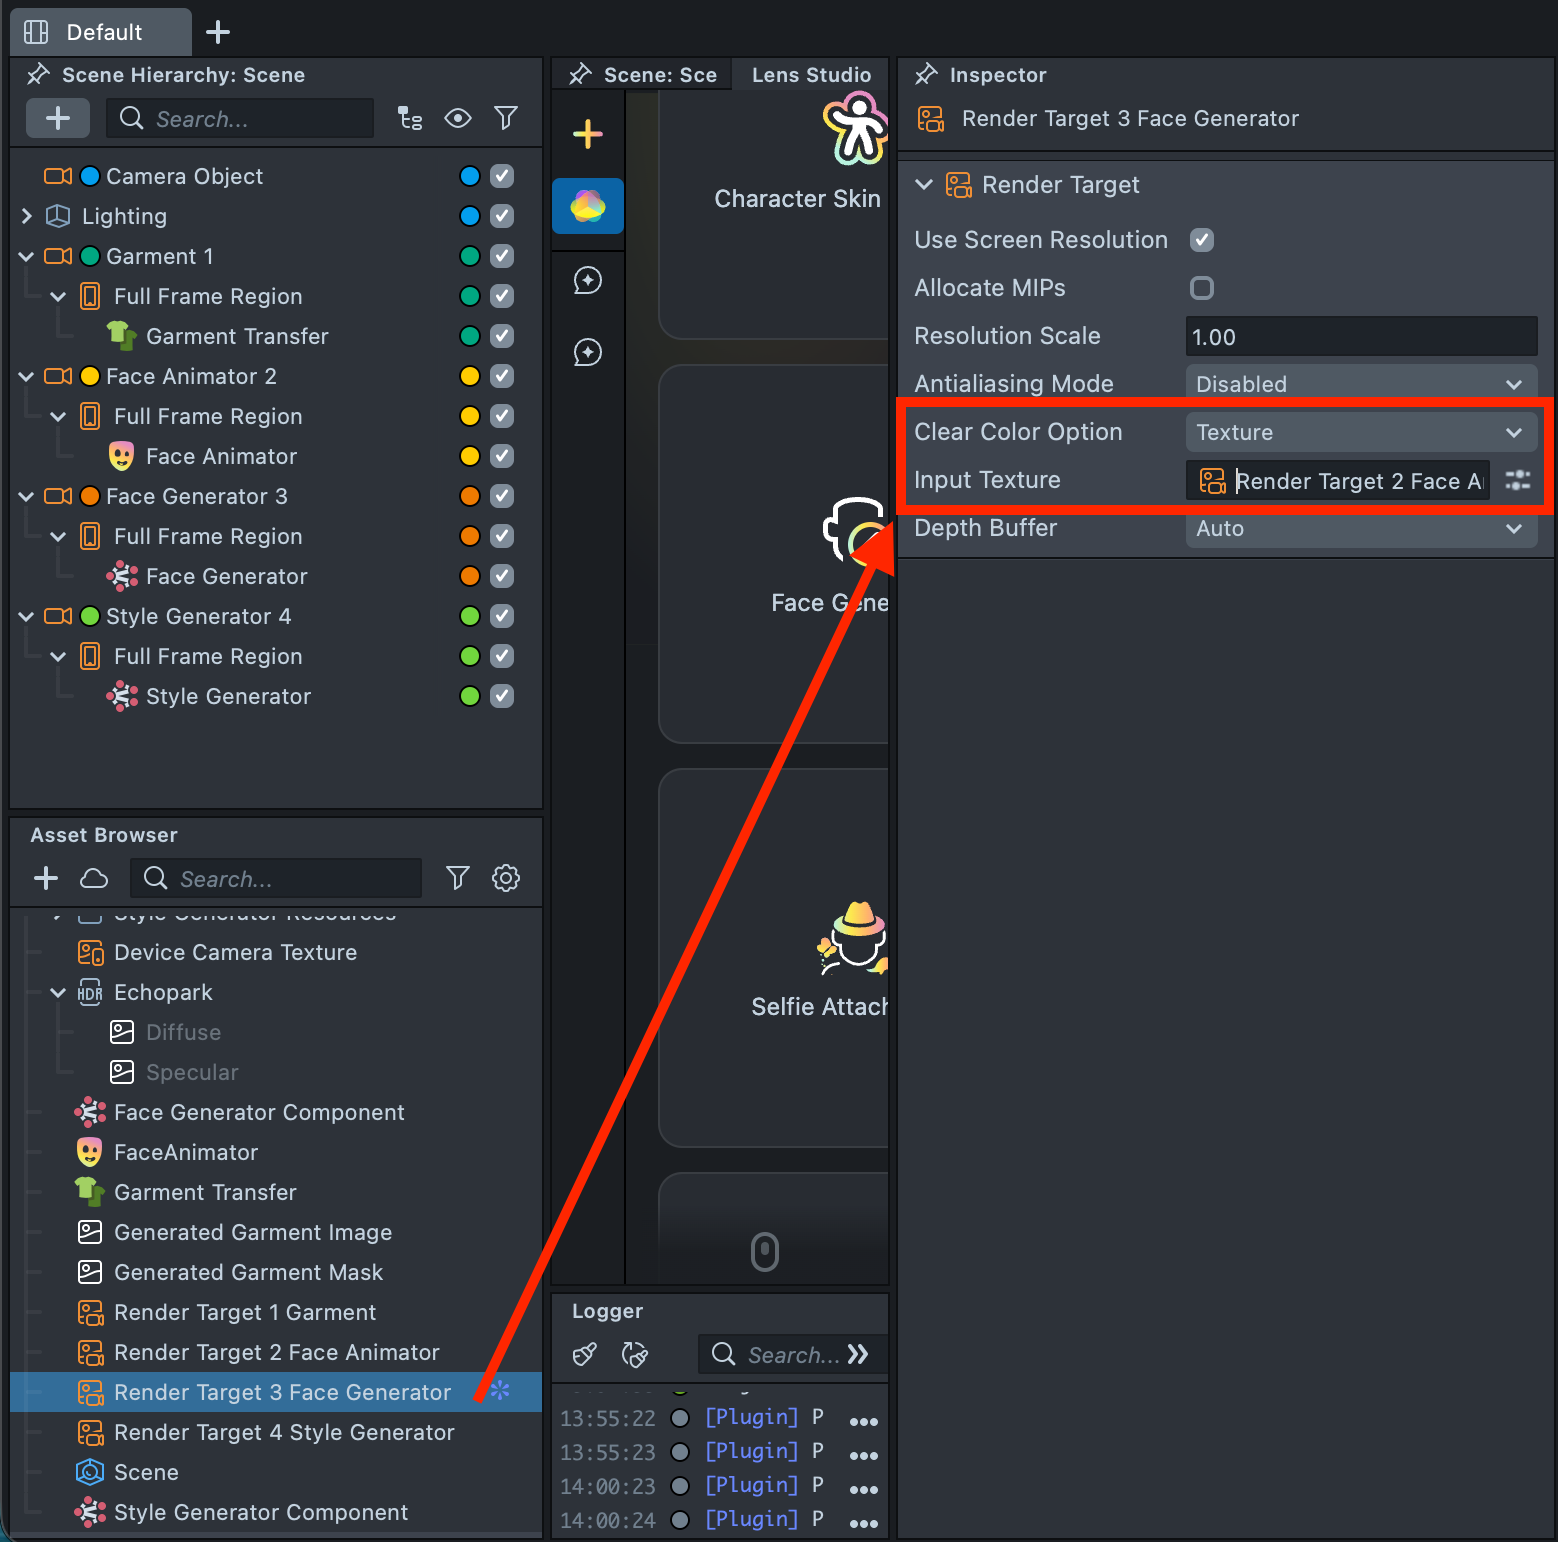
2.13. Repeat this process for Render Target 3 Face Generator. Under Clear Color Option, choose Texture, then set the Input Texture to Render Target 2 Face Animator.
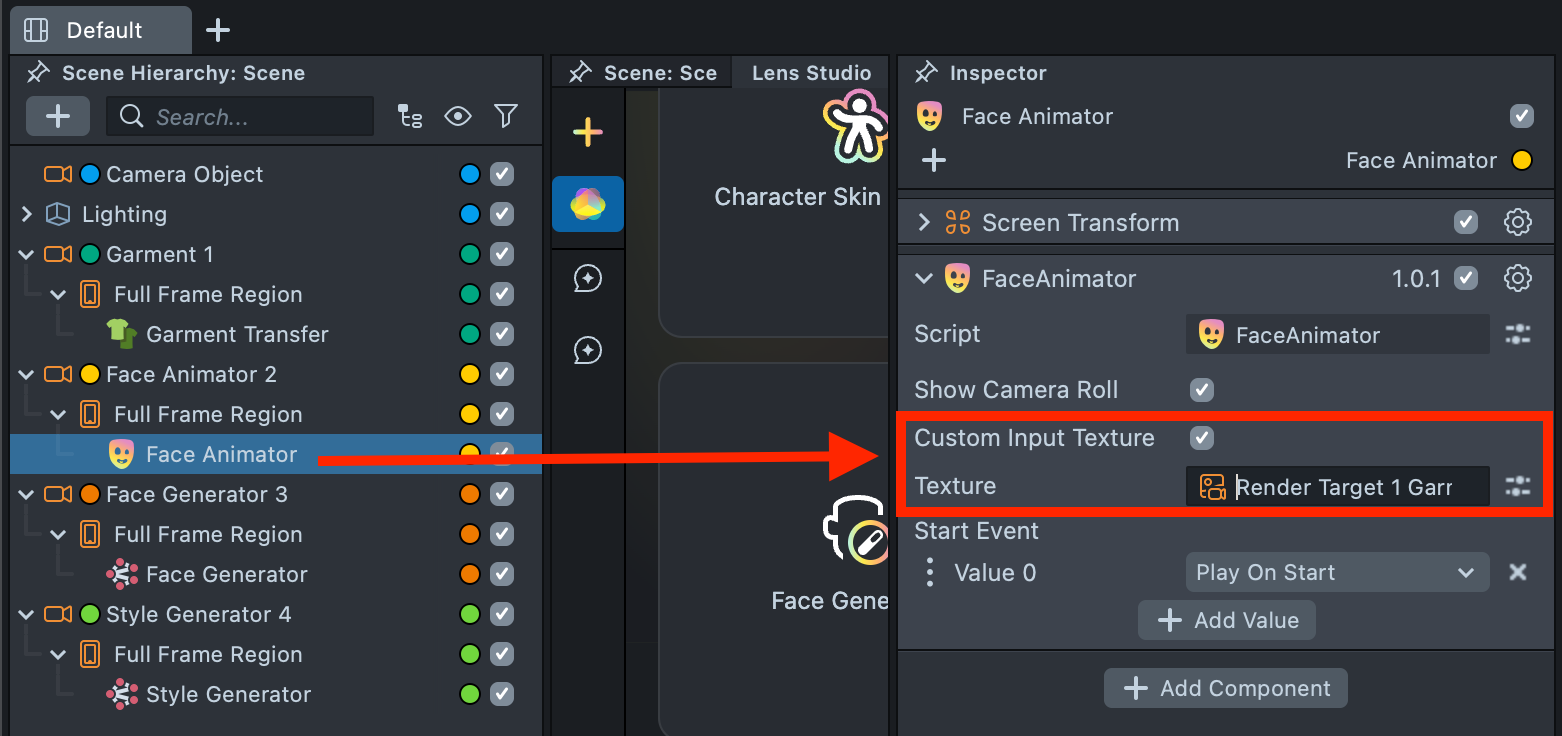
2.14. Similar action is not required for Render Target 2 Face Animator, as the Face Animator component requires a direct input texture assignment. In the Face Animator component, enable Custom Input Texture, then drag and drop Render Target 1 Garment into the Texture field.
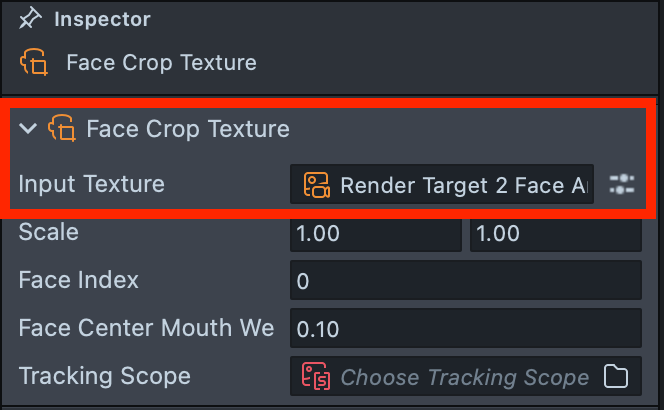
2.15. Open the Face Generator component and locate Face Crop Texture. Hover over it, right-click, and select Select.

2.16. In the Inspector for the opened Face Crop Texture, set Render Target 2 Face Animator as the Input Texture.
2.17. Open the Style Generator component and set Render Target 3 Face Generator as its Input Texture.

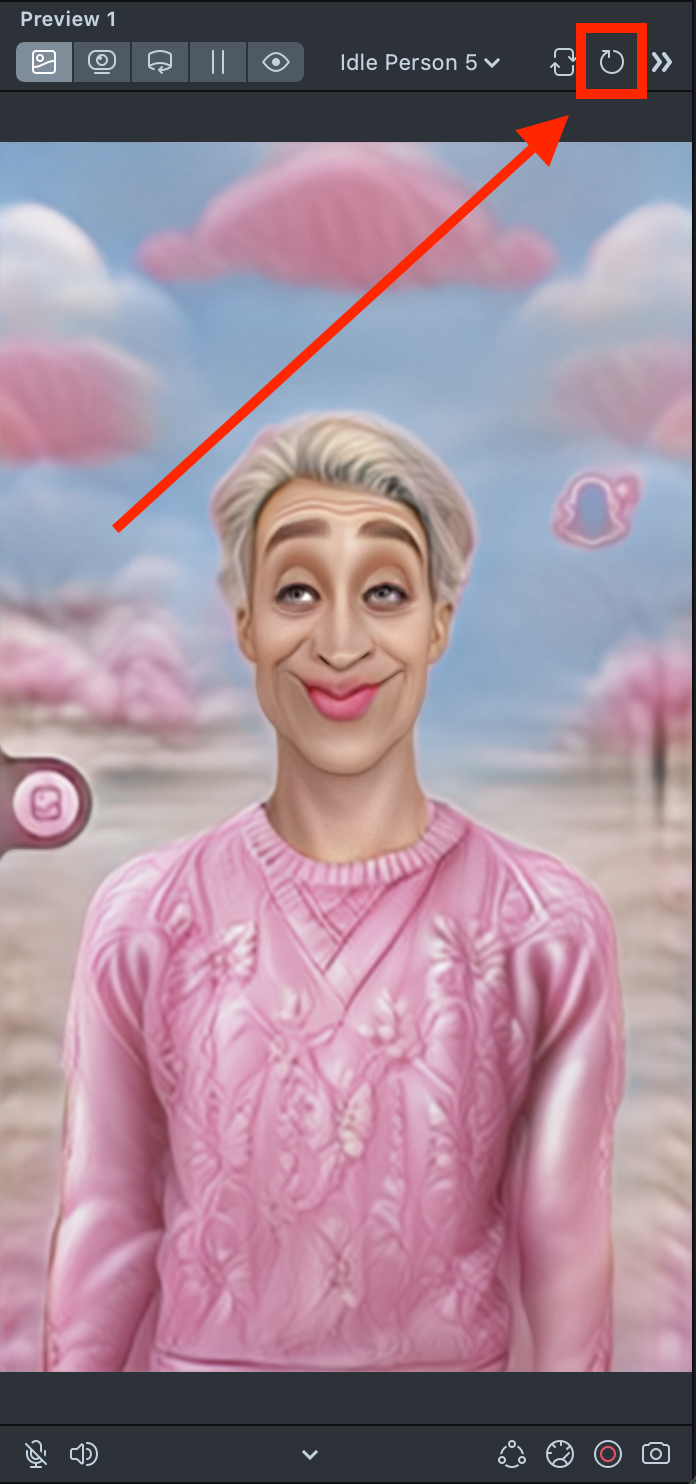
2.18. Click the Reset button to ensure the Preview reflects the correct result after applying all changes made in the previous steps.
2.19. You may notice that the Style Generator effect appears on top of the Camera Roll button. This behavior is built into the Face Animator component to simplify workflows for basic Lenses. However, this built-in logic does not handle complex camera and effect structures correctly. To resolve this, open the Face Animator component and disable Show Camera Roll.

2.20. You may also notice that the Style Generator effect overlays the Snapchat watermark. The watermark is a legal requirement and cannot be removed. We are currently working on improving its rendering logic so that it always appears above all effects.
Summary
Your Lens is now complete and ready to be tested on a device.
In this tutorial, you learned that successfully combining multiple components requires a clear understanding of how cameras work, how Render Layers are configured, and most importantly - how Render Targets enable one camera to access and "see" the output of another.
To learn more about Render Targets, Render Layers, and camera configuration, see the Camera documentation.