Body Generator
Body Generator is a powerful tool for generating and customizing 3D bodies for creating Lenses using AI.
This guide will walk you through all the features and provide tips and hacks for getting the most out of your 3D body creations.
Getting Started
Launching Body Generator
-
Navigate to the
GenAI Home Pageusing theLens Studio AIoption in the top right corner of the Lens Studio.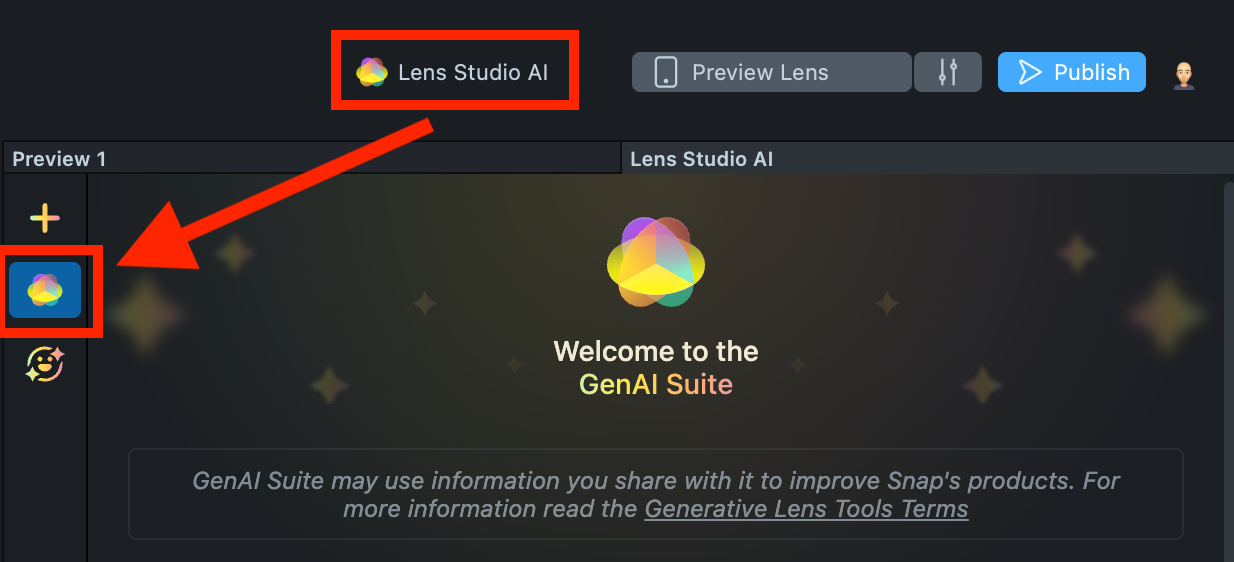
-
On the
GenAI Home Page, you may need to scroll down to find the menu of GenAI tools. In the panel, select Body Generator.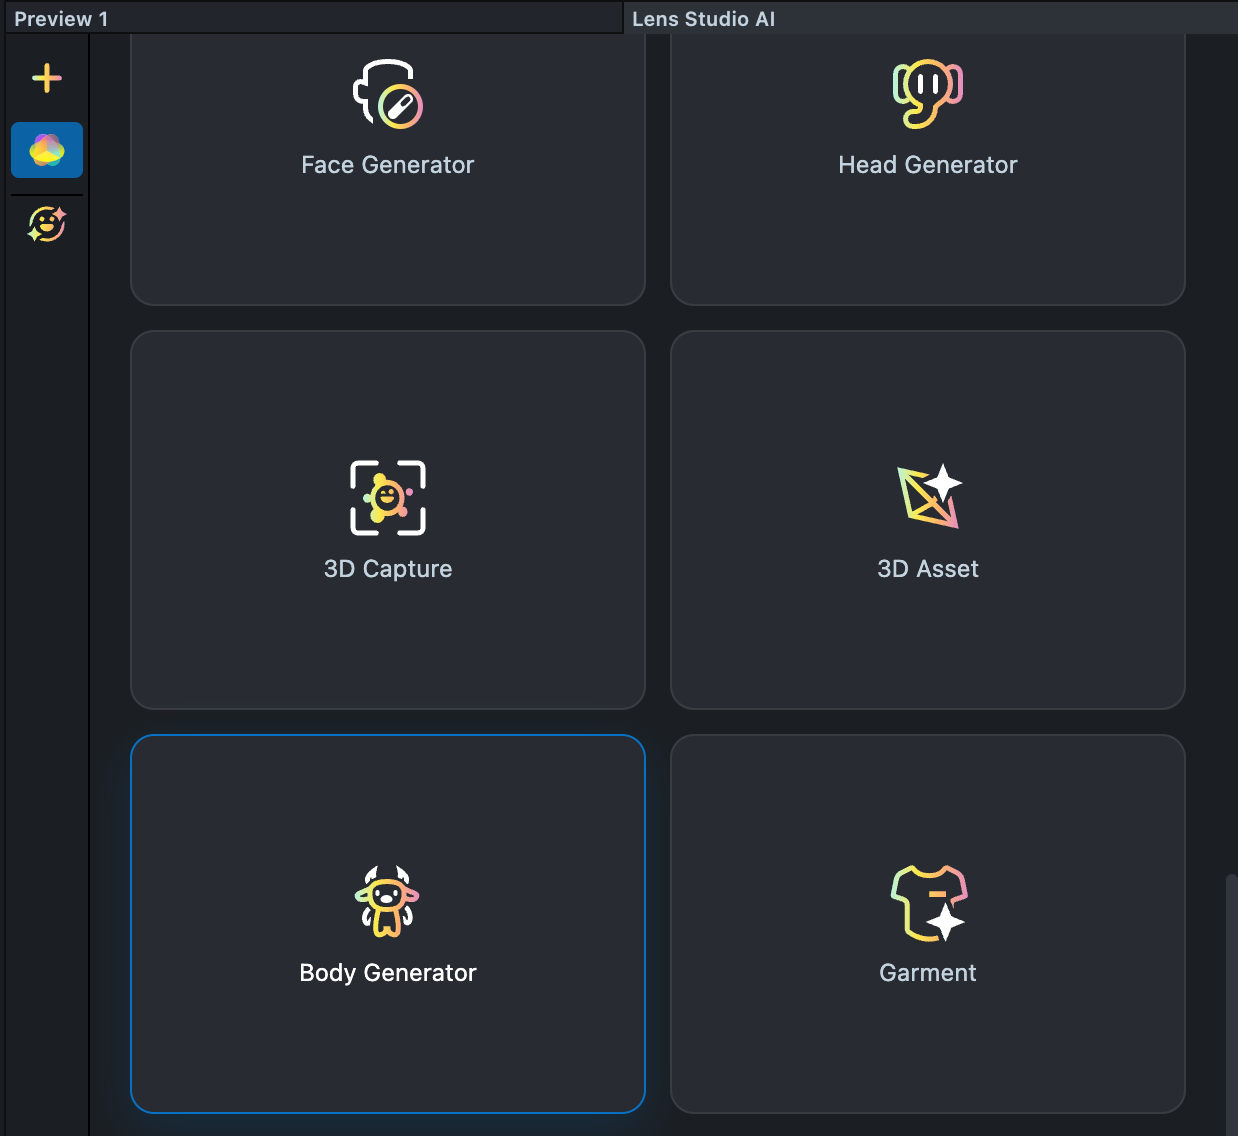
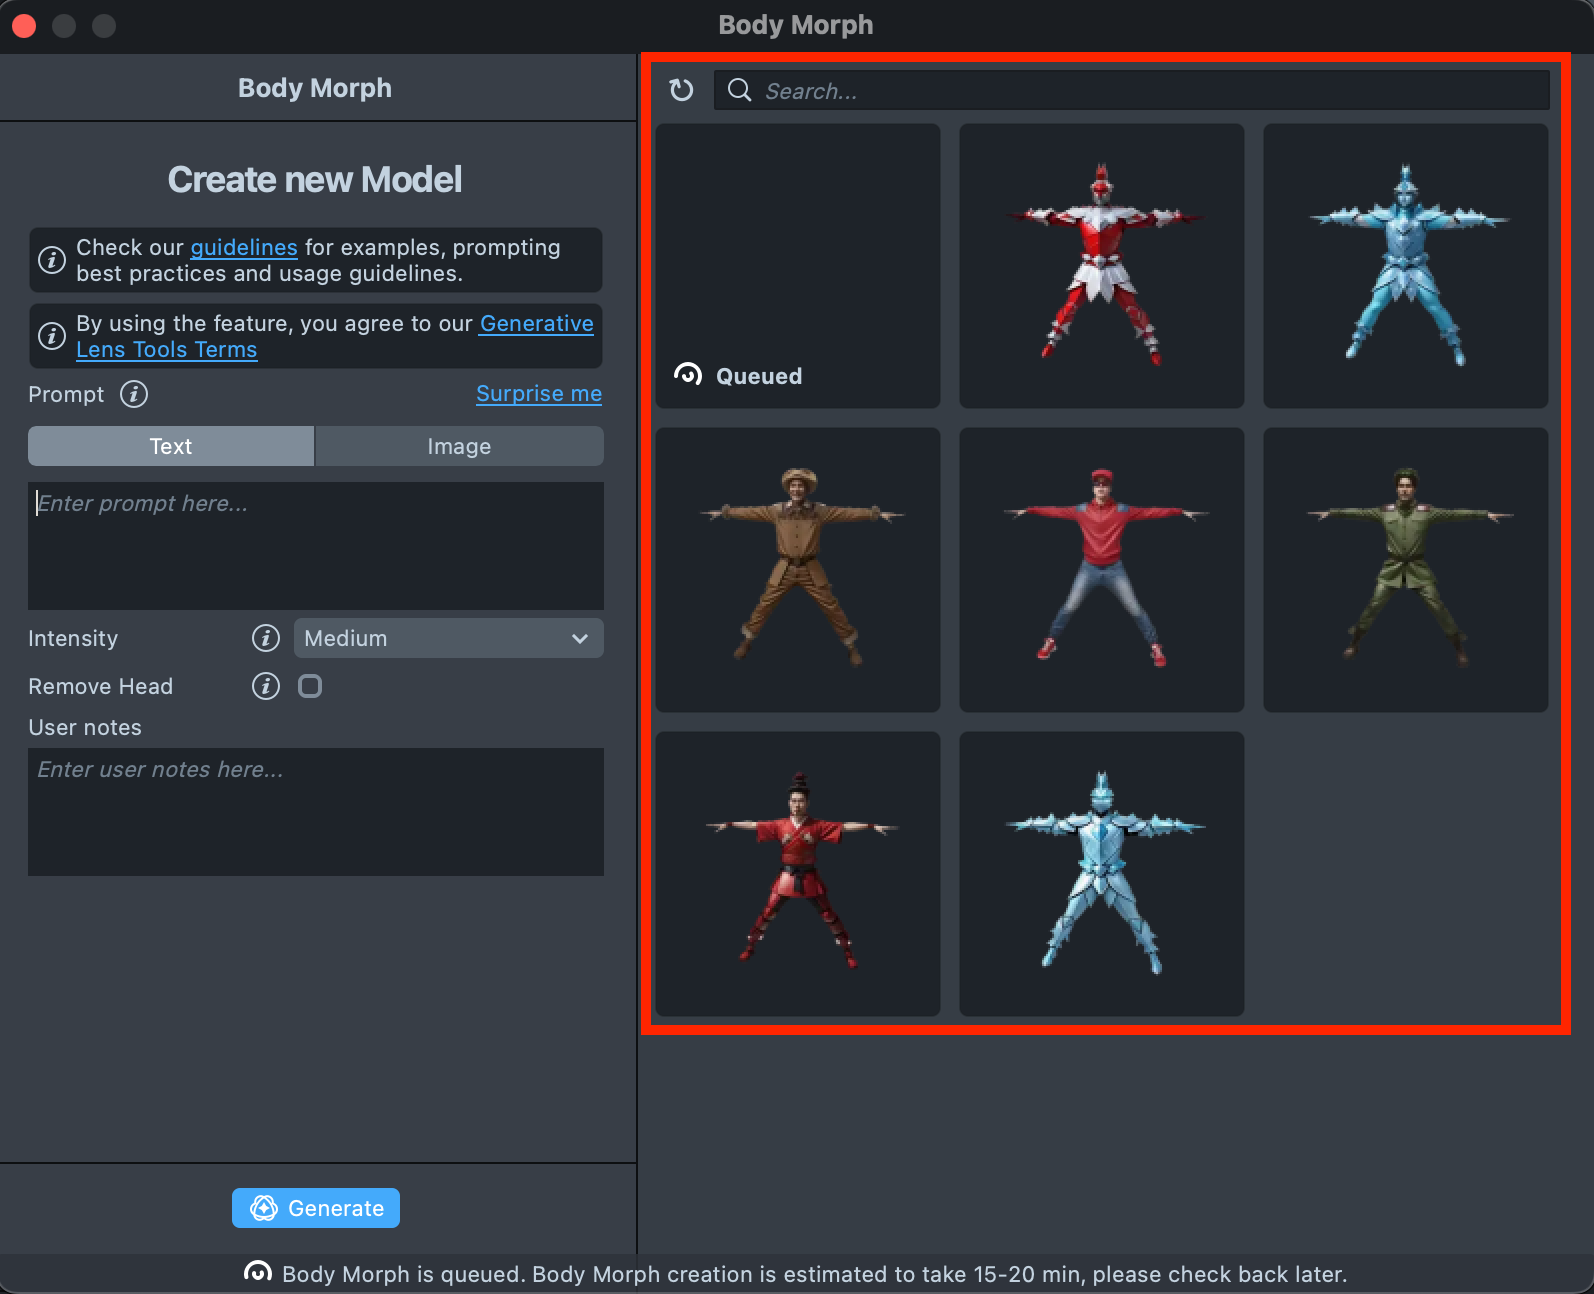
User Interface Overview
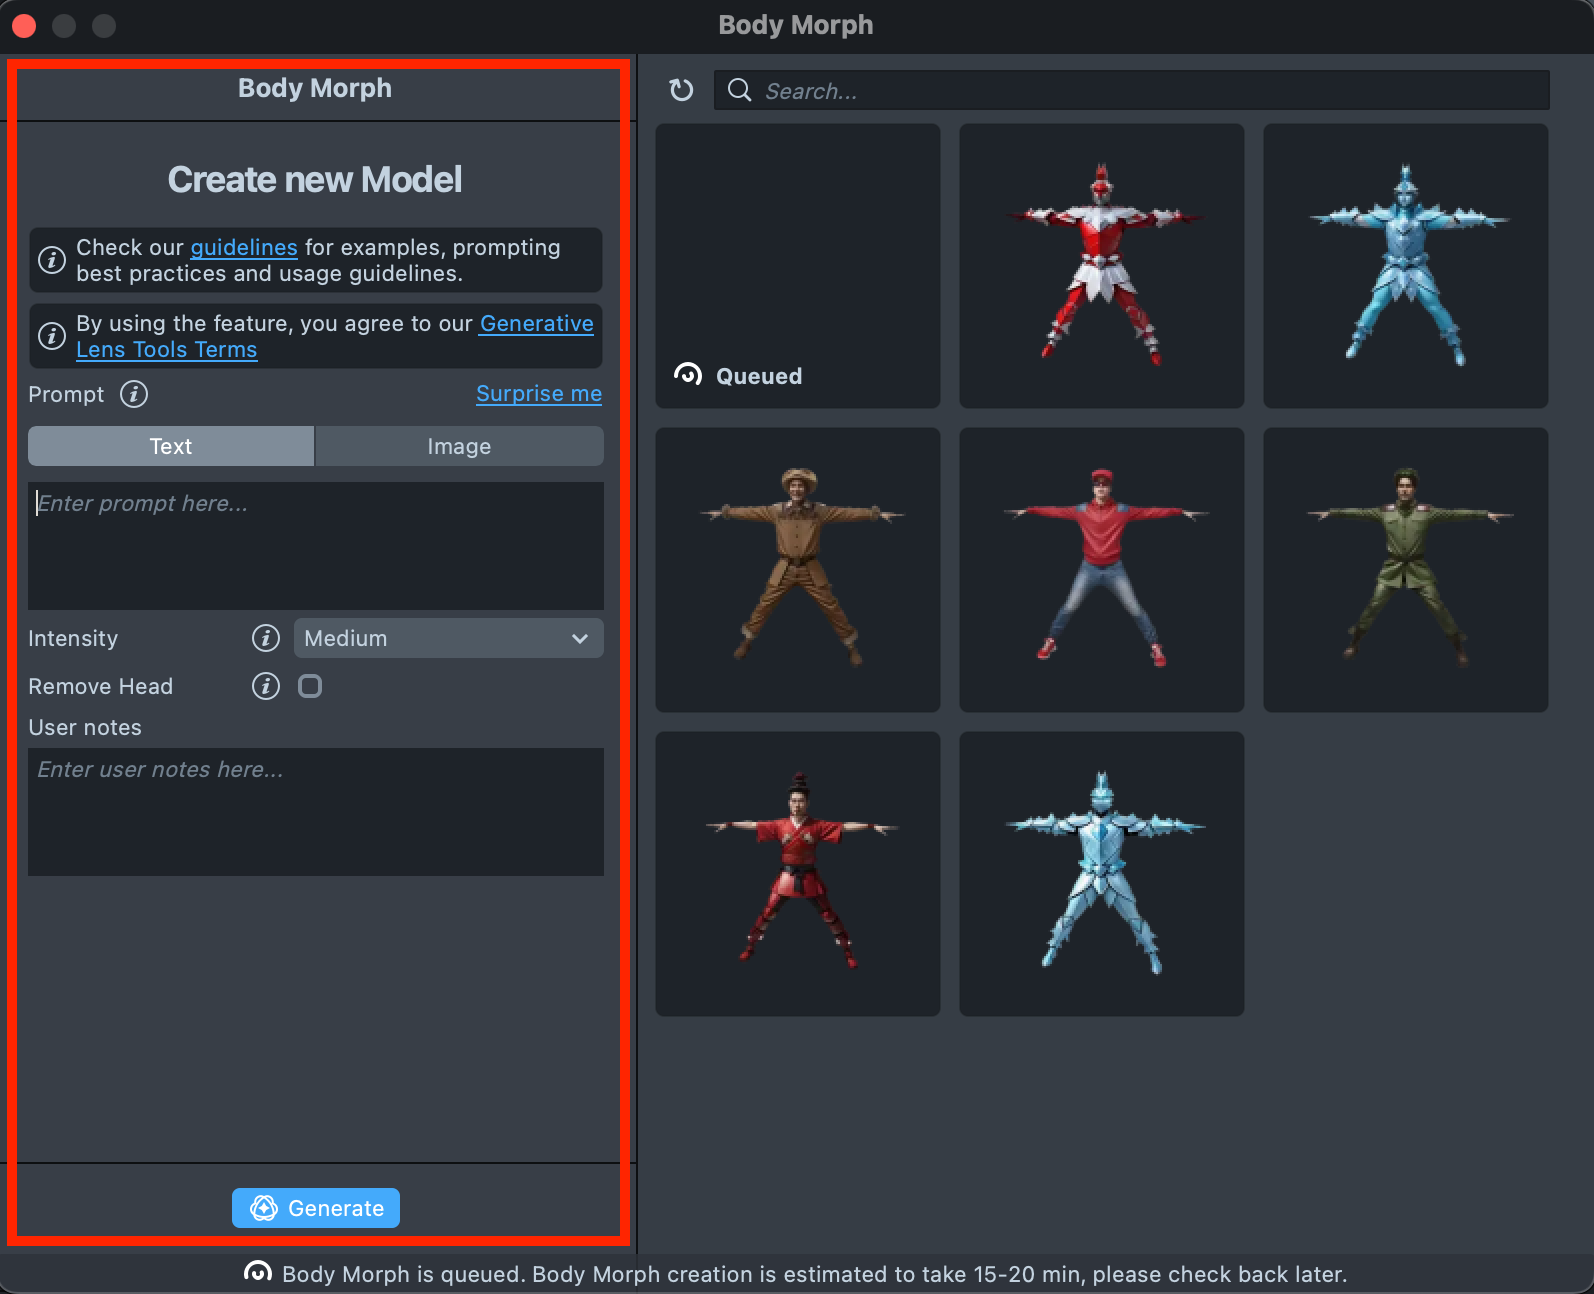
-
Create new Model Toolbar: Contains tools for creating and editing models.
-
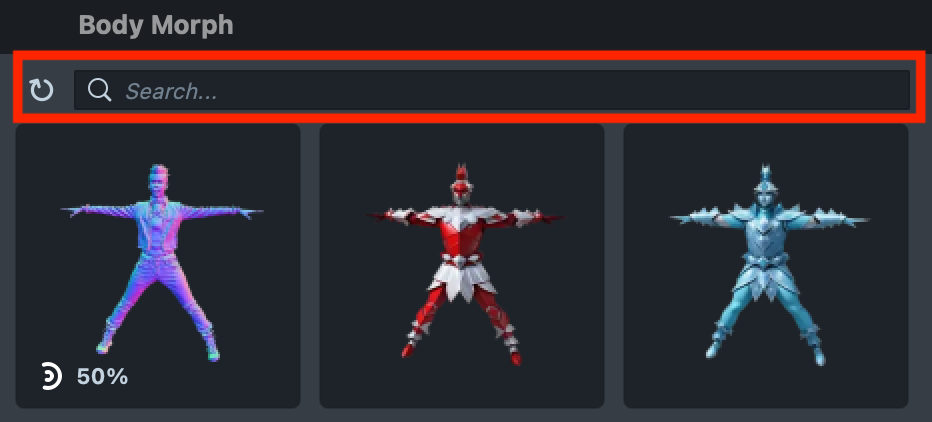
Gallery: Displays all Body Generator you created and their statuses.
-
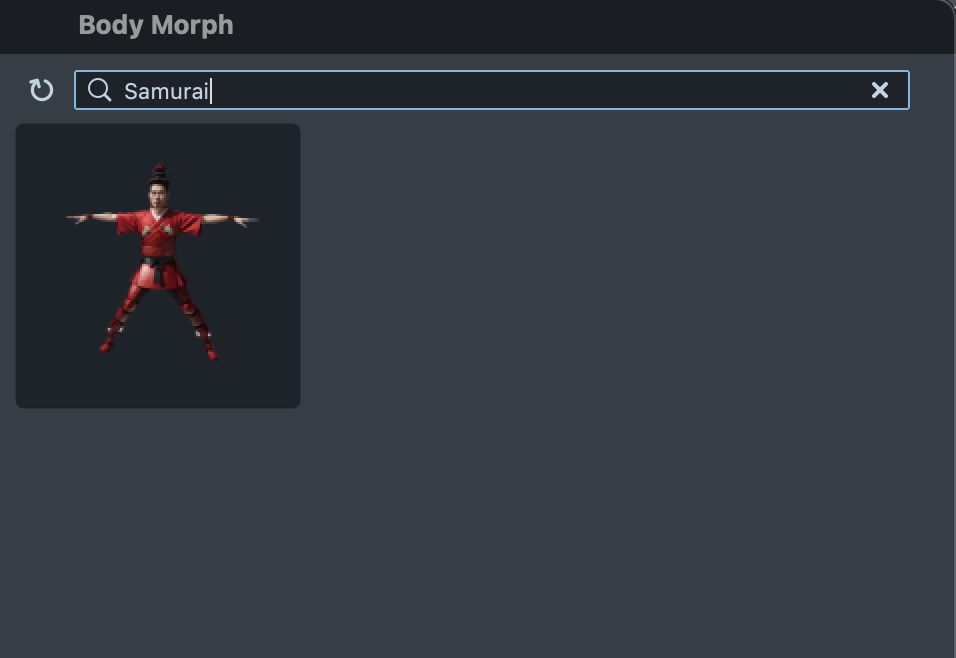
Search: Search through the created assets.
 ,
,
Generating a Body
Prompt
-
Text prompt: You can create and enter your own prompt or use the
Surprise mefeature, which will generate a random prompt.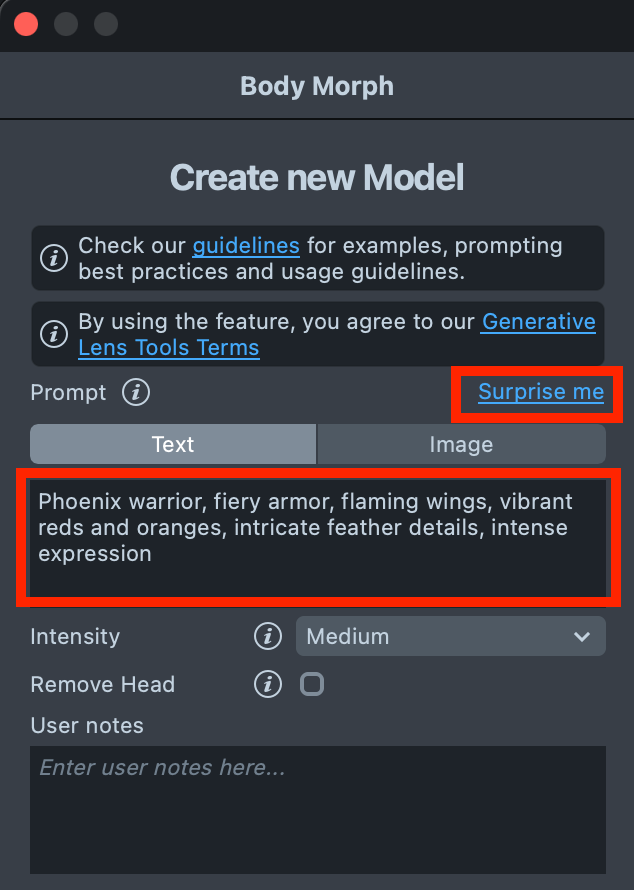
-
Image prompt: You can provide a reference image of the Body you want to generate and add additional details in the text field.
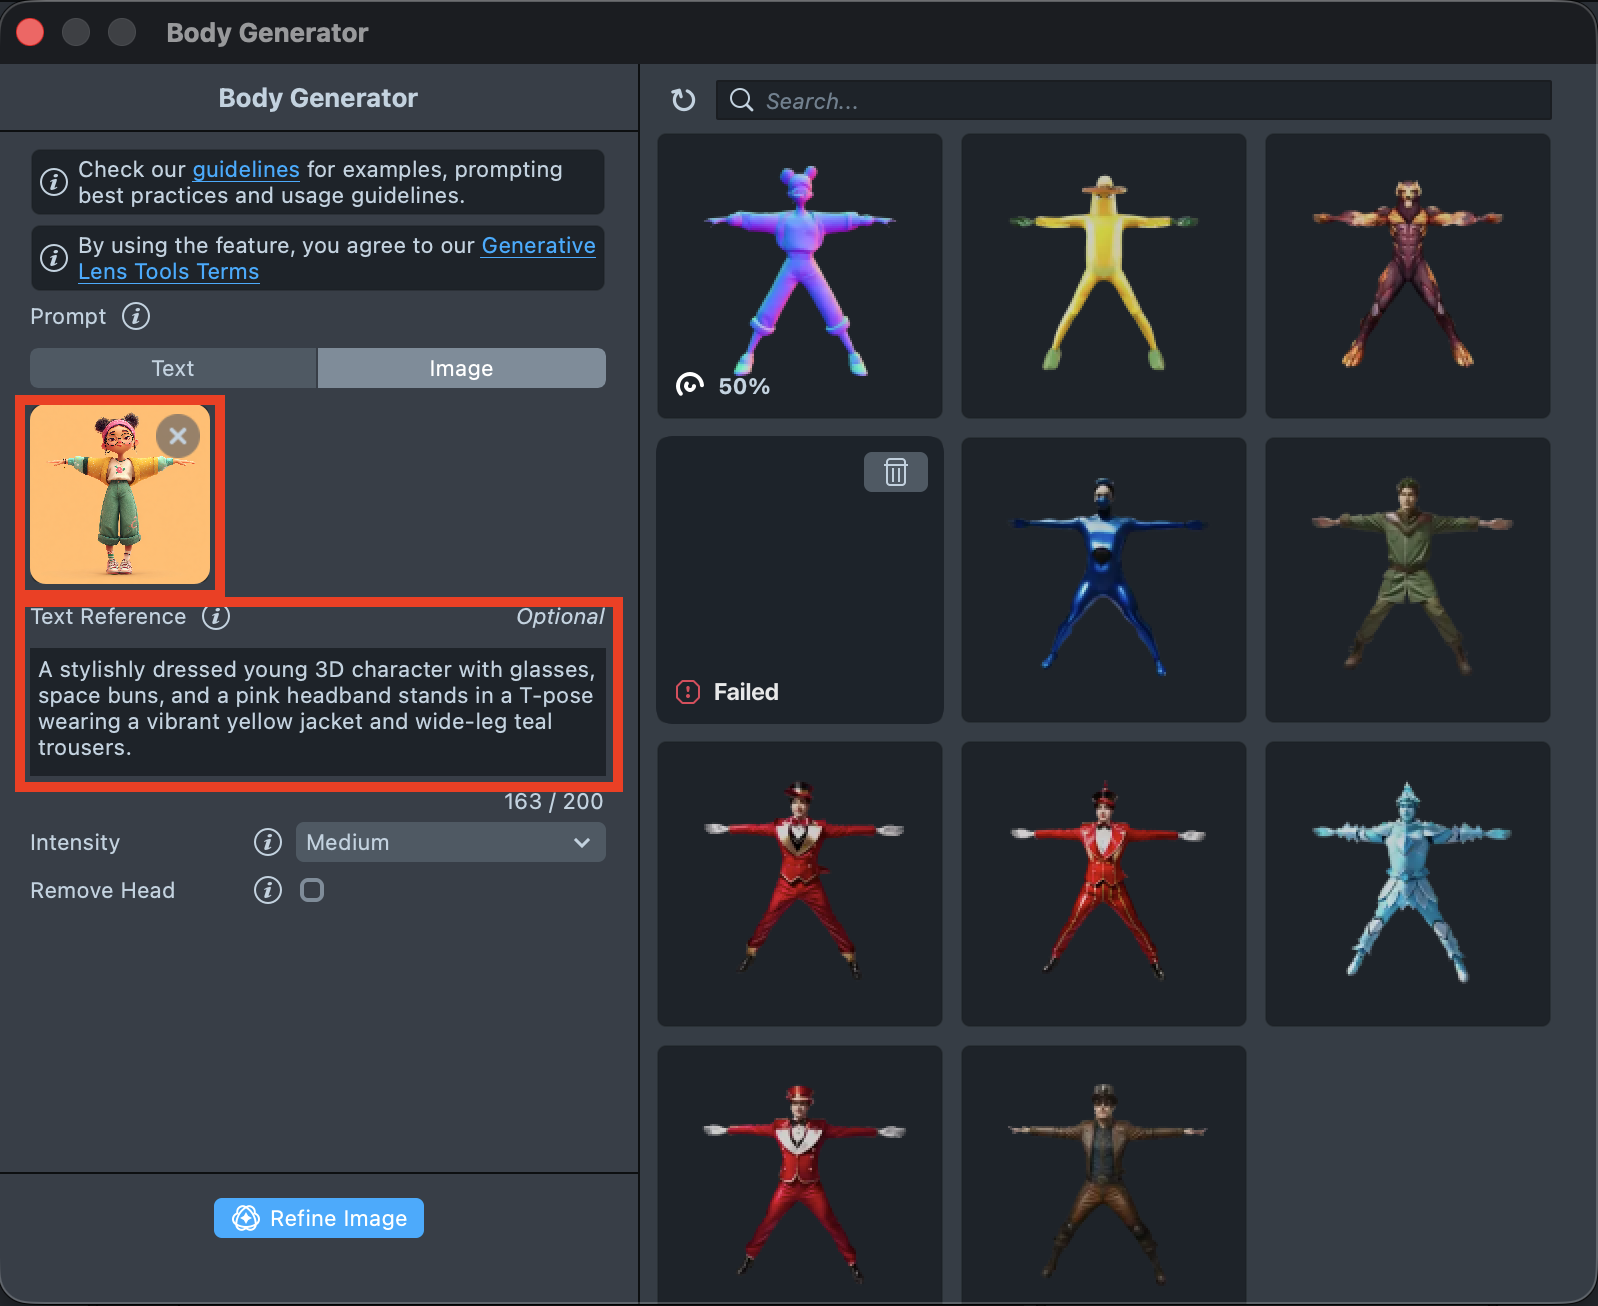
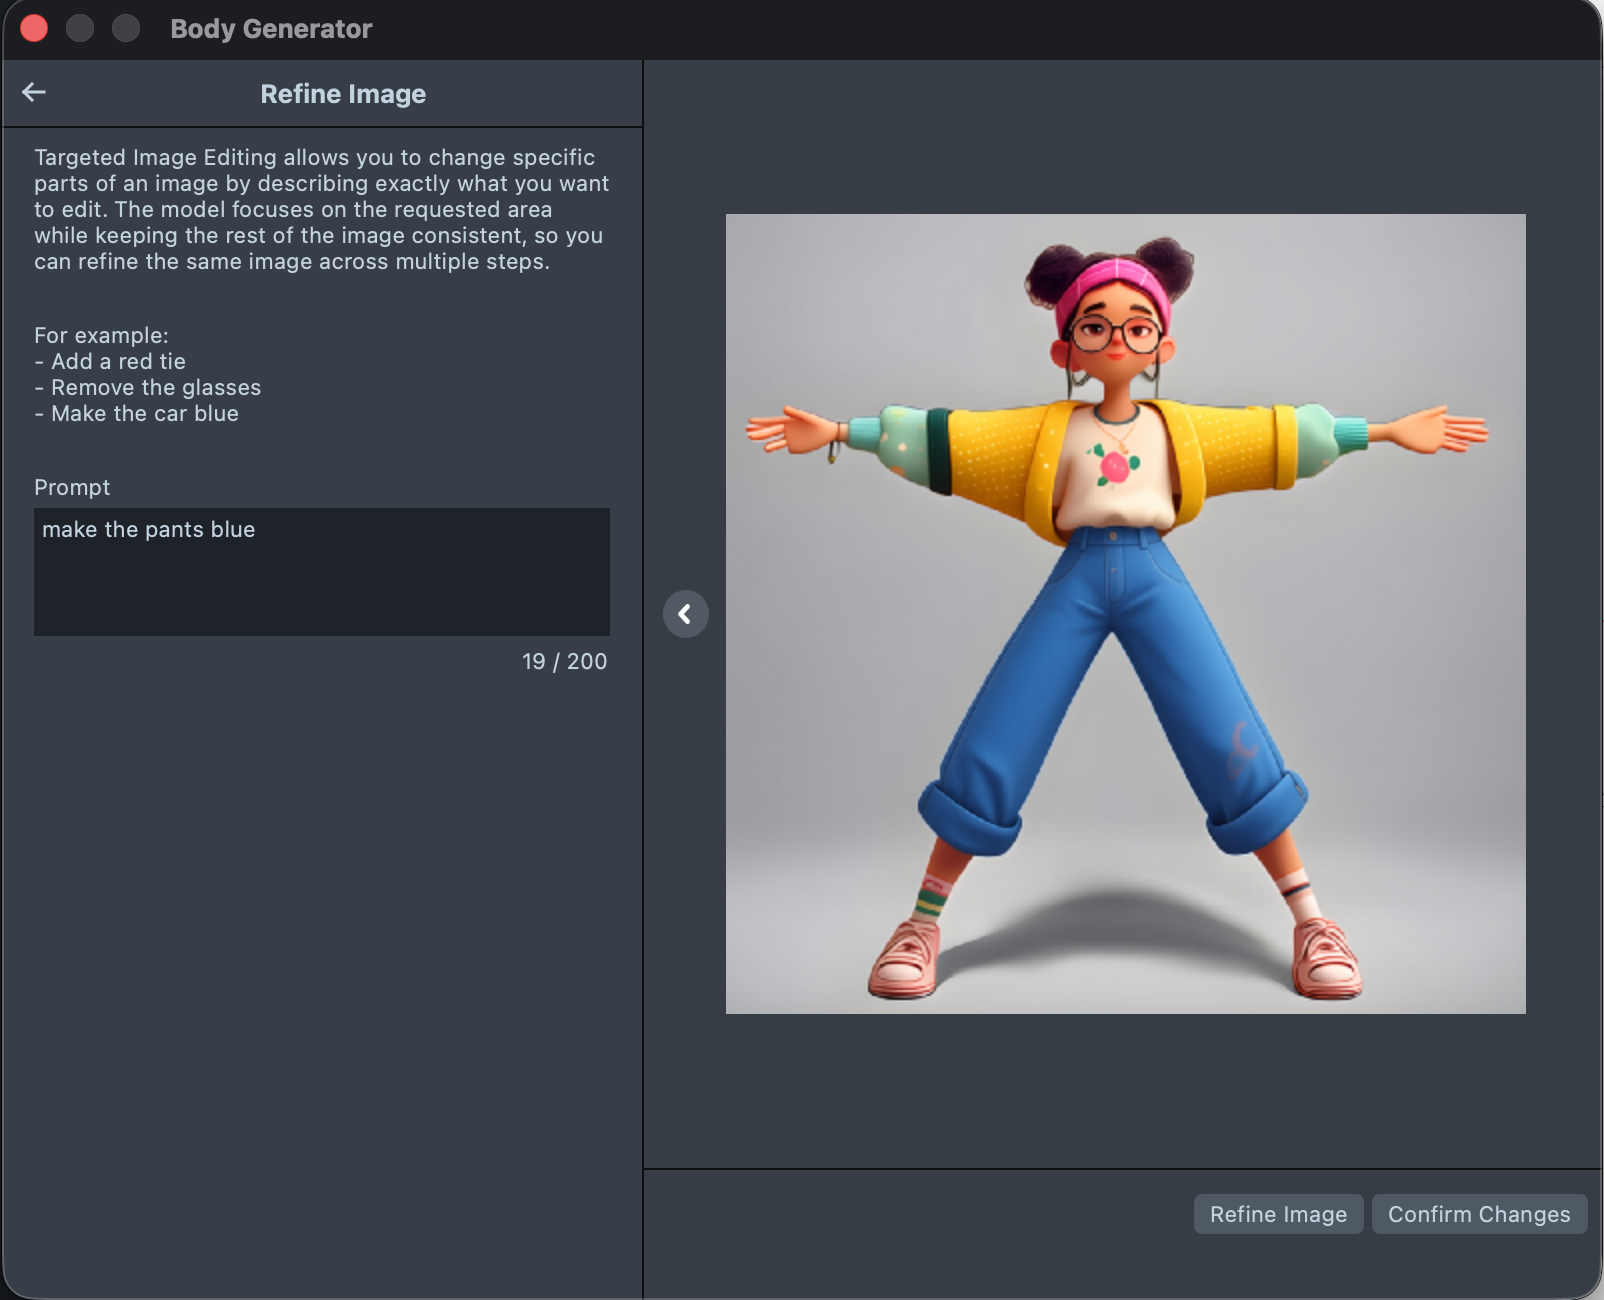
Image Input Editing
- You can refine the input image provided using natural language. Describe what specific aspect of the image you want to change with a plain short description, and click "Refine Image." Once ready with the changes, you can click "Confirm Changes" to proceed with the generation.
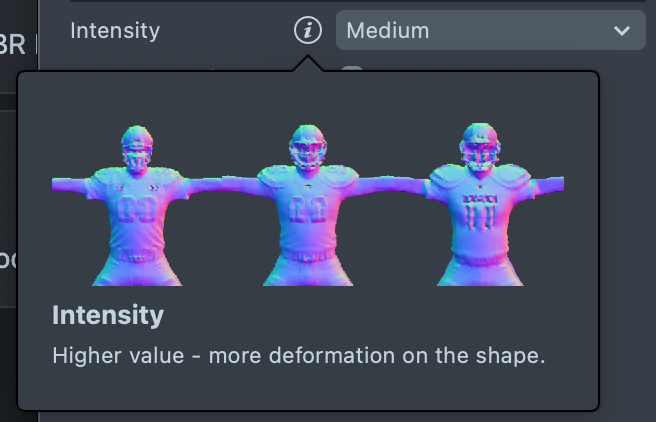
Intensity settings
-
Intensity settings regulate the level of deformation of your Body.
Settings tips
- Remove Head
- The advanced “Remove Head” option allows you to create costumes without the head on top. In order to take full advantage of the option, focus on describing only the costume from the neck downwards. Any information you provide towards the head can be distracting and would not be used in the end anyway.
Generation
-
Press
Generatewhen you are ready.
-
Check the
Statusbar for info.
Body Generator Preview and Editing
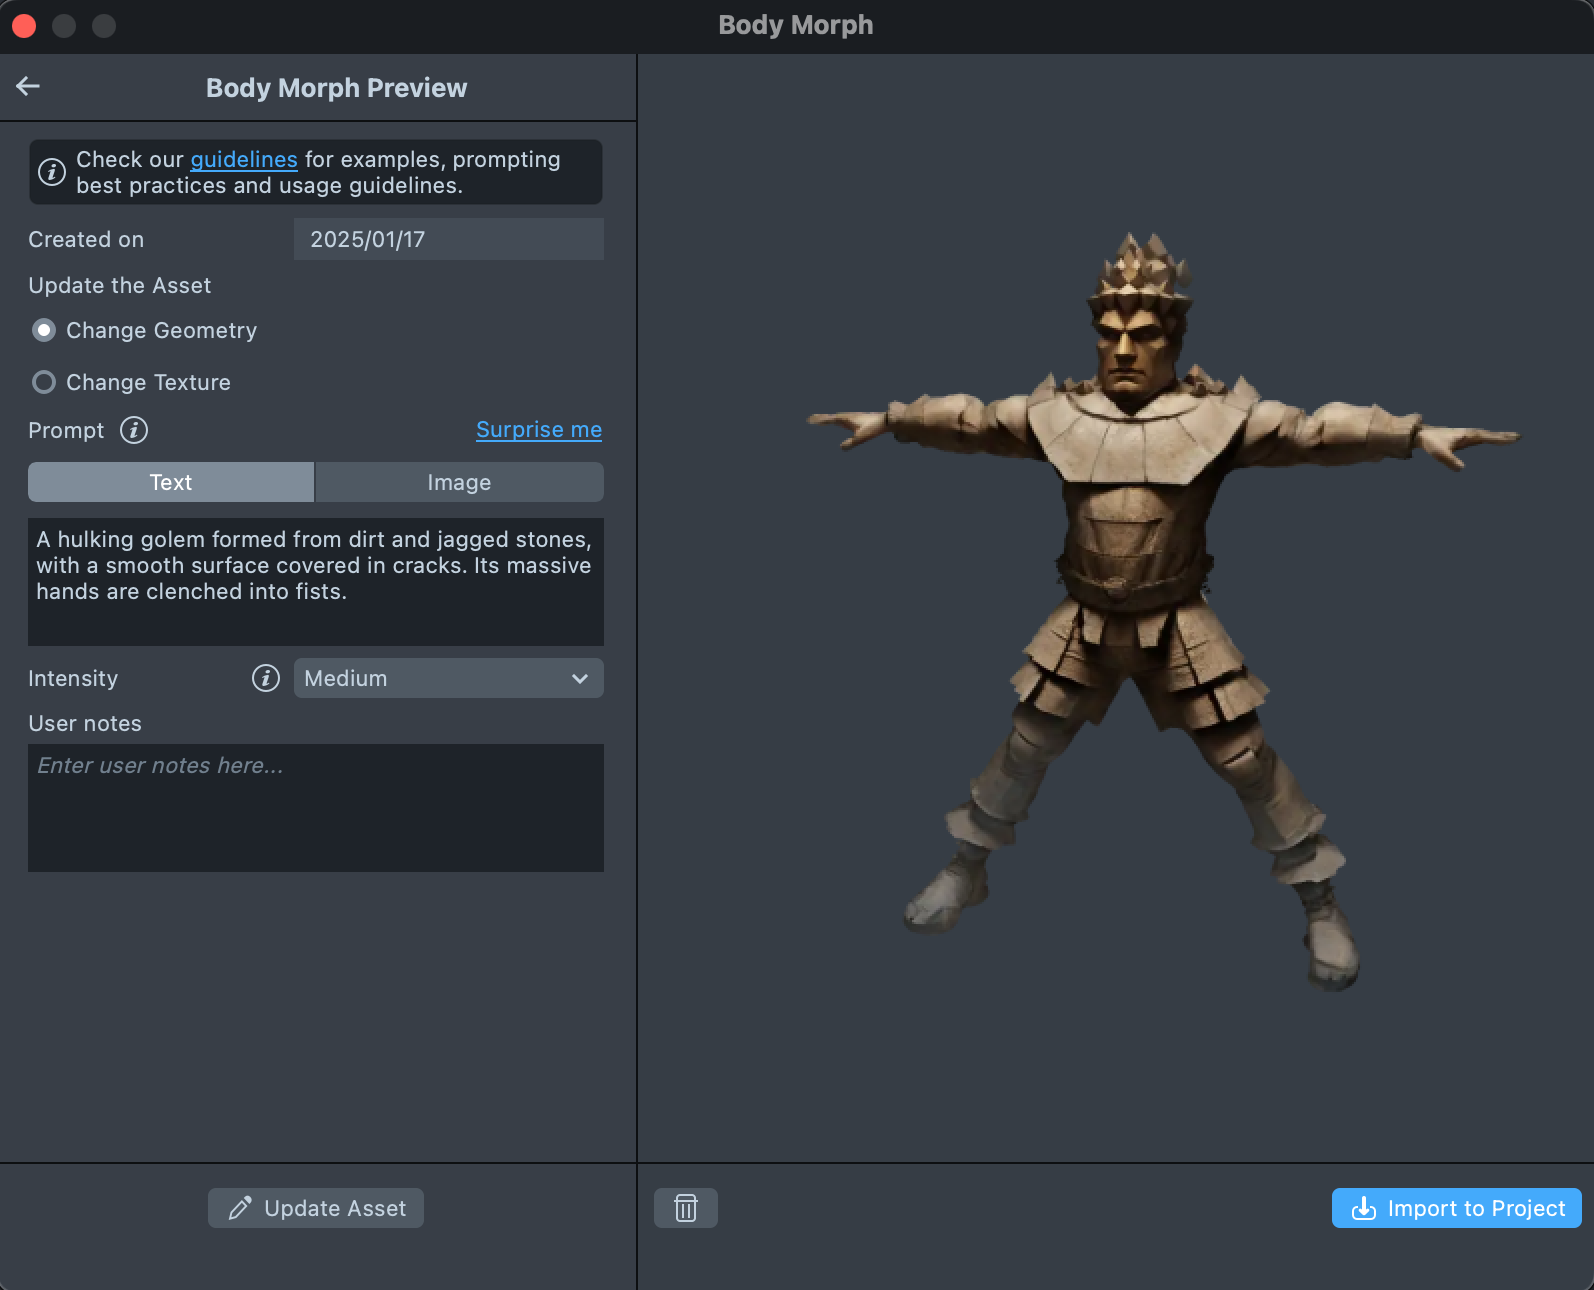
Change Geometry and Texture
-
You can adjust the Asset by changing
GeometryorTexture. Add more details to the prompt field and adjust intensity. -
Press
Update Assetand wait for the result. The new effect will be created and displayed in theGalleryview.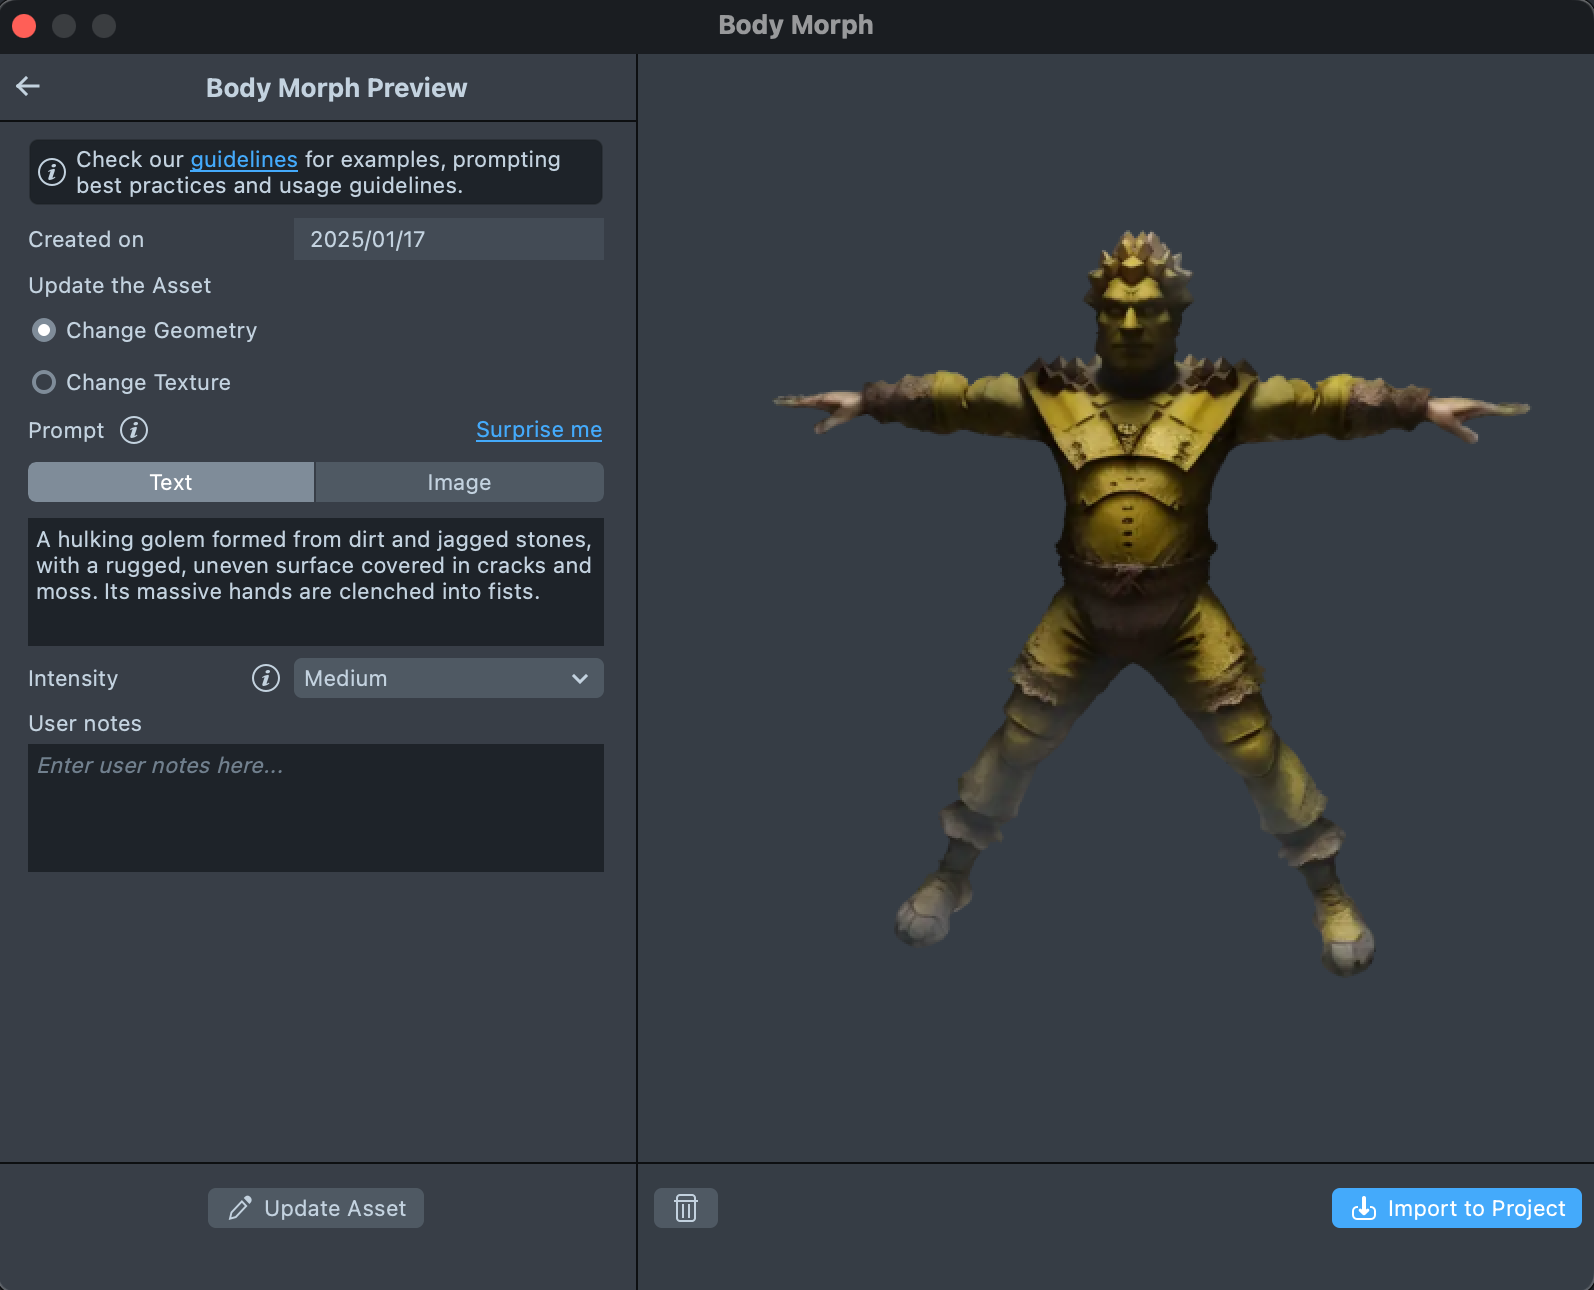
Delete Generated Body
- You can also delete the Asset.

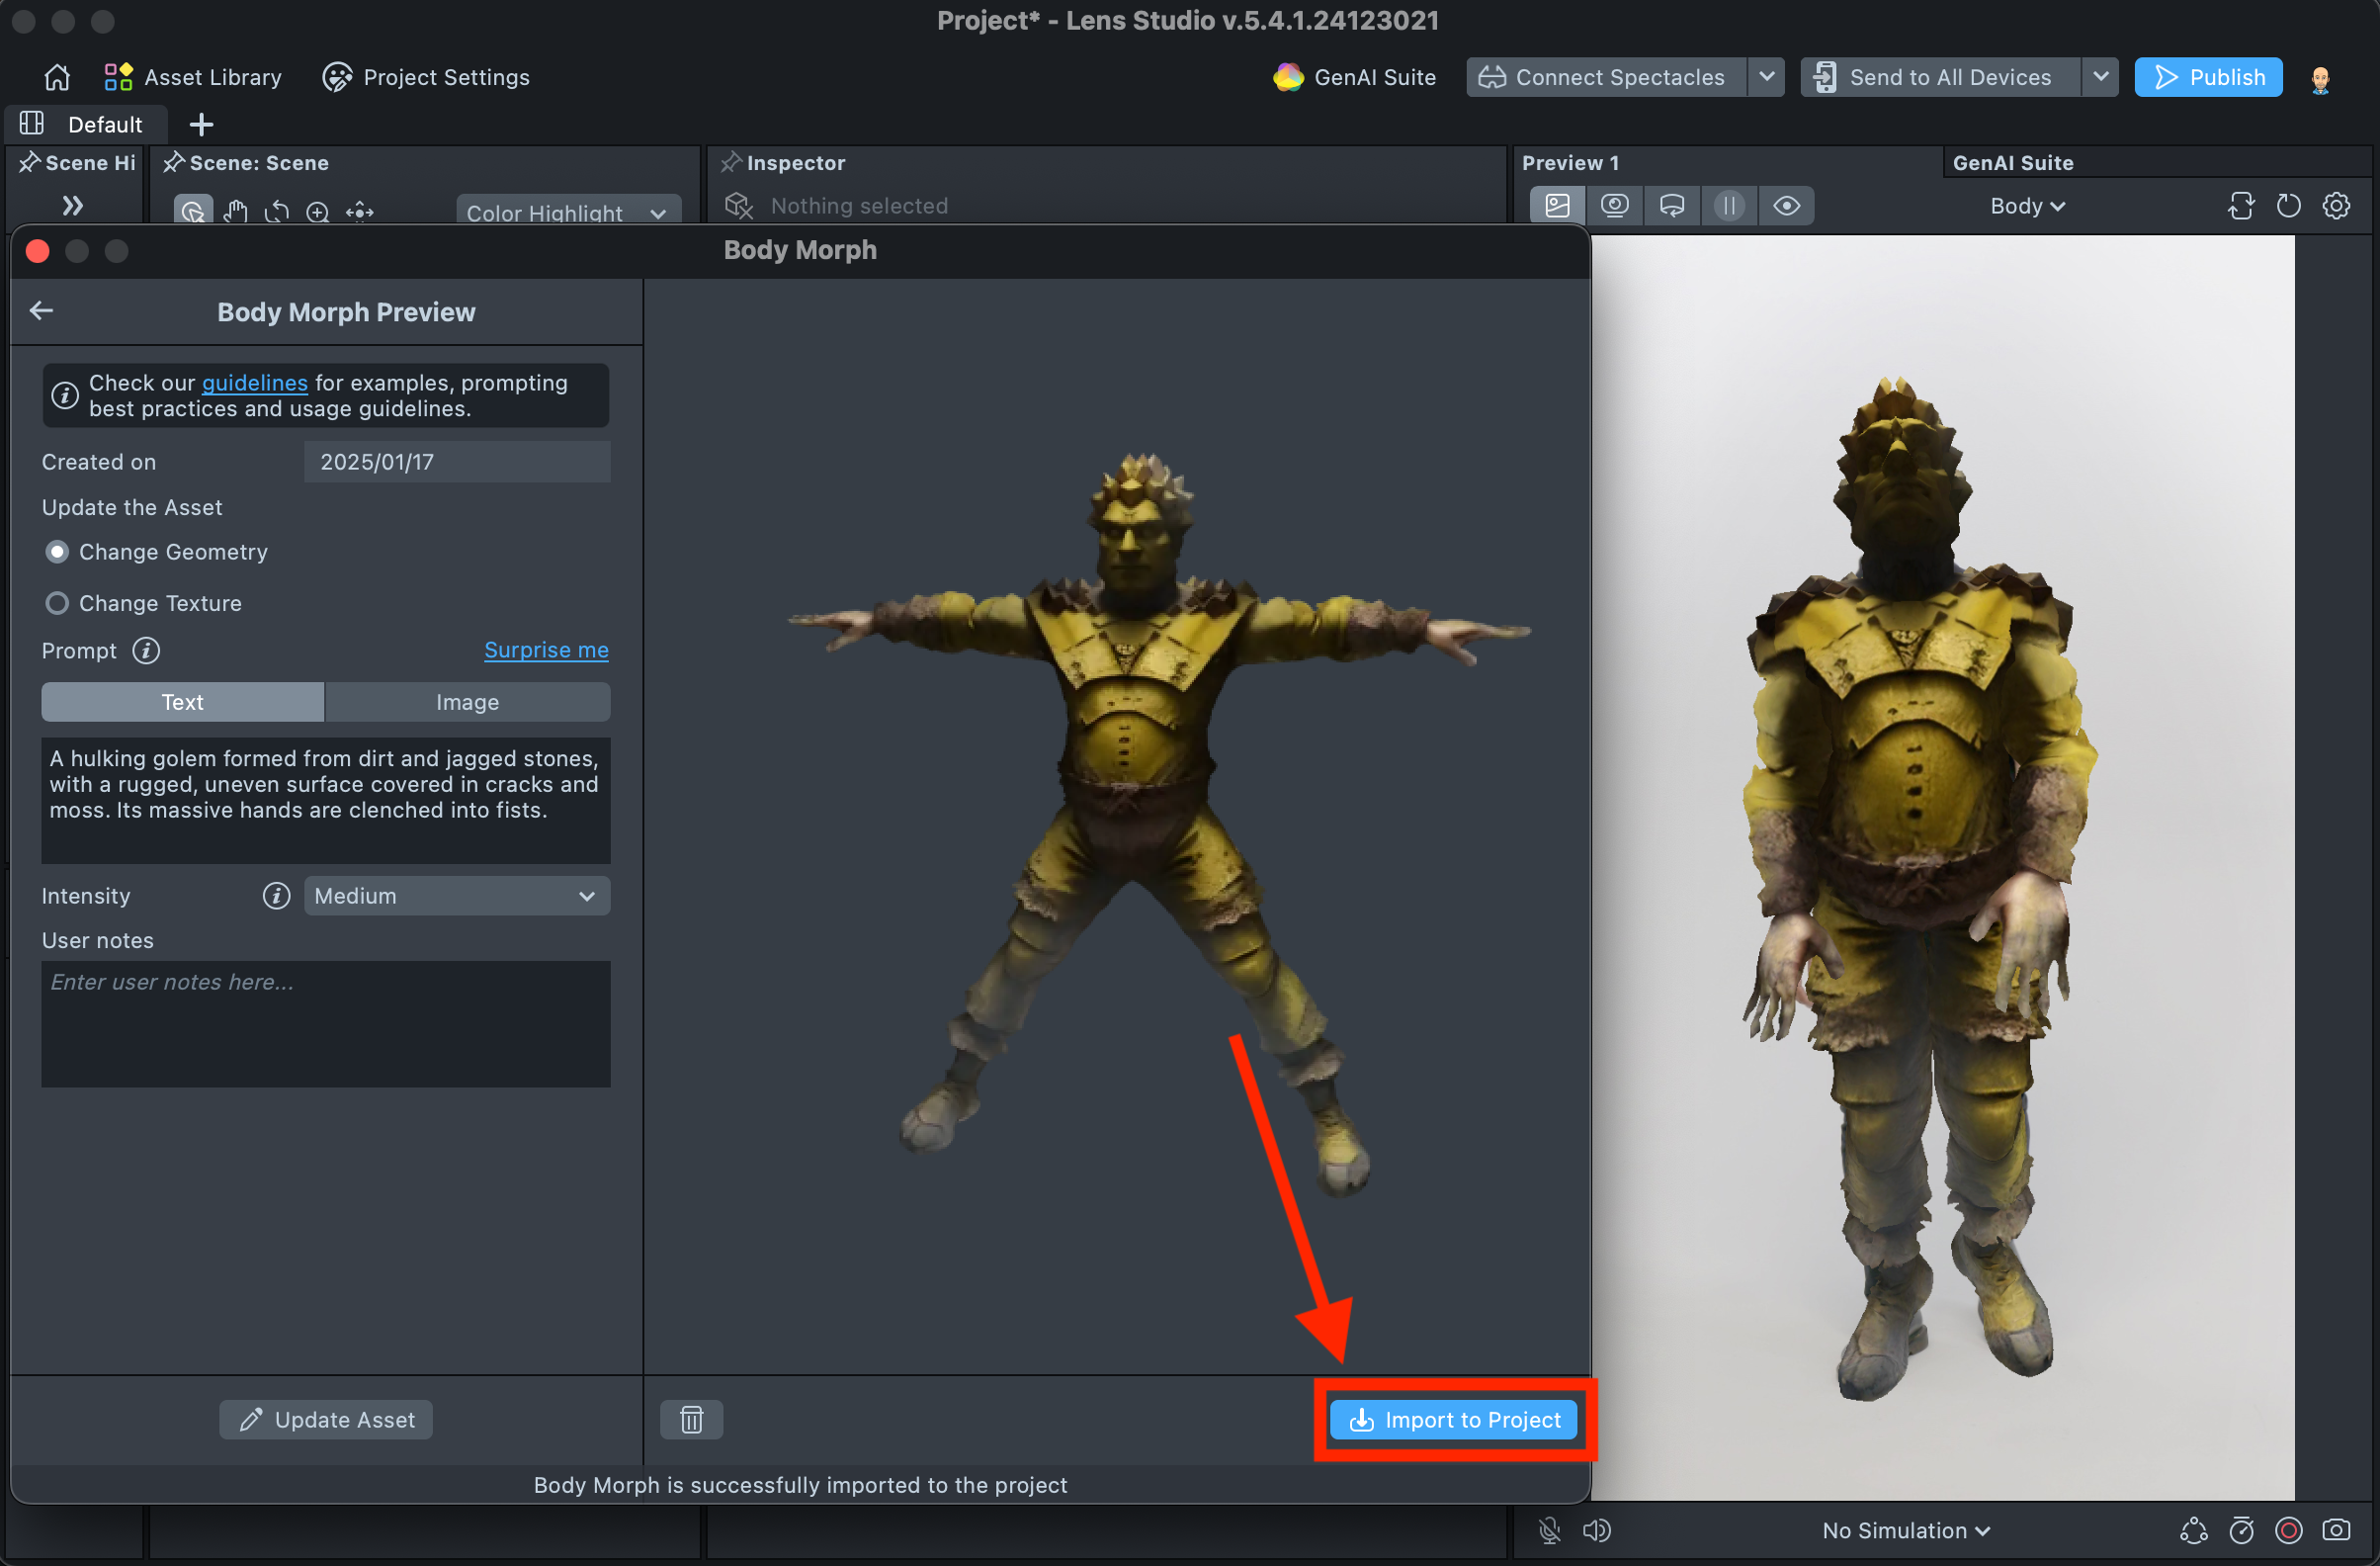
Create a Lens
Import to Project and Preview the Result
- Press
Import to ProjectButton to start creating a Lens with your Body Generator. - You can see a preview of the Lens your are building in the preview panel. Once satisfied with the result save your project and push the Lens for testing on Snapchat. Take a look at the Pairing to Snapchat guide to test your Lens on device, and the Publishing guide to learn more about sharing your creation.
Prompt Tips and Hacks
Words and Phrases
- Context Words and Phrases: It’s best to break long descriptions into short context phrases of 2–3 words, separated by commas. Be precise and make sure your prompt can be interpreted as a costume. Vague prompts may result in inconsistent or unexpected costume types. Add relevant details to clarify the costume, but avoid overloading the prompt.
- Works best: Cybernetic samurai, neon-lit armor, sleek black and red design, robotic limbs, detailed plating, high-tech visor
- Works worse: A cybernetic samurai with neon-lit armor, featuring a sleek black and red design, robotic limbs enhanced with intricate plating, and a high-tech visor
Descriptors
- Character: Mention the character you want to create.
- Example: rhino, medieval king, clown, alien, samurai, robot, baby penguin
- Features: Mention specific garment and accessory features you want to emphasize.
- Example: black leather jacket, metallic accents, neon blue hairpiece, fingerless gloves, glowing wrist communicator
- Details: Add descriptors for accessories and special details.
- Example: reinforced steel-toe combat boots, belt with gadget pouches, holographic display visor
- Emotions: Mention emotions if needed.
- Example: smiling, angry, cute, excited, sad, scared
- Style: Mention style if needed.
- Example: realistic, cartoon, steampunk, anime, retro, minimalistic
- Color: While using color words can provide more control, too many color phrases can cause visual dismiss issues.
| Prompt 1 | Prompt 2 | Prompt 3 |
|---|---|---|
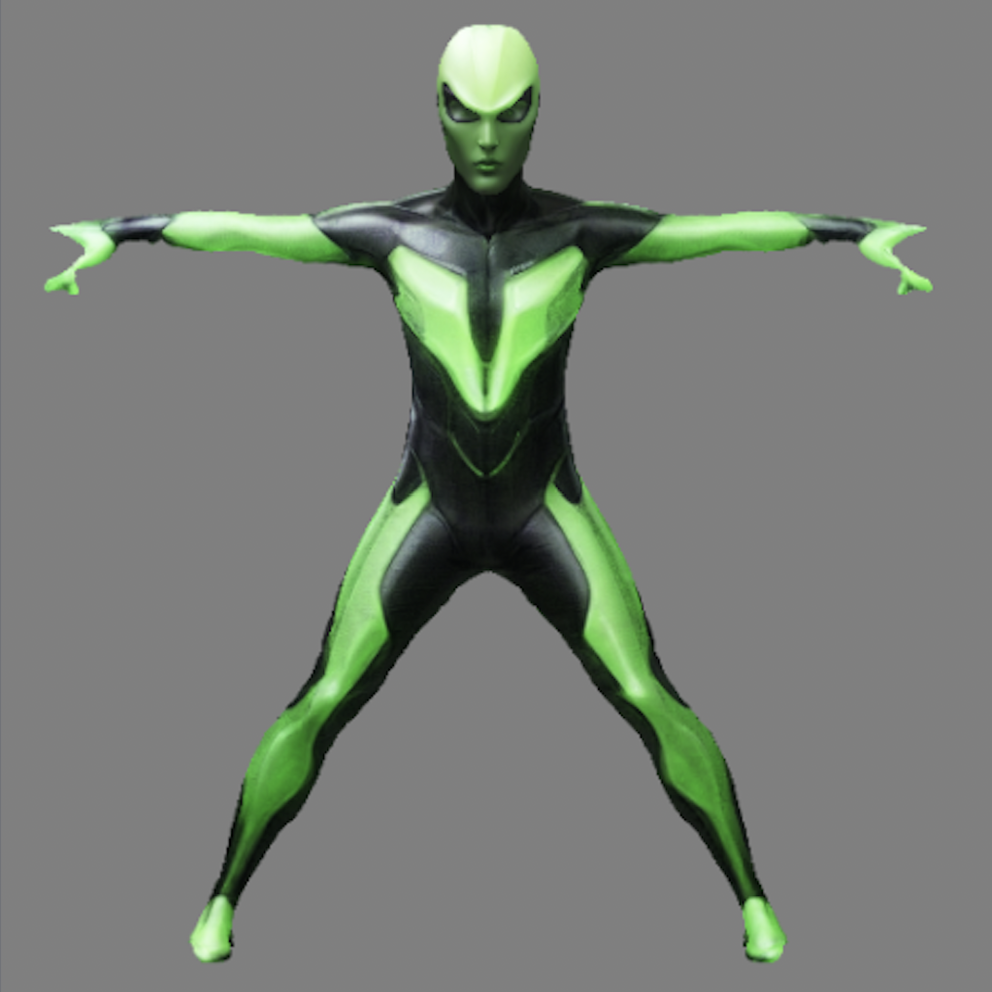 | 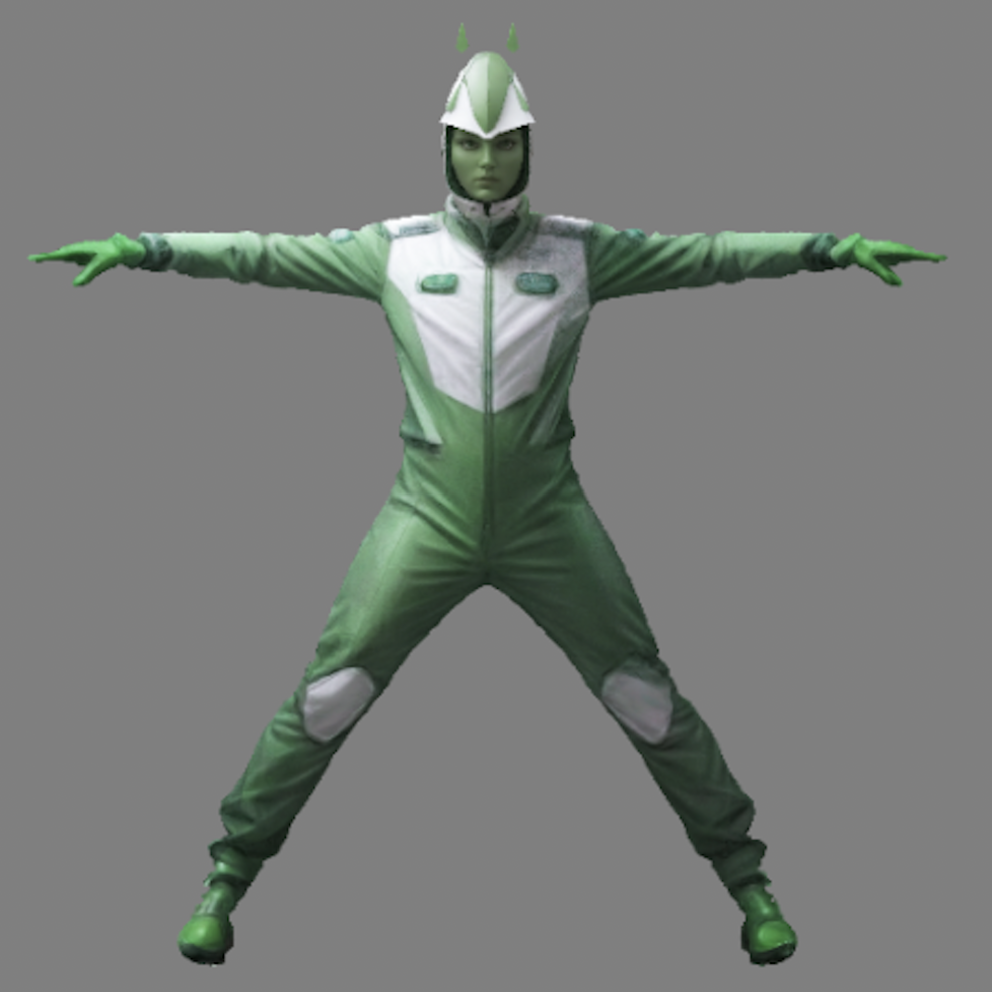 | 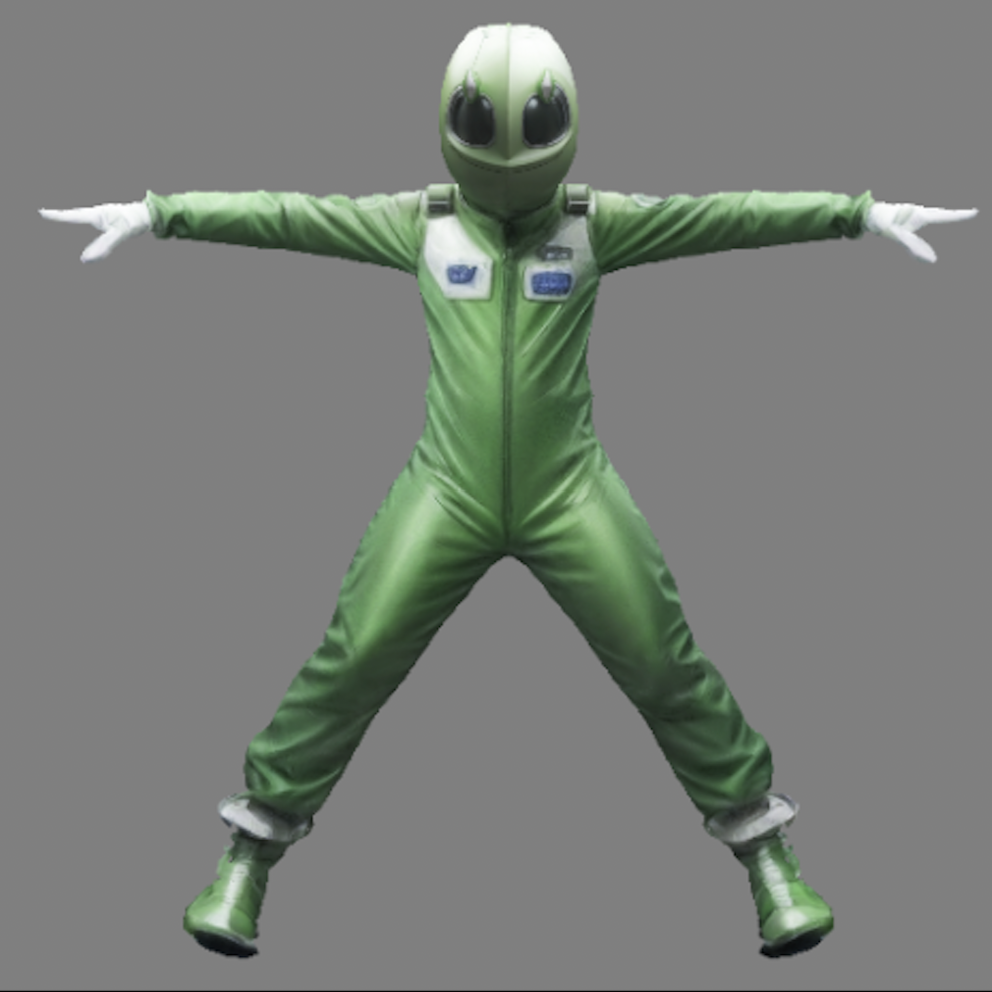 |
| Green alien | Green alien, white space suit, gloves | Green alien, white space suit, gloves, big shoes, huge head, small body, big legs, huge feet |
Advanced prompting
-
You can increase/decrease weight (importance) of certain words/phrases/characters by adding certain symbols to the prompt. The rules are as follows:
- (word) - increases importance of the word by a multiplier of 1.1
- [word] - decreases importance of the word by a multiplier of 1.1
- (word:float_number) - changes importance of the “word” by a multiplier of float_number ([0 .. +Infinity])
-
Examples:
- (Old) person - Make the person slightly older
- Bright [sunny] (autumn:2.0) day - Make the day slightly less sunny but much more “autumn-y”
- A (dark blue:0.5) suit - Make the suit twice as bright as before
Special words
- High-poly: To increase the level of detail.
- 3D printed: For geometric models with minimal overhangs.
- Anatomy: For detailed human or animal models.
- Hyper-realistic: To increase the realistic natural effect.
- Biomorphic: To create smooth abstract shapes.
Order of Words
Weight of words: The words at the start of your prompt have the most influence and should fully reflect the concept.
- Works best: 1 human head, big sunglasses, red curly hair, realistic portrait, green lizard skin, good quality, highres, hi-poly model, snake teeth, opened mouth
- Works worse: highres, hi-poly, good quality 3D model, snake teeth, green lizard skin, curls, red hair, human head
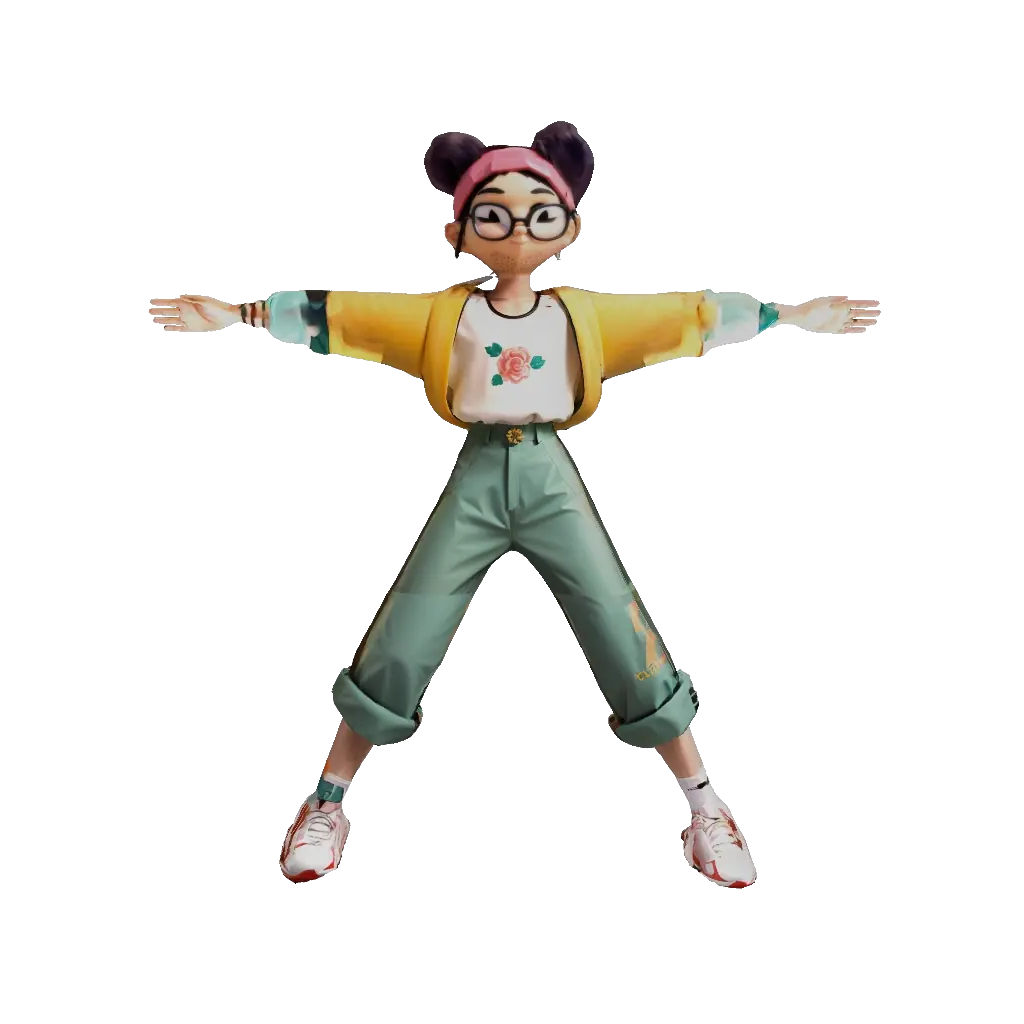
Image Prompting
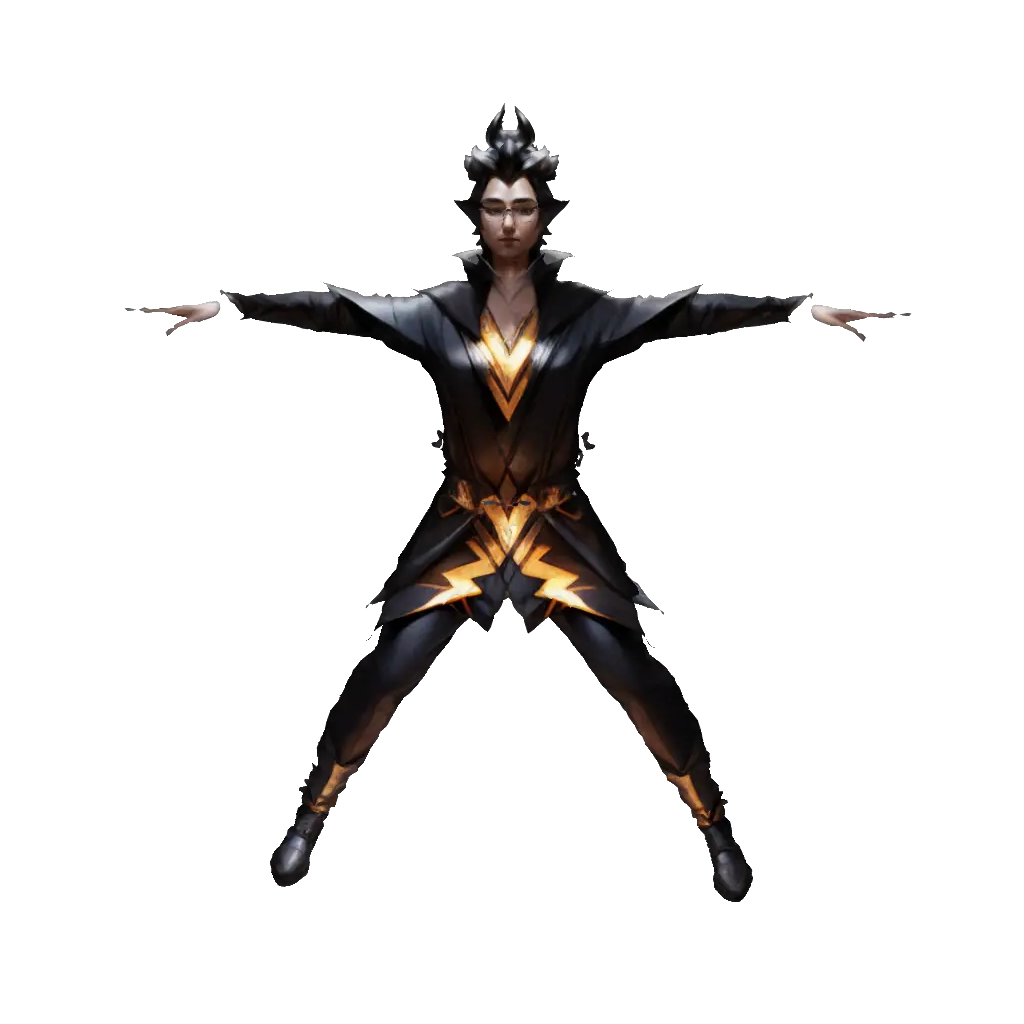
When using an image prompt, choose an image that shows the character’s full body for best results.
-
Works best: contains only the costume we want to create, shown in a full frontal view ✅
-
Works worse: cluttered image with extreme lighting, which is difficult to interpret, with only the head visible ❌
Animating Body Generator with Mixamo
Important
Please don't forget to upload the custom model provided below.
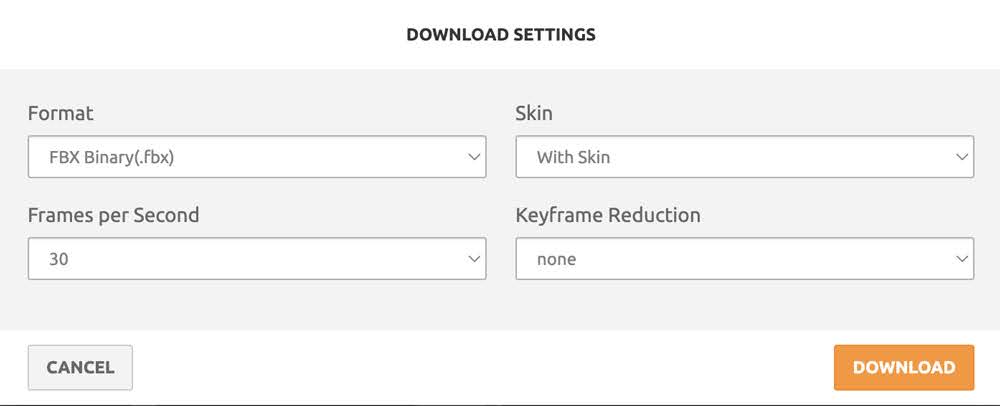
Step 1: Download the .fbx file created for Mixamo
-
Go to the Mixamo website. Click on the Upload Character button and upload the
.fbxfile. -
After selecting the animation, adjust the settings and click Download.
-
Select the
.fbxformat and choose the With skin option (we will transfer skin and animation to Body Morph in LS).
Step 2: Set up Body Generator animation in Lens Studio
-
Add the Body Generator component into the scene.
-
Drag and drop the
.fbxfile with the Mixamo animation into the Scene Hierarchy in Lens Studio. -
Copy the Animation Player component from the imported Mixamo
.fbxhierarchy.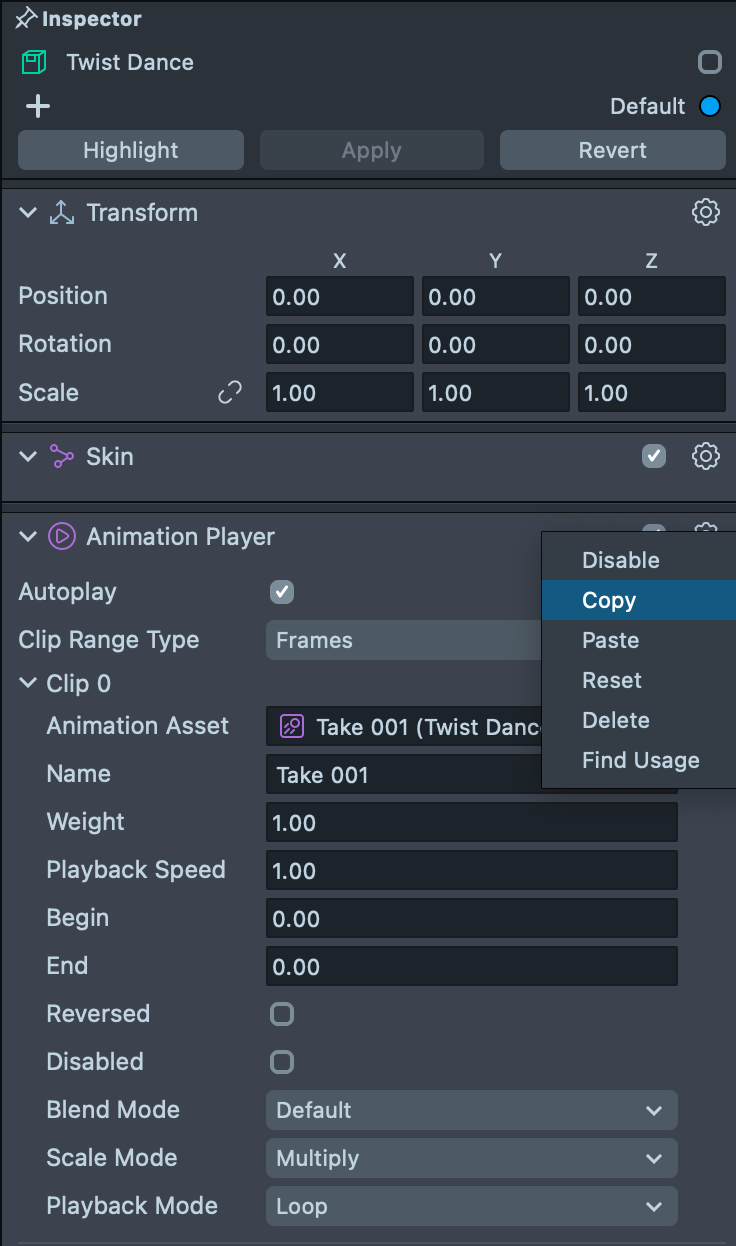
-
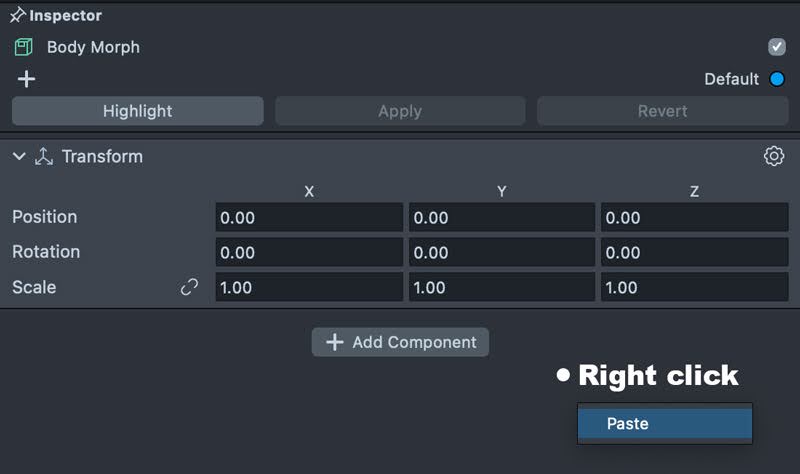
Right-click and Paste the animation component into the root of the Body Morph hierarchy.
-
Delete the template object from Mixamo with the animation.
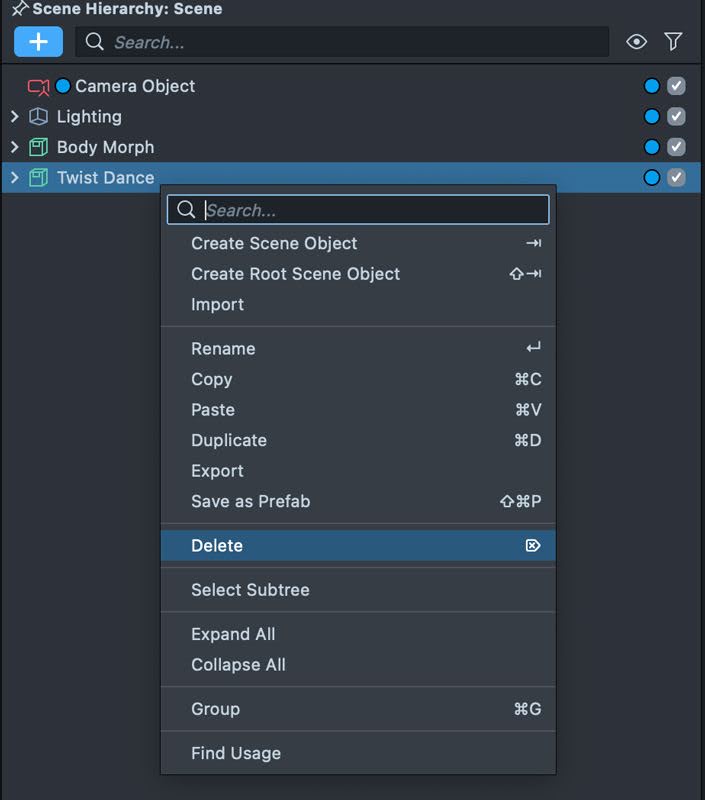
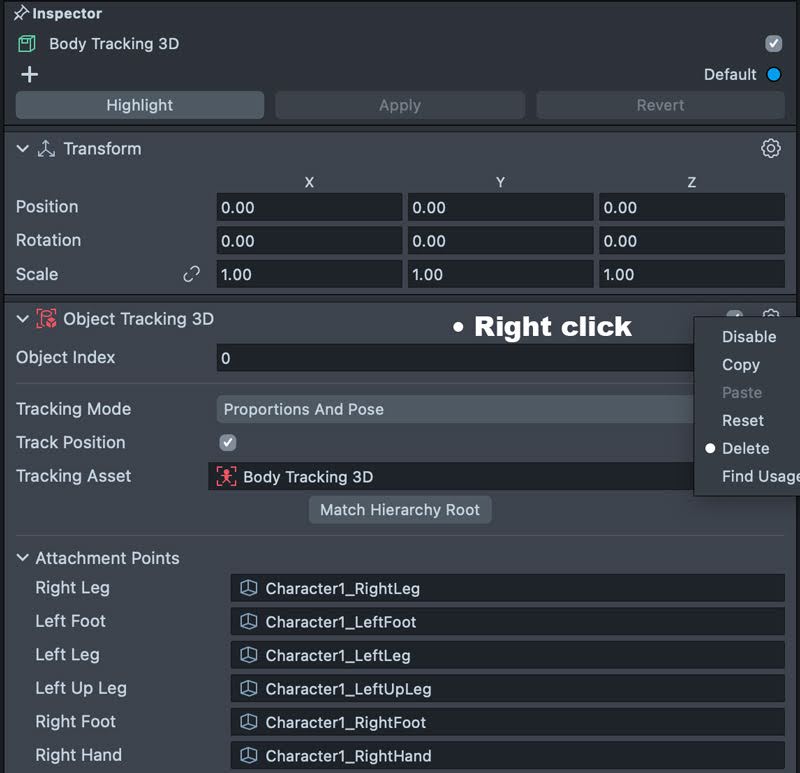
-
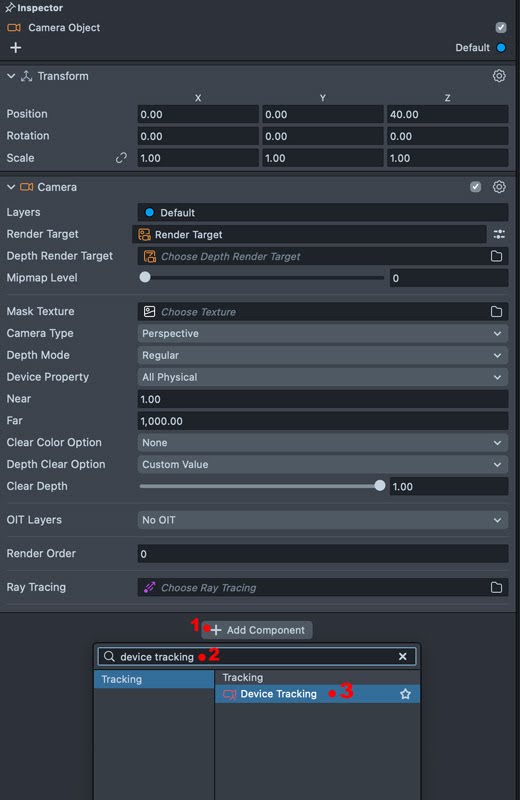
Delete the Object Tracking 3D component in the Body Morph hierarchy.
Step 3: Put animated Body Generator on the surface
-
Move the Body Generator object out of the Camera hierarchy.
-
Add the
Device Trackingcomponent to the Camera object. Select Surface Tracking mode.