Face Generator
Design powerful face effects with advanced stylization and transformation capabilities. From subtle morphs and hairstyles to bold geometry changes, Face Generator gives creators full control over how a face looks. Use text prompts or image samples as inputs to generate unique styles, and apply them to the entire face or focus on specific areas.
Getting Started
Launching Face Generator
-
Navigate to the
Lens Studio AIoption in the top right corner of the Lens Studio. Then, click on theGenAI Home Pagetab in the sidebar.
-
On the
GenAI Home Pagetab, you may need to scroll down to find Face Generator.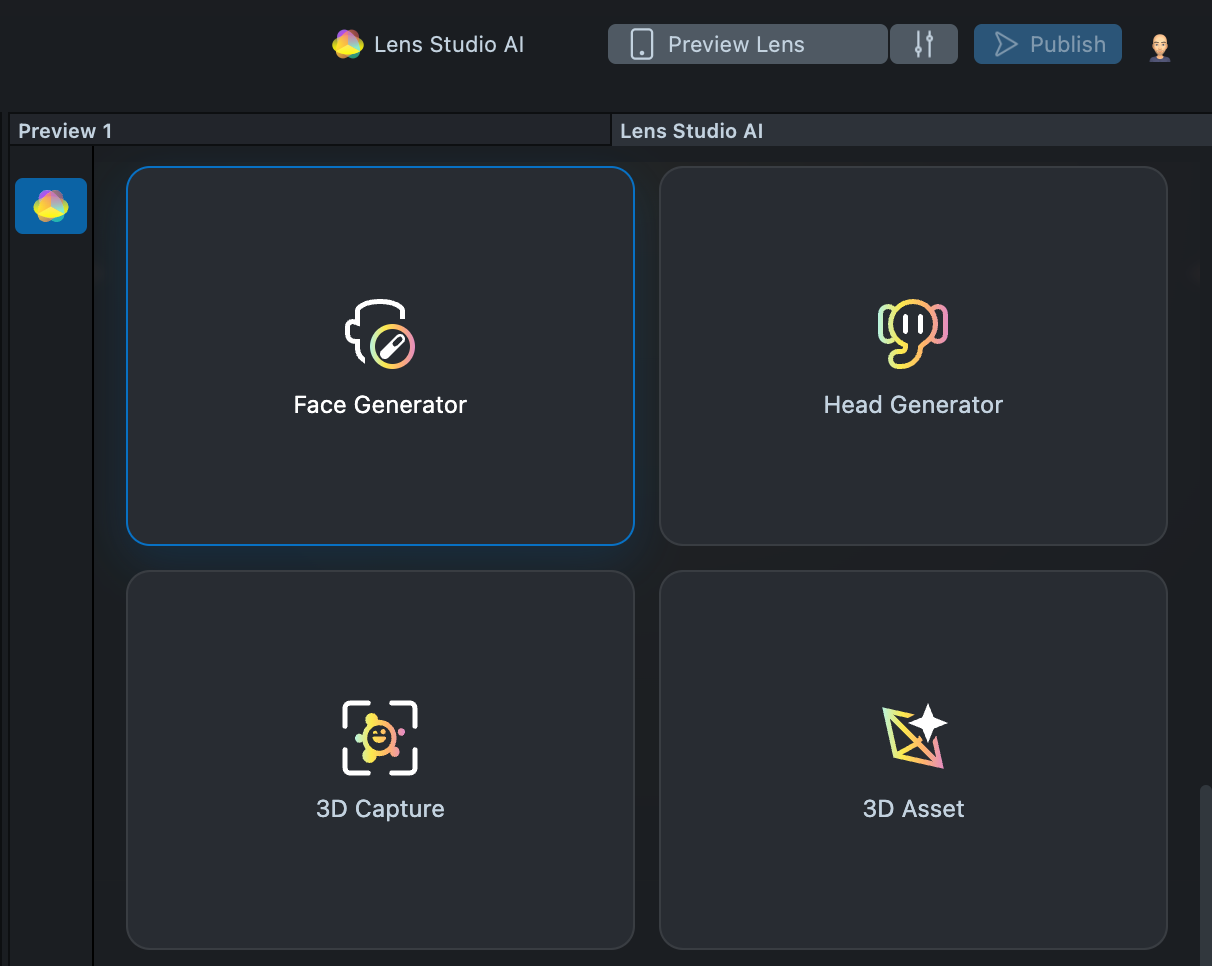
User Interface Overview
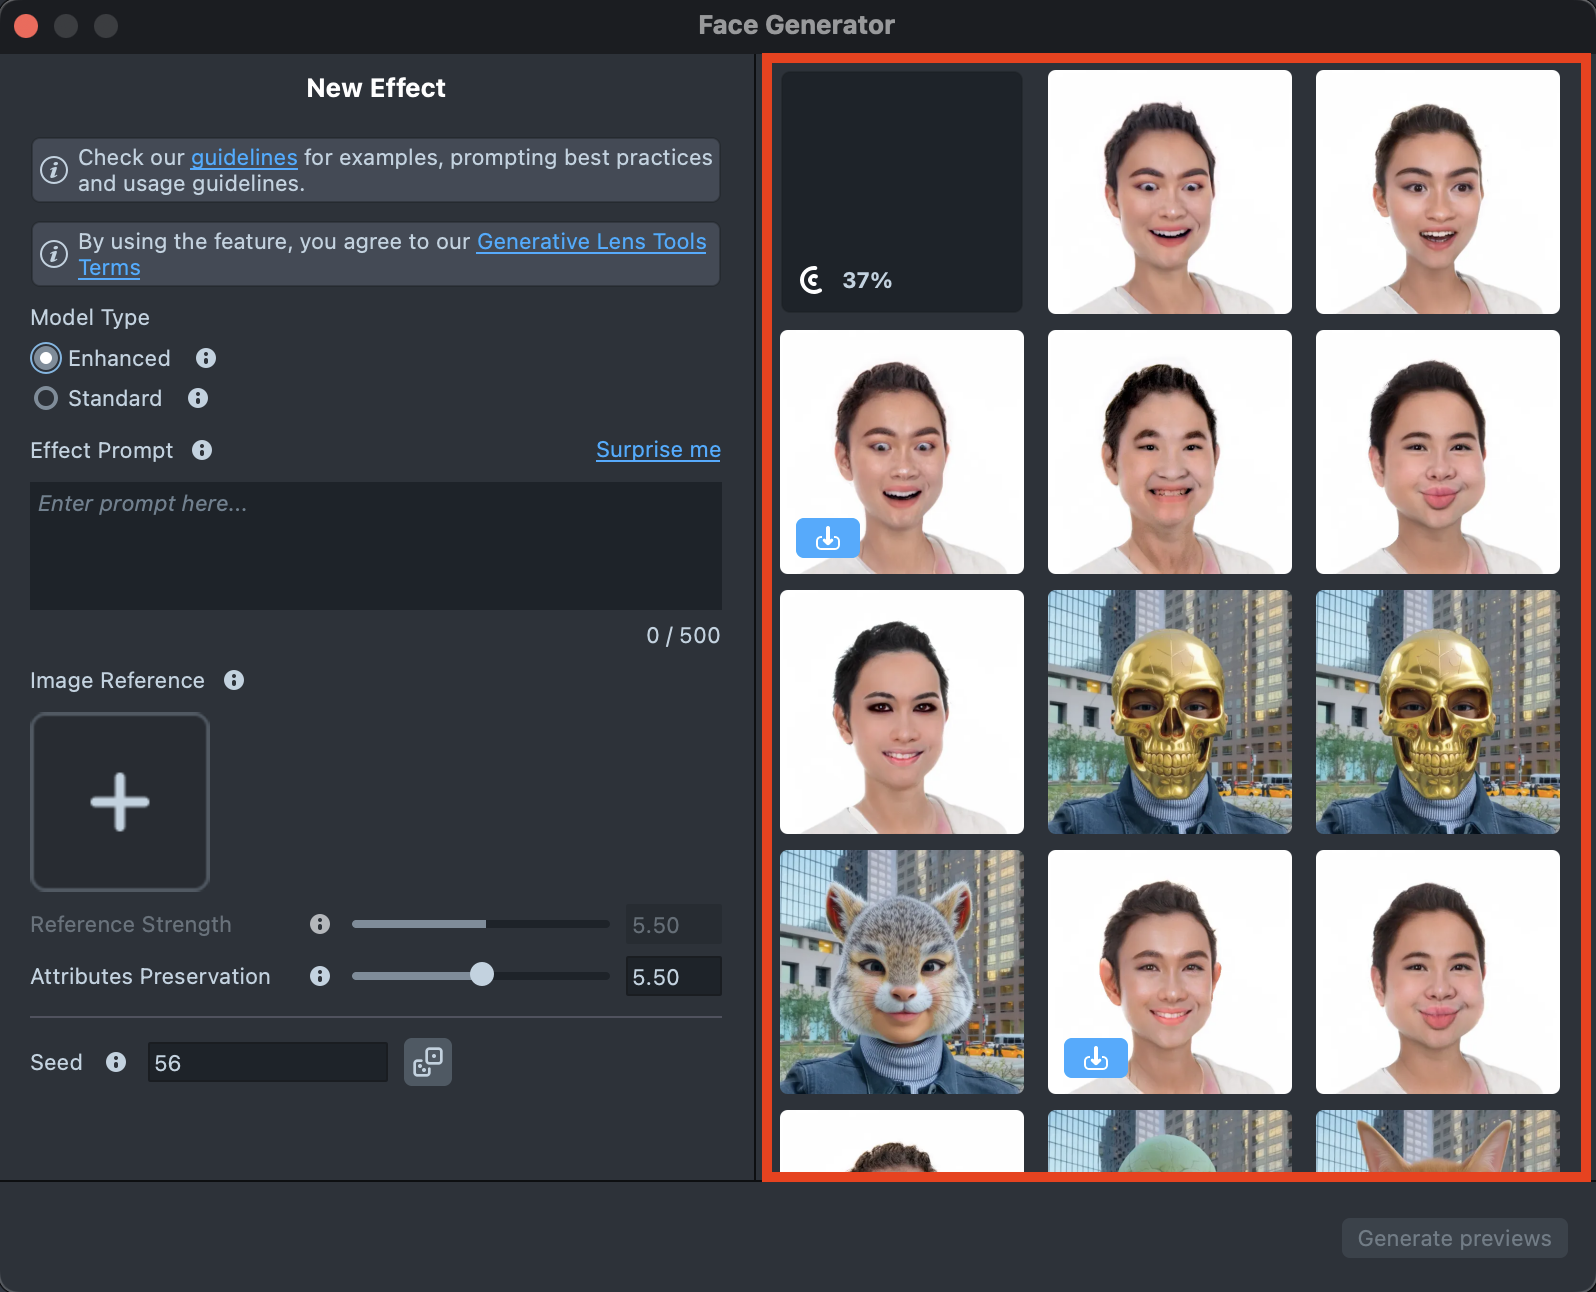
- Creation Panel: Provides tools for creating and editing face effects.

- Gallery: Shows all the effects you’ve created along with their statuses.
Enhanced Model
Enhanced Model ideal for morphs, characters, and animal transformations, while preserving identity.
Effect Creation flow
-
Click the
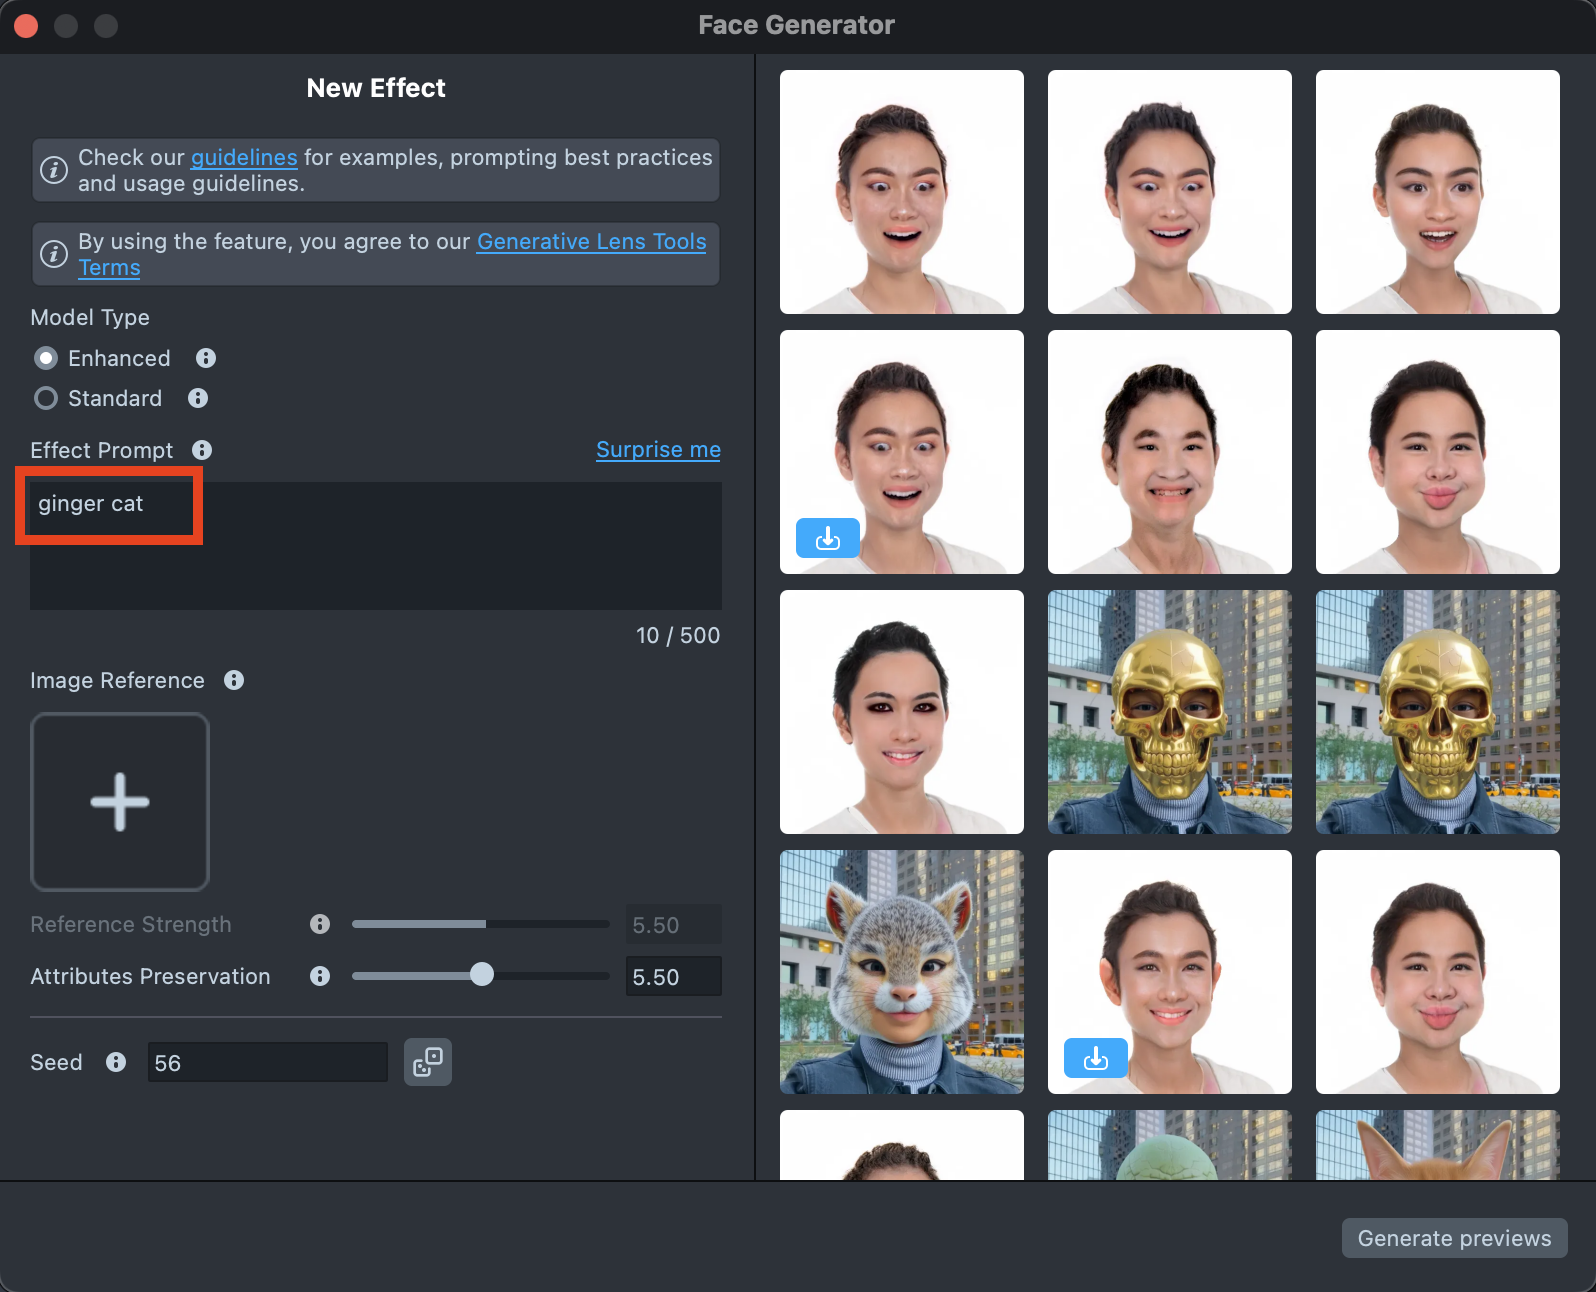
Surprise mebutton to try one of the default prompts and get familiar with the model.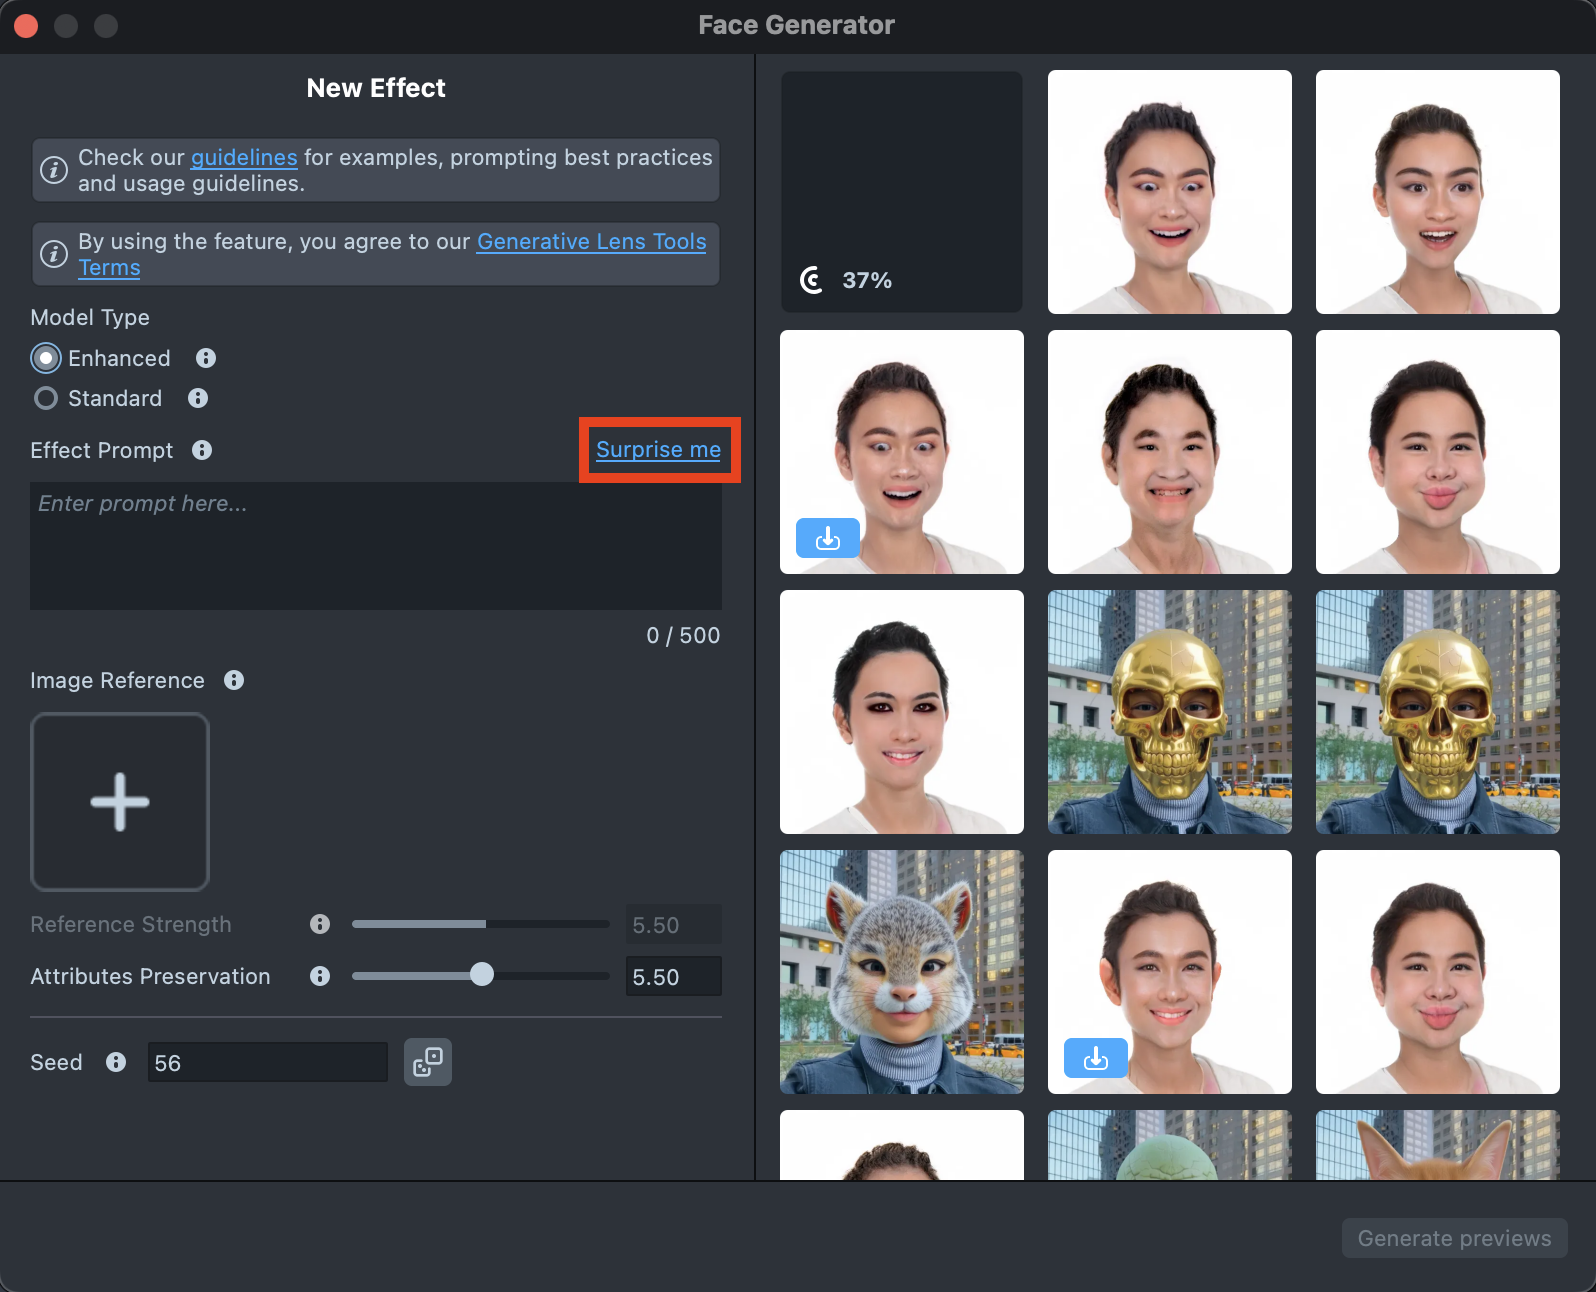
-
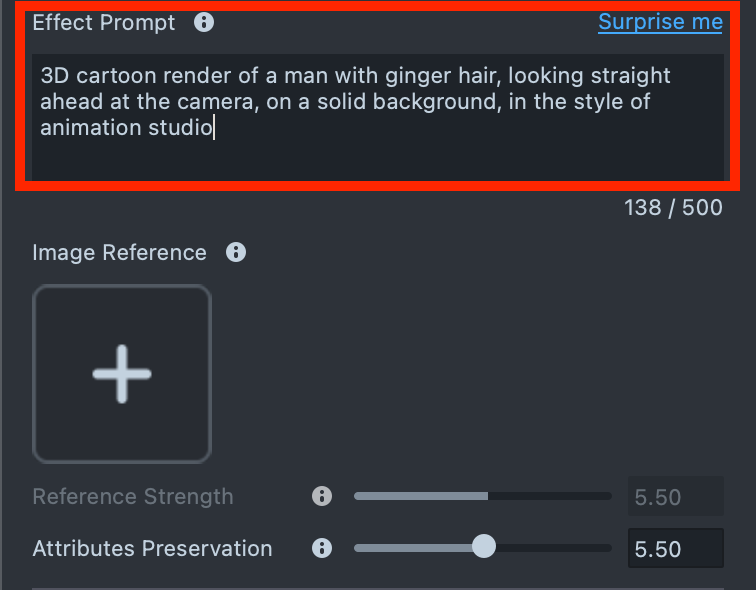
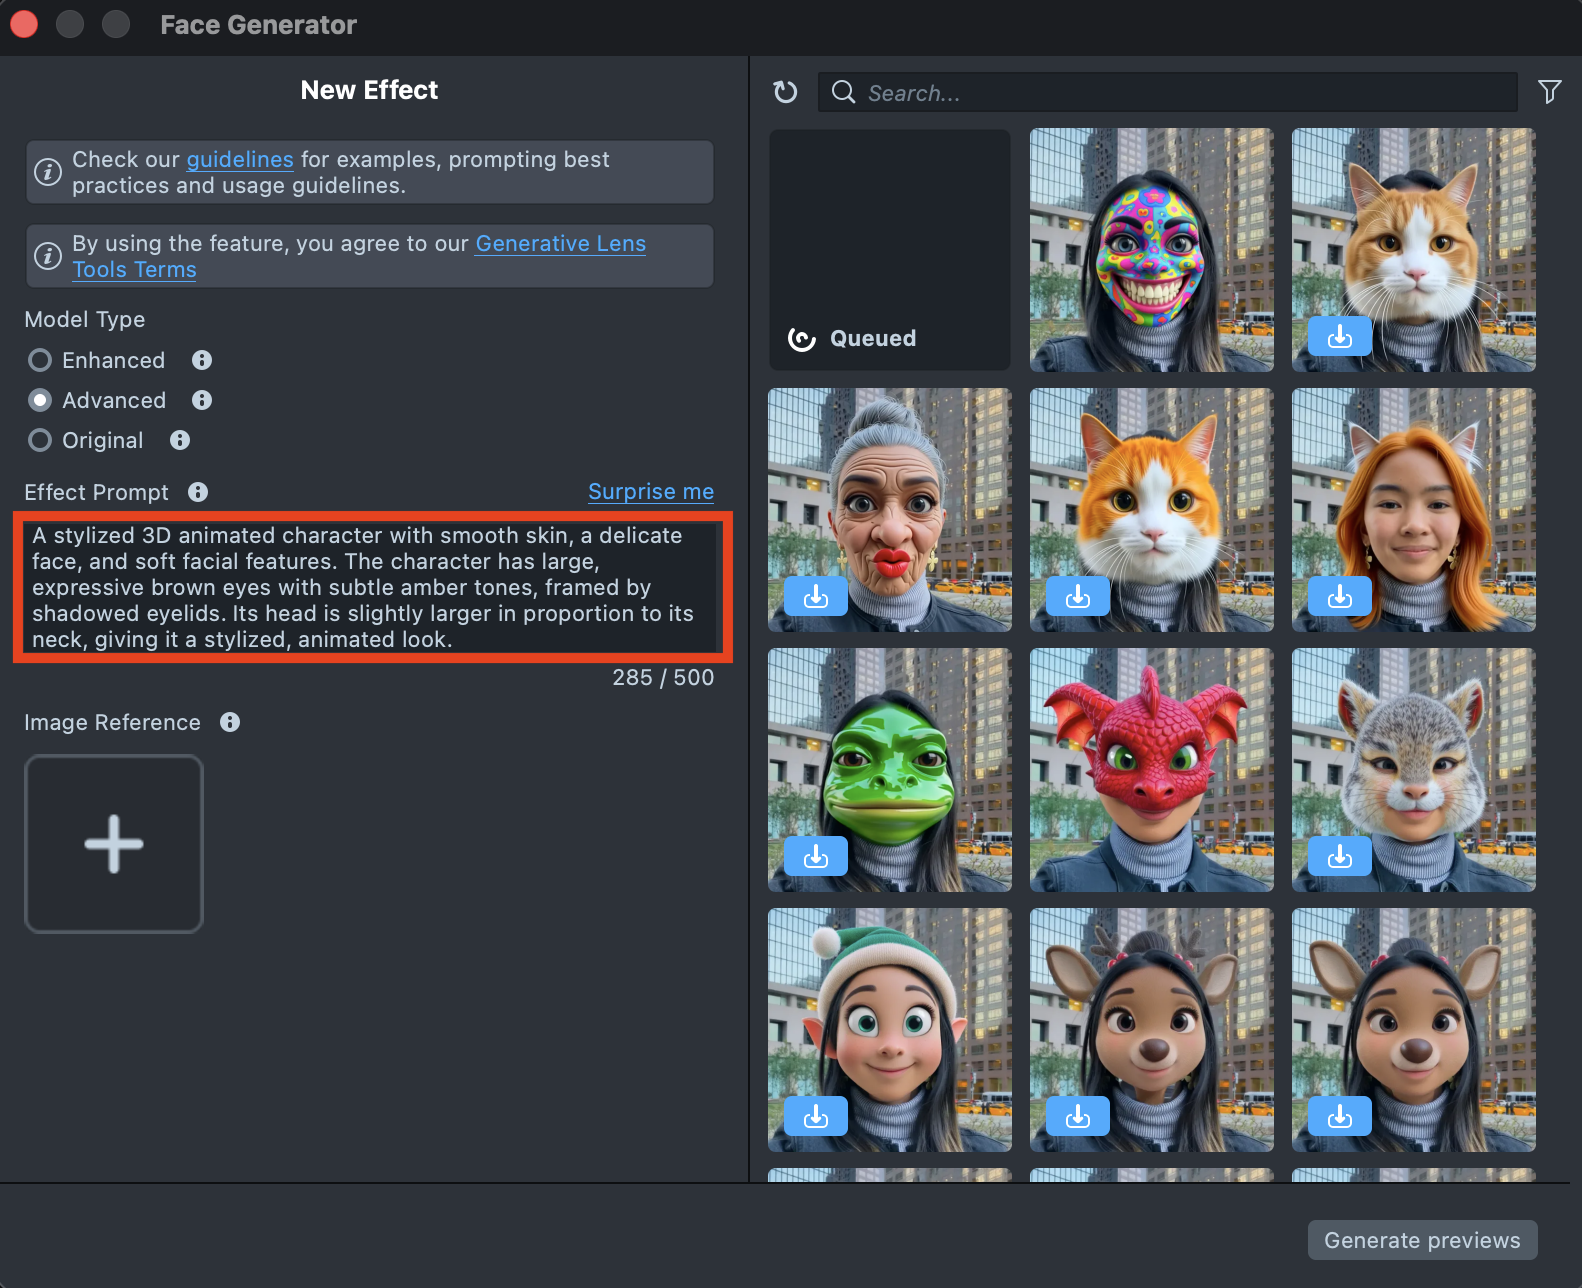
If you are ready to use your own prompt, enter a description of the Effect you’d like to generate in the
Effect Prompttext field (up to 500 characters).See the Best Practices guide to learn how to achieve the best results.
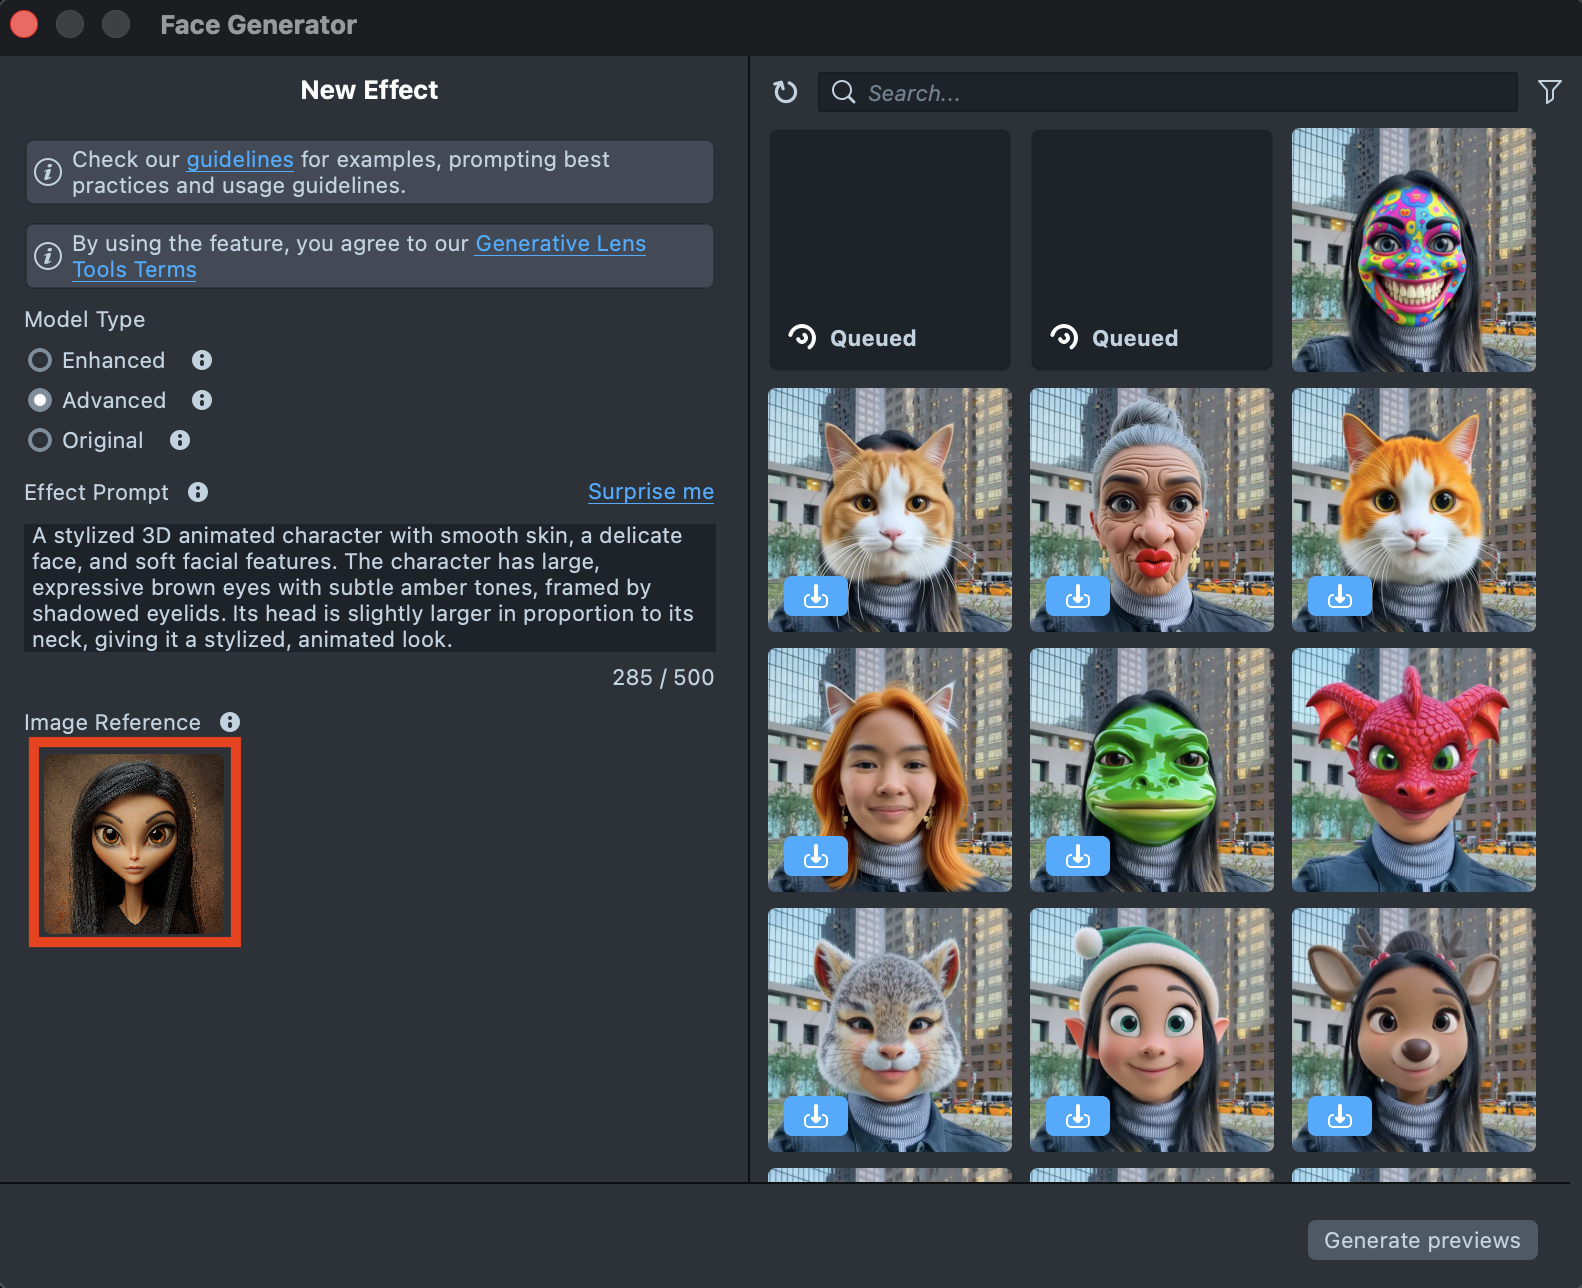
-
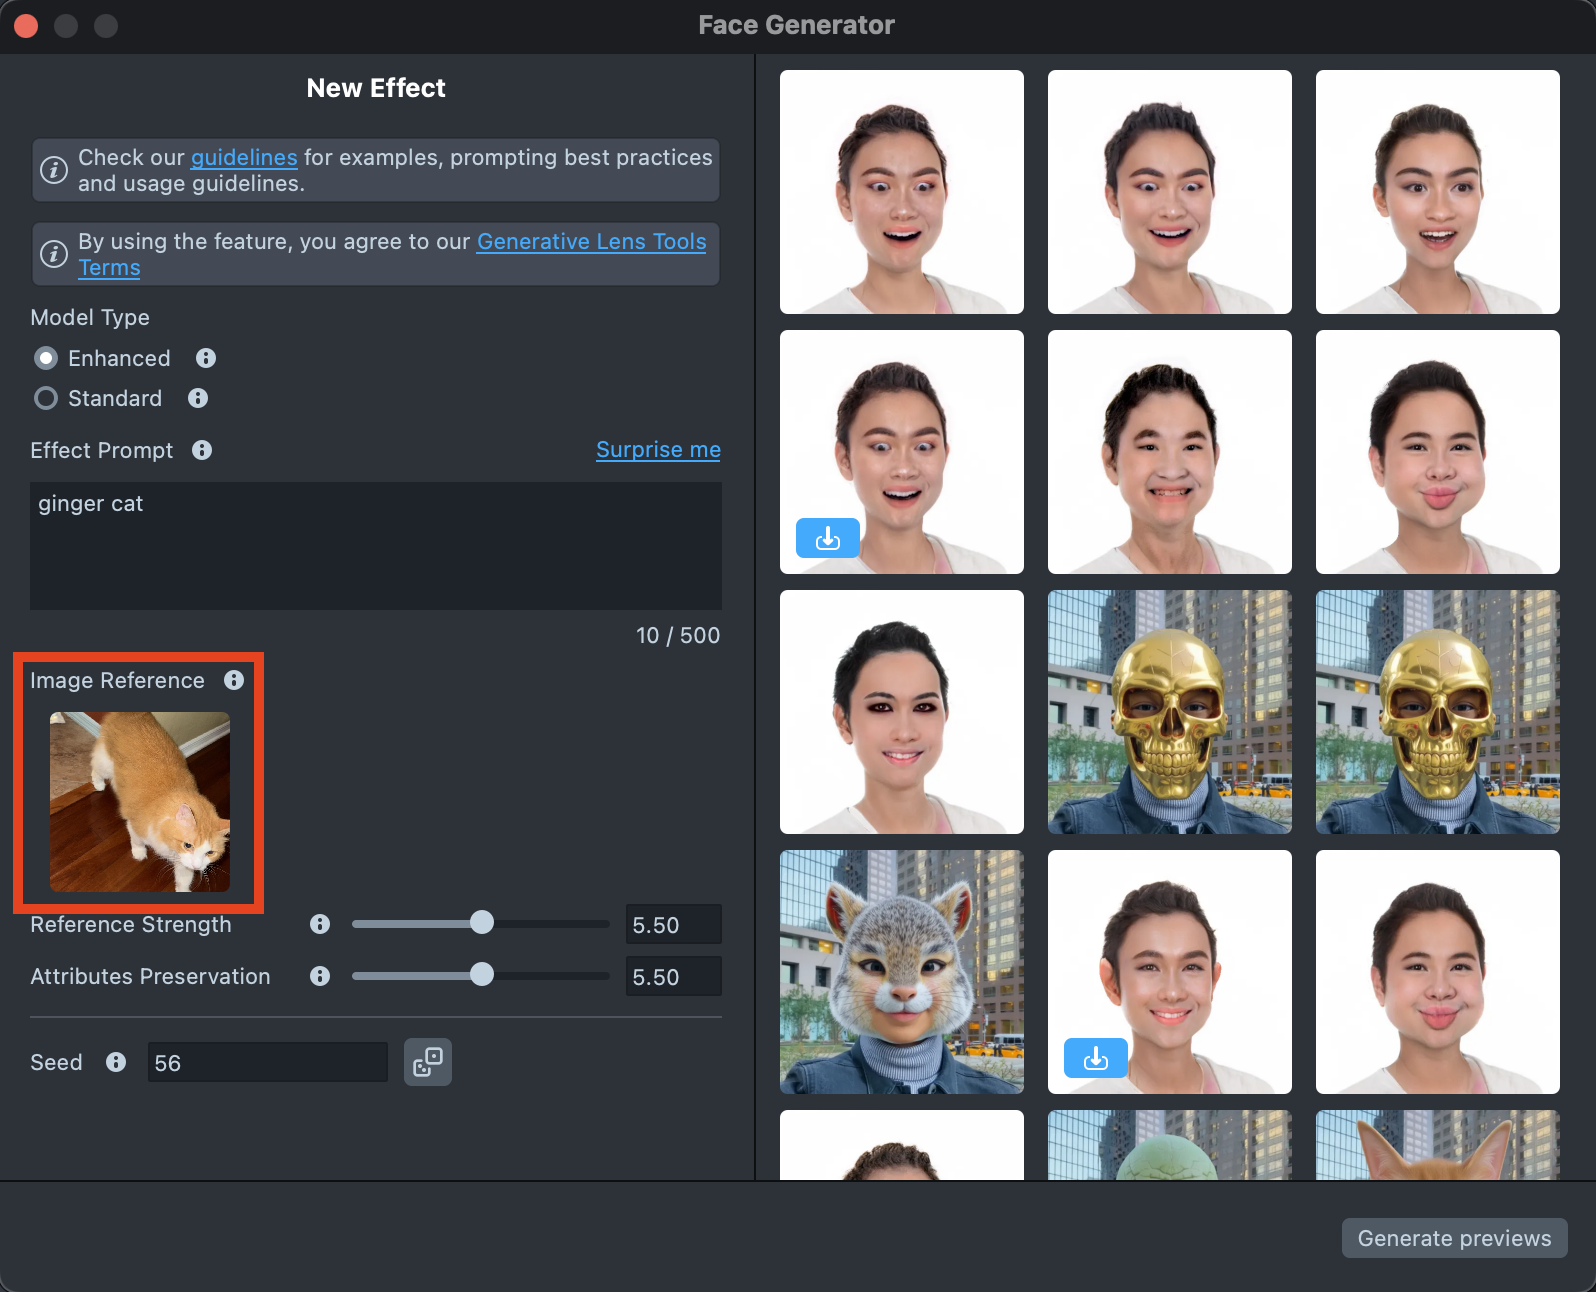
You can add an image input to guide the generation and make the result closer to your vision.
You can use
Effect Prompt,Image Reference, or a combination of both - whichever works best for your case.See the Best Practices guide to learn how to achieve the best results.
-
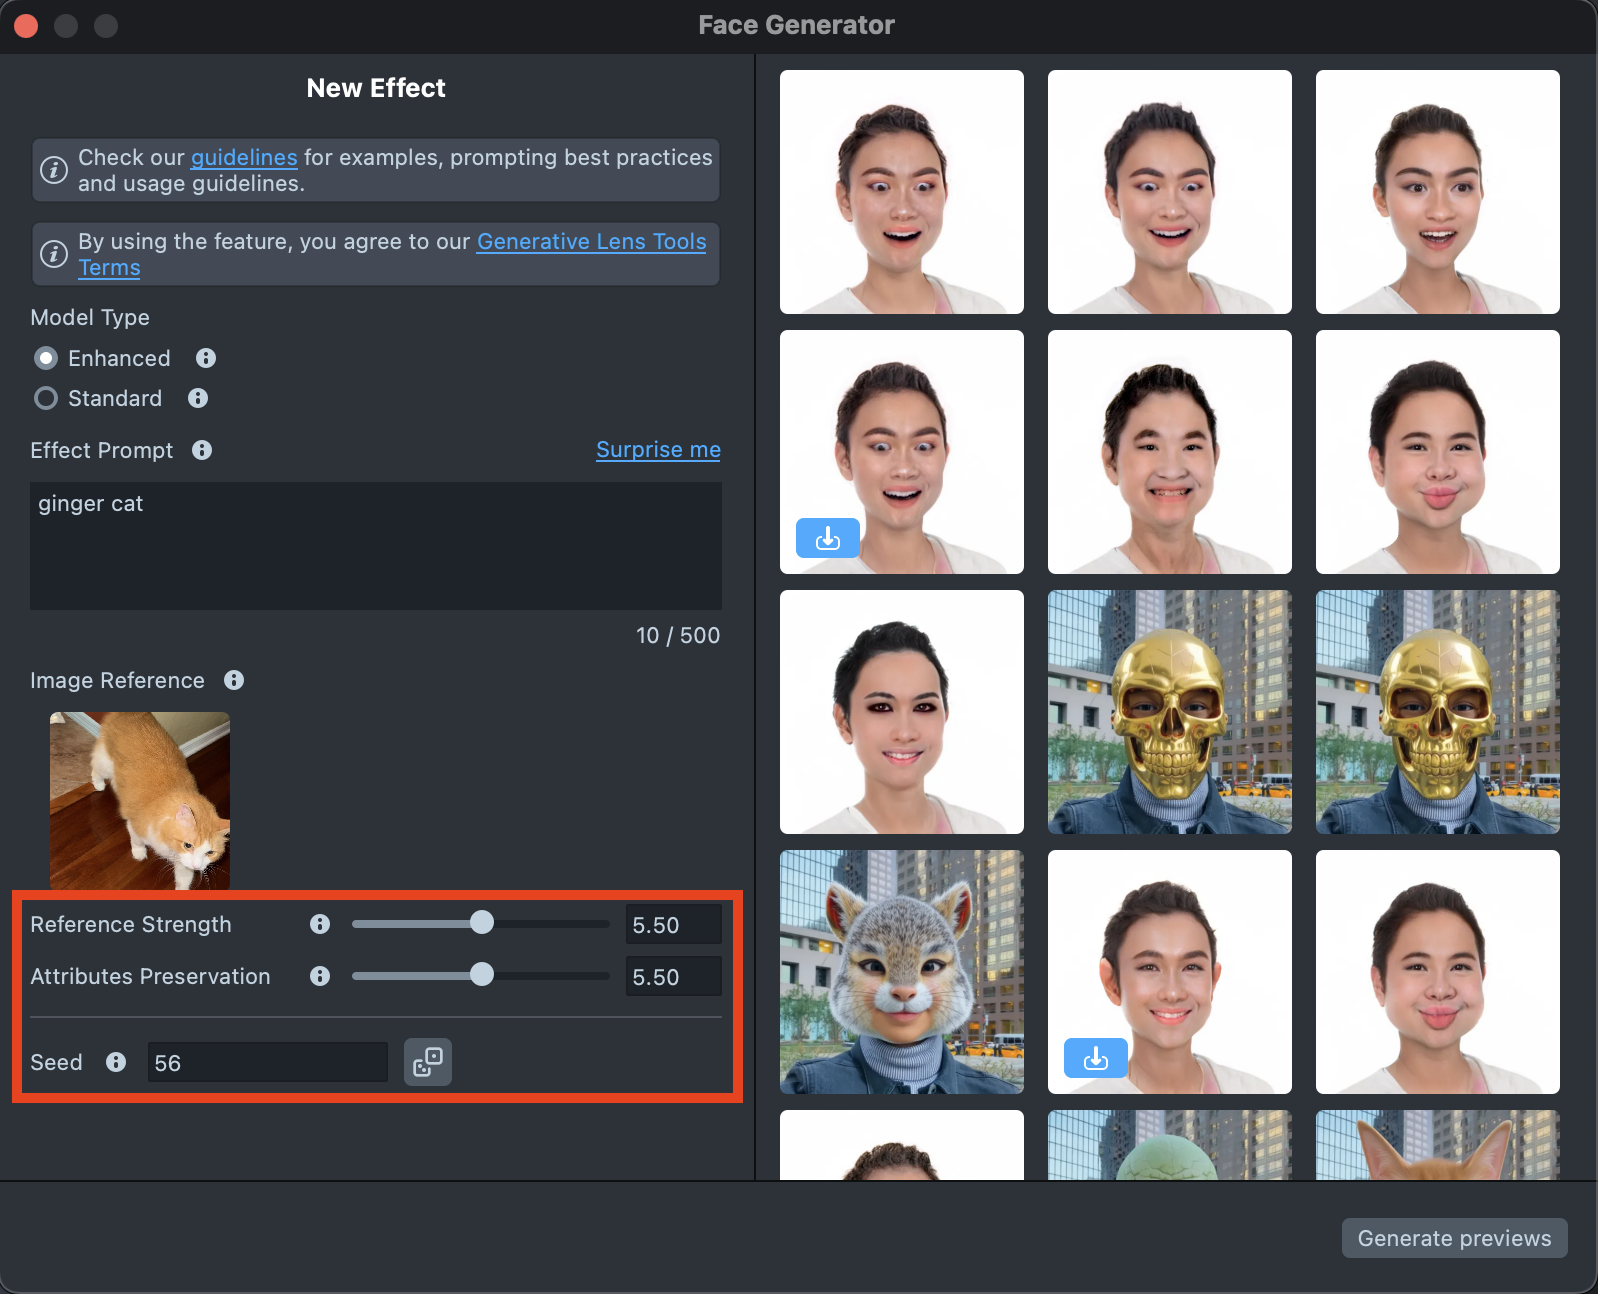
The settings can significantly affect the final result, helping you achieve the best match for your vision:
- Reference strength - Controls how strongly the effect follows the Image Reference. A higher value makes the result closer to the Image Reference, but reduces similarity to the original user photo.
- Attributes preservation - Affects the hair and headwear area the most. When increasing the value, the model maintains greater consistency in the hair area and does not remove hair or headwear from the head.
- Seed - Control randomness. Use the same number to recreate the same look, or try different ones for new variations.
See the Settings section to learn more.
-
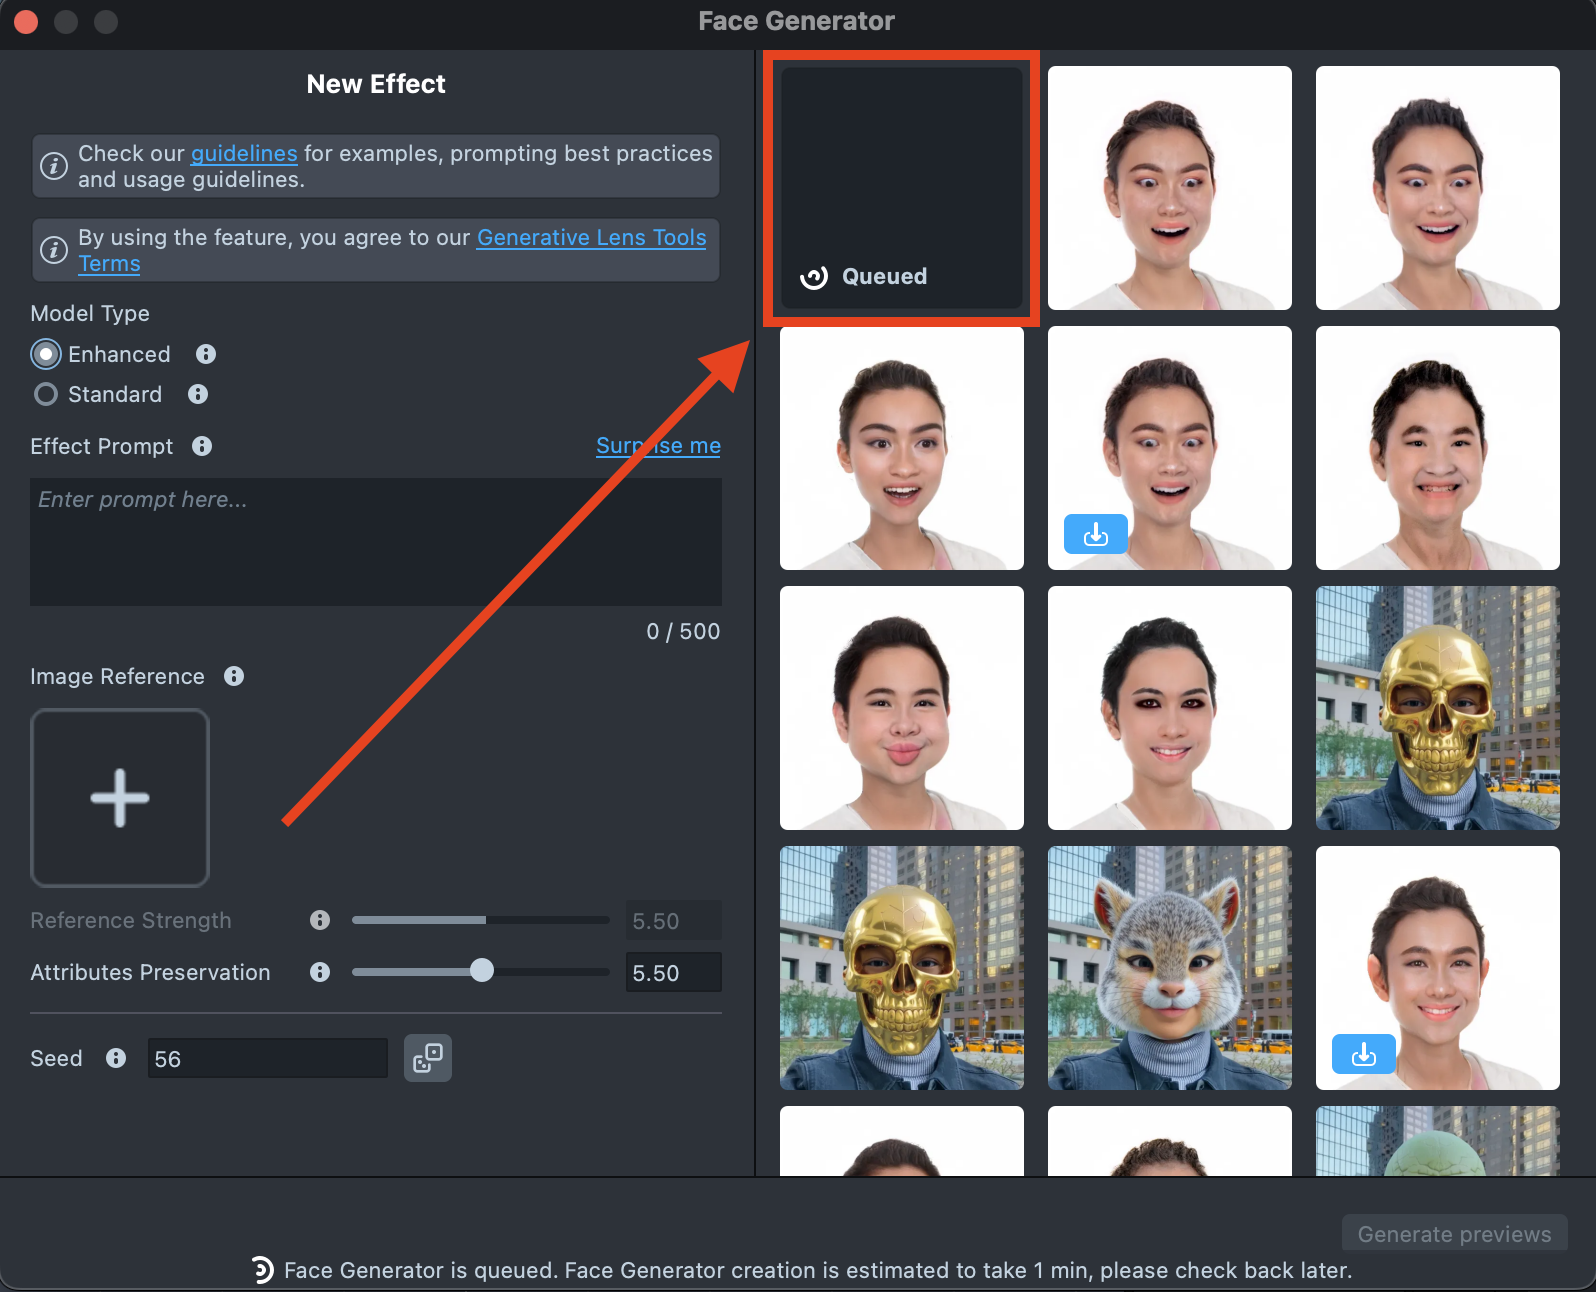
When your prompt is ready, press the
Generate Previewsbutton to generate the previews.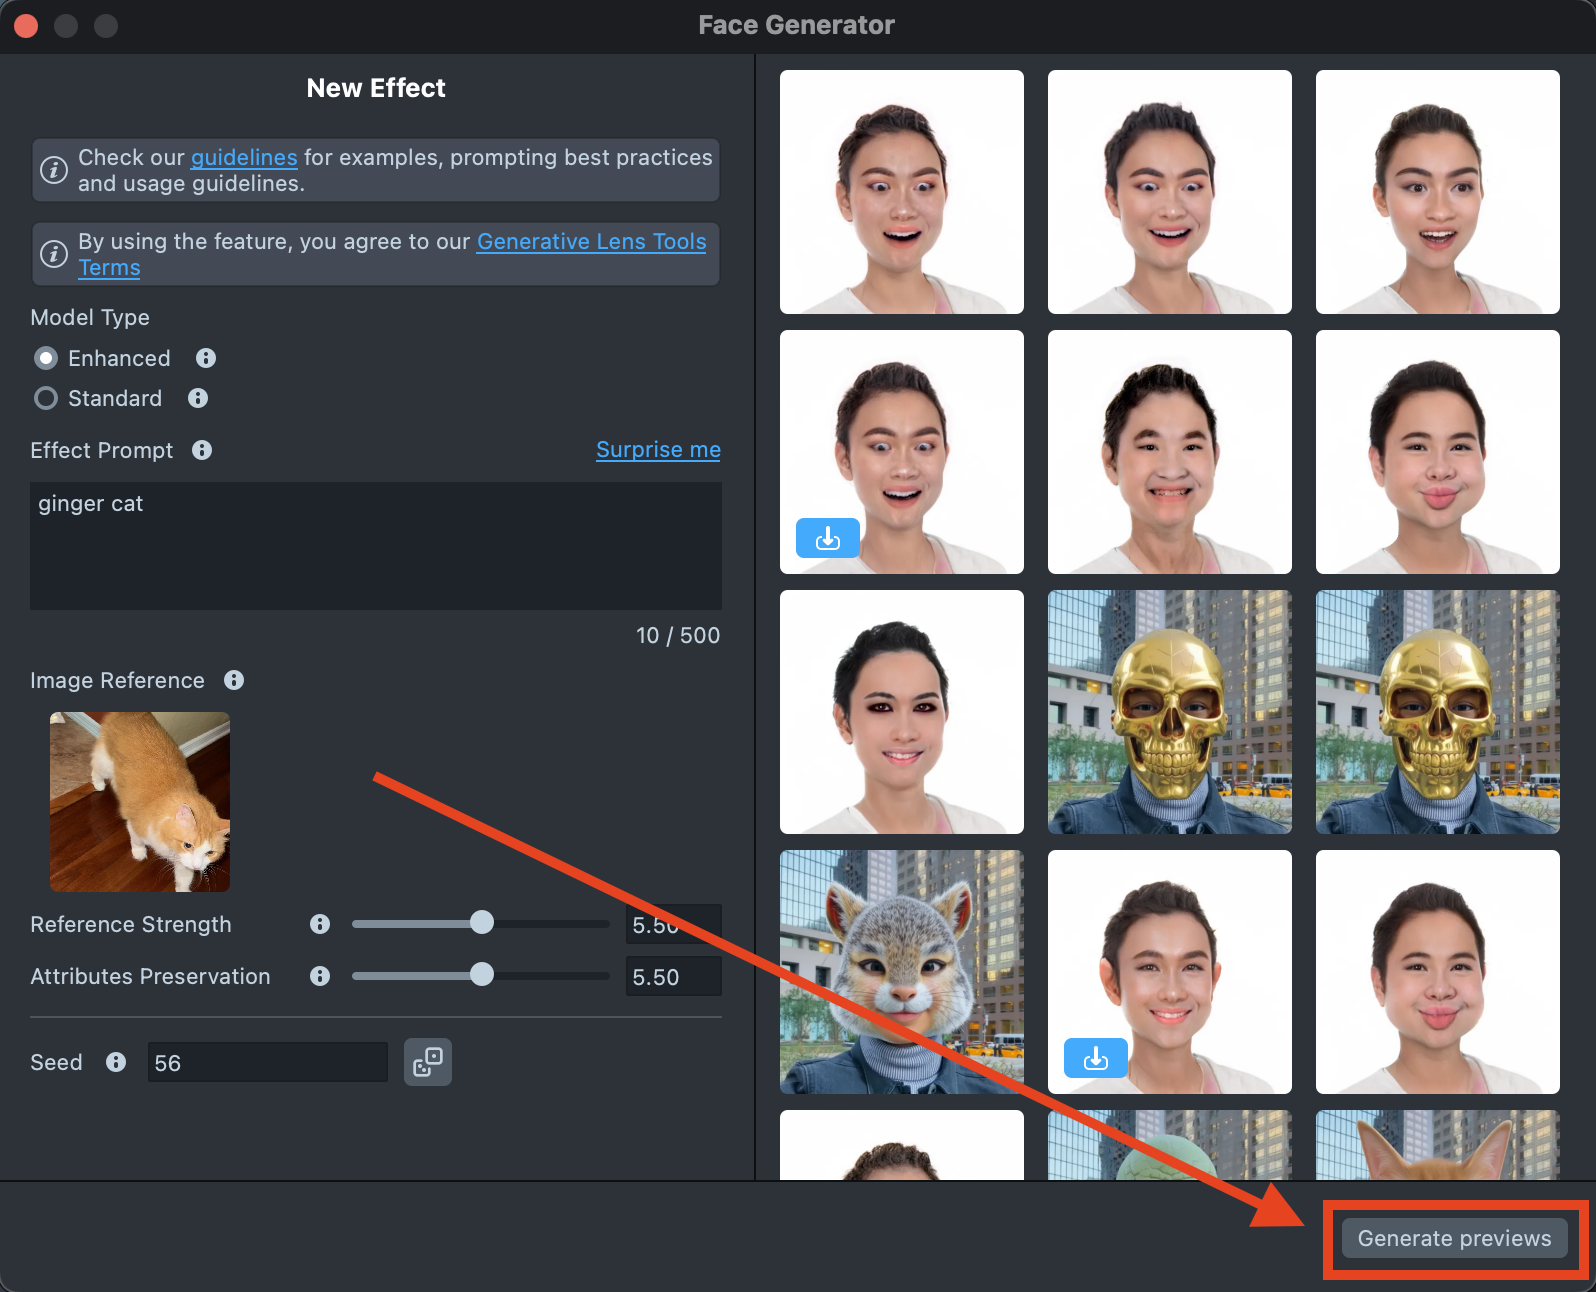
-
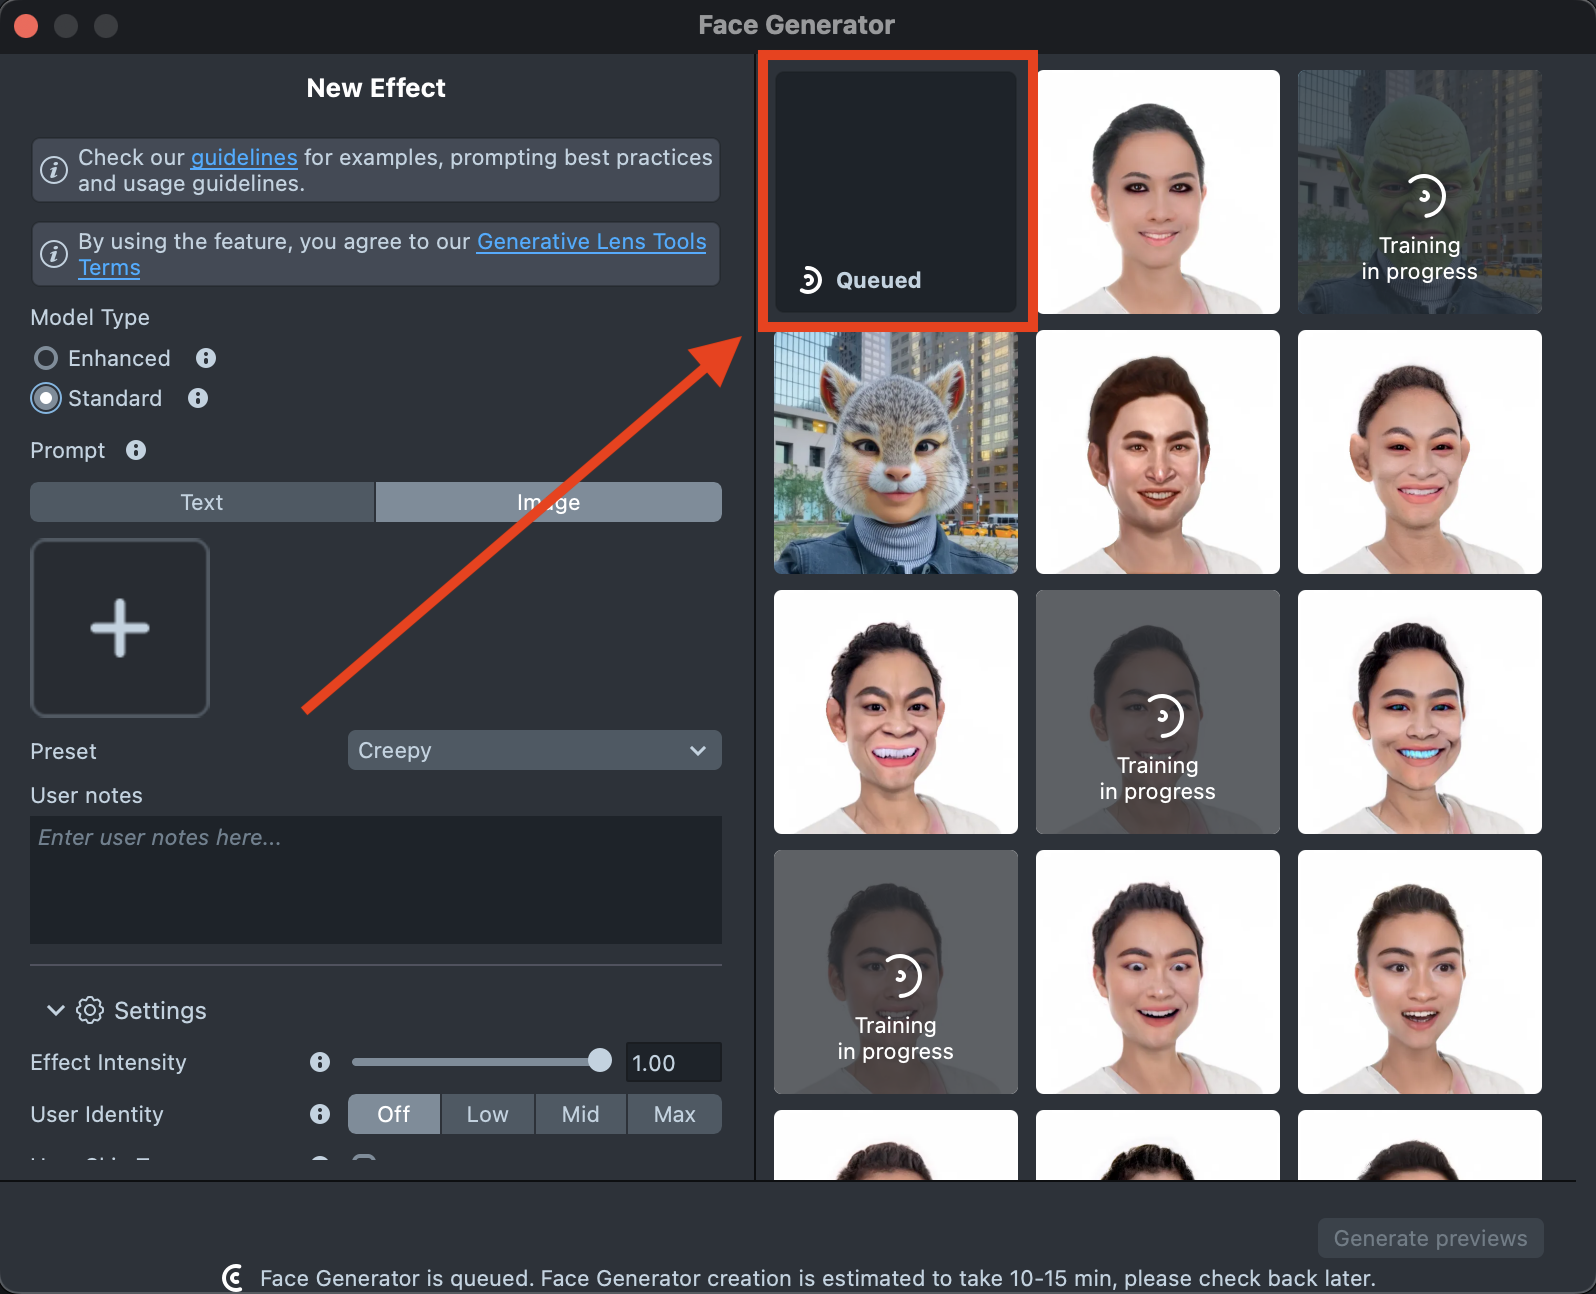
A new tile will appear in the Gallery with a loading indicator in the corner, showing the progress.
Generating the preview may take up to 5 minutes, but you can close the plugin and come back later.
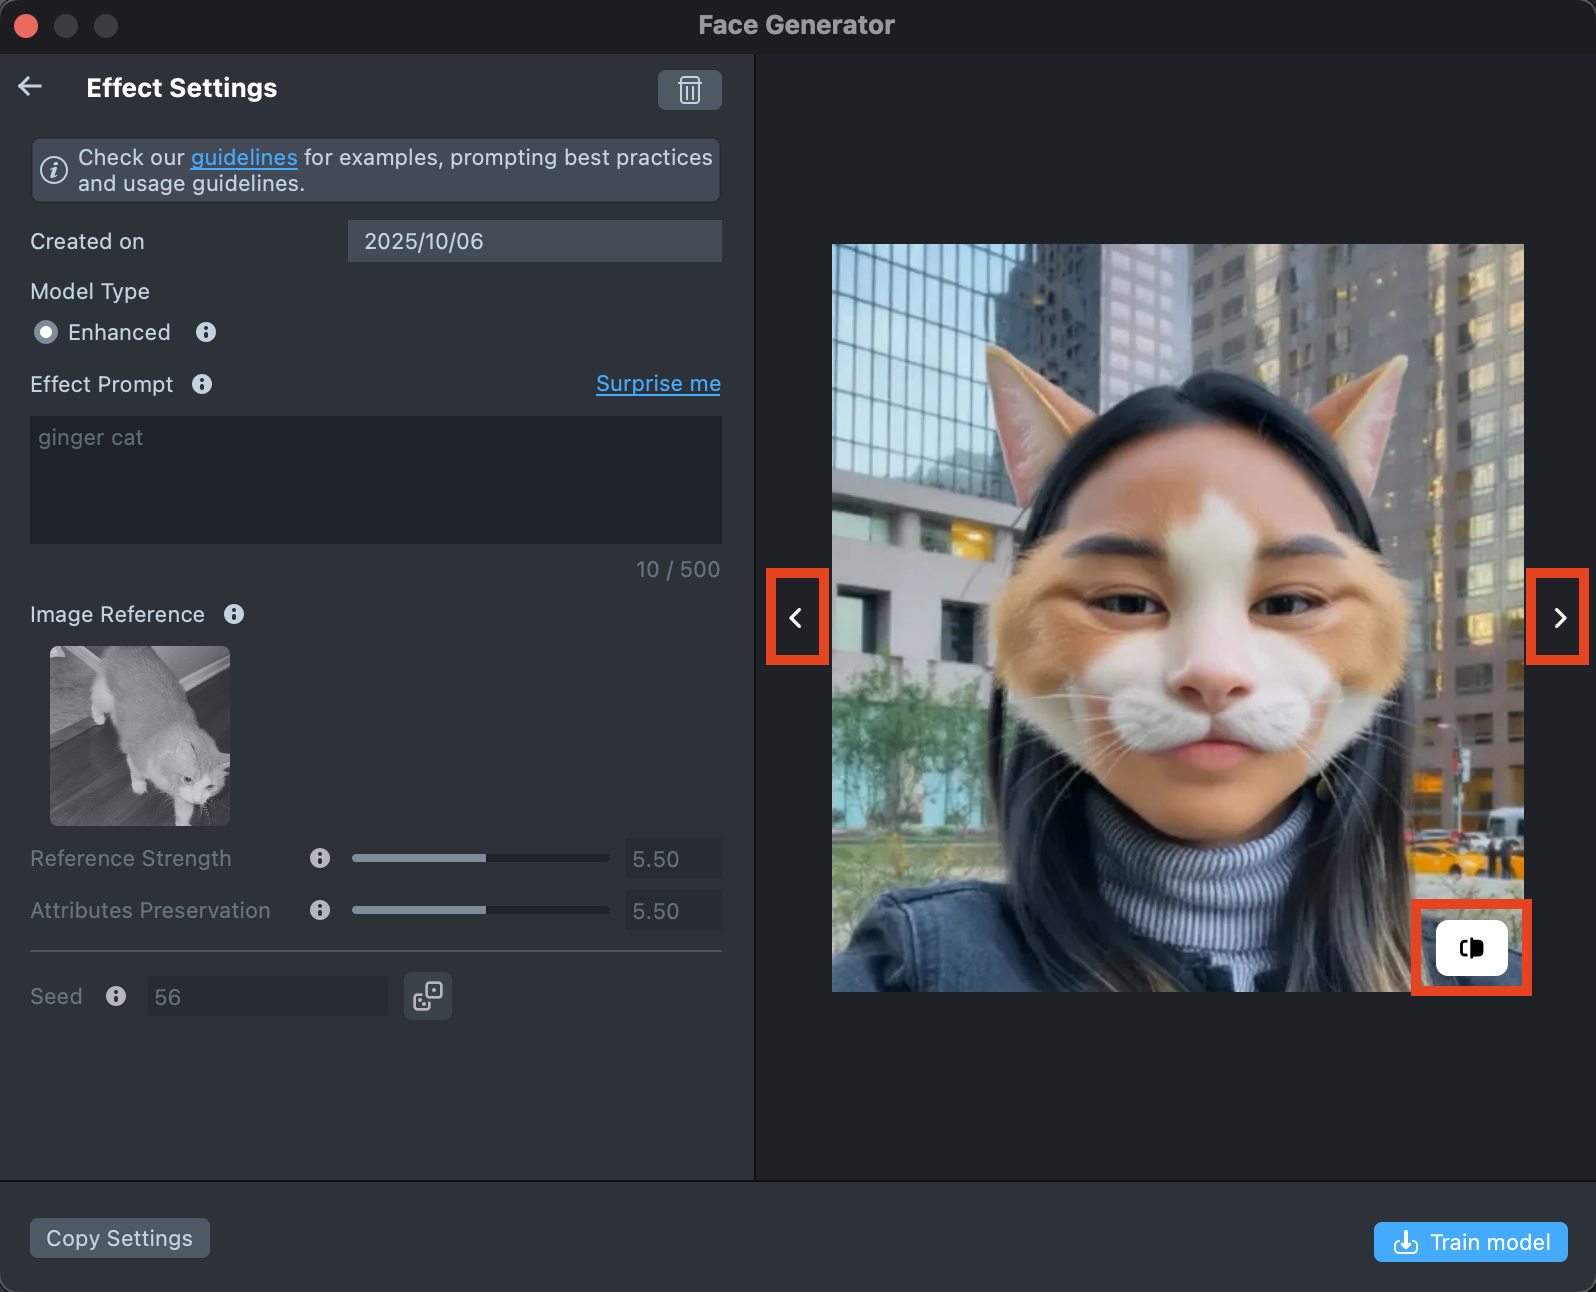
-
Once the preview has been generated, you can click its tile in the Gallery to open the details page. Here, you can use the arrows on the sides to preview the effect on different models. Additionally, you can click the button in the bottom-right corner to view the original image the effect was applied to.
-
If the preview doesn’t match your expectations, click
Copy Settingsto adjust your prompts or seed.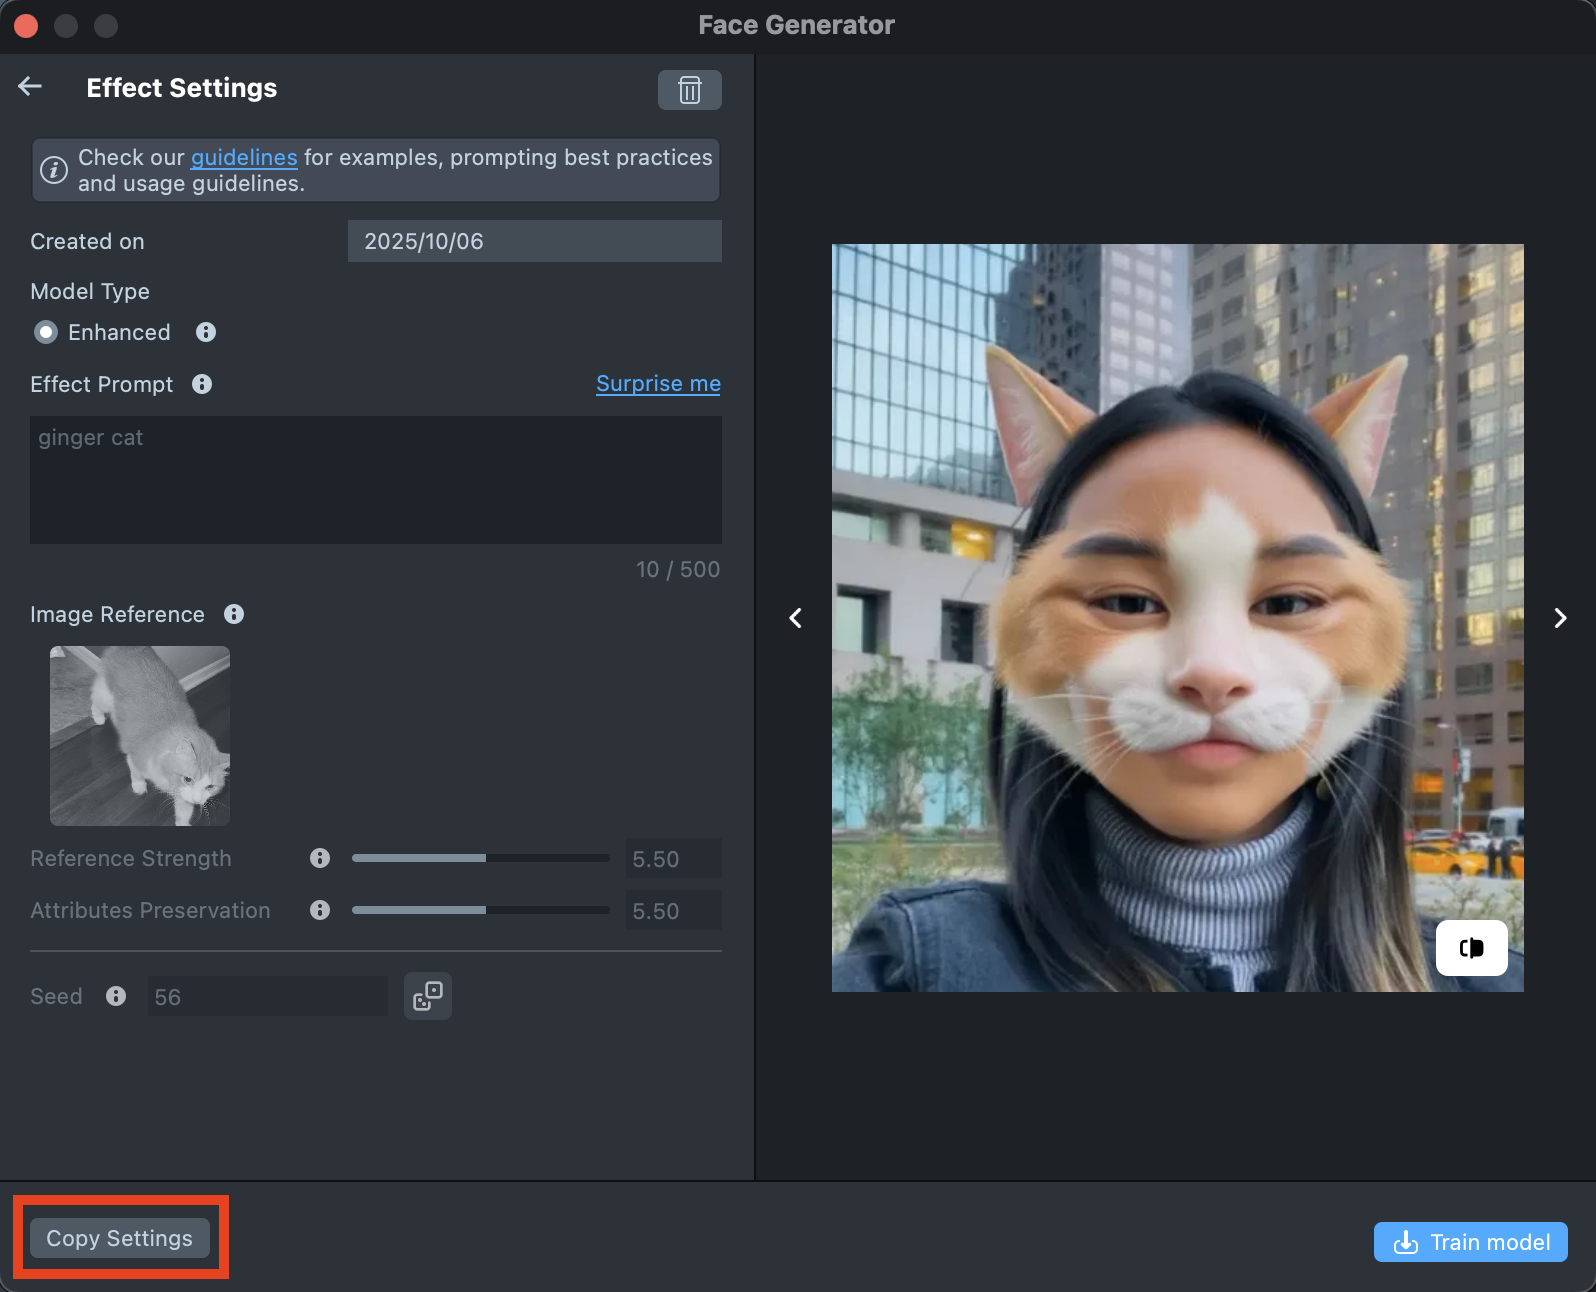
-
You can make as many tweaks as needed until the result feels right - all changes will appear in the Gallery as a new effect, without altering the current one. This way, you can always go back and compare whether the updated effect looks better than the original.
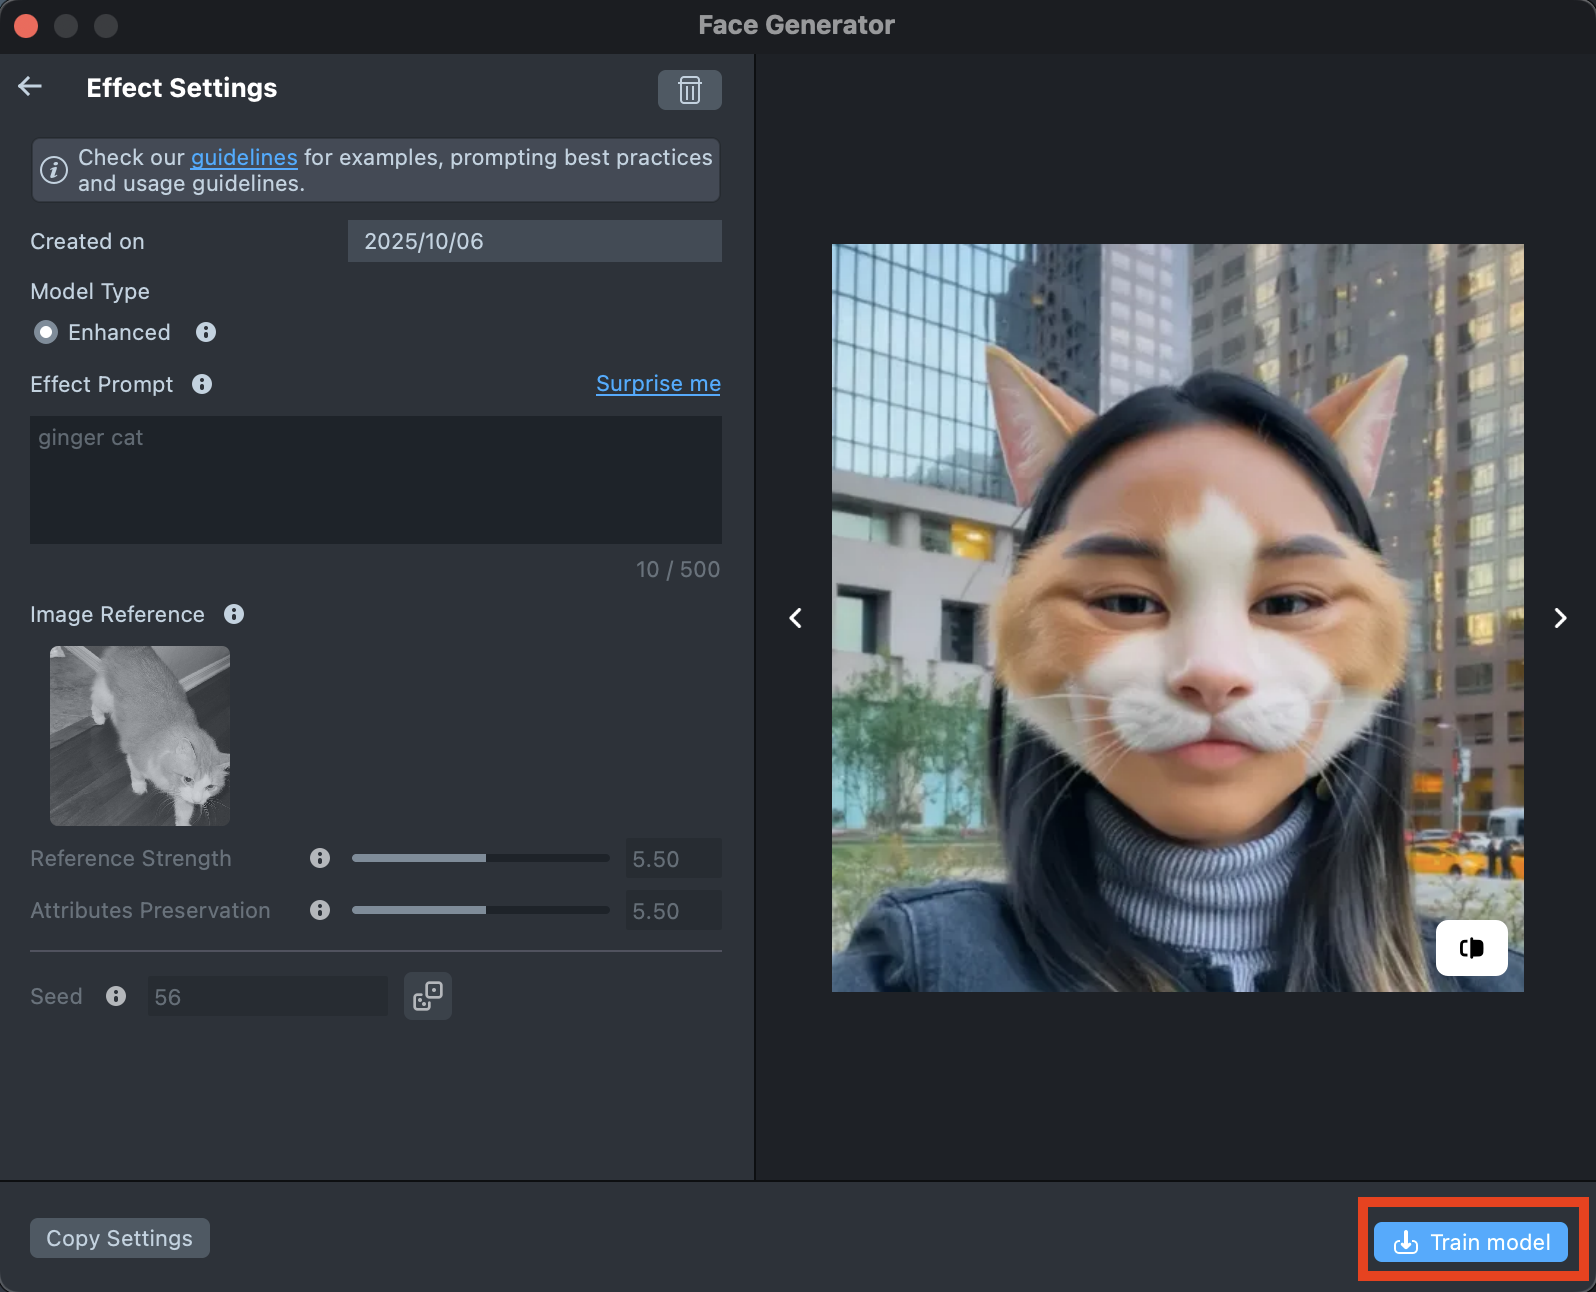
-
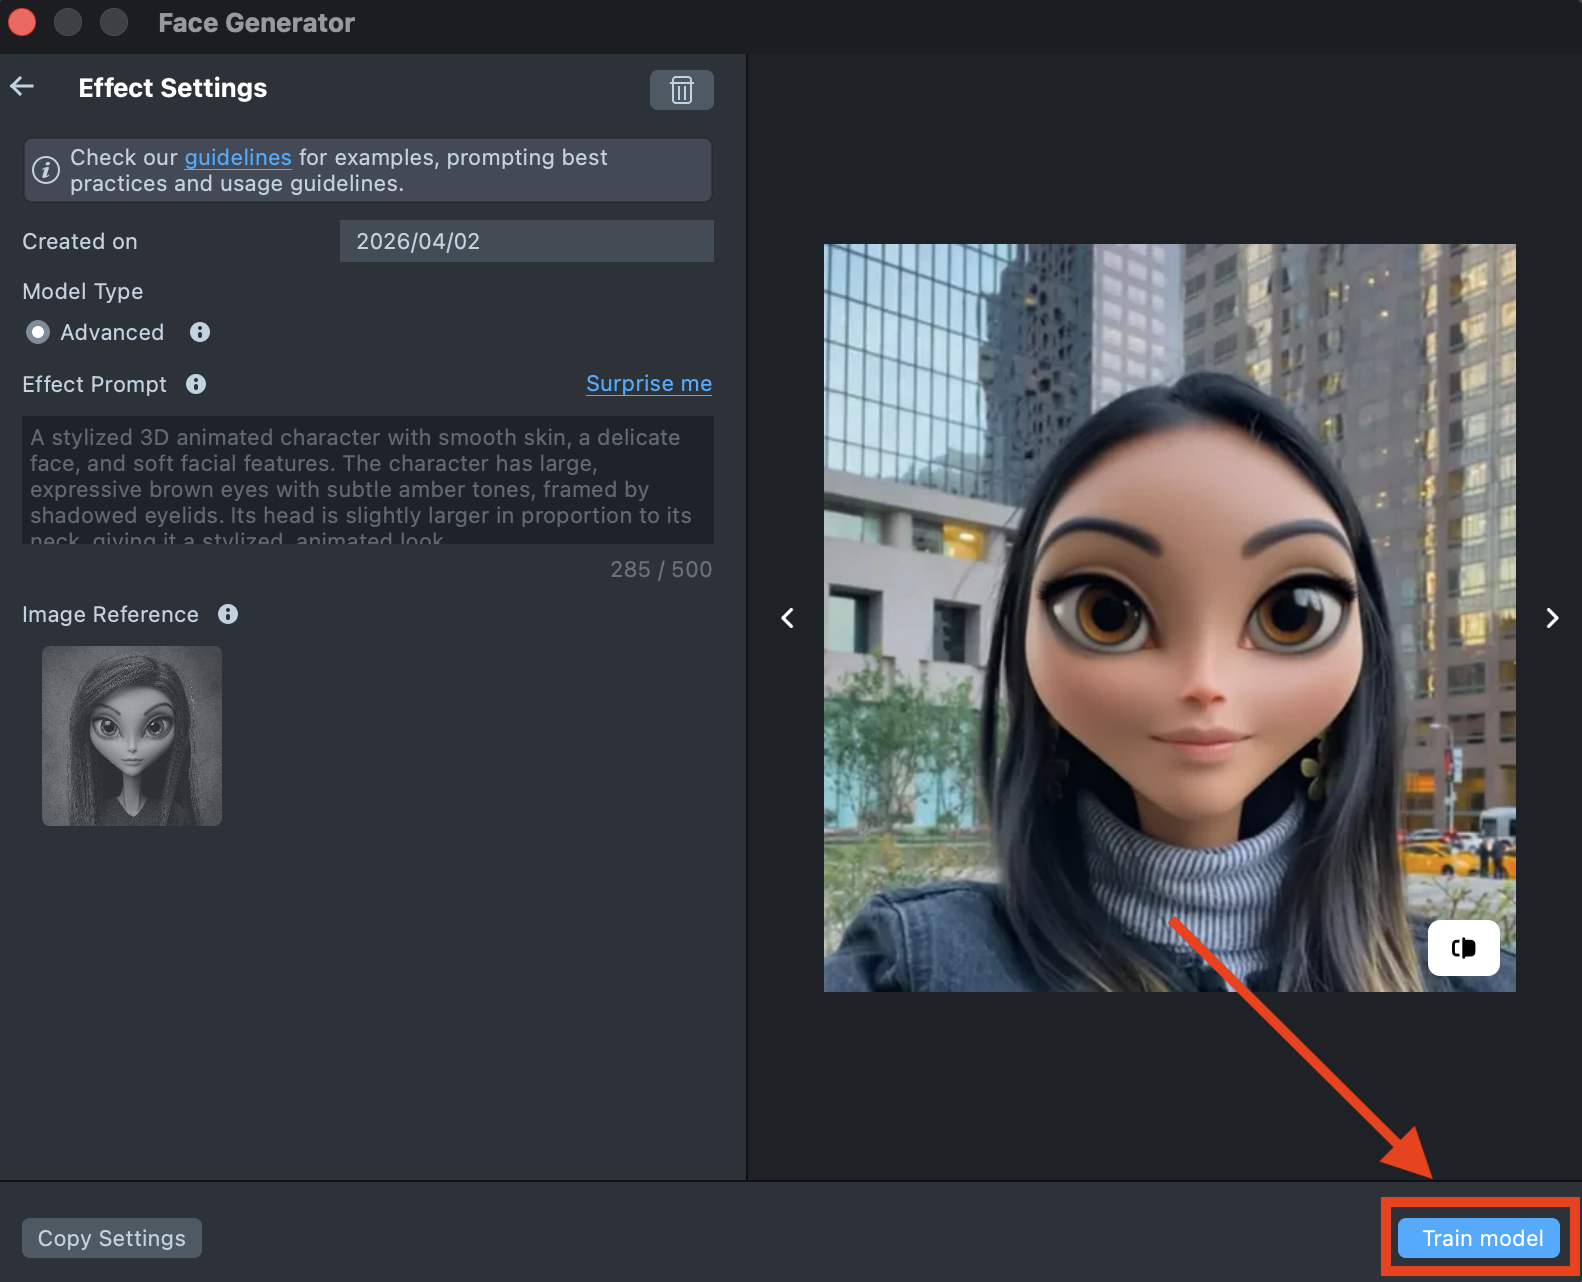
Happy with the preview? Click
Train Modelto start training your model. You’ll be able to track the training status directly in the Gallery.
Training the model may take up to 2 hours, but you can close the plugin and come back later.
-
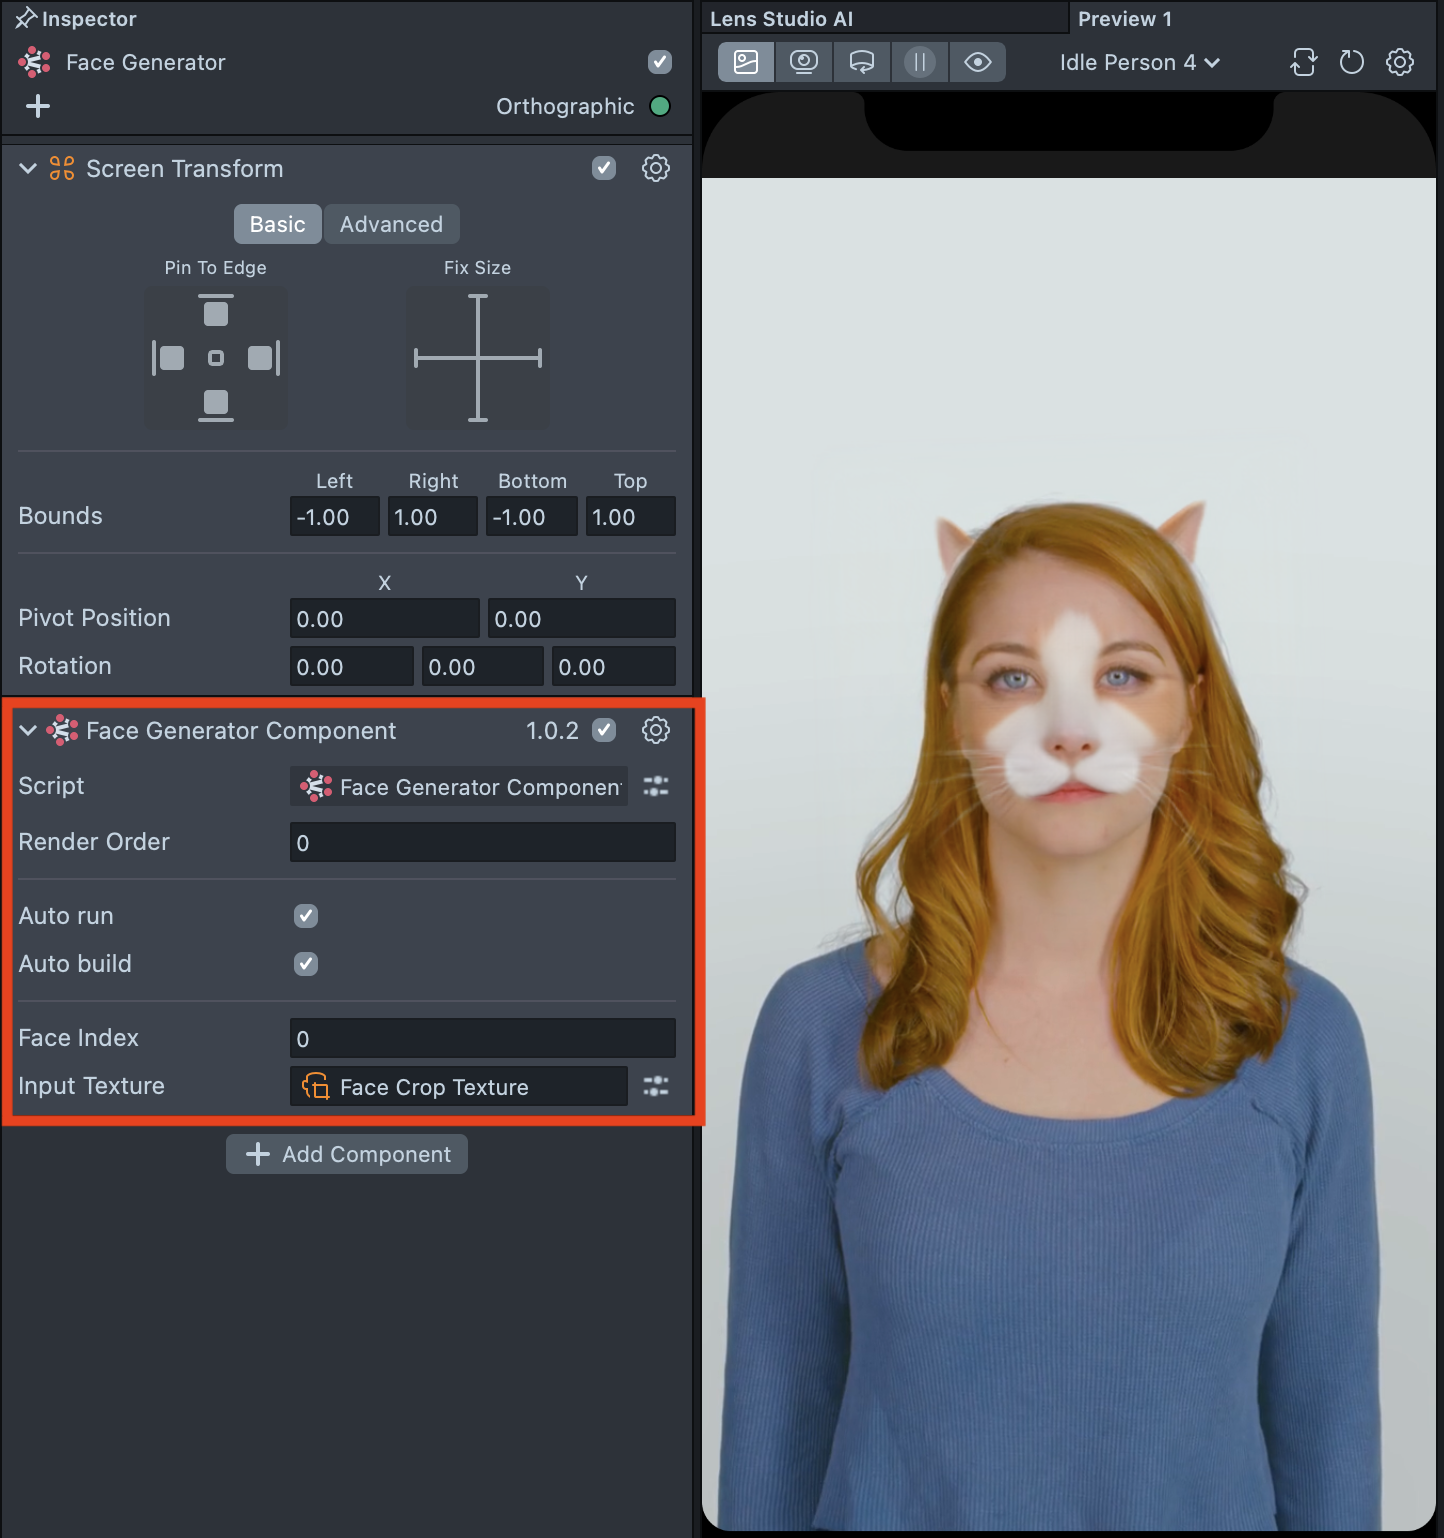
Once training is complete, you can import the effect directly from the Gallery by clicking the
Importbutton, or clickImport to projecton the details page to add it to your project.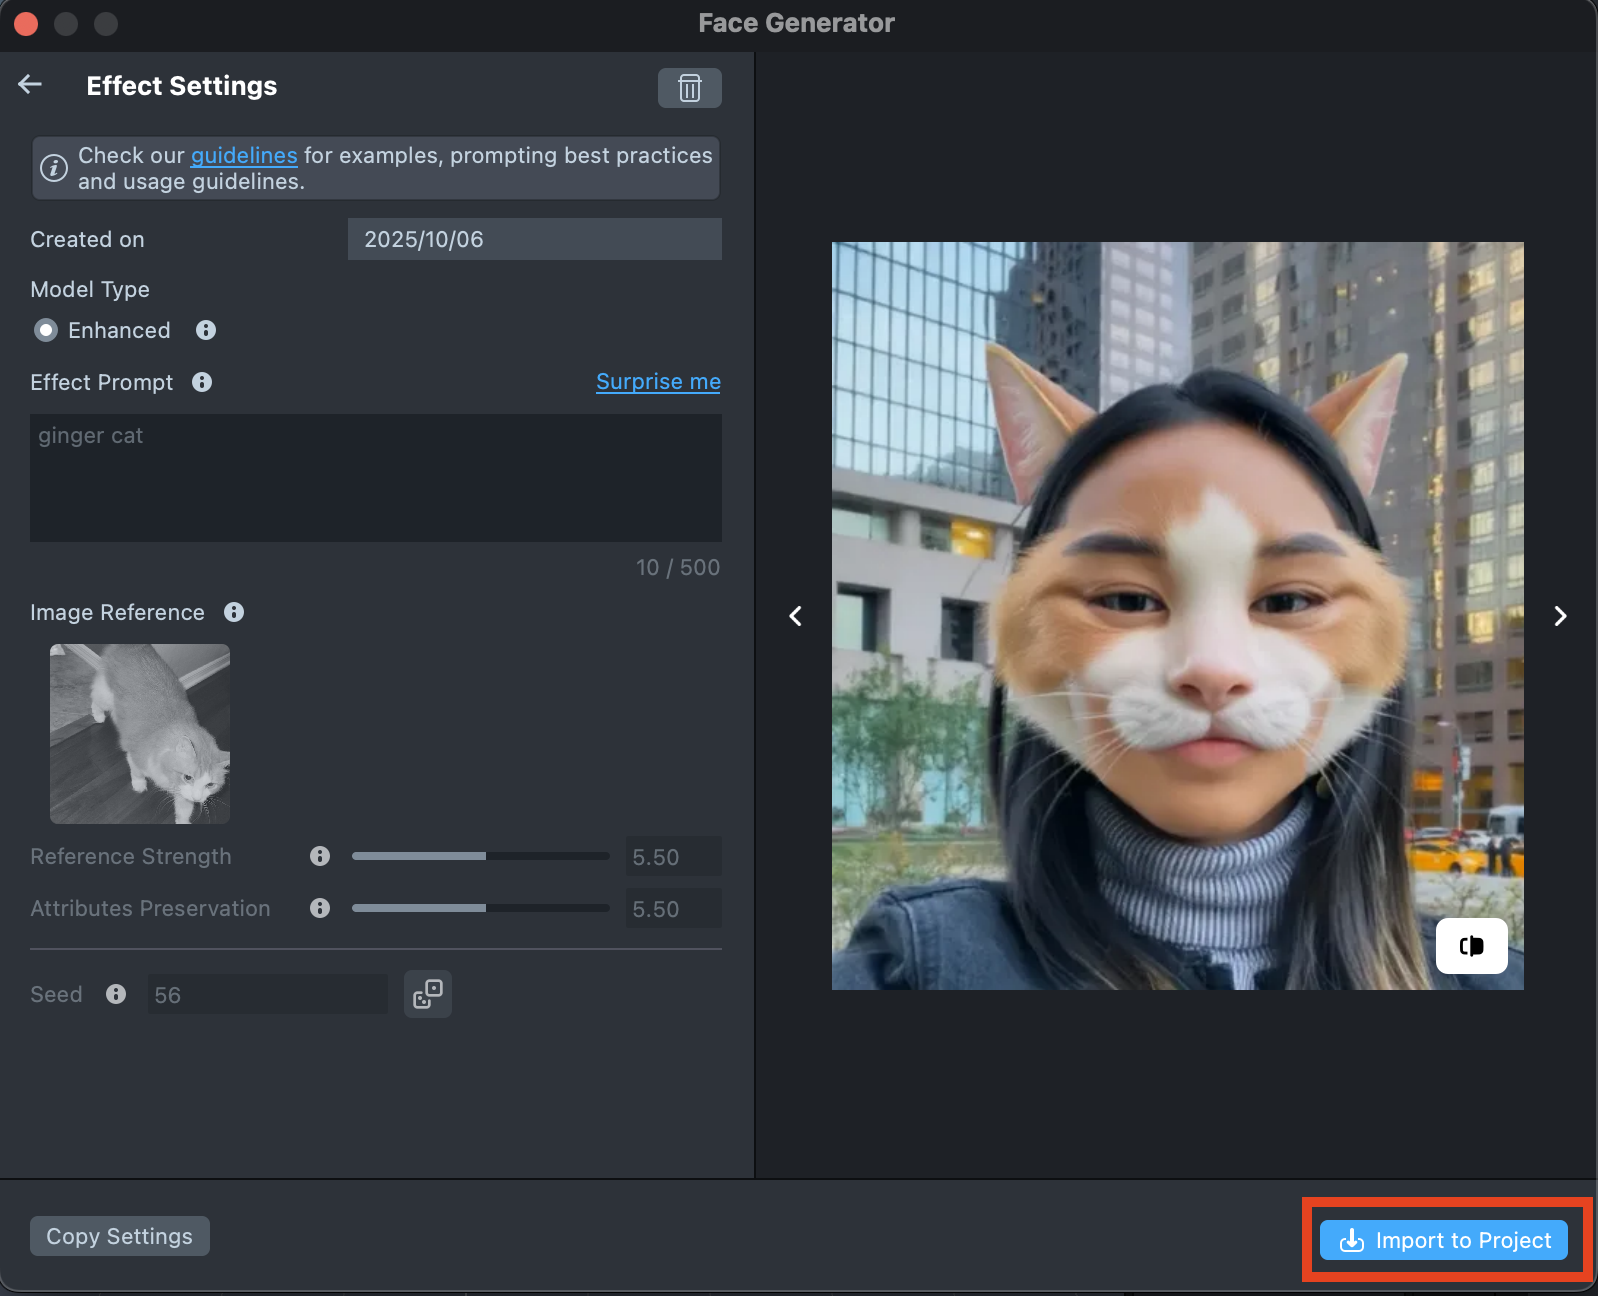
-
Follow this guide to learn how to combine Face Generator with AI Portraits, or refer to this guide to learn how to combine Face Generator with Style Generator, Face Animator, and Garment.
Best Practices
Effect Prompt
You can use different types of prompts—both short and long—to guide the generation process. It’s usually best to start with a short prompt and refine it as you go. Add adjectives, specific details, or additional descriptions to bring the result closer to your desired look. Keep in mind that the tool interprets your prompt literally.
- Focus on the essentials. Describe only the changes you want to make, and avoid unnecessary or general details.
- Skip background descriptions. There’s no need to mention the background unless it’s part of your design.
- Use descriptive words. Adjectives like 3D, cartoon, or realistic can help you control the style of the generated image.
- Long prompts. More detailed prompts can help you create stronger, distinctive designs. Combine them with fine-tuned settings to achieve precise and distinctive results.
- Prompt Weighting. You can use special symbols in your Effect Prompt to control how much influence specific words or phrases have on the final result - emphasizing or reducing their impact as needed.
Image Reference
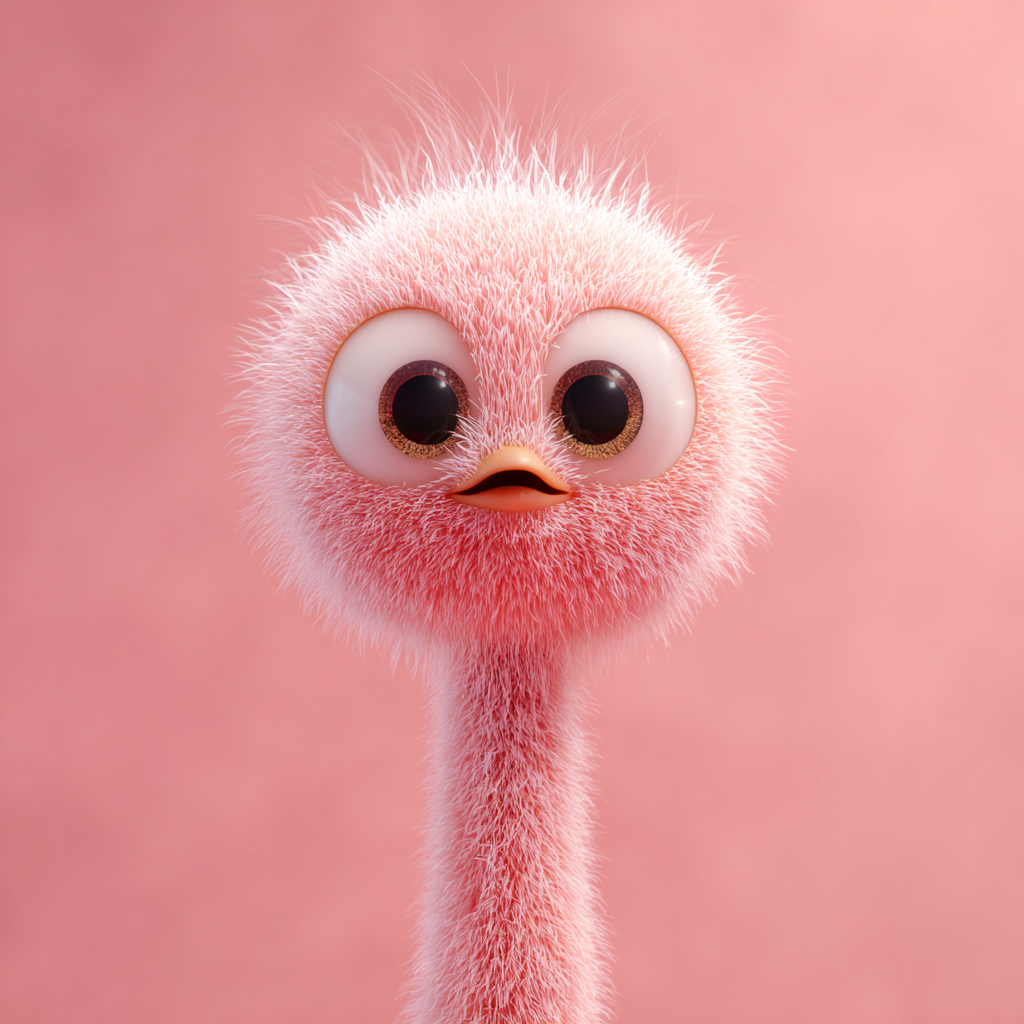
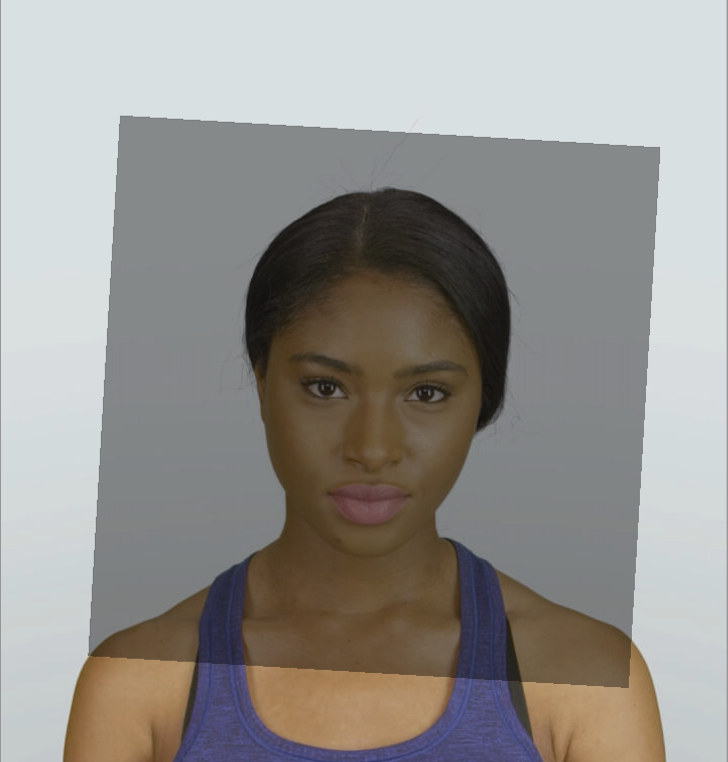
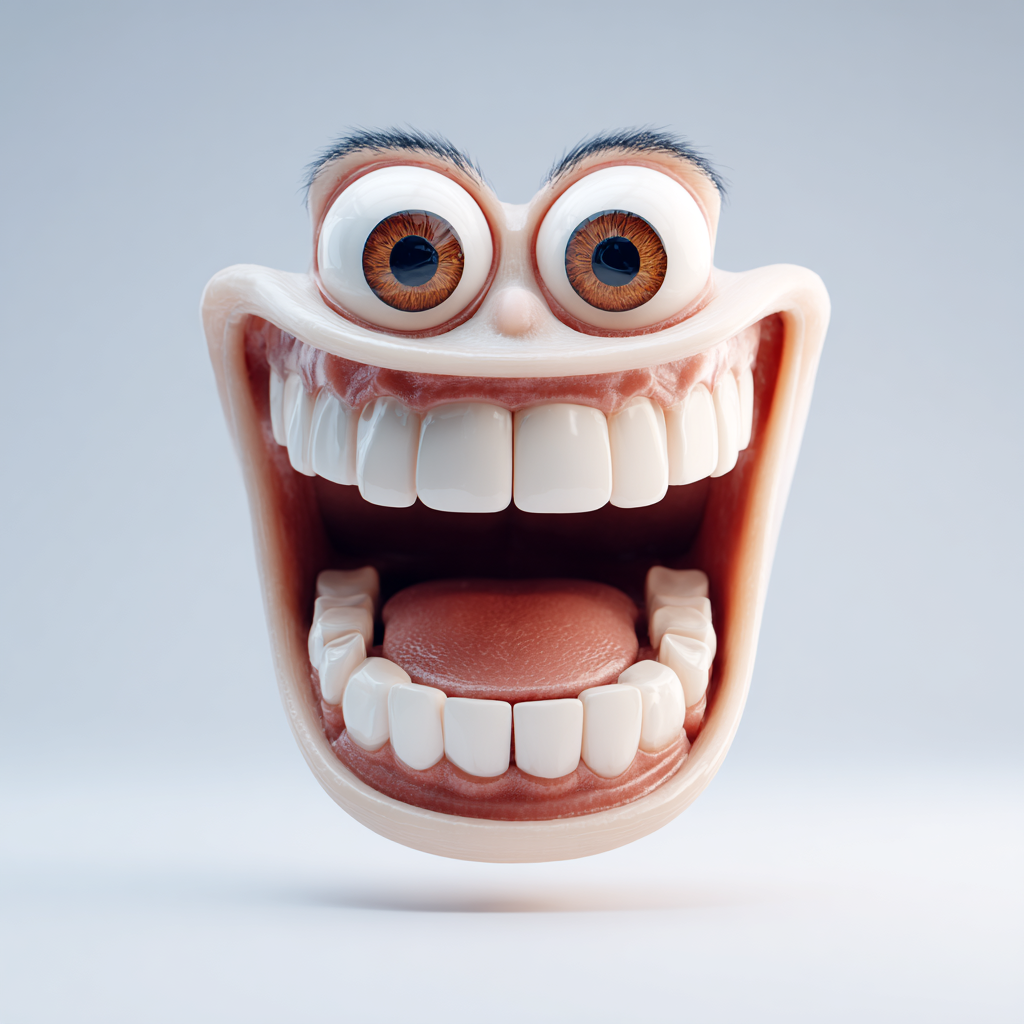
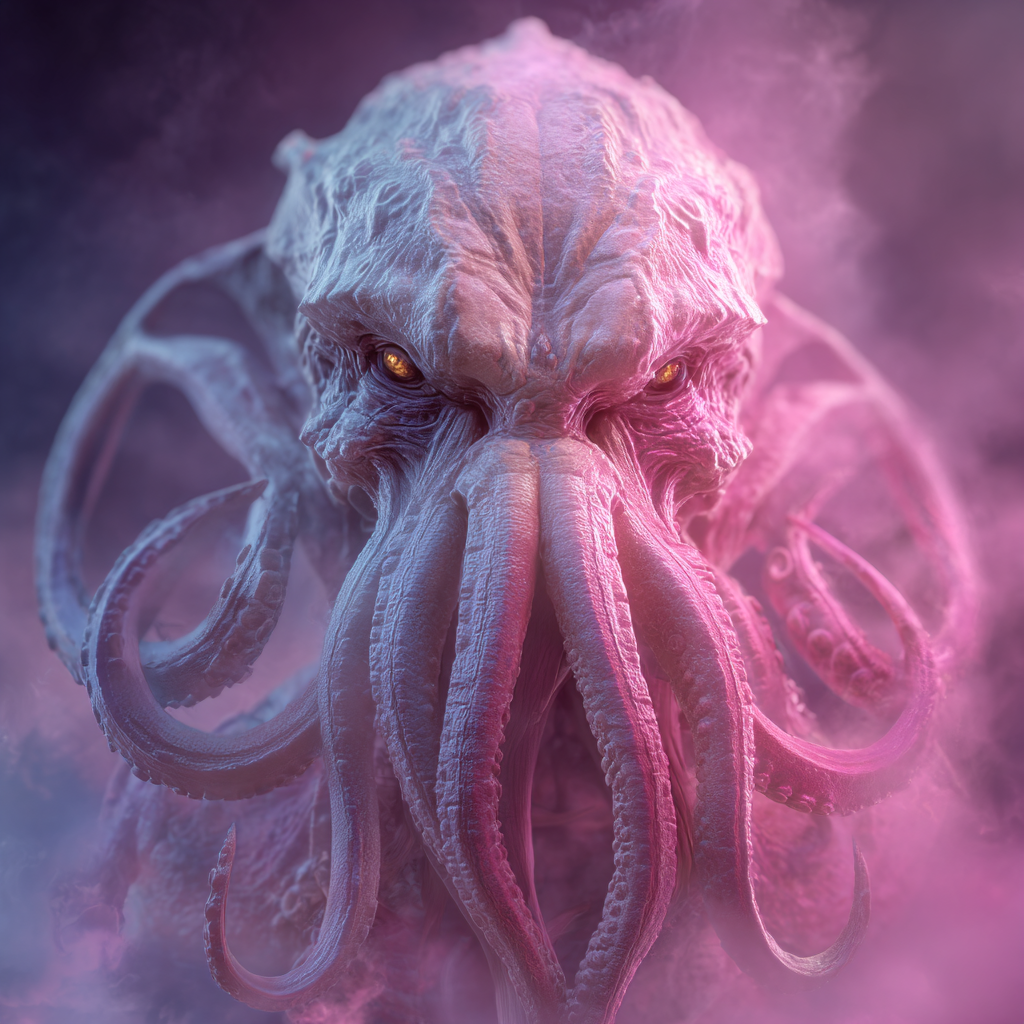
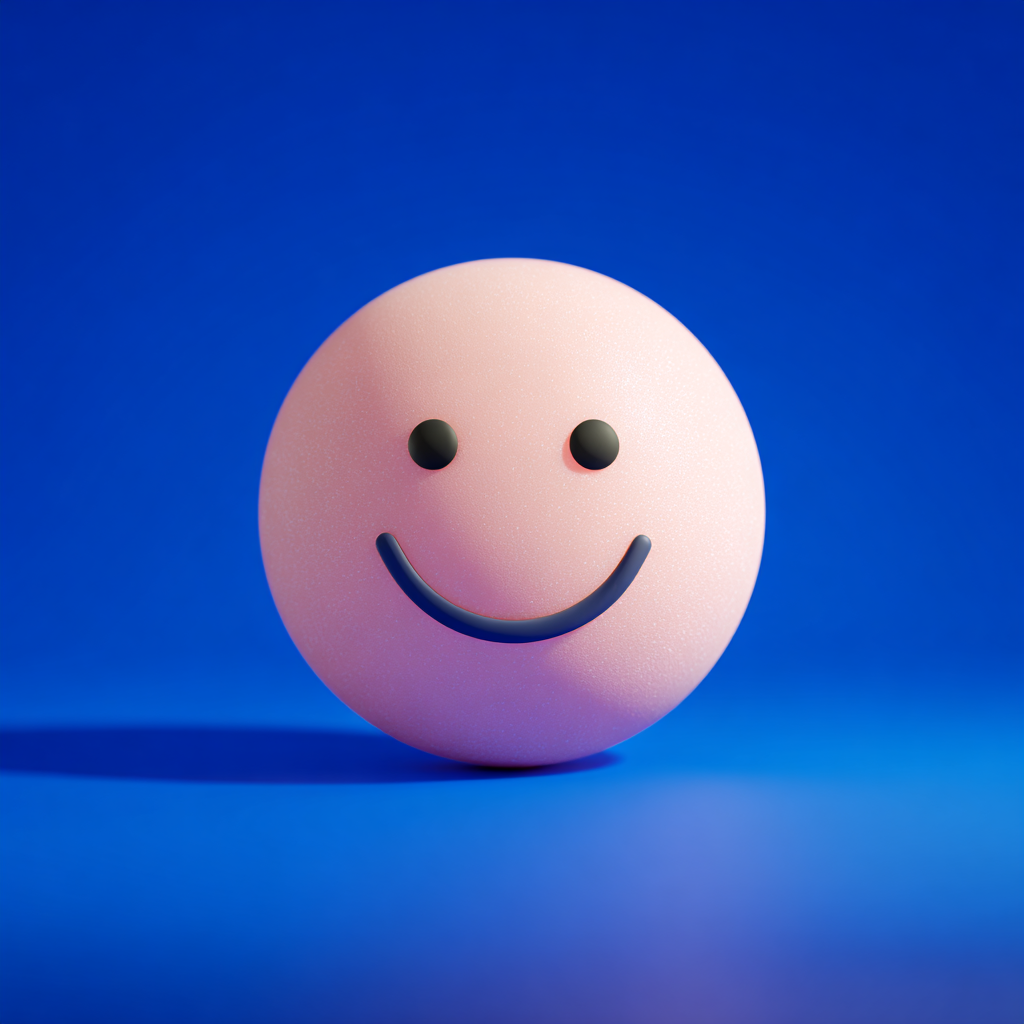
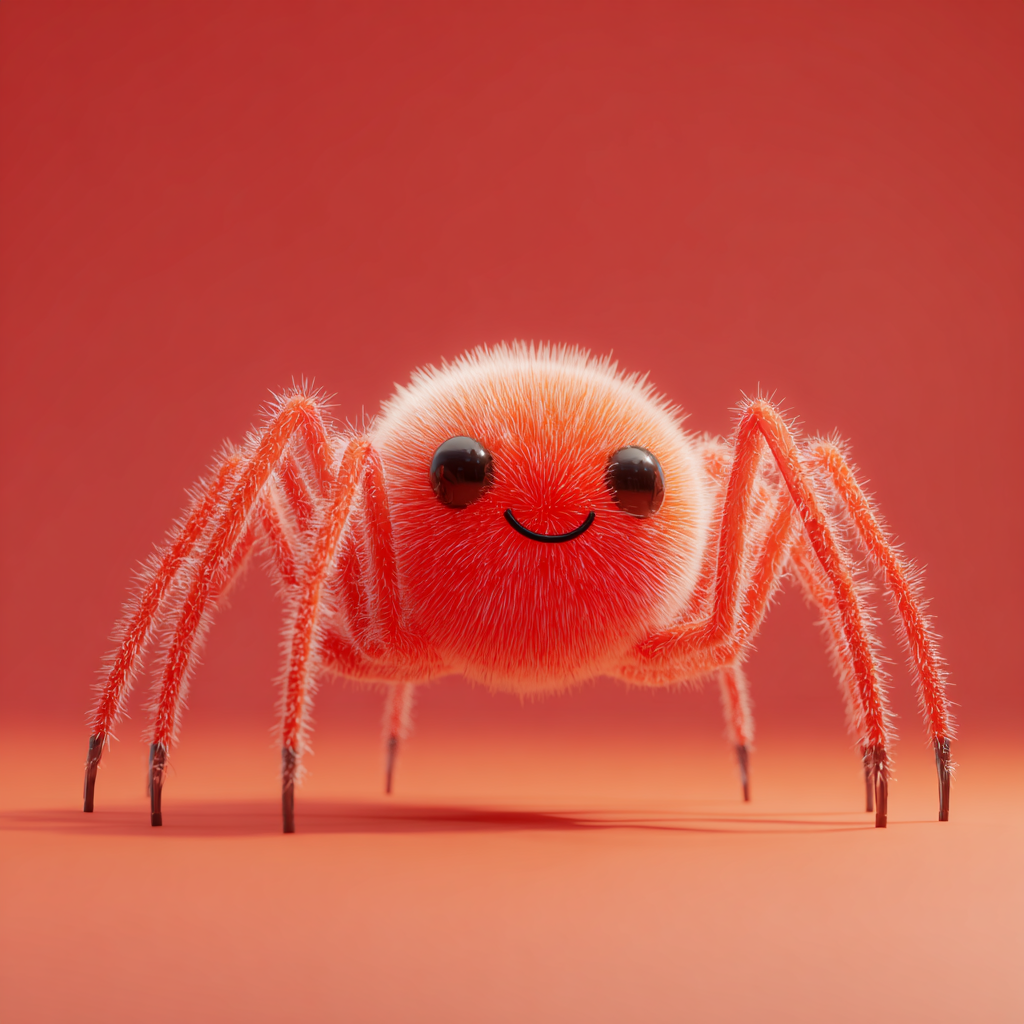
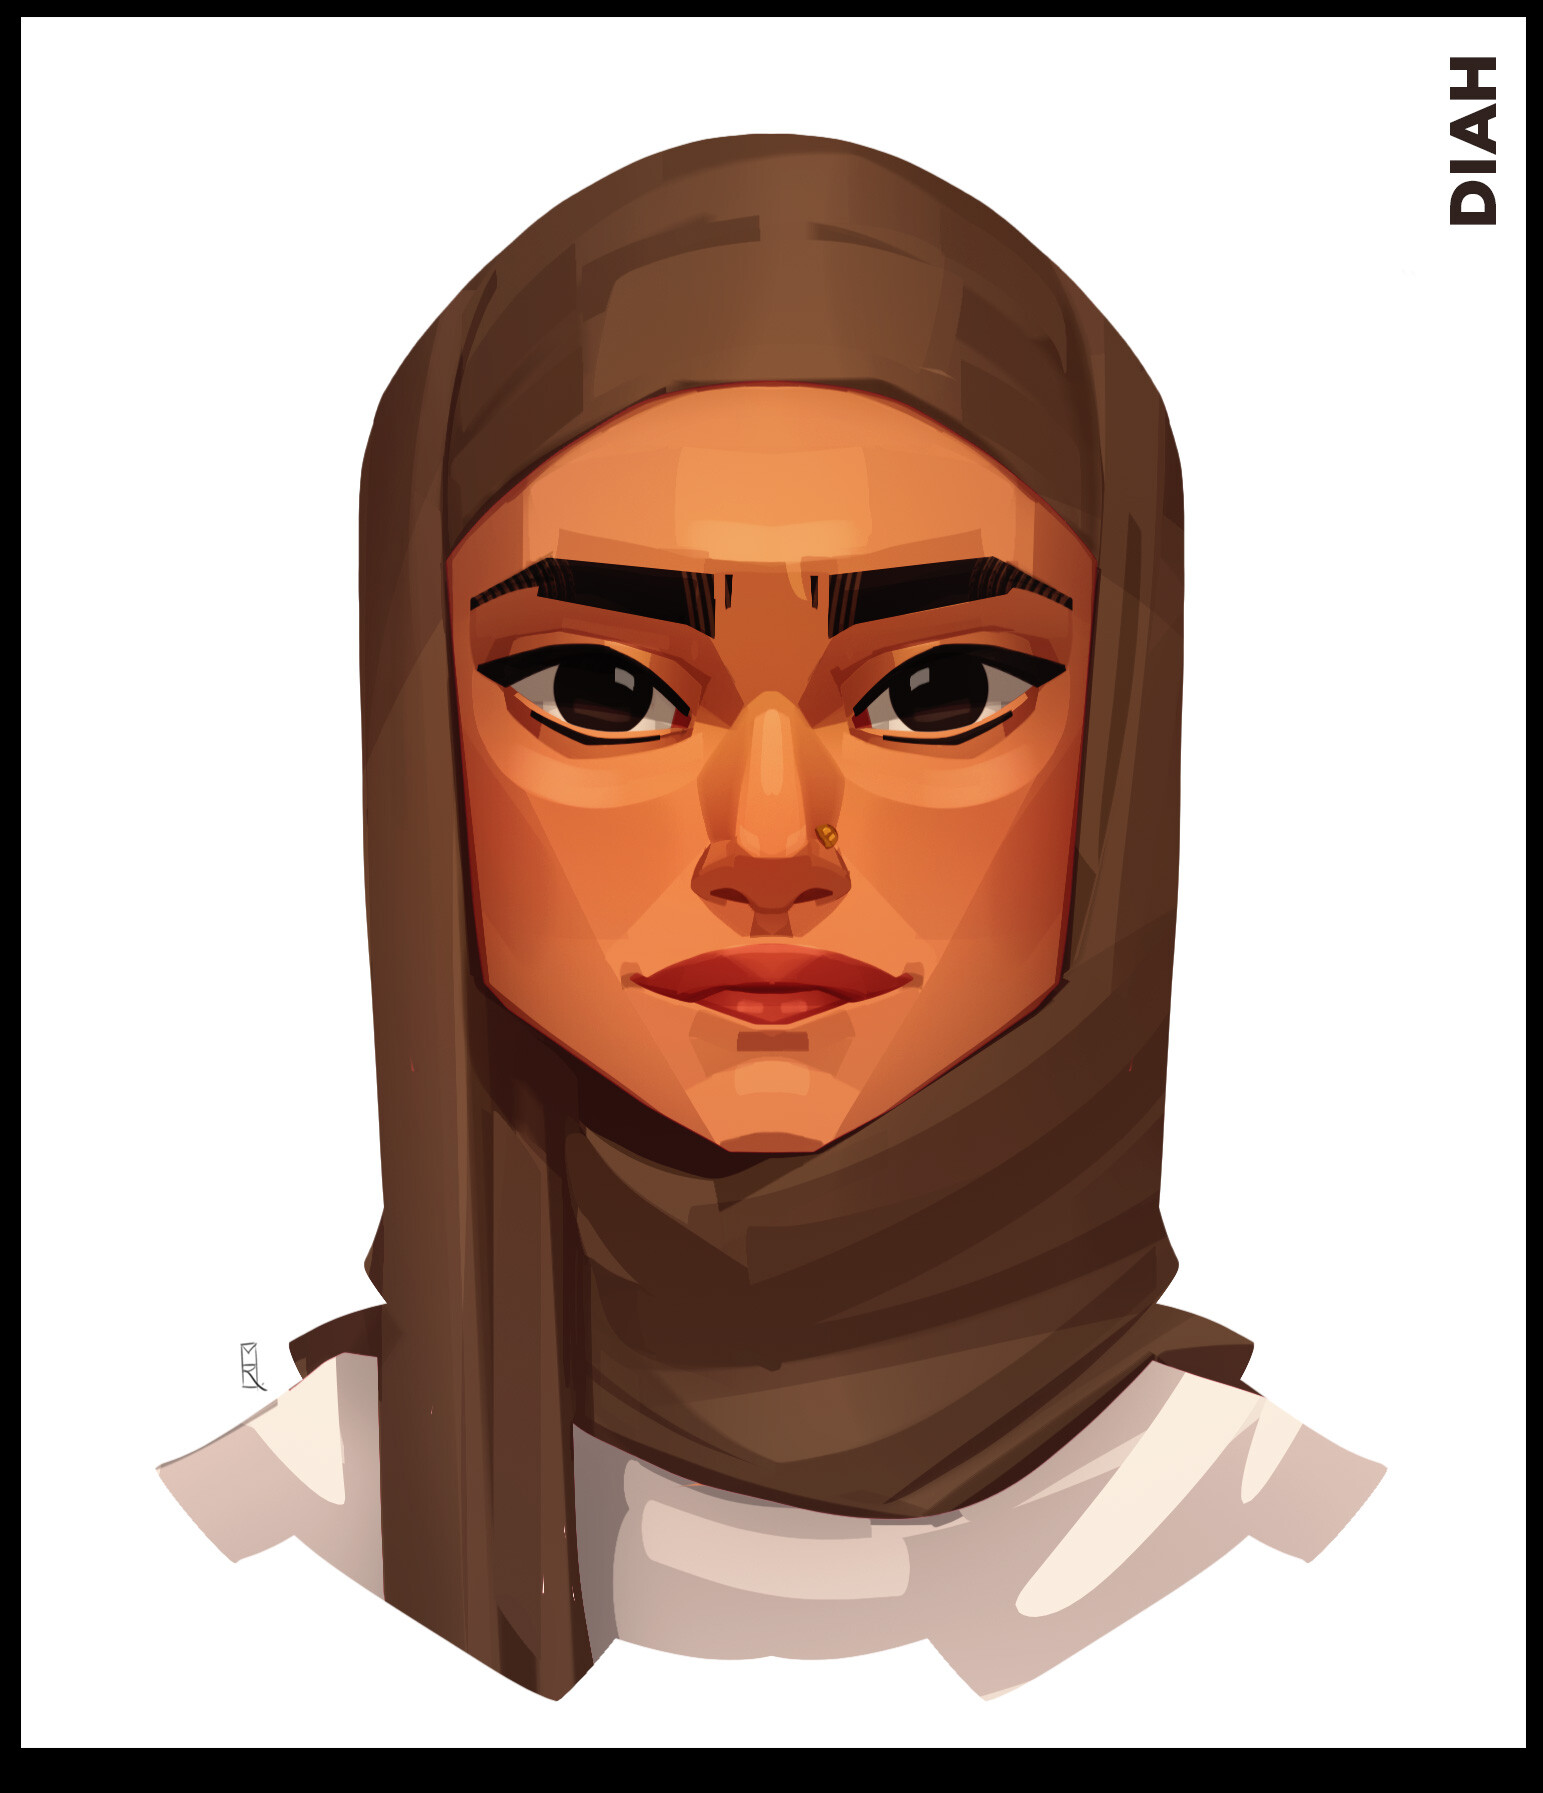
Use a high-quality image with a solid background and a frontal orientation of the object. It is best if the object has features of a human face or such details as generalized eyes, lips, etc.
| Ideal Image Reference | ||
|---|---|---|
 |  |  |
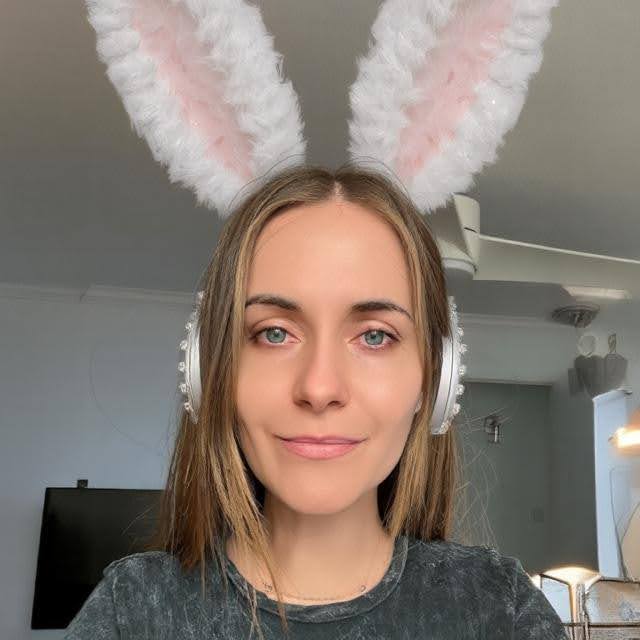
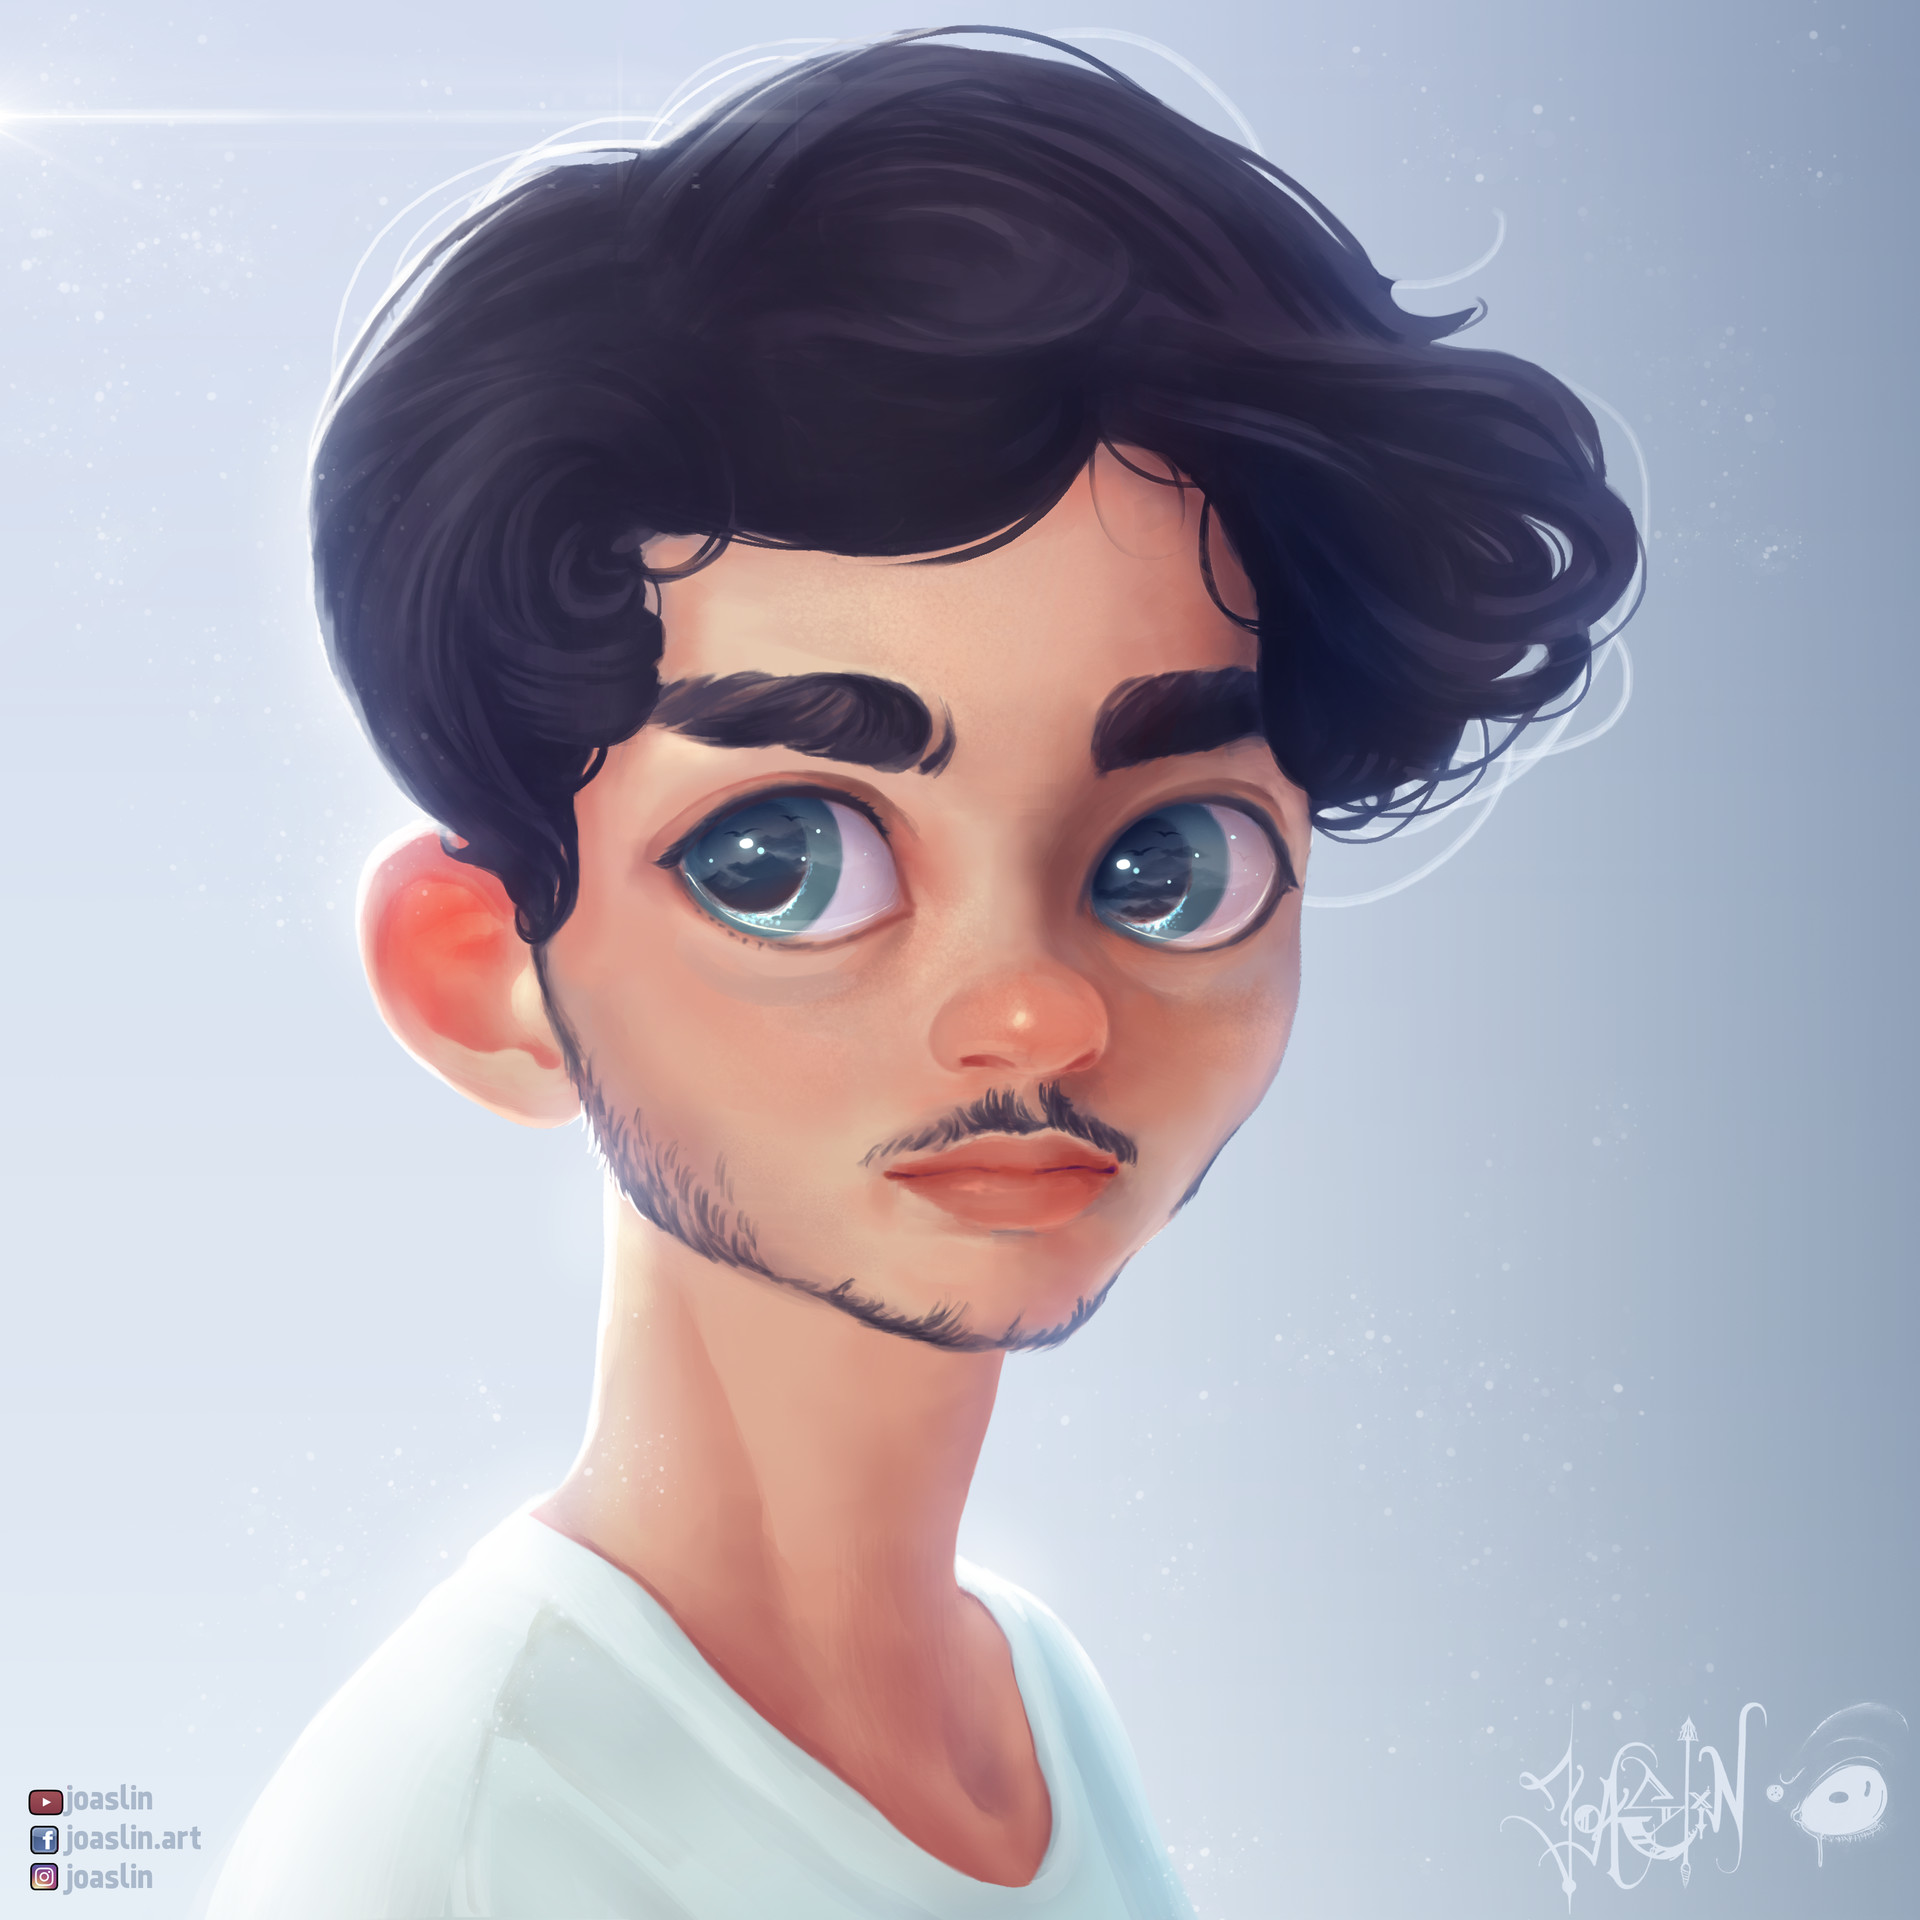
| Good Image Reference | ||
|---|---|---|
 |  | 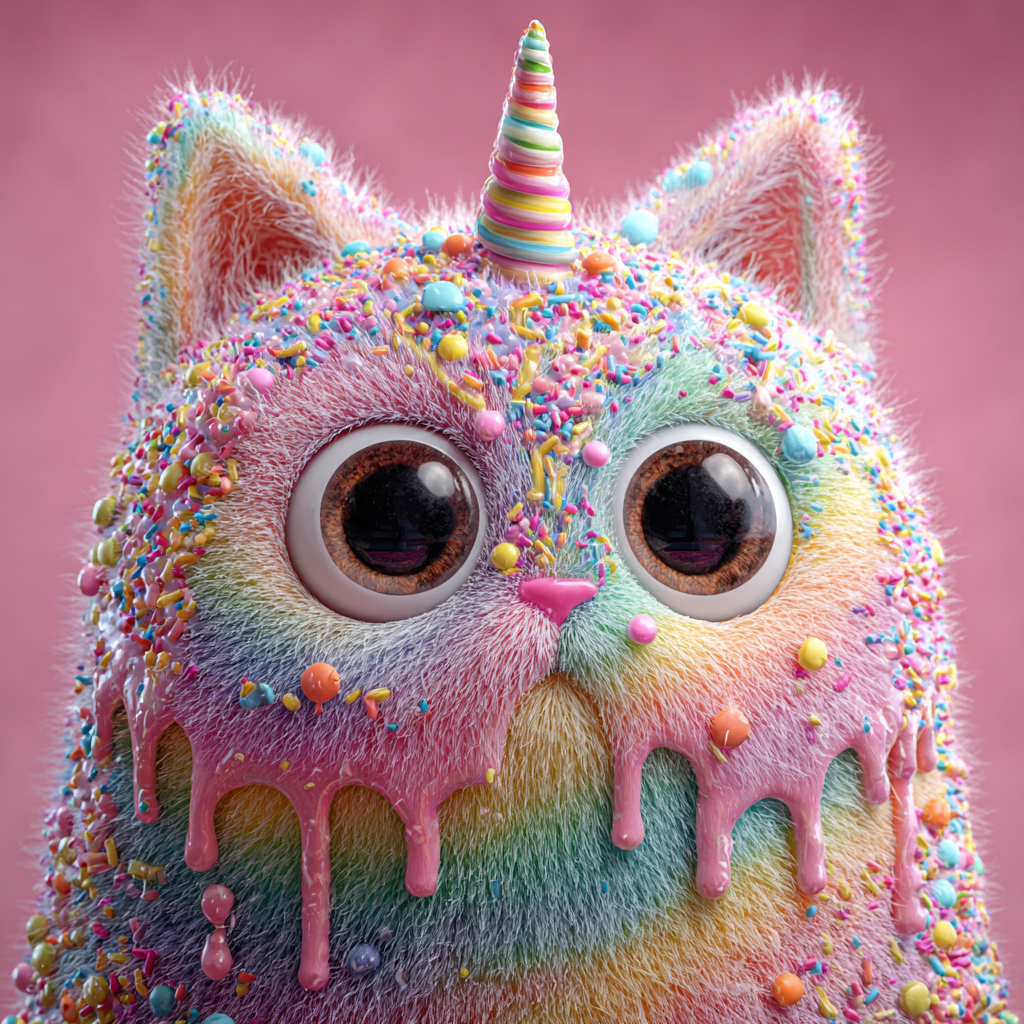 |
| Poor Image Reference | ||
|---|---|---|
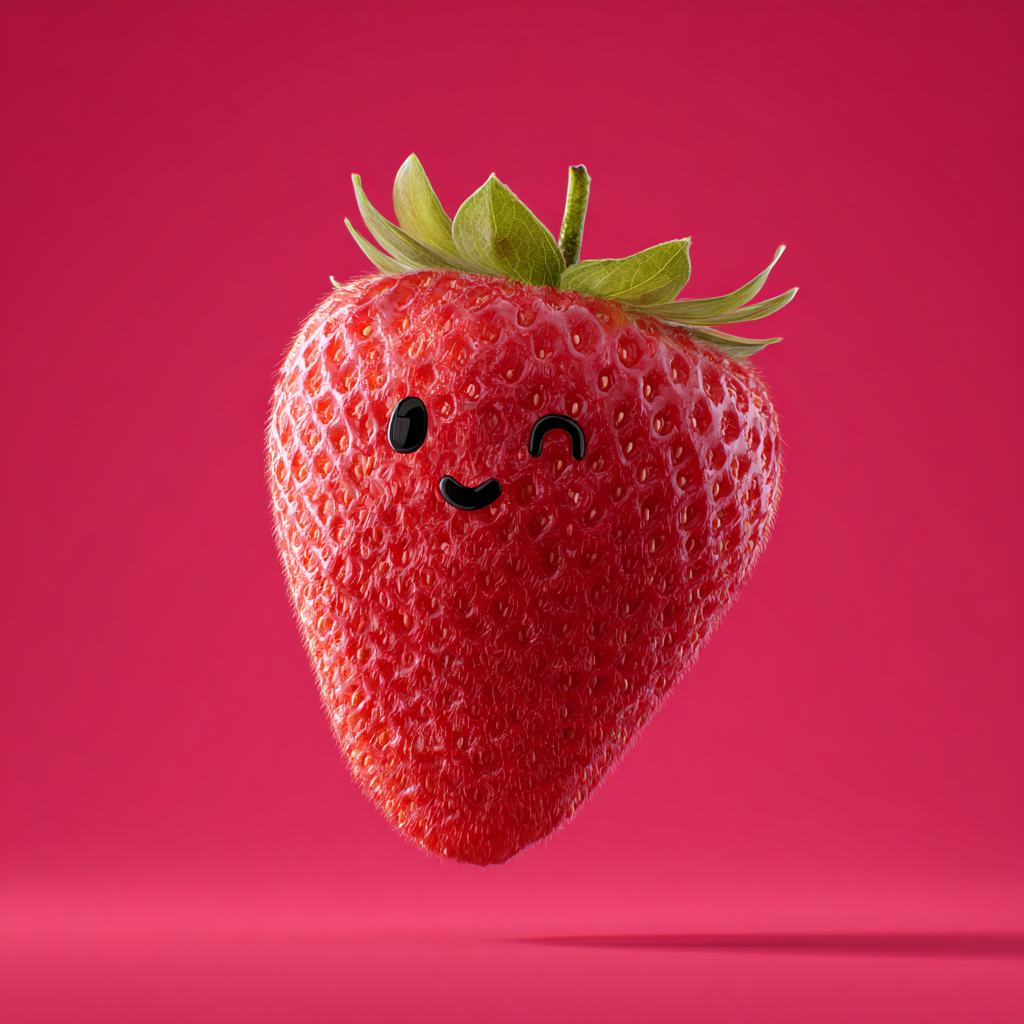 |  |  |
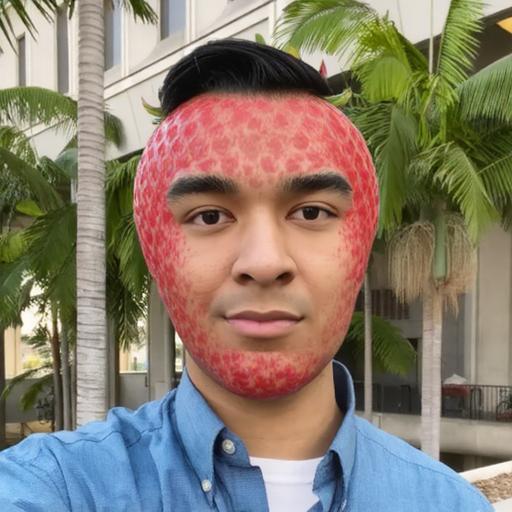
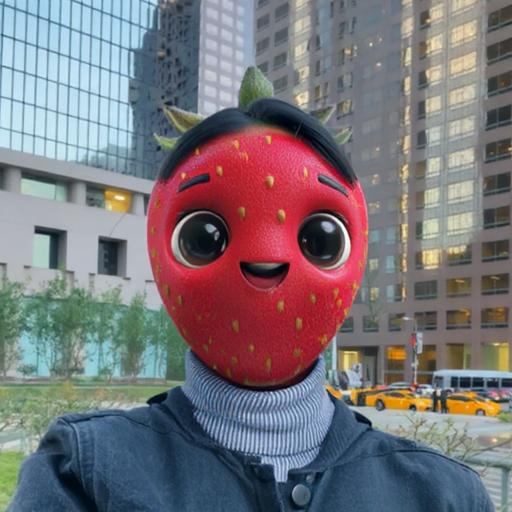
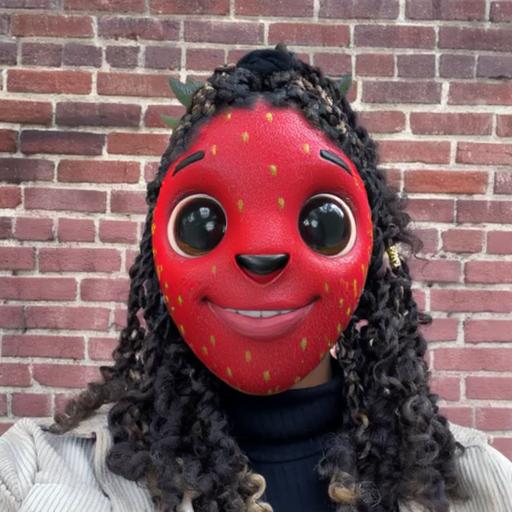
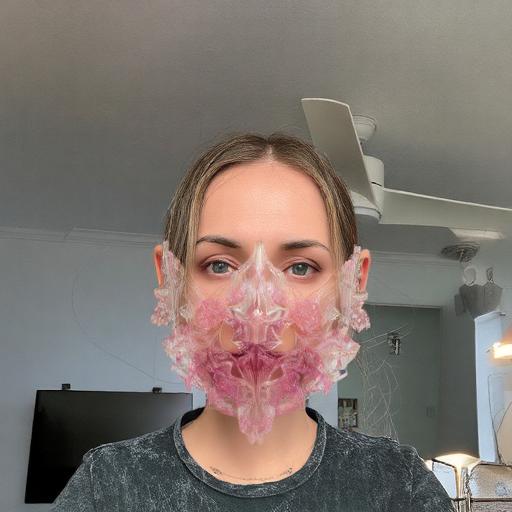
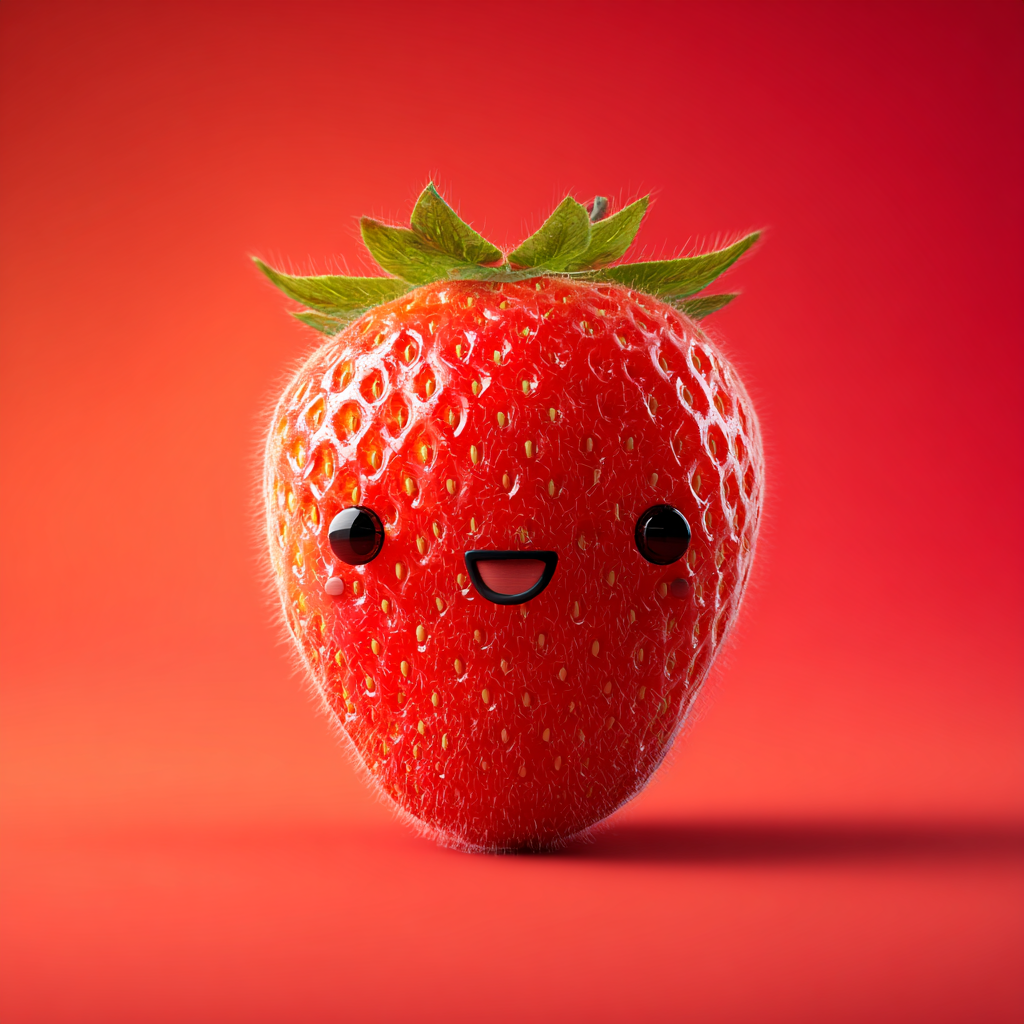
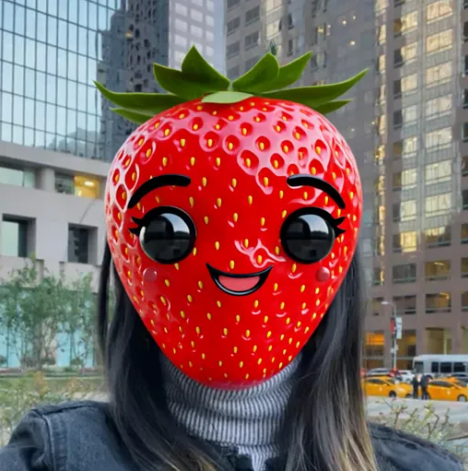
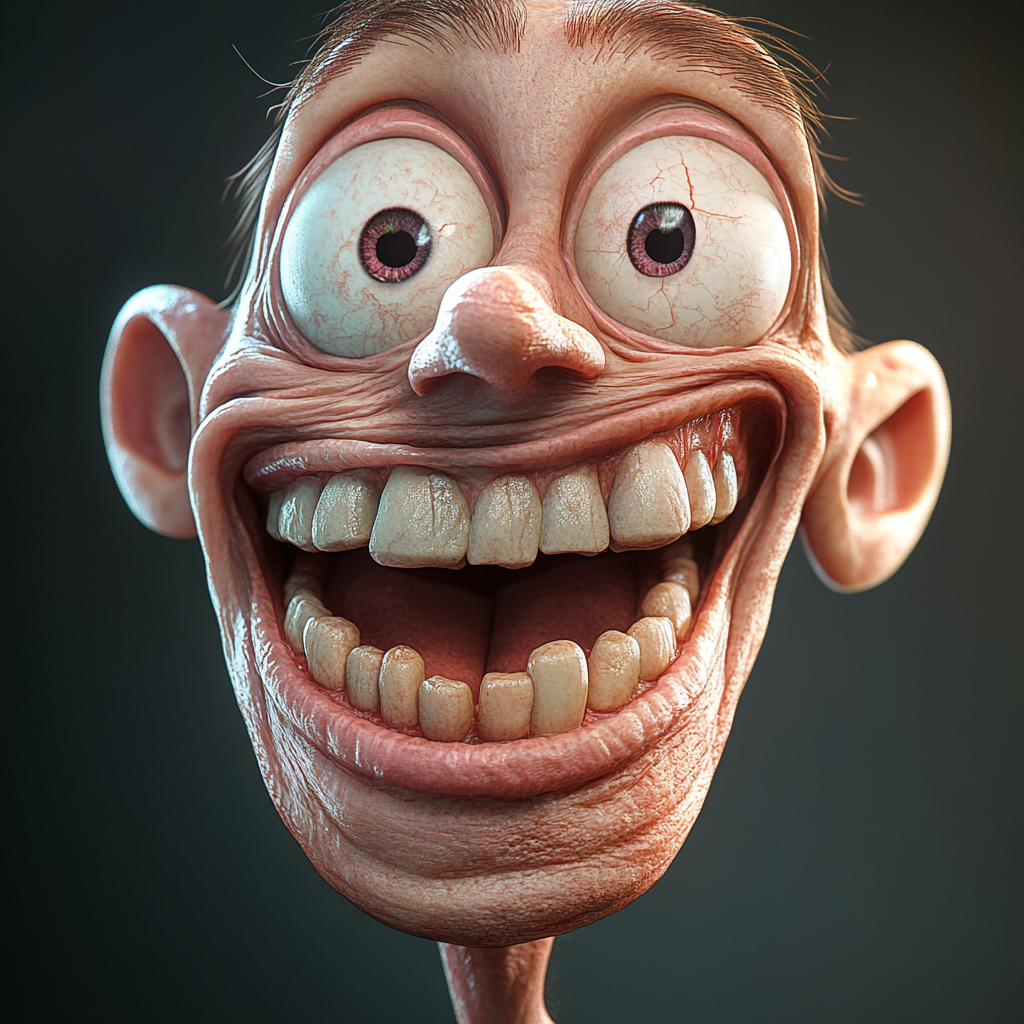
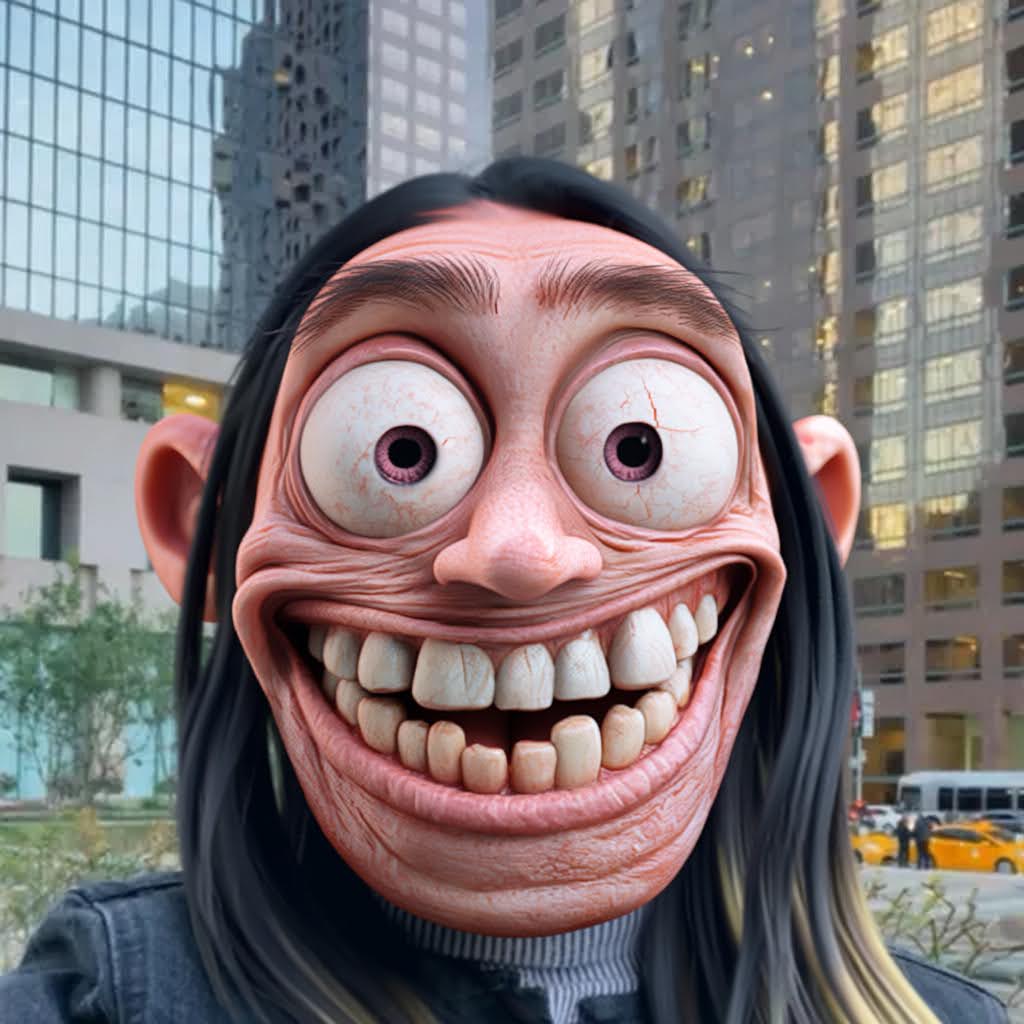
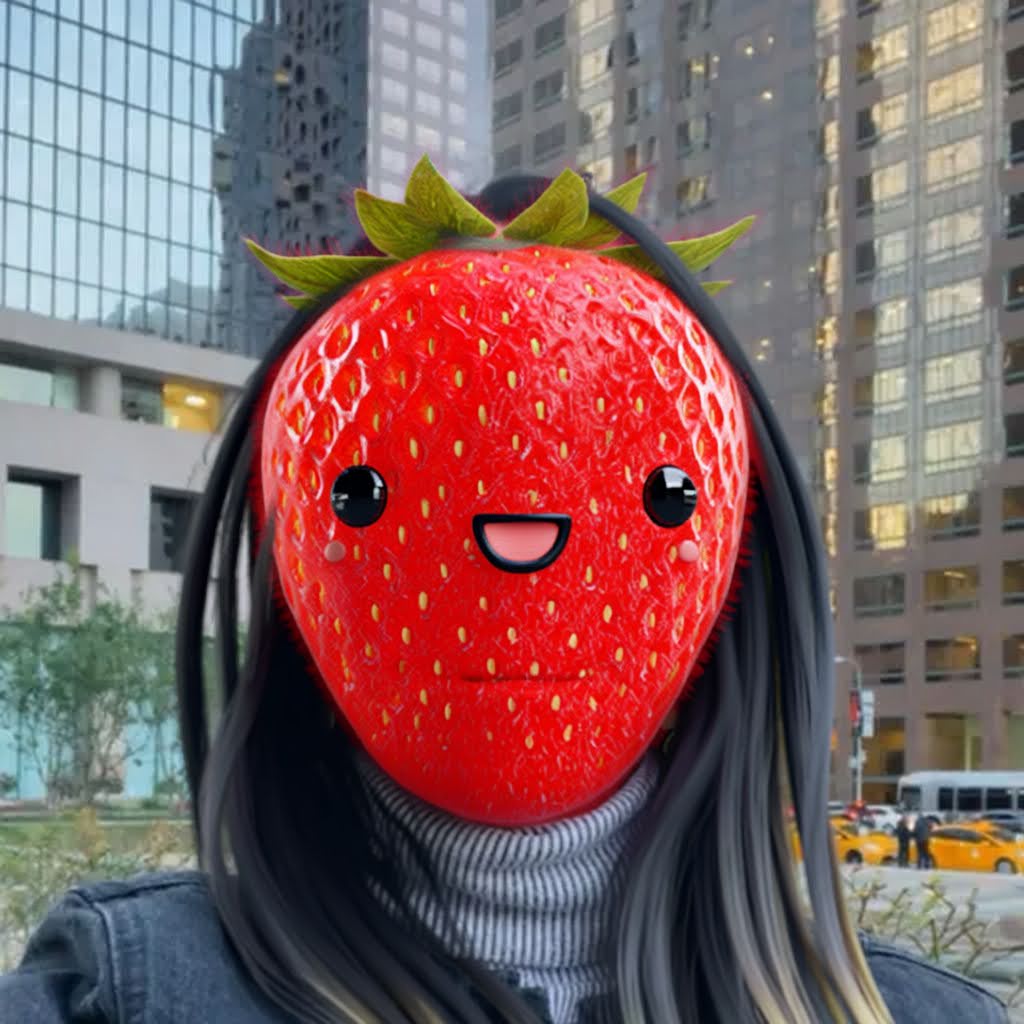
For example, take this strawberry:
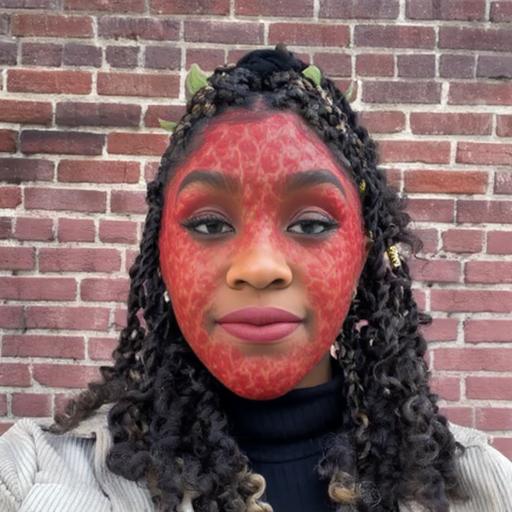
The ML model doesn’t understand that these dots are meant to represent eyes or how to map them from the reference design onto a person’s face. As a result, the generated images will look like this:
Images like this are better handled by the Advanced Model. Switch to it for more accurate and visually consistent results.

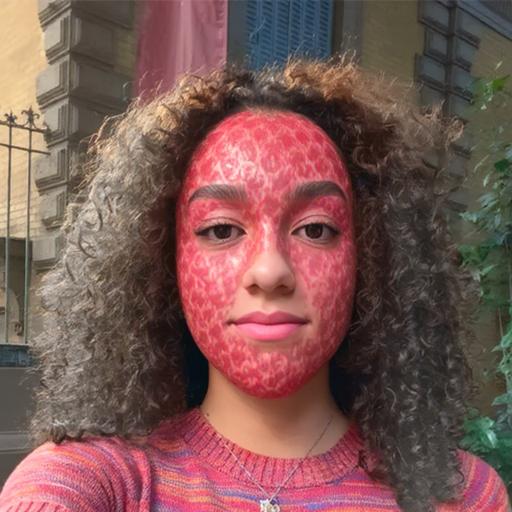
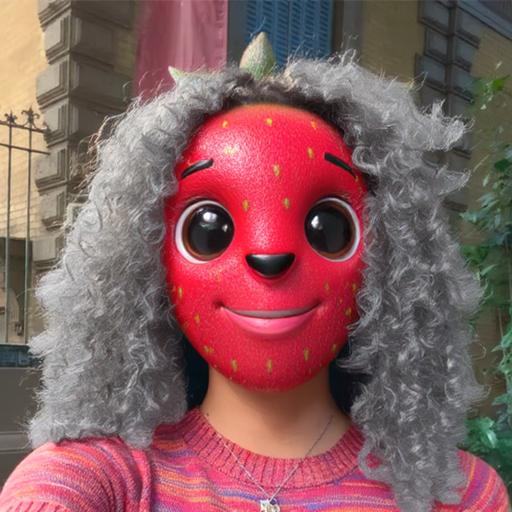
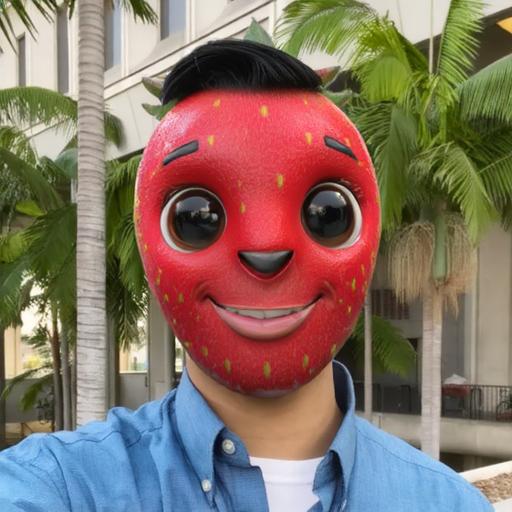
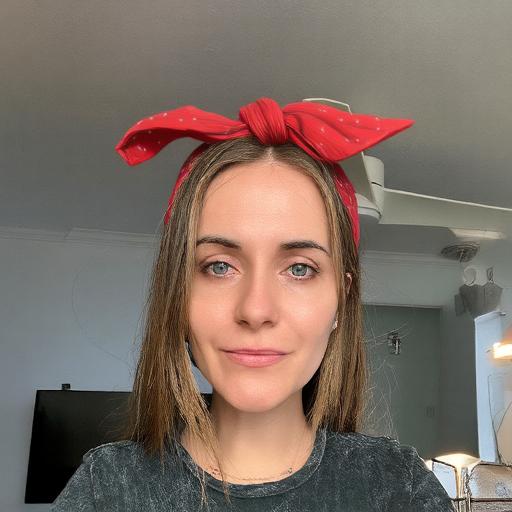
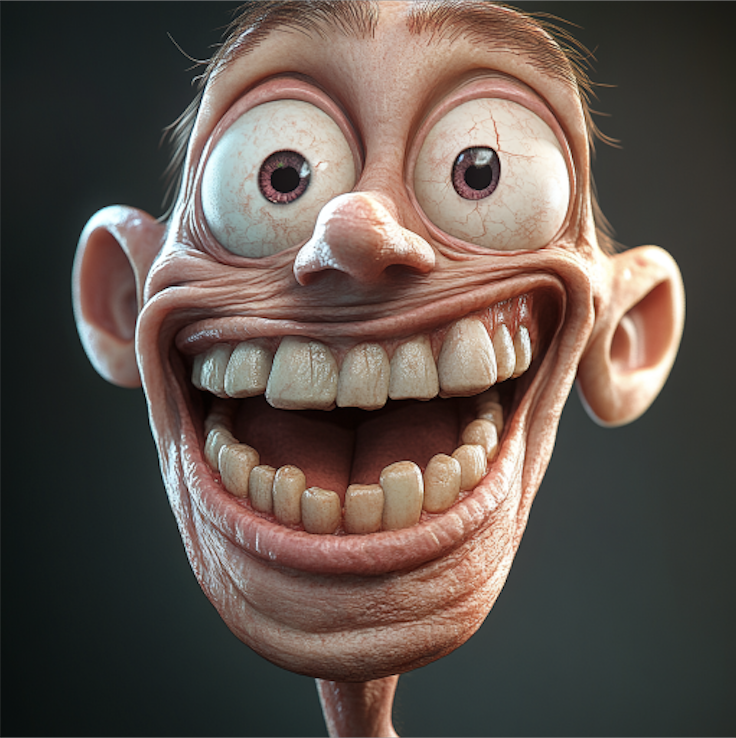
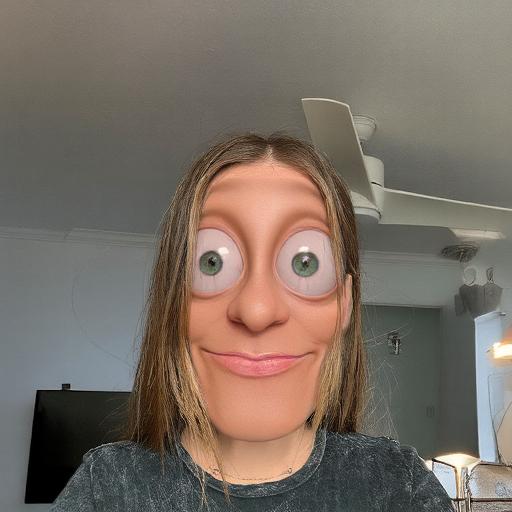
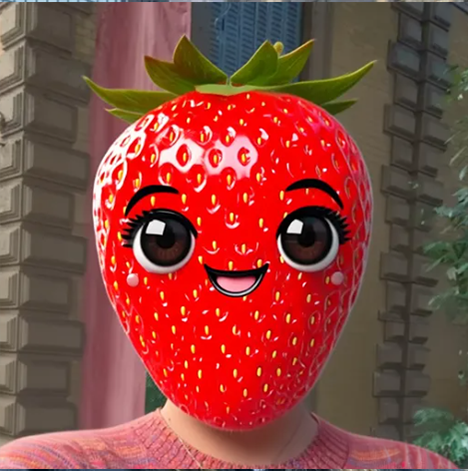
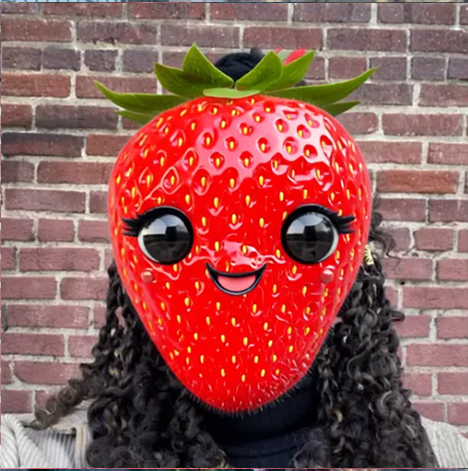
If you use a strawberry like this instead:
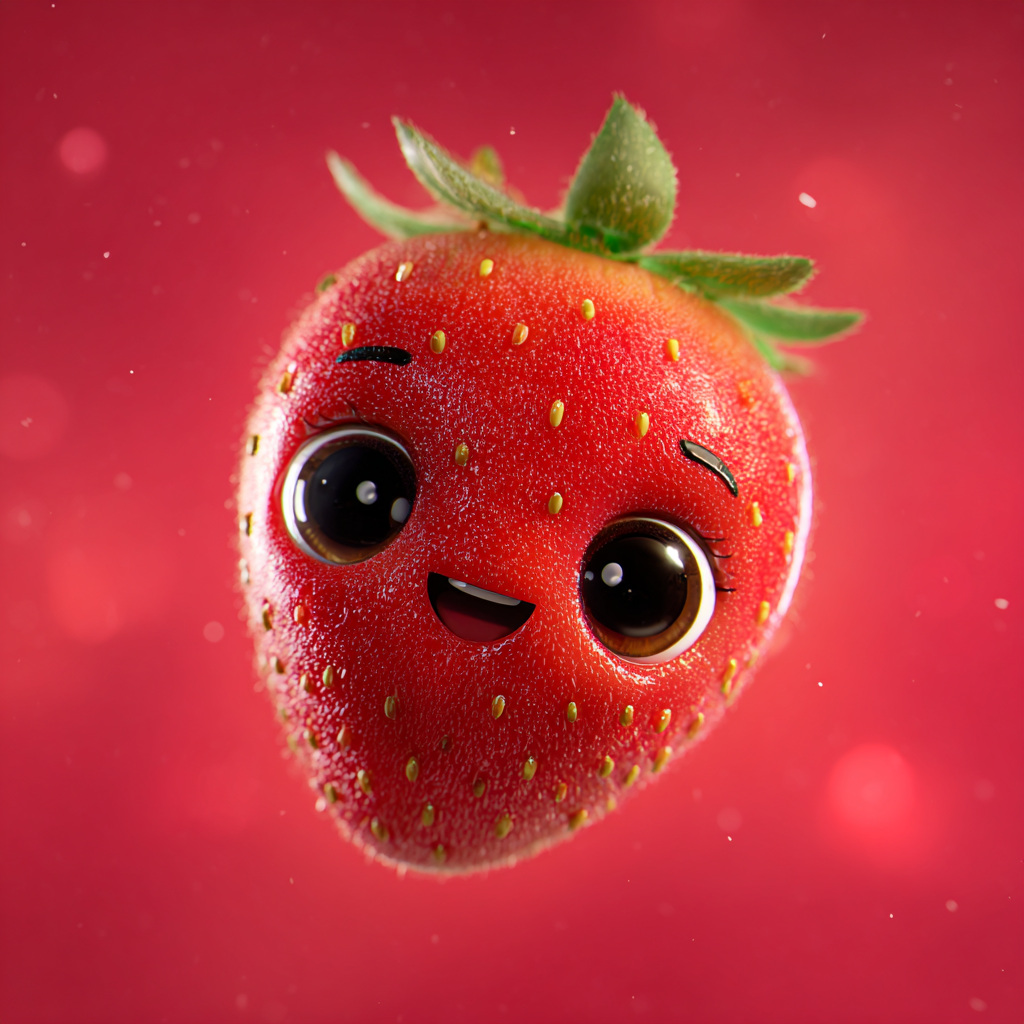
The ML model recognizes the eye placement and the familiar shapes and features in the original image, allowing it to transfer them to the user’s face more accurately. The resulting images will look like this:
Effect Prompt + Image Reference
You can combine an Image Reference with an Effect Prompt to expand your design possibilities and explore different styles - even if they differ from the original image. If you want to recolor the skin or add a new hairstyle, try entering a custom Effect Prompt in the corresponding field.
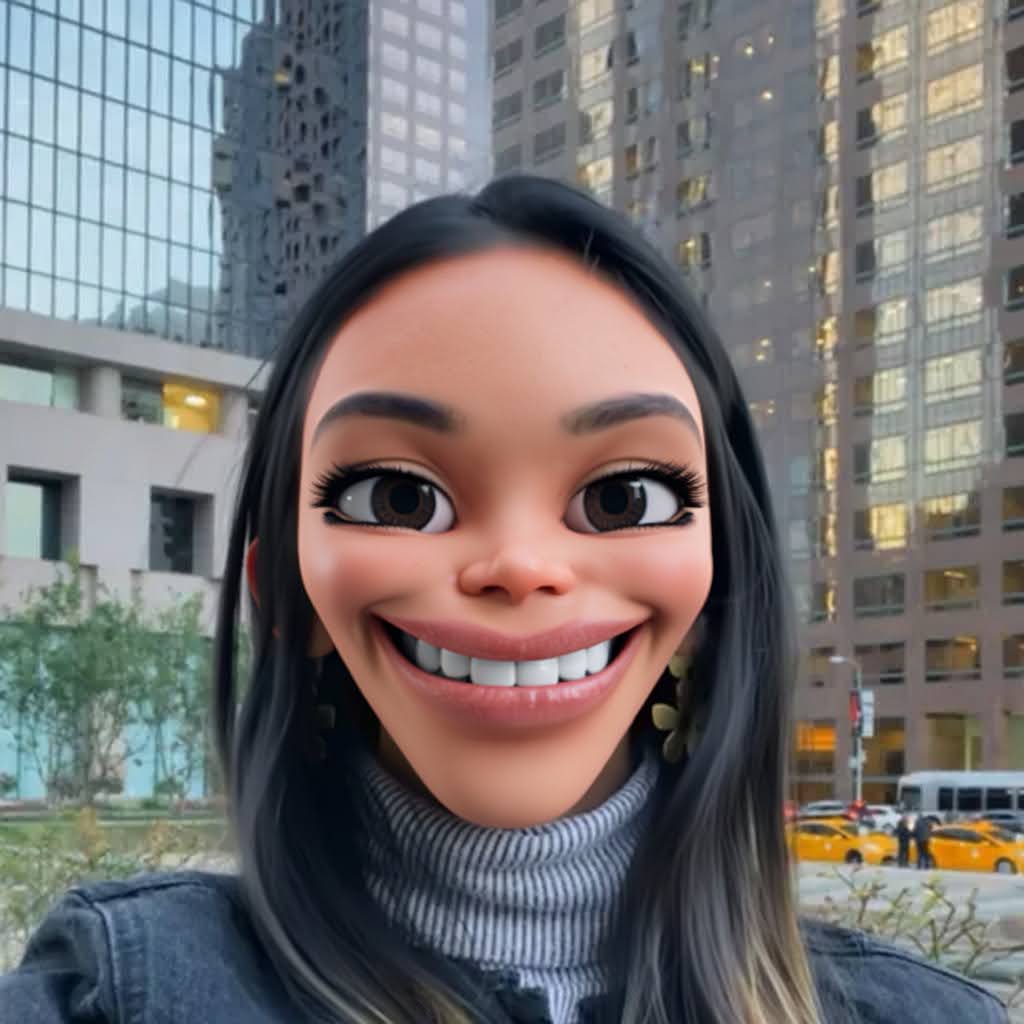
Comparison of Prompt Combinations
-
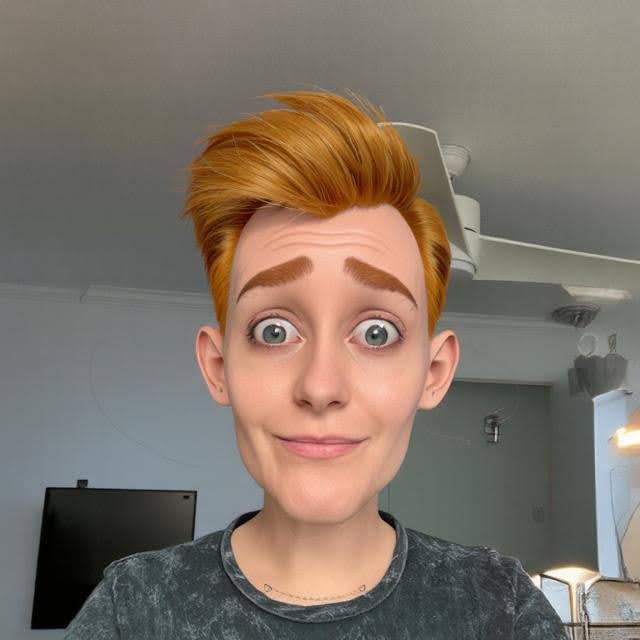
Effect Prompt only:
Original user image Effect Prompt Processed user image 
-
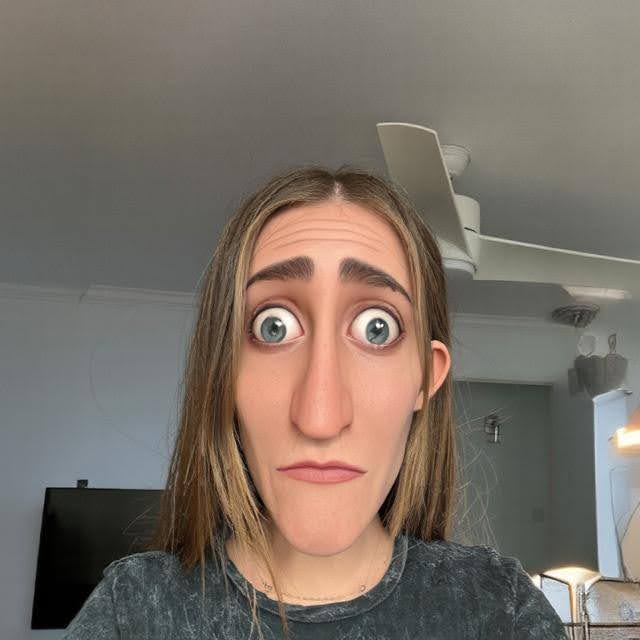
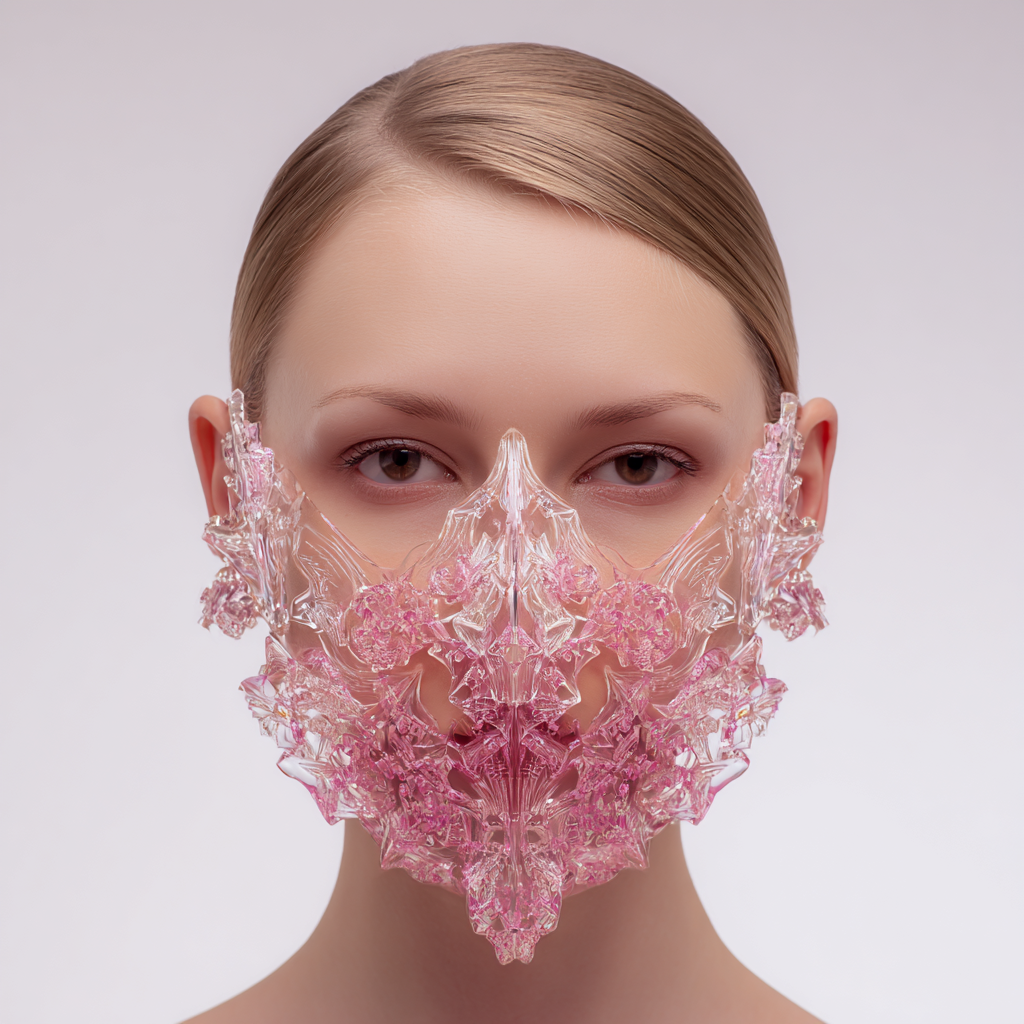
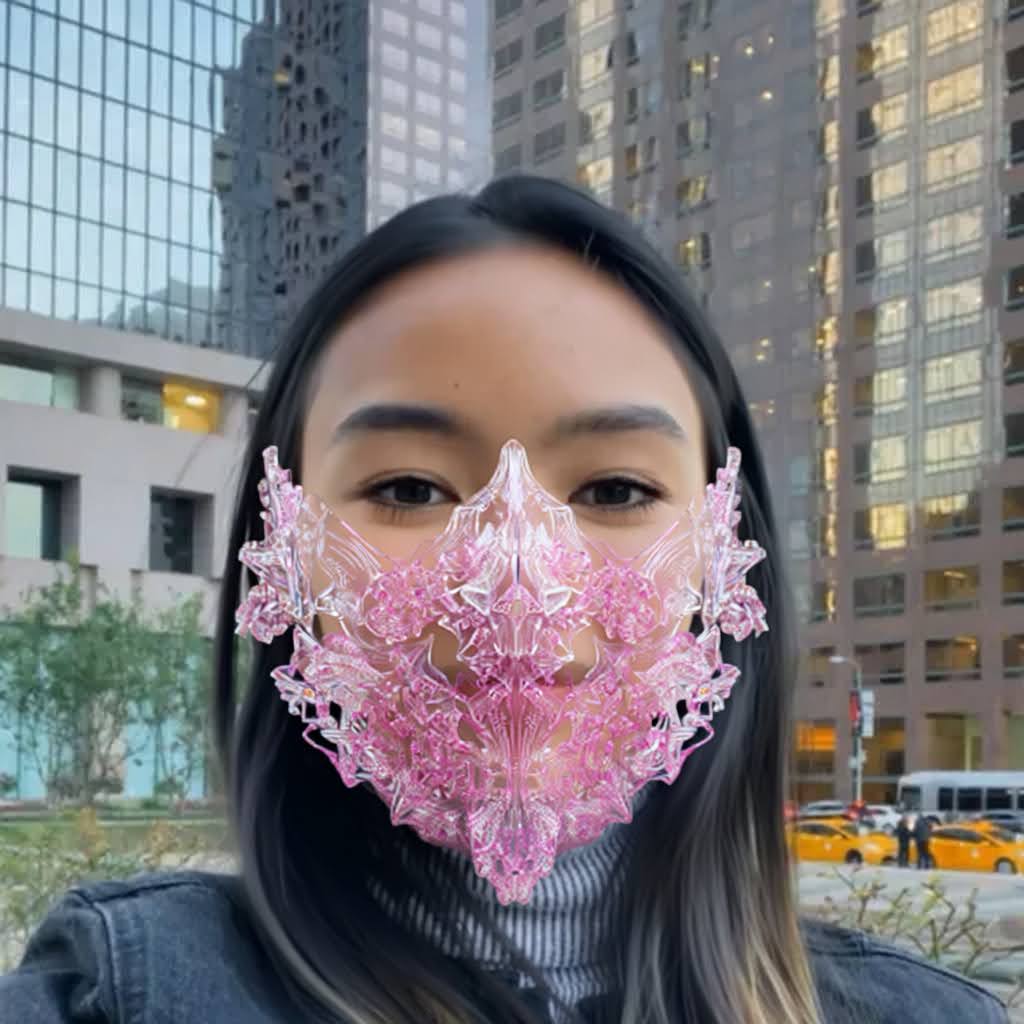
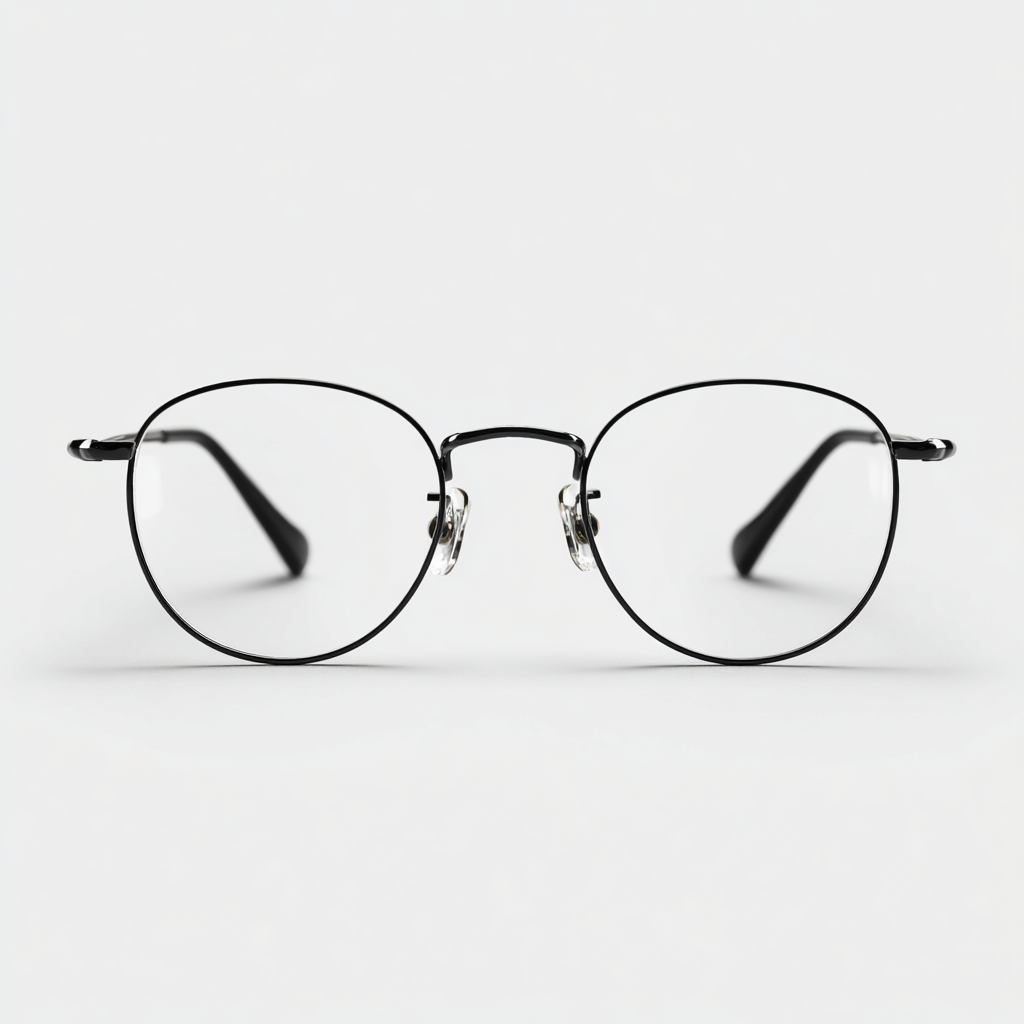
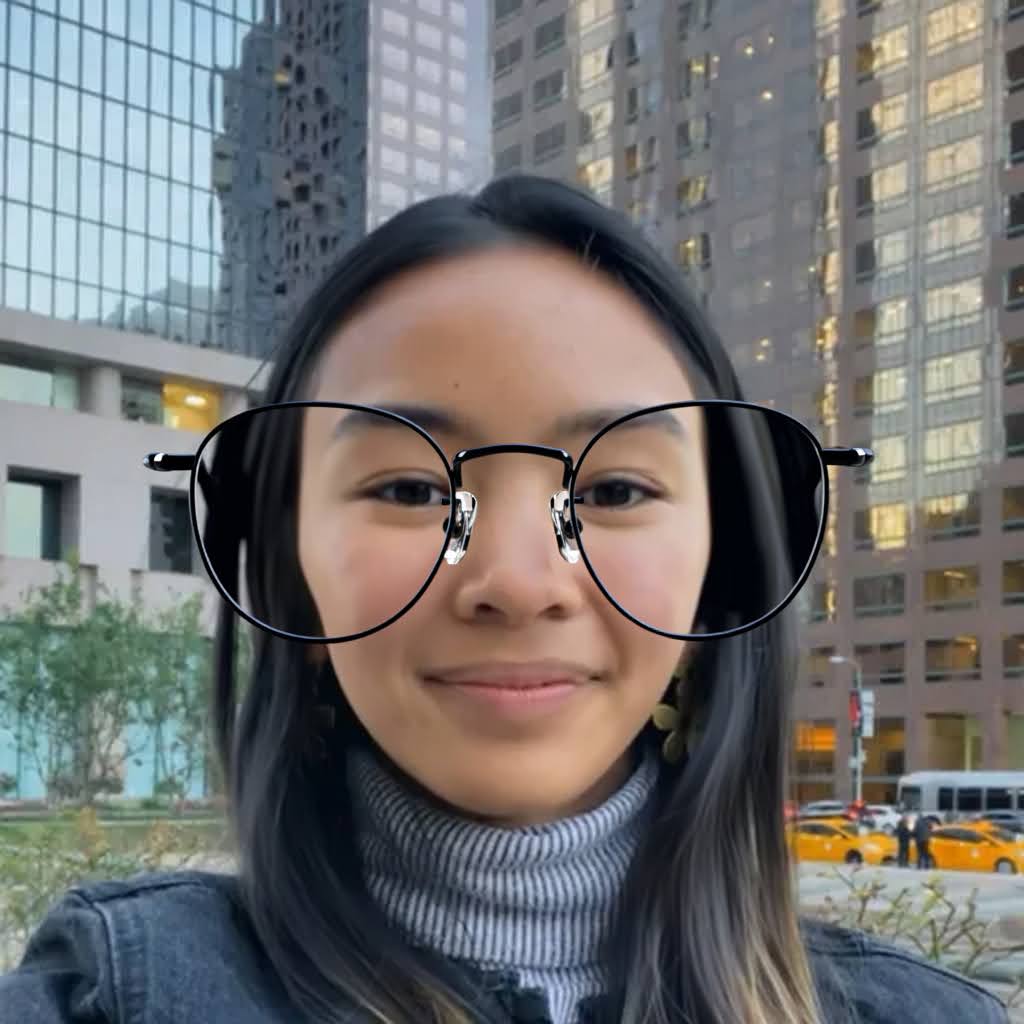
Image Reference only:
Original user image Image Reference Processed user image 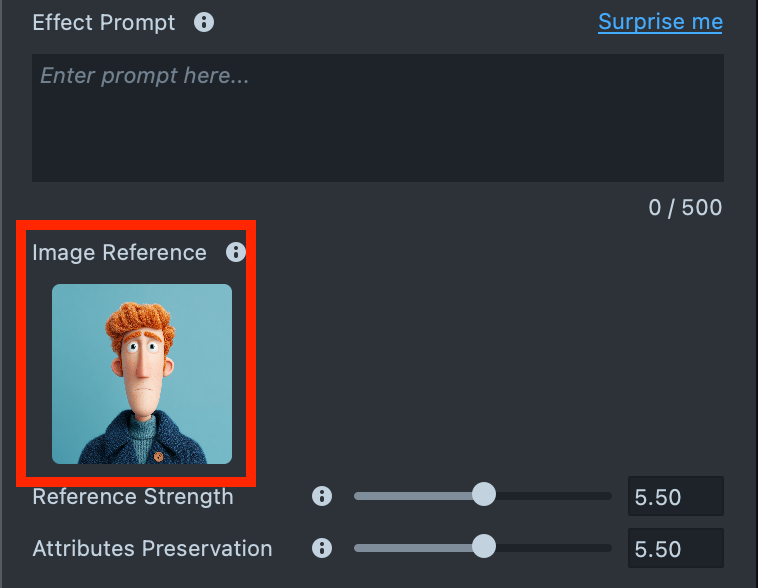
-
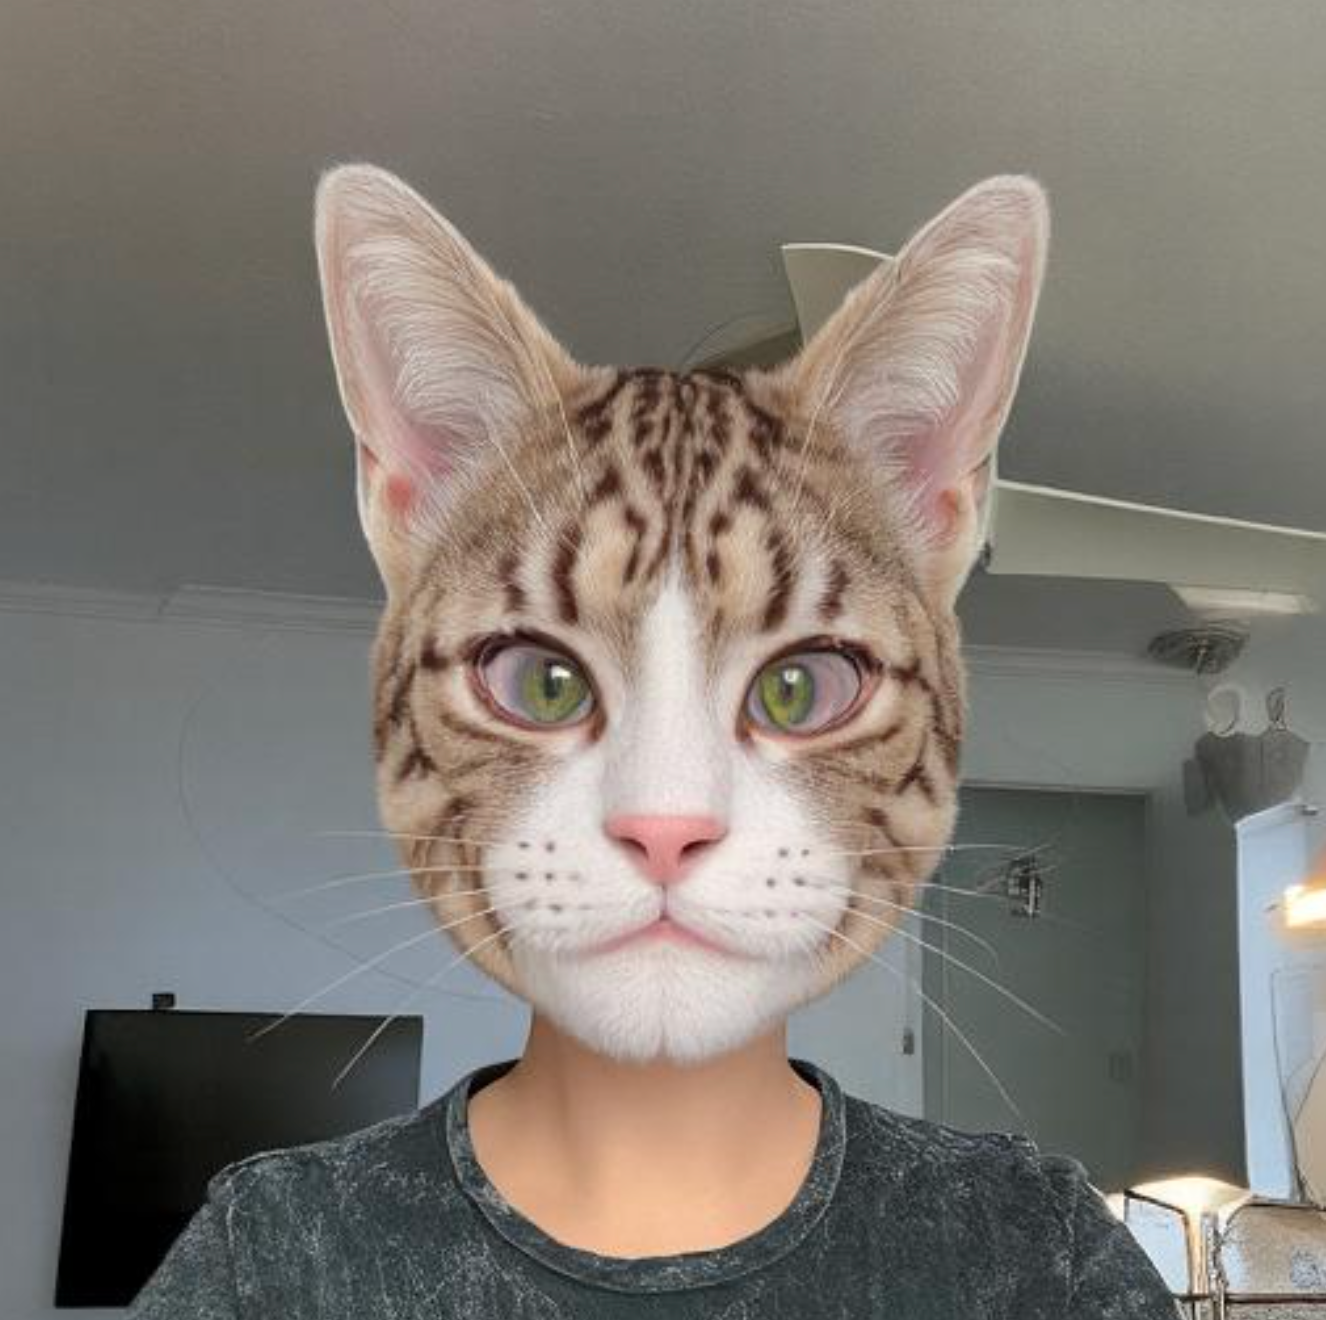
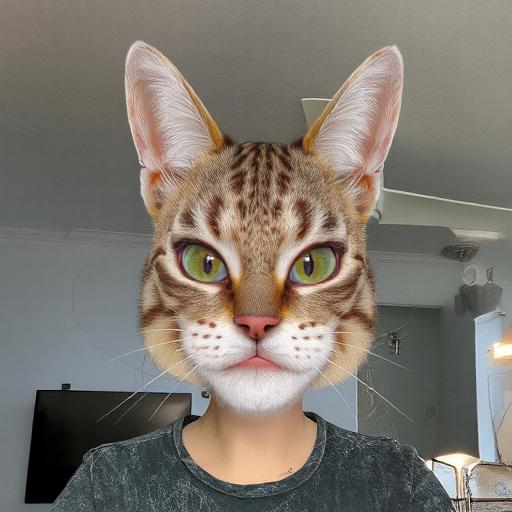
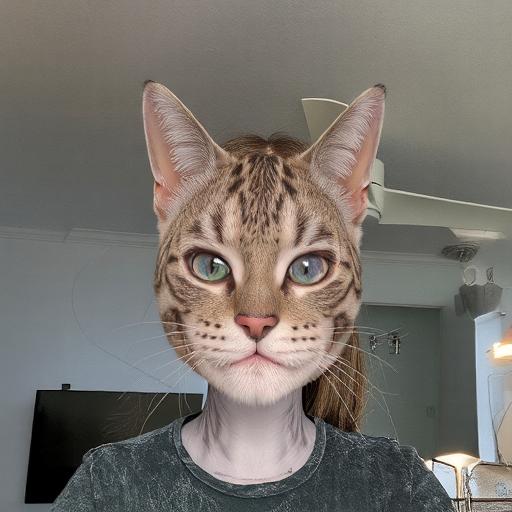
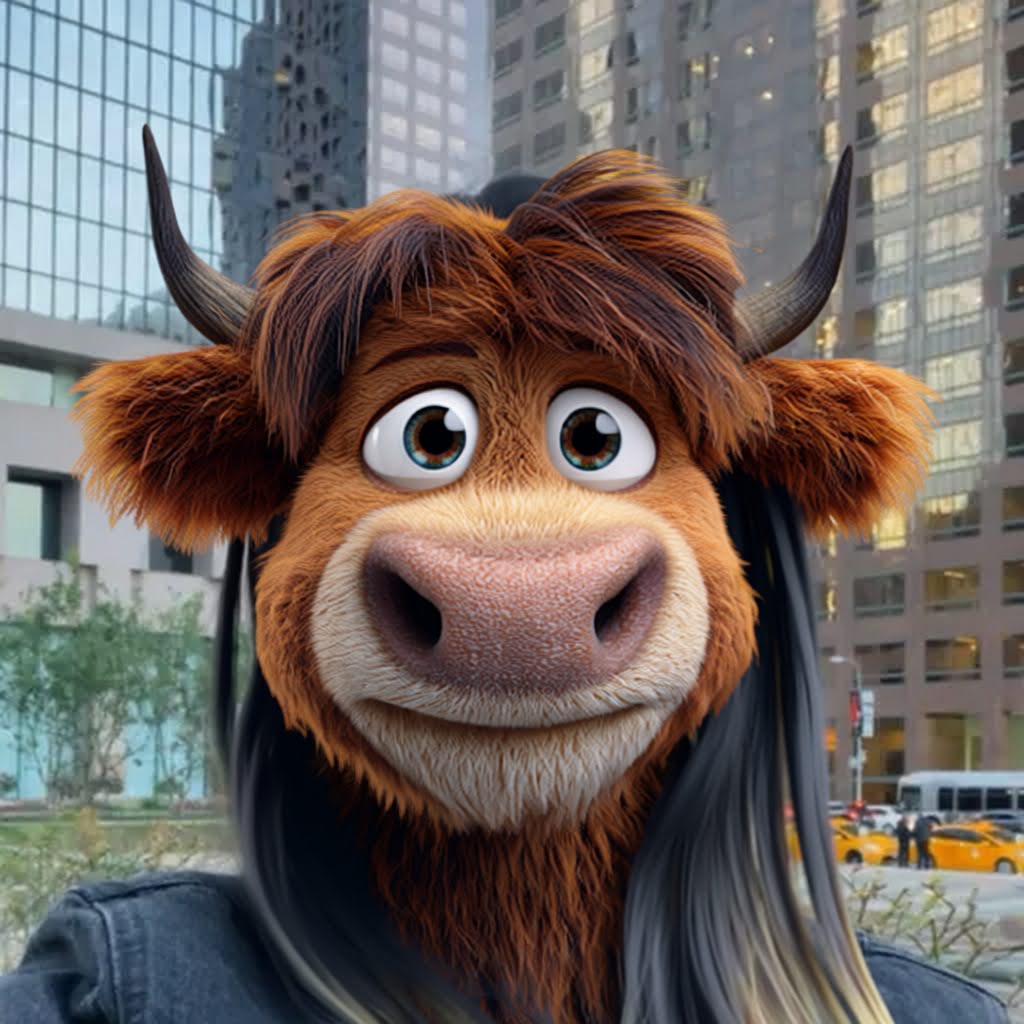
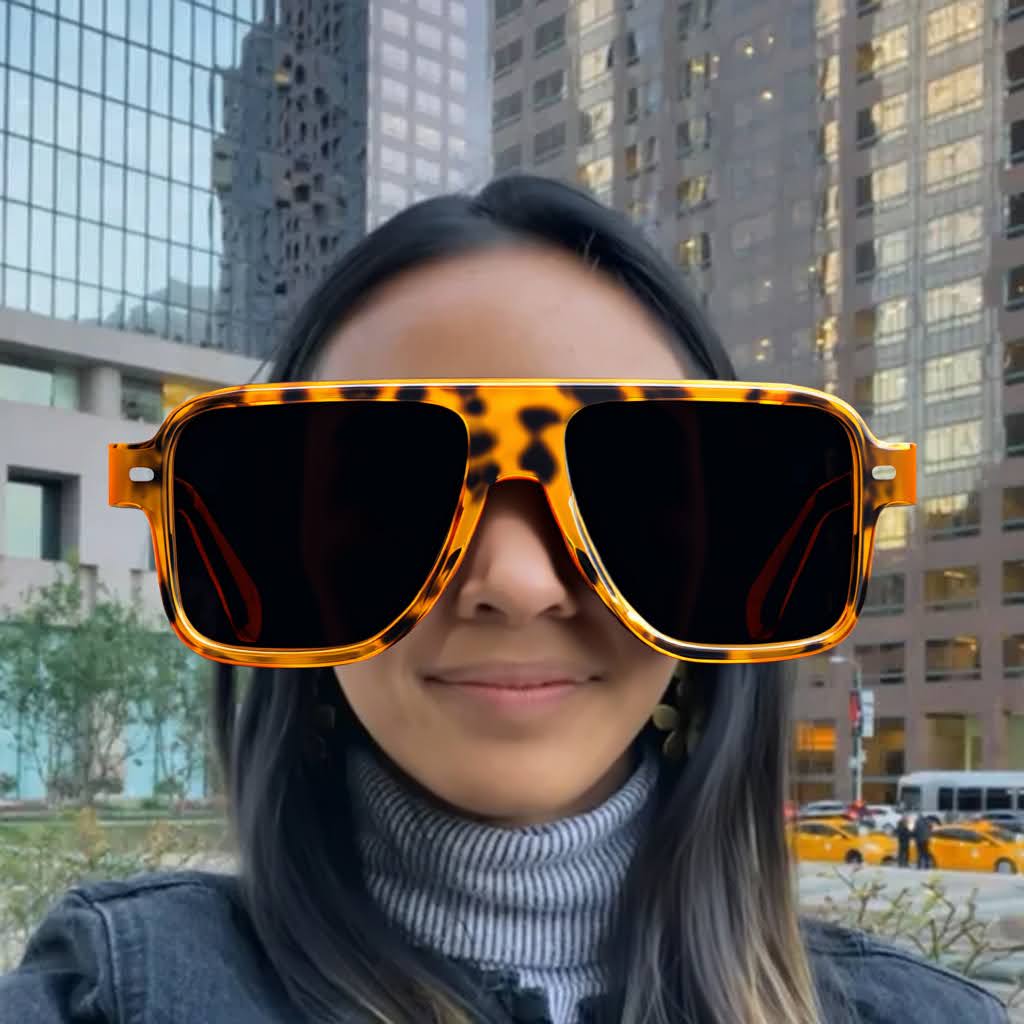
Effect Prompt + Image Reference:
Original user image Effect Prompt + Image Reference Processed user image 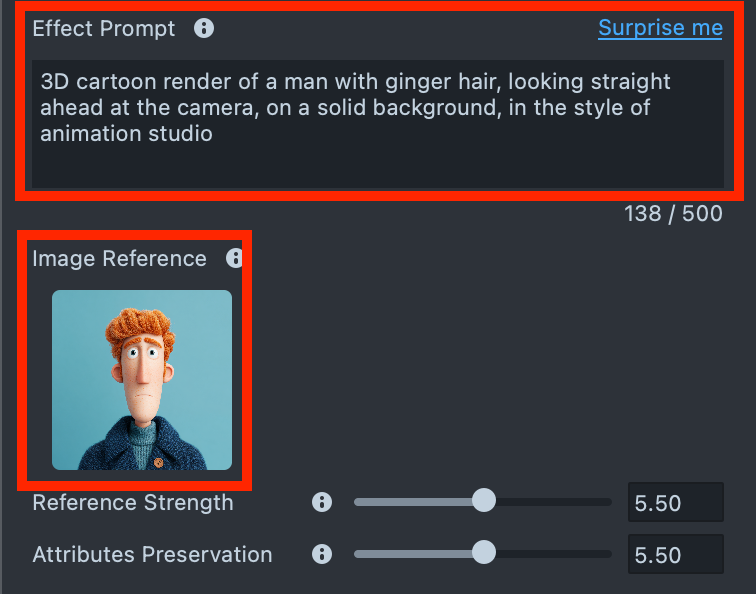
Design Consistency
To prevent model flickering, make sure your design renders consistently across all previews. Your effect should look as similar as possible from one person to another, ensuring the generated ML model maintains the intended appearance. If the effect appears unstable or changes noticeably between persons, try adjusting your prompt or settings until you achieve consistent results.
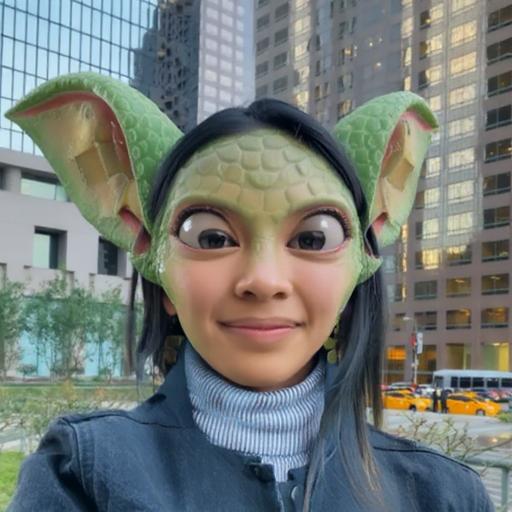
Here’s an example of an unstable effect - you can see noticeable flickering and changes in ear shape as the head turns.
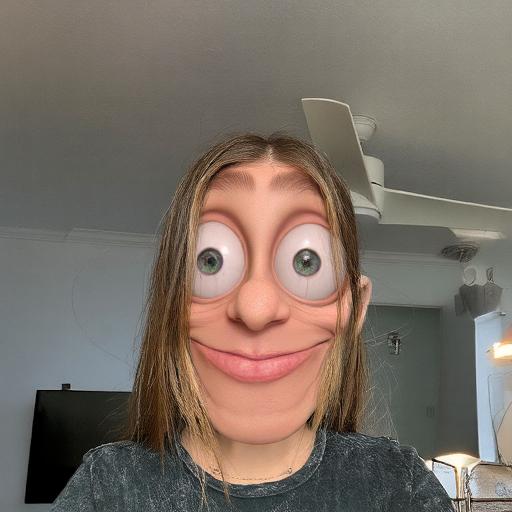
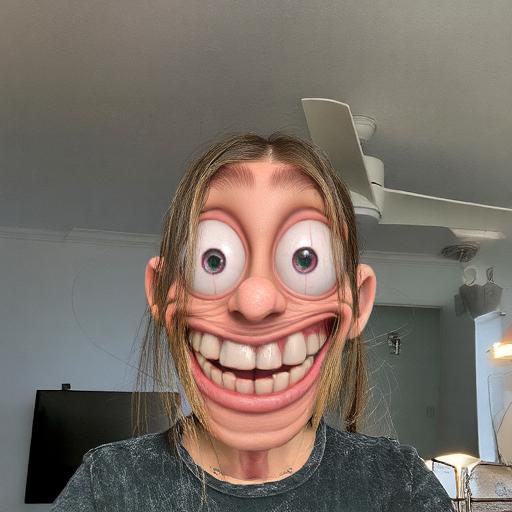
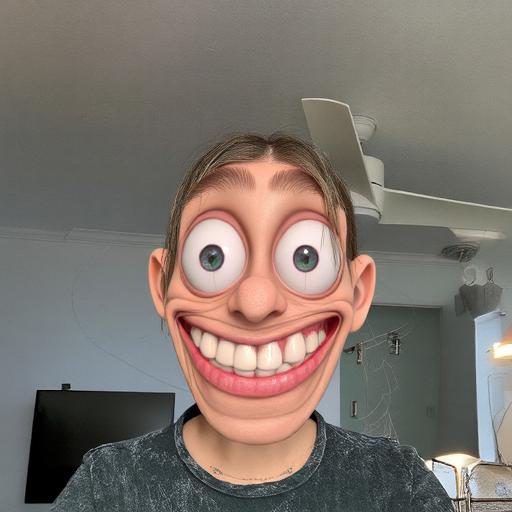
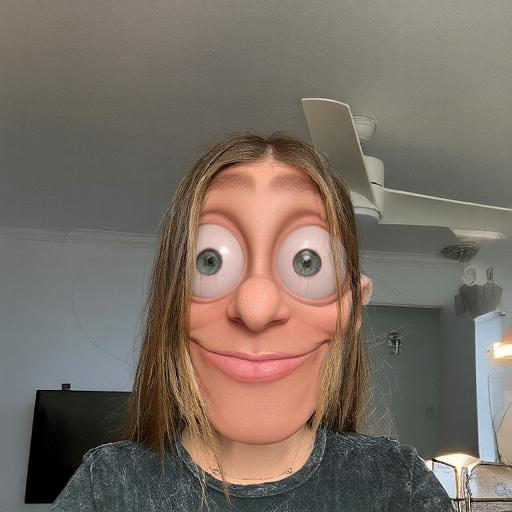
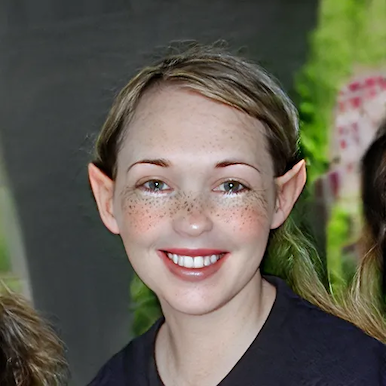
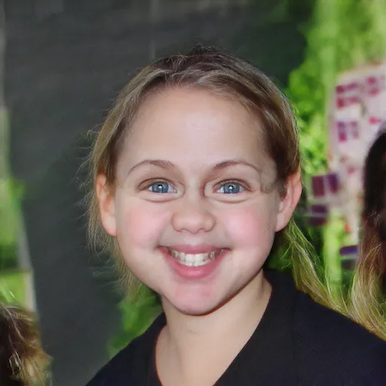
If we look at how the effect appears on different people, we can see noticeable variations - including changes in face shape, eye appearance, and ear size and shape.
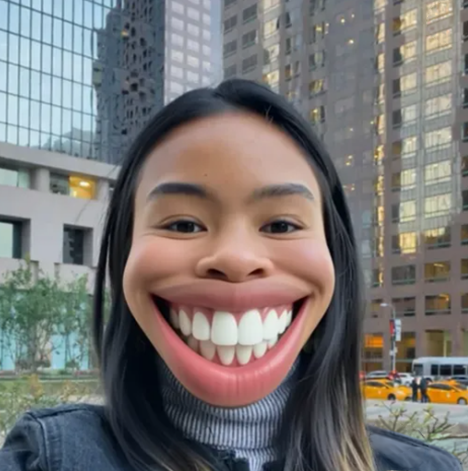
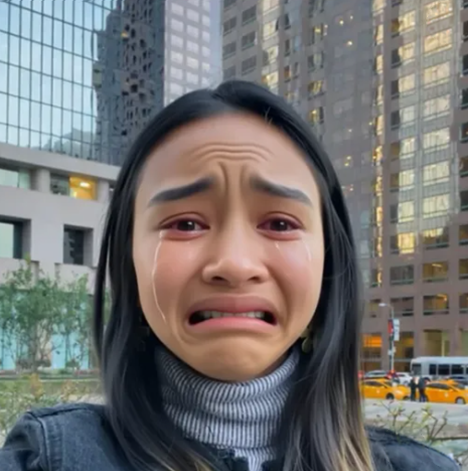
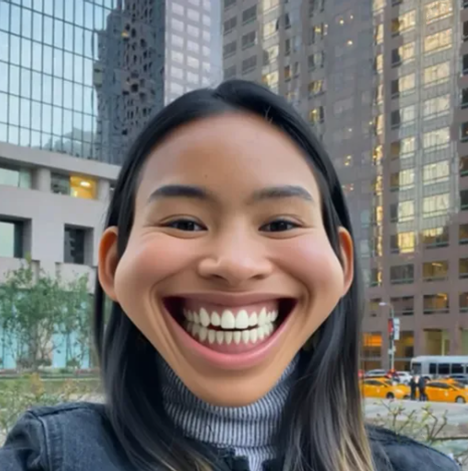
| Inconsistent Previews | |||
|---|---|---|---|
 |  | 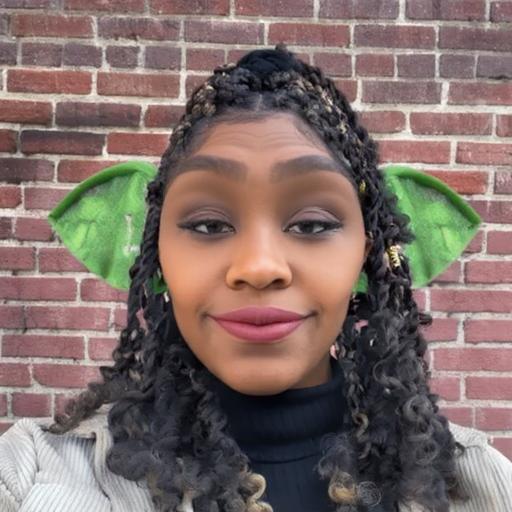 | 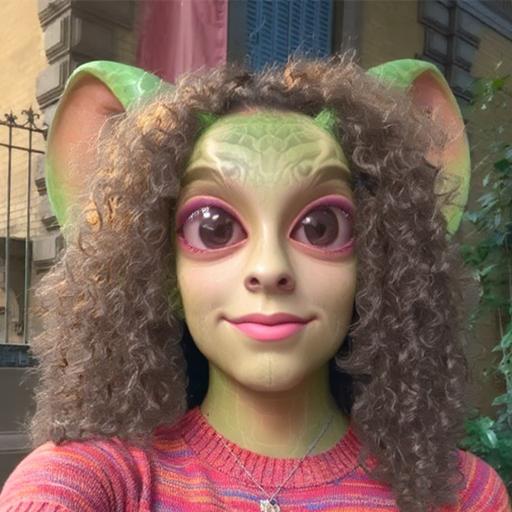 |
Try lowering the Attributes Preservation setting to achieve a consistent result across all subjects. Below is an example of a consistent dataset, where the effect remains stable across different faces.
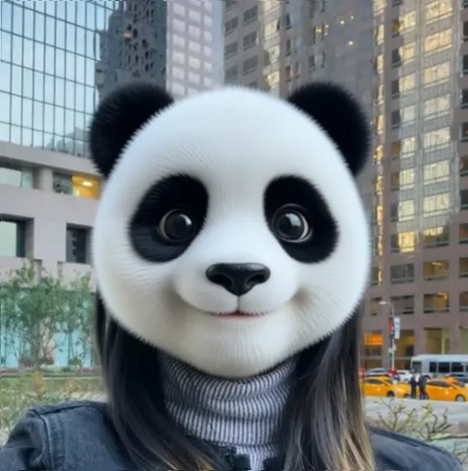
| Consistent Previews | |||
|---|---|---|---|
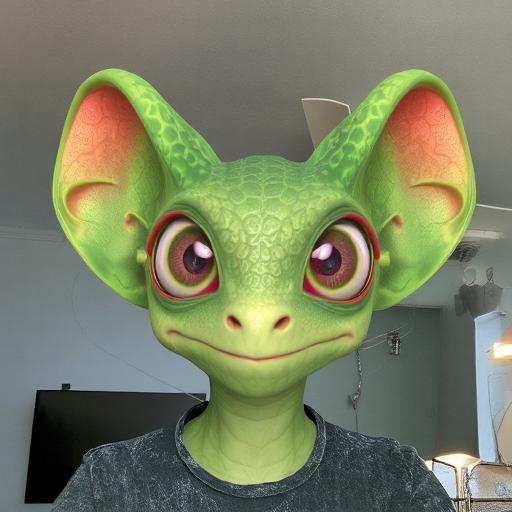 | 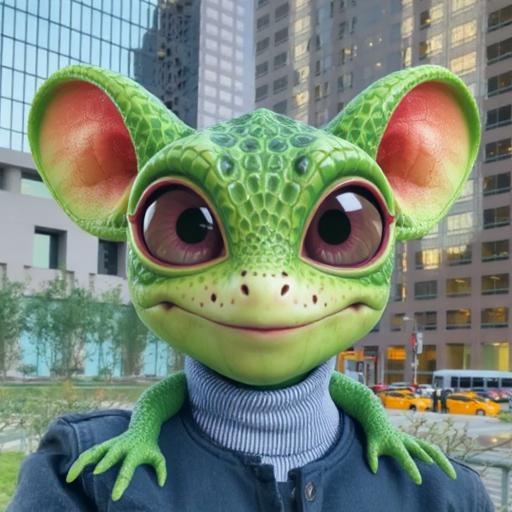 |  |  |
Crop
Keep in mind that the tool operates within a defined area. It transforms the user’s head and the surrounding region. Any part of your design that extends beyond this area will be cropped. For the best visual results, make sure your design stays within the crop area.
| Crop area | Cropped effect |
|---|---|
 |  |
Examples
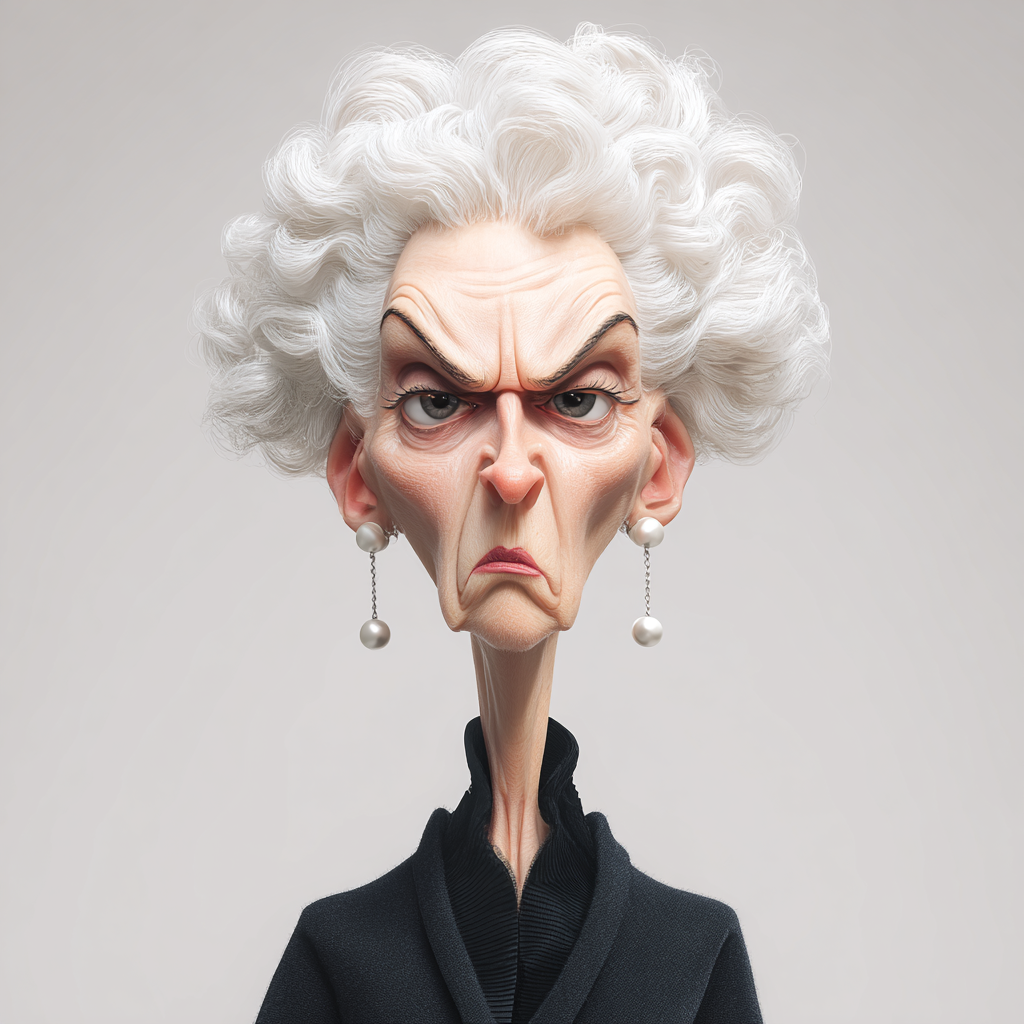
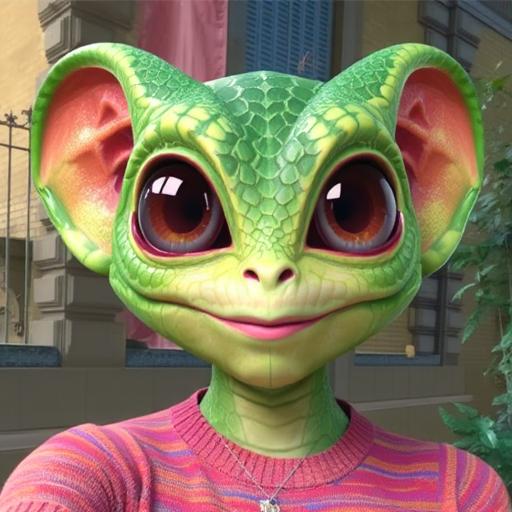
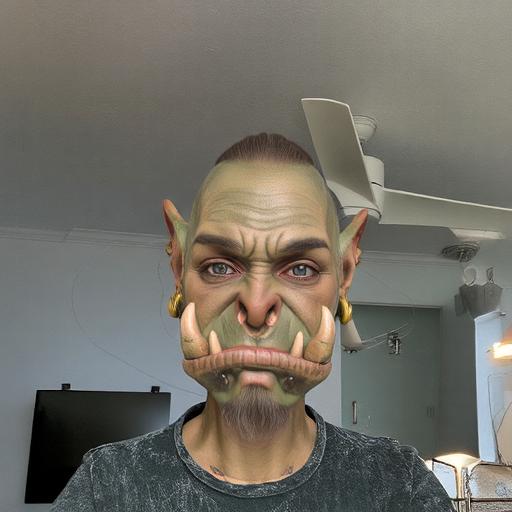
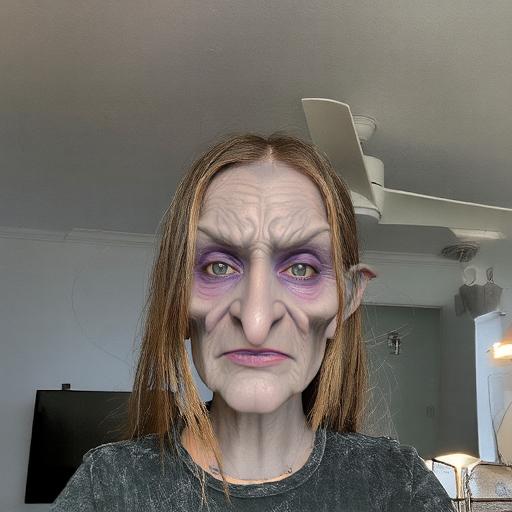
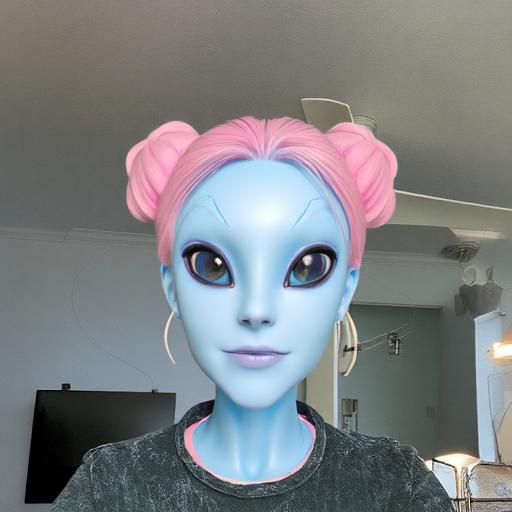
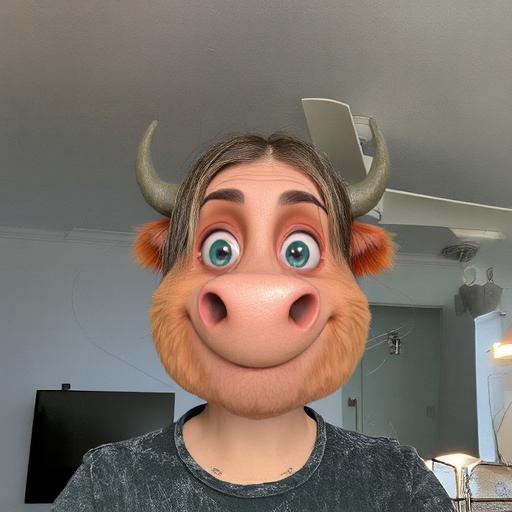
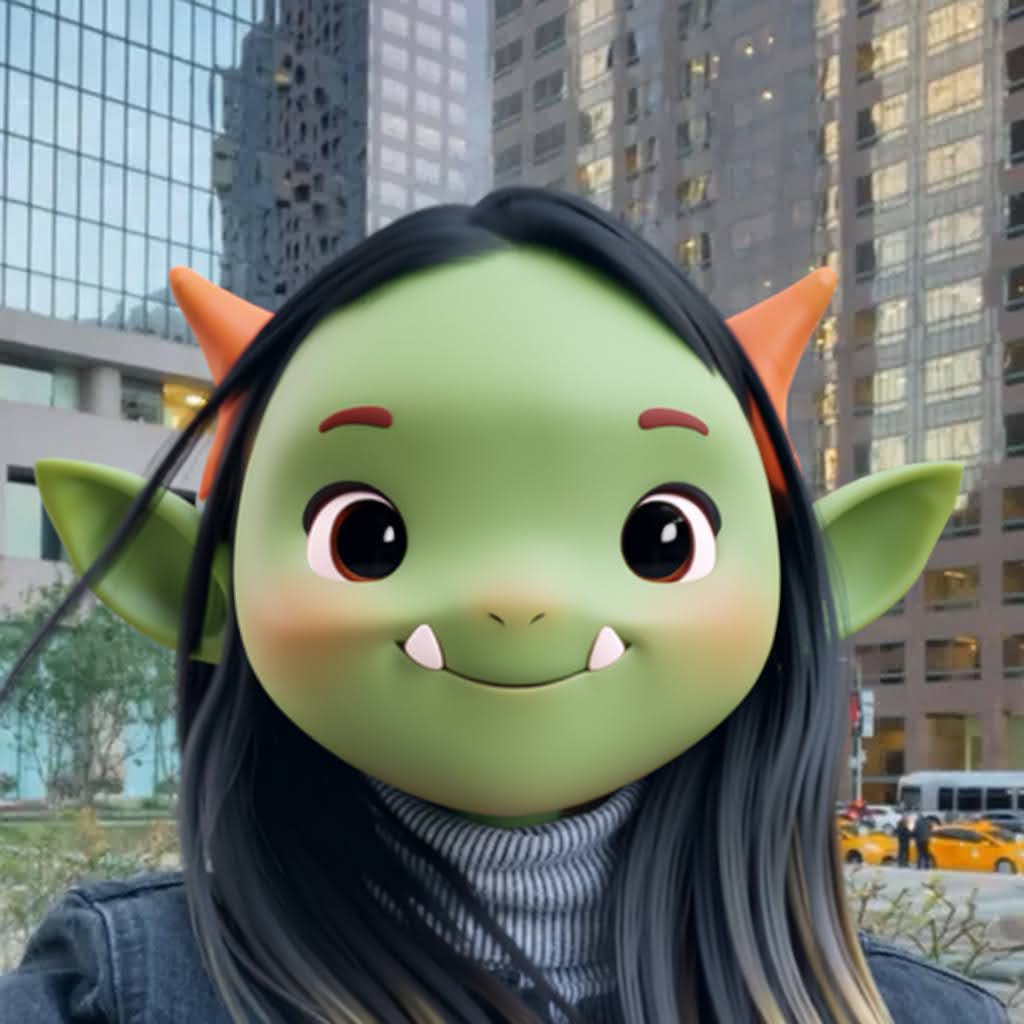
Using this model, you can achieve high-quality visual effects such as morphing, gender swaps, facial hair (mustache or beard), beauty and style transformations, age changes (old or baby), animal transformations, and the addition of accessories.
-
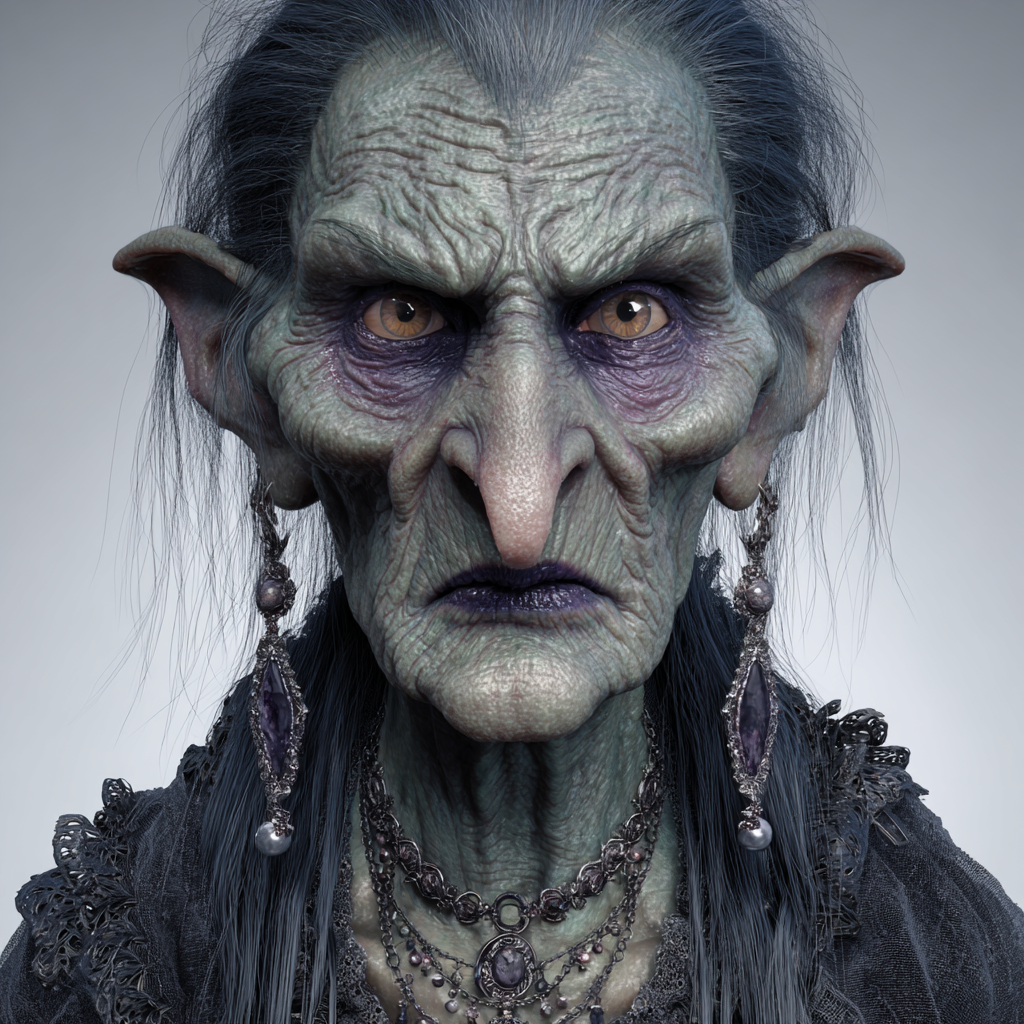
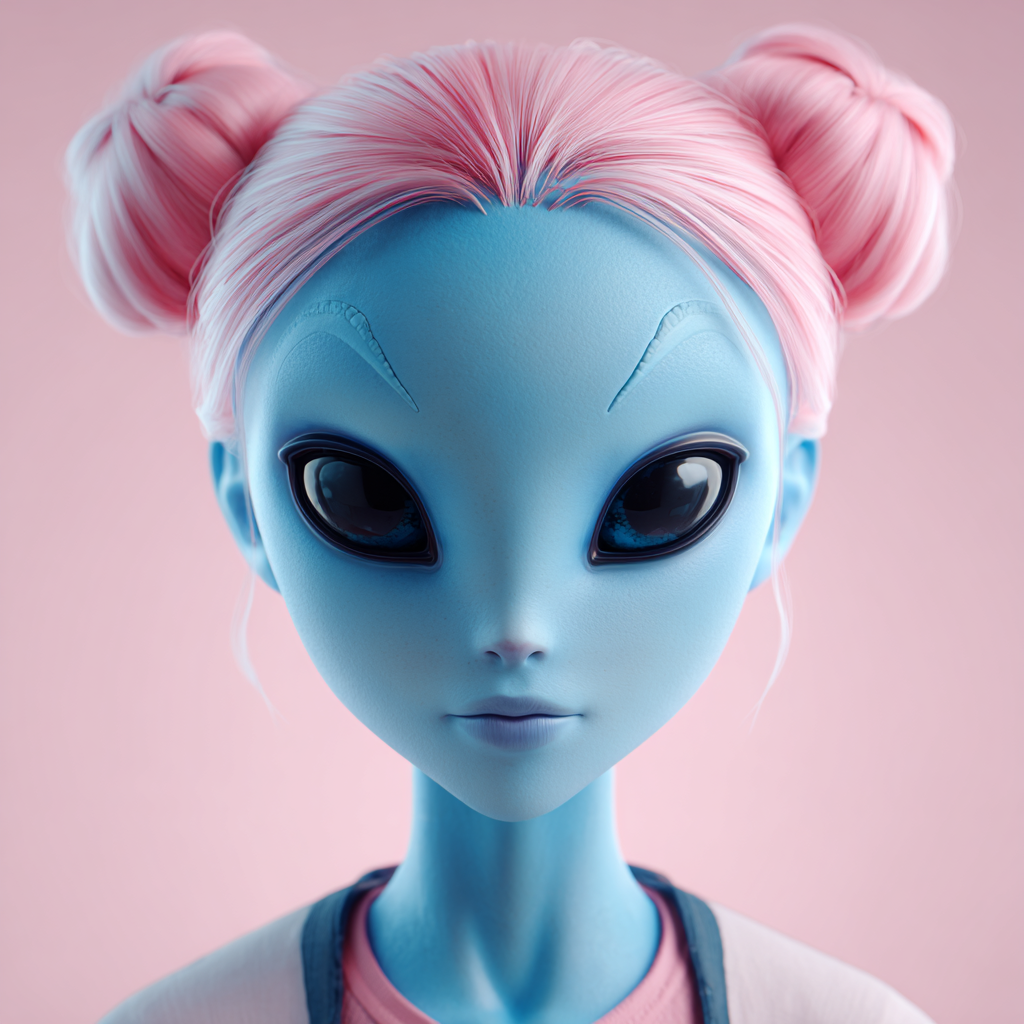
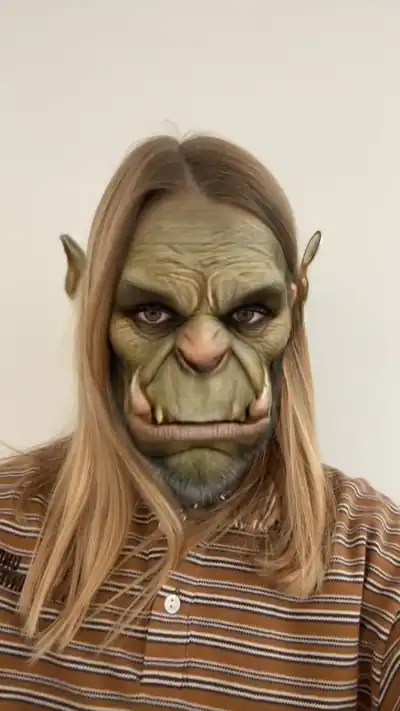
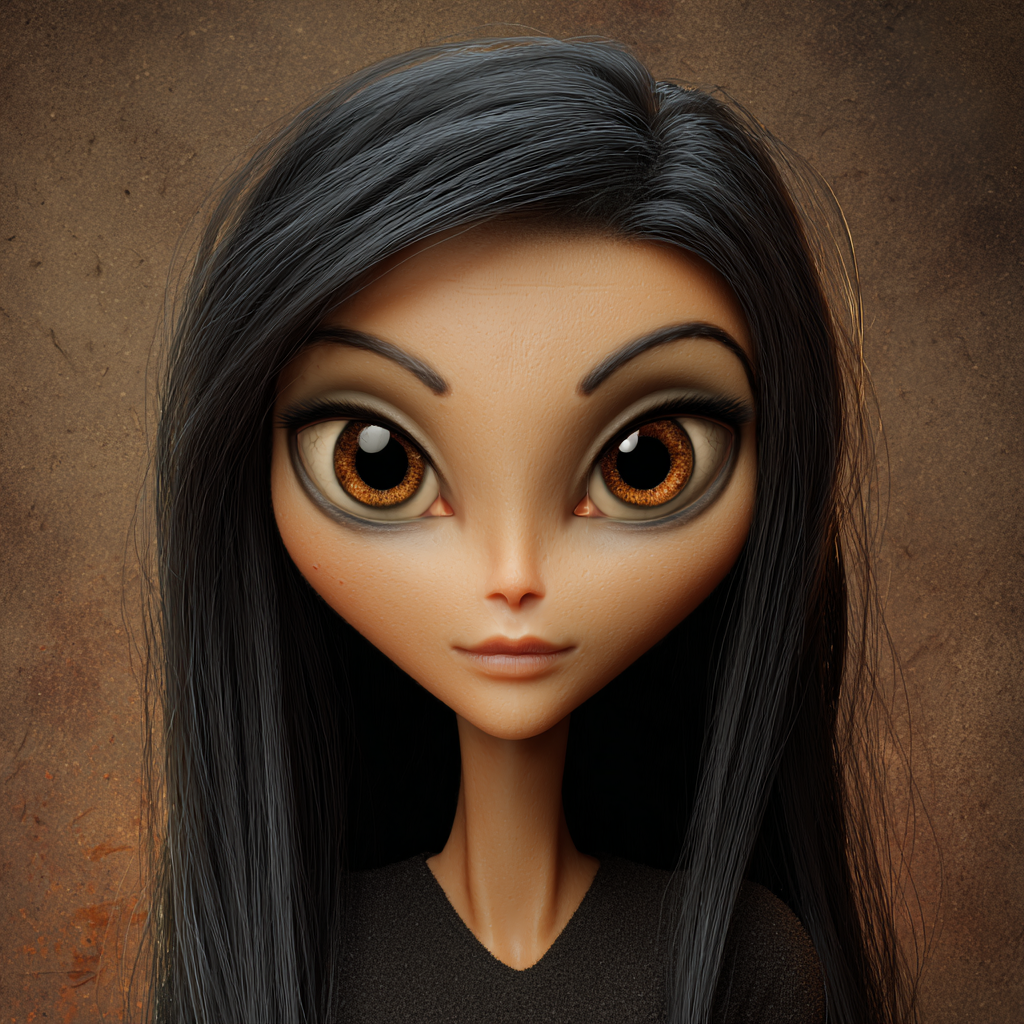
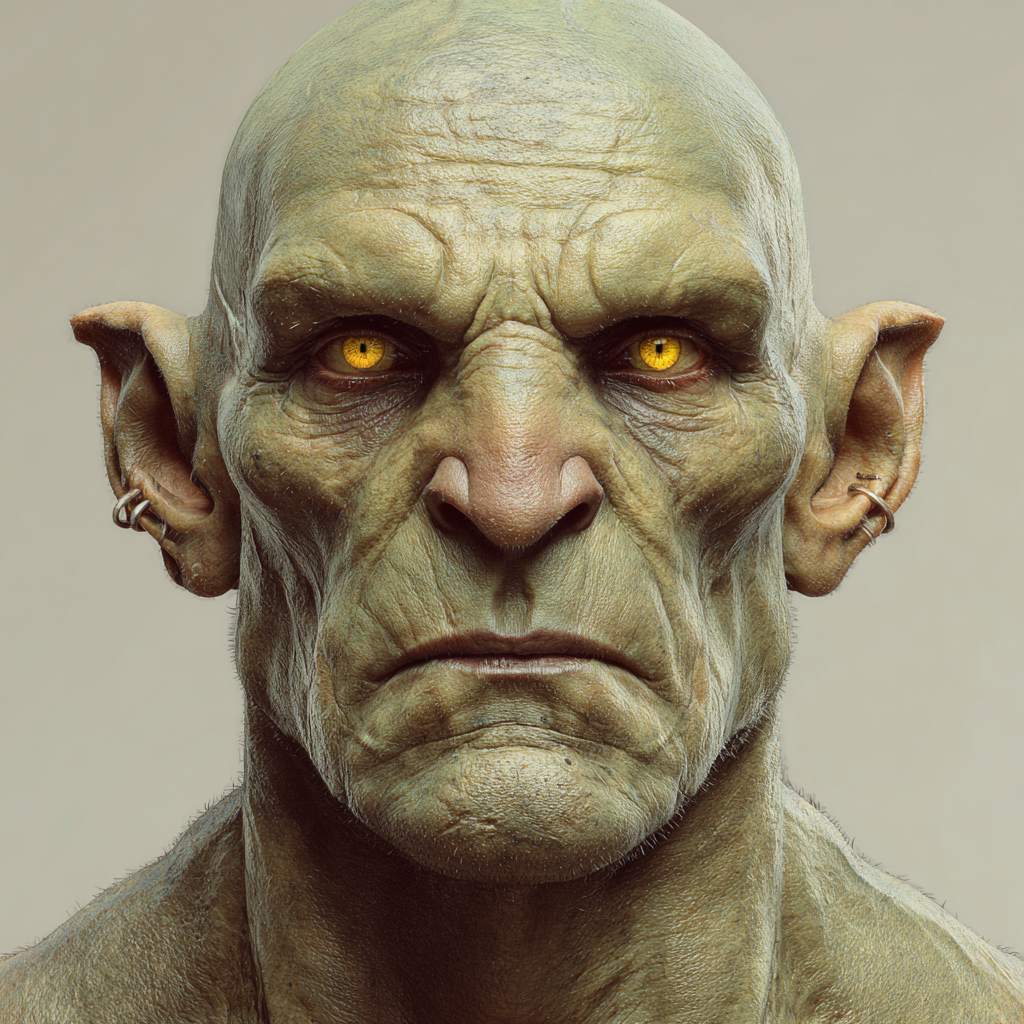
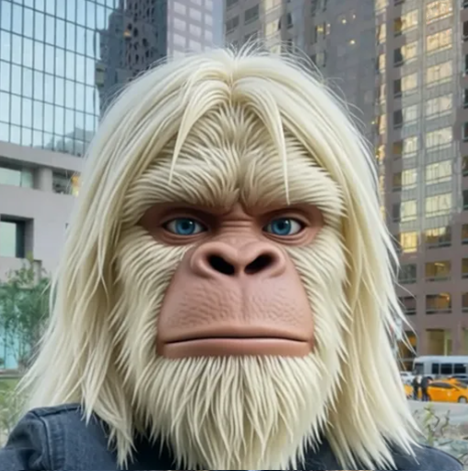
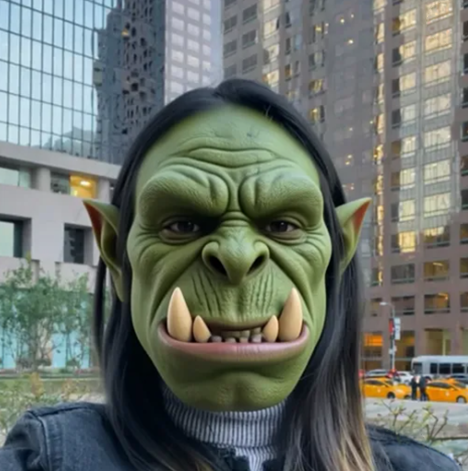
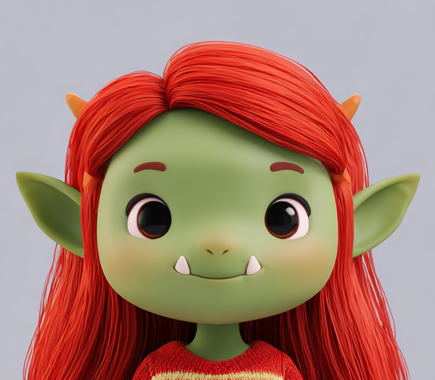
Transformations
Create a wide variety of characters - from stylized cartoons to fantasy beings like orcs or elves. For the best results, use high-quality reference images or detailed text prompts. Characters with human-like features typically deliver the most consistent results. You can adjust or recolor skin tones by experimenting with different seeds or adding a supporting text prompt to your image.
-
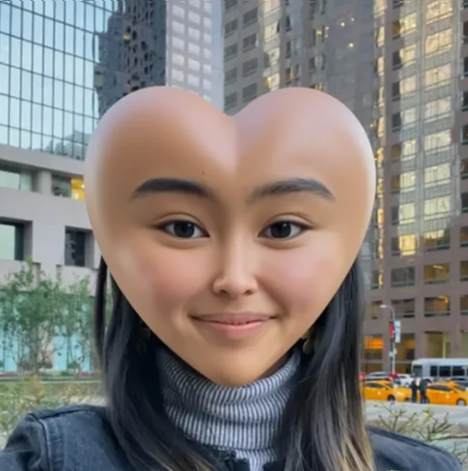
Morphing
Morphing is the most flexible and controllable generation type. Using image references and customization options, you can transform the user while preserving their unique features and skin texture. By adjusting the settings, transformations can range from subtle enhancements to dramatic changes - experiment to find the perfect balance.
-
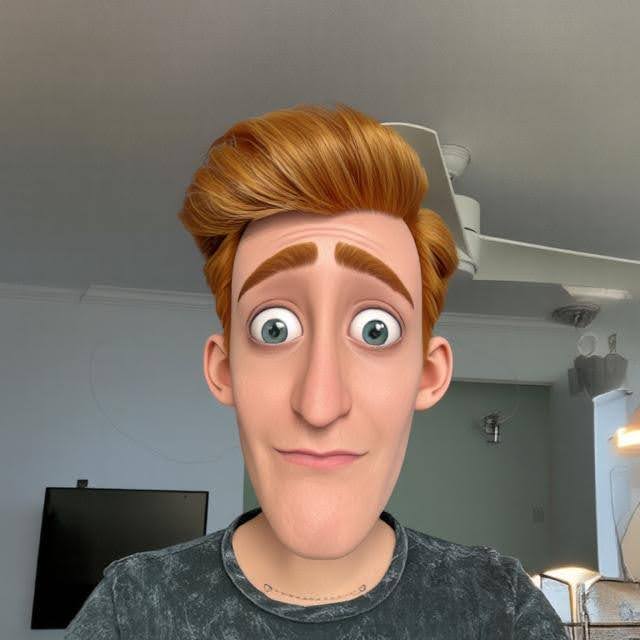
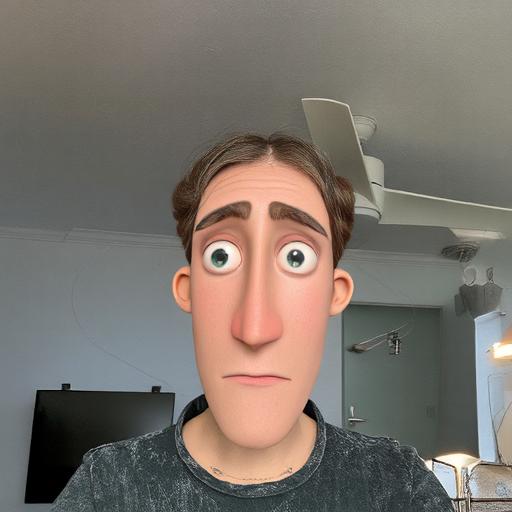
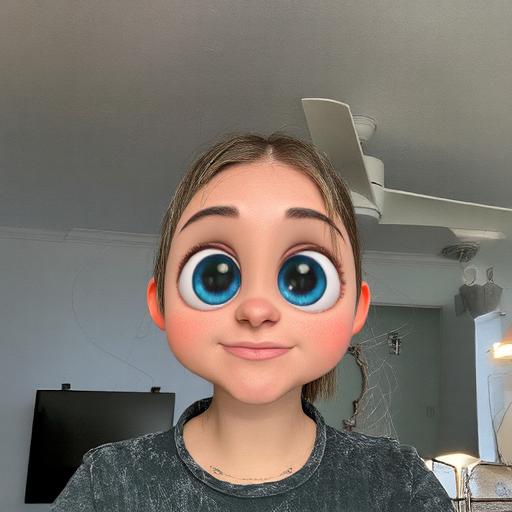
3D cartoon
The tool provides extensive support for cartoon-style designs. You can create a wide range of transformations and fine-tune them using the available settings.
-
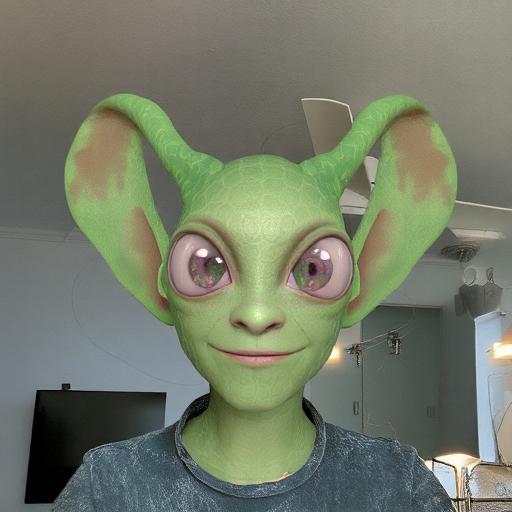
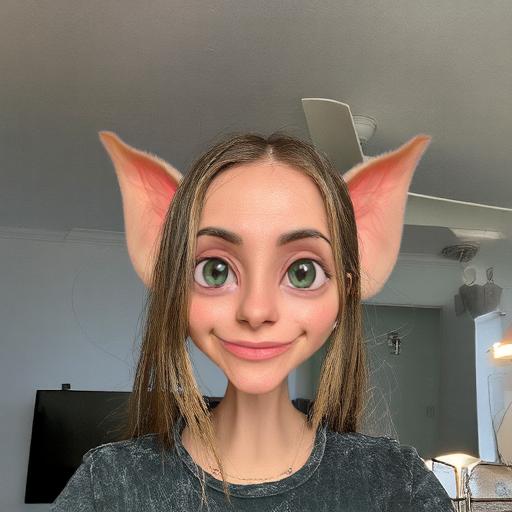
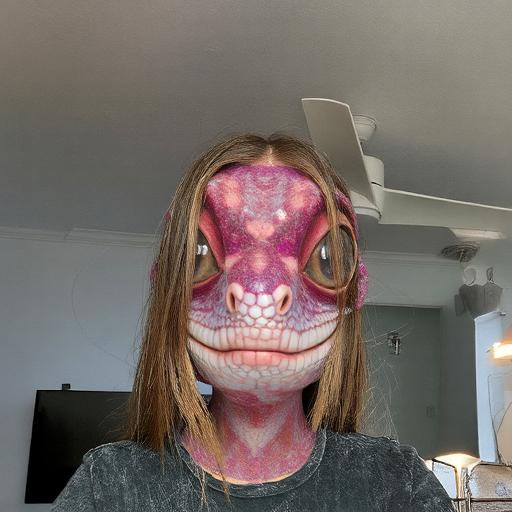
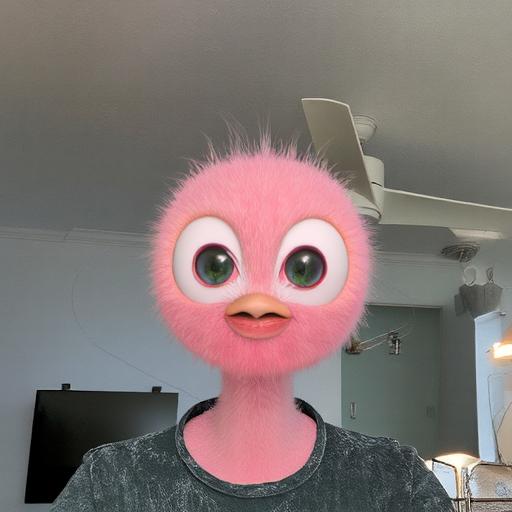
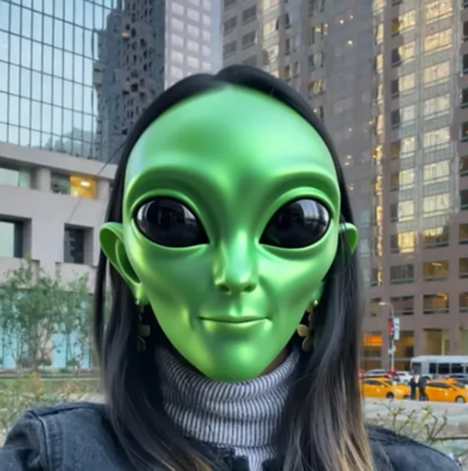
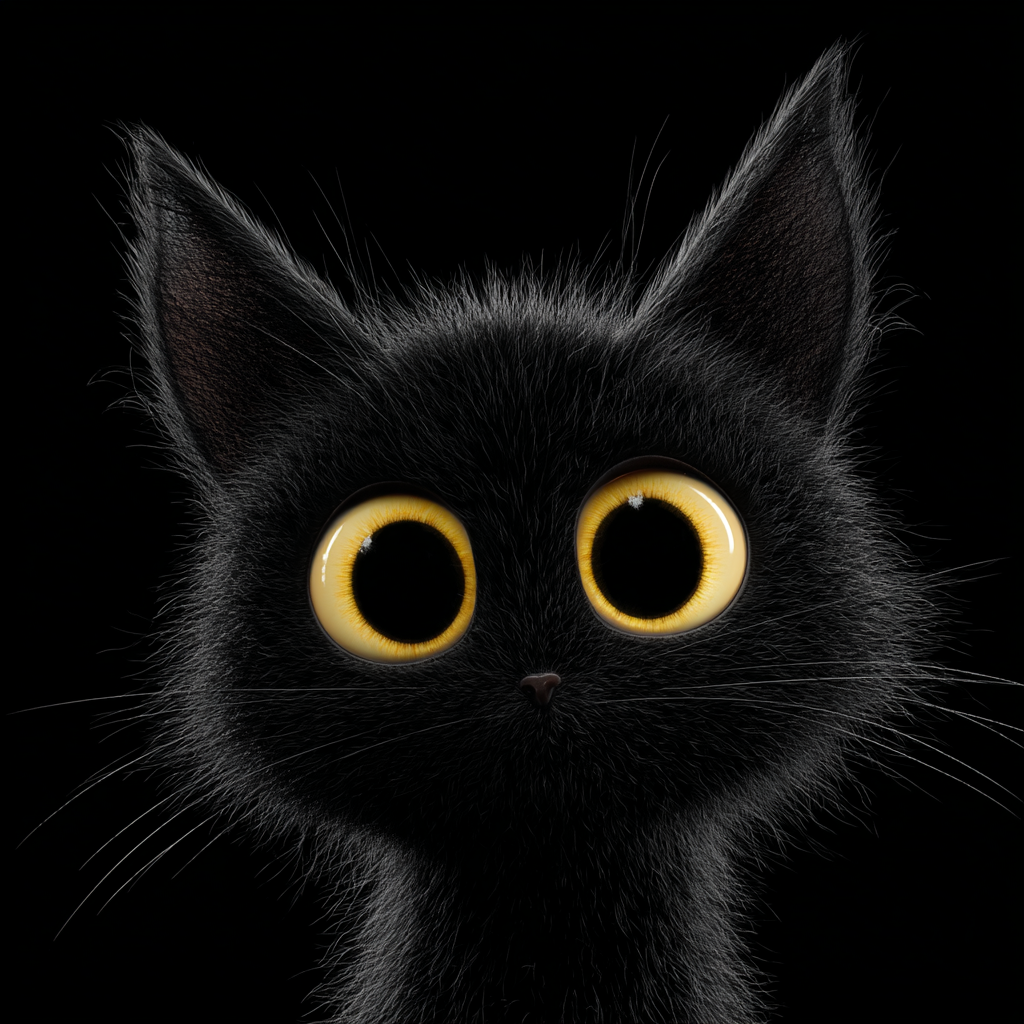
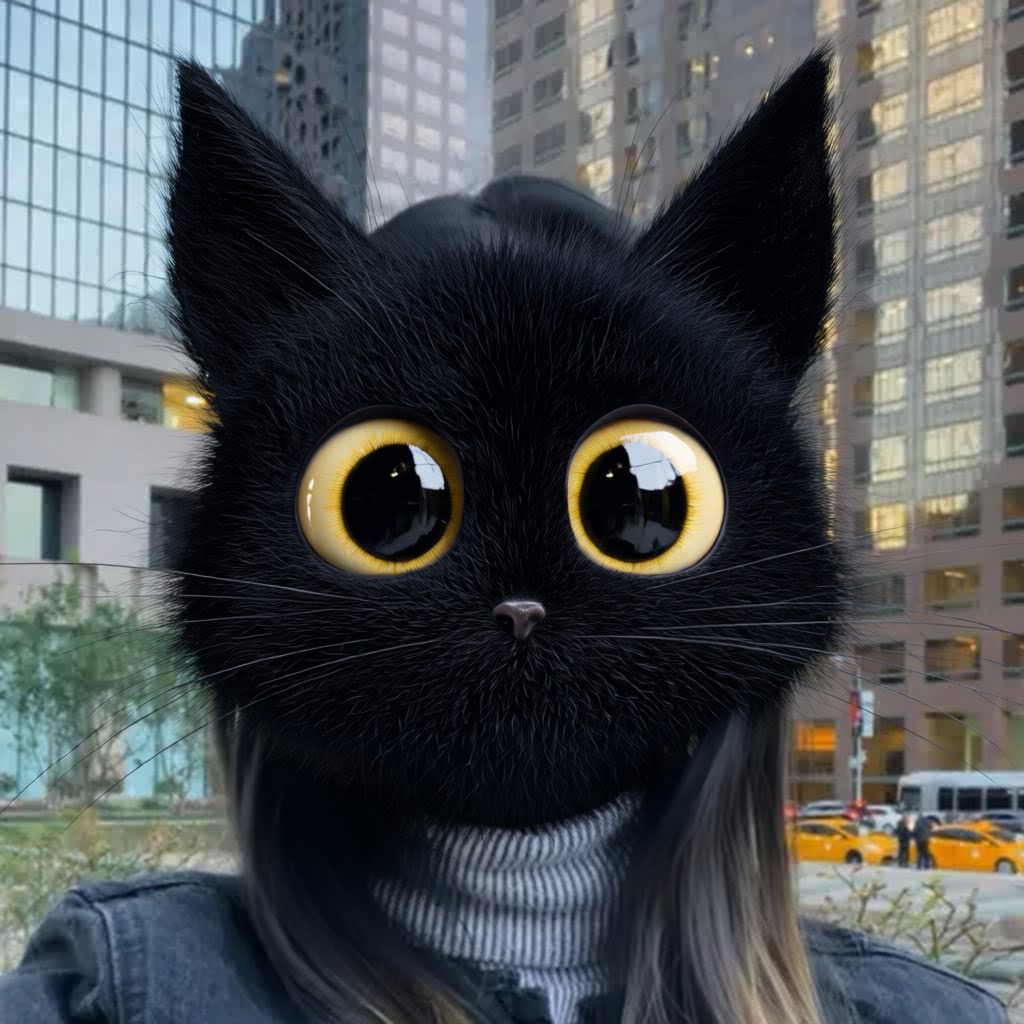
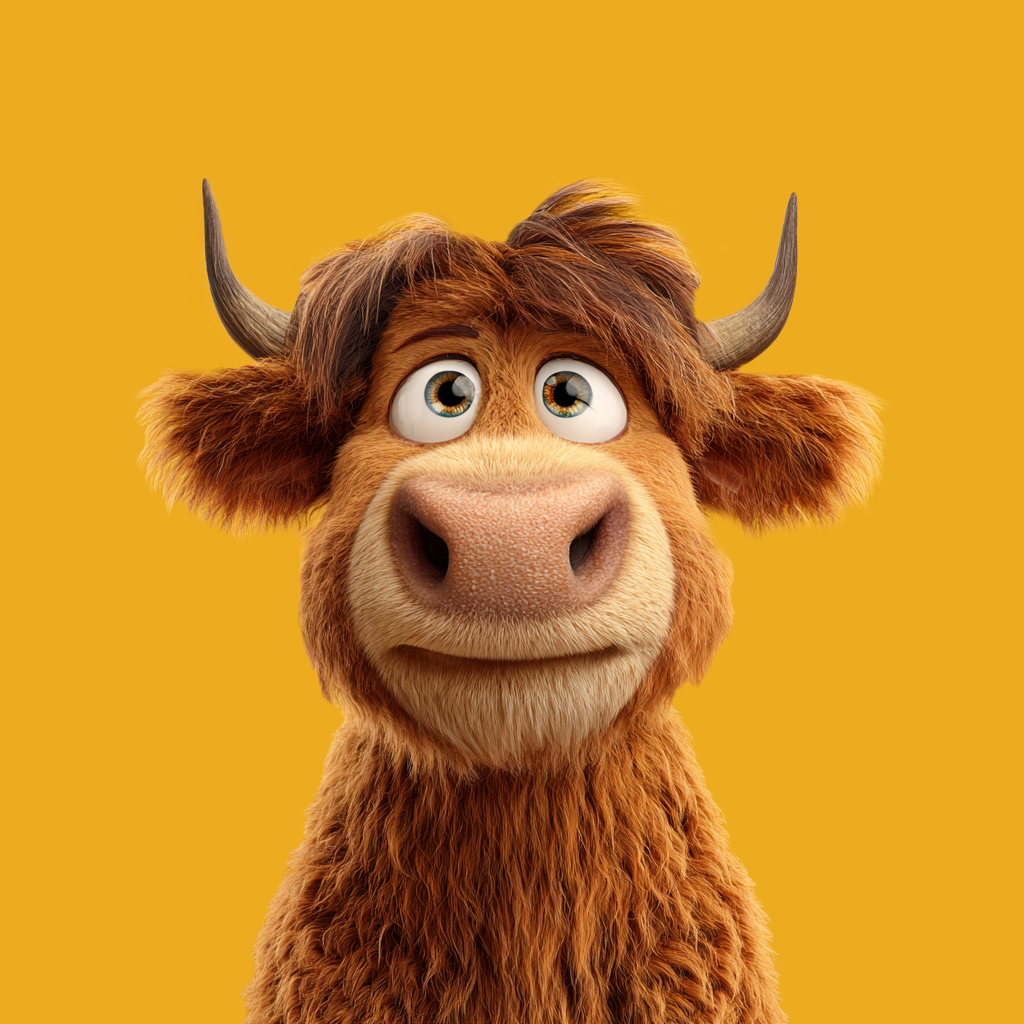
Animal transformation
By choosing an appropriate reference image and adjusting the settings, you can achieve a controlled resemblance to the interpreted input image. Keep in mind that the model is optimized for facial detection - animals with more anthropomorphic (human-like) features will yield the best results.
-
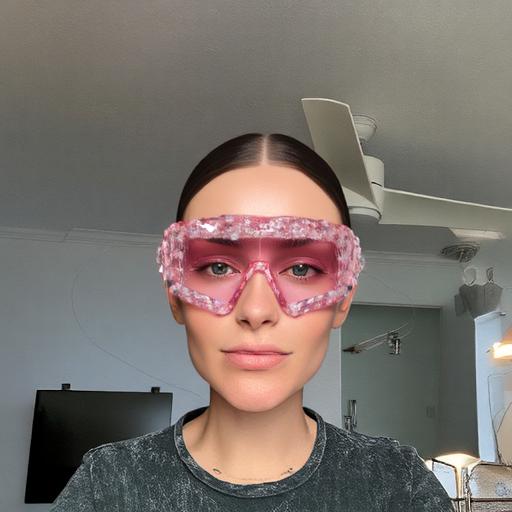
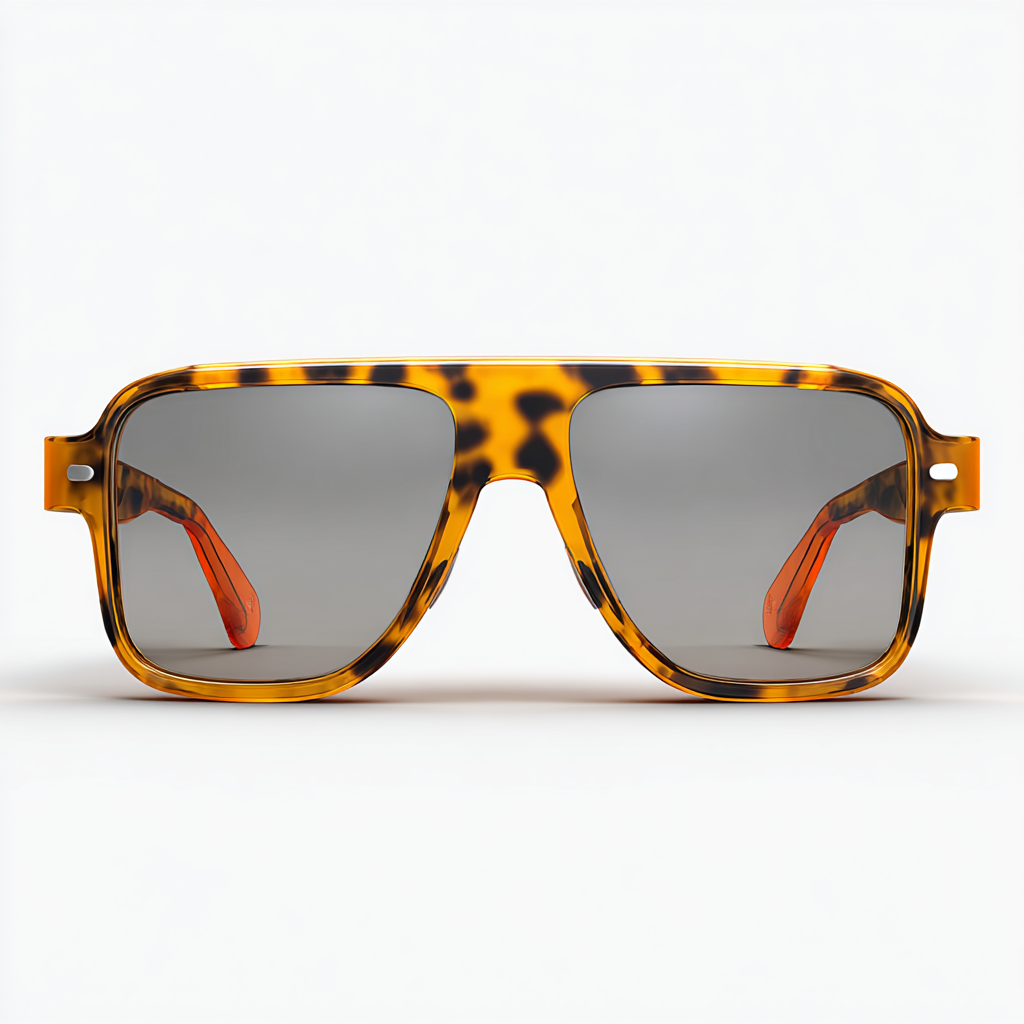
Accessories
You can also use this model to generate various accessories for your model - such as glasses, hats, masks, and more. When generating models, make sure your designs remain consistent across all variations.
Settings
Reference Strength
Controls how strongly the effect follows the Image Reference. A higher value makes the result closer to the Image Reference, but reduces similarity to the original user photo.
| Image Reference | Value: 2.35 | Value: 5.50 | Value: 7.75 |
|---|---|---|---|
 |  |  |  |
Attributes Preservation
Affects the hair and headwear area the most. Higher values provide stronger preservation of the user’s hairstyle and headwear.
| Image Reference | Value: 1.00 | Value: 5.50 | Value: 10.00 |
|---|---|---|---|
|  |  |  |
Seed
Control randomness with a seed. Use the same number to recreate the same look, or try different ones for new variations.
| Seed: 56 | Seed: 89050 | Seed: 14543 | Seed: 57288 |
|---|---|---|---|
 |  |  |  |
Advanced Model
Advanced Model unlocks a next-generation pipeline that delivers higher-quality results, stronger prompt control, and more expressive, flexible edits using text and image prompts.

It is particularly well suited for high-quality visual transformations, including:
- Morphing
- Gender swap
- Mustache and beard effects
- Beauty transformations with style variations
- Age transformations (for example, older or younger)
- Animal transformations
- Accessories
For more realistic textures and stronger identity preservation of the user’s facial features, it is recommended to use the Enhanced Model.
Effect Creation flow
-
Click the
Surprise mebutton to try one of the default prompts and get familiar with the model.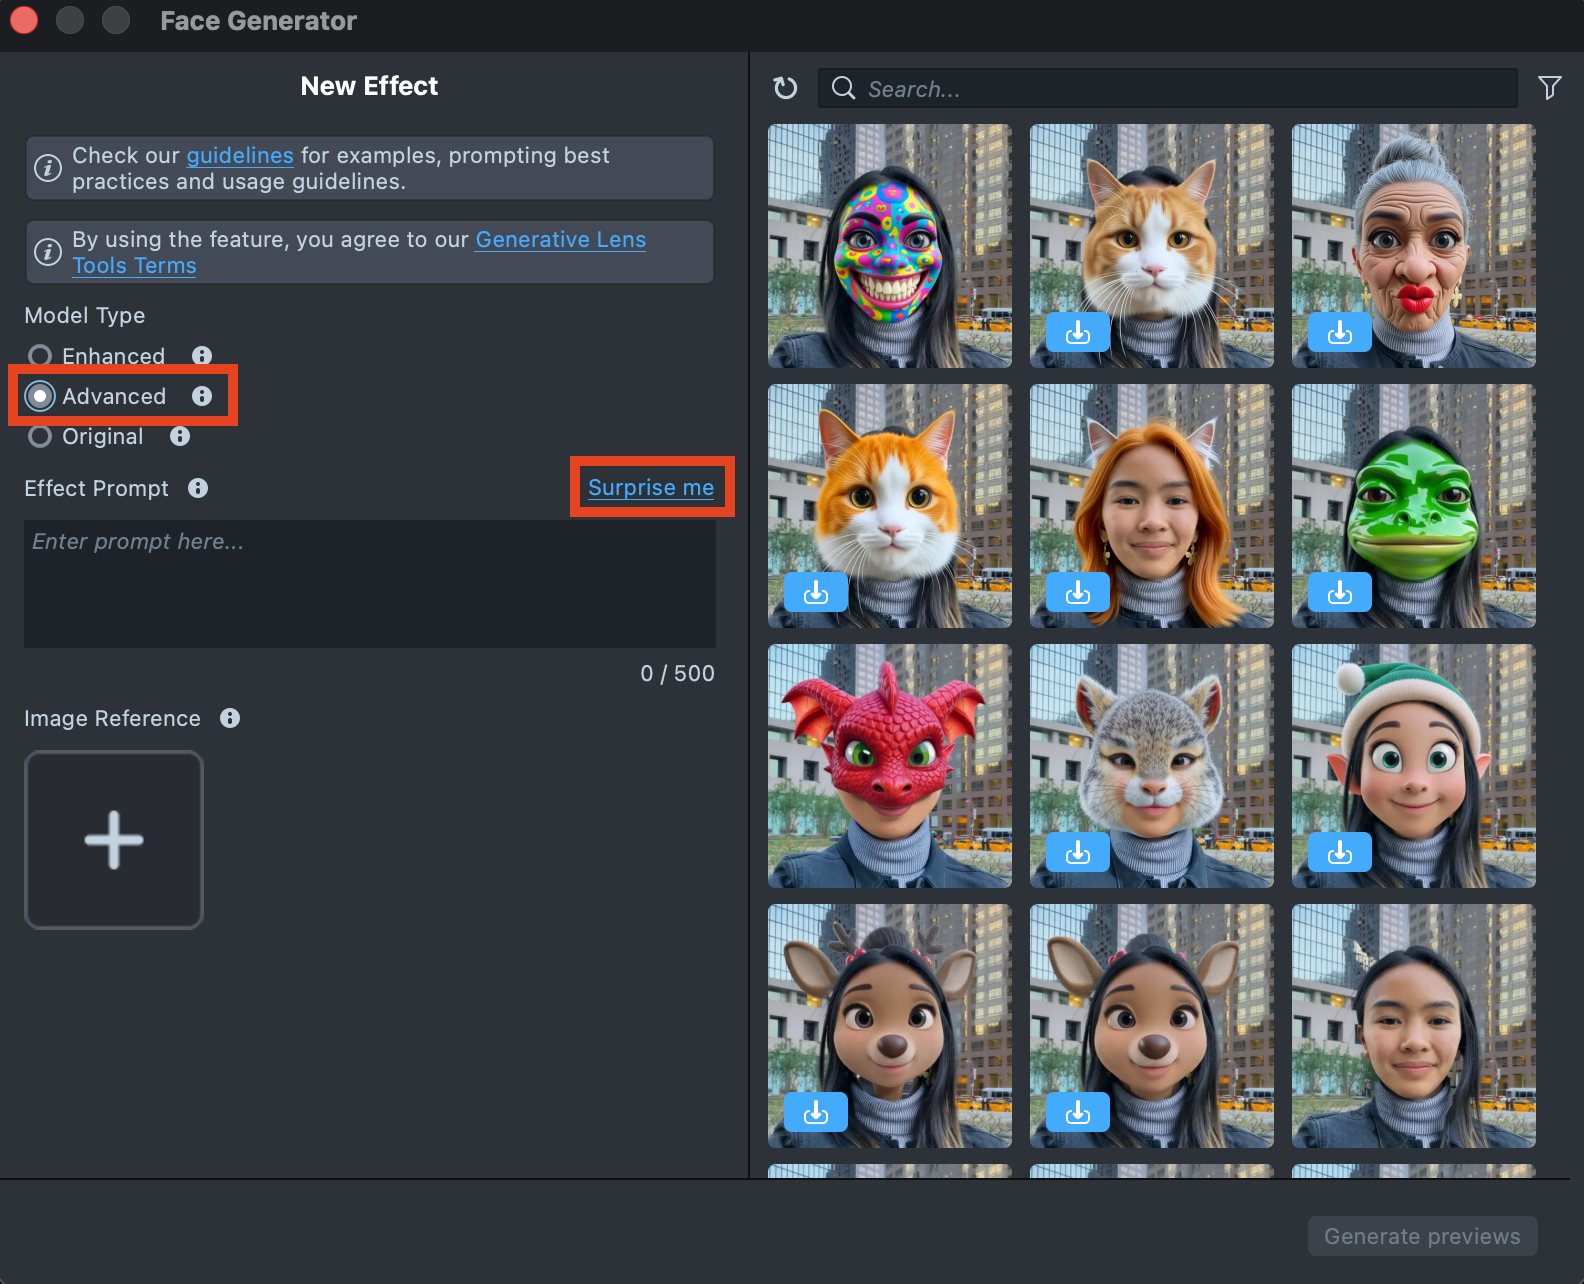
-
If you are ready to use your own prompt, enter a description of the Effect you’d like to generate in the
Effect Prompttext field (up to 500 characters).See the Best Practices guide to learn how to achieve the best results.
-
You can add an image input to guide the generation and make the result closer to your vision.
You can use
Effect Prompt,Image Reference, or a combination of both - whichever works best for your case.See the Best Practices guide to learn how to achieve the best results.
-
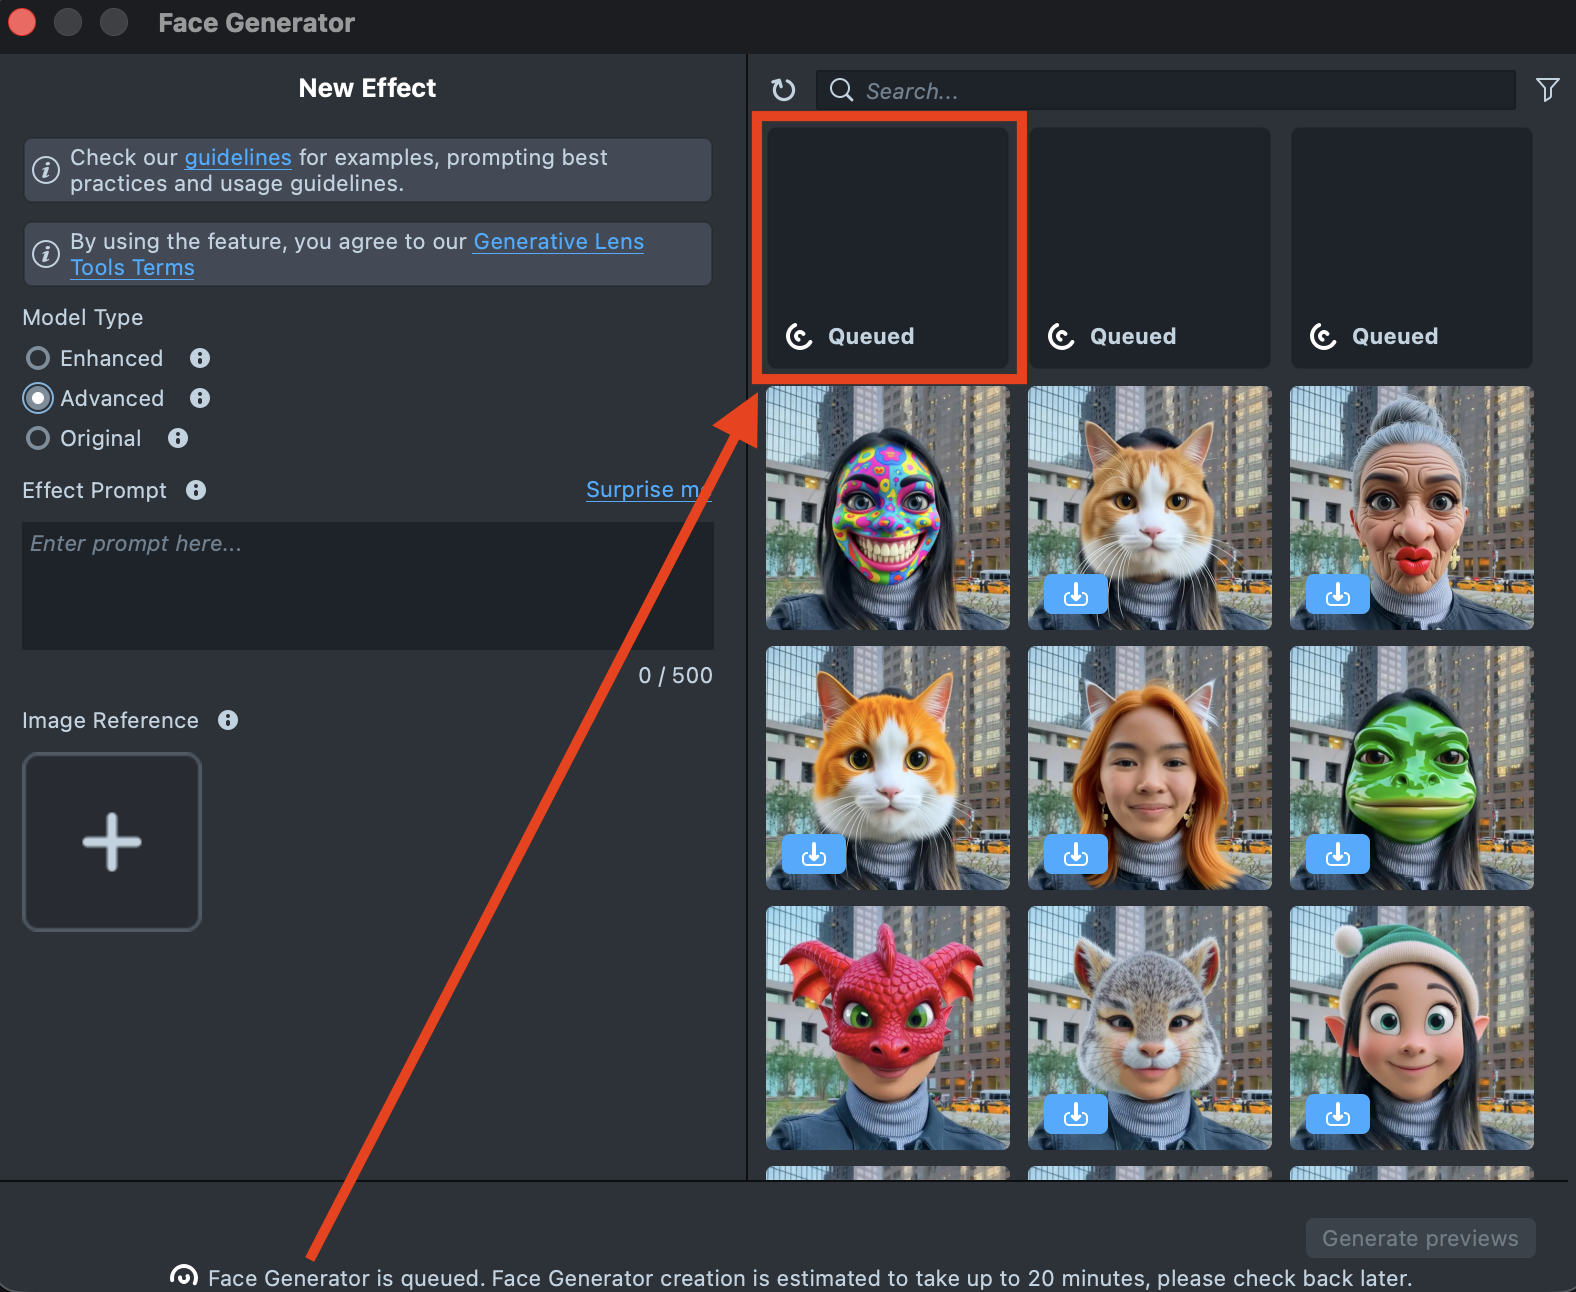
When your prompt is ready, press the
Generate previewsbutton to generate the previews.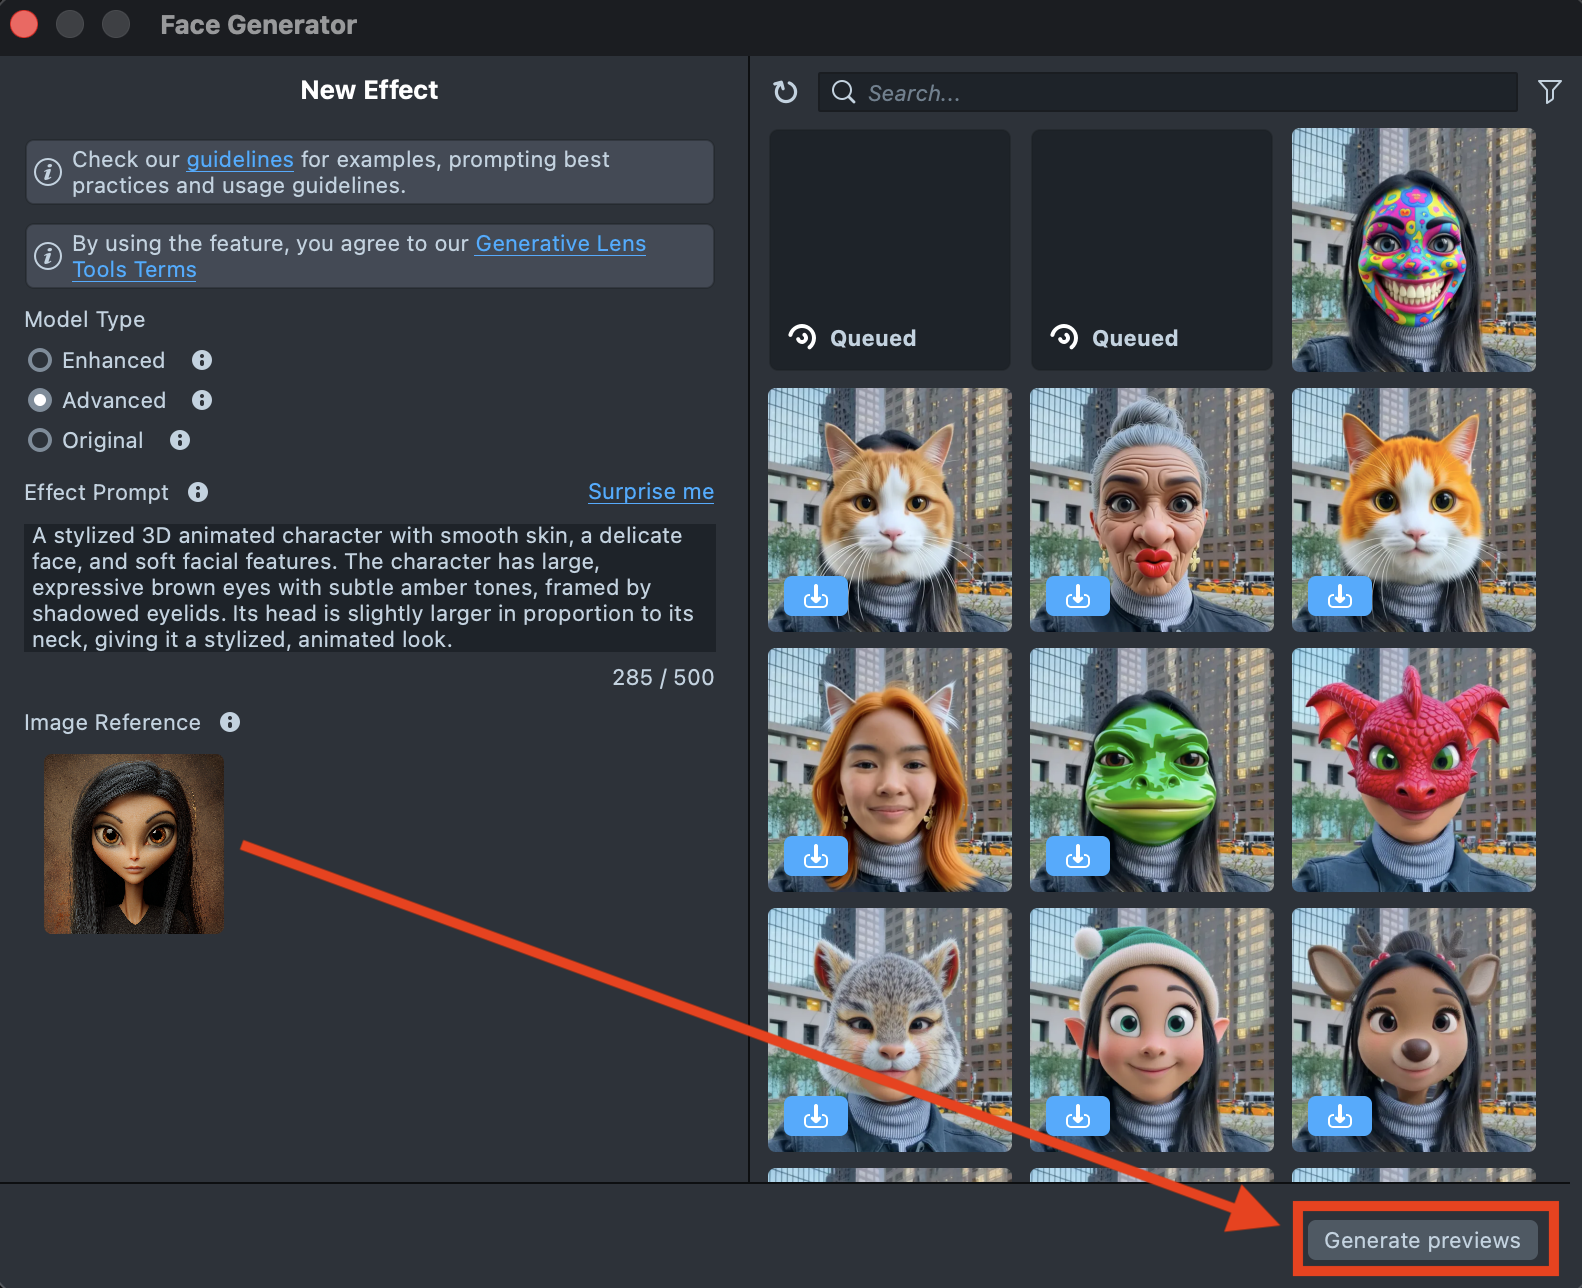
-
A new tile will appear in the Gallery with a loading indicator in the corner, showing the progress.
Generating the preview may take up to 20 minutes, but you can close the plugin and come back later.
-
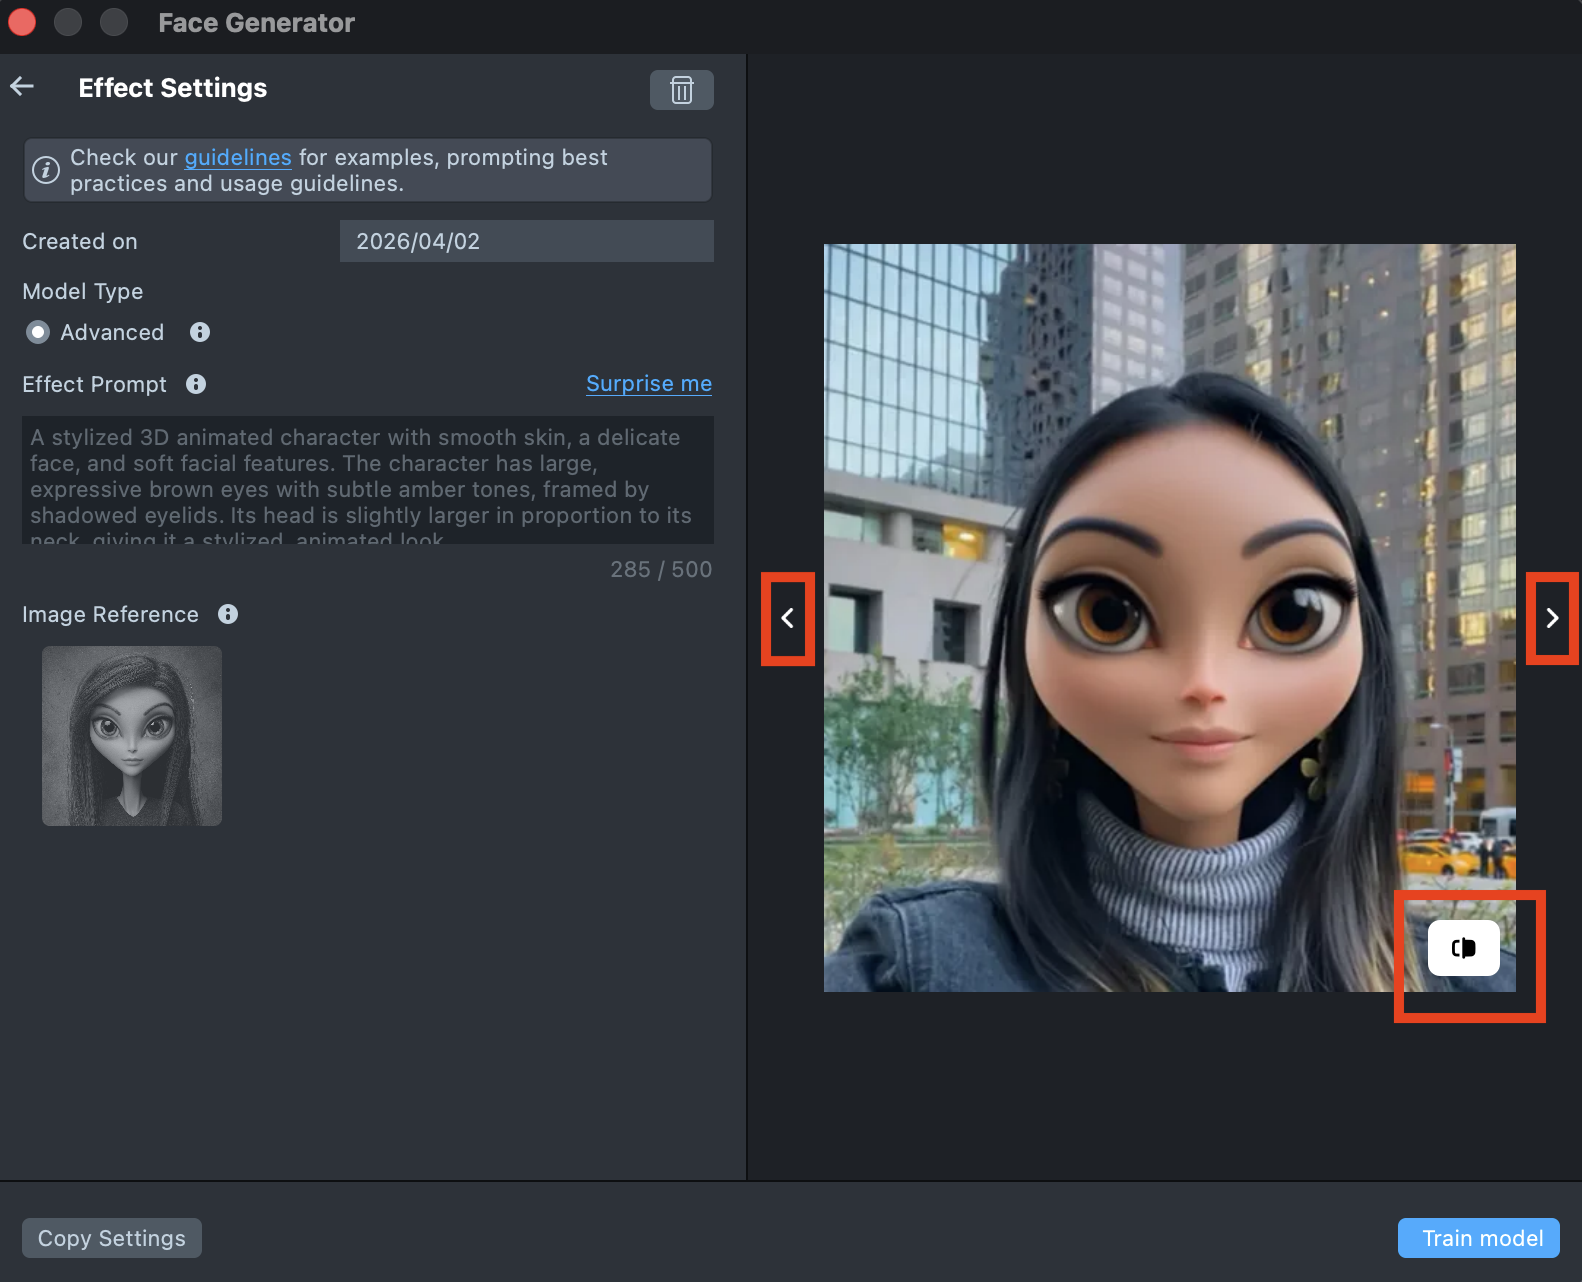
Once the preview has been generated, you can click its tile in the Gallery to open the details page. Here, you can use the arrows on the sides to preview the effect on different models. Additionally, you can click the button in the bottom-right corner to view the original image the effect was applied to.
-
If the preview doesn’t match your expectations, click
Copy Settingsto adjust your prompts or seed.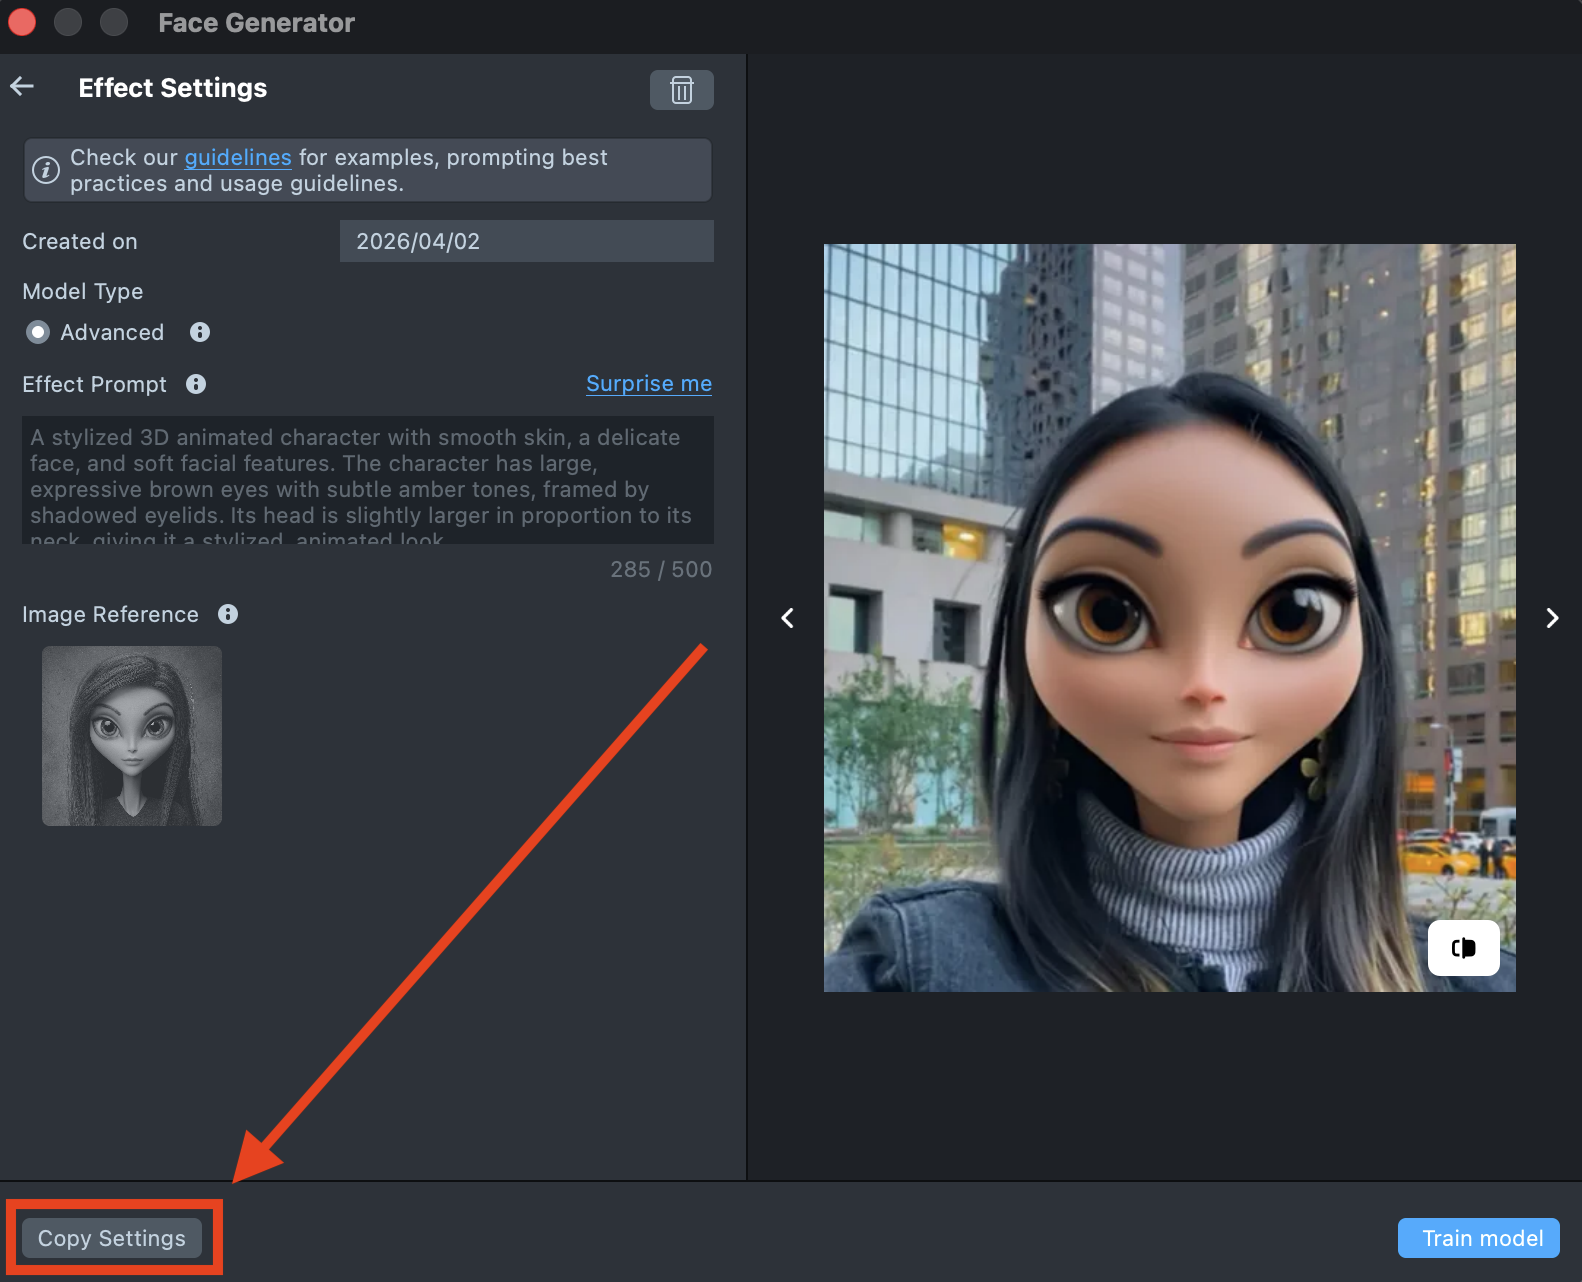
-
You can make as many tweaks as needed until the result feels right - all changes will appear in the Gallery as a new effect, without altering the current one. This way, you can always go back and compare whether the updated effect looks better than the original.
-
Happy with the preview? Click
Train modelto start training your model. You’ll be able to track the training status directly in the Gallery.Training the model may take up to 2 hours, but you can close the plugin and come back later.
-
Once training is complete, you can import the effect directly from the Gallery by clicking the
Importbutton, or clickImport to projecton the details page to add it to your project.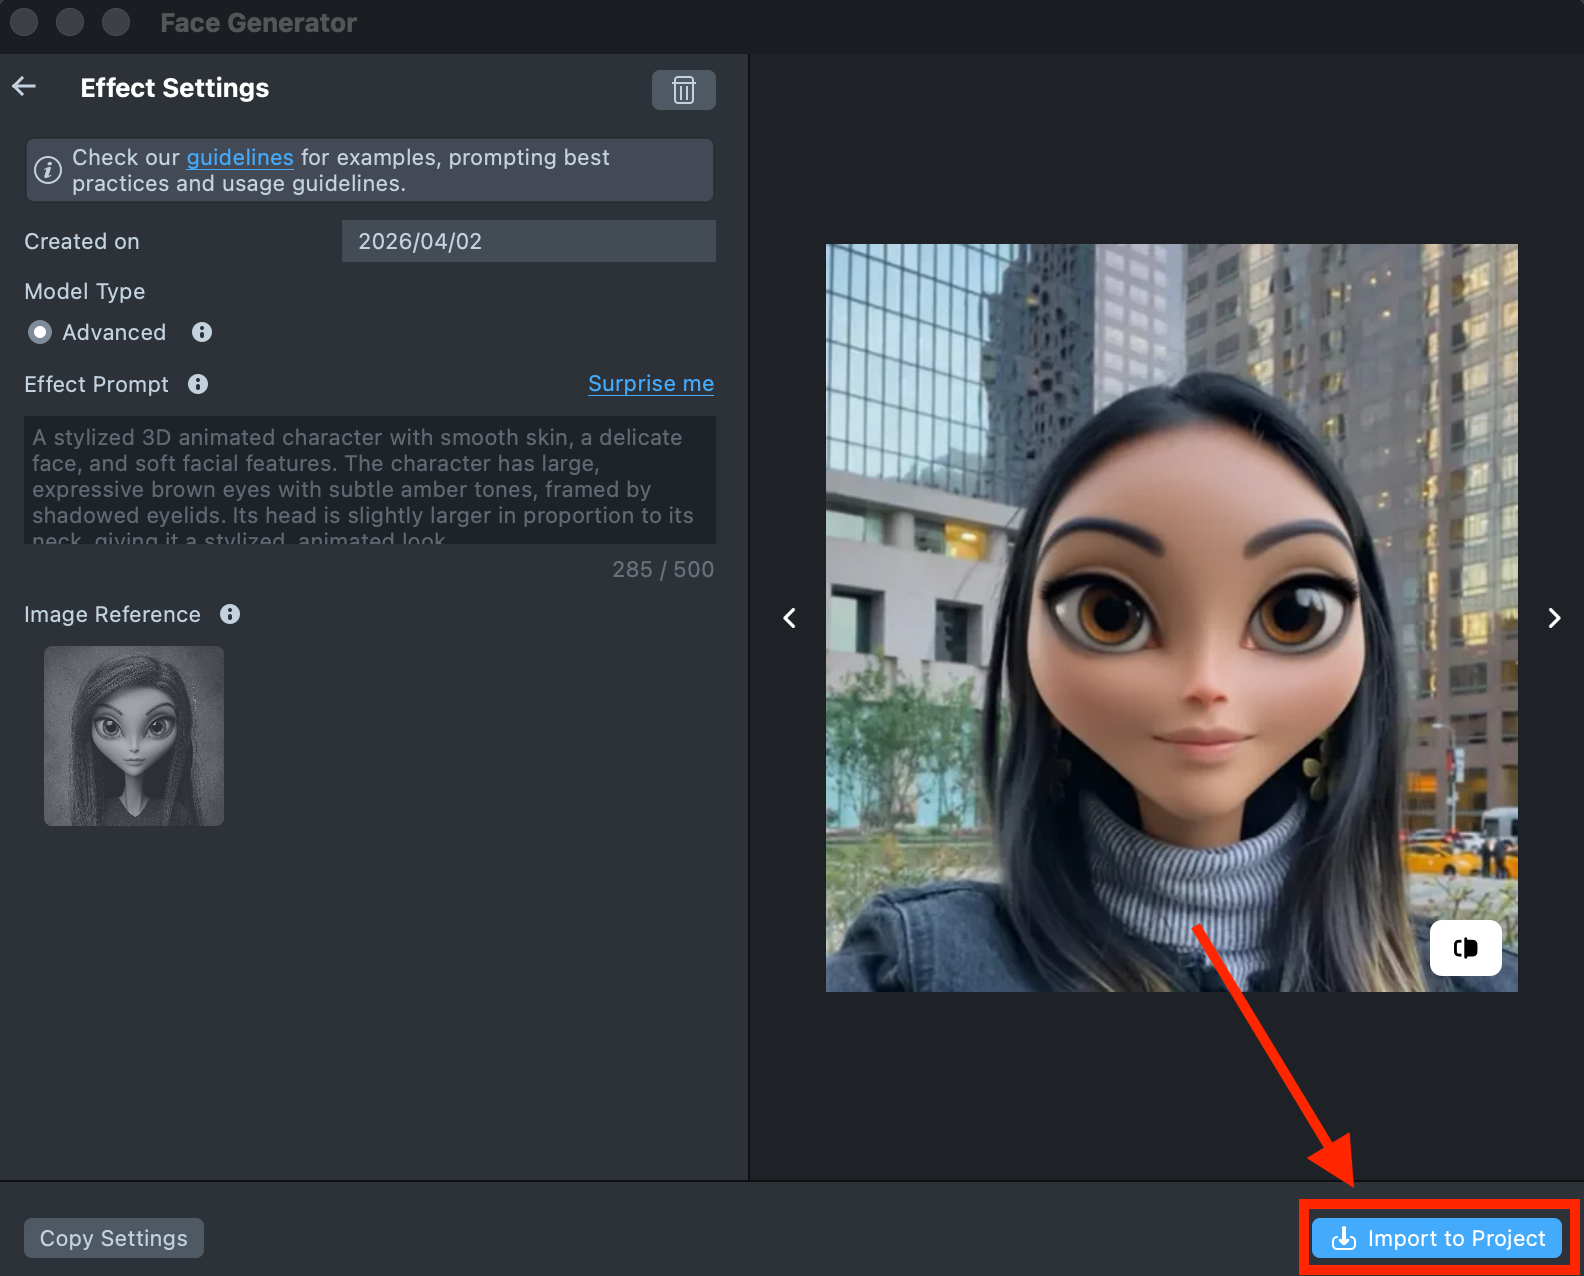
-
Follow this guide to learn how to combine Face Generator with AI Portraits, or refer to this guide to learn how to combine Face Generator with Style Generator, Face Animator, and Garment.
Best Practices
Effect Prompt
You can use different types of prompts, both short and long to guide the generation process. It’s usually best to start with a short prompt and refine it as you go. Add adjectives, specific details, or additional descriptions to bring the result closer to your desired look.
- Focus on the essentials. Describe only the changes you want to make, and avoid unnecessary or general details.
- Skip background descriptions. There’s no need to mention the background unless it’s part of your design.
- Use descriptive words. Adjectives like 3D, cartoon, or realistic can help you control the style of the generated image.
Image Reference
For best results, use a high-quality image with a solid background and a frontal view of the subject. However, Advanced Model supports a wider range of inputs, allowing you to generate effects from virtually any reference image - even those that were previously difficult to segment or do not contain human facial features.
All of the following image references work well with the Advanced model:
   |    |    |
For example, this strawberry image would not produce good results with the Enhanced model:
However, with the Advanced model, it can generate results like the following:

Effect Prompt + Image Reference
To achieve the best results or expand the capabilities of the Image Reference, you can combine it with an Effect Prompt. By specifying details in a text prompt, such as hair color, hairstyle, or accessories, you can guide the model’s understanding of the reference image and better control the final result.
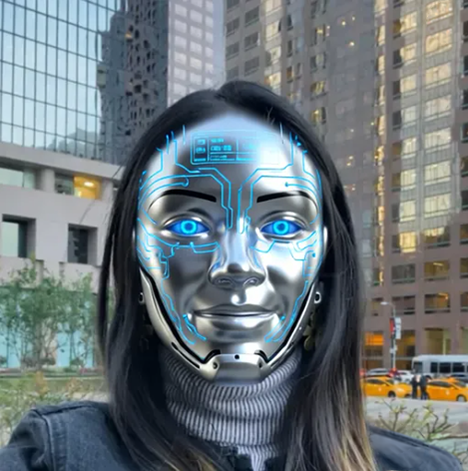
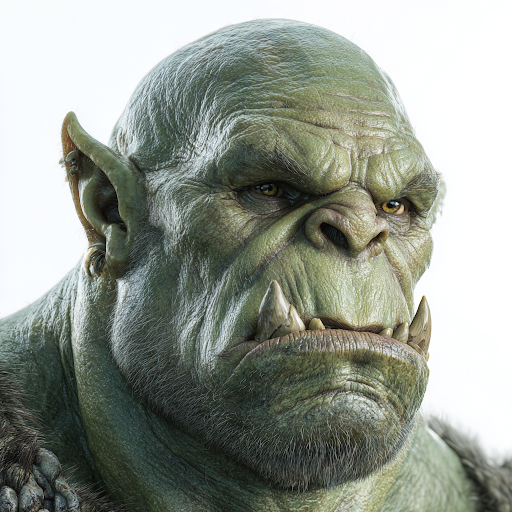
Comparison of Prompt Combinations
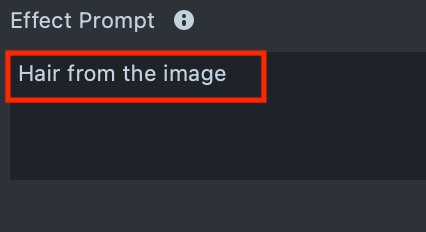
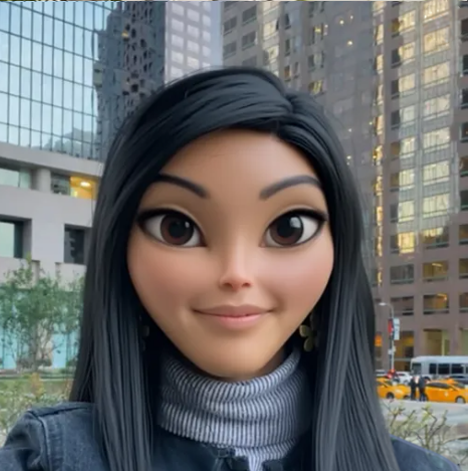
| Image Reference | Effect Prompt | Processed user image |
|---|---|---|
|  | 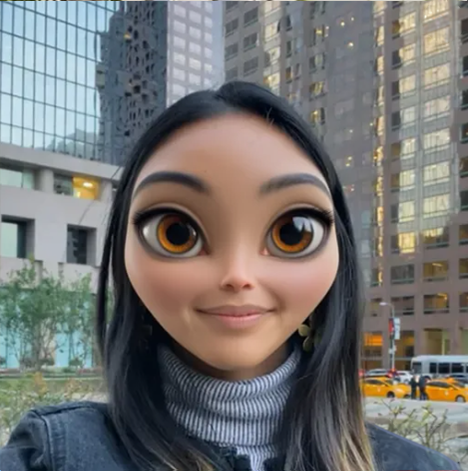 |
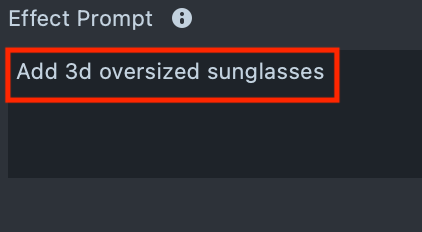
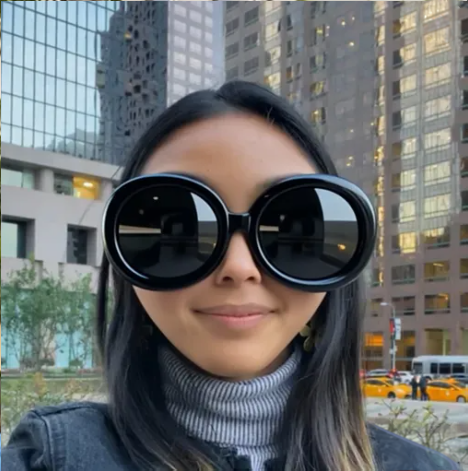
| Image Reference | Effect Prompt | Processed user image |
|---|---|---|
|  | 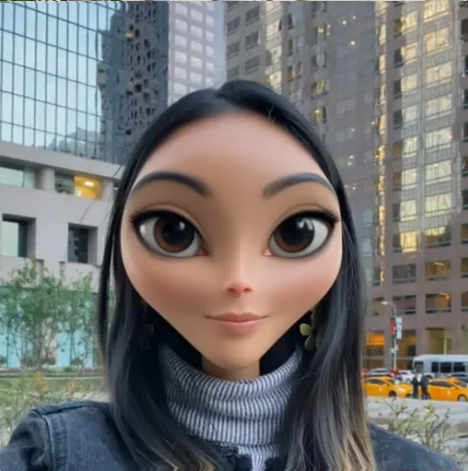 |
| Image Reference | Effect Prompt | Processed user image |
|---|---|---|
|  |  |
| Image Reference | Effect Prompt | Processed user image |
|---|---|---|
|  |  |
Crop
Keep in mind that the tool operates within a defined area. It transforms the user’s head and the surrounding region. Any part of your design that extends beyond this area will be cropped. For the best visual results, make sure your design stays within the crop area.
| Crop area | Cropped effect |
|---|---|
| |
Examples of effects created with Effect Prompts
-
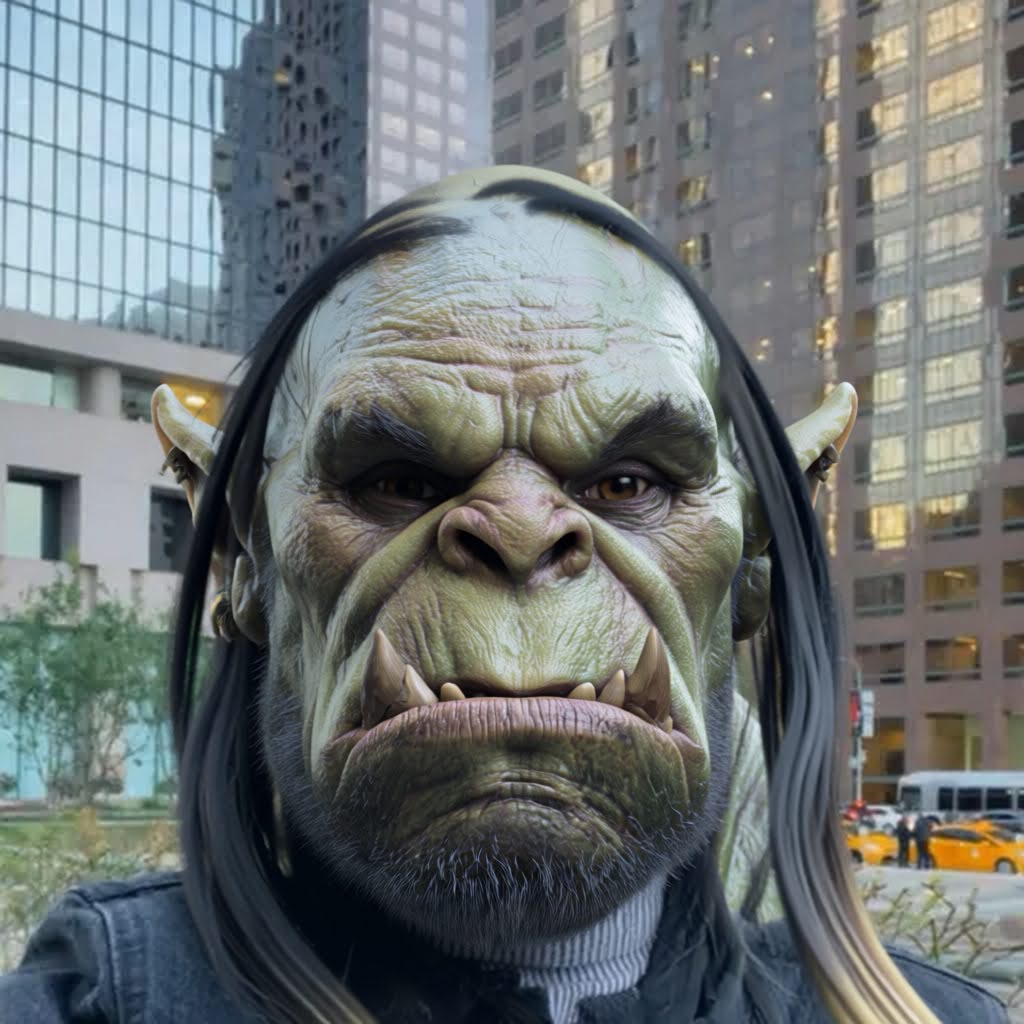
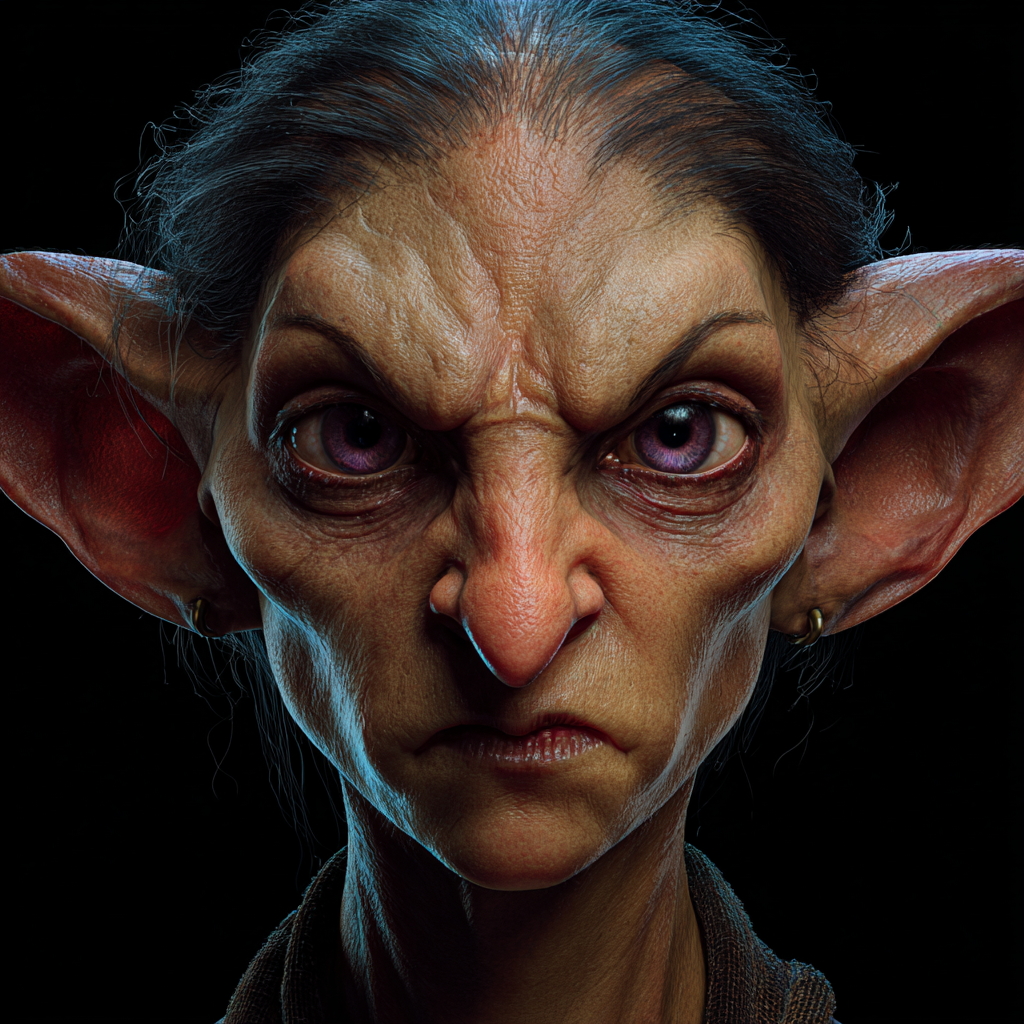
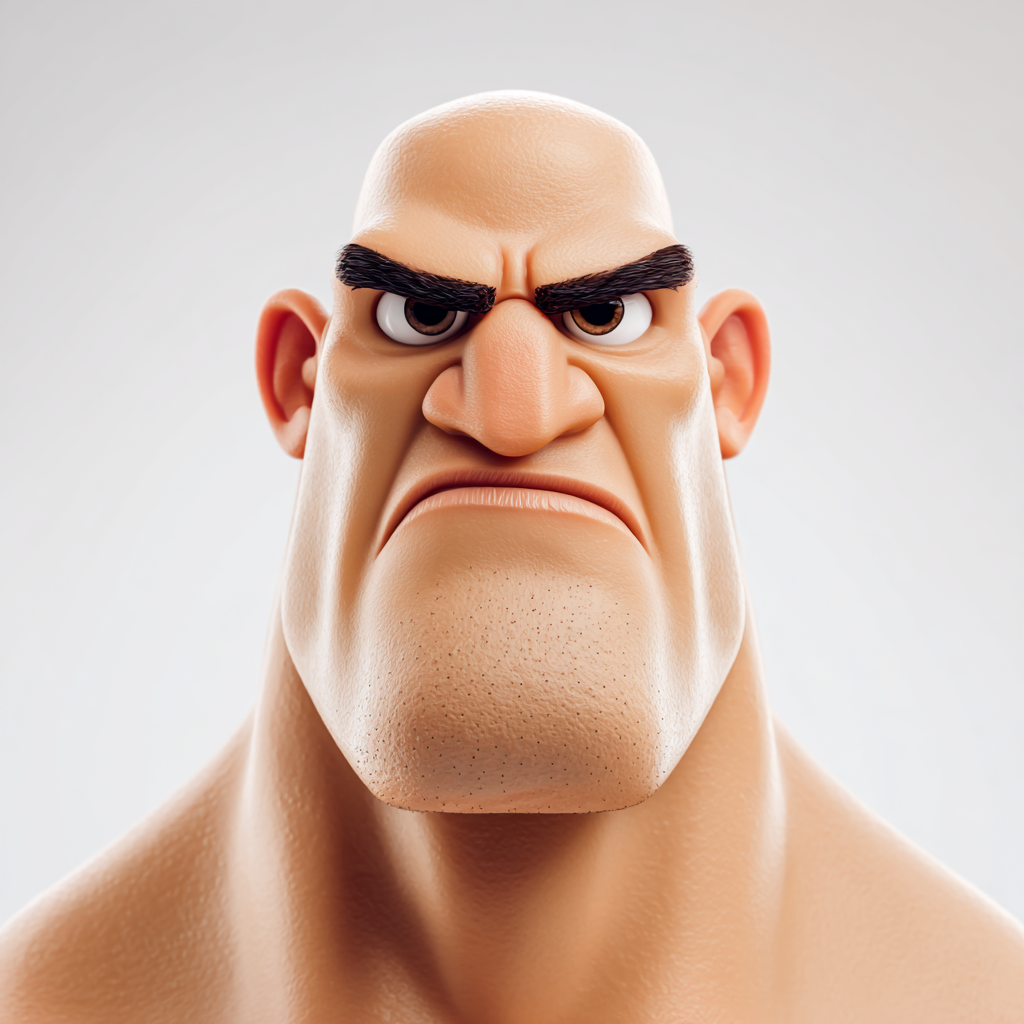
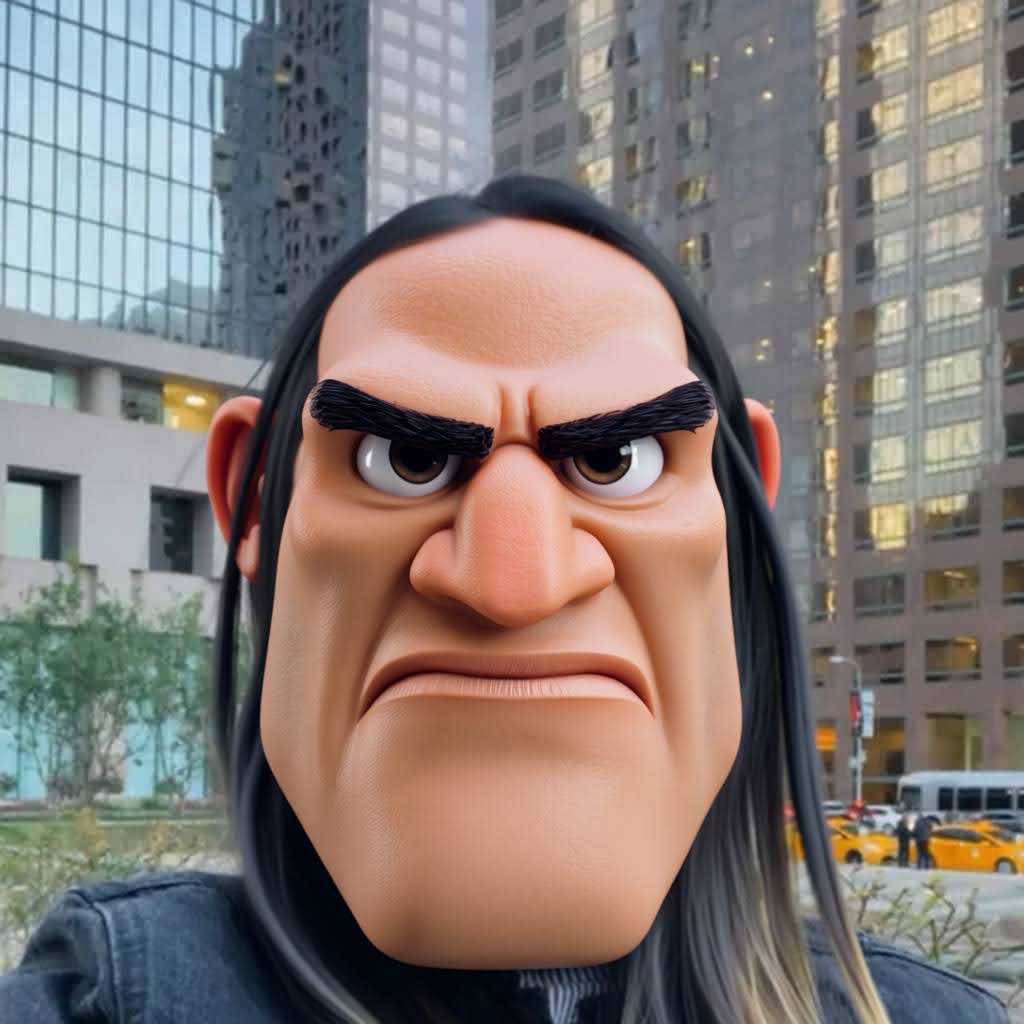
Transformations
You can generate a wide range of characters, from cartoons to orcs and elves. To achieve the best results, write a clear and descriptive text prompt that captures your idea. Start with shorter prompts, then refine and expand them as needed.
-
Morphing
Morphing is one of the most exciting categories. Experiment with different ideas, and ensure the results remain consistent across the entire generated dataset.

-
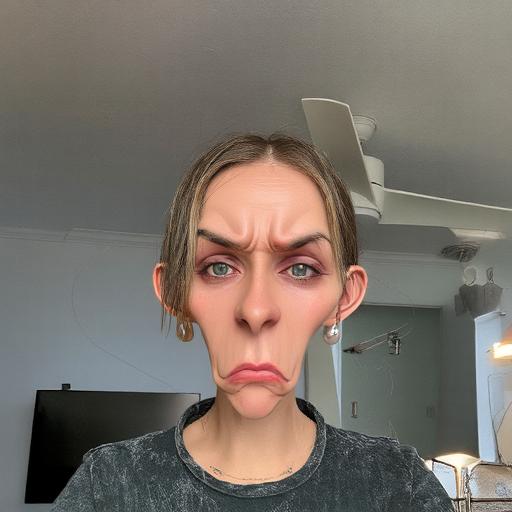
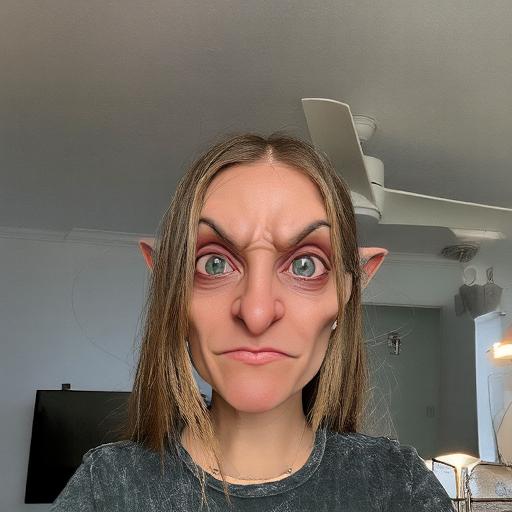
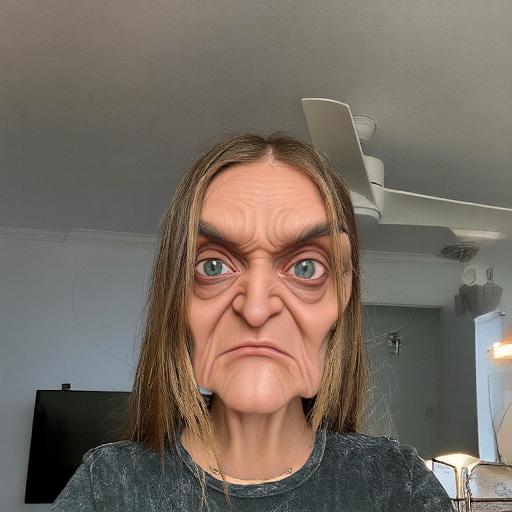
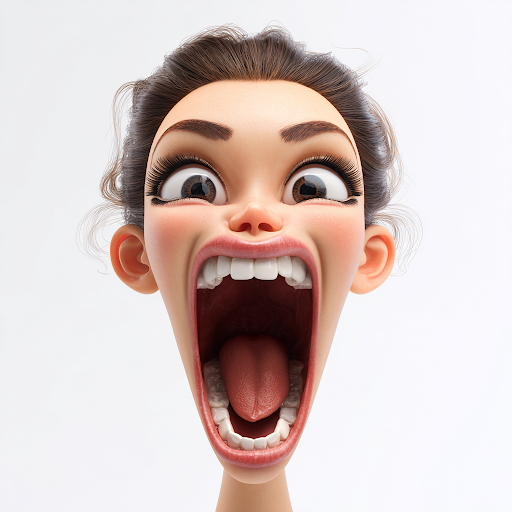
Expression
The tool also provides strong support for expressive designs. You can create a wide range of transformations and control them using prompts.

-
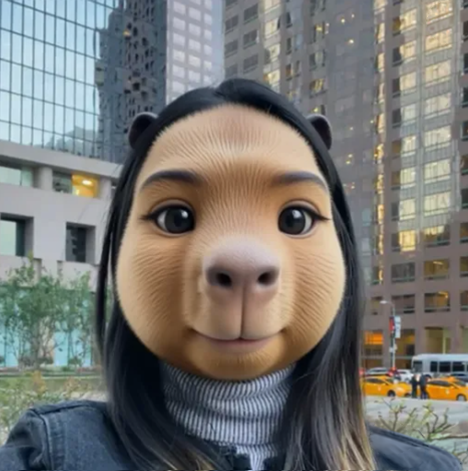
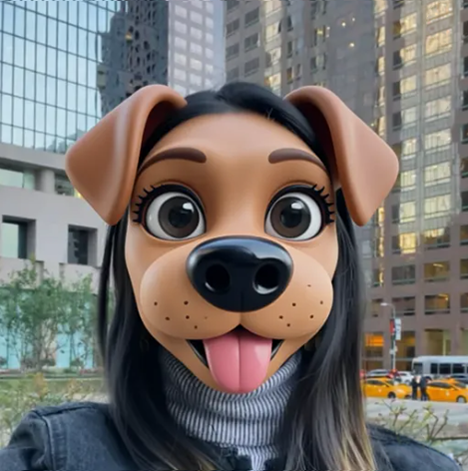
Animal transformation
You can also create animal transformations, turning the subject into various animals or blending human and animal features.
-
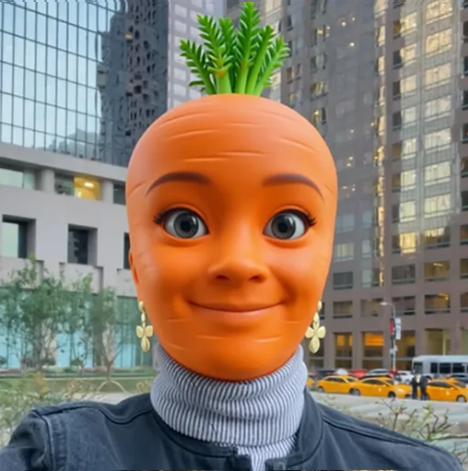
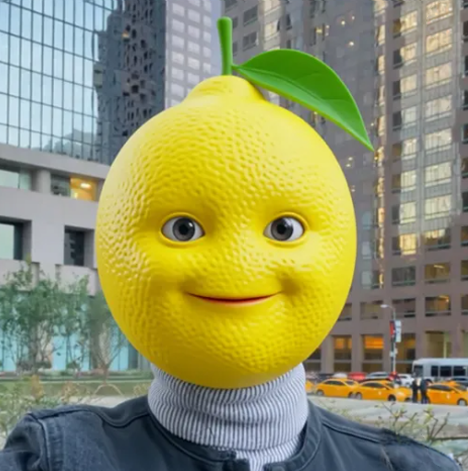
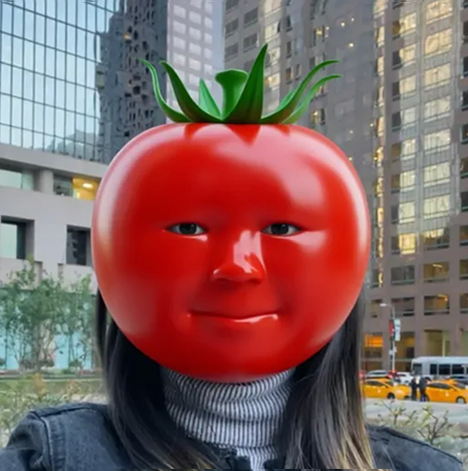
Food Transformation
Similar to animals, you can also generate fruits, vegetables, and a wide range of other objects.
-
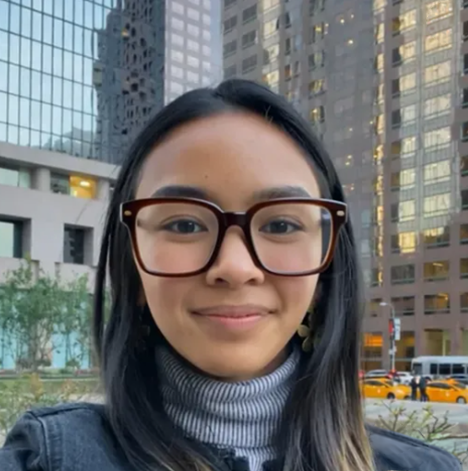
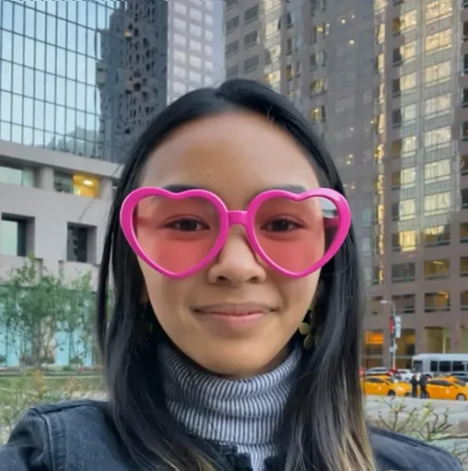
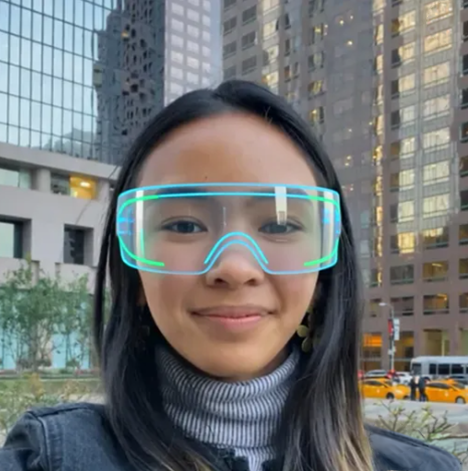
Accessories
Accessory generation is now stable and independent. Generated objects remain steady without flickering and are accurately positioned on the user’s head.
-
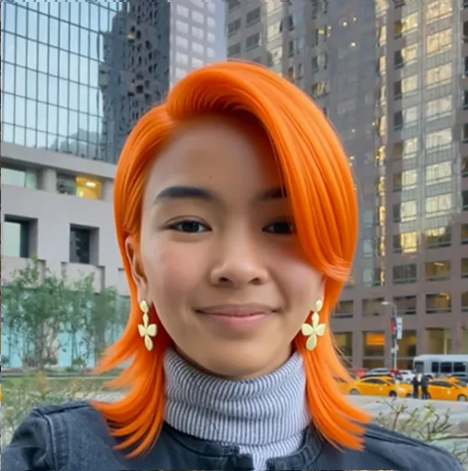
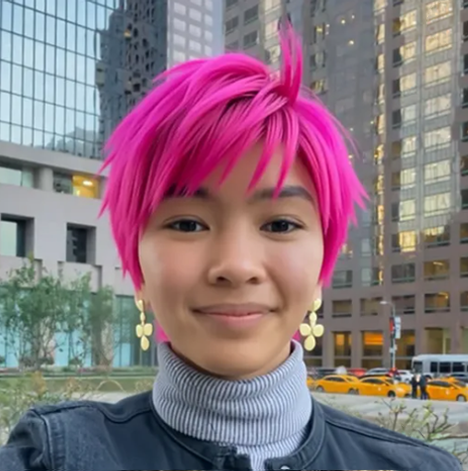
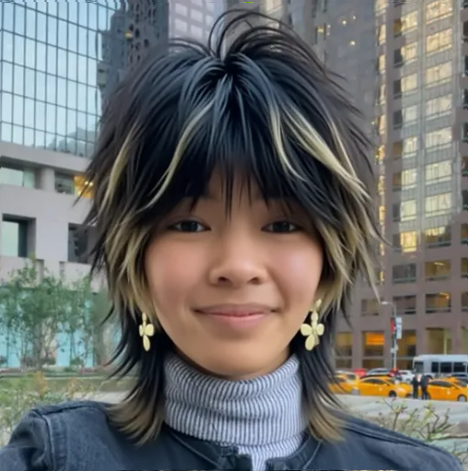
Hairstyle
Using the Advanced Model, you can generate a variety of haircuts and hairstyles. For the most realistic results, avoid using cropped images. These hairstyles are generated as part of the ML output and remain fixed, but they can be especially effective for fashion-style visuals.
-
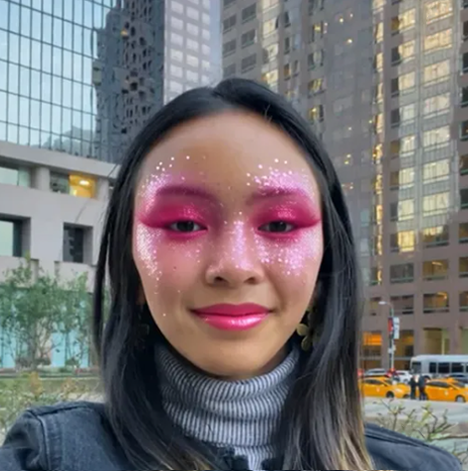
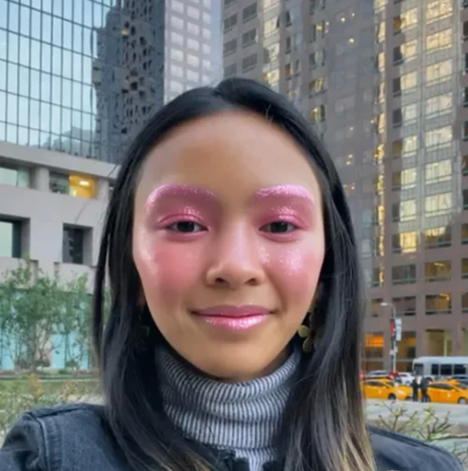
Makeup
Makeup is not the primary focus of this tool, but it can still be used for experimentation. Certain styles produce stable results, and the outcomes can be unexpectedly compelling.
-
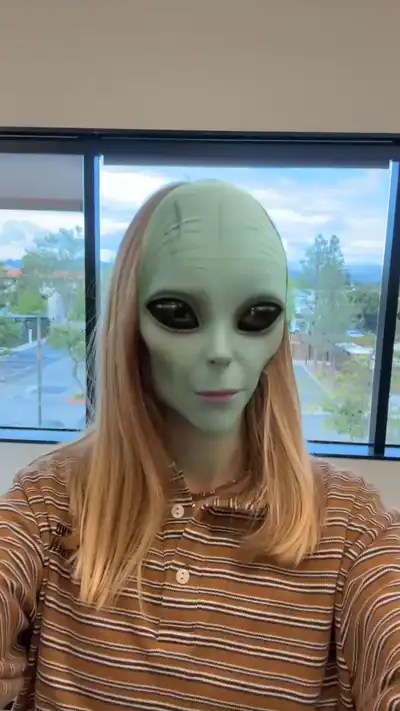
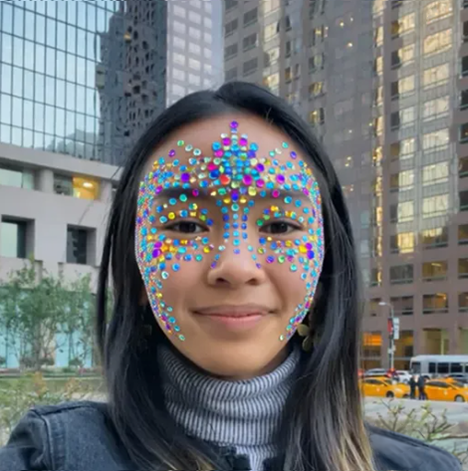
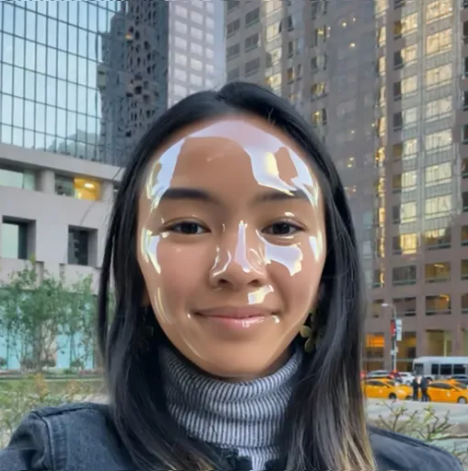
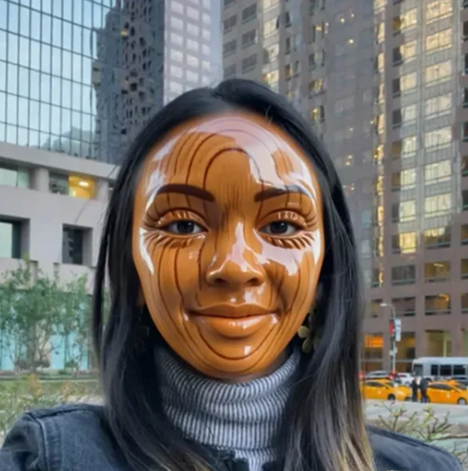
Face Mask
This effect type is designed to generate content within the facial area. It allows you to modify facial textures and create a variety of mask-style effects.
Examples of effects created with Image References
-
Transformation
Works well with a wide range of reference images, producing high-quality textures and vibrant colors. The reconstruction is performed within the cropped region.


-
Morphing
Facial morphing with human texture preservation has been significantly improved. The tool supports complex transformations while maintaining high-quality textures.
-
Transformation
For complex shapes, the tool supports 1:1 transformations from reference images, including detailed morphs with recoloring.
In such cases, the reference is applied directly and does not preserve the user’s facial features.
-
Accessories
Accessory generation is now stable and independent. Generated objects remain steady without flickering and are accurately positioned on the user’s head.
-
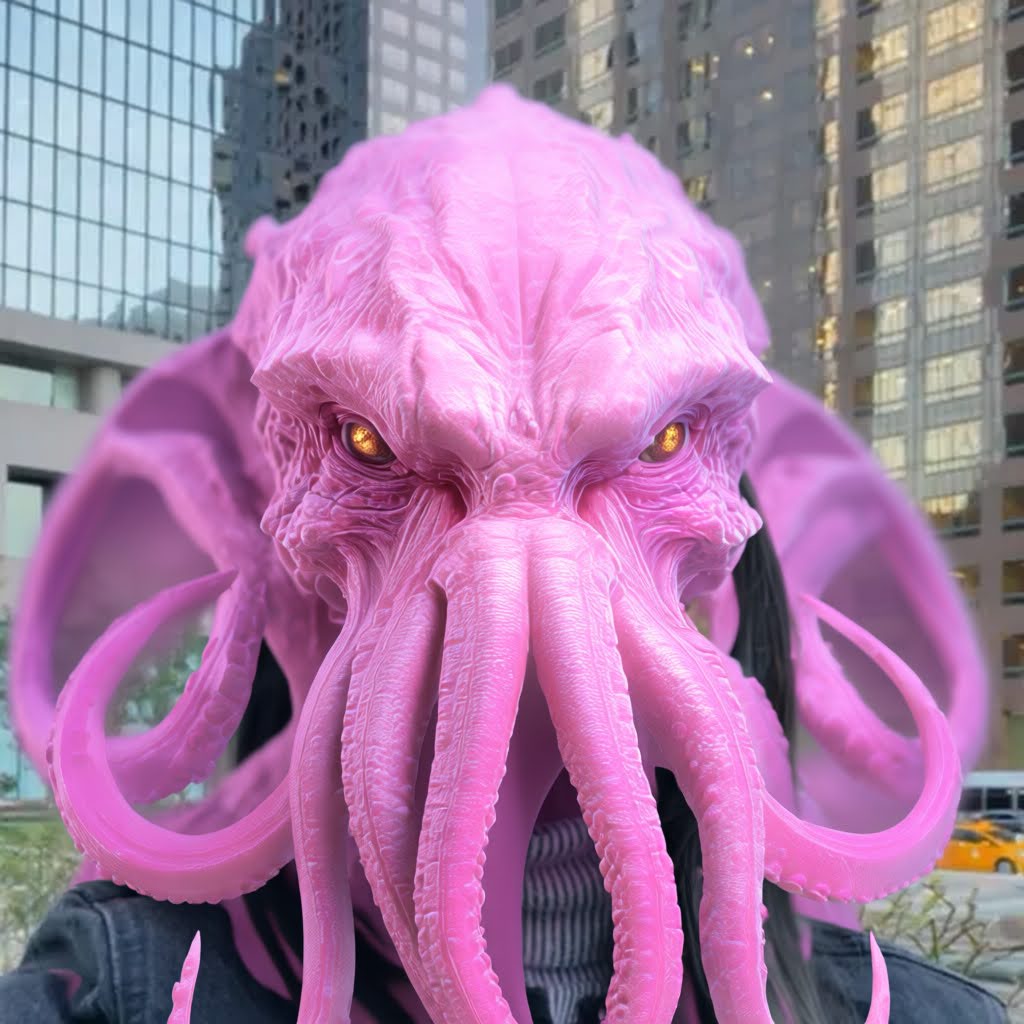
Complex Shapes
Complex shapes that were previously difficult to process are now handled reliably. The model can track eyes and facial structures even when they do not resemble human features.


Original Model
Original model is familiar mode for classic face transformations.
Effect Creation flow
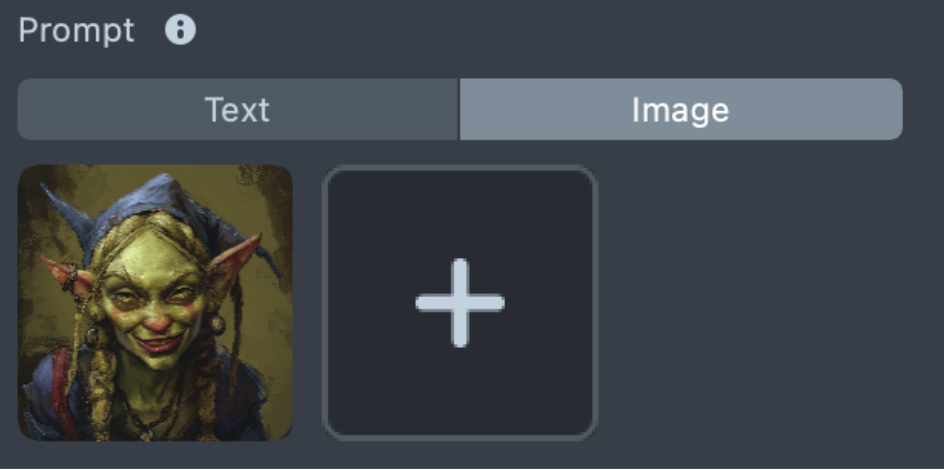
-
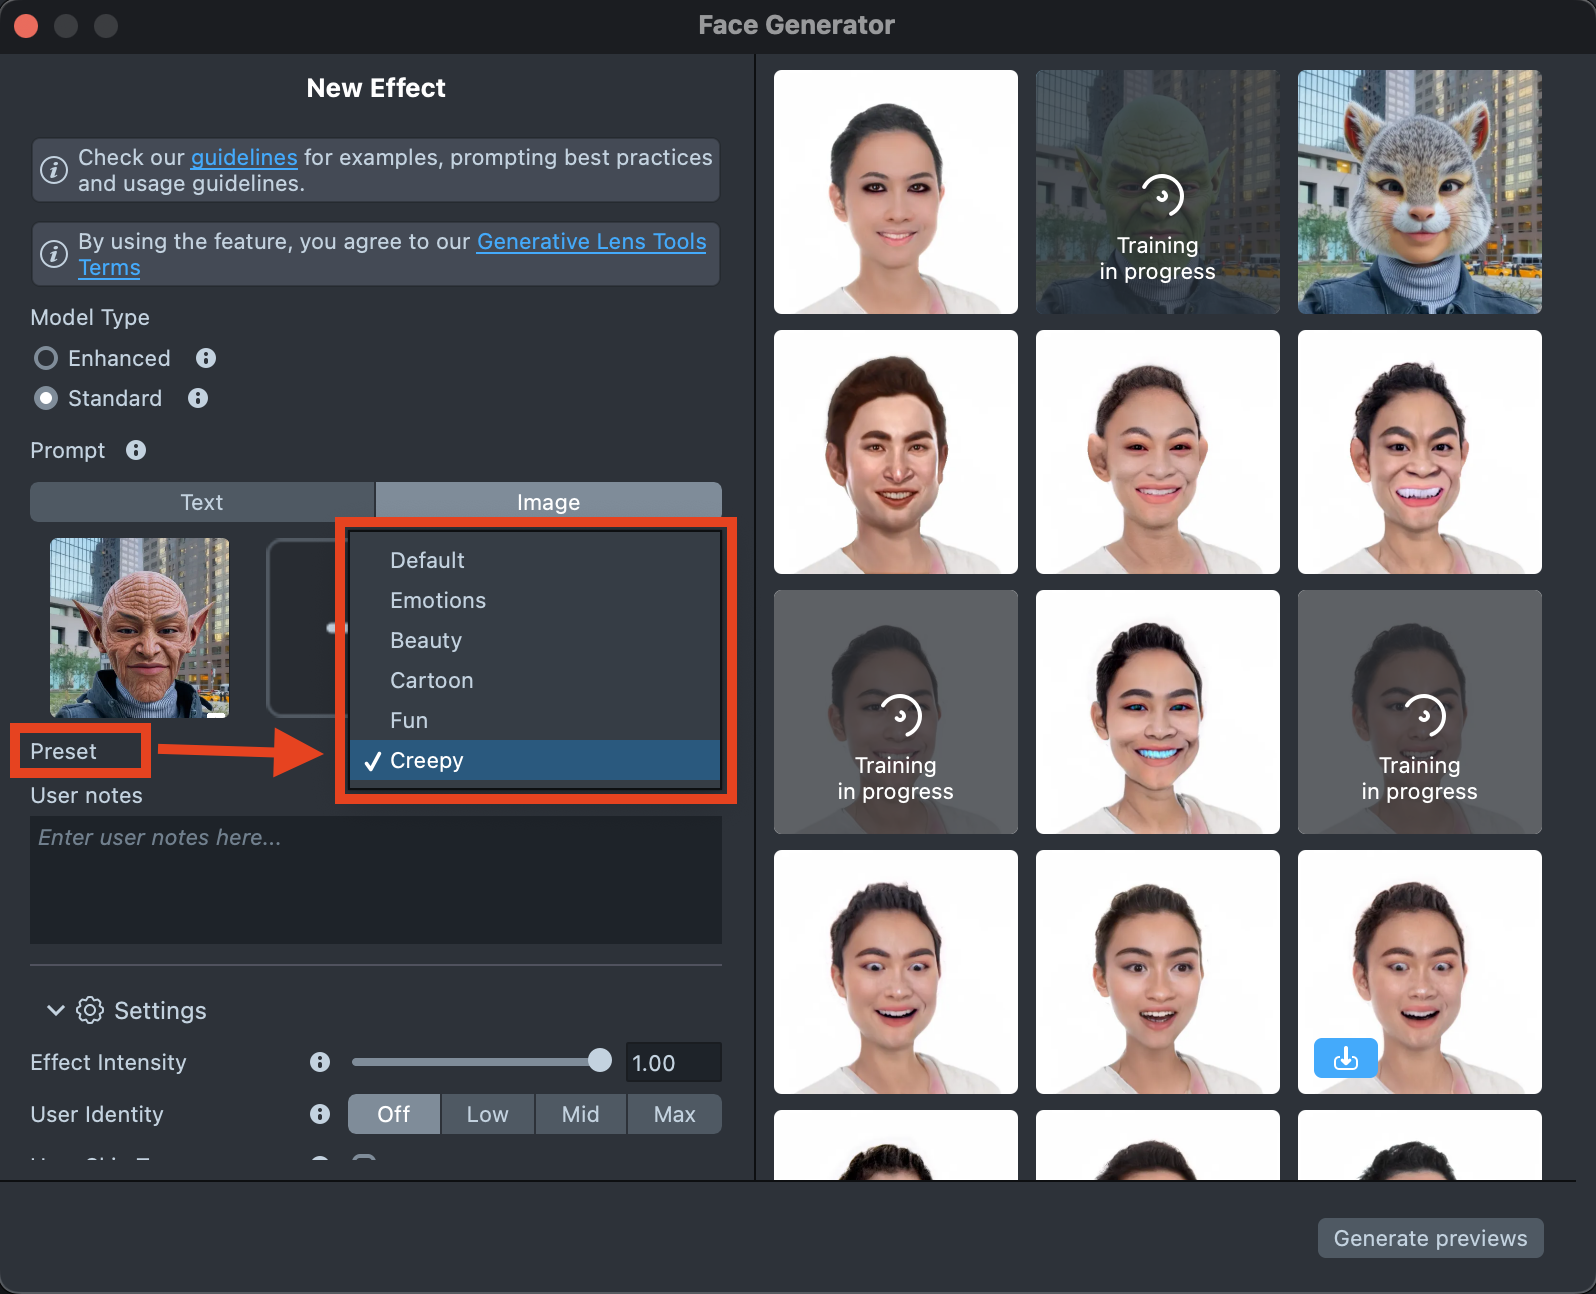
The Original model cannot work with two prompts at the same time, so you need to choose the tab you want to use - either
TextorImage.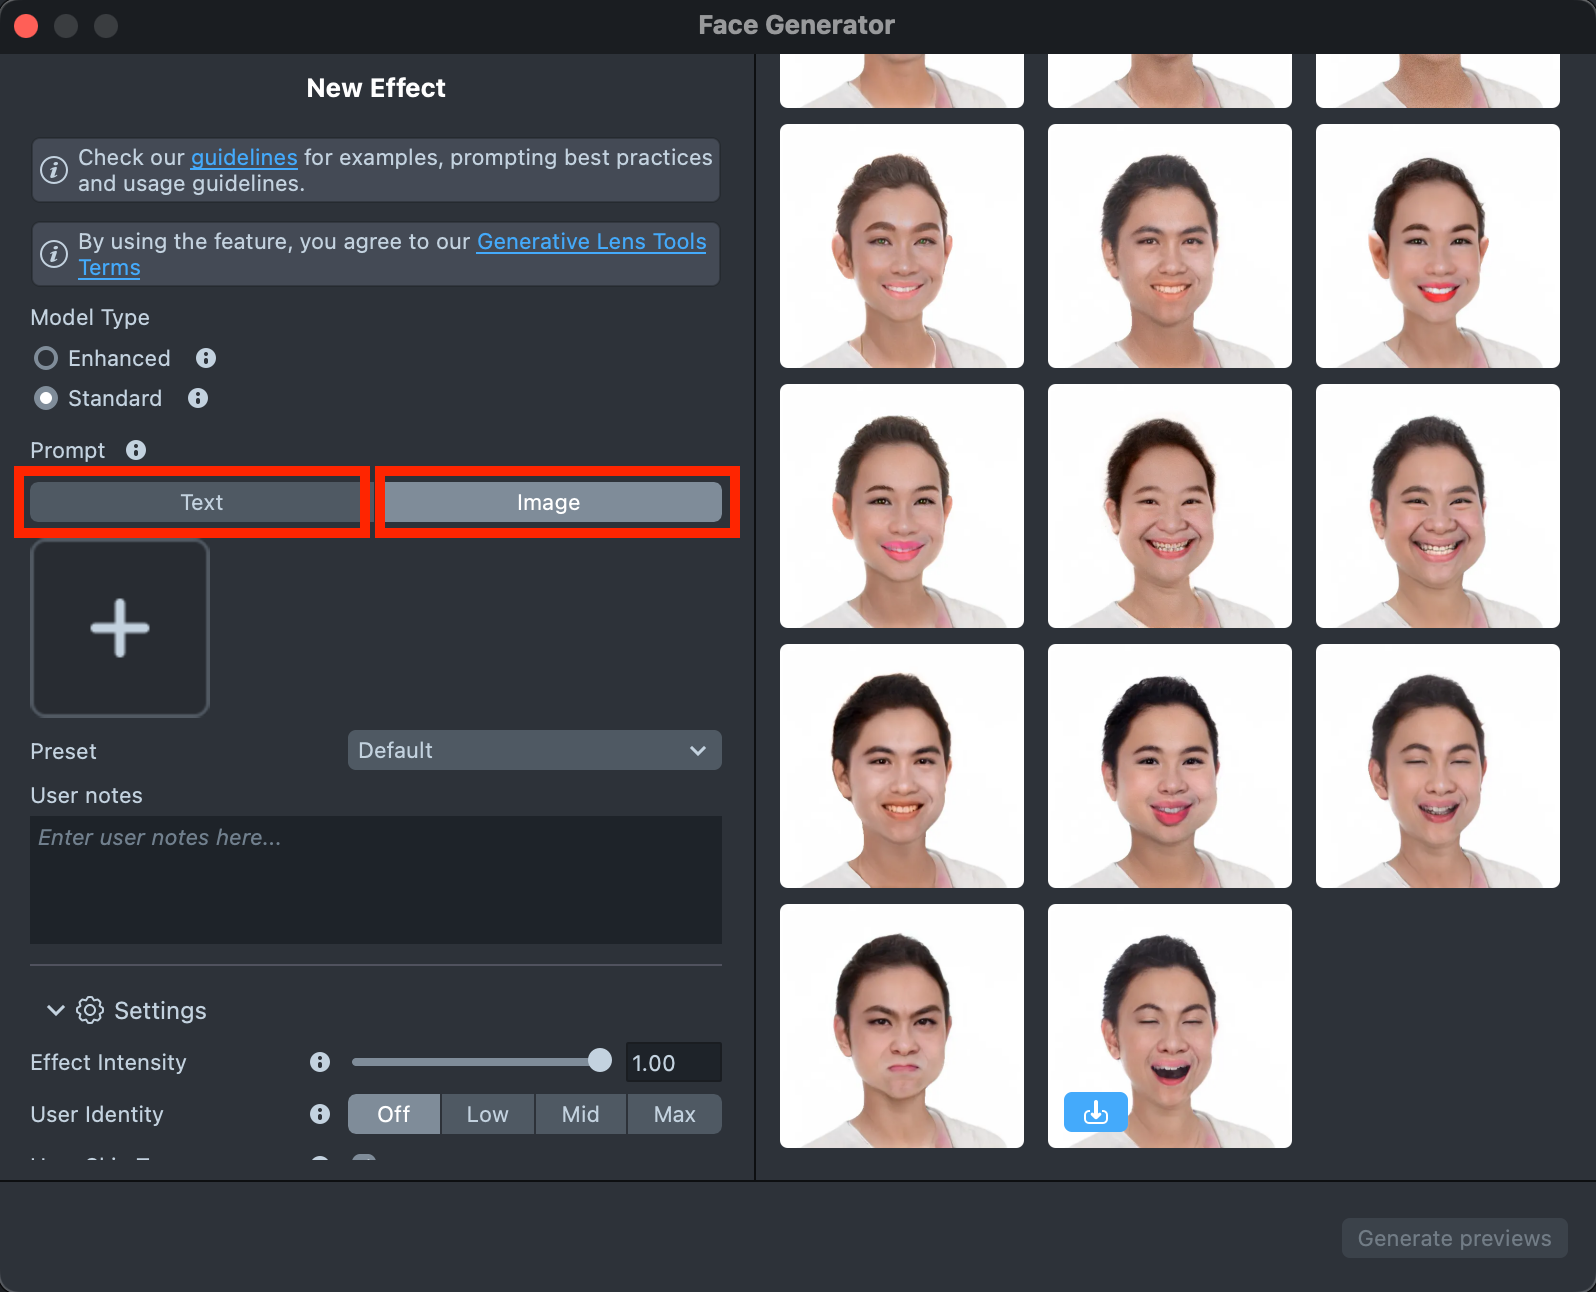
-
The
Texttab includes aSurprise mebutton that lets you try one of the default prompts and get familiar with the model.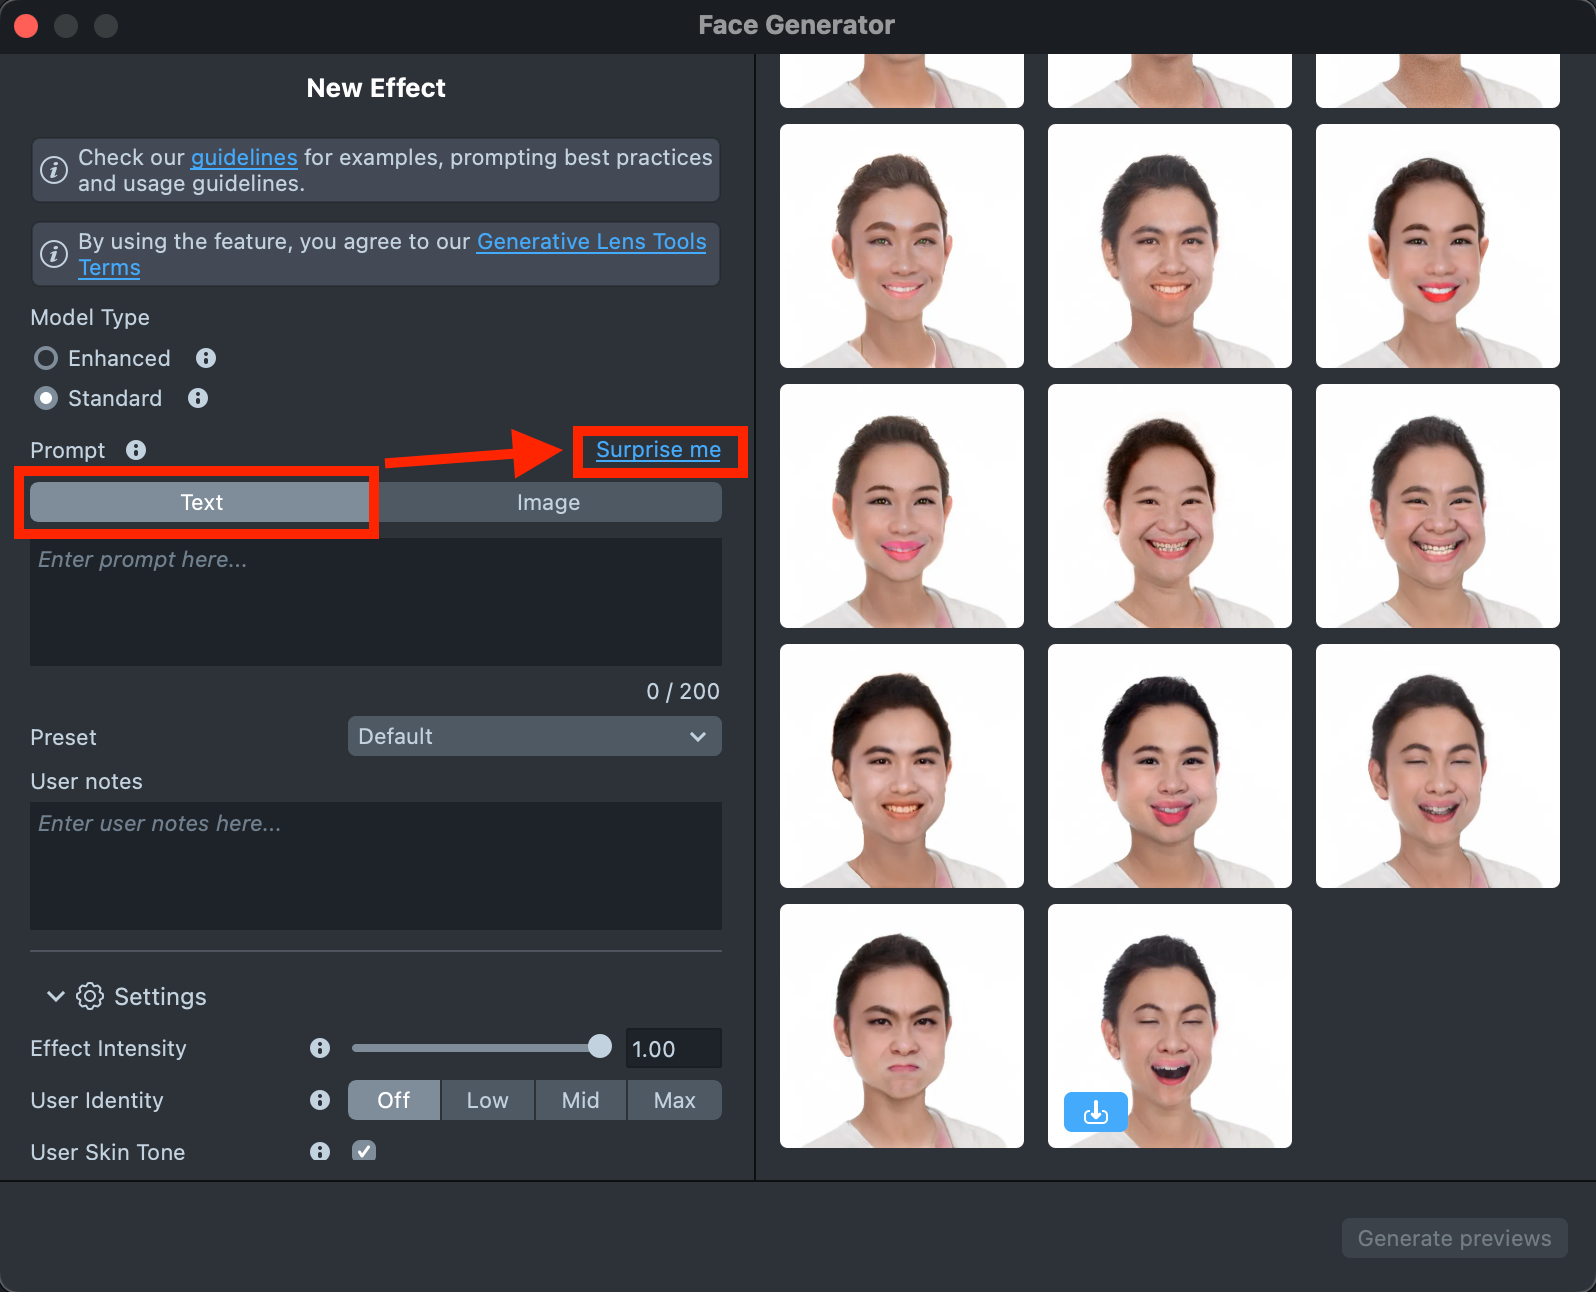
-
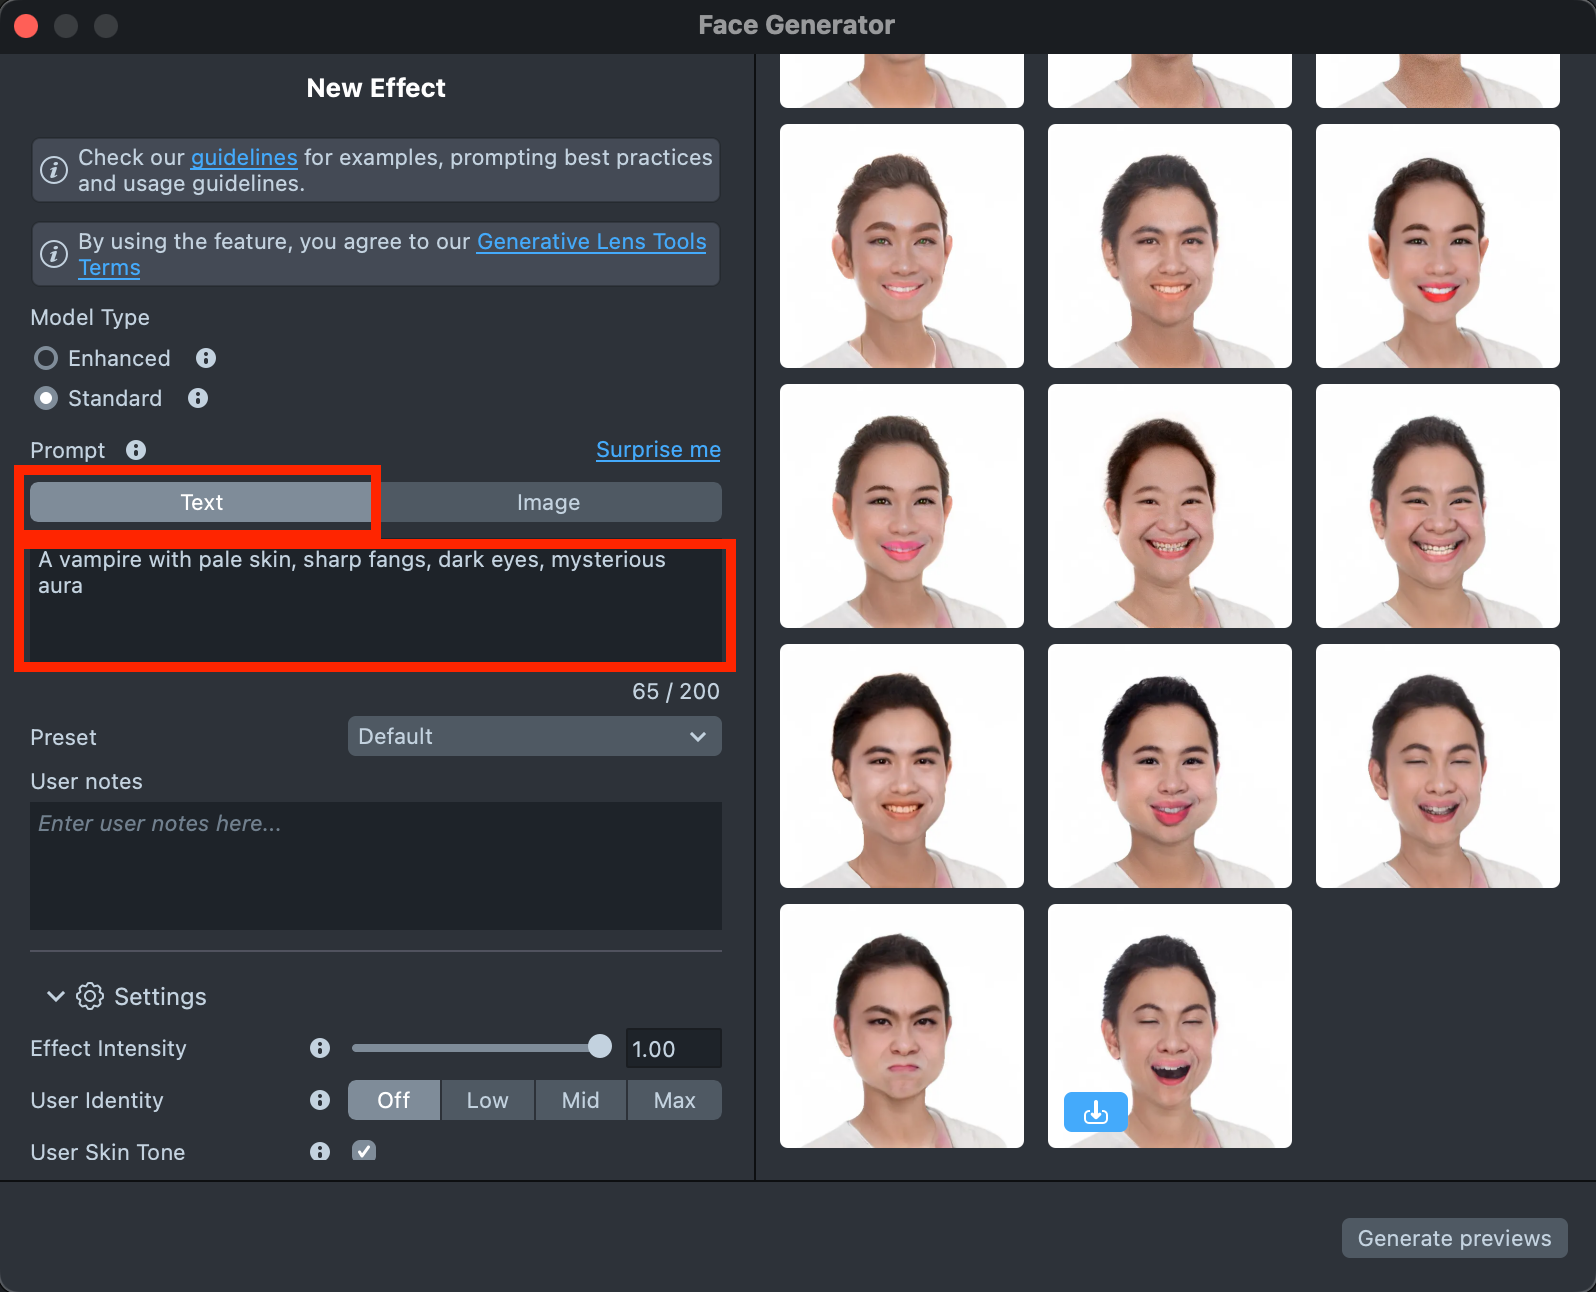
The
Texttab also provides a field for your own prompt, where you can enter a description of the effect you’d like to generate (up to 200 characters)See the Best Practices guide to learn how to achieve the best results.
-
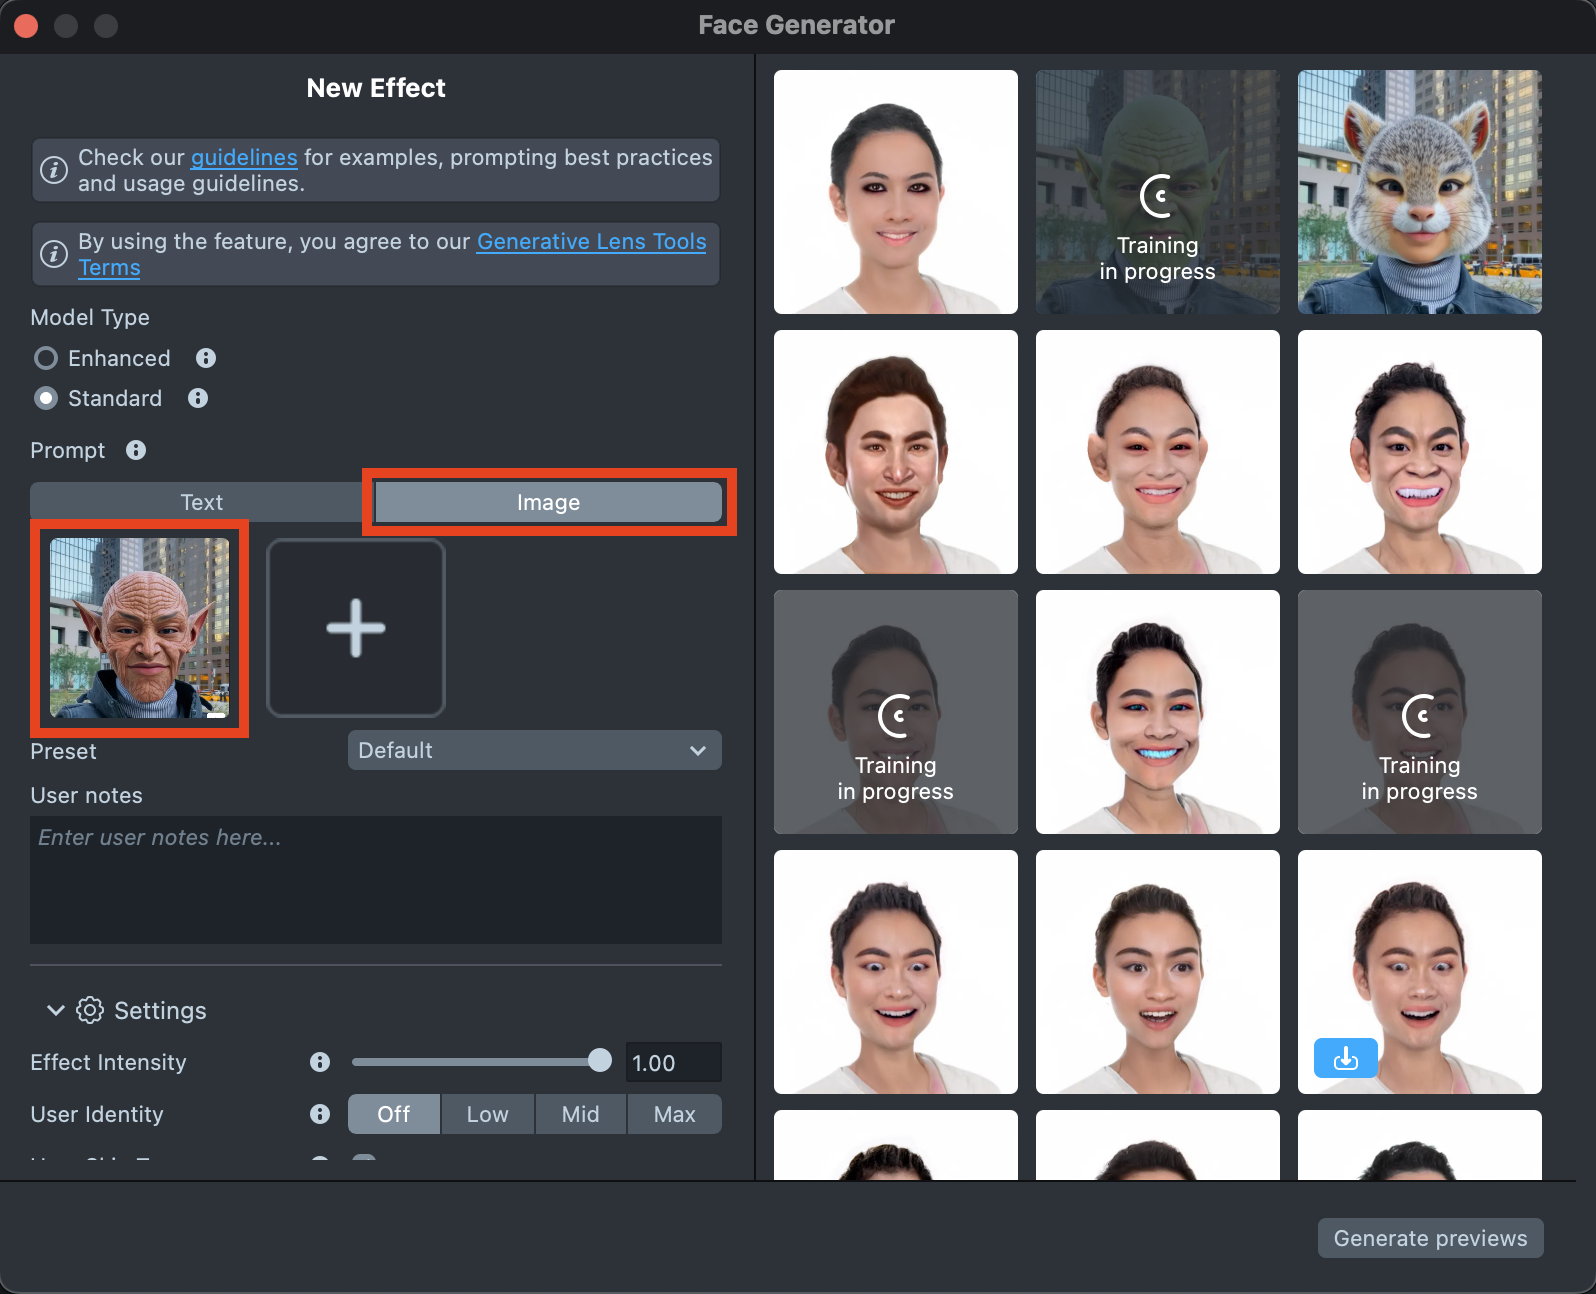
The
Imagetab allows you to upload up to five images to guide the generation and bring the result closer to your vision.See the Best Practices guide to learn how to achieve the best results.
-
Select a Preset corresponding to the desired effect type. You can learn more in the Presets section.
-
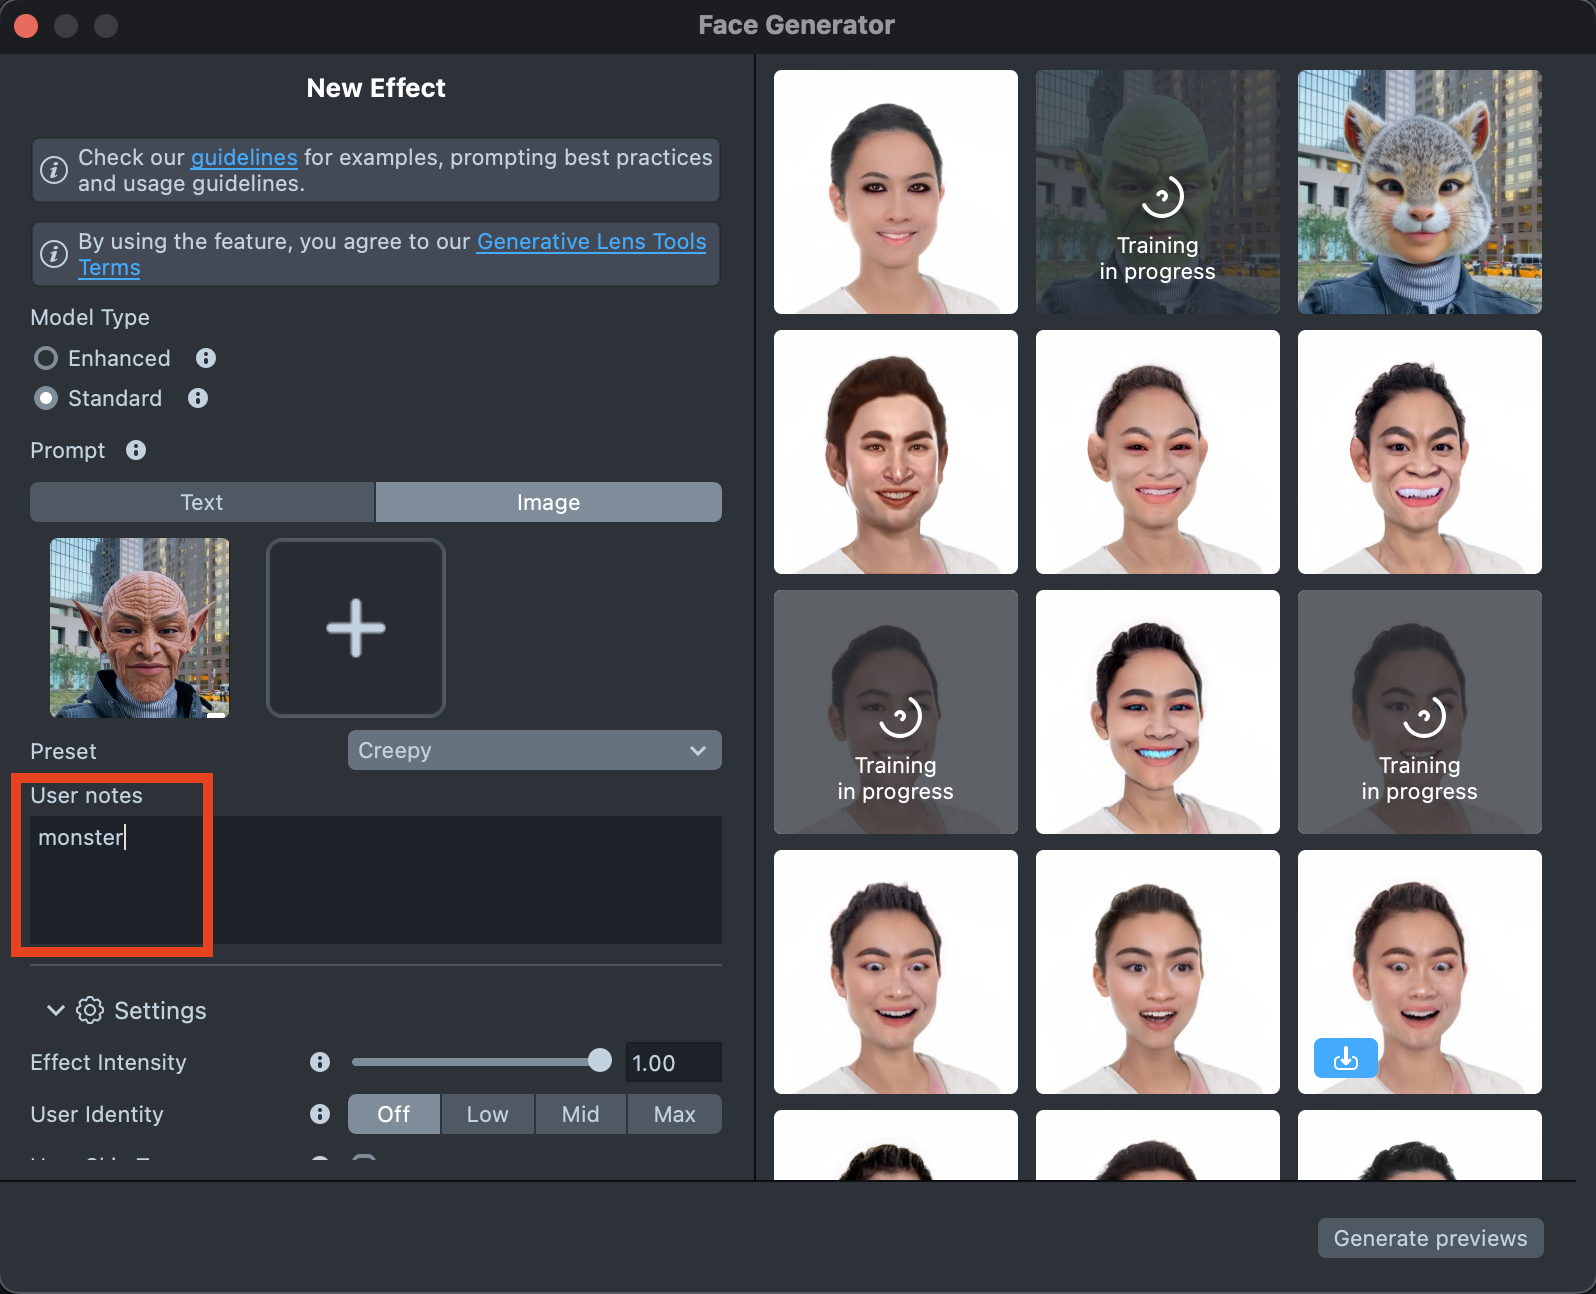
Optionally, you can add user notes for yourself in the designated field.
-
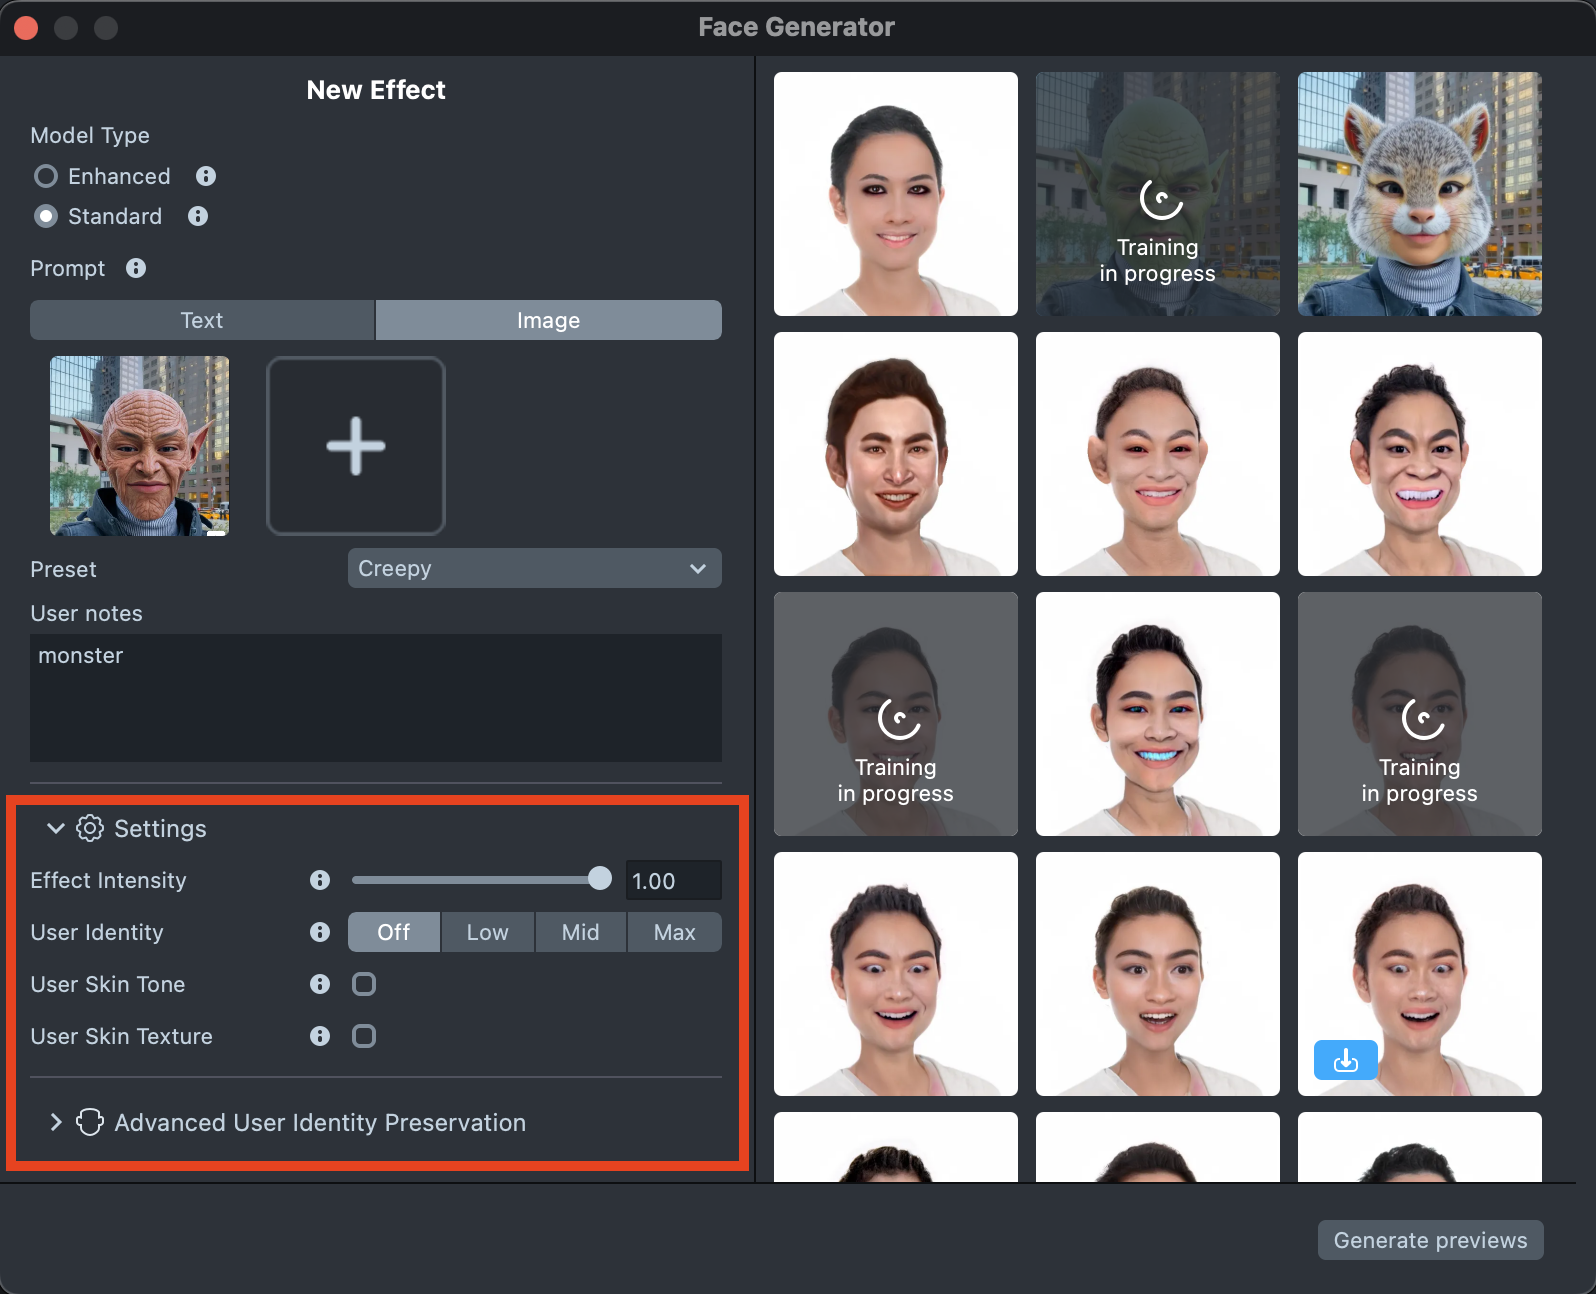
The settings can significantly affect the final result, helping you achieve the best match for your vision. You can find a detailed description in the Settings section.
-
When your prompt is ready, press the
Generate Previewsbutton to generate the previews.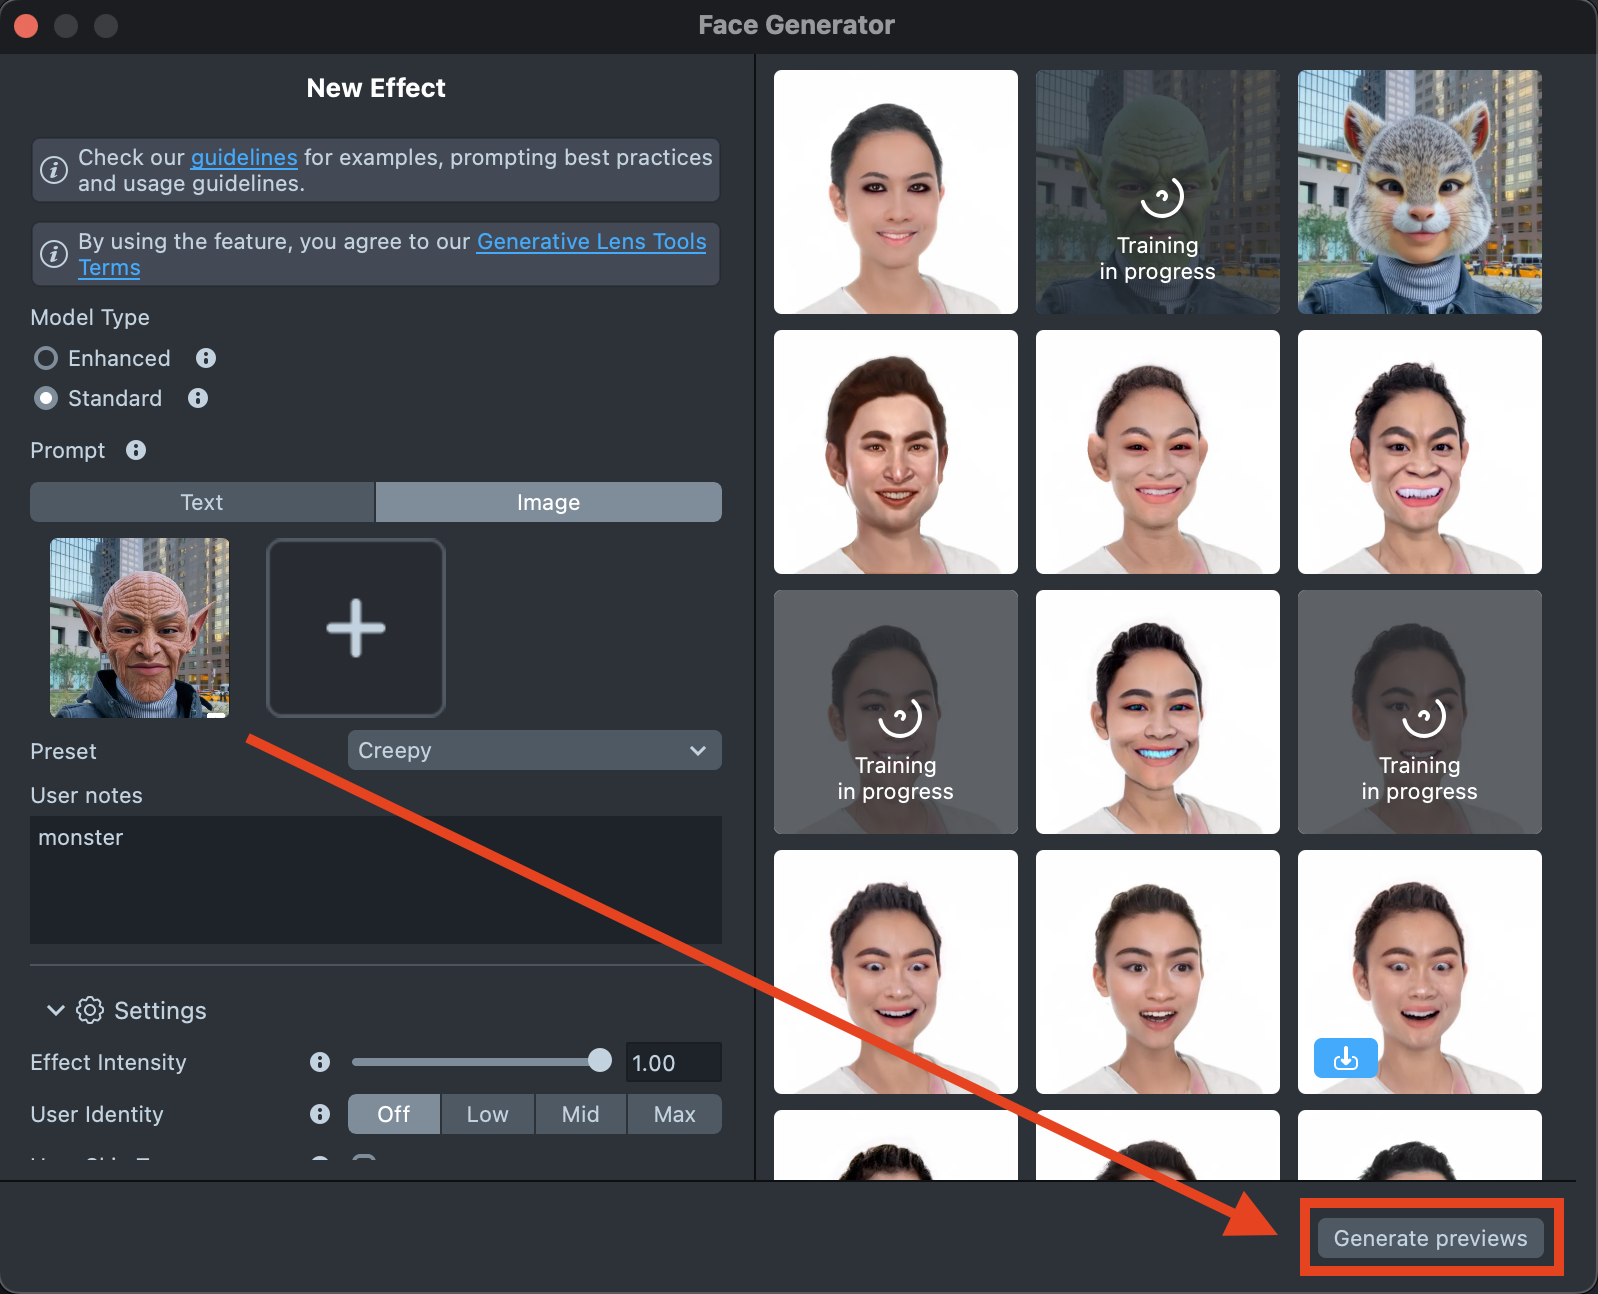
-
A new tile will appear in the Gallery with a loading indicator in the corner, showing the progress.
Generating preview may take up to 15 minutes but you can close the plugin and return later.
-
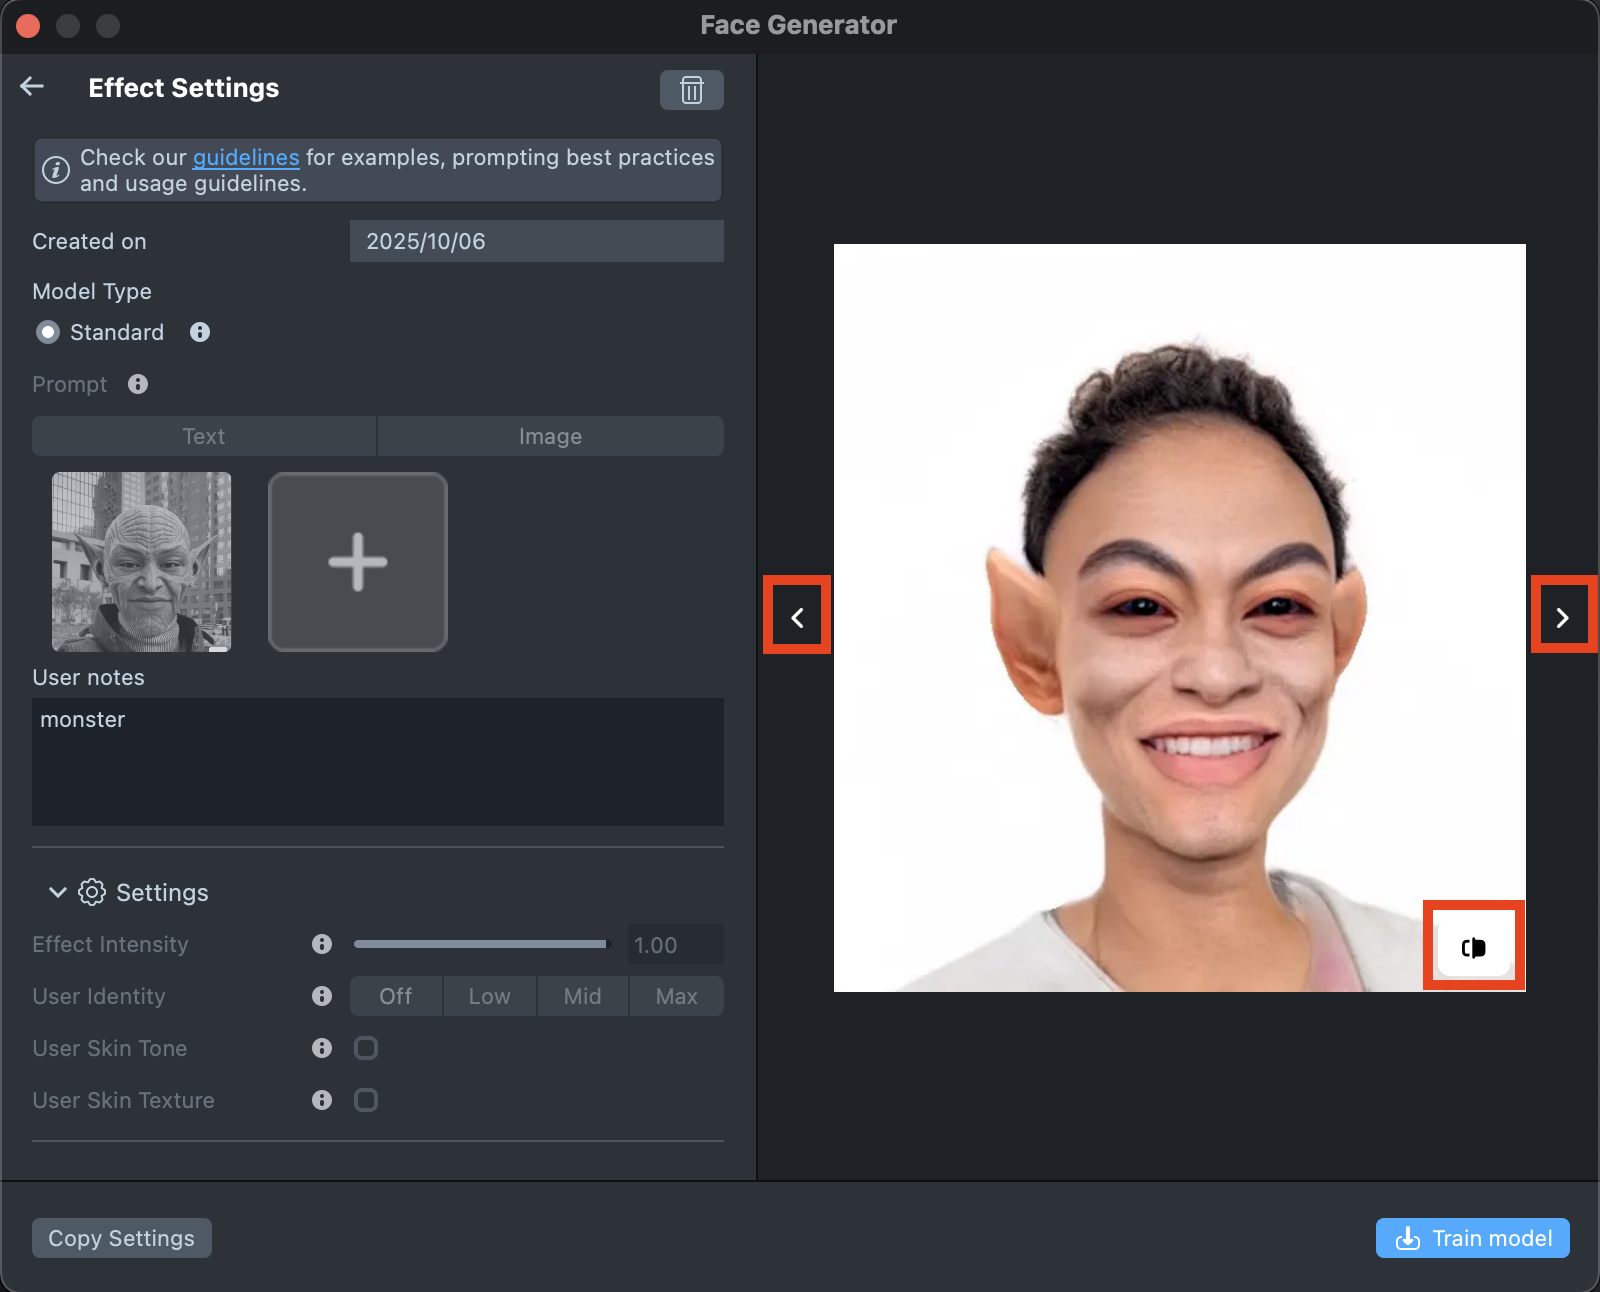
Once the preview has been generated, you can click its tile in the Gallery to open the details page. Here, you can use the arrows on the sides to preview the effect on different models. Additionally, you can click the button in the bottom-right corner to view the original image the effect was applied to.
-
If the preview doesn’t match your expectations, click
Copy Settingsto adjust your prompts or seed.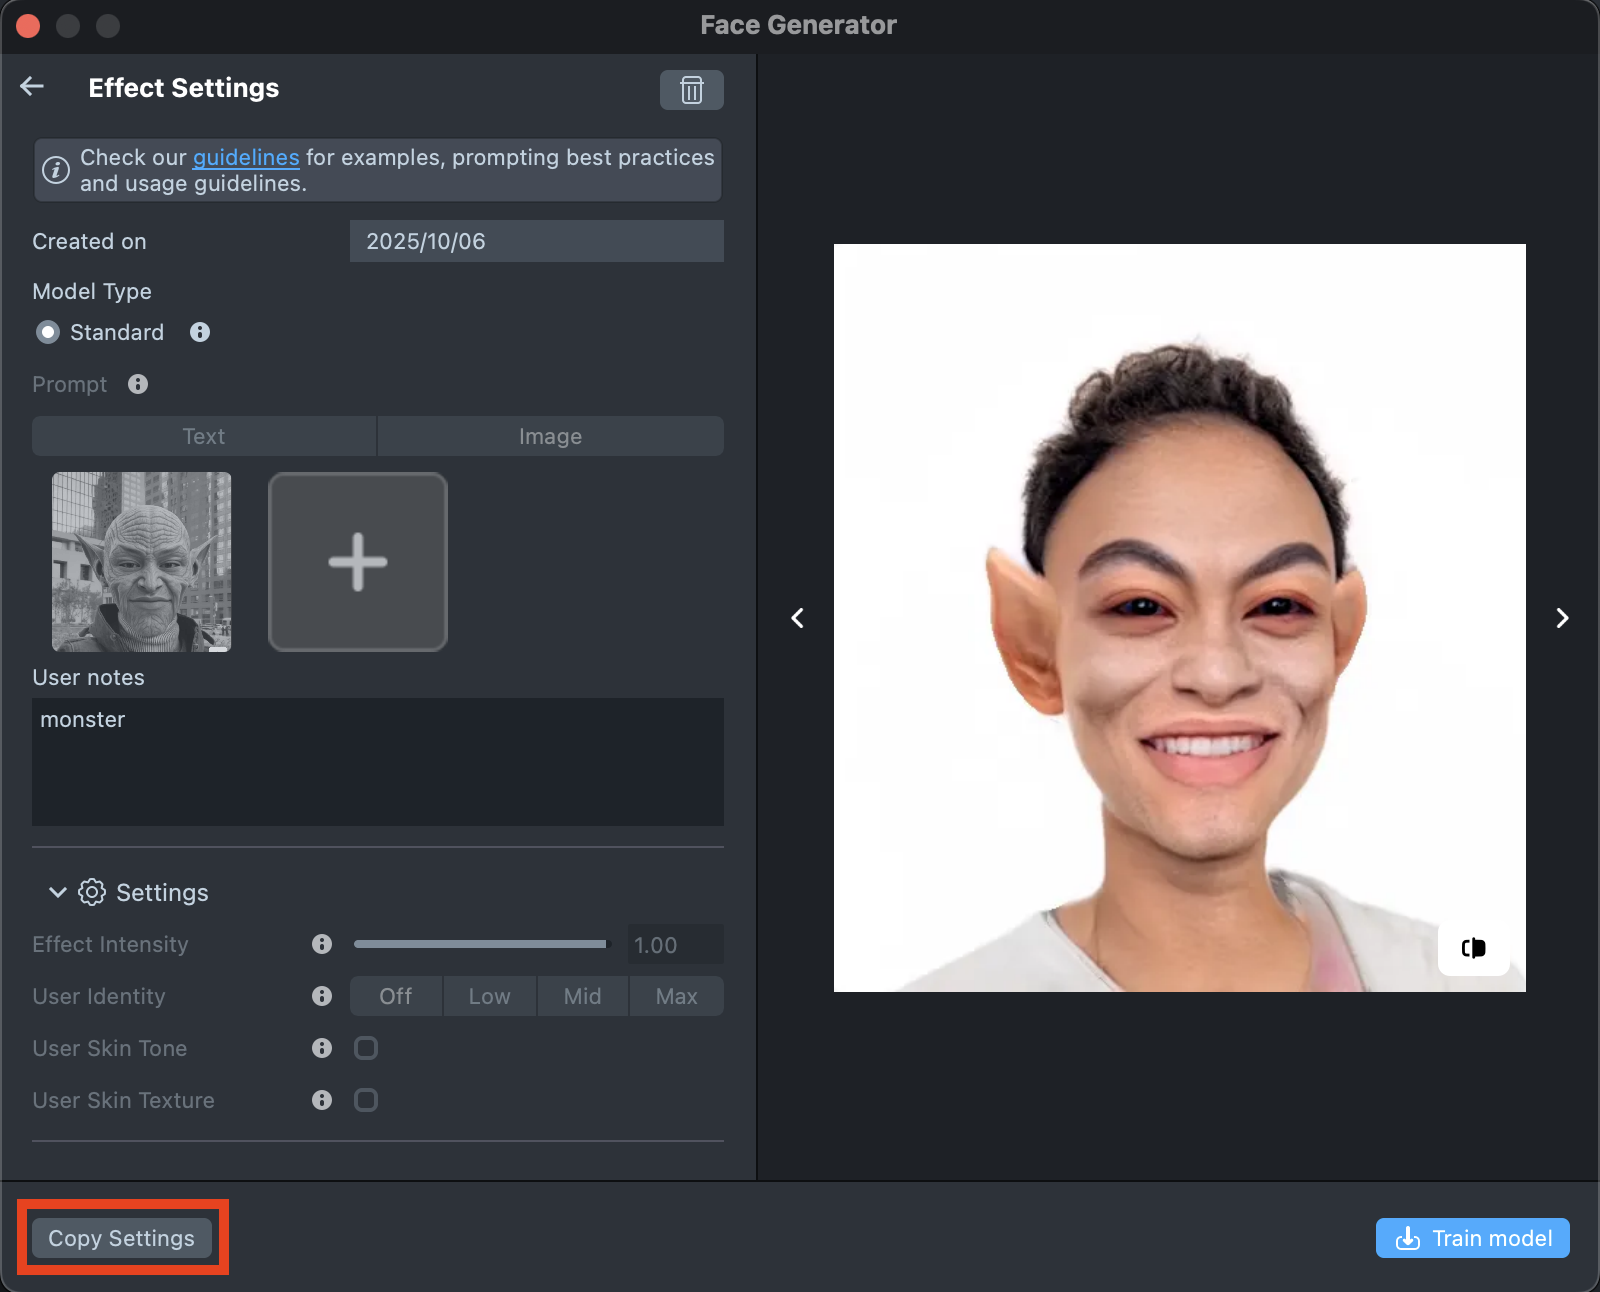
-
You can make as many tweaks as needed until the result feels right - all changes will appear in the Gallery as a new effect, without altering the current one. This way, you can always go back and compare whether the updated effect looks better than the original.
-
Happy with the preview? Click
Train Modelto start training your model. You’ll be able to track the training status directly in the Gallery.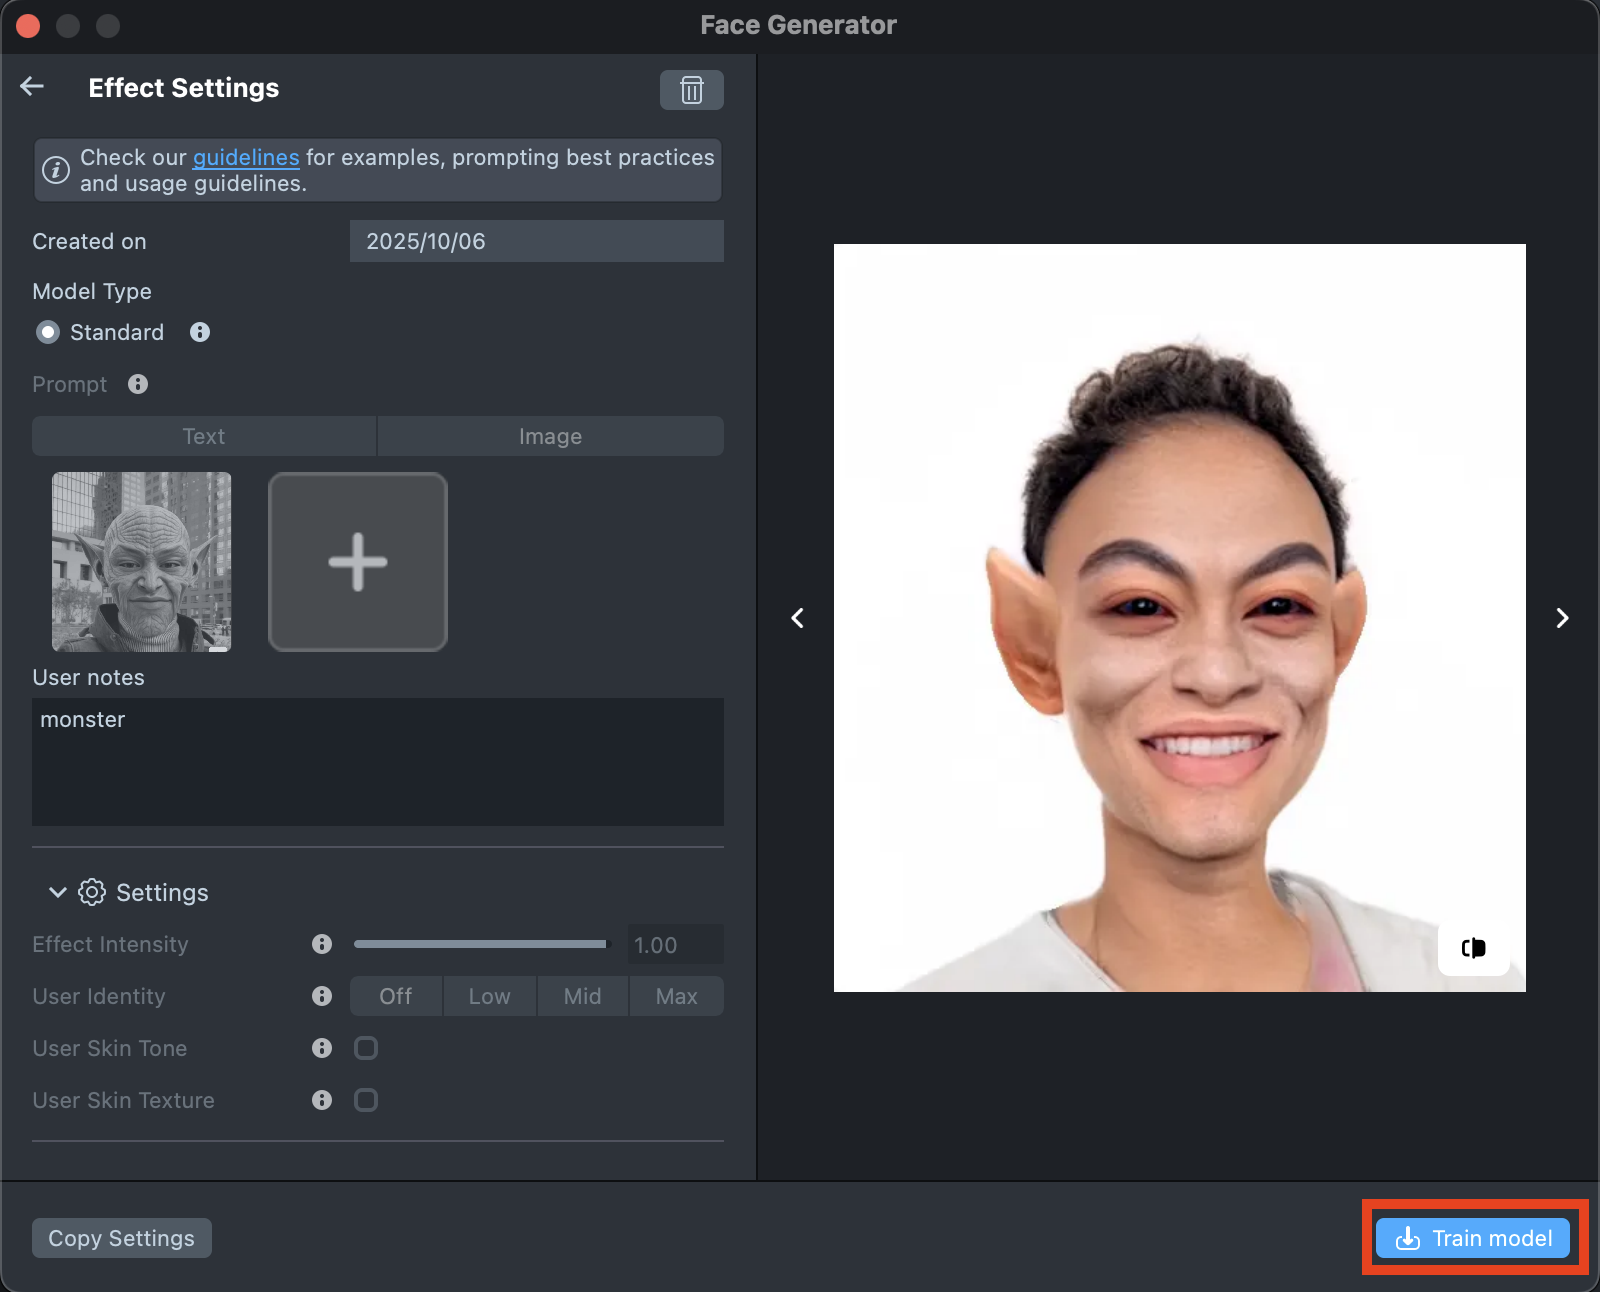
-
Once training is complete, you can import the effect directly from the Gallery by clicking the
Importbutton, or clickImport to projecton the details page to add it to your project.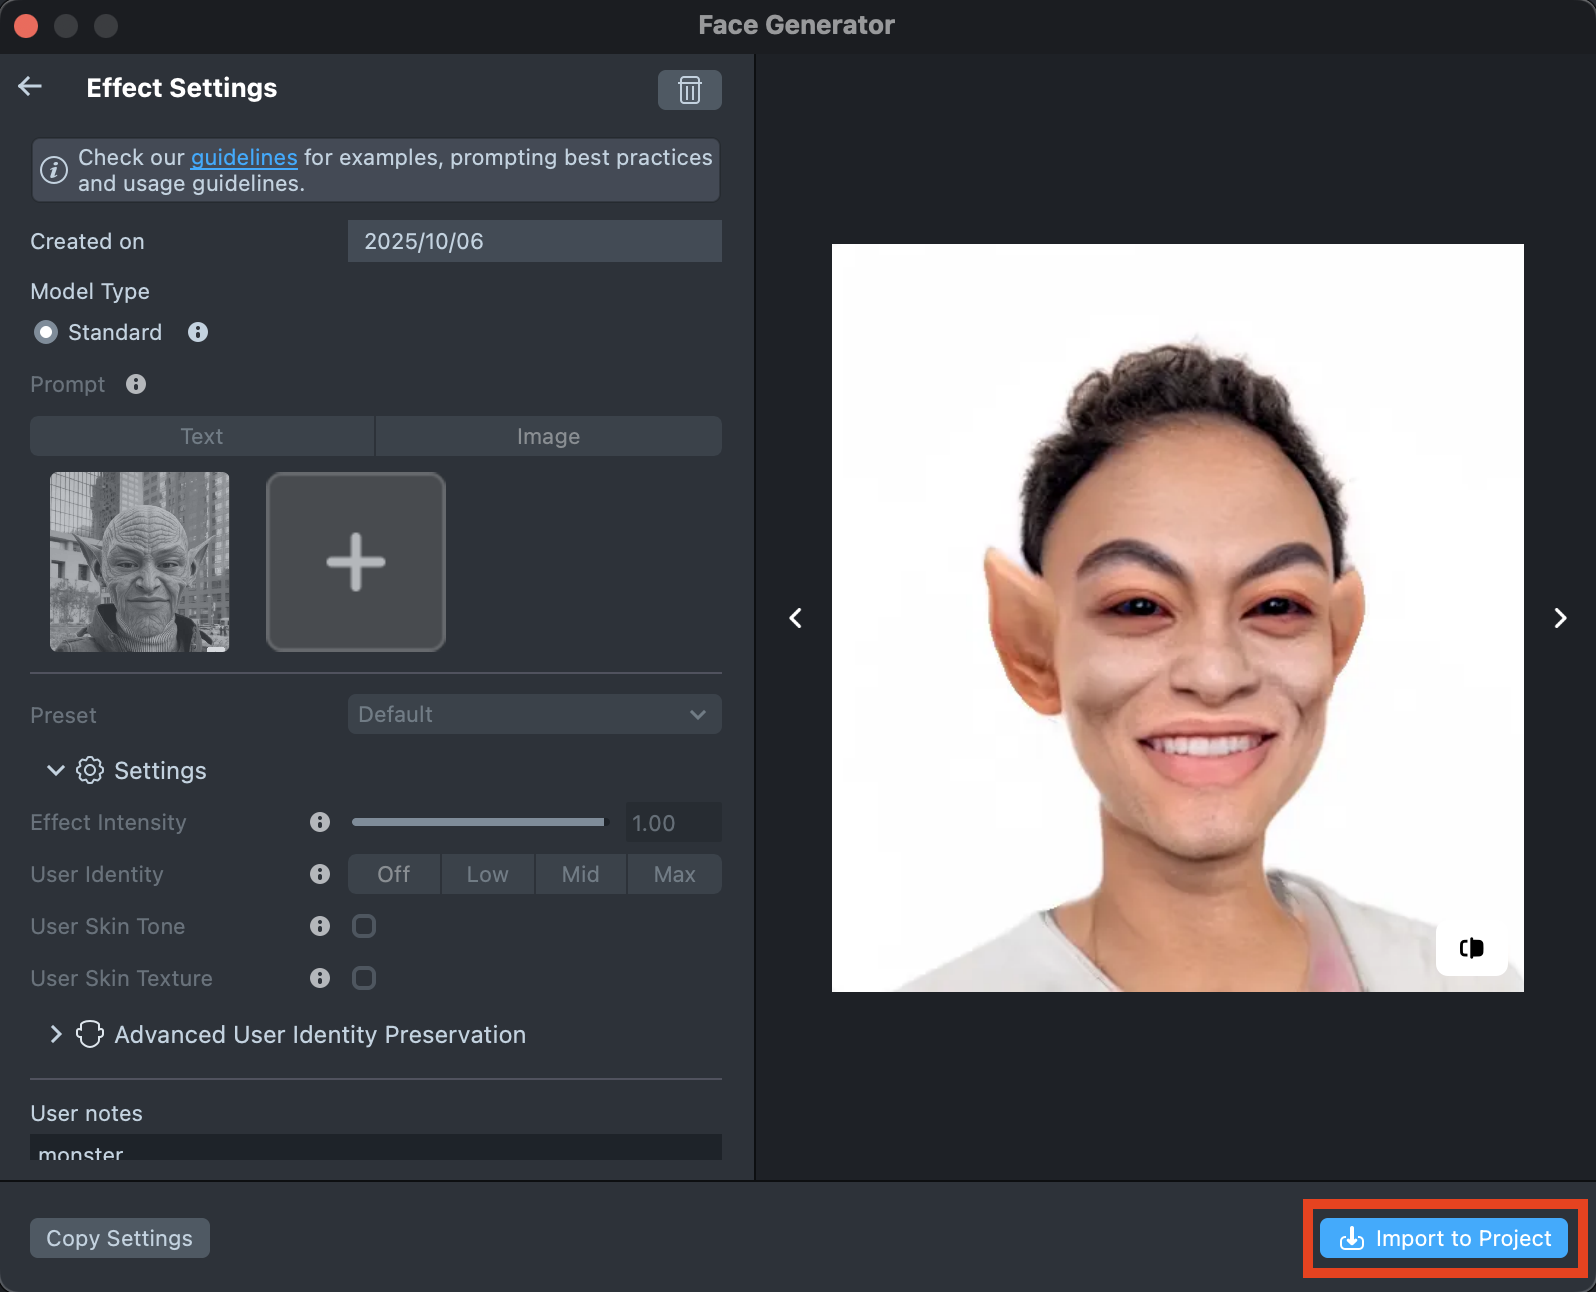
-
Follow this guide to learn how to combine Face Generator with AI Portraits, or refer to this guide to learn how to combine Face Generator with Style Generator, Face Animator, and Garment.
Best Practices
Text Prompt
-
Be specifiс: provide a detailed description. You can clarify what you want to have with just a couple of words.
Prompt: baby elf Prompt: baby face, baby elf, elf ears, big dark eyes, small mouth, big lips, smile, elf, eyes make-up, big lashes, freckles, sunny skin, glossy lips, huge lips, girl 
-
Use adjectives: - try to include adjectives describing the face.
Prompt: attractive chubby face 
-
Describe parts of the face: try to describe changes on the face you want to achieve.
Prompt: huge head, big cheeks, big lips, happy Prompt: baby, big fat face, cute baby, big eyes, smile, small mouth, big lips, child face 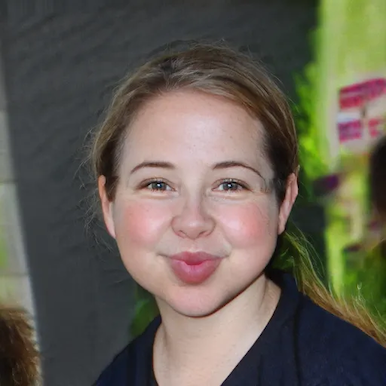
-
Describe the appearance of the person: you can describe how the person should look in generated effect.
Prompt: metalhead person in California 80s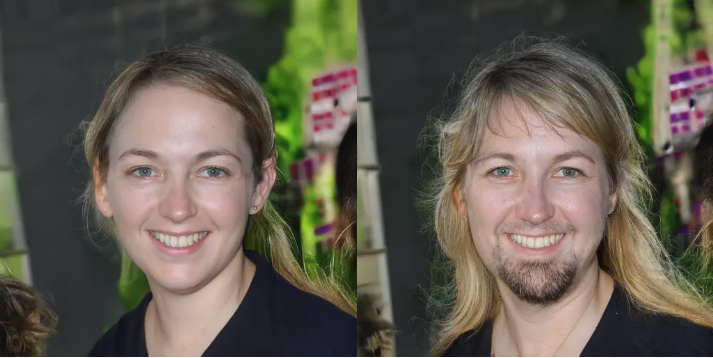
Advanced Text Prompt
- Special words:
- High quality: Ensures the generated face is clear, sharp, and visually appealing.
- Detailed: Emphasizes small, intricate facial features.
- Flat shading: Uses a shading technique without gradients for a stylized, simplistic look.
- HD: Combines high resolution and extreme detail for a realistic, impressive face.
- Maximalistic: Rich in detail and complexity, with elaborate features.
- High definition: Produces a high-resolution face with enhanced clarity and detail.
- Fine luster: Adds shine or gloss, giving the face a polished appearance.
- Prompt Weighting:. You can use special symbols in your Effect Prompt to control how much influence specific words or phrases have on the final result - emphasizing or reducing their impact as needed.
Image Prompt
-
Number of images: Using multiple but consistent images can create a more intense and fantastical effect with the same parameters.
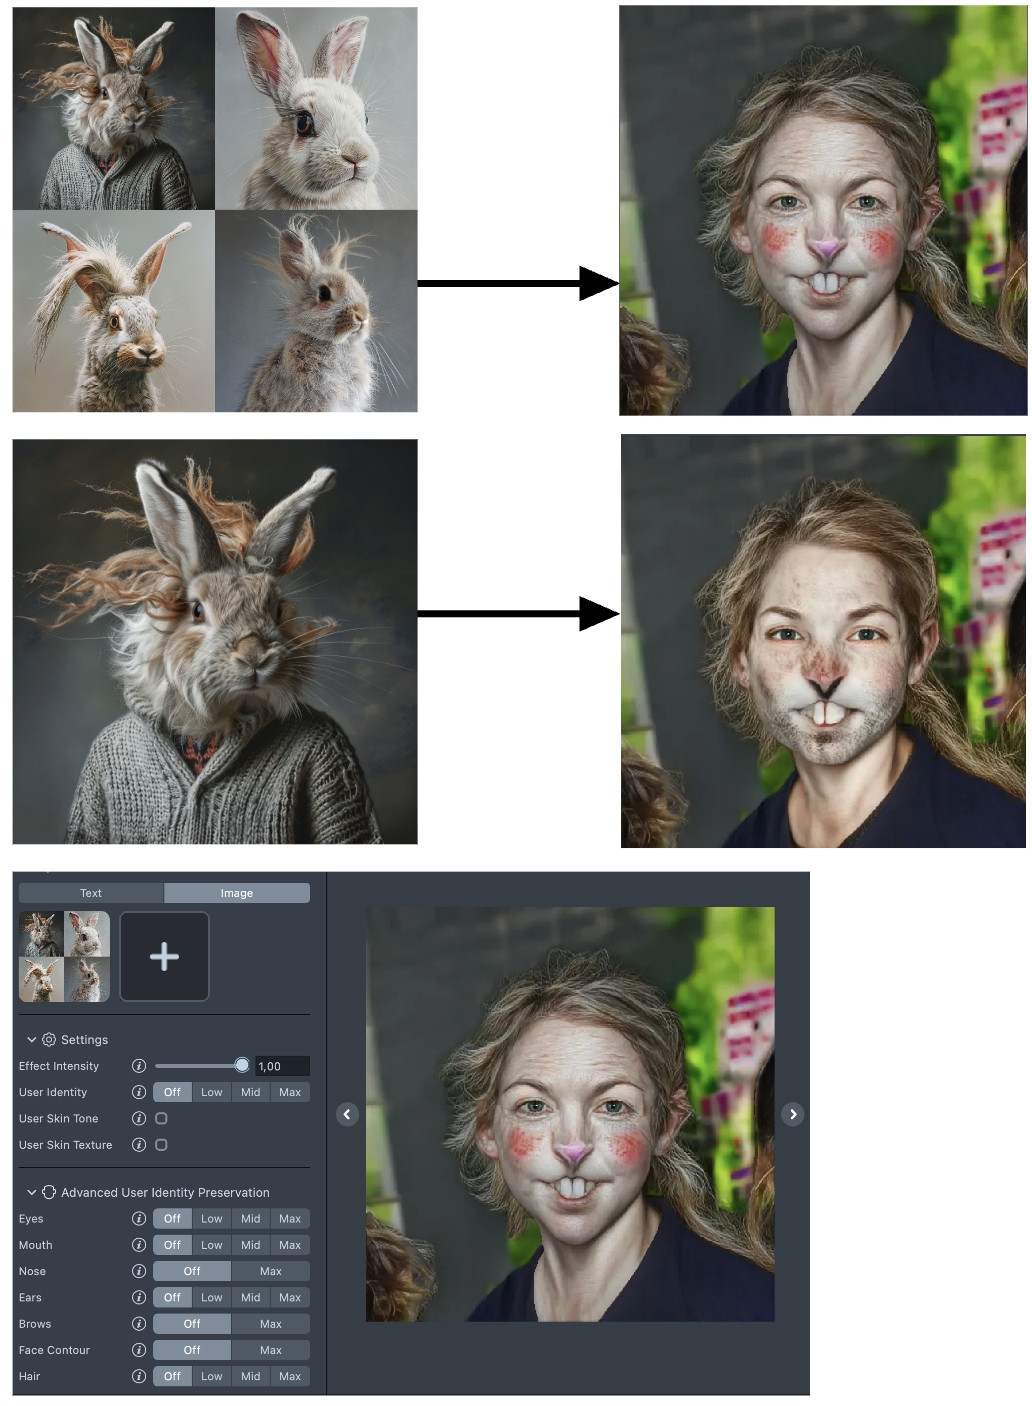
-
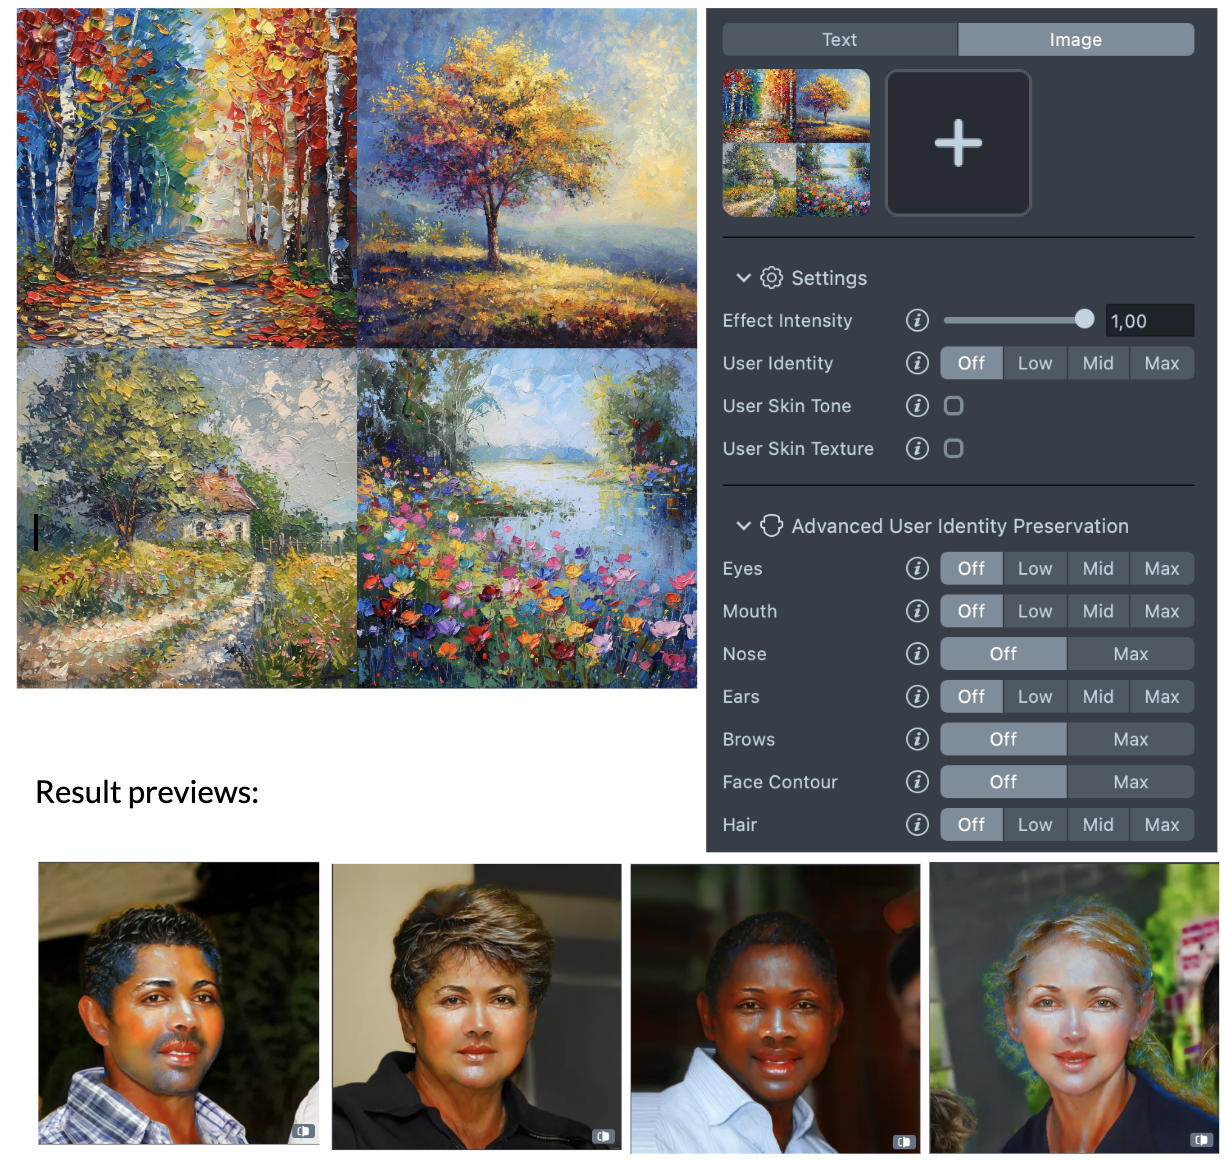
Copy style of art: To capture and stylize the effect with a specific vibe, you can also use images that embody the desired style, even if they don't feature characters. For instance, nature scenes or still life images can be effective. In such cases, use the cartoon preset and adjust the effect intensity. Setting the intensity to 1 will give you the most intense effect.
-
Quality: Try to upload high-quality reference images. The quality of the image can highly influence the quality of the effect. For example: if the reference image is small and blurry, the effect may have unexpected results.
Effect with Low quality reference Effect with High quality reference 

-
Light: Make sure the lighting on the picture is good. The skin color should look natural, the structure of the face visible. It`s better to not have any contrast shadows or artifacts on the face.
Challenging lighting Even lighting 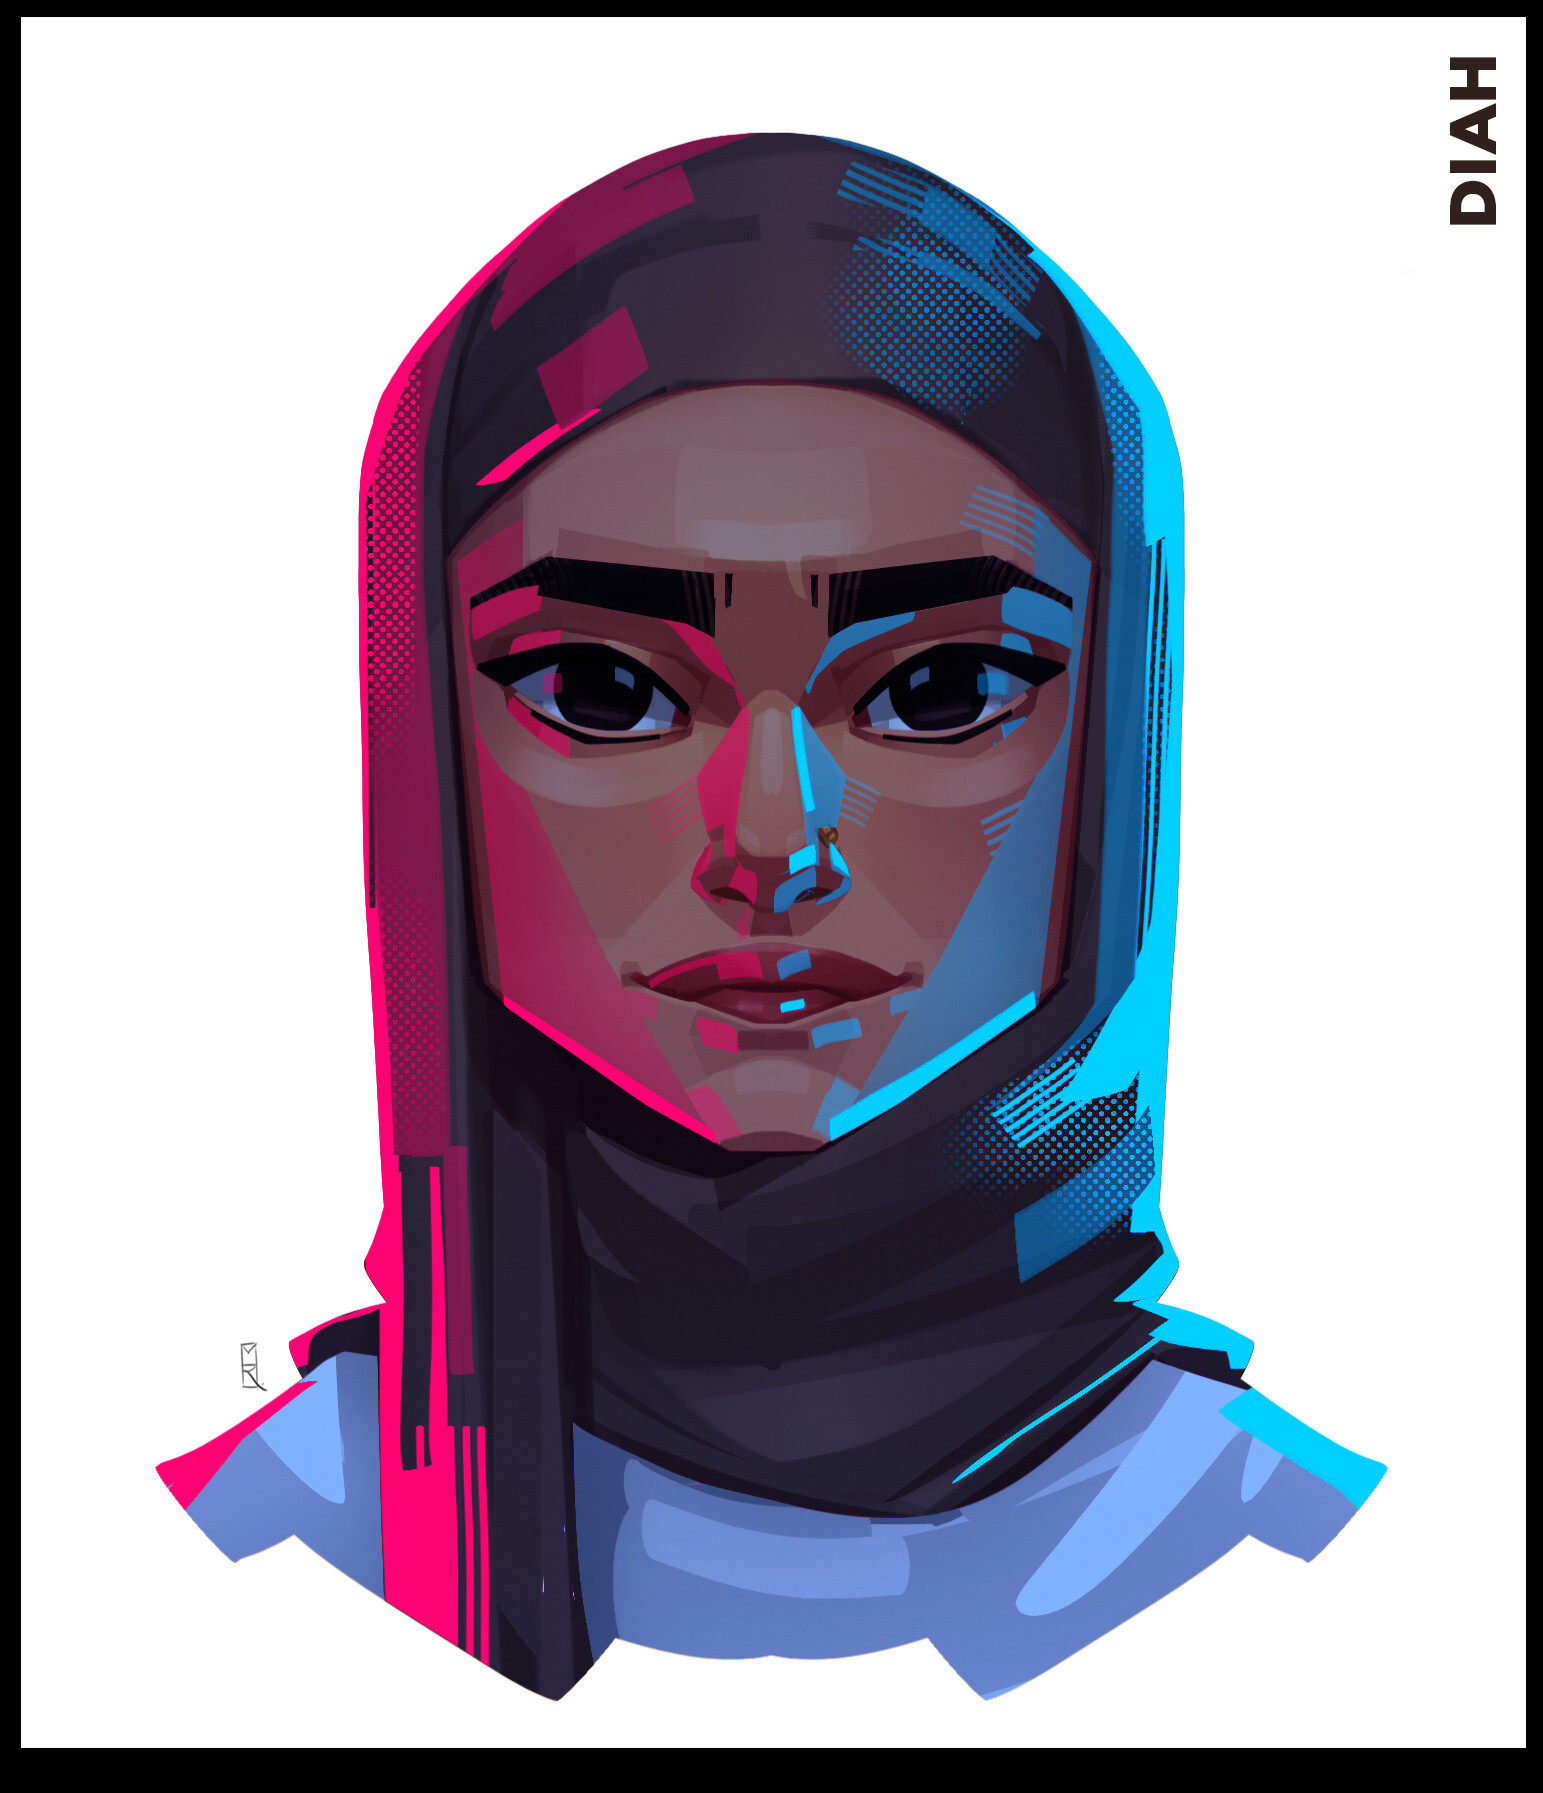
-
Scale: Try to make the face take up the 2/3 of the frame, the shoulders are not necessary but they can help with the scale of the head relative to the body.
Challenging Scale Good Scale 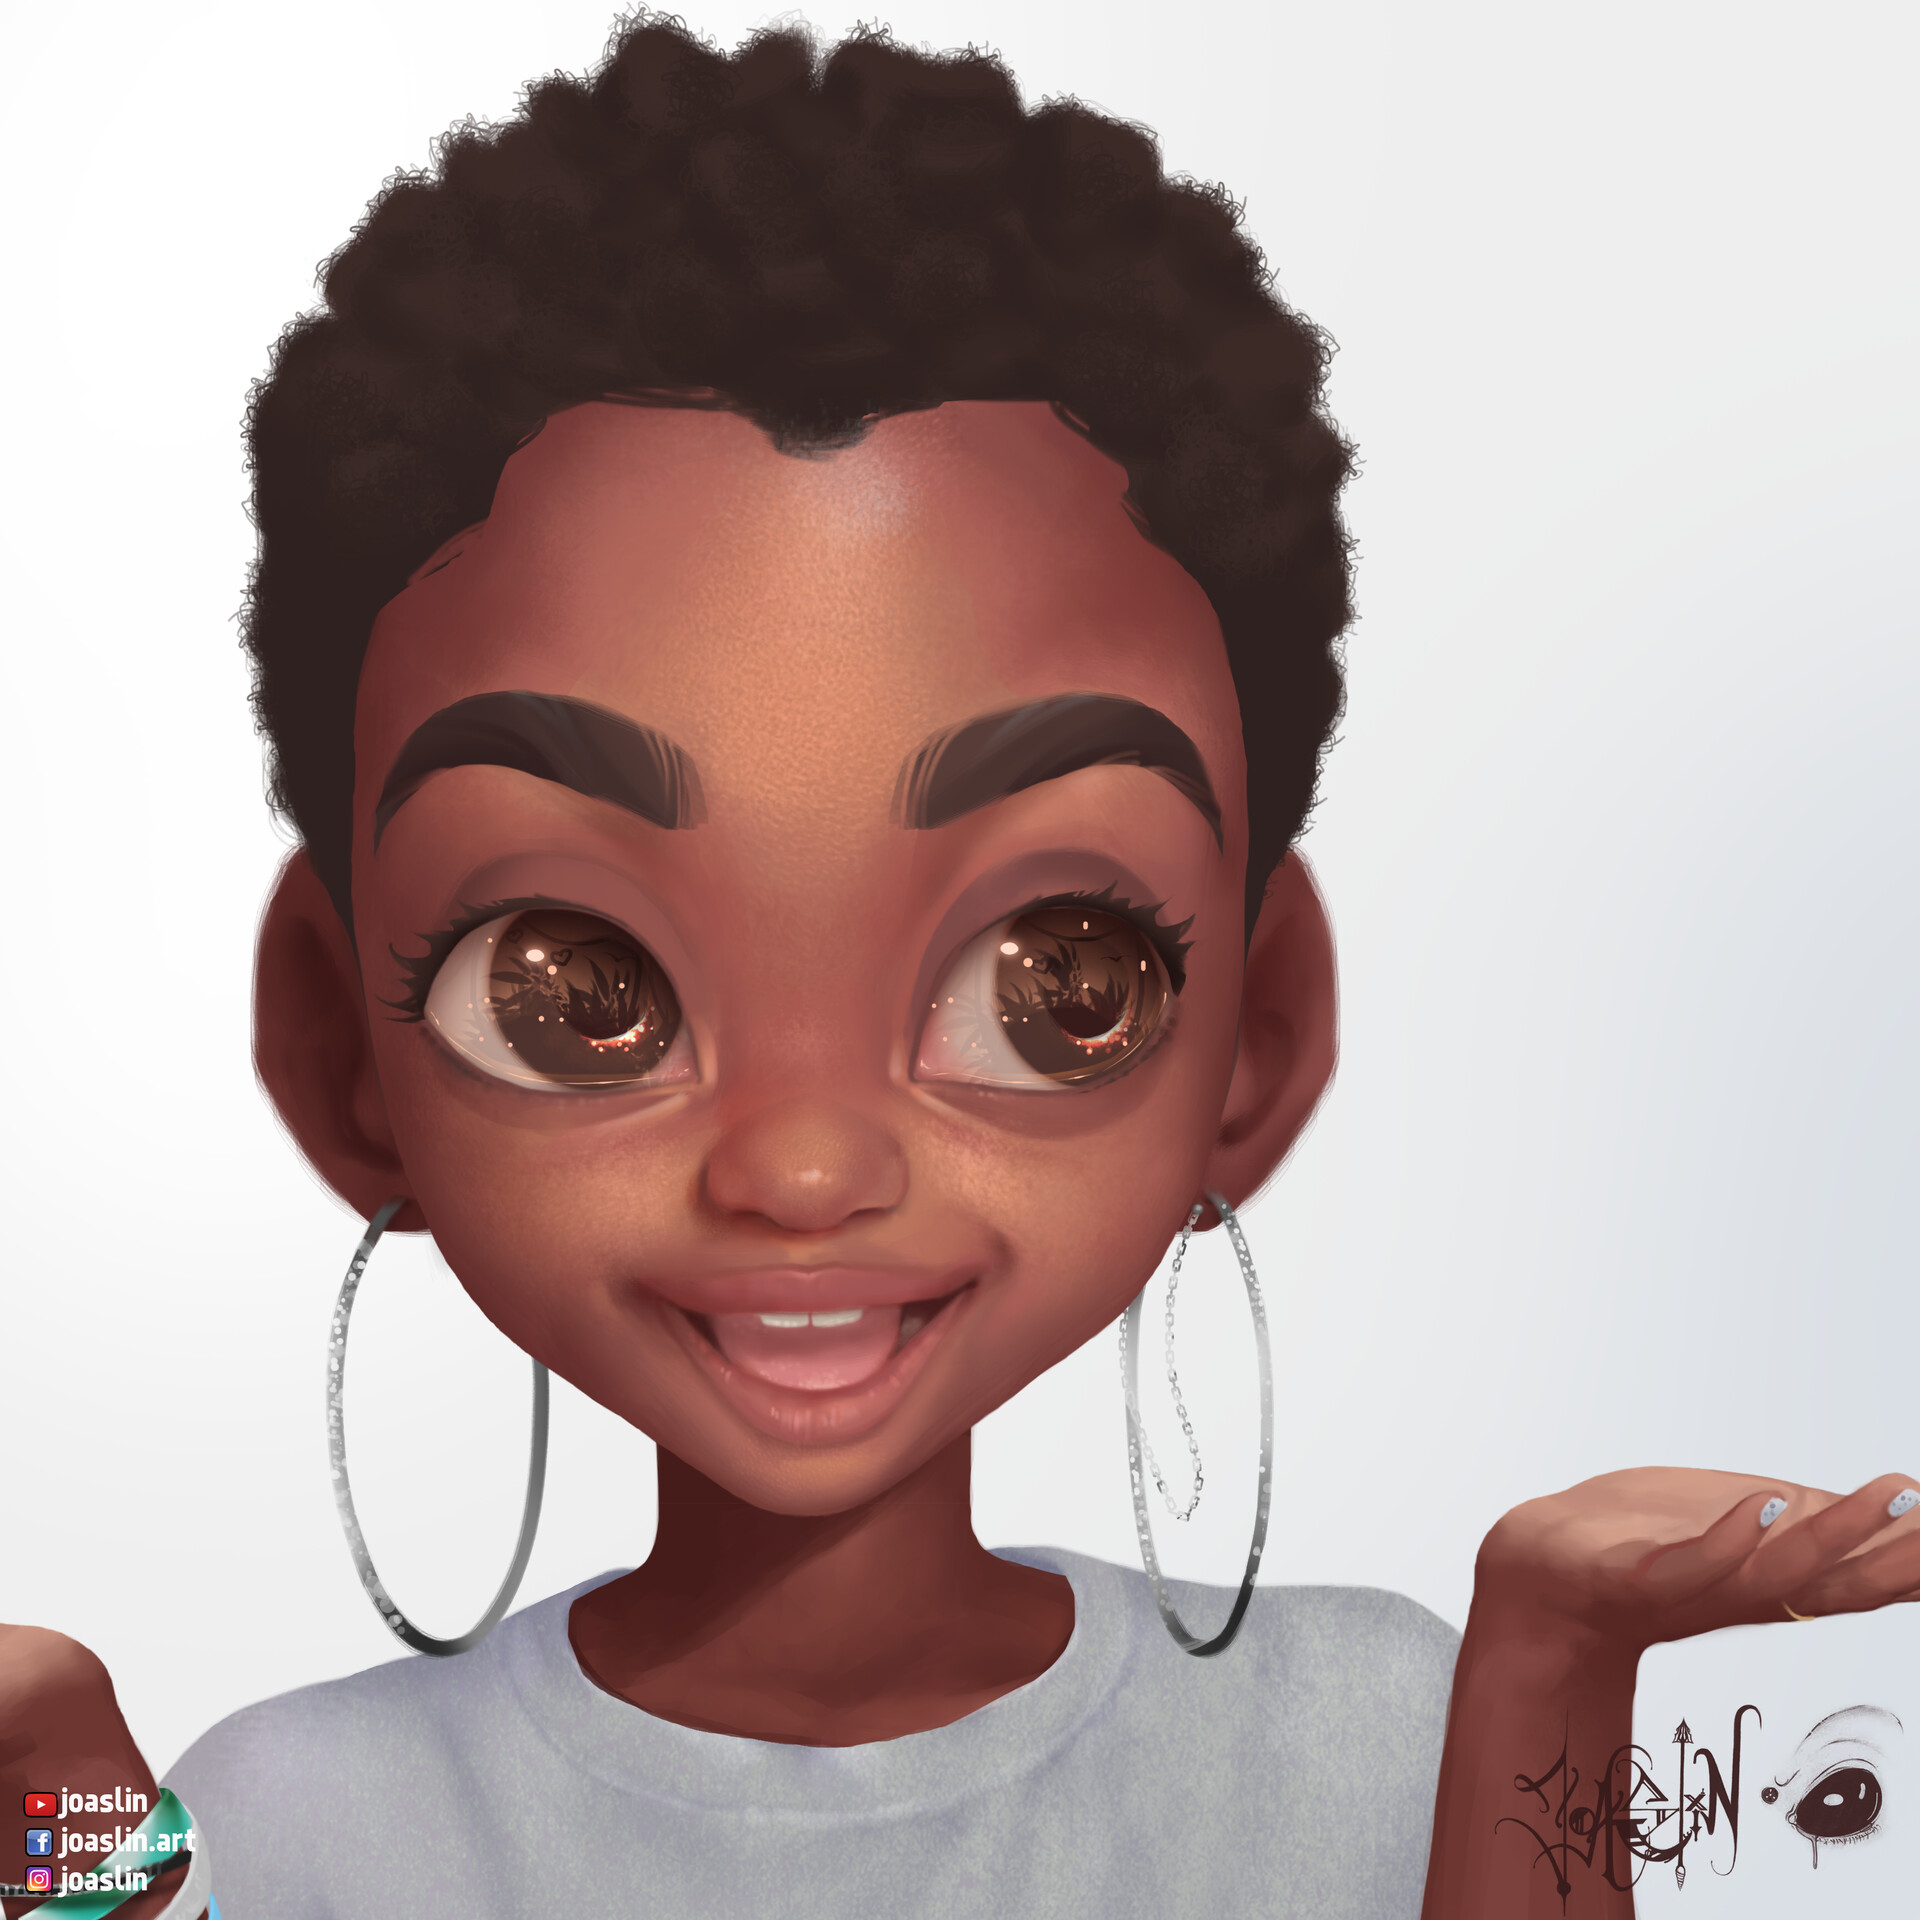
Presets
-
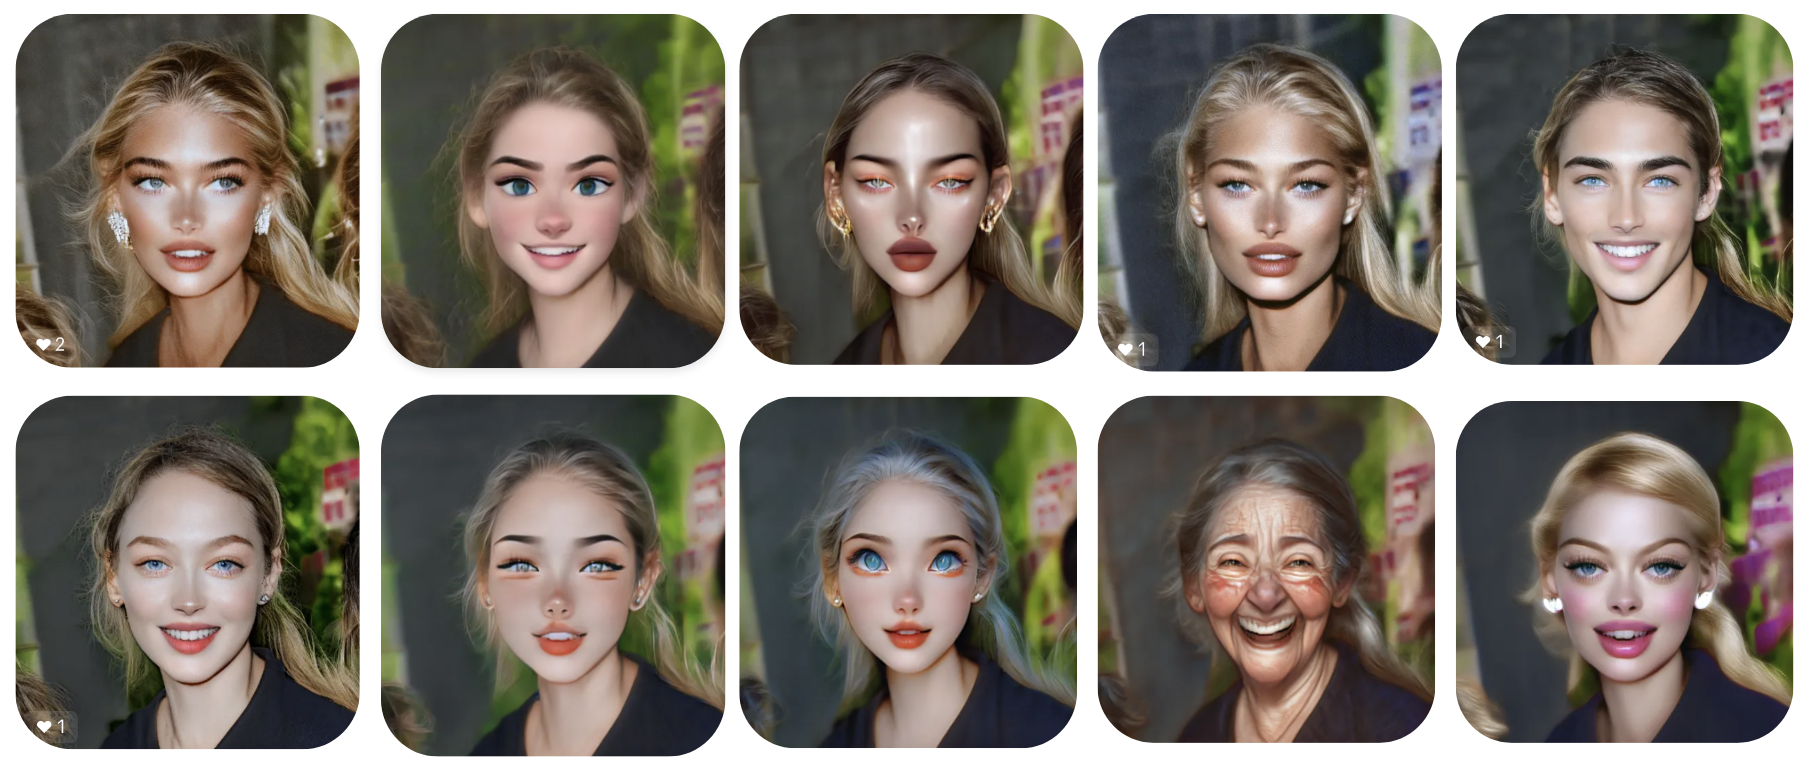
Beauty: This preset is ideal for makeup applications, beauty morphings, and beautification effects. It enhances facial features to create a polished, aesthetically pleasing look, perfect for cosmetic transformations and glamorous enhancements.
-
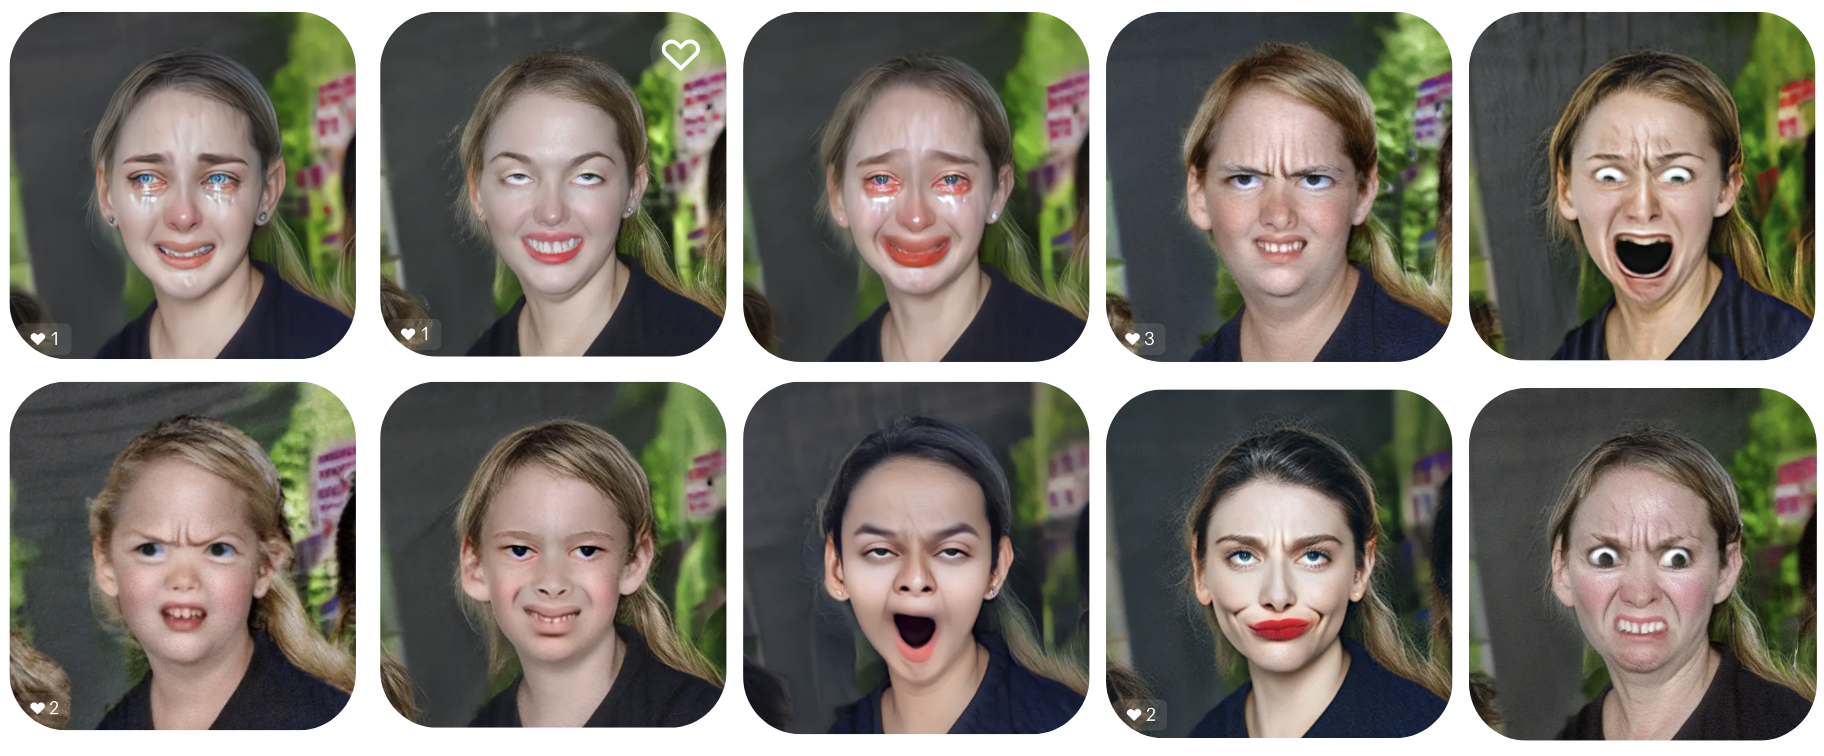
Emotions: This preset is perfect for capturing and enhancing various facial expressions and emotional states. It works best for generating expressive effects, mood transformations, and emotional highlights, allowing for vivid portrayal of feelings such as happiness, sadness, anger, and surprise.
-
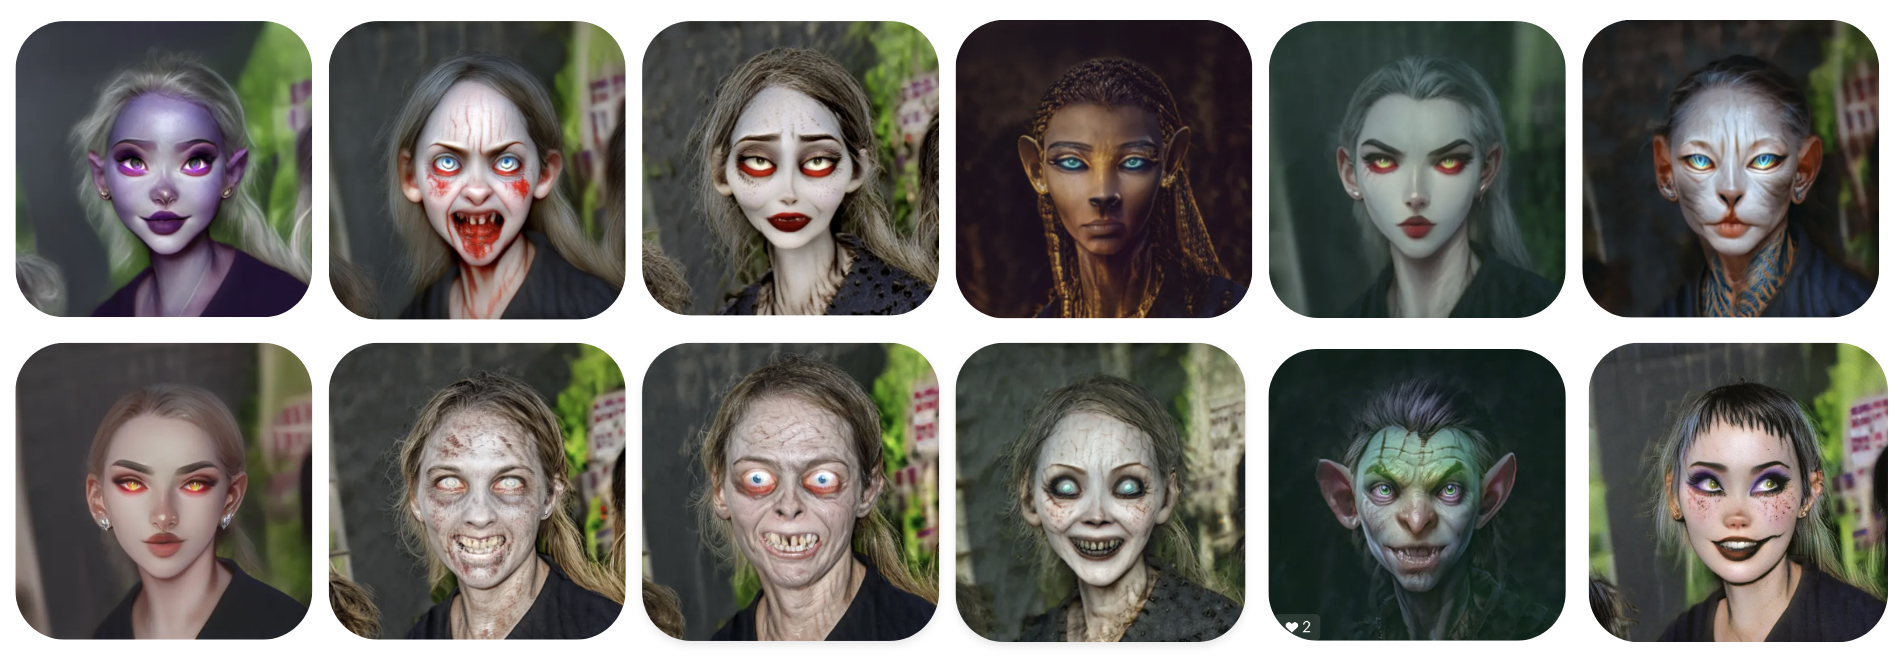
Creepy: This preset is designed to create eerie, unsettling, and spooky effects. It works best for generating horror-themed transformations, horror facial morphings, perfect for creating a chilling and haunting atmosphere.
-
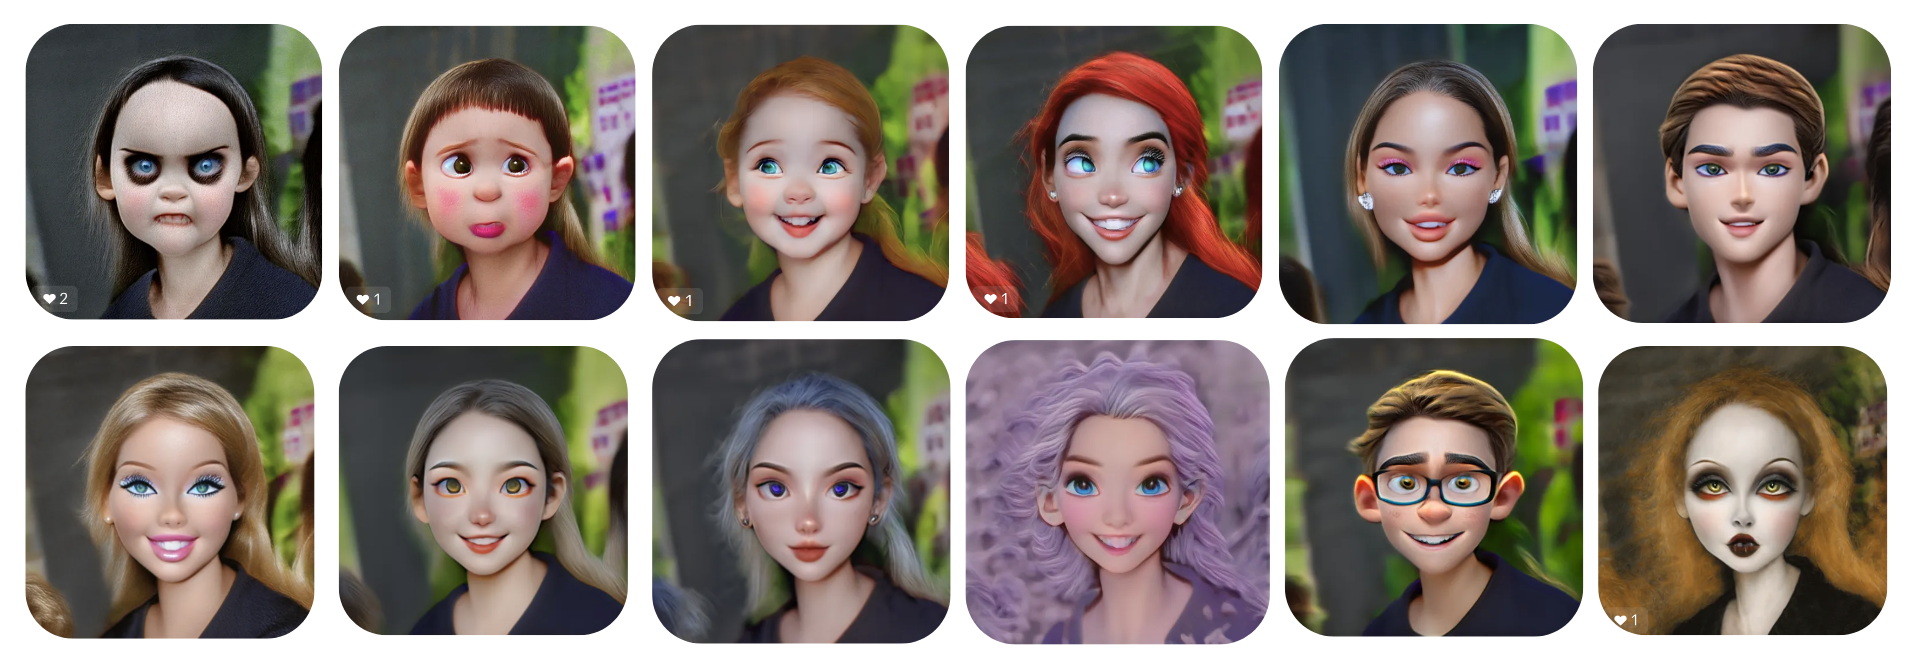
Cartoon: This preset is ideal for transforming faces into whimsical, animated styles. It works best for generating playful and colorful cartoon effects, creating a fun and lighthearted look with exaggerated features, perfect for lively characters.
Settings
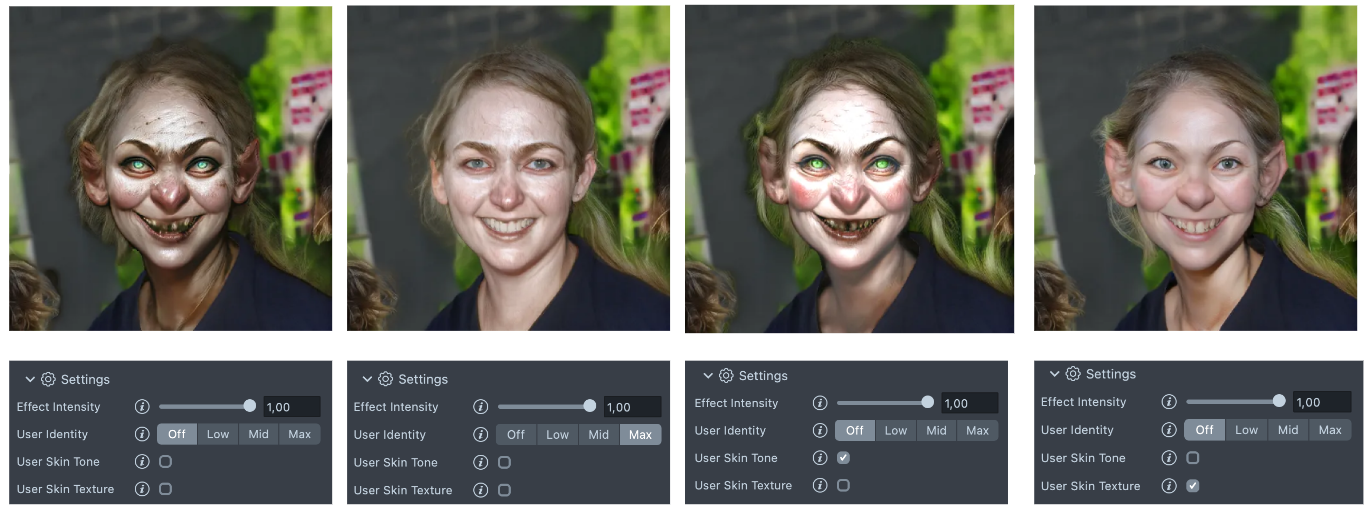
General Settings
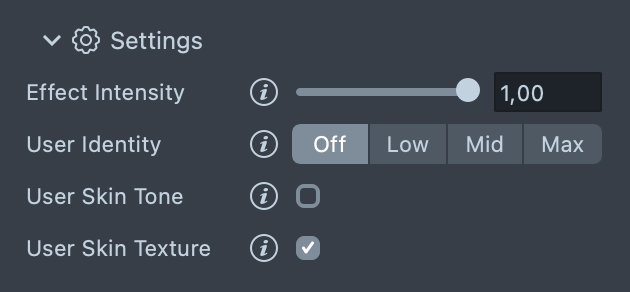
- Effect Intensity: The higher the setting, the more intense the final style will be.
- User Identity: This setting aims to preserve the user's identity features.
- Off: The user's identity features are not preserved.
- Low: The intensity of the final stylized effect is at its lowest (less stylization).
- Mid: Strikes a balance in terms of intensity.
- Max: The intensity of the final stylized effect is at its highest (more stylization).
- Use Skin Texture (On/Off): When enabled, this makes the output style resemble the original image more closely. It affects everything, including the background, eyes, and skin texture. The trade-off is higher resolution at the cost of a weaker effect.
- Use Skin Tone (On/Off): This setting allows the skin tone of the target style to match the skin tone of the original domain. It can be turned on or off according to the desired level of stylization.
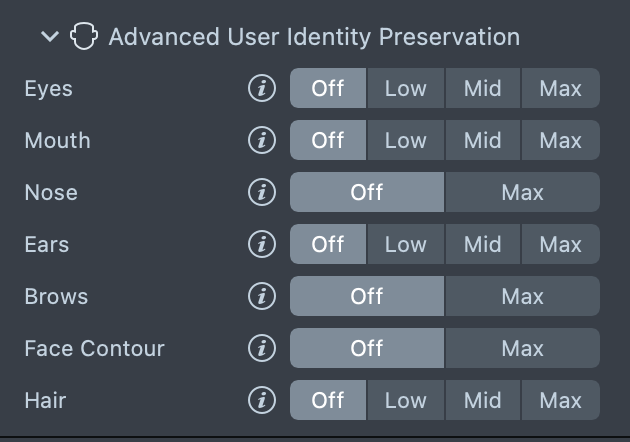
Advanced User Identity Preservation
-
Eyes
- Off: The user's eye features are not preserved.
- Low: The intensity of the final stylized effect on the eyes is at its lowest (less stylization).
- Mid: Strikes a balance in terms of intensity for the eyes.
- Max: The intensity of the final stylized effect on the eyes is at its highest (more stylization).
-
Mouth
- Off: The user's mouth features are not preserved.
- Low: The intensity of the final stylized effect on the mouth is at its lowest (less stylization).
- Mid: Strikes a balance in terms of intensity for the mouth.
- Max: The intensity of the final stylized effect on the mouth is at its highest (more stylization).
-
Nose
- Off: The user's nose features are not preserved.
- Max: The intensity of the final stylized effect for the nose is at its highest (more stylization).
-
Ears
- Off: The user's ear features are not preserved.
- Low: The intensity of the final stylized effect on the ears is at its lowest (less stylization).
- Mid: Strikes a balance in terms of intensity for the ears.
- Max: The intensity of the final stylized effect on the ears is at its highest (more stylization).
-
Brows
- Off: The user's brow features are not preserved.
- Max: The intensity of the final stylized effect on the brows is at its highest (more stylization).
-
Face Contour
- Off: The user's face contour features are not preserved.
- Max: The intensity of the final stylized effect on the face contour is at its highest (more stylization).
-
Hair
- Off: The user's hair features are not preserved.
- Low: The intensity of the final stylized effect on the hair is at its lowest (less stylization).
- Mid: Strikes a balance in terms of intensity for the hair.
- Max: The intensity of the final stylized effect on the hair is at its highest (more stylization).
Preview the Result
You can see a preview of your Lens in the preview panel.
When you’re satisfied with the result, save your project and push the Lens for testing on Snapchat. See the Pairing to Snapchat guide to test your Lens on a device, and the Publishing guide to learn more about sharing your creation.