Selfie Attachments
Selfie Attachments lets you dream up any prop and see it magically placed on any person in a Snapchat Lens. From floating kittens to majestic Roman helmets, the only limit is your imagination. And you can choose whether your attachment appears as a static element or comes to life as an animated one.
Getting Started
Launching Selfie Attachments
-
Navigate to the
Lens Studio AIoption in the top right corner of the Lens Studio. Then, click on theGenAI Home Pagetab in the sidebar.
-
On the
GenAI Home Pagetab, you may need to scroll down to find Selfie Attachments.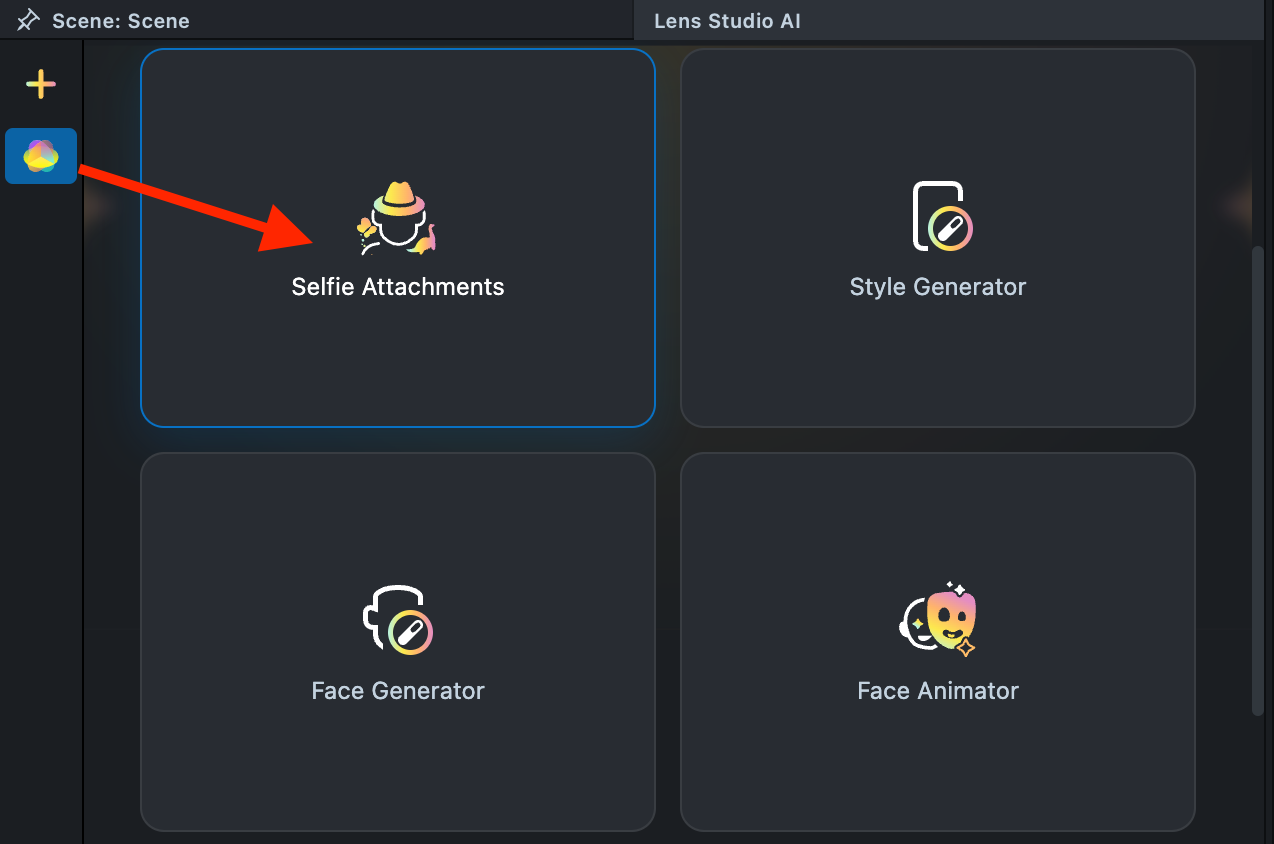
User Interface Overview
-
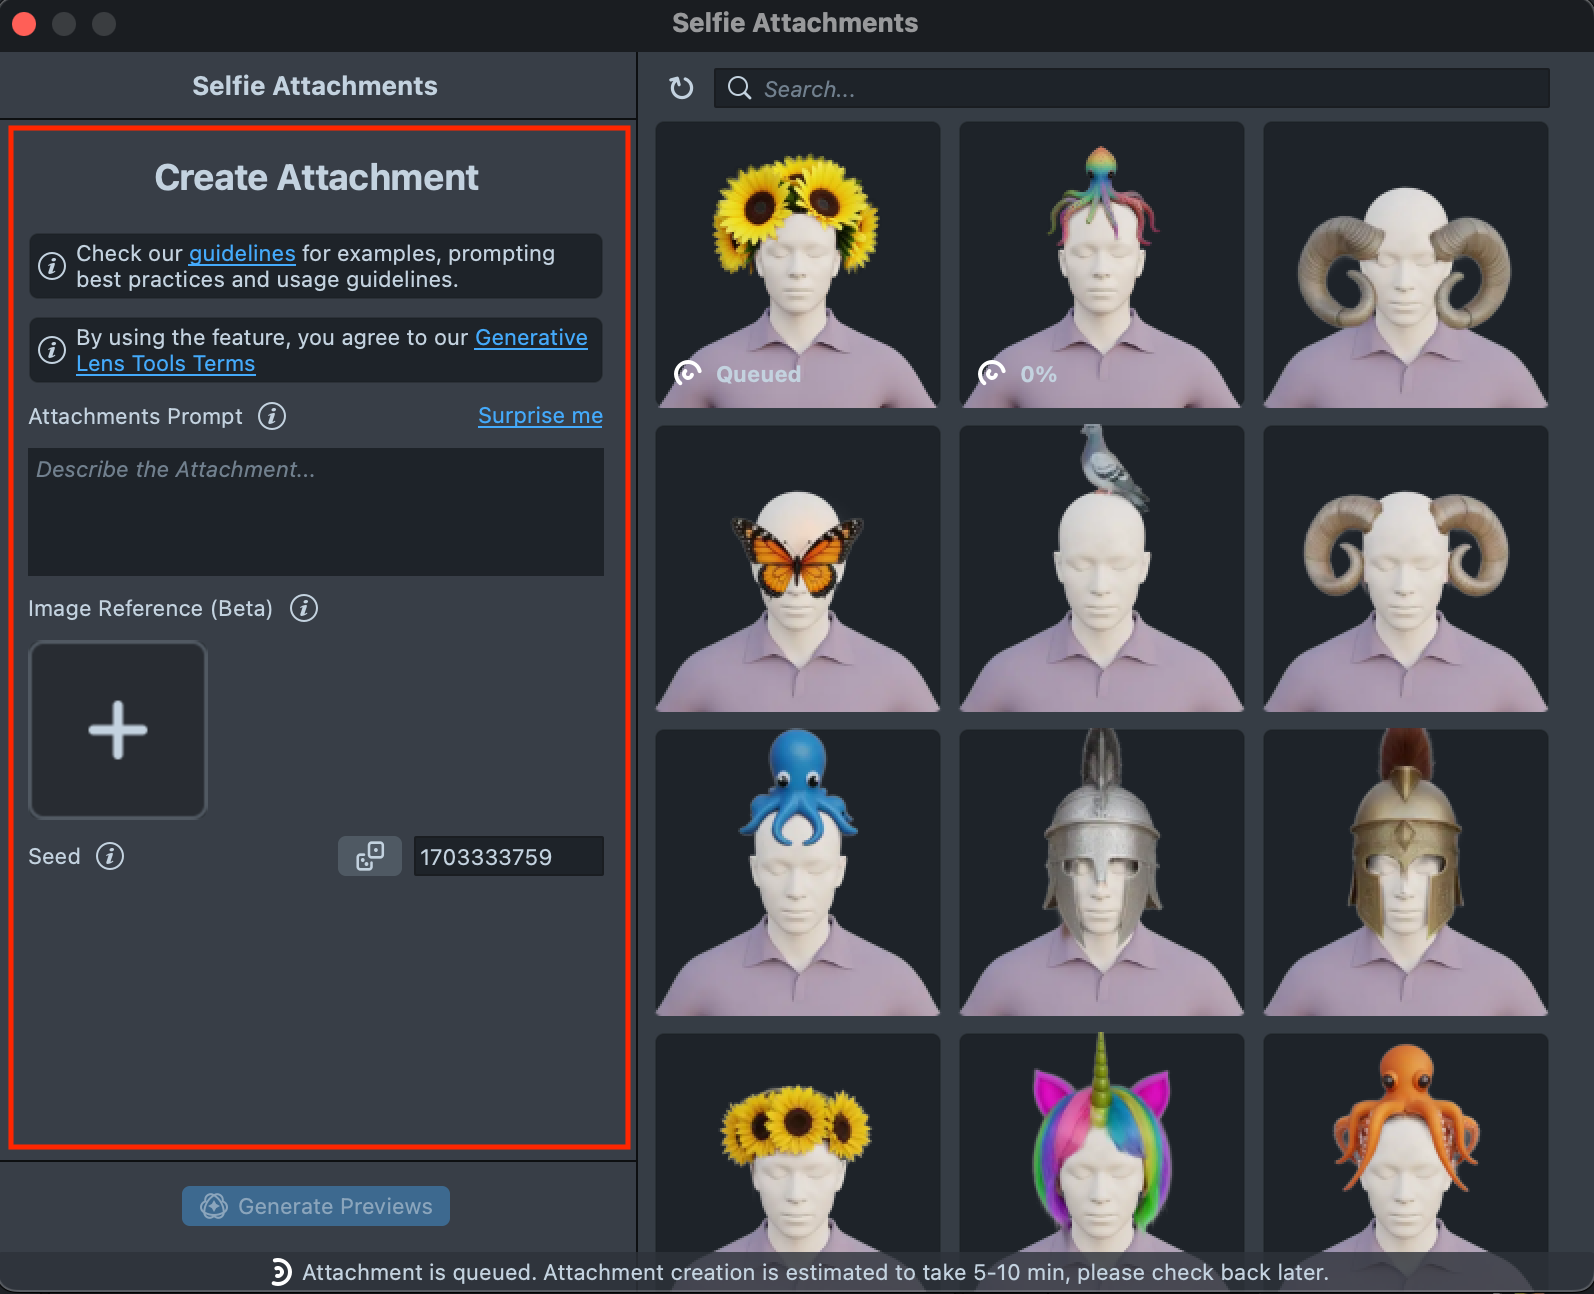
Creation Panel: Contains the input fields for a text prompt, image prompt, seed and animation prompt.
-
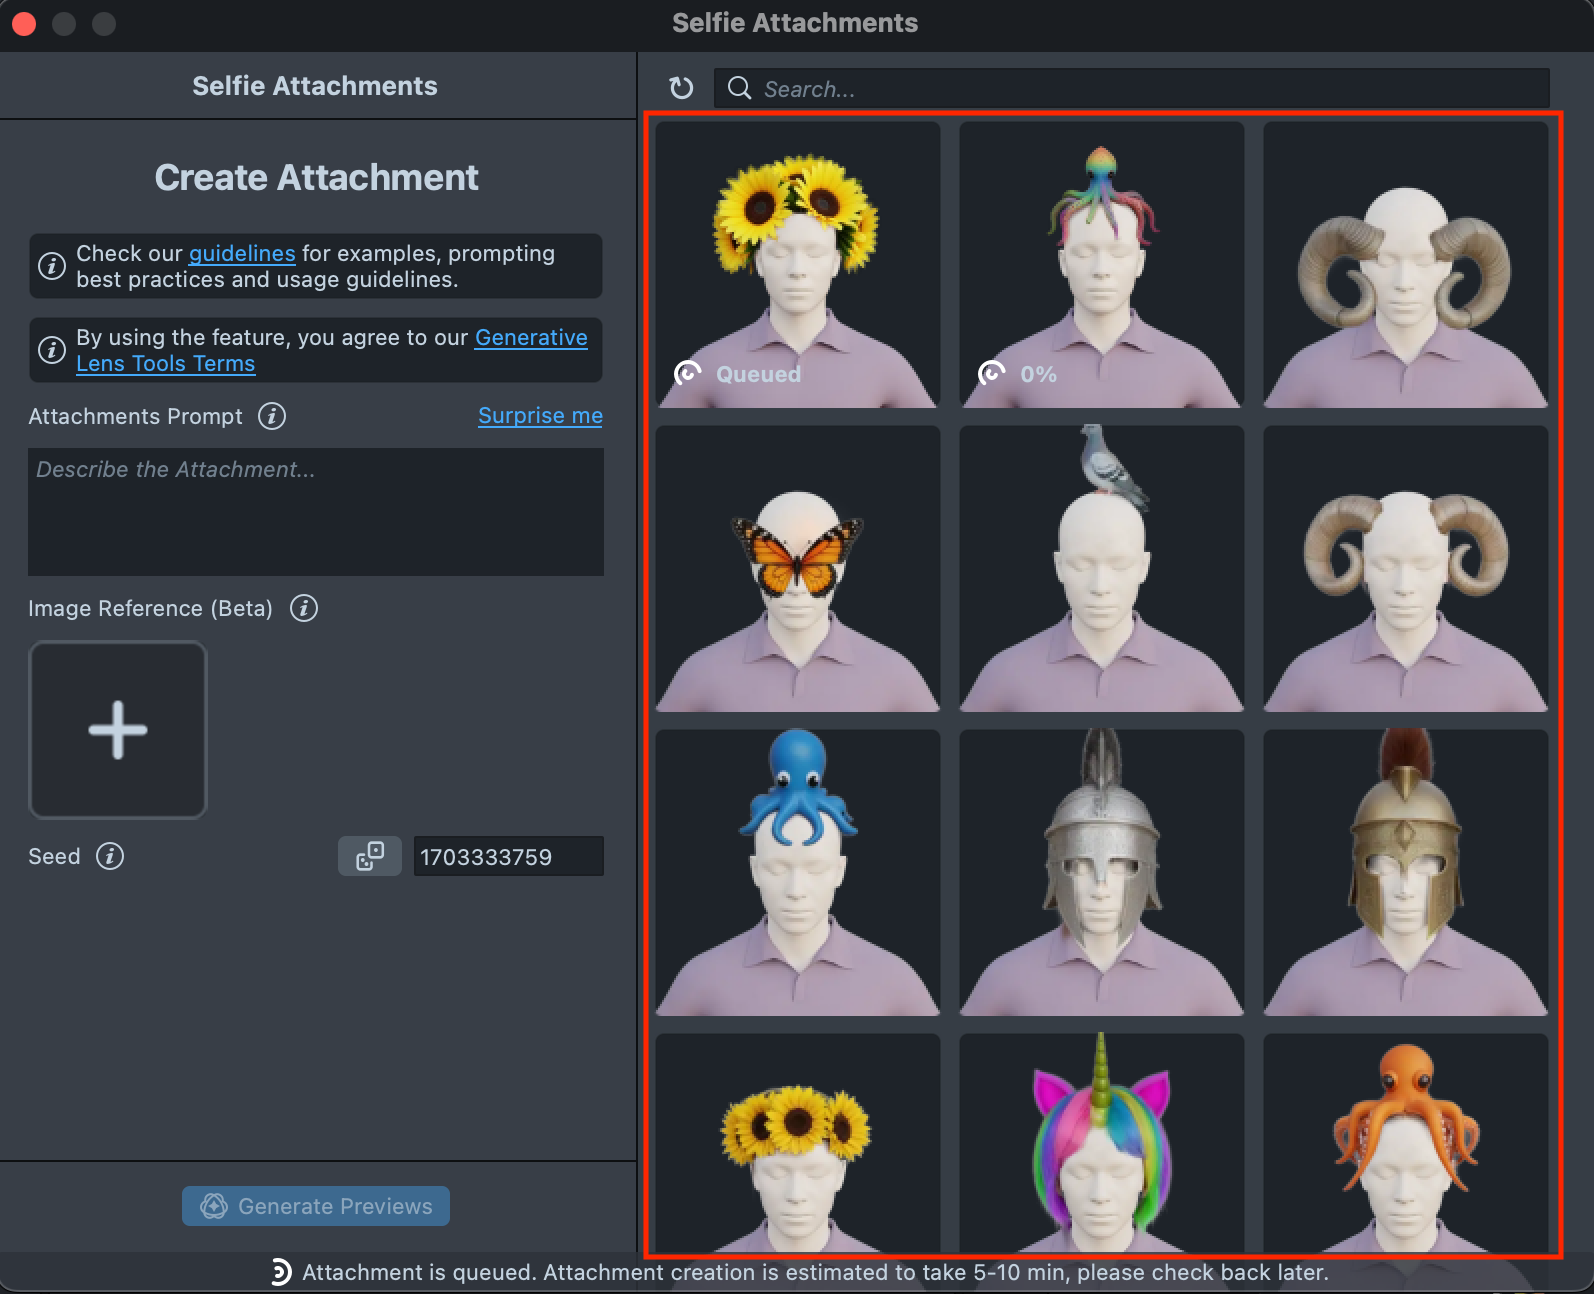
Gallery: Displays all Attachments you created and their Statuses.
-
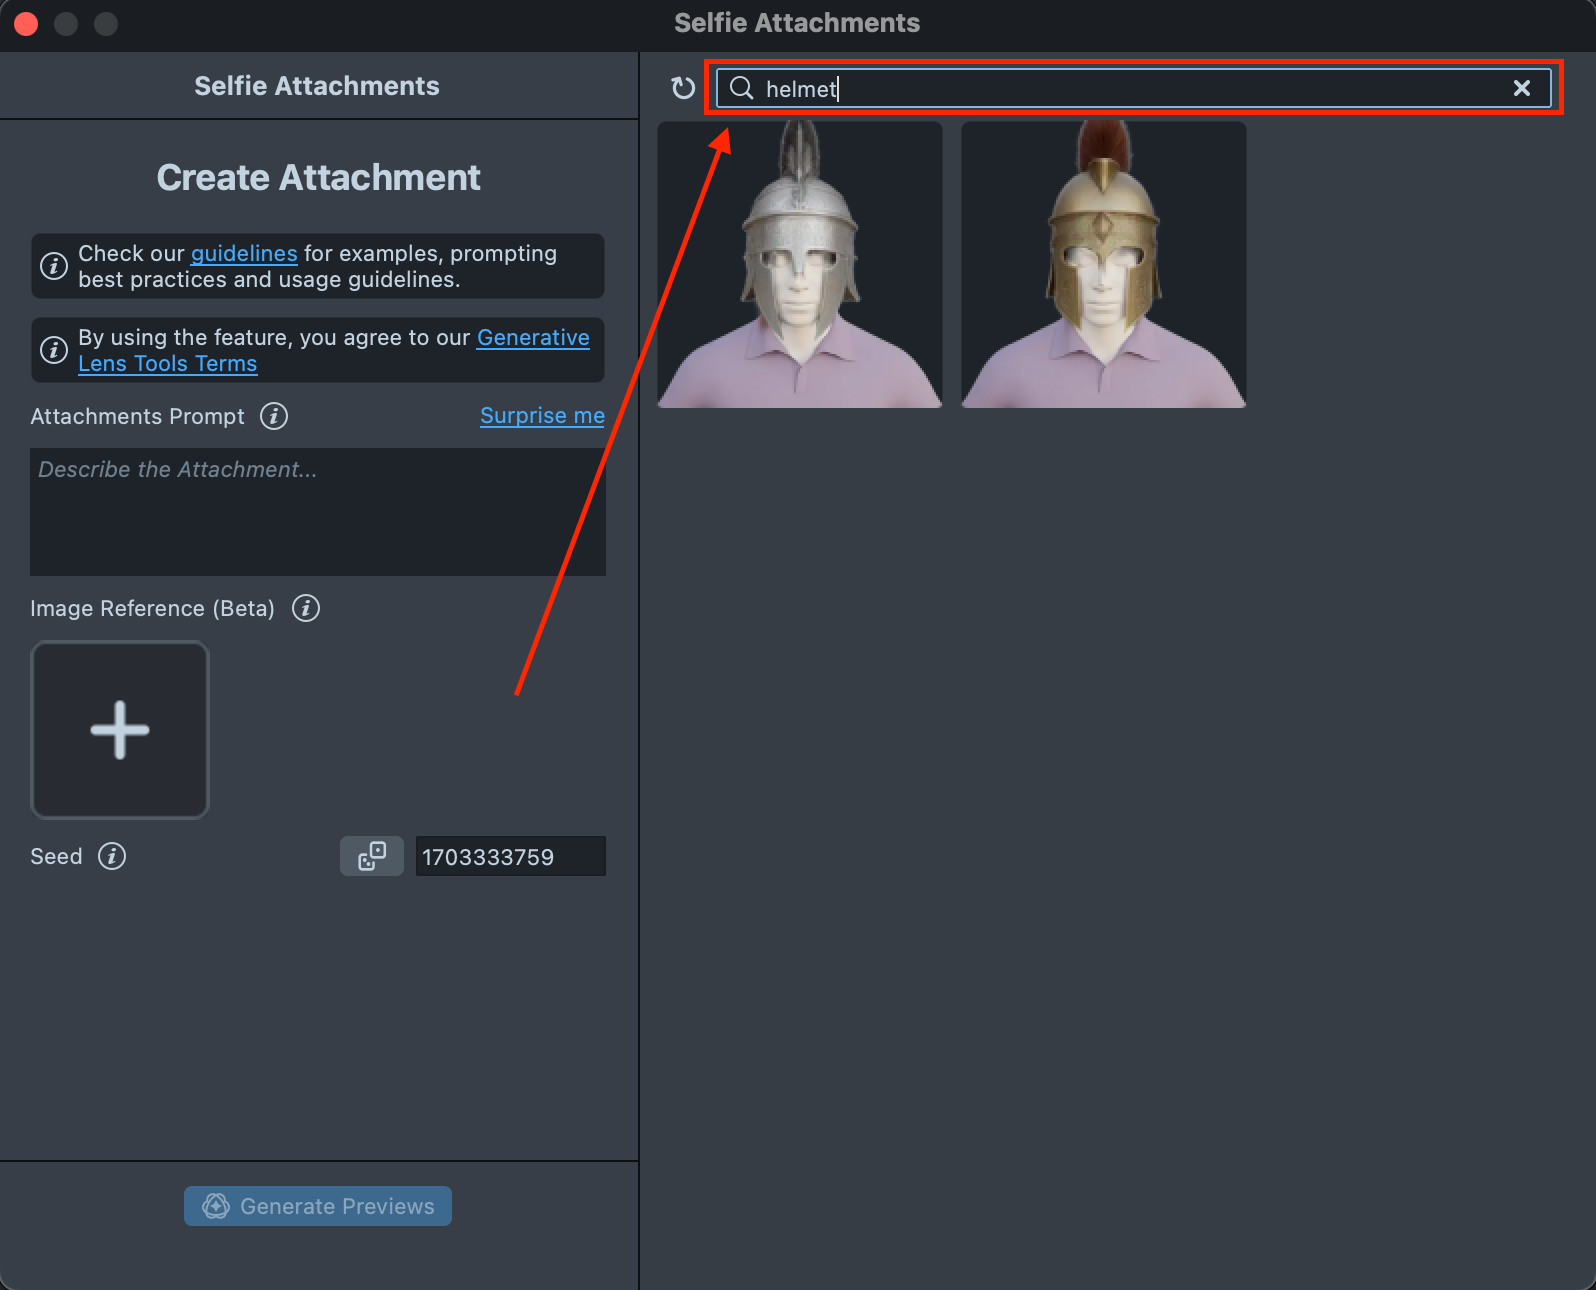
Search: Search and Filter created Attachments.
Creating new Attachment
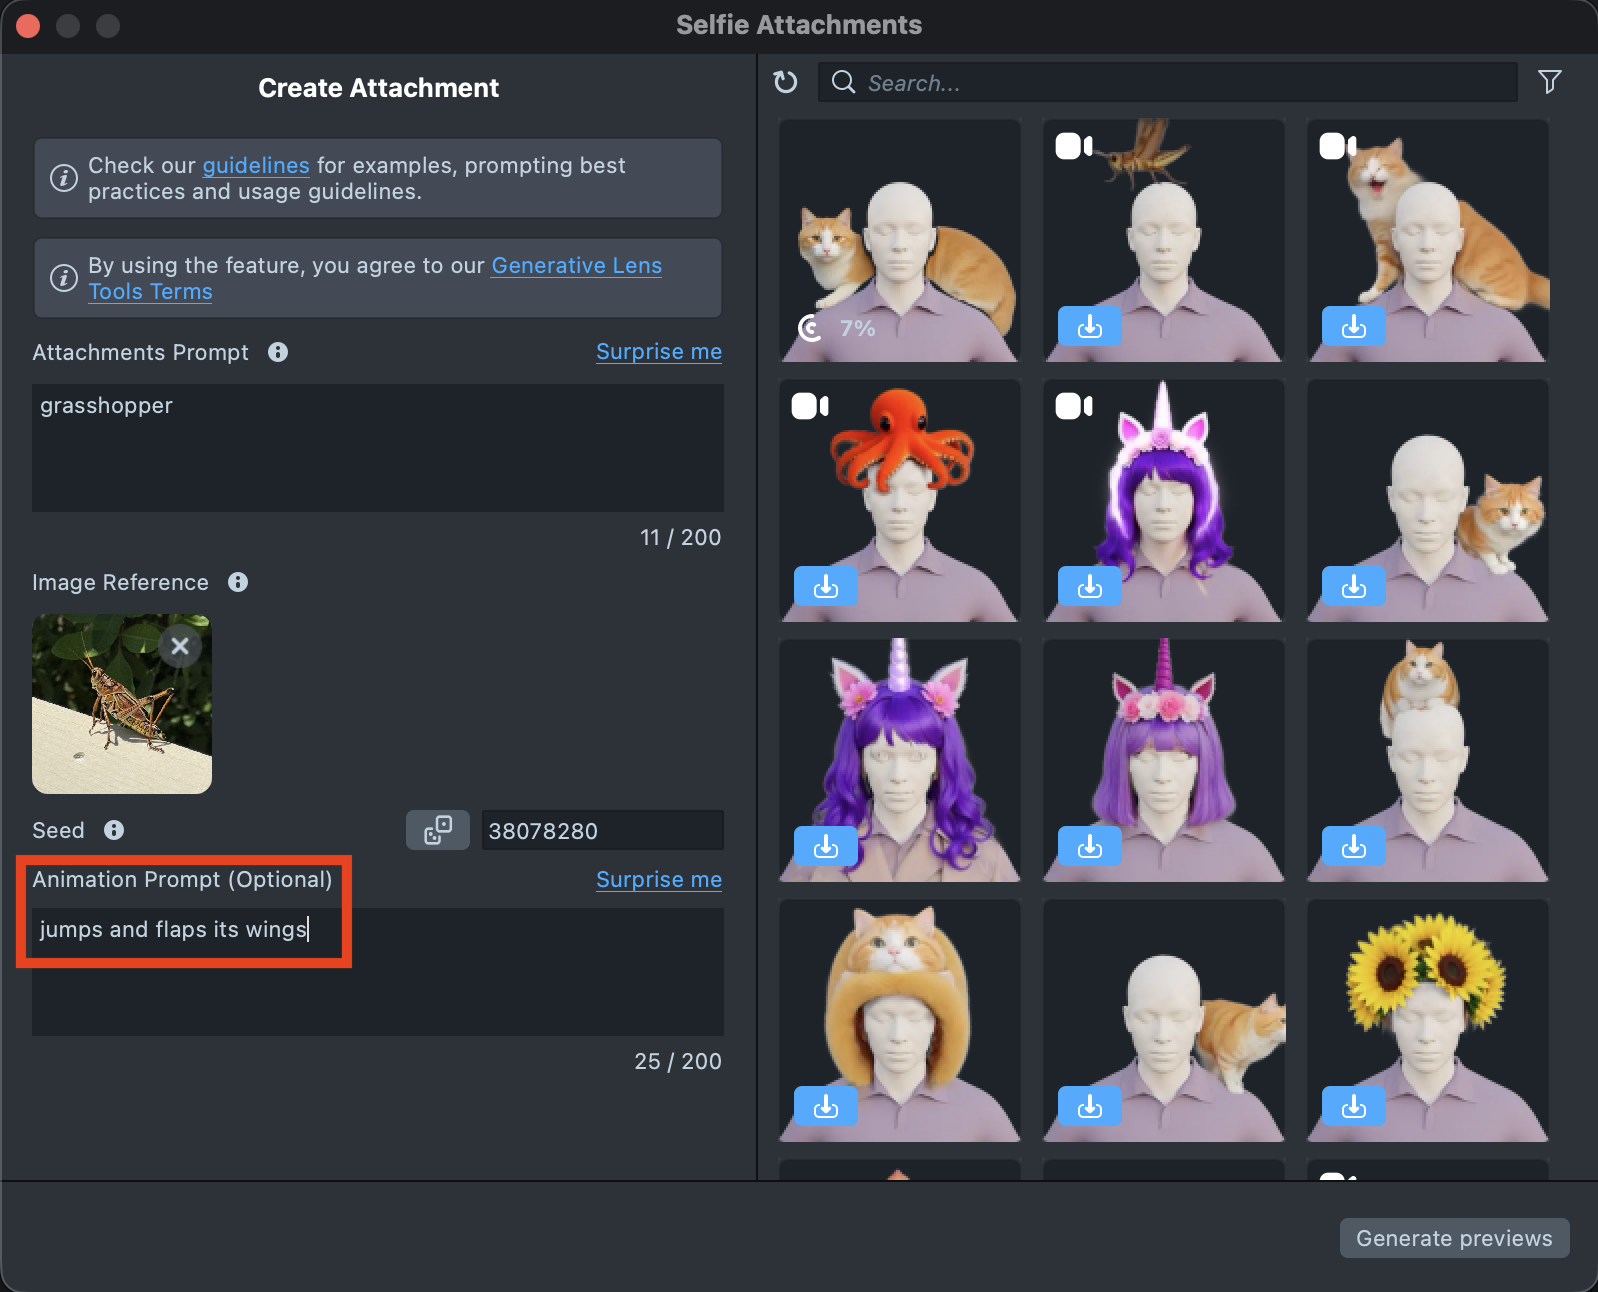
To create an animated attachment, add an animation description in the Animation Prompt field. Leave it blank if you want a static attachment.
Let’s walk through the process of creating an animated attachment.
-
Click the
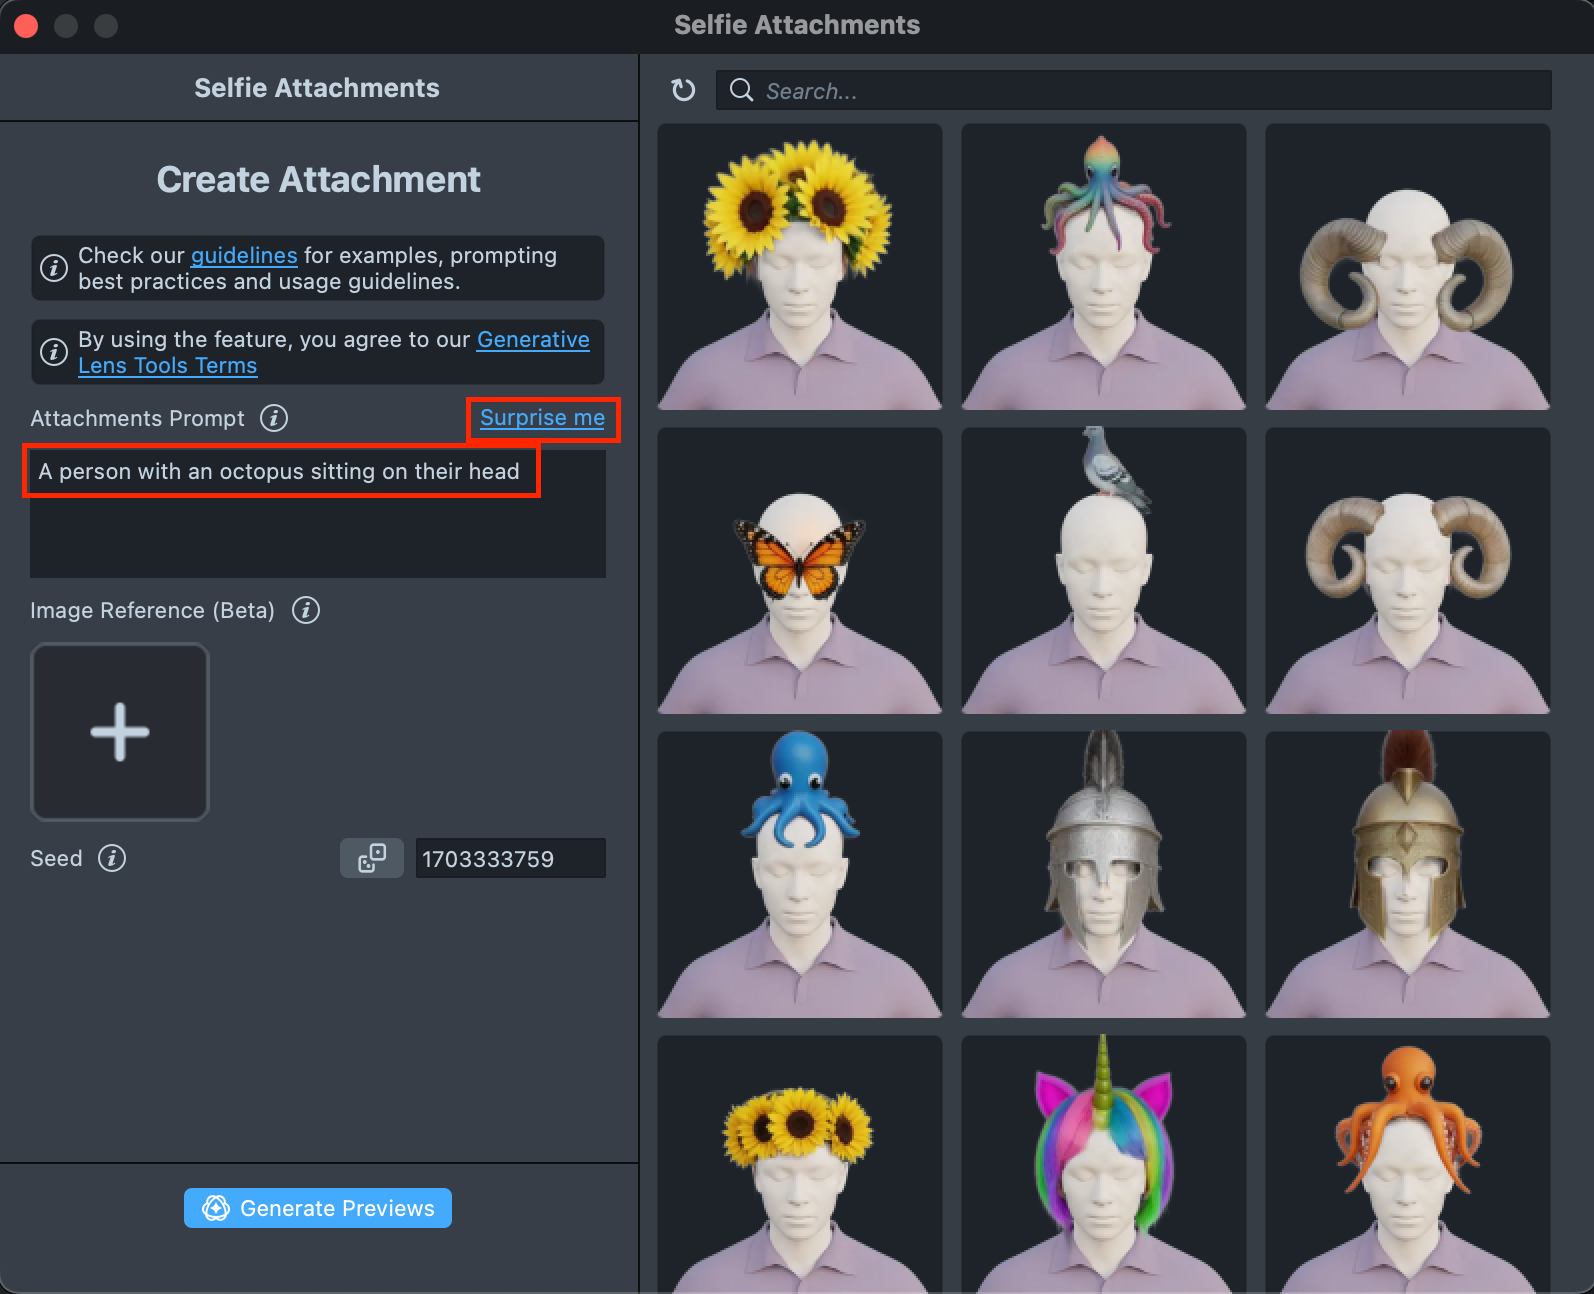
Surprise mebutton to try one of the default prompts and get familiar with the plugin.Generating the static attachment may take 5-10 minutes, but you can close the plugin and come back later.
-
If you are ready to use your own prompt, enter a description of the Attachment you’d like to generate in the "Attachments Prompt" text field. Use seed to reproduce experiments and control the randomness of generation.

-
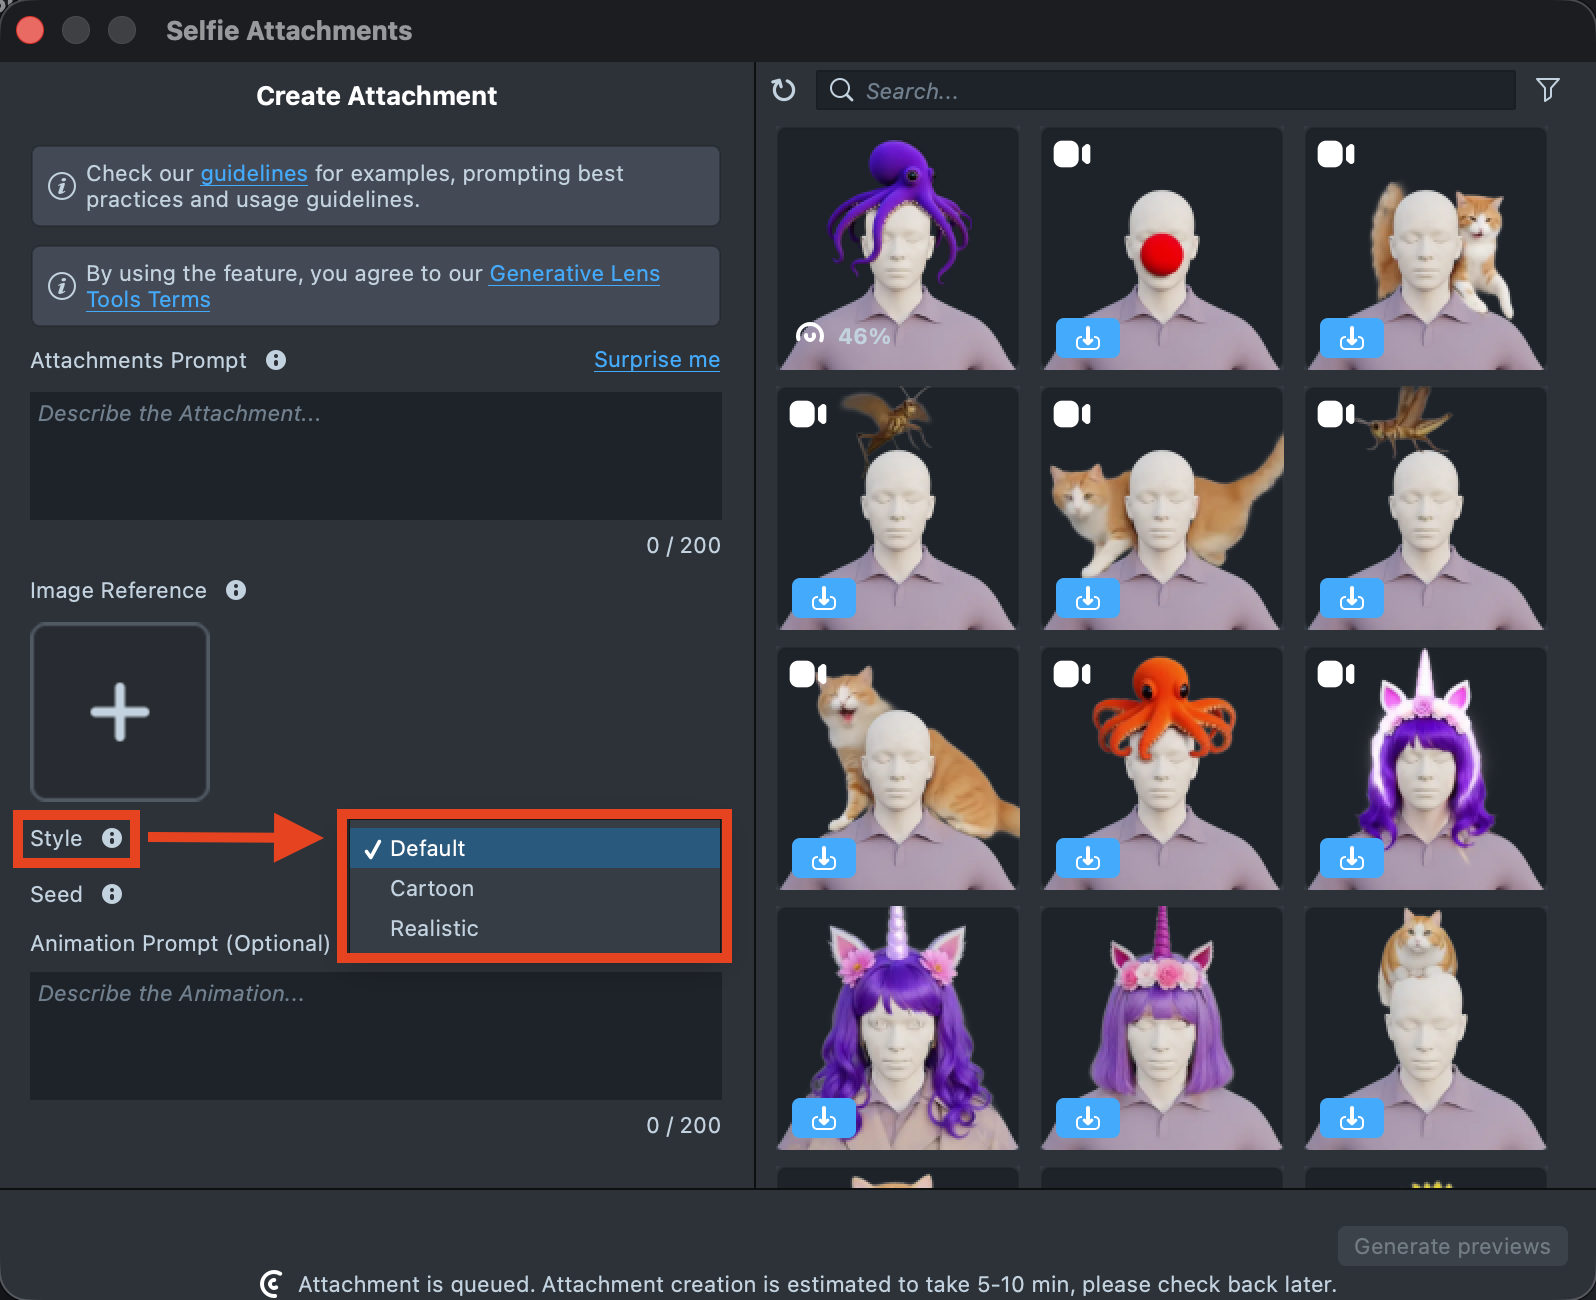
UPDATE: The plugin now includes a Styles option. You can customize the look of your selfie attachments by selecting one of the available styles:
- Default: A balanced and neutral result
- Cartoon: A fun, stylized aesthetic
- Realistic: More lifelike, high-fidelity outputs
-
Optionally, you can add an image input to guide the generation and make the result closer to your vision.
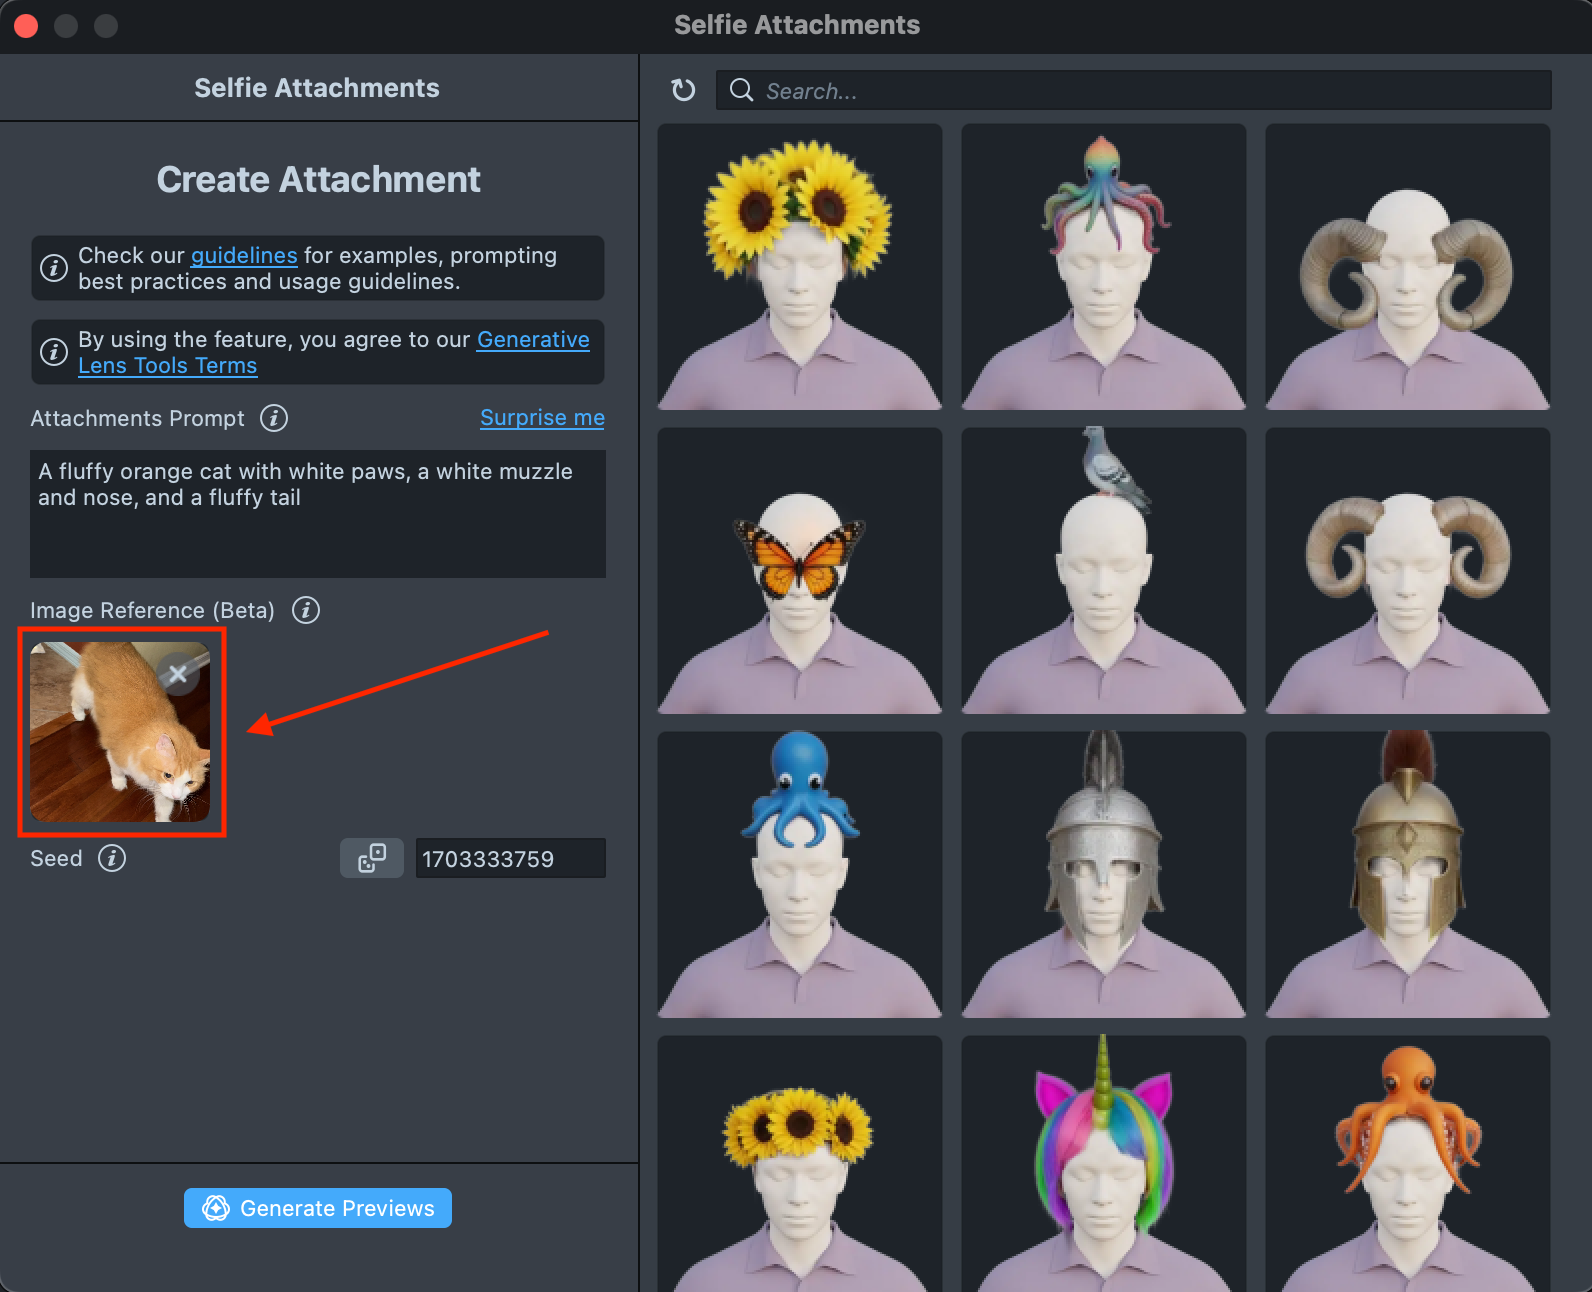
At this stage, text prompts produce the highest-quality assets. We recommend using a text prompt as the foundation of your request and adding an image prompt only as a supplement.
-
To create an animated attachment, add an animation description to the "Animation Prompt" text field.
-
When your prompt is ready, press the
Generate previewsbutton to generate the previews.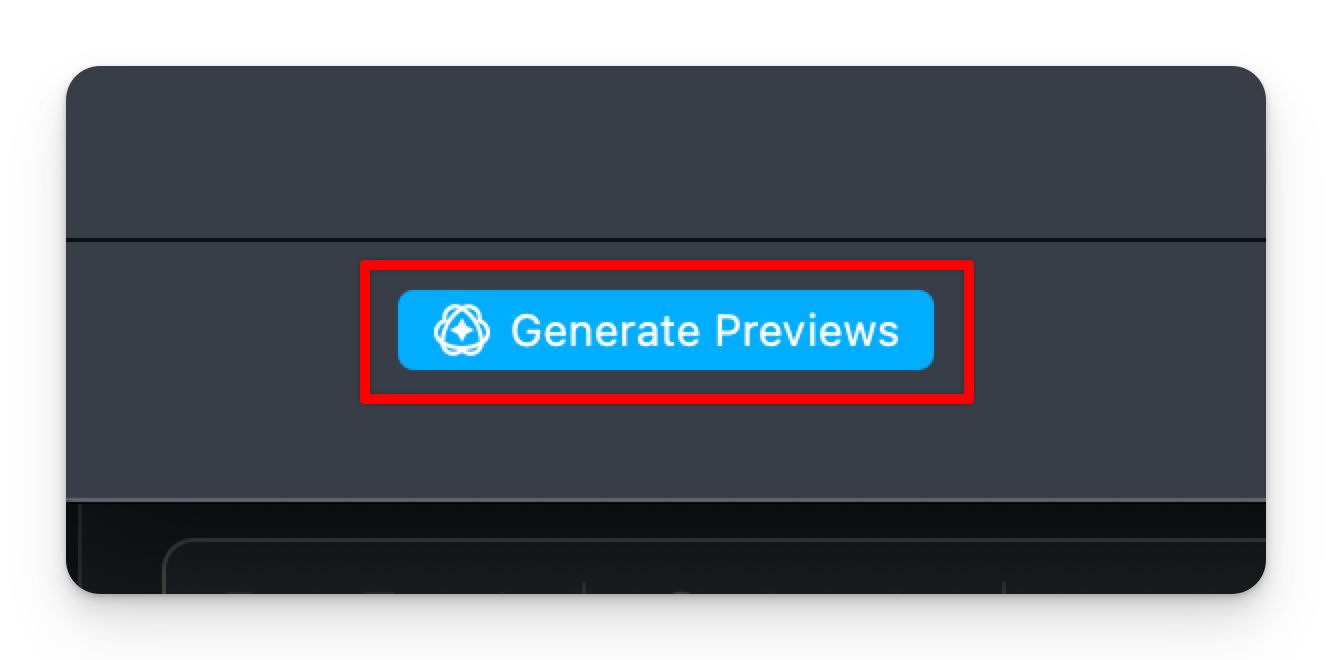
-
You will be presented with four previews of the future attachment. Select the one that best fits your needs and click the
Preview Animationsbutton when you are ready.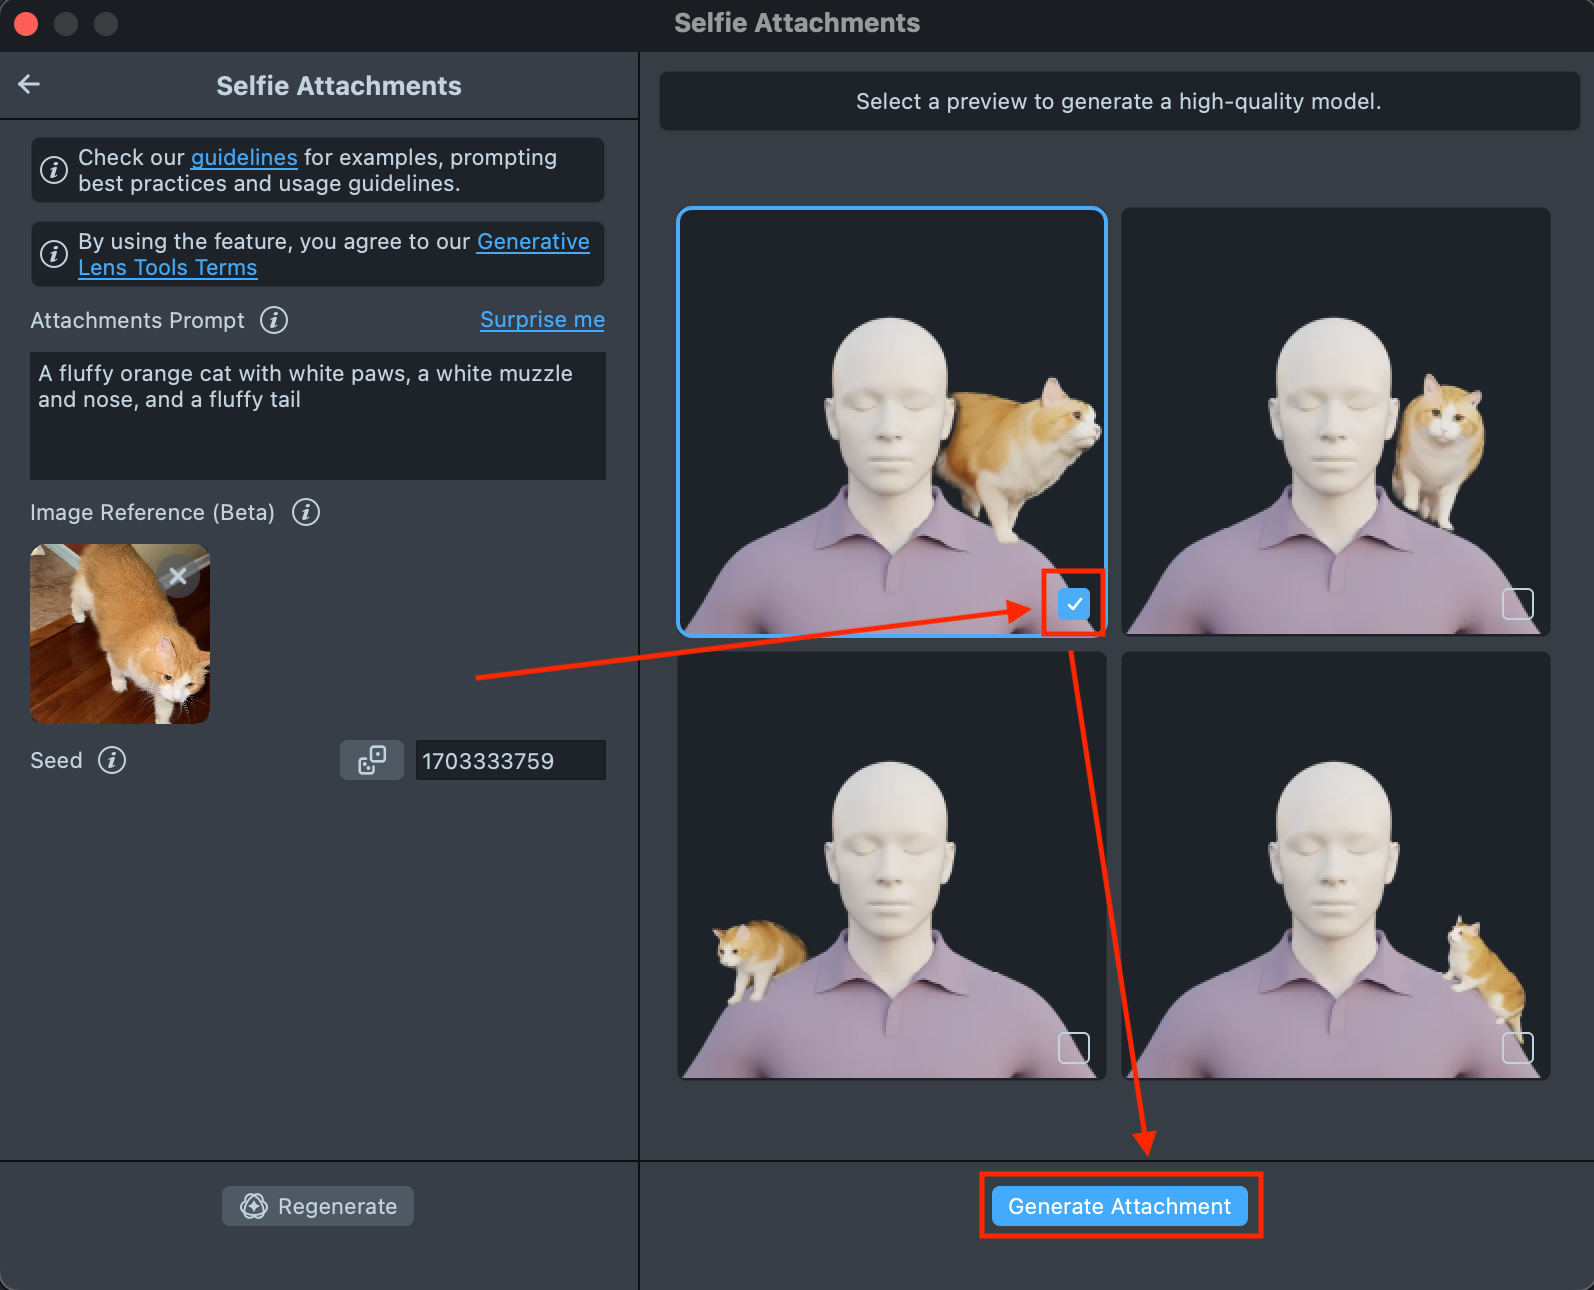
-
You will then see four new previews, each animated according to your animation prompt. Select the one that best fits your needs and click
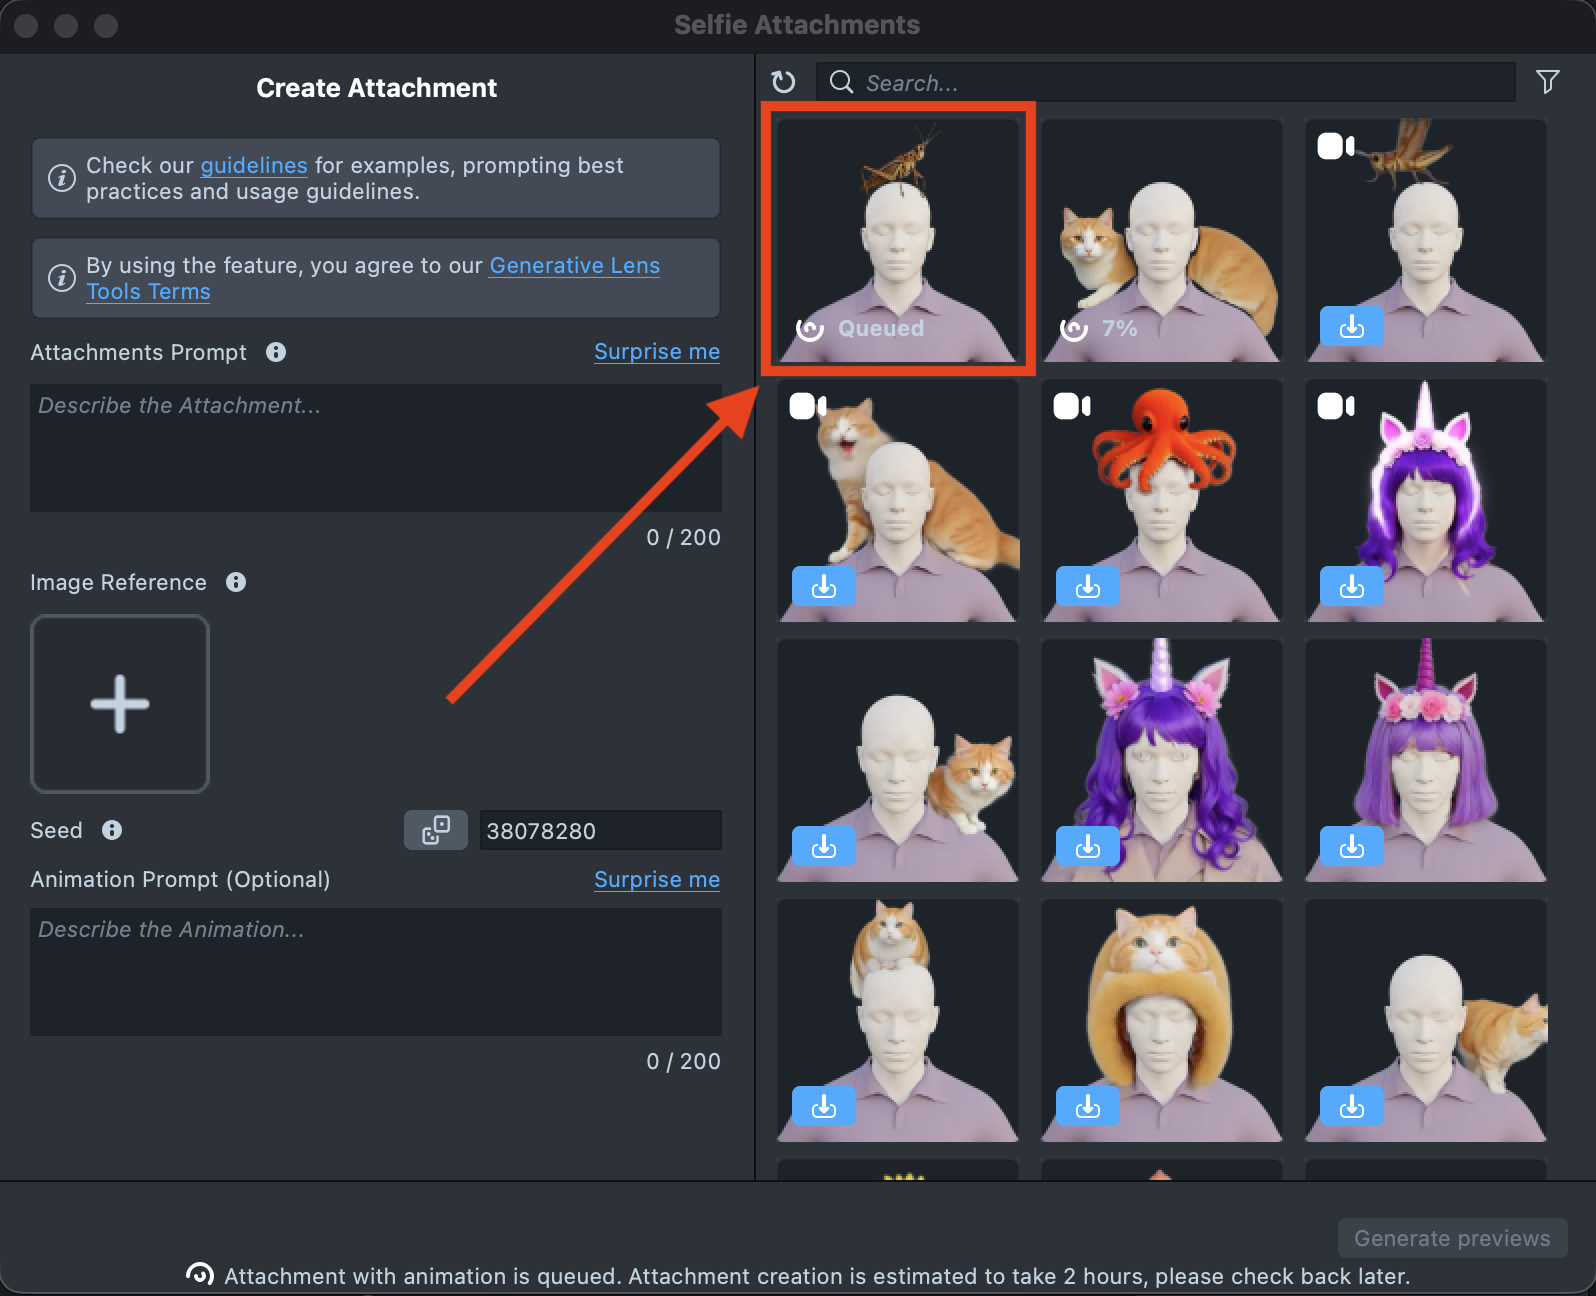
Generate attachmentwhen you're ready. -
A new tile will appear in the Gallery with a loading indicator in the corner, showing the progress.
Generating the animated attachment may take up to 2 hours, but you can close the plugin and come back later.
-
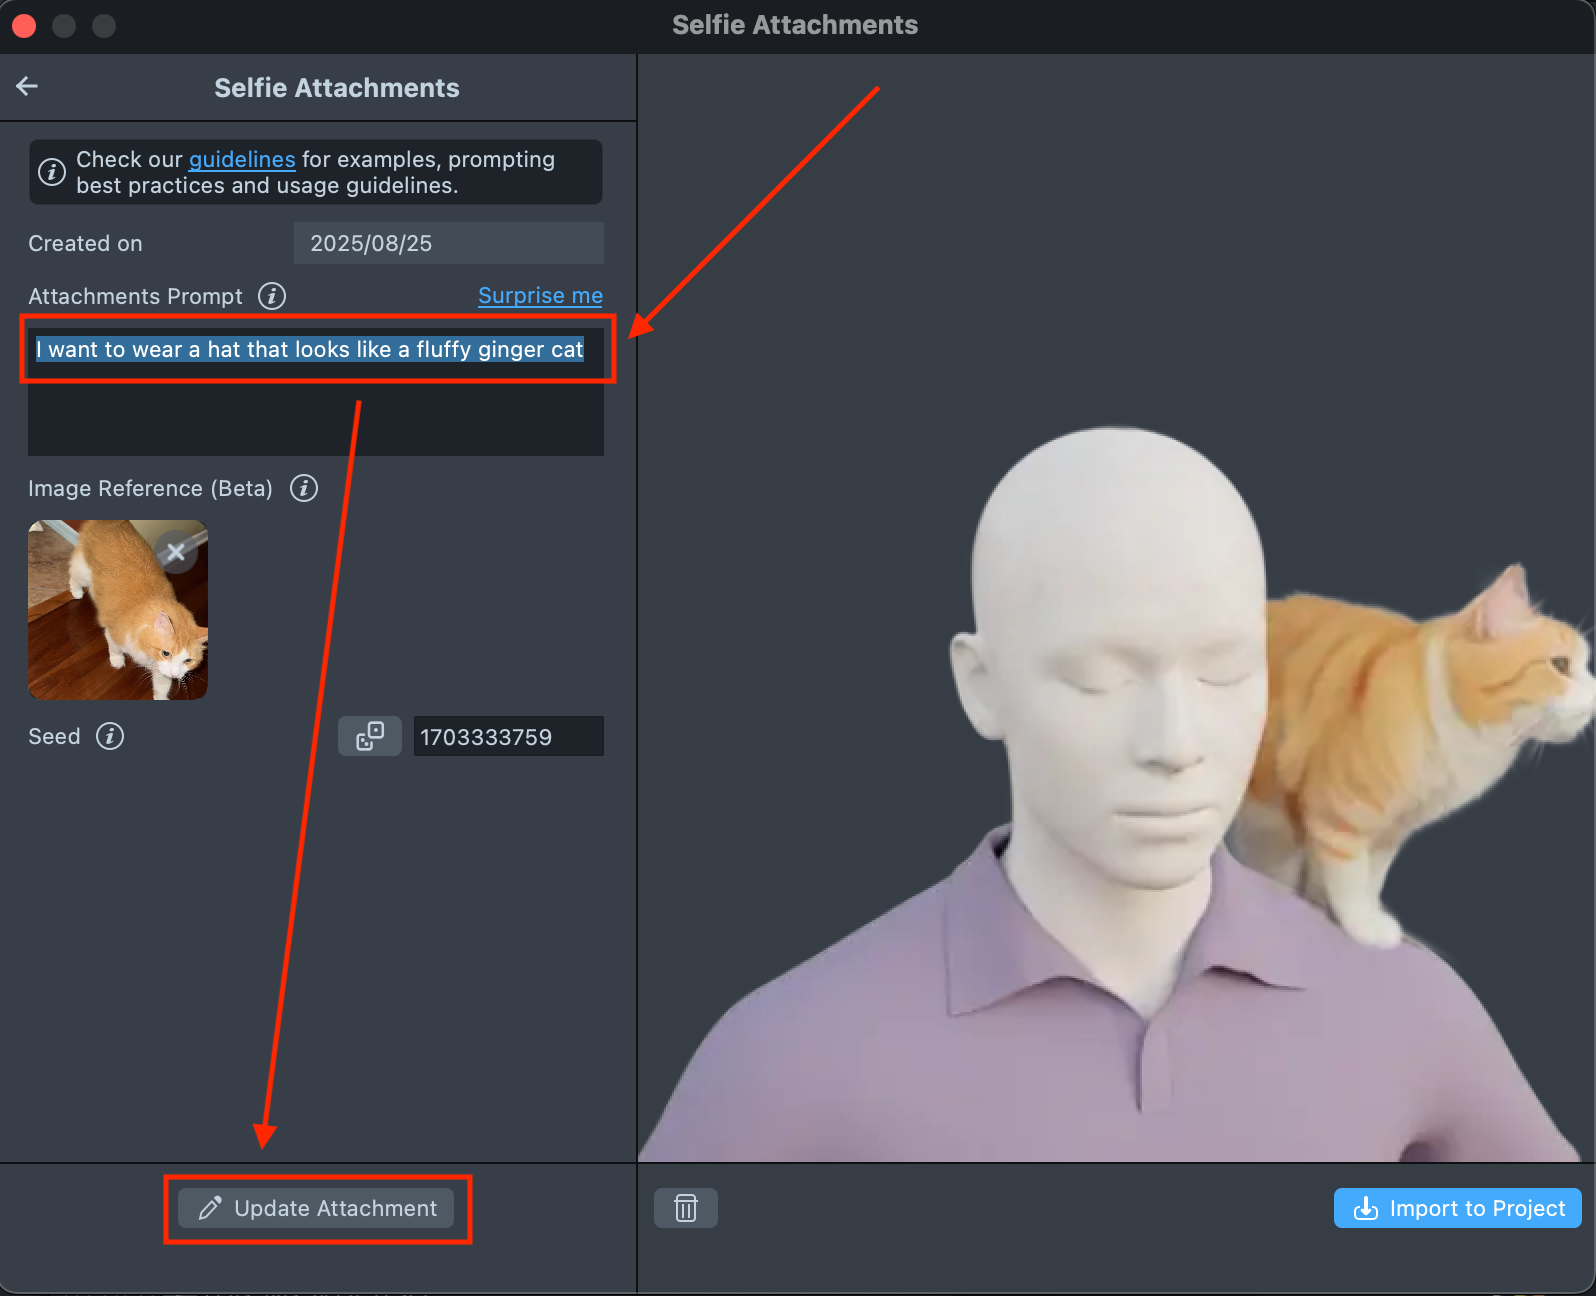
When the animated attachment is ready, click its tile in the Gallery to review it.
If the preview doesn’t match your expectations, click Change animation to keep the same attachment and adjust only the animation.
If you want to modify all prompts, click Change attachment instead.
- You can always preview the static attachment by switching to the
Statictab. If you decide not to use the animated version and want to import only the static attachment, uncheckInclude animationand then clickImport to project.

-
When you’re satisfied with the animated attachment, click
Import to Projectto add the asset to your project.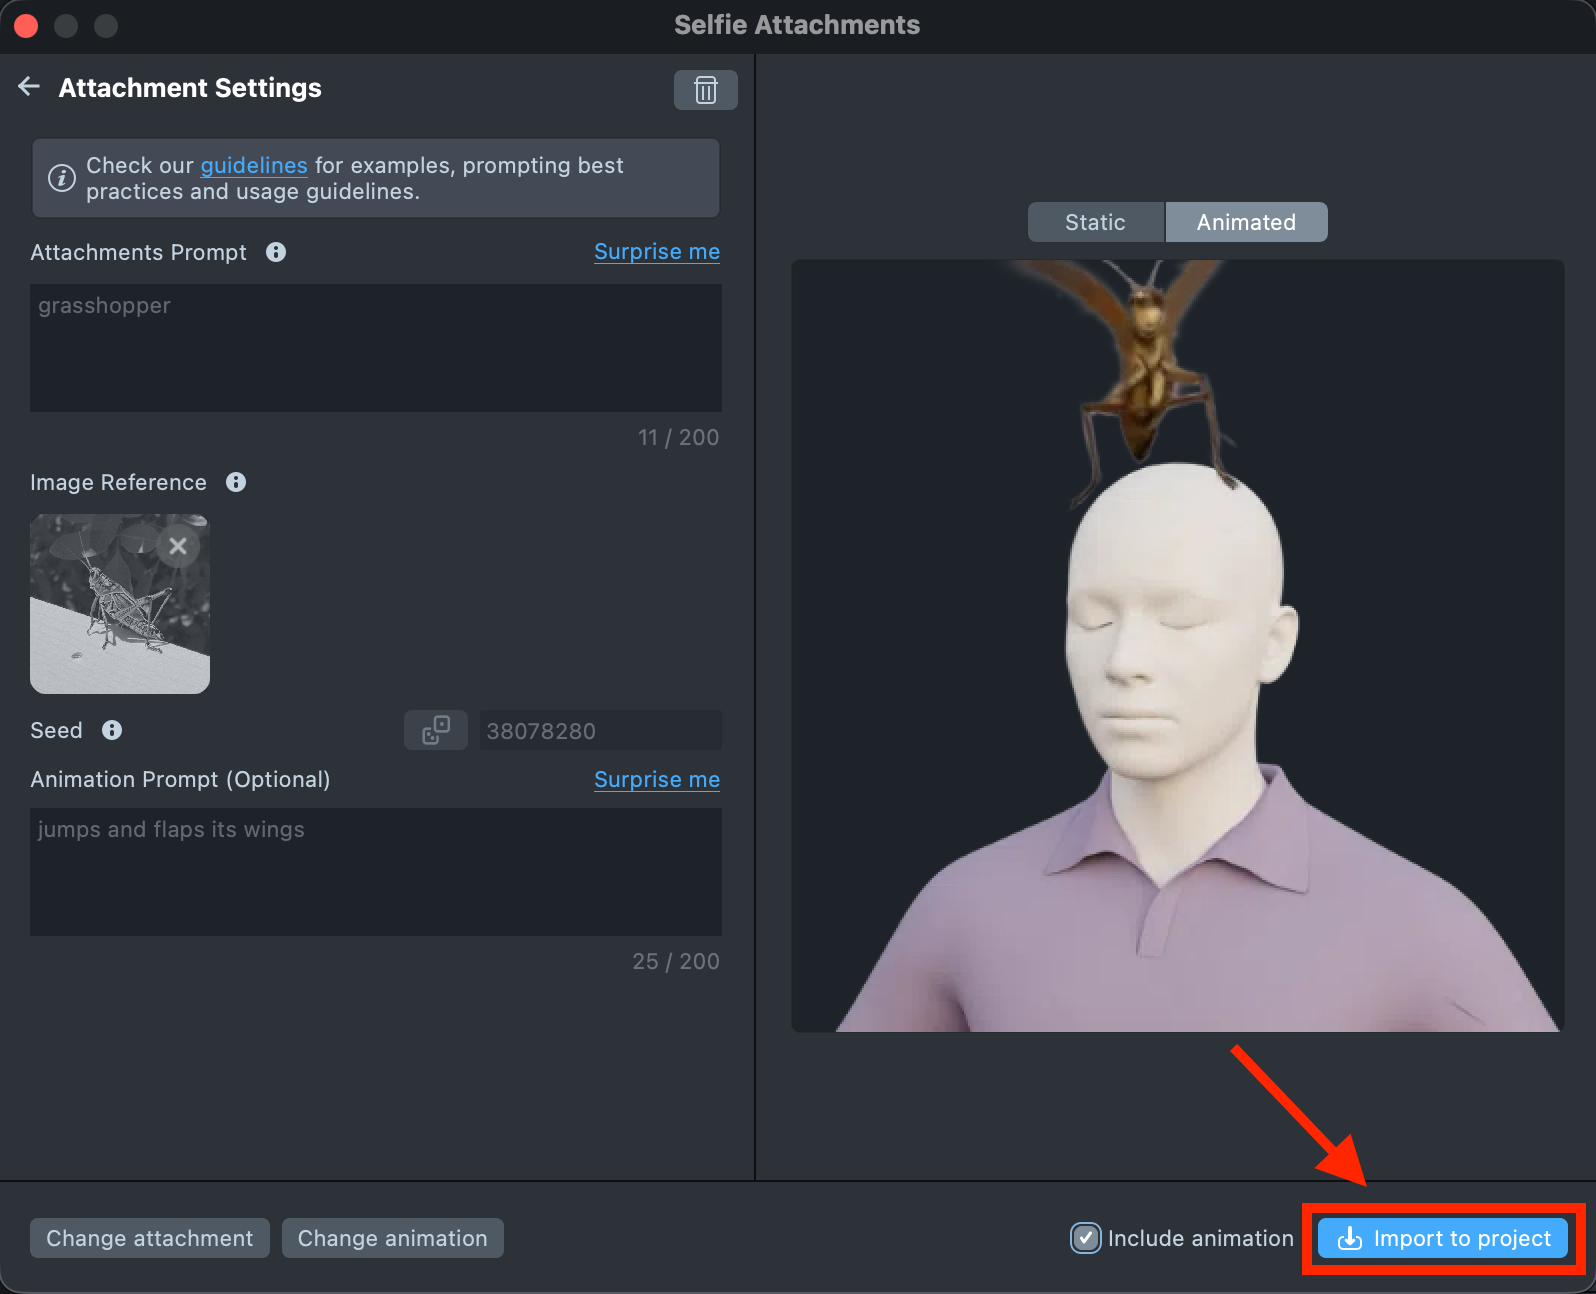
-
You can also animate any static attachments you previously created by clicking
Add animationand entering an animation prompt.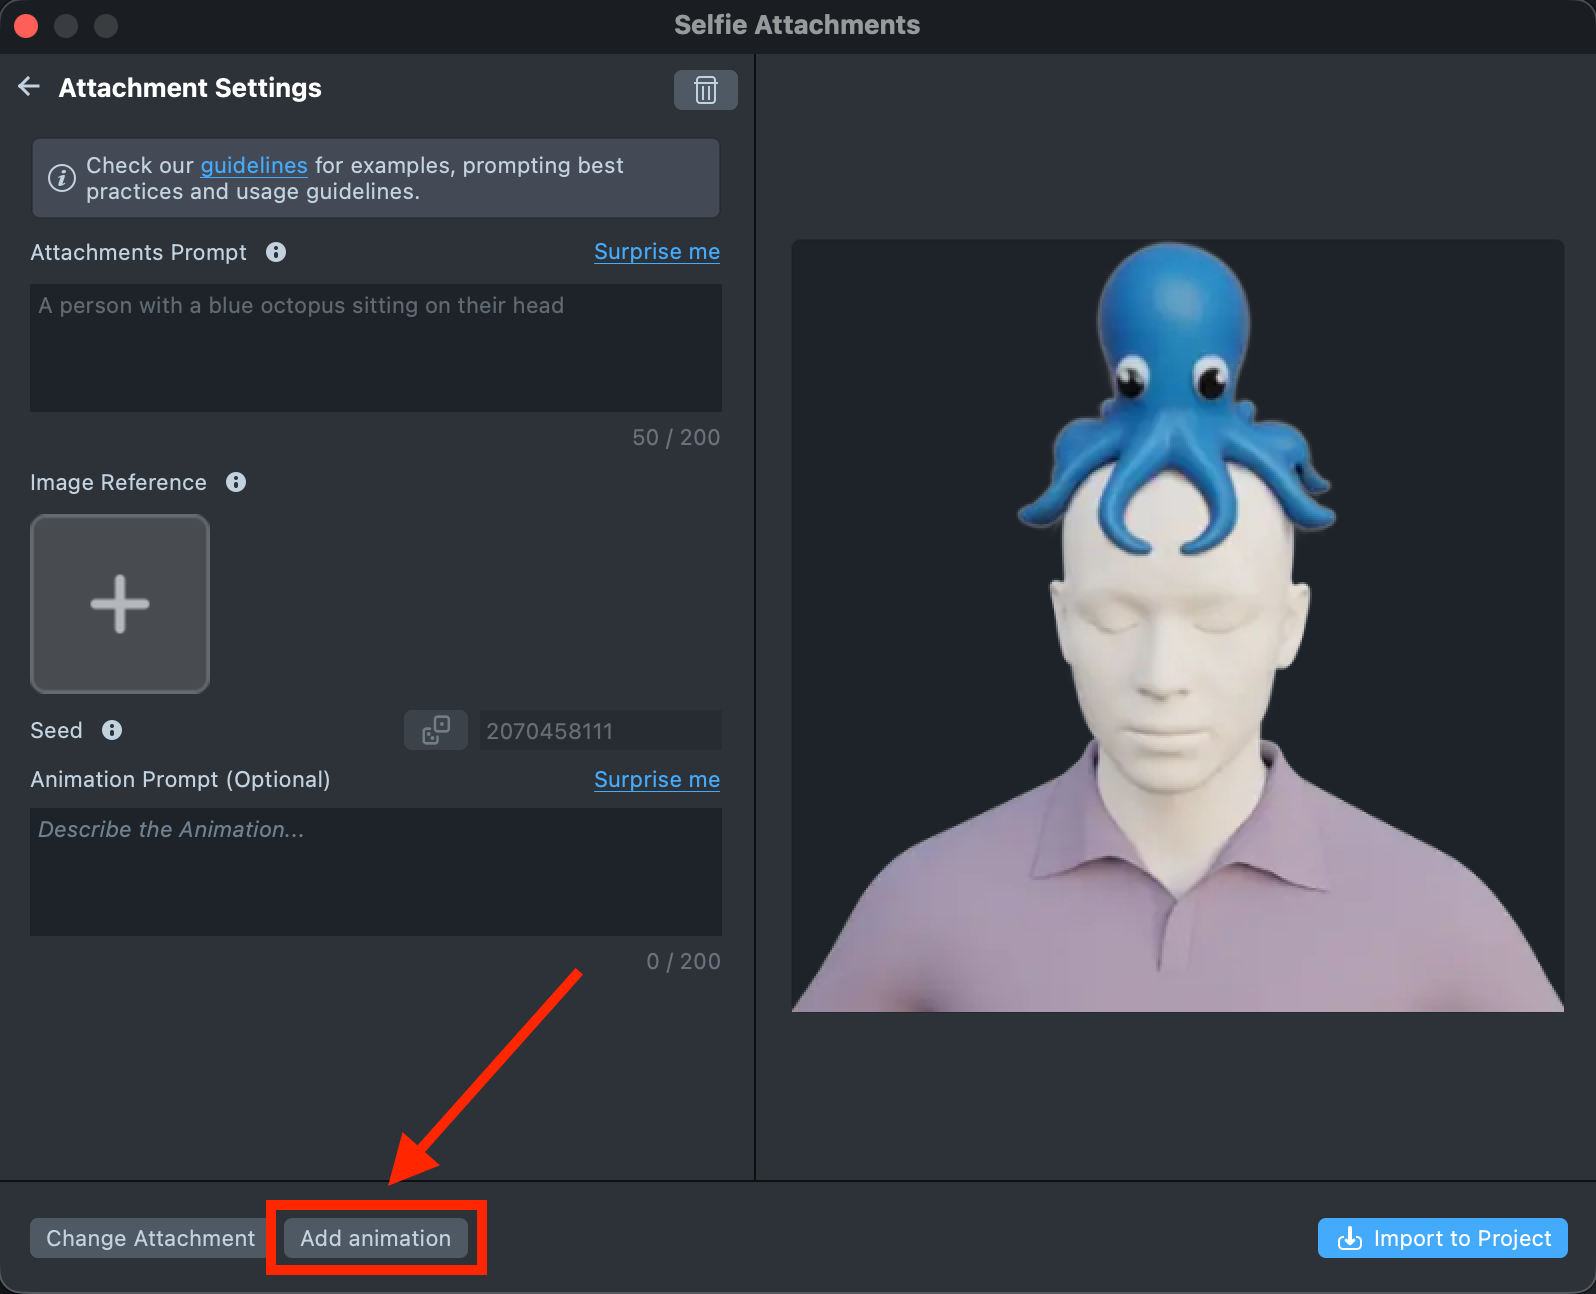
-
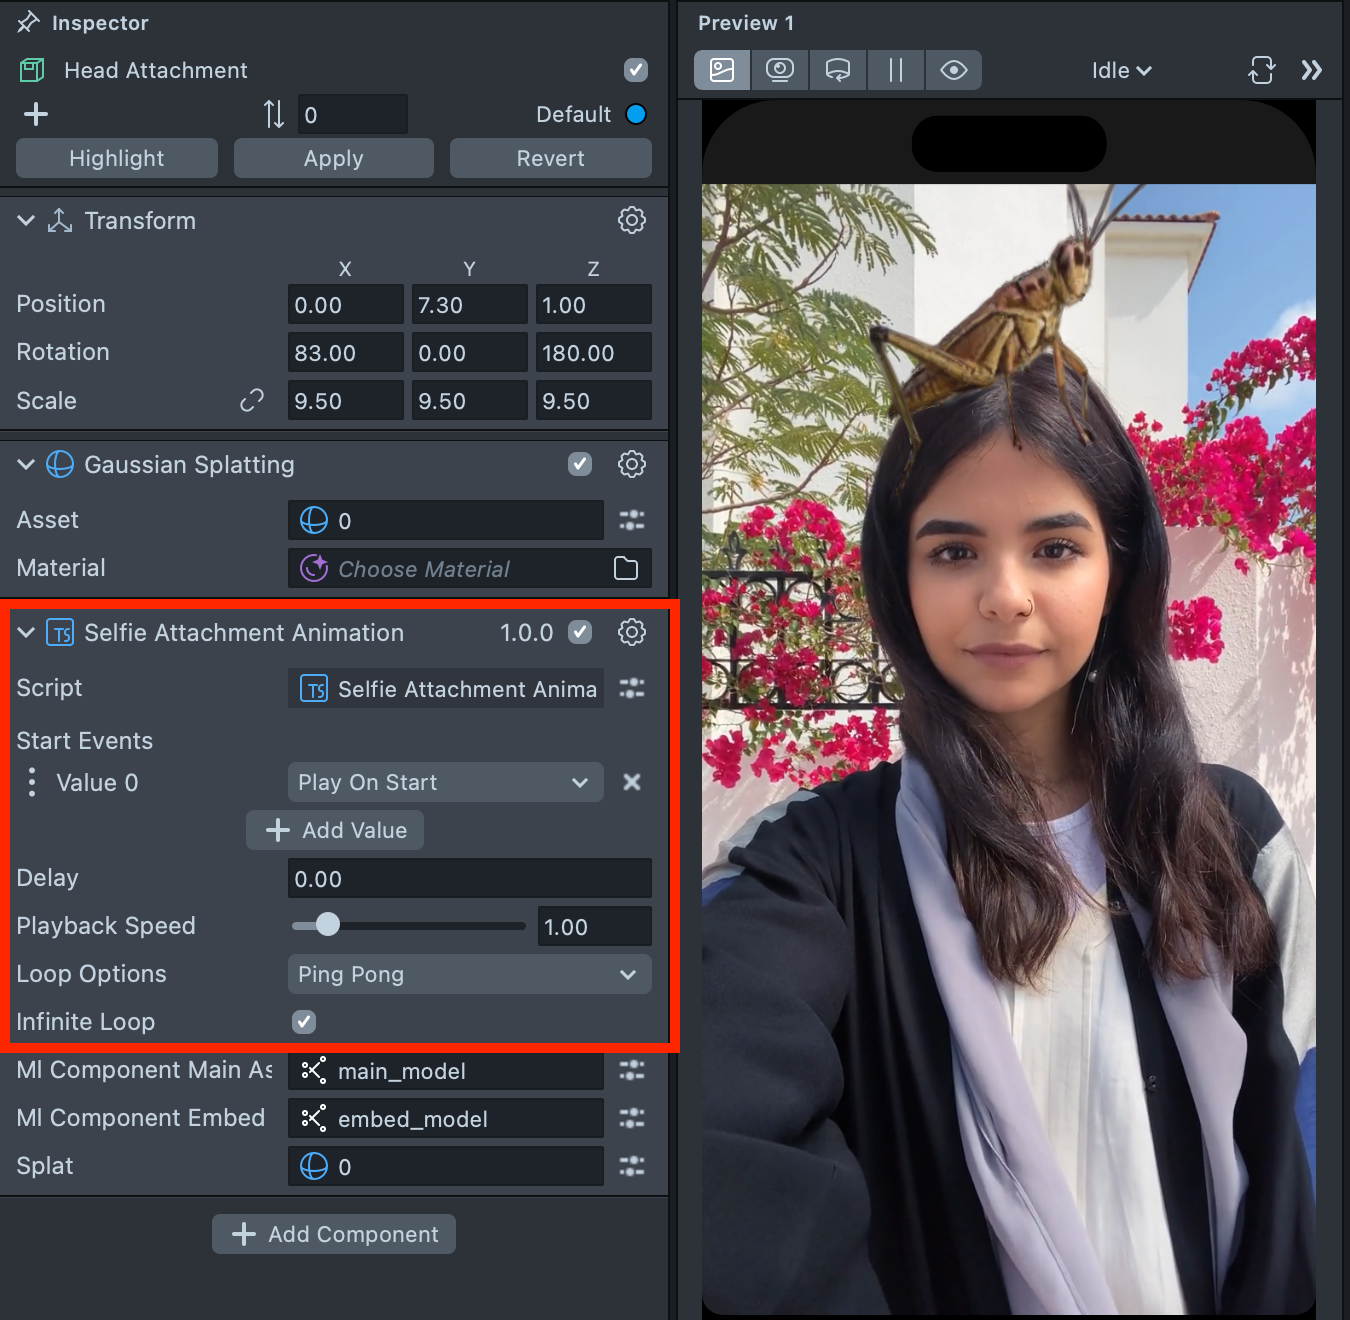
After you click
Import to Project, all necessary elements will be added to the Scene Hierarchy, including the component itself. The component provides the following options for configuring the animated attachment:
-
Start Events—Defines one or more events that trigger the animation.
-
Delay—Defines the delay time before the animation starts playing.
-
Playback Speed—Defines how fast the animation plays relative to its original speed.
-
Loop Options—Defines how the animation repeats, such as looping continuously or using a ping-pong motion.
-
Infinite Loop—Defines whether the animation plays endlessly without stopping.
- Follow this guide to learn how to combine Selfie Attachments with Style Generator, Head Generator and Zoom Component.
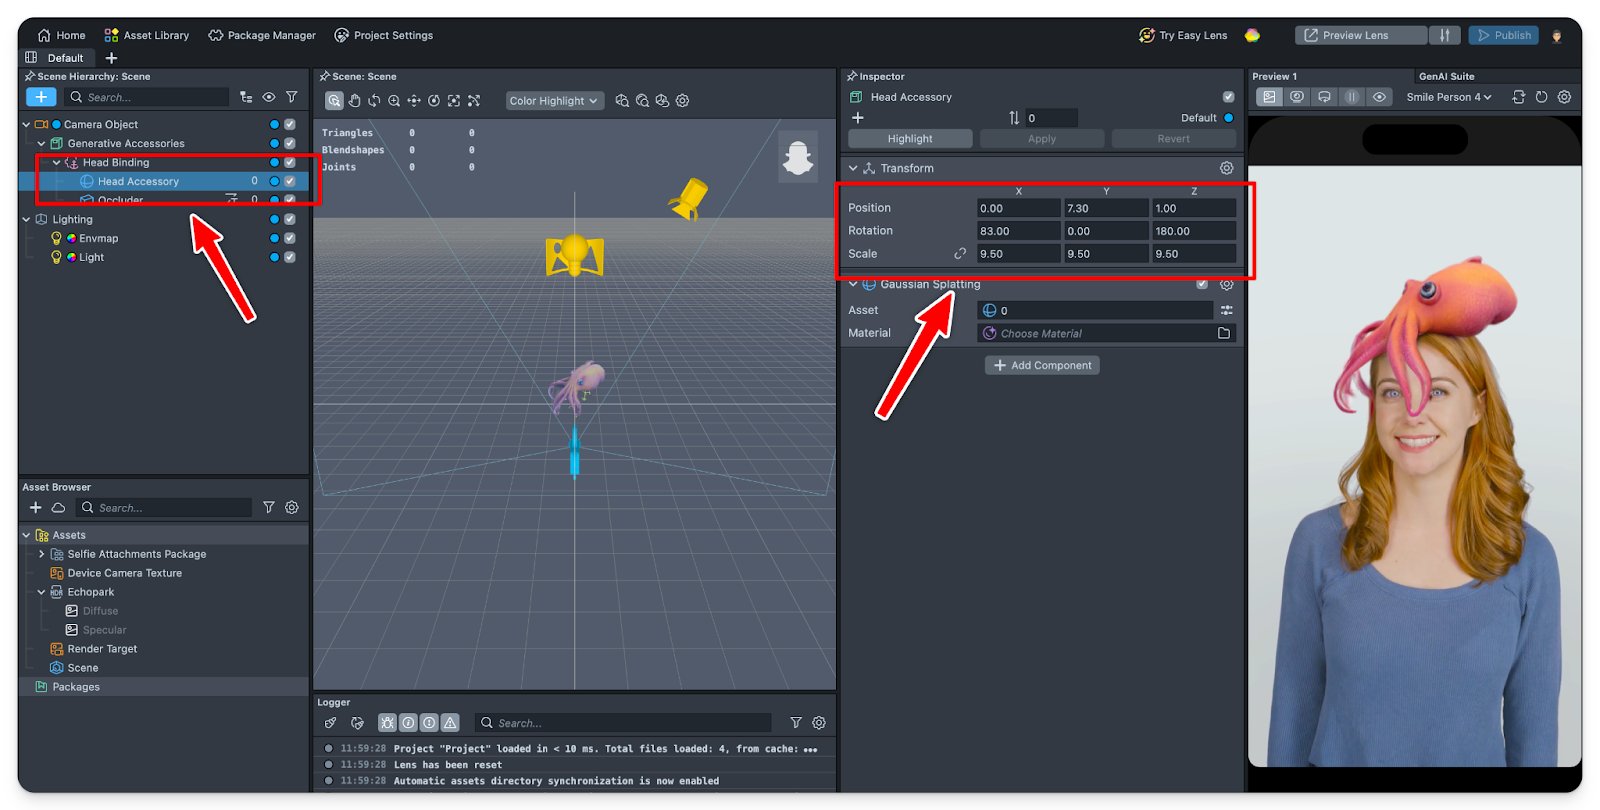
Pro tip #1: Adjusting the position of the Attachment
Sometimes, the attachment might be slightly misaligned with the resulting person. In this case, select your attachment in Scene Hierarchy and slightly tune the transform params as shown below.
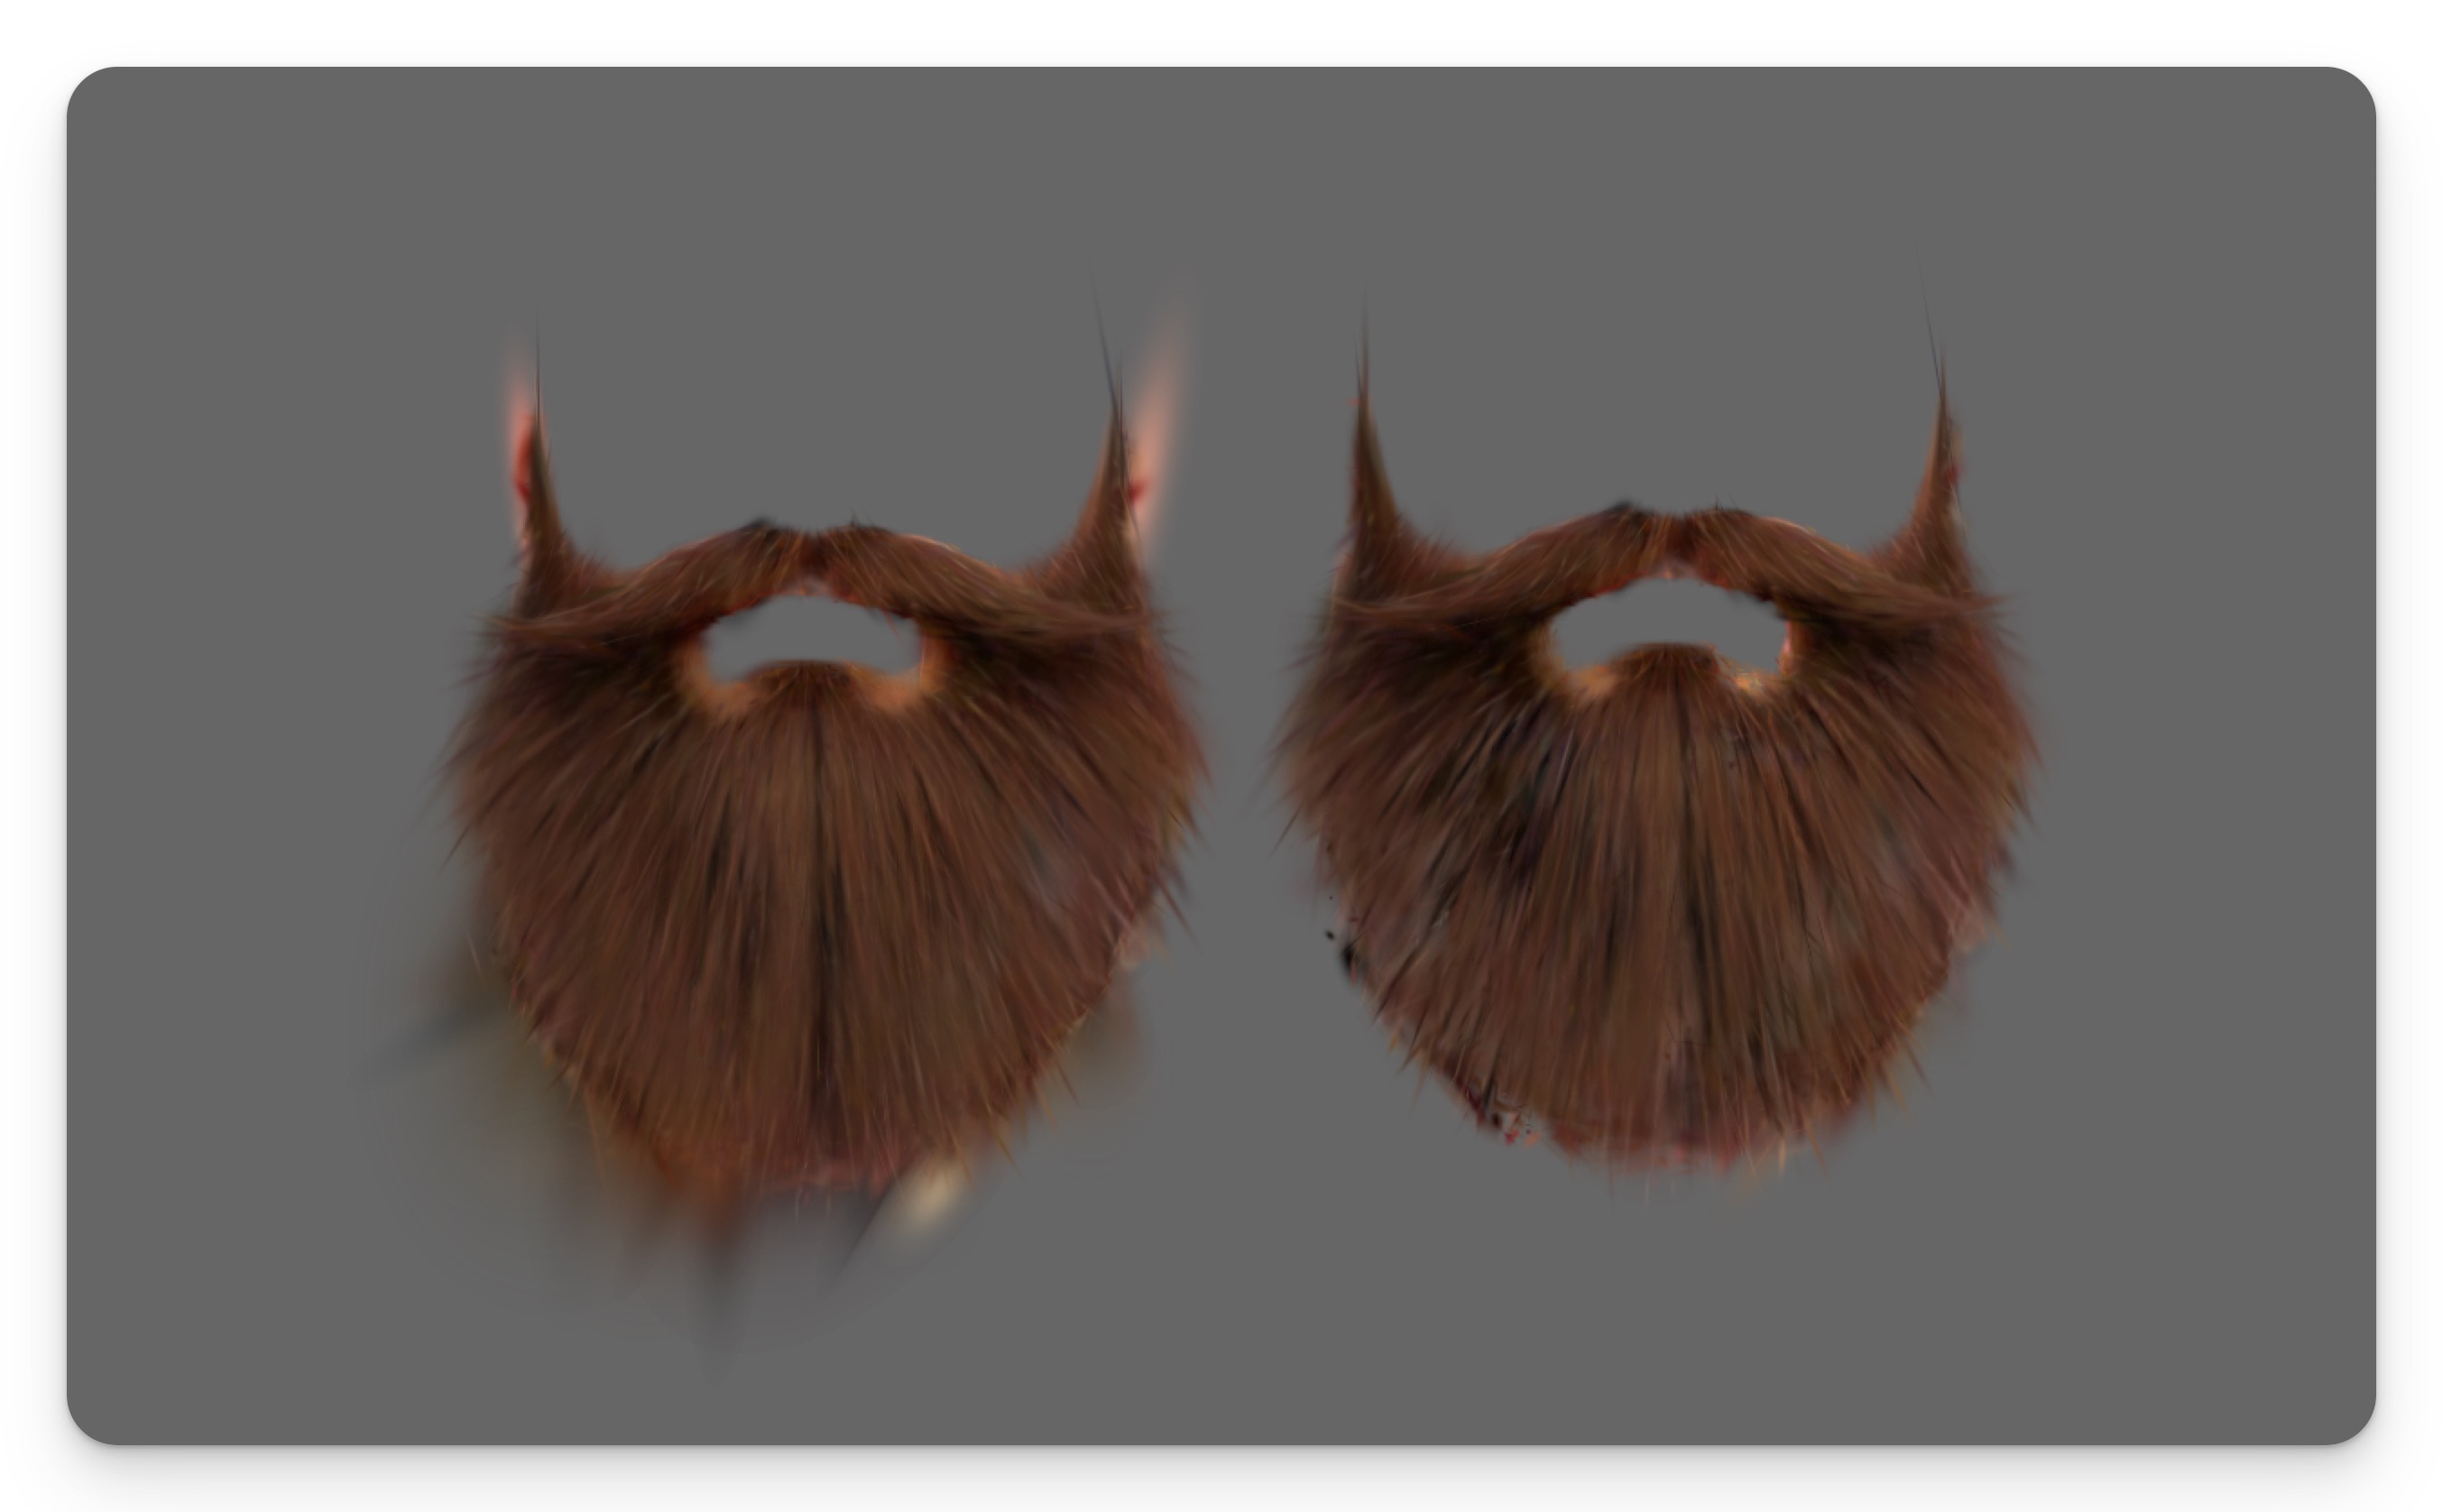
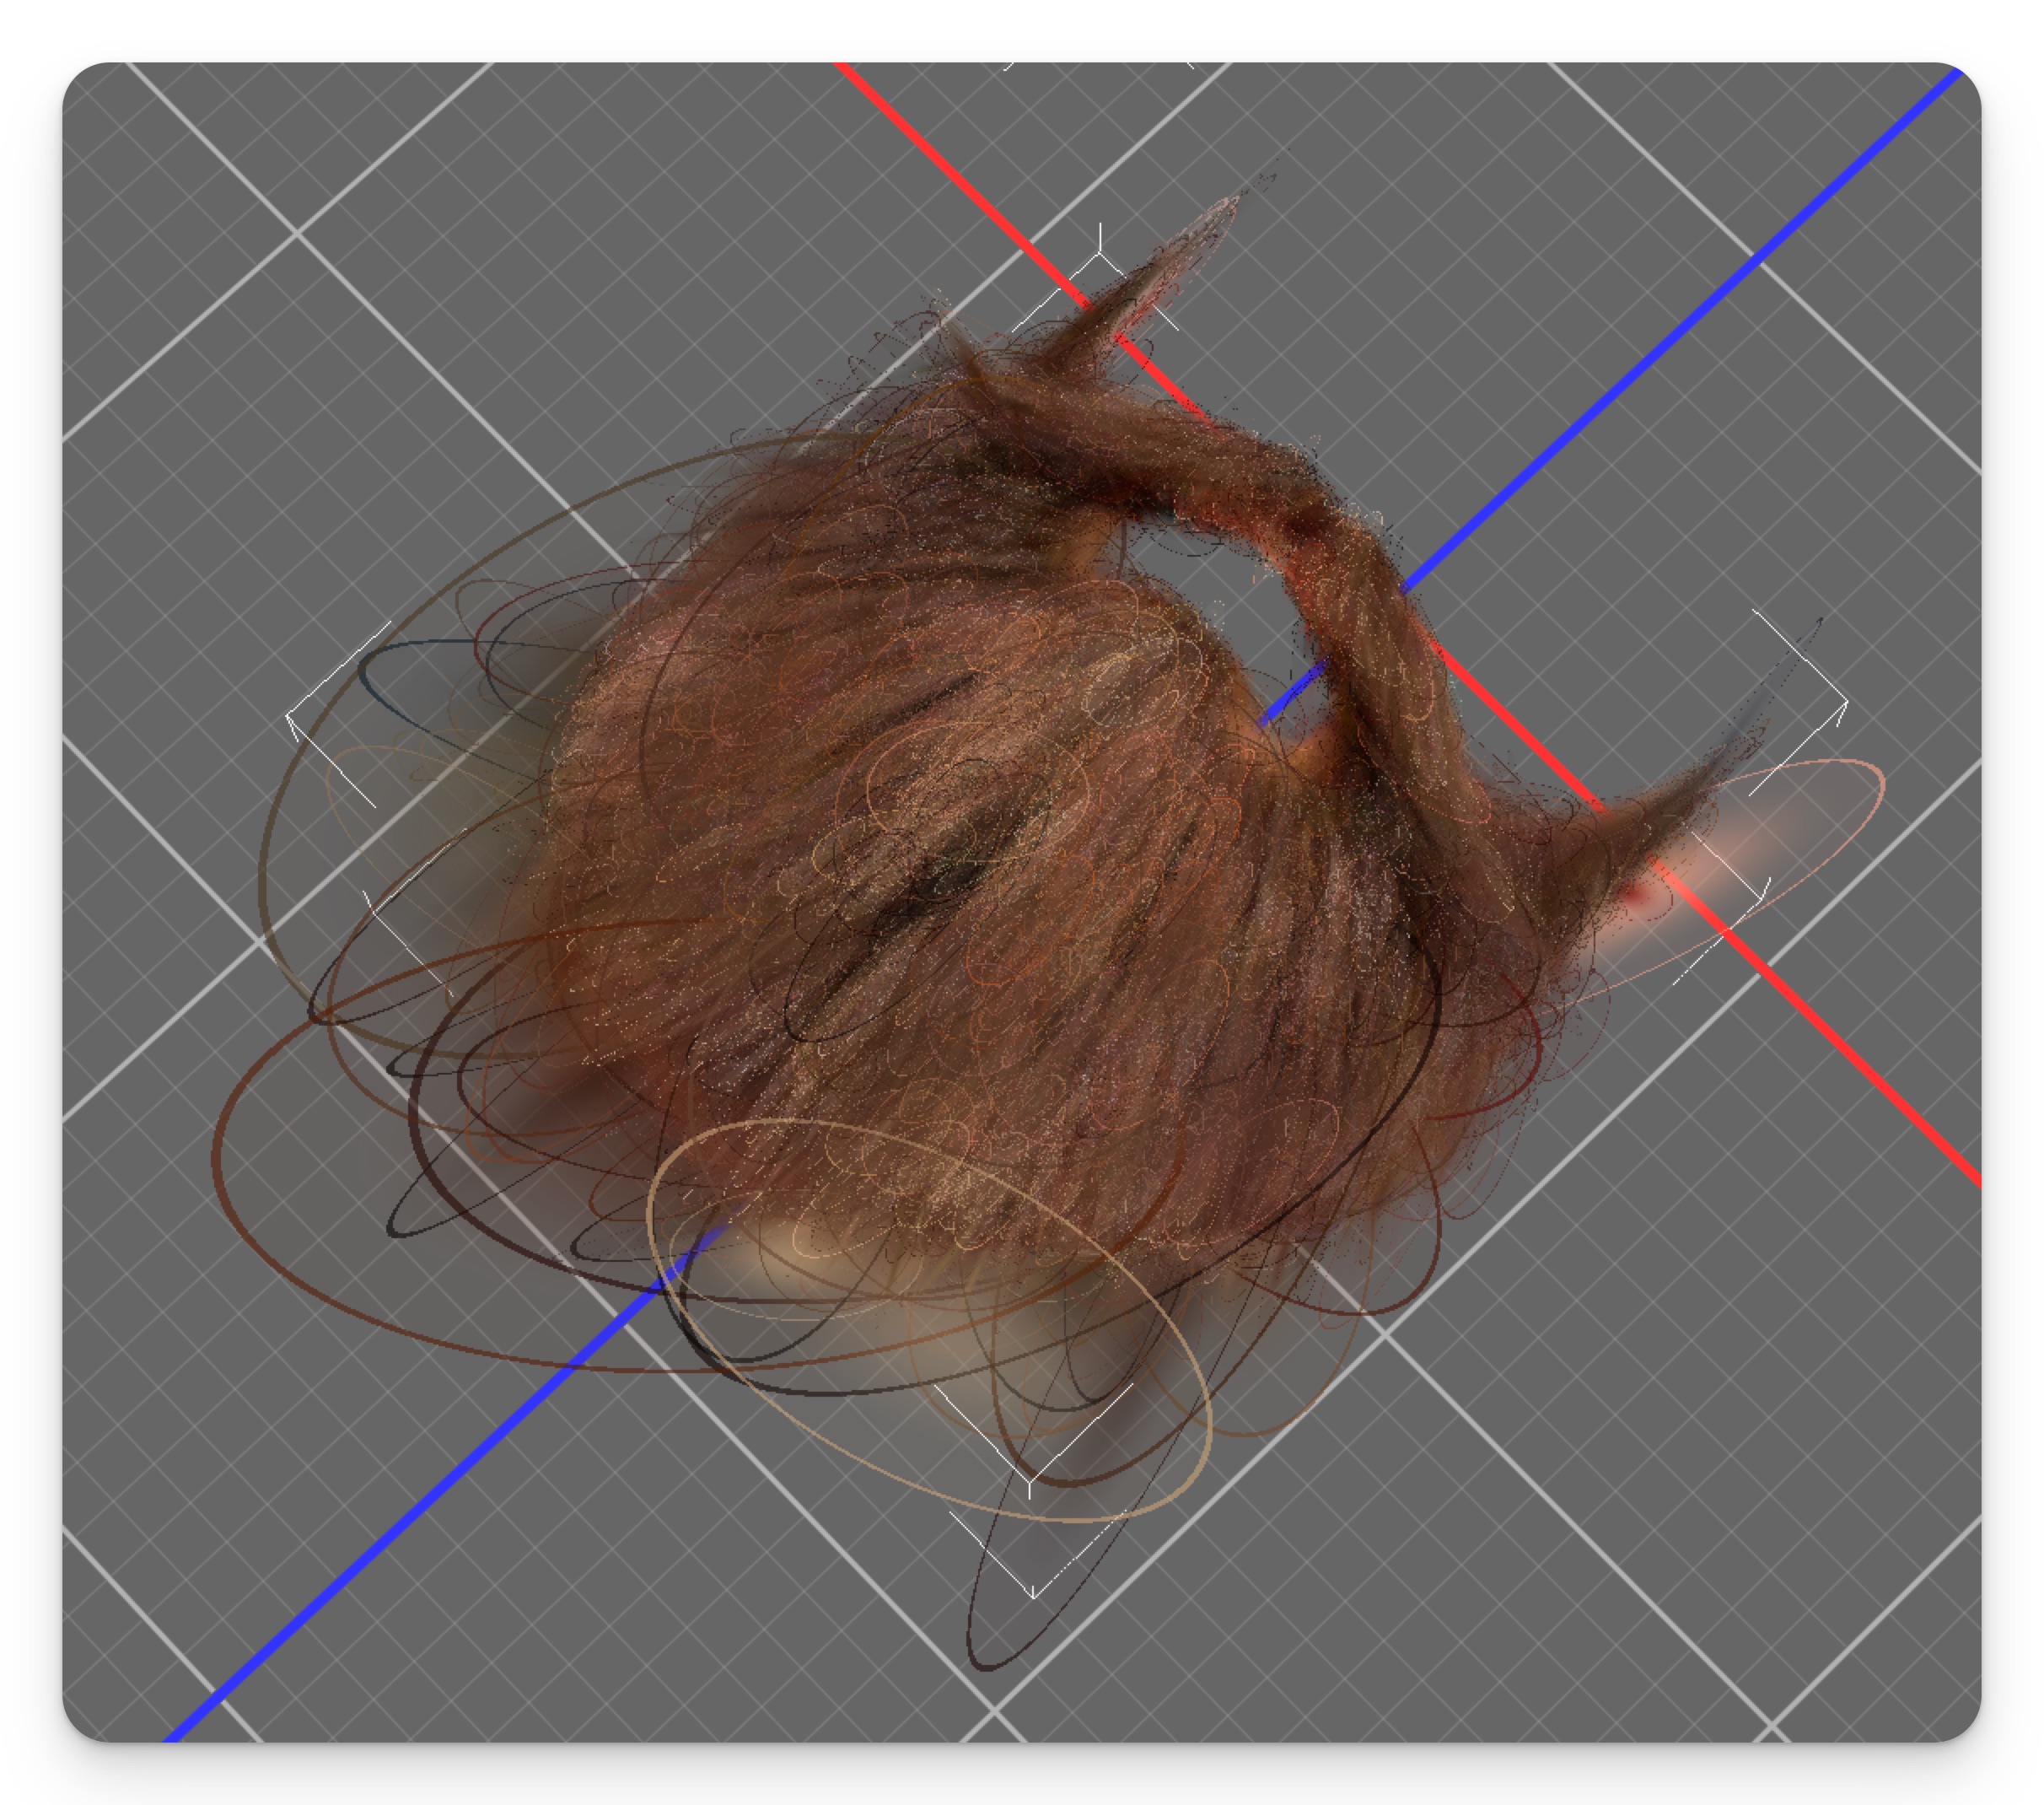
Pro Tip #2: Cleaning Up the Splats
Sometimes, the final attachment includes unwanted splats that clutter the asset. Luckily, you can clean them up manually. Here's a before/after example:
-
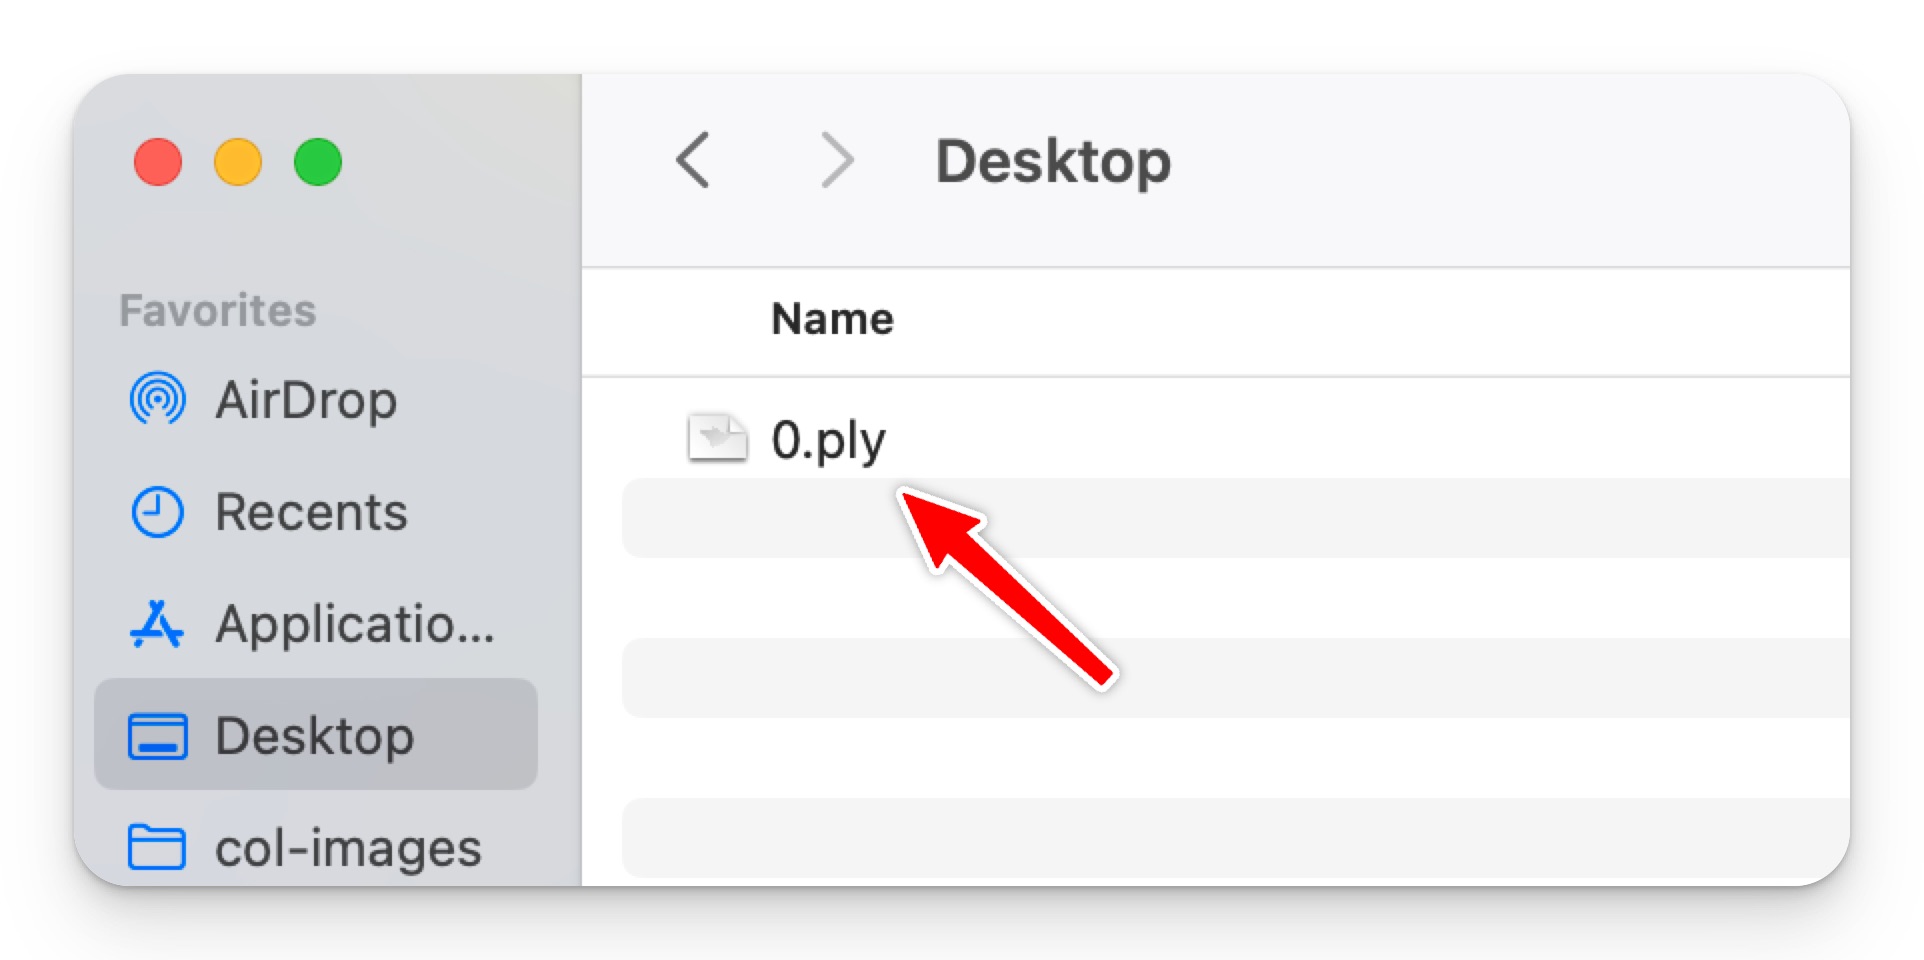
After generation, locate the splat (.ply) file in the
Asset Browsertab. Move it somewhere convenient to access (for example, Desktop).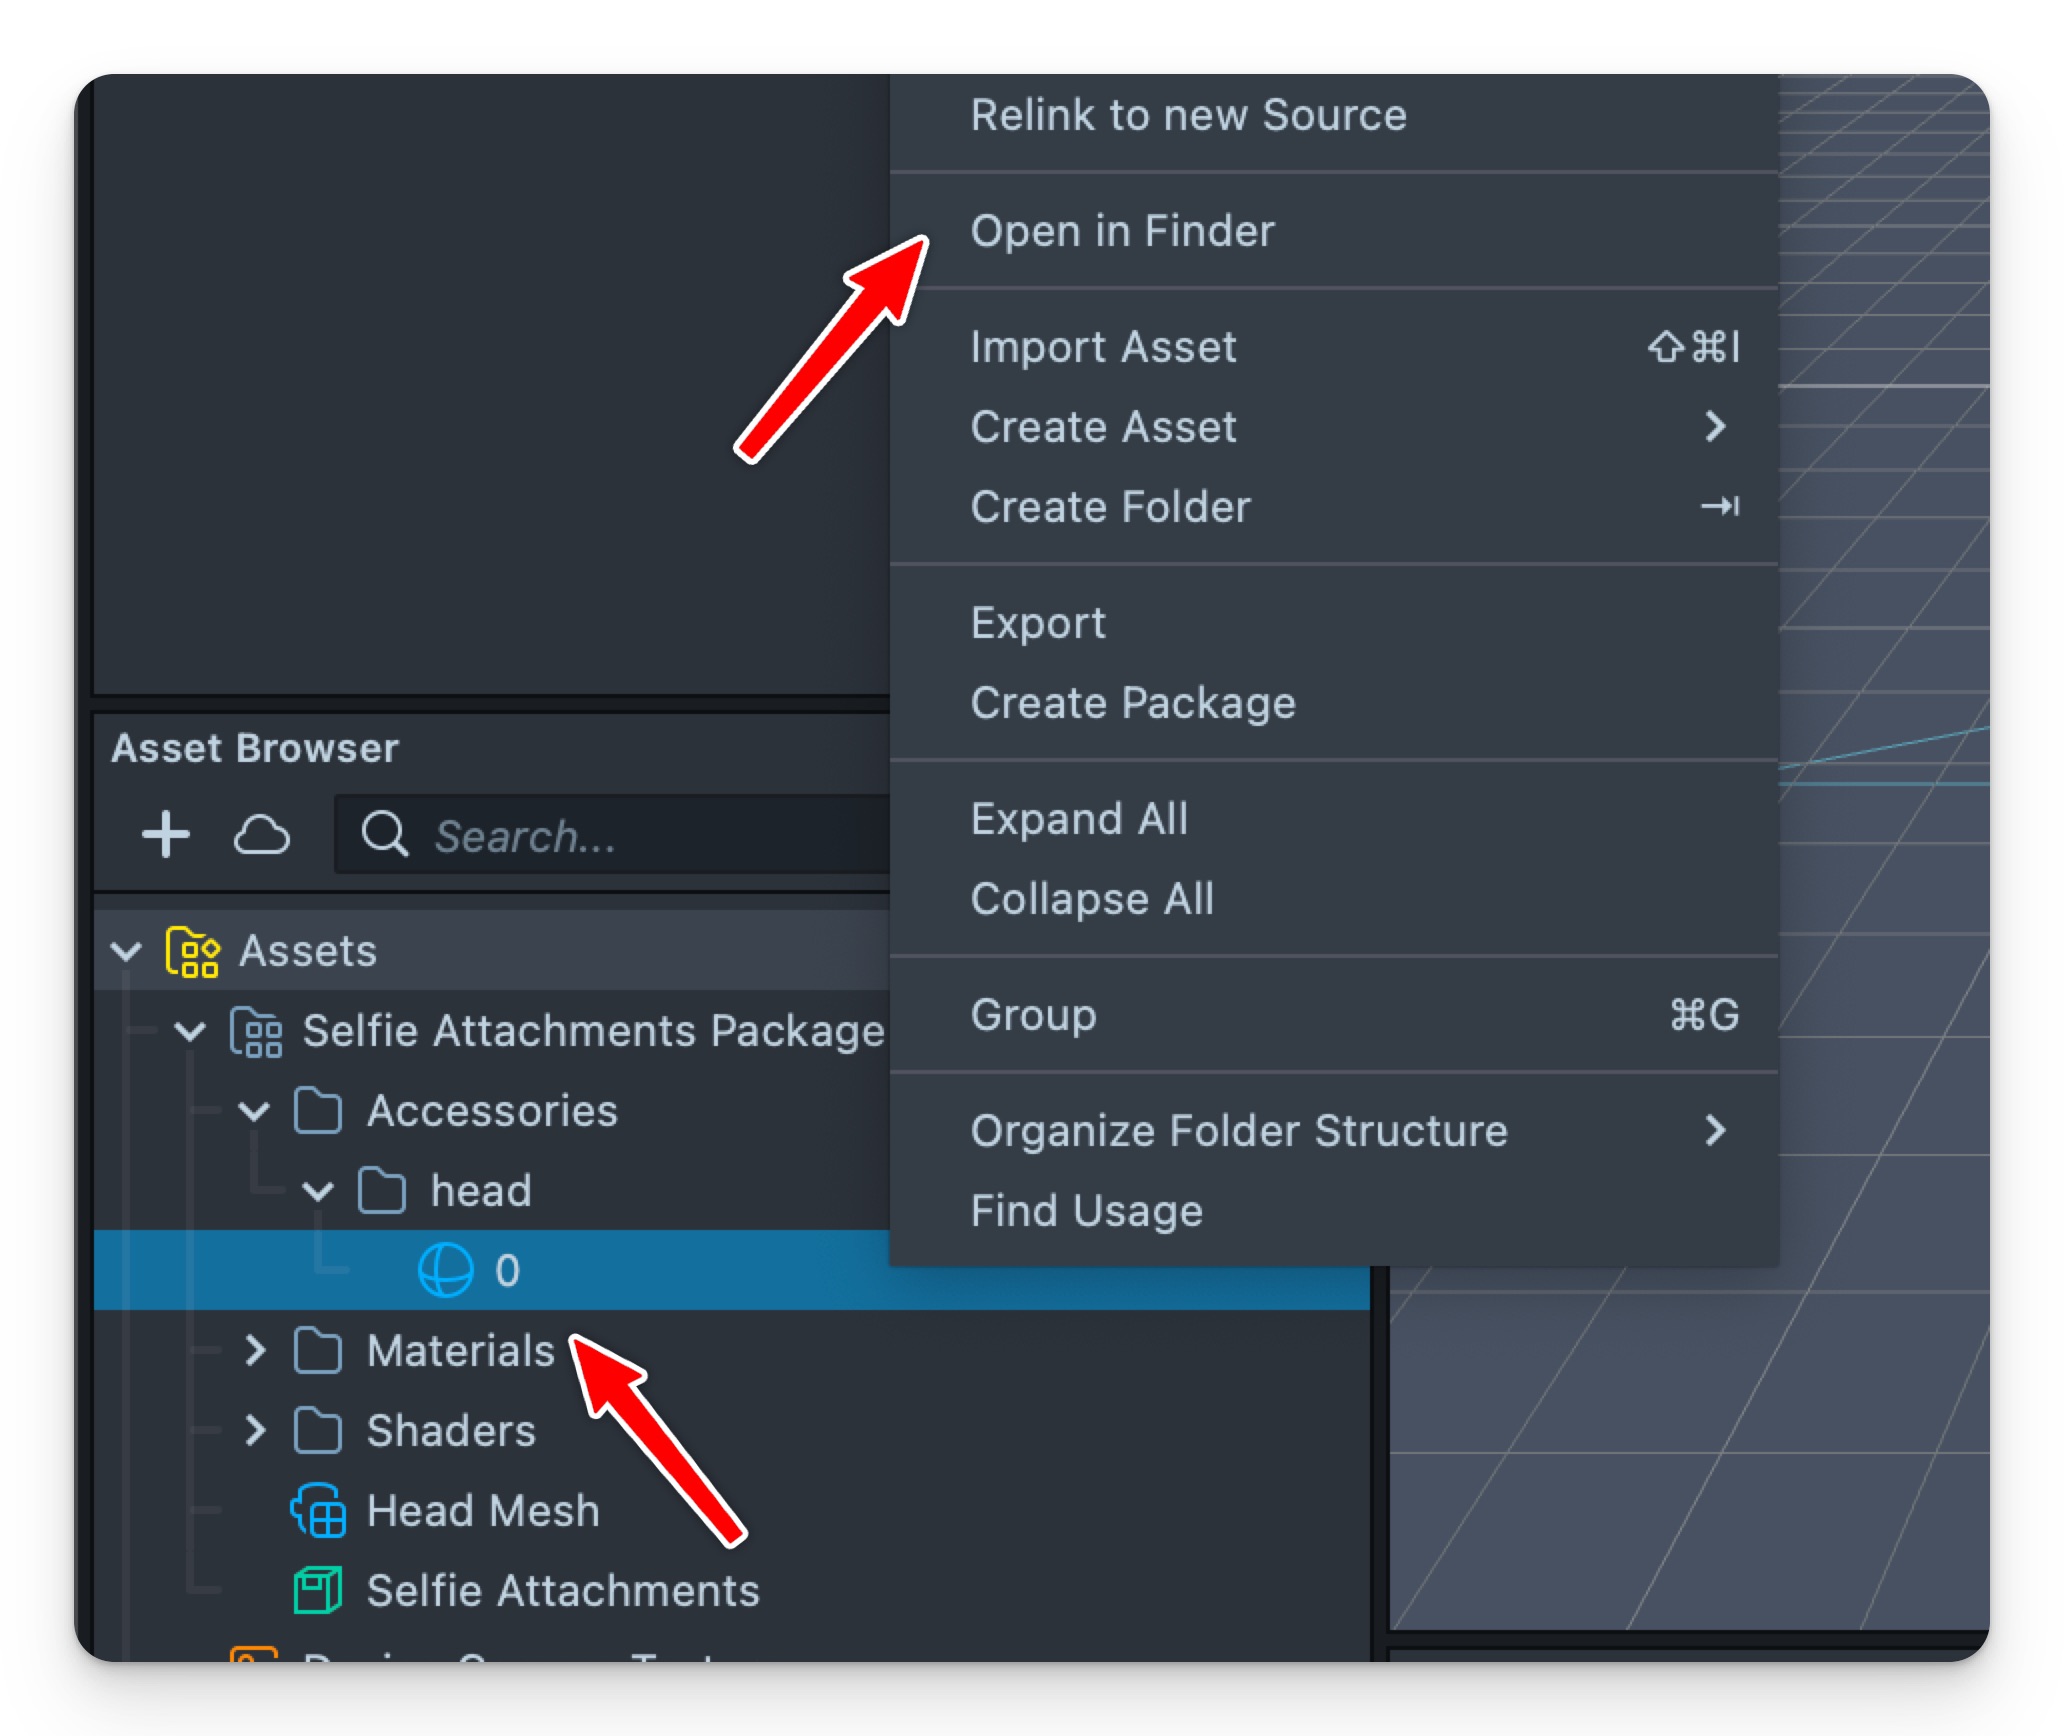
-
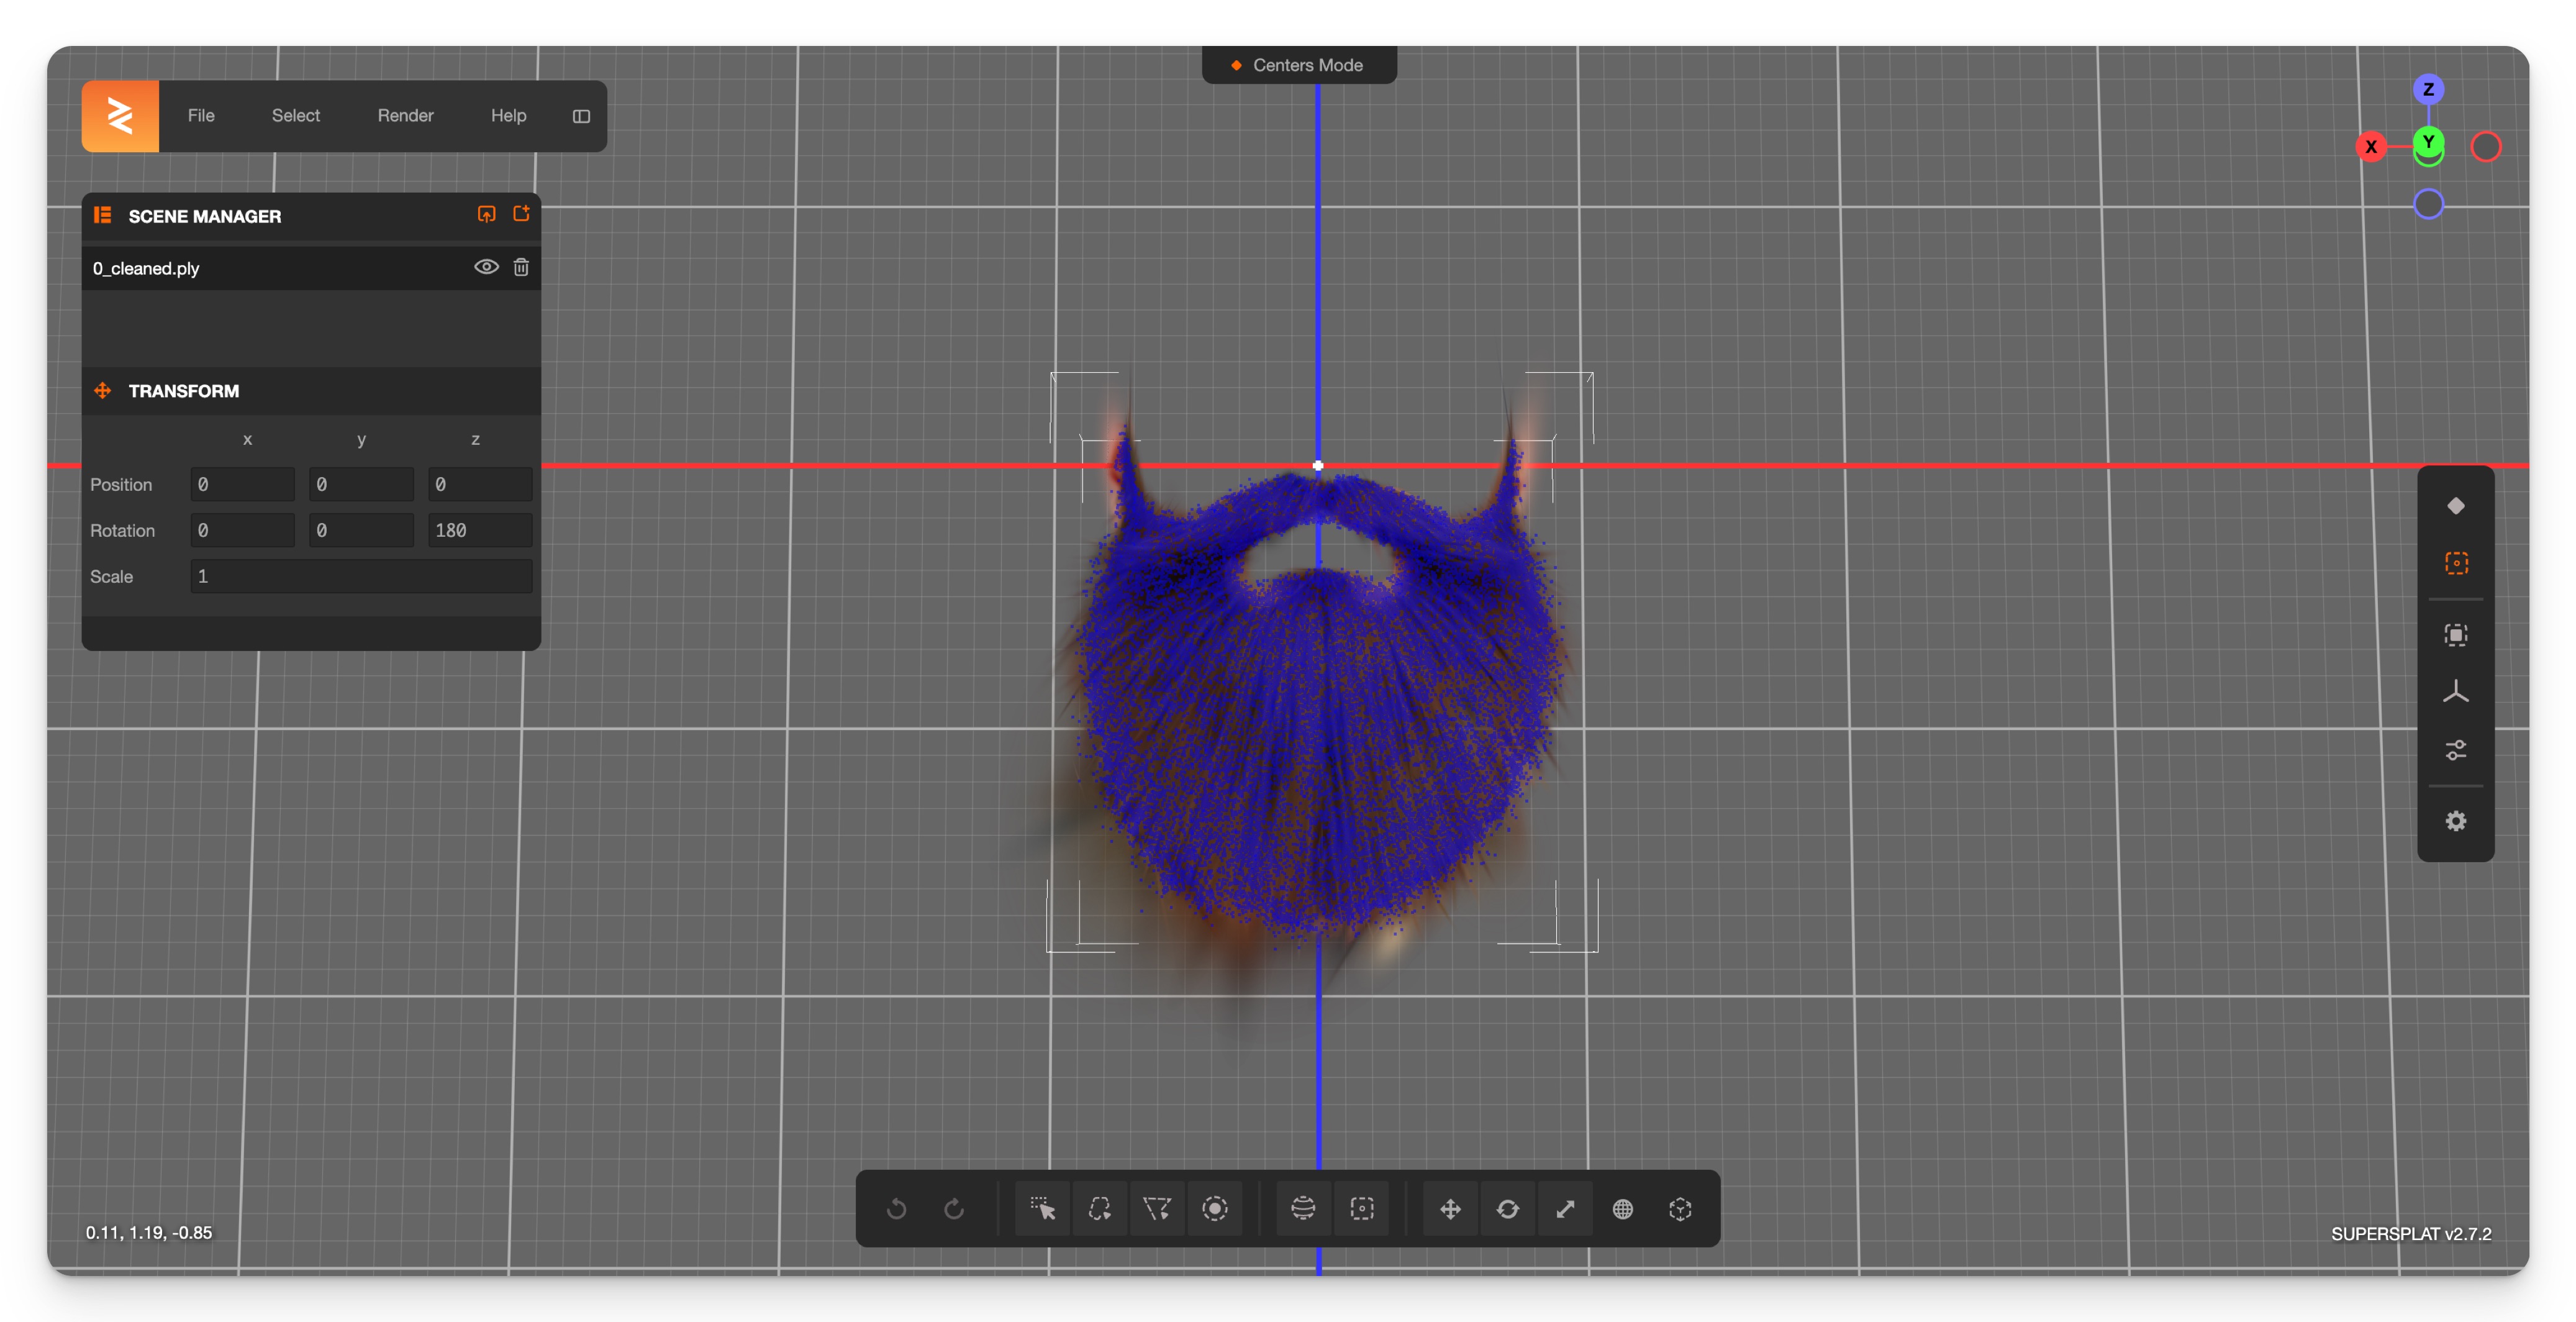
Open the Supersplat editor in your browser: https://superspl.at/editor. Drag and drop the .ply file into the canvas.
-
In the right panel, enable
Splat Mode.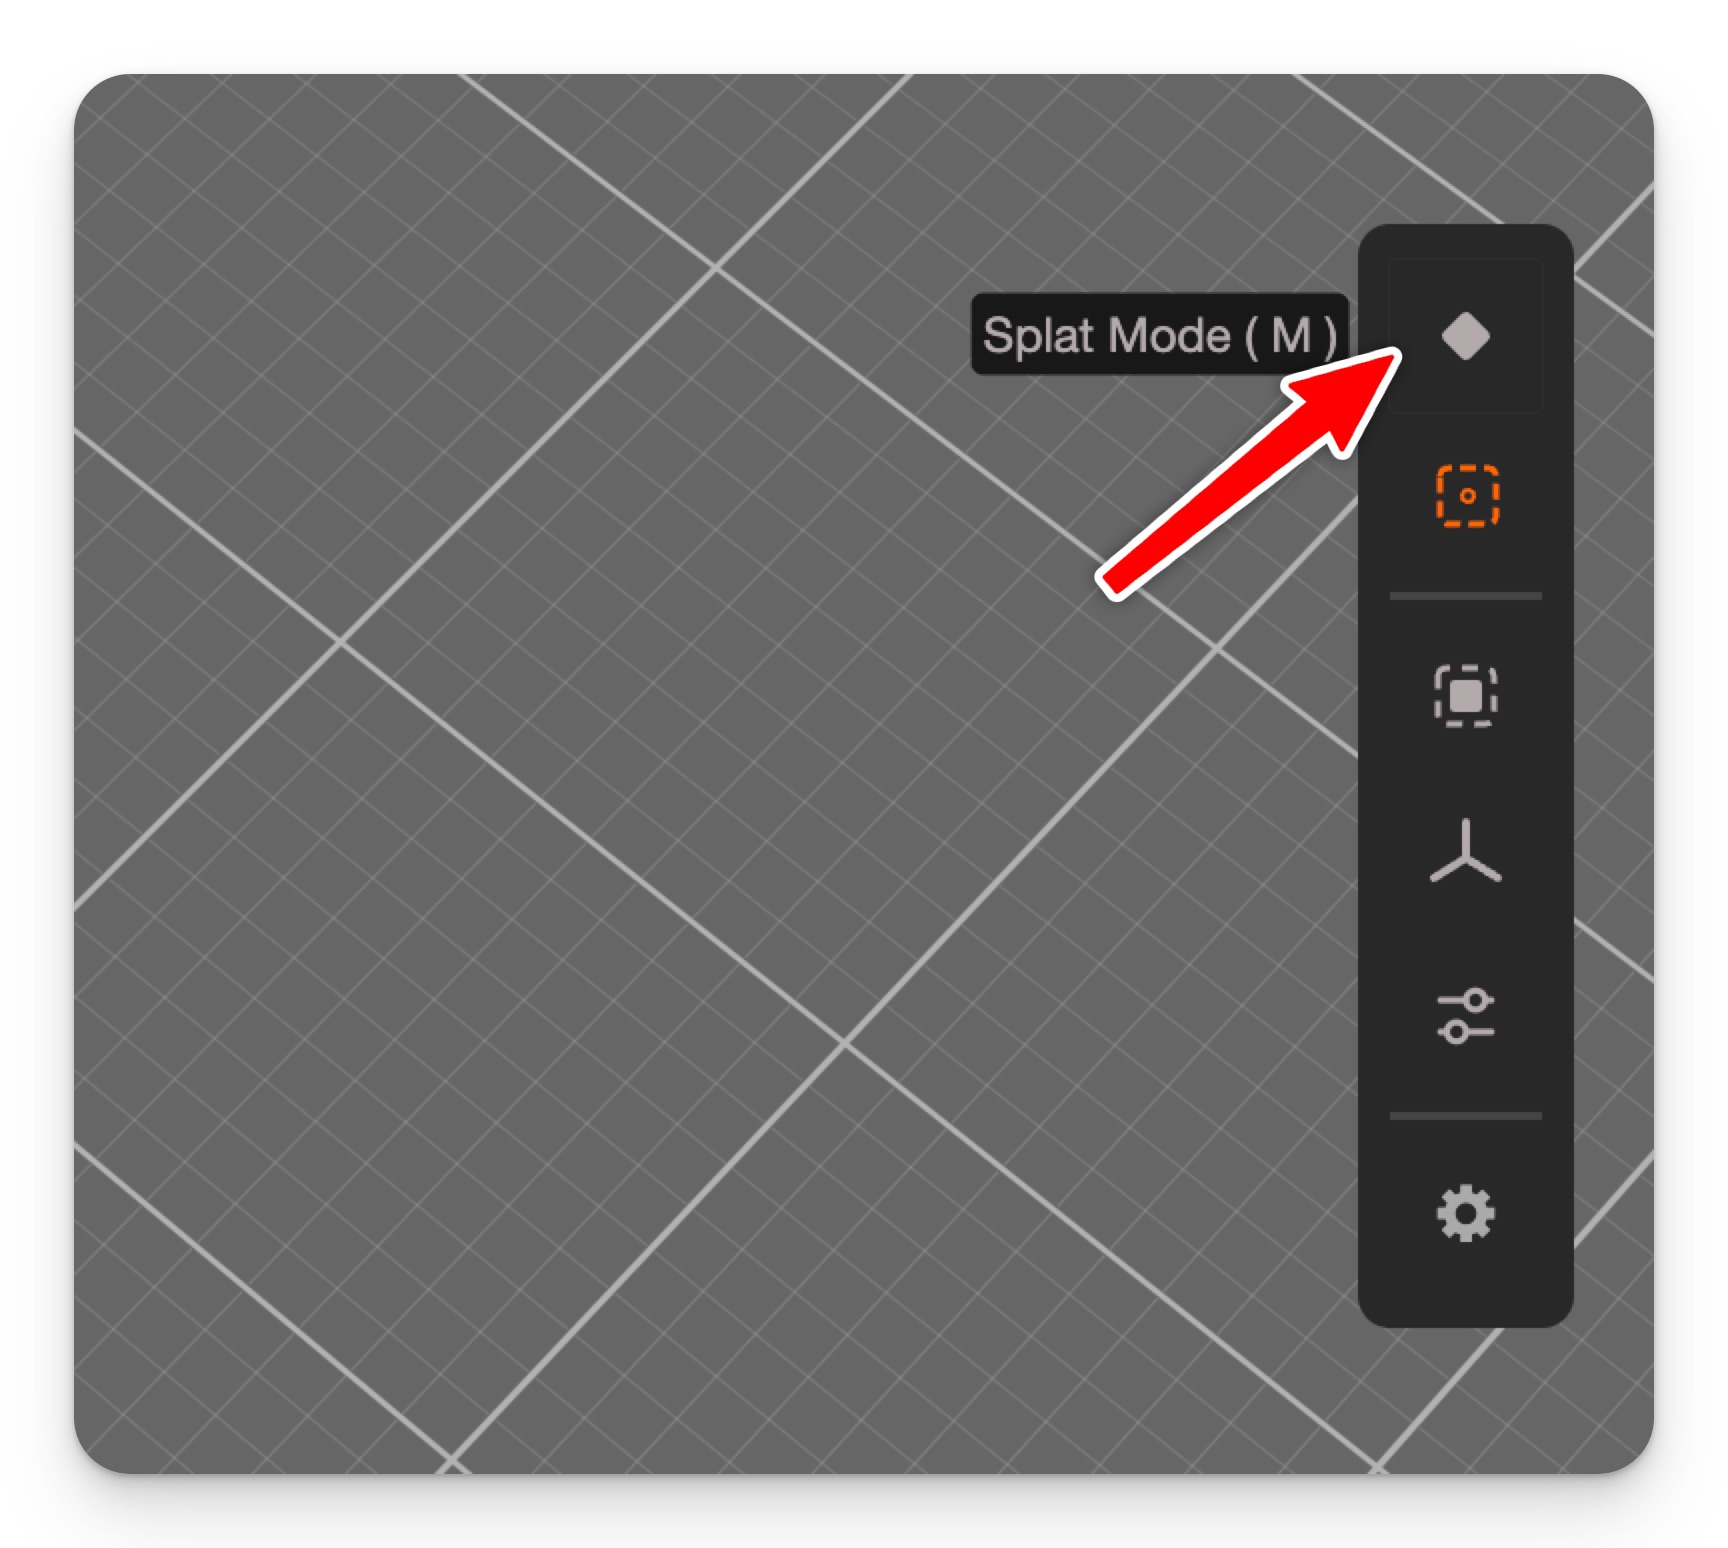
-
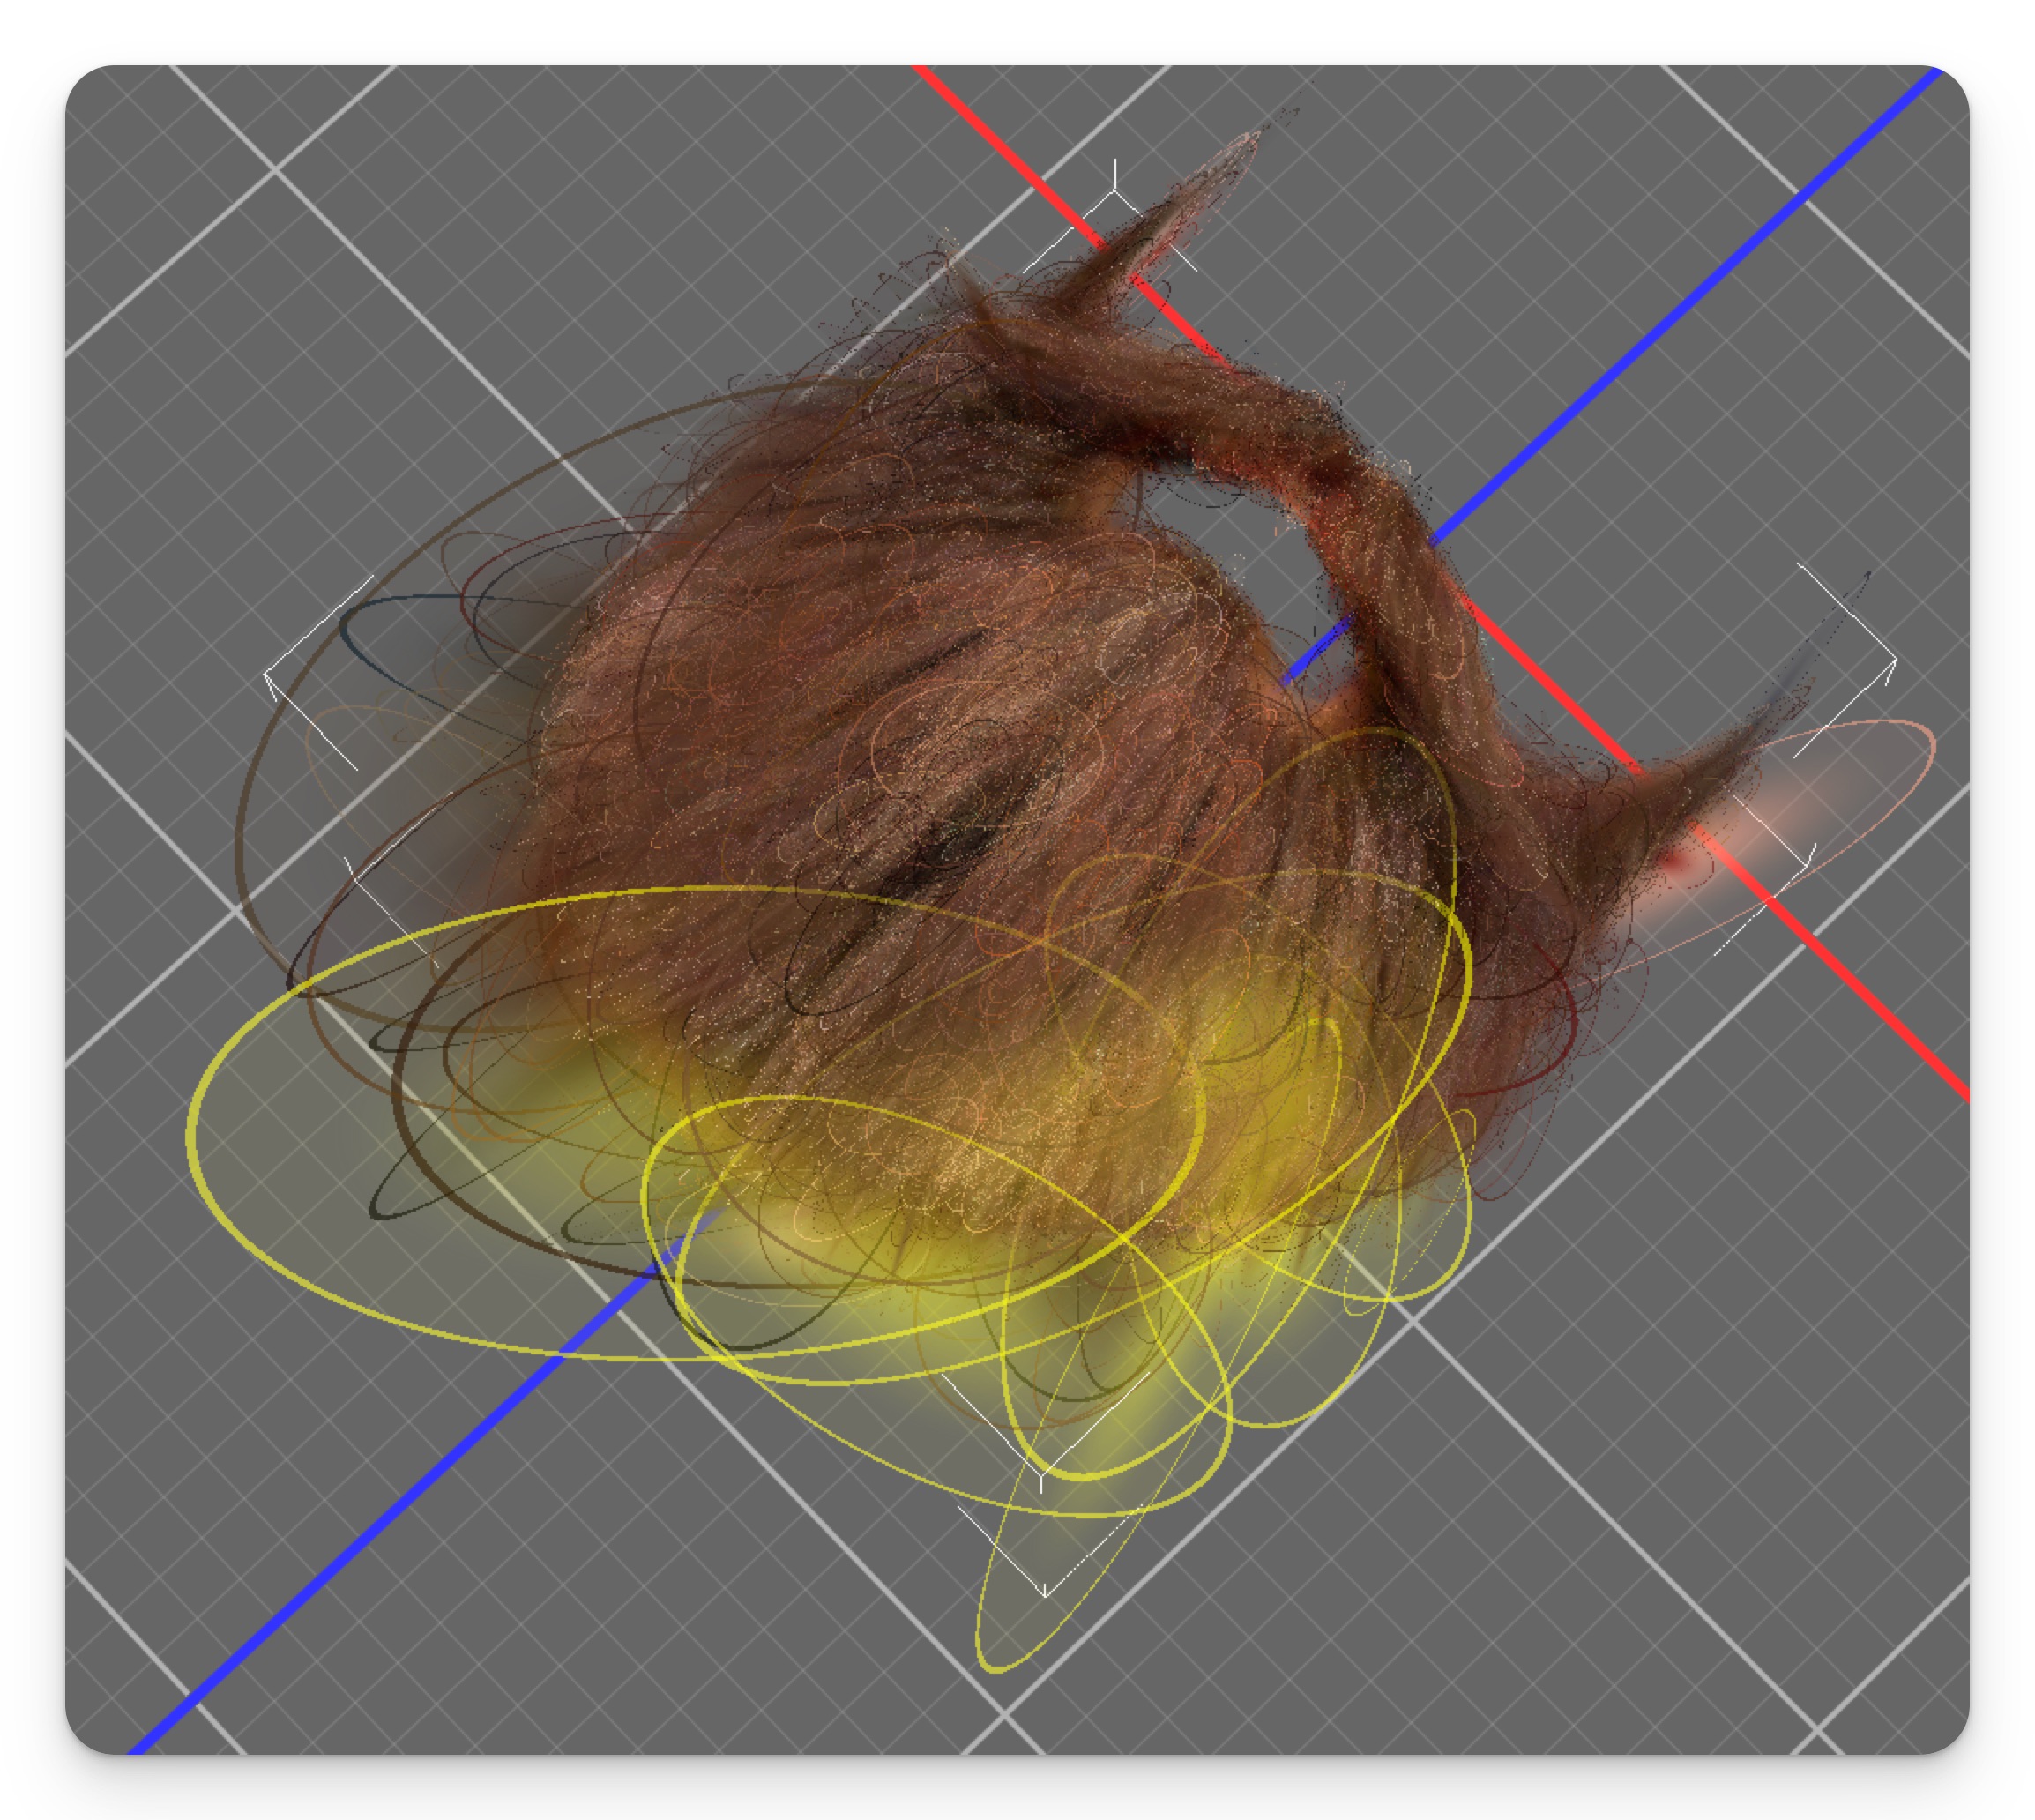
In the bottom panel, enable
Lasso Select(or another selection tool). Select the splats to delete. Tip: rotate the asset for better visibility.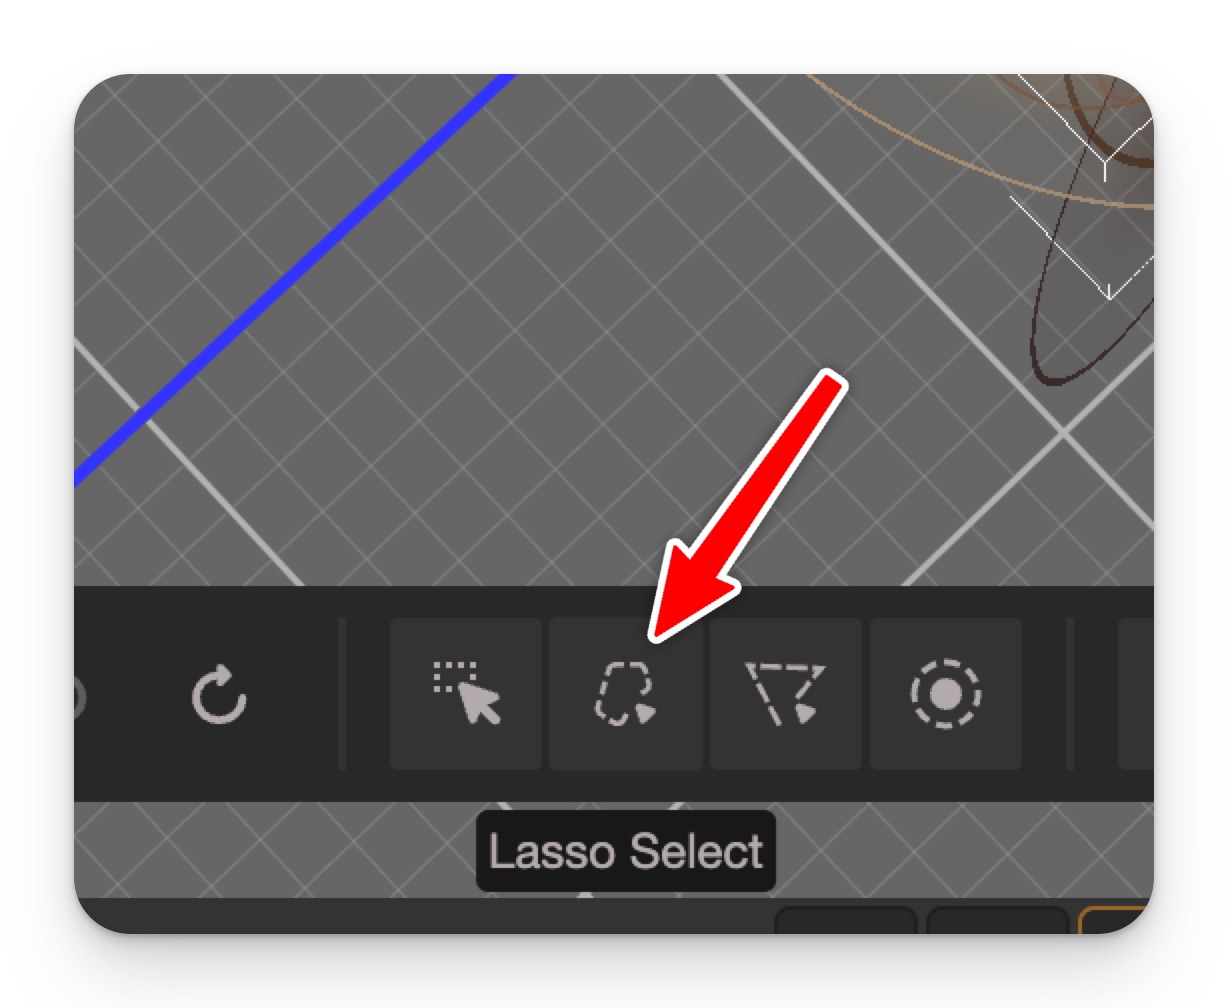
-
Press
<Backspace>orDeleteto remove selected splats. Repeat until you're happy with the result. -
Export the cleaned splat.
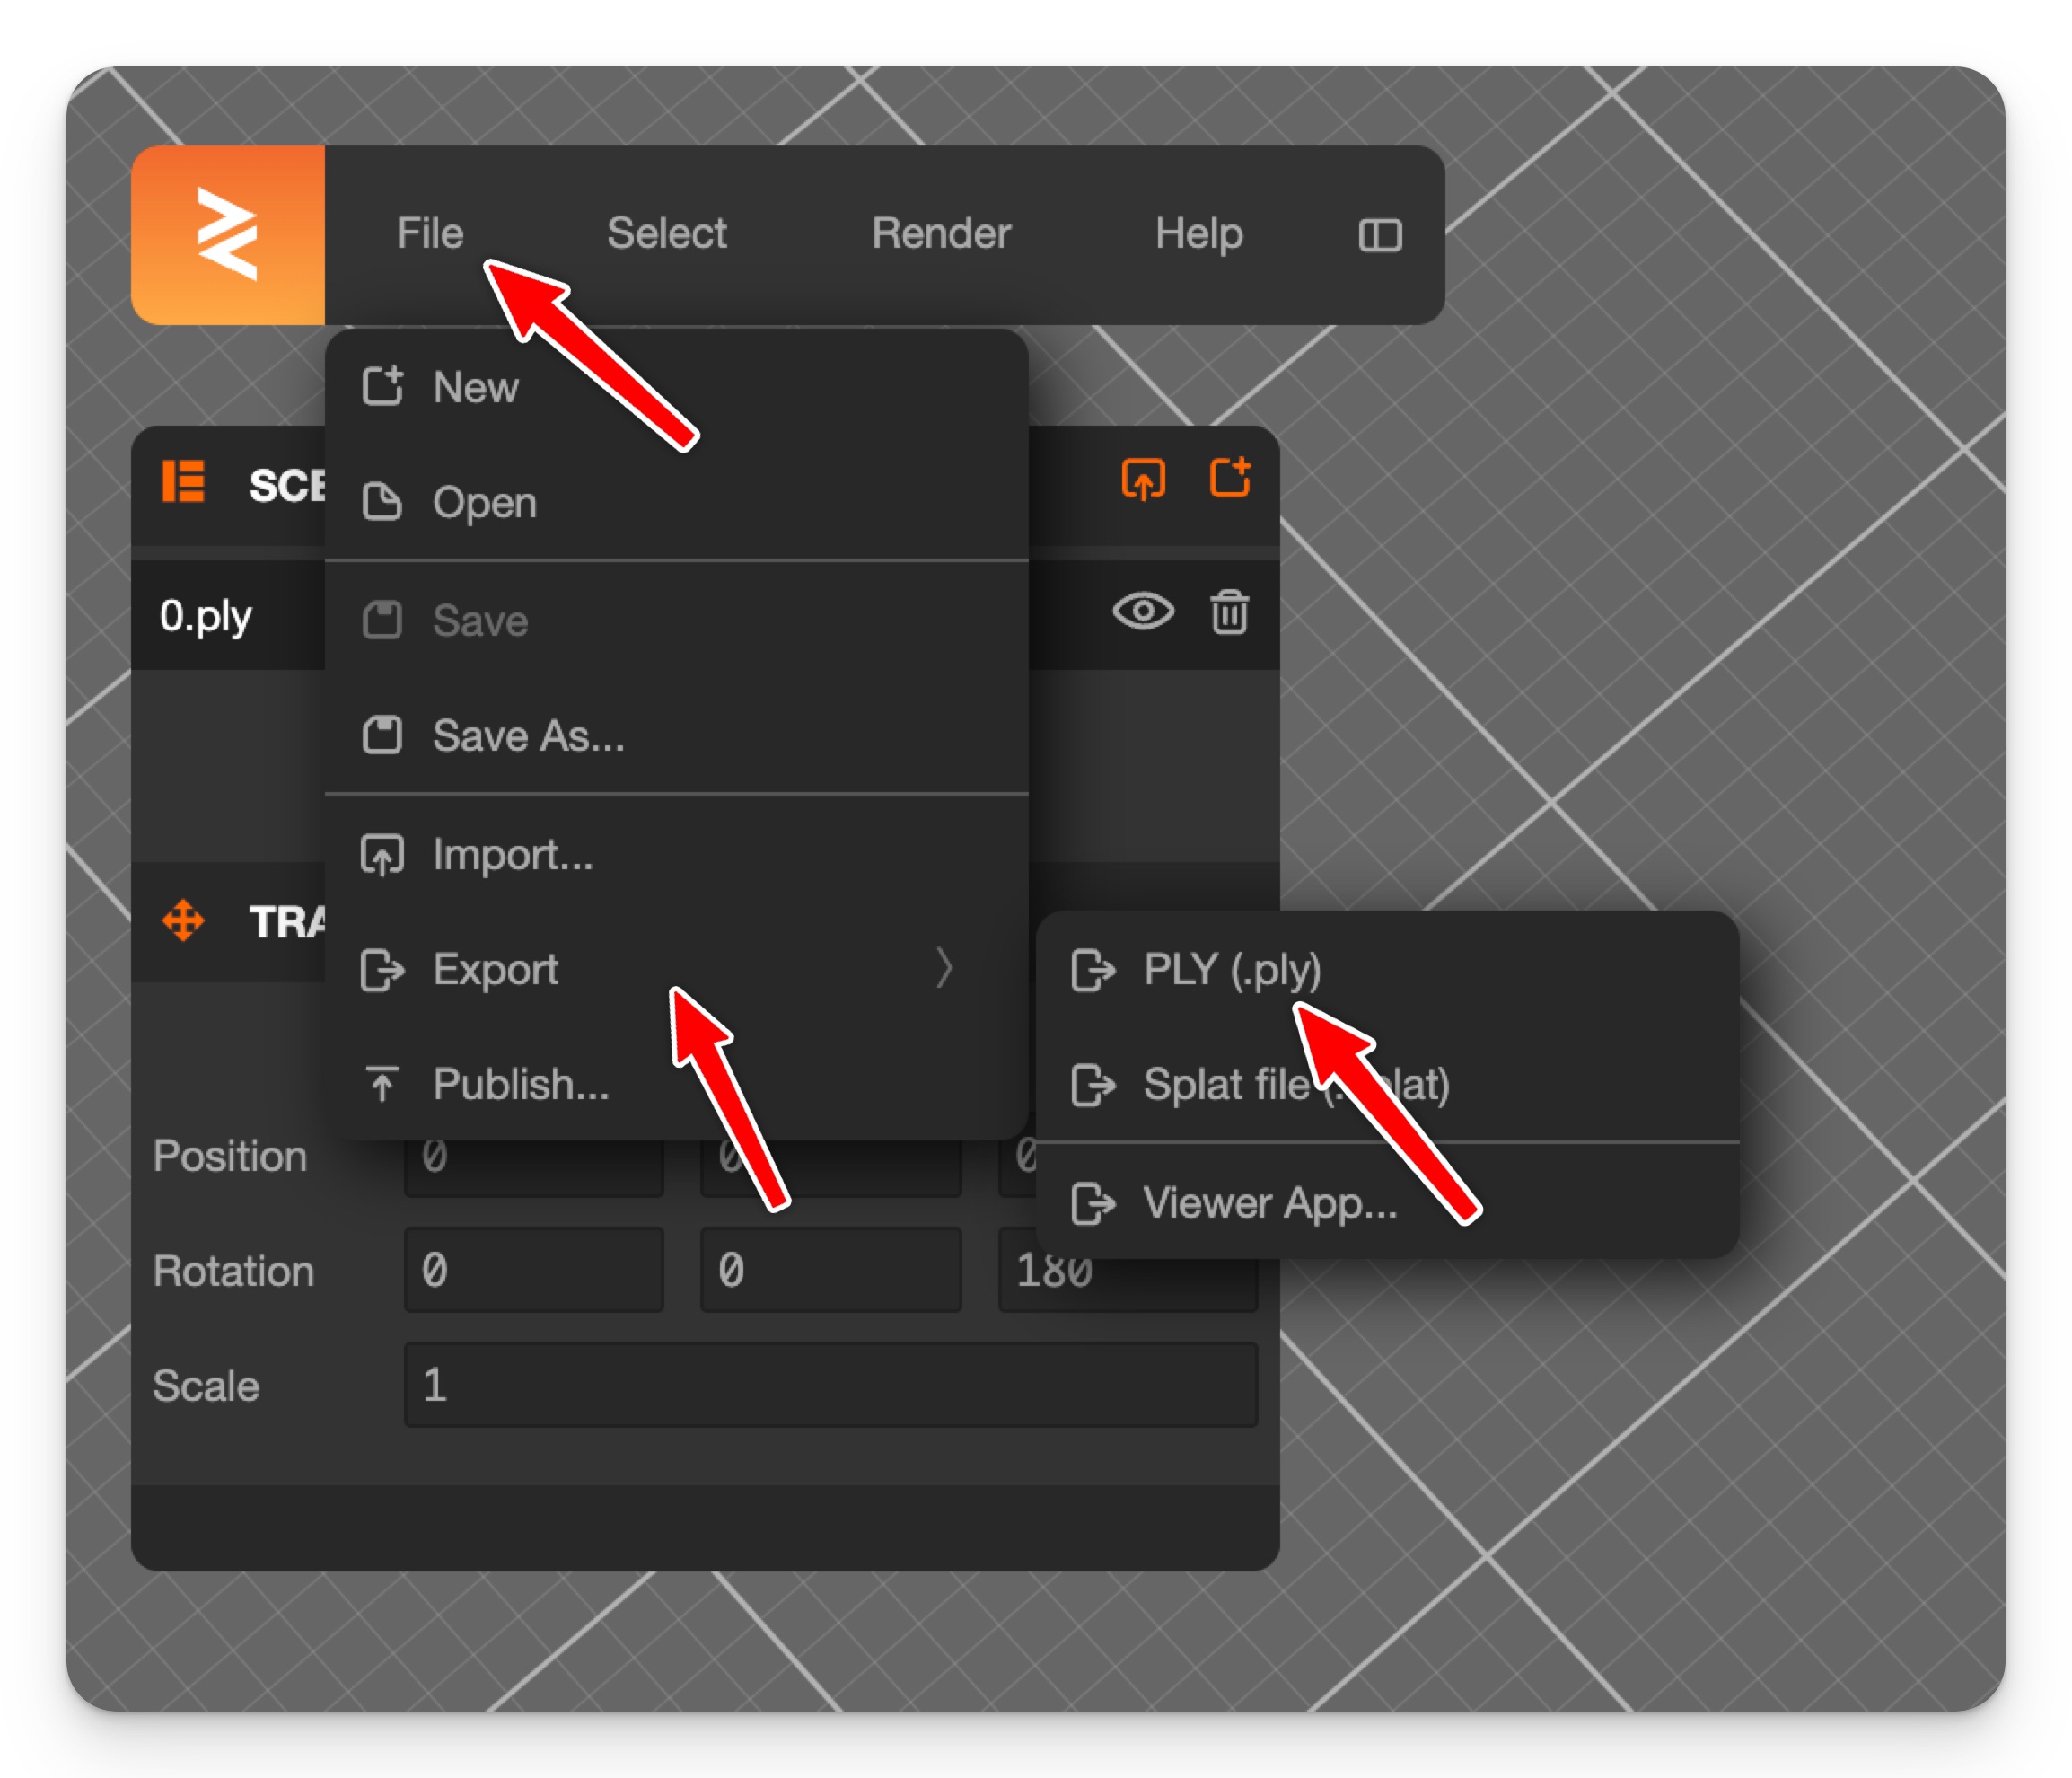
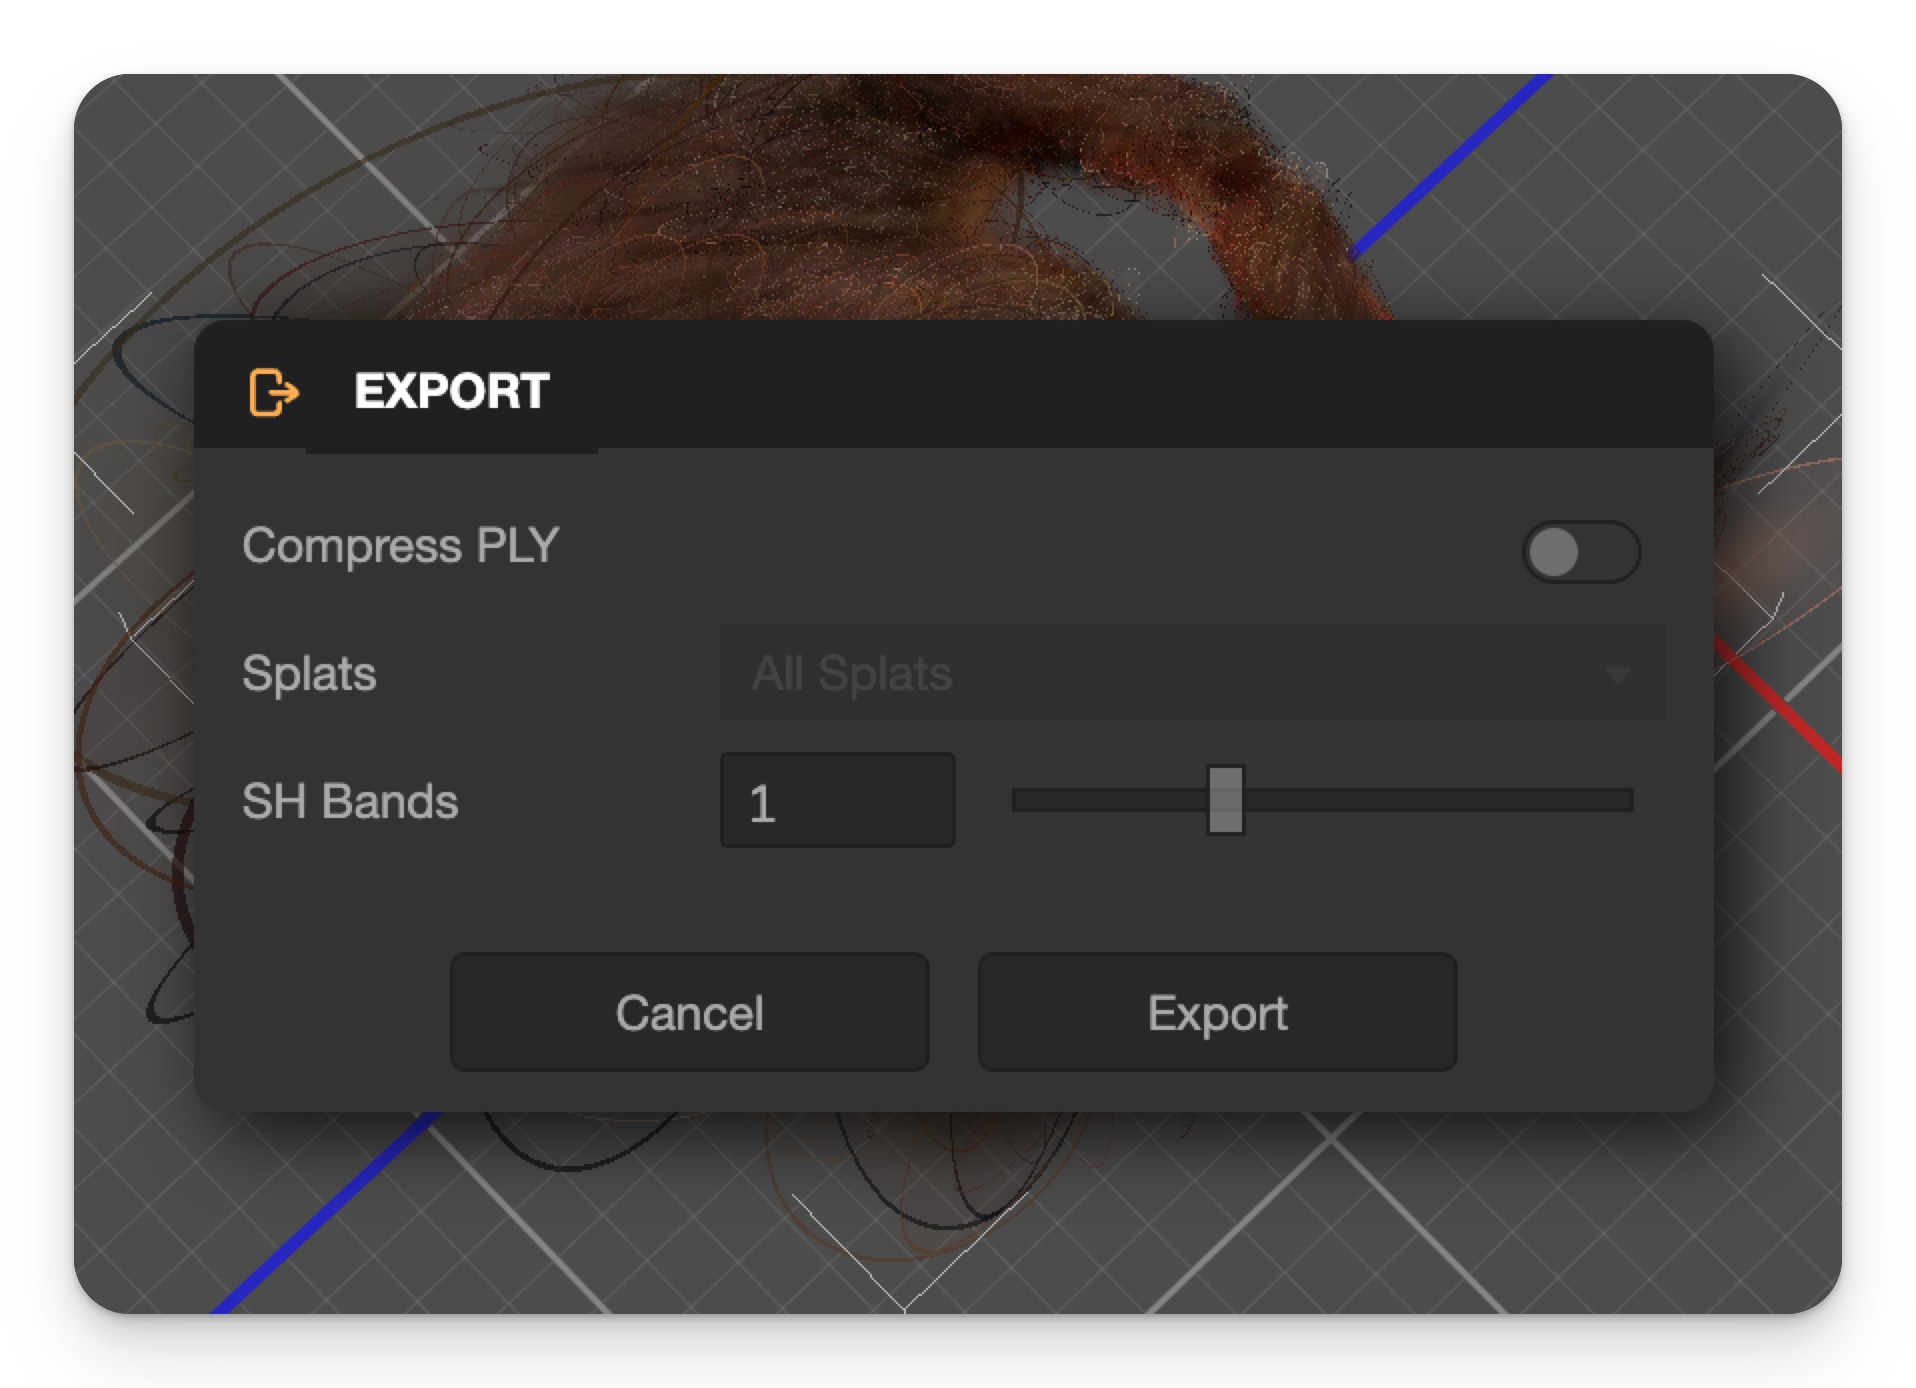
-
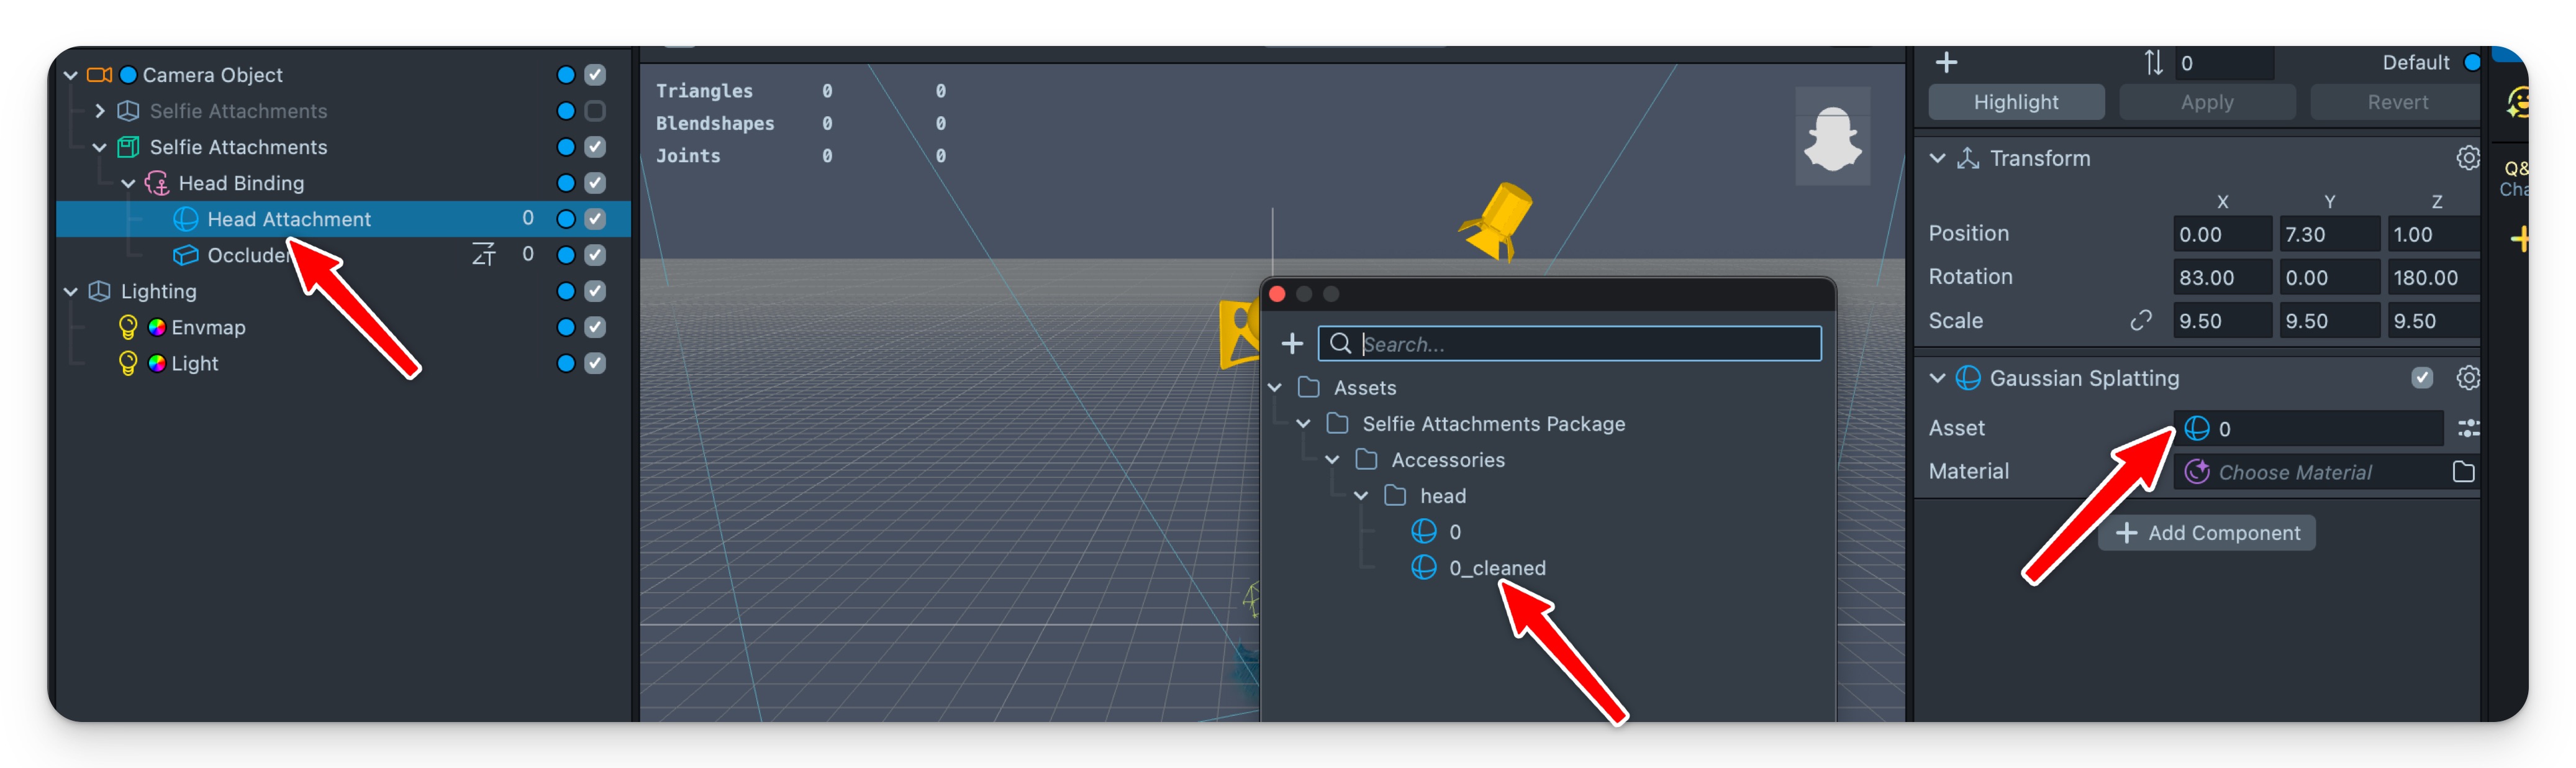
Drag the cleaned splat back into your Lens Studio project (alongside the original .ply file). Update the
Assetfield in theGaussian Splattingcomponent.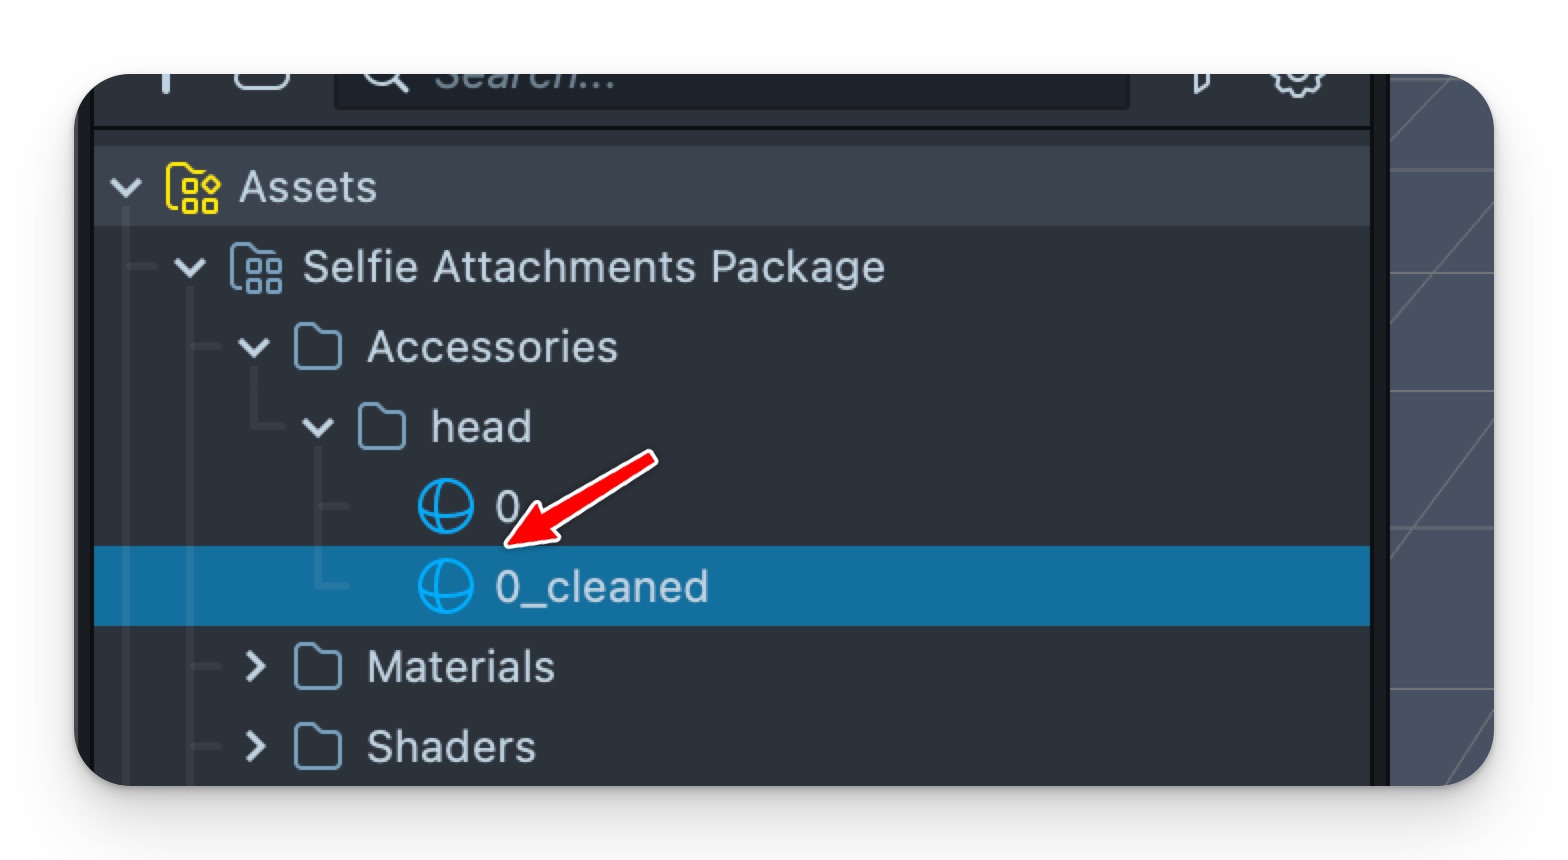
Done. You can repeat this flow to tidy up your splats as needed.
Prompt Tips and Hacks
A few approaches exist to write a prompt. Pick whichever style feels most natural to you.
Prompt Styles
-
Instruction-based (Recommended)
Tell the tool exactly what to create and where to place it on the body. Think of it like giving directions to an artist. Examples:
- "add a purple octopus with long tentacles sitting on top of my head"
- "put a donut with sprinkles around my entire face like a face mask"
- "place a shiny silver monocle over my right eye"
-
Description-based
Just describe a person with the prop already there. It’s a bit more casual, but still works well. Examples:
- "a person with a huge jello instead of a head"
- "a person wearing a majestic Roman helmet with a red plume"
- "a person with a giant hamburger stacked on their head"
-
Vibe-based
Feeling playful? Describe your mood, theme, or aesthetic - let the tool surprise you. Examples:
- "I love sea creatures - make something fun and tentacly"
- "Give me festival energy. Colorful, loud, and wild."
- "Something goofy that makes my head look like a dessert"
Tips for Great Results
-
Be specific. 1–3 sentences usually works best. Both examples below work well.
- "a person wearing a yellow chef hat with colorful fruit and vegetable decorations"
- "a person with a giant fish on the head has its mouth wide open and is eating the head. the upper jaw of the fish is on the head and the lower jaw of the fish is around the neck. the face of the person is inside the mouth."
-
Describe placement precisely, if ambiguous. Use terms like "on top of the head," "covering the face," or "resting on the shoulder."
-
Avoid describing the person. Don't include age, skin color, or personal traits - the tool focuses only on the attachment.
-
Focus on supported body regions: head, face, neck, and shoulders.
-
One prop per generation works best. Avoid stacking too many elements at once.
-
Great results can take a few tries - experiment with the seed and hit "regenerate" to explore new variations.
Common Issues & Workarounds
-
Misplaced props: sometimes, props like animals may appear covering the whole head instead of sitting on top. To fix this, clarify in your prompt even further.
✅ "a person with a hamburger on top of the head. Bottom of the hamburger is positioned just above the forehead"
✅ "…the upper jaw of the fish is on the head and the lower jaw of the fish is around the neck"
-
Unsupported features:
🚫 Transparent glasses, makeup, tattoos, and full-body wearables aren't supported.
🚫 Items placed on hands, feet, or lower body will not render properly.
More Creative Prompt Ideas
- "add a golden crown floating slightly above my head, with glowing gems"
- "a person with a cluster of helium balloons lifting their head upward"
- "wrap a fluffy pink scarf loosely around the neck"
- "add a tiny UFO hovering just above my left eyebrow"
- "a person with spaghetti noodles draped over their face like a curtain"
Now it's your turn - get weird, get wild, get wearable. And remember, a great prop starts with a great prompt.