AI Clips
AI Clips plugin enables creators to generate 5-second AI-powered videos by combining a user’s image with a unique embedded prompt. Each Lens transforms a single photo into a dynamic video experience based on its predefined creative concept.
Getting Started
Lenses created with AI Clips plugin will be available only to Lens+ subscribers. Using AI Clips does not automatically enroll you in Lens+ Payouts, to begin monetizing your Lenses, apply here.
Launching AI Clips
- Navigate to the
Lens Studio AIoption in the top right corner of the Lens Studio. Then, click in theGenAI Home Pagetab in the sidebar.

- On the
GenAI Home Pagetab, you may need to scroll down to find AI Clips.

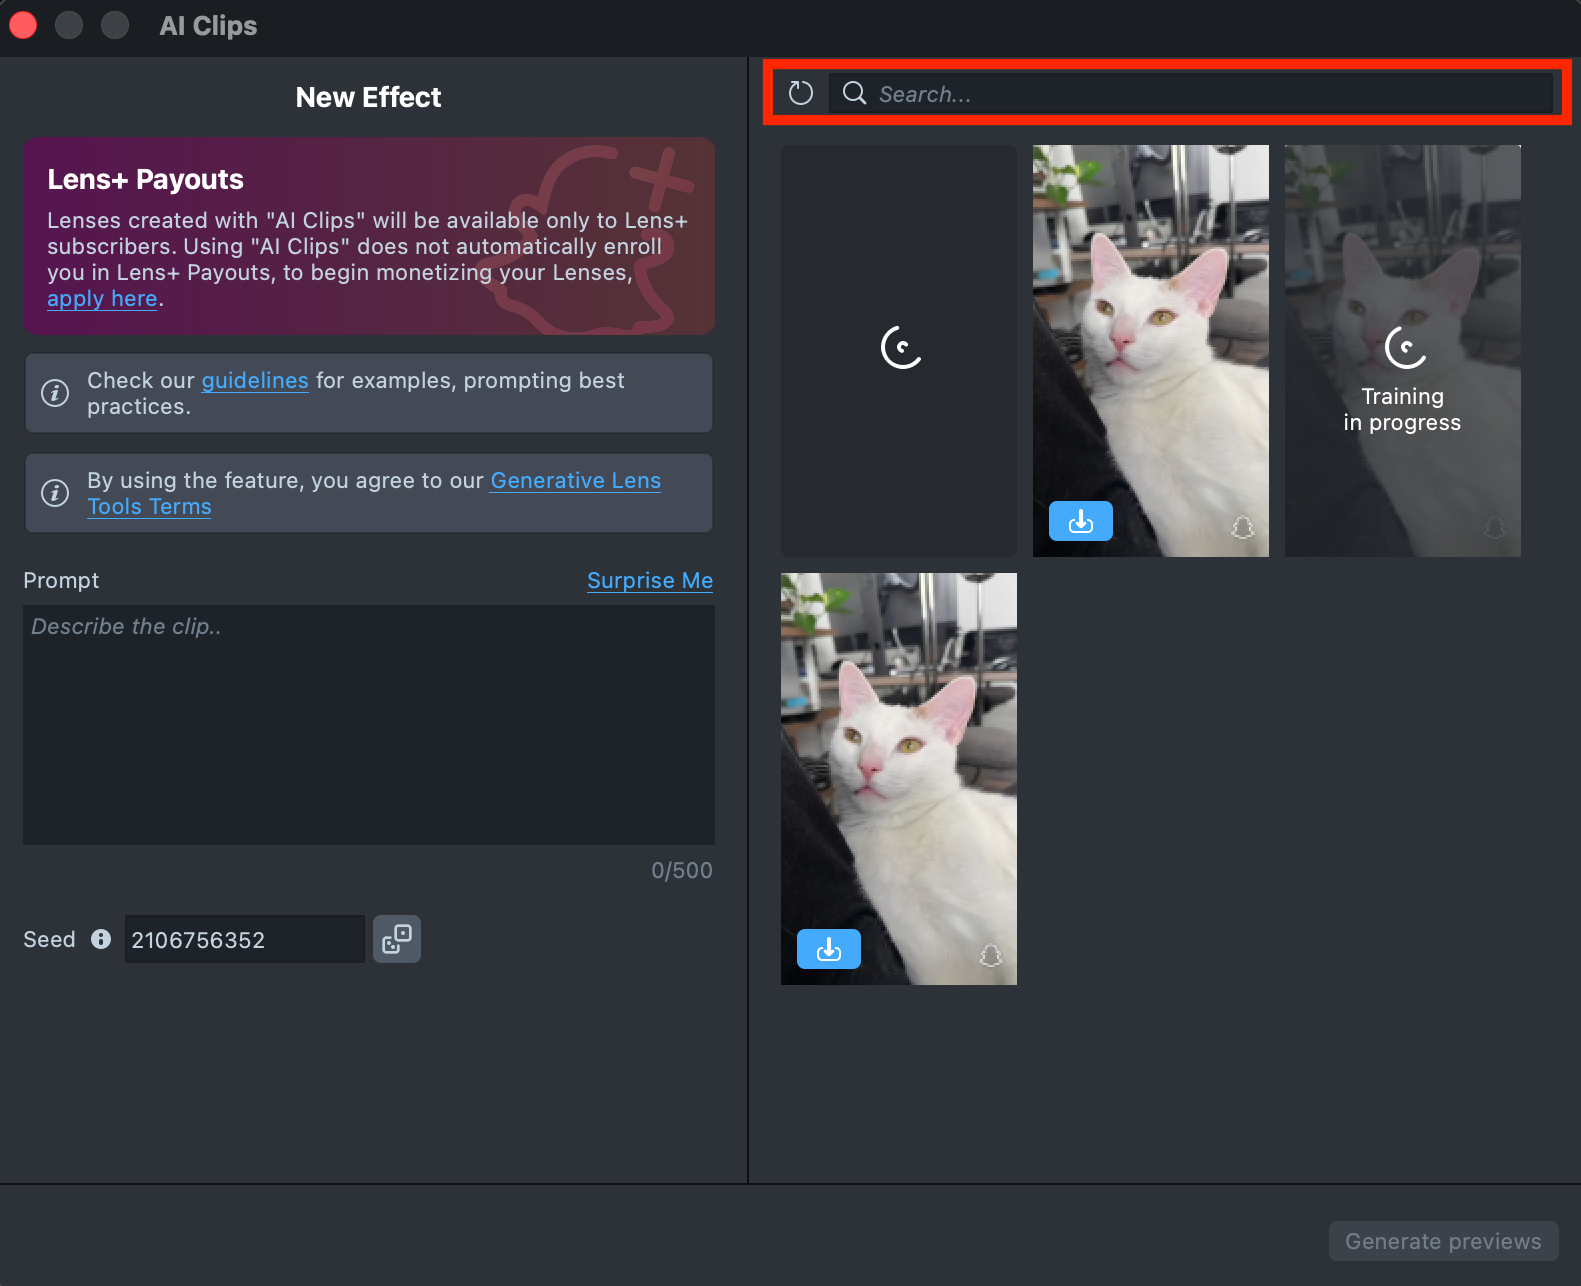
User Interface Overview
- Creation Panel: Provides tools for creating and editing AI Clips.

- Gallery: Shows all the clips you’ve created along with their statuses.
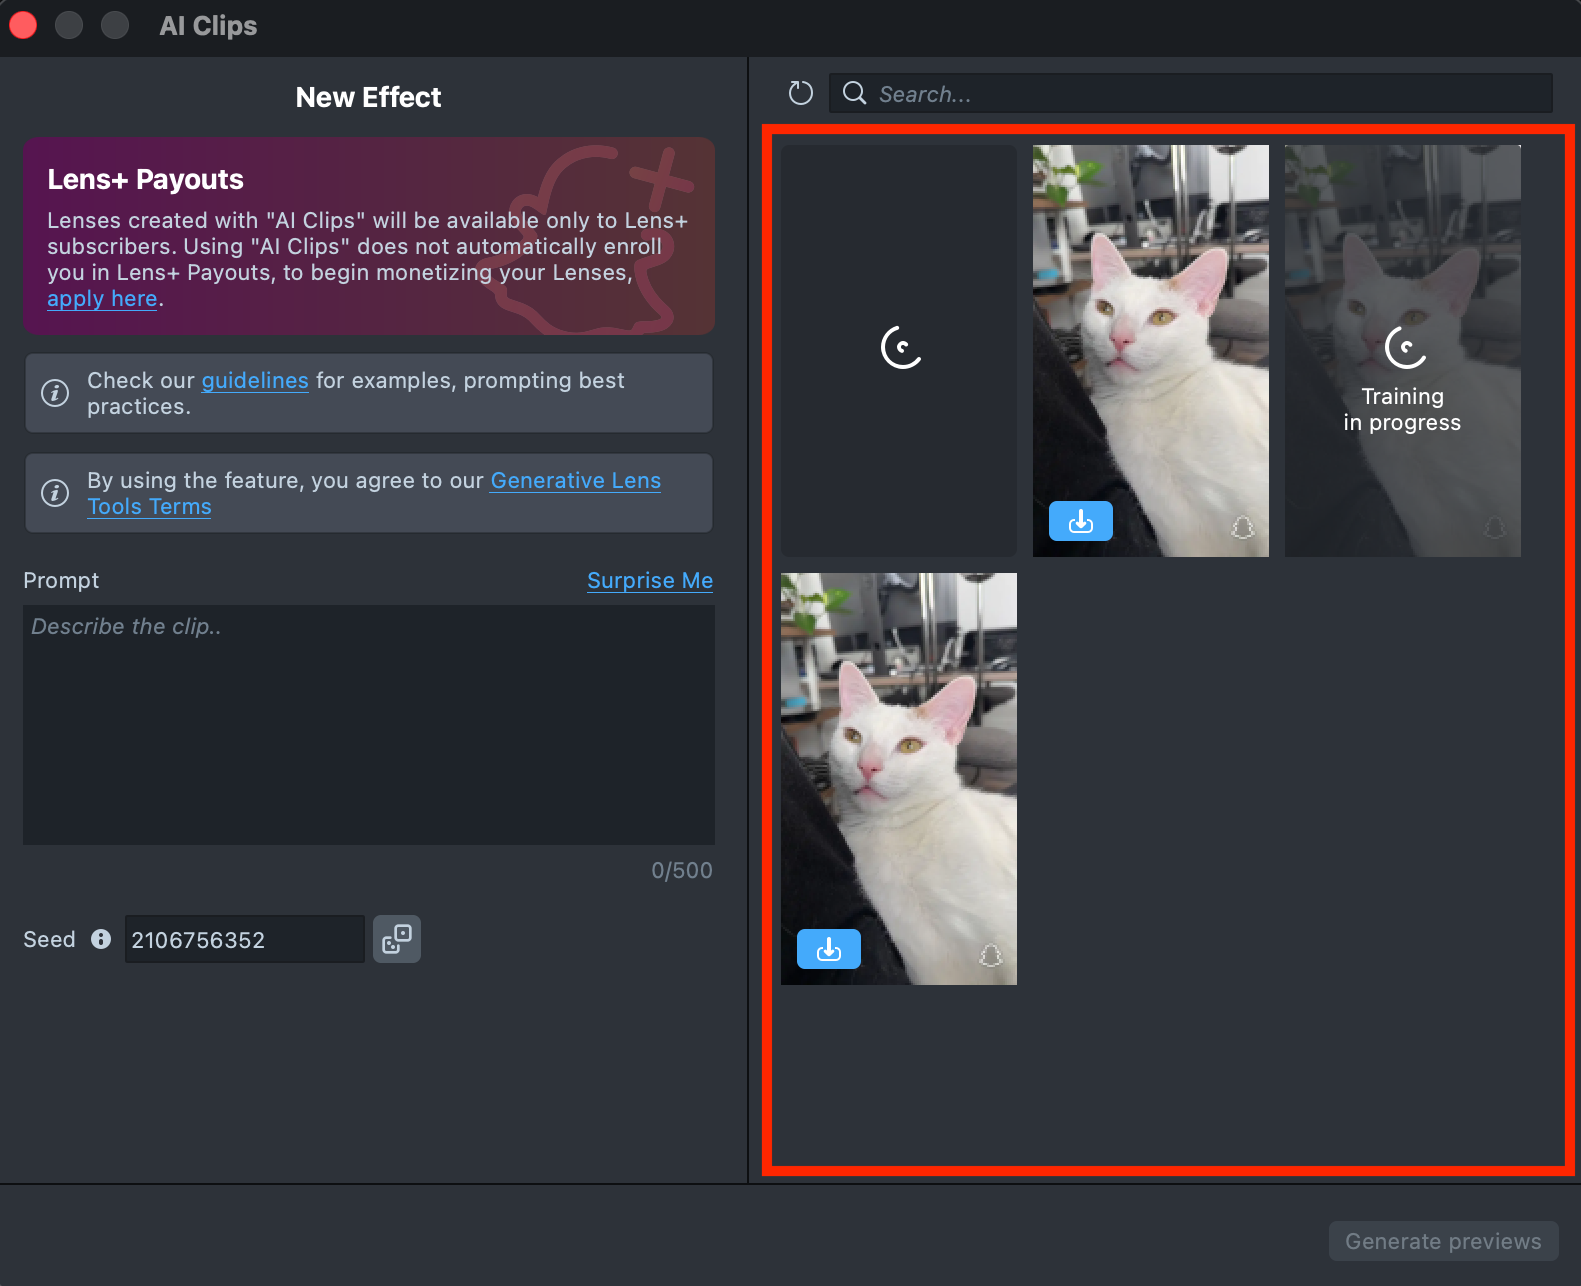
- Search: Allows you to quickly find specific clip by name or keyword within your Gallery.
Effect Creation flow
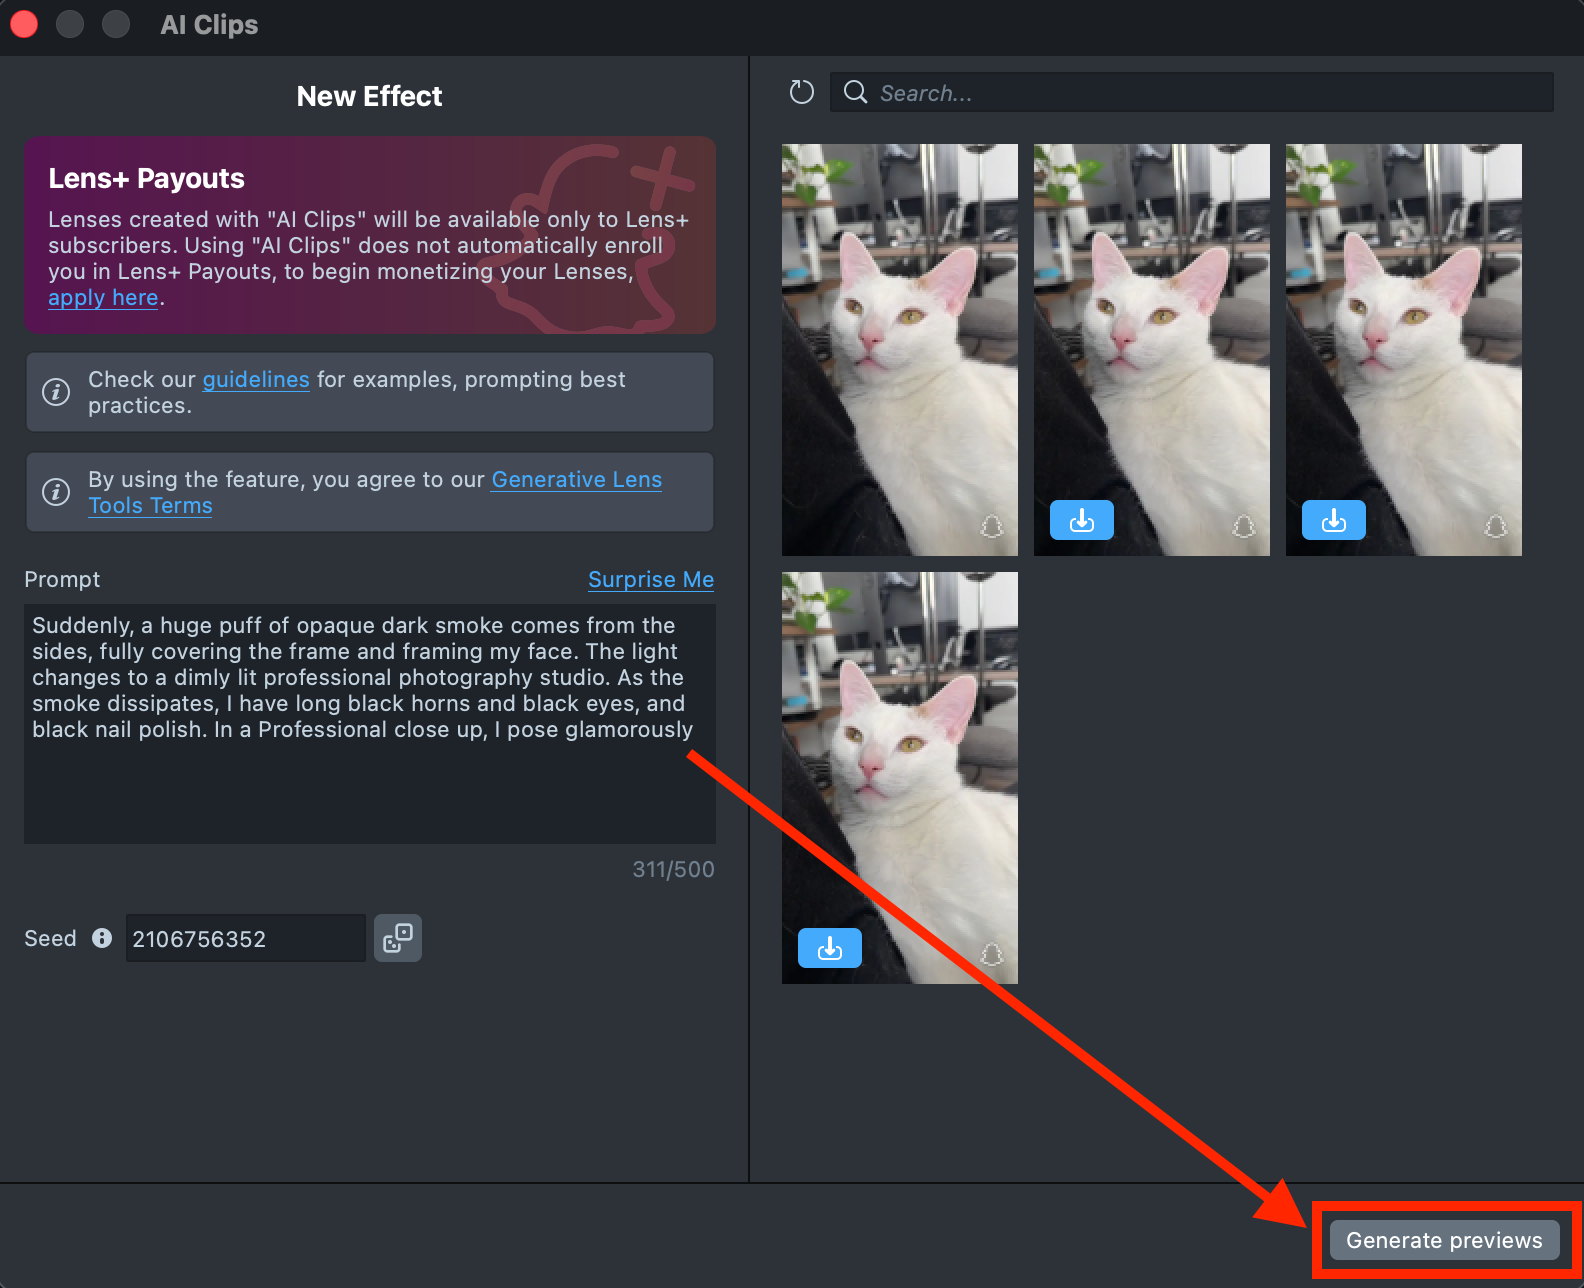
- Enter a text description of the AI Clip you want to generate. You can use the
Surprise Mebutton to insert one of the default prompts and get familiar with the creation flow.

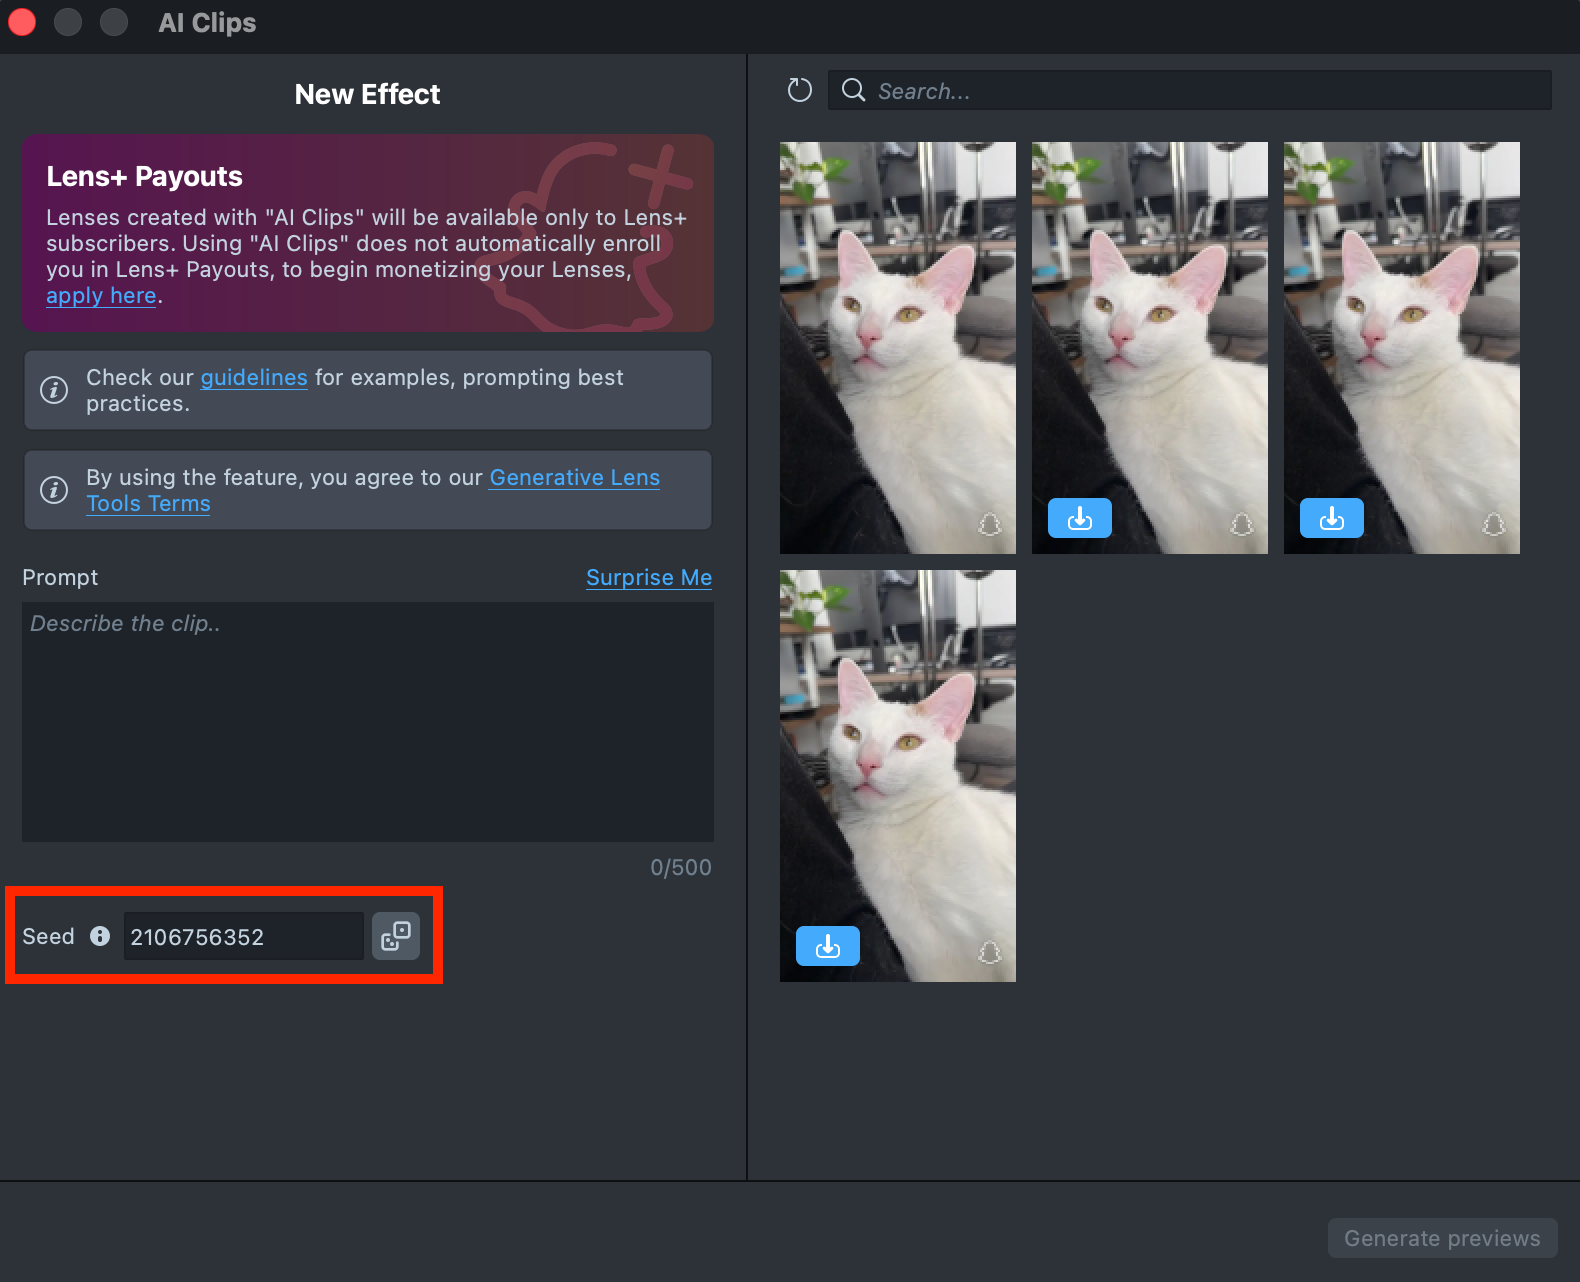
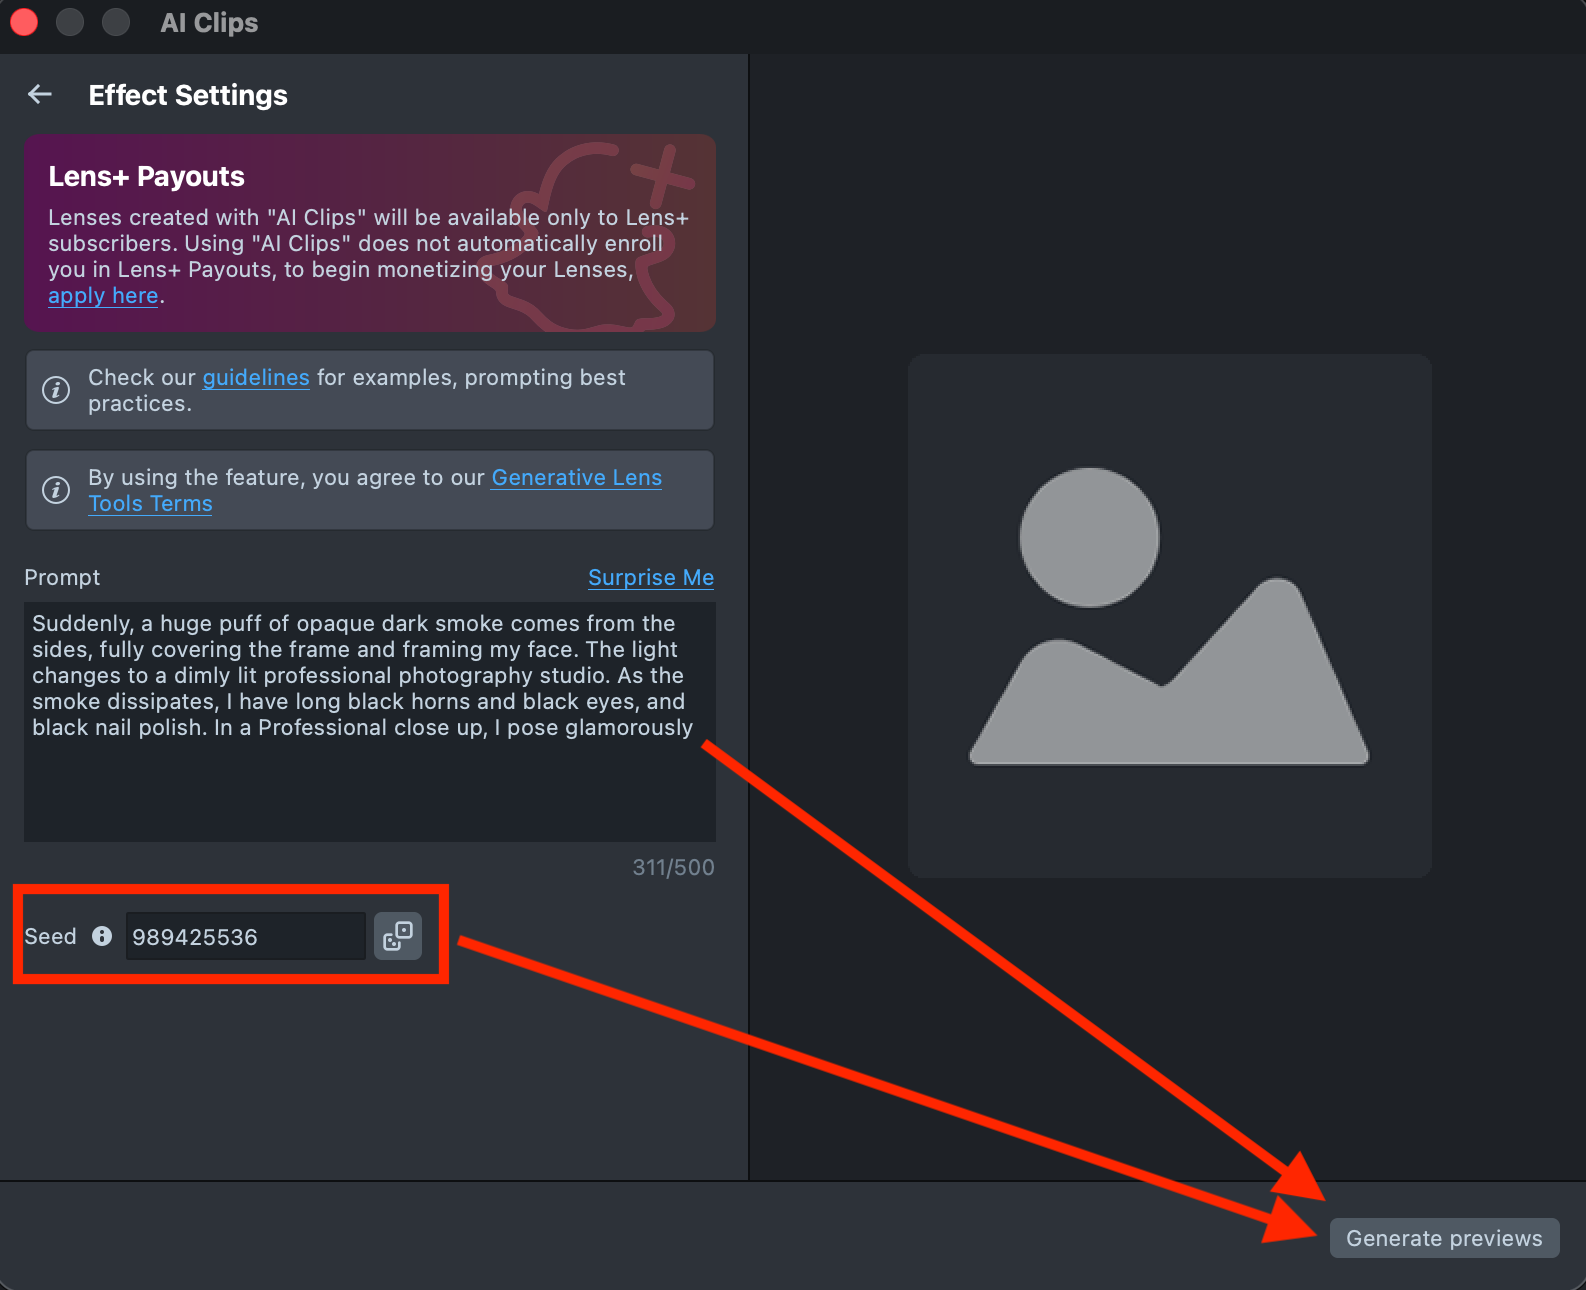
- Use Seed to reproduce experiments and control the randomness of generation.
- Once you’ve entered your prompts and selected a Seed, click the
Generate previewsbutton to generate a sample of your clip.
-
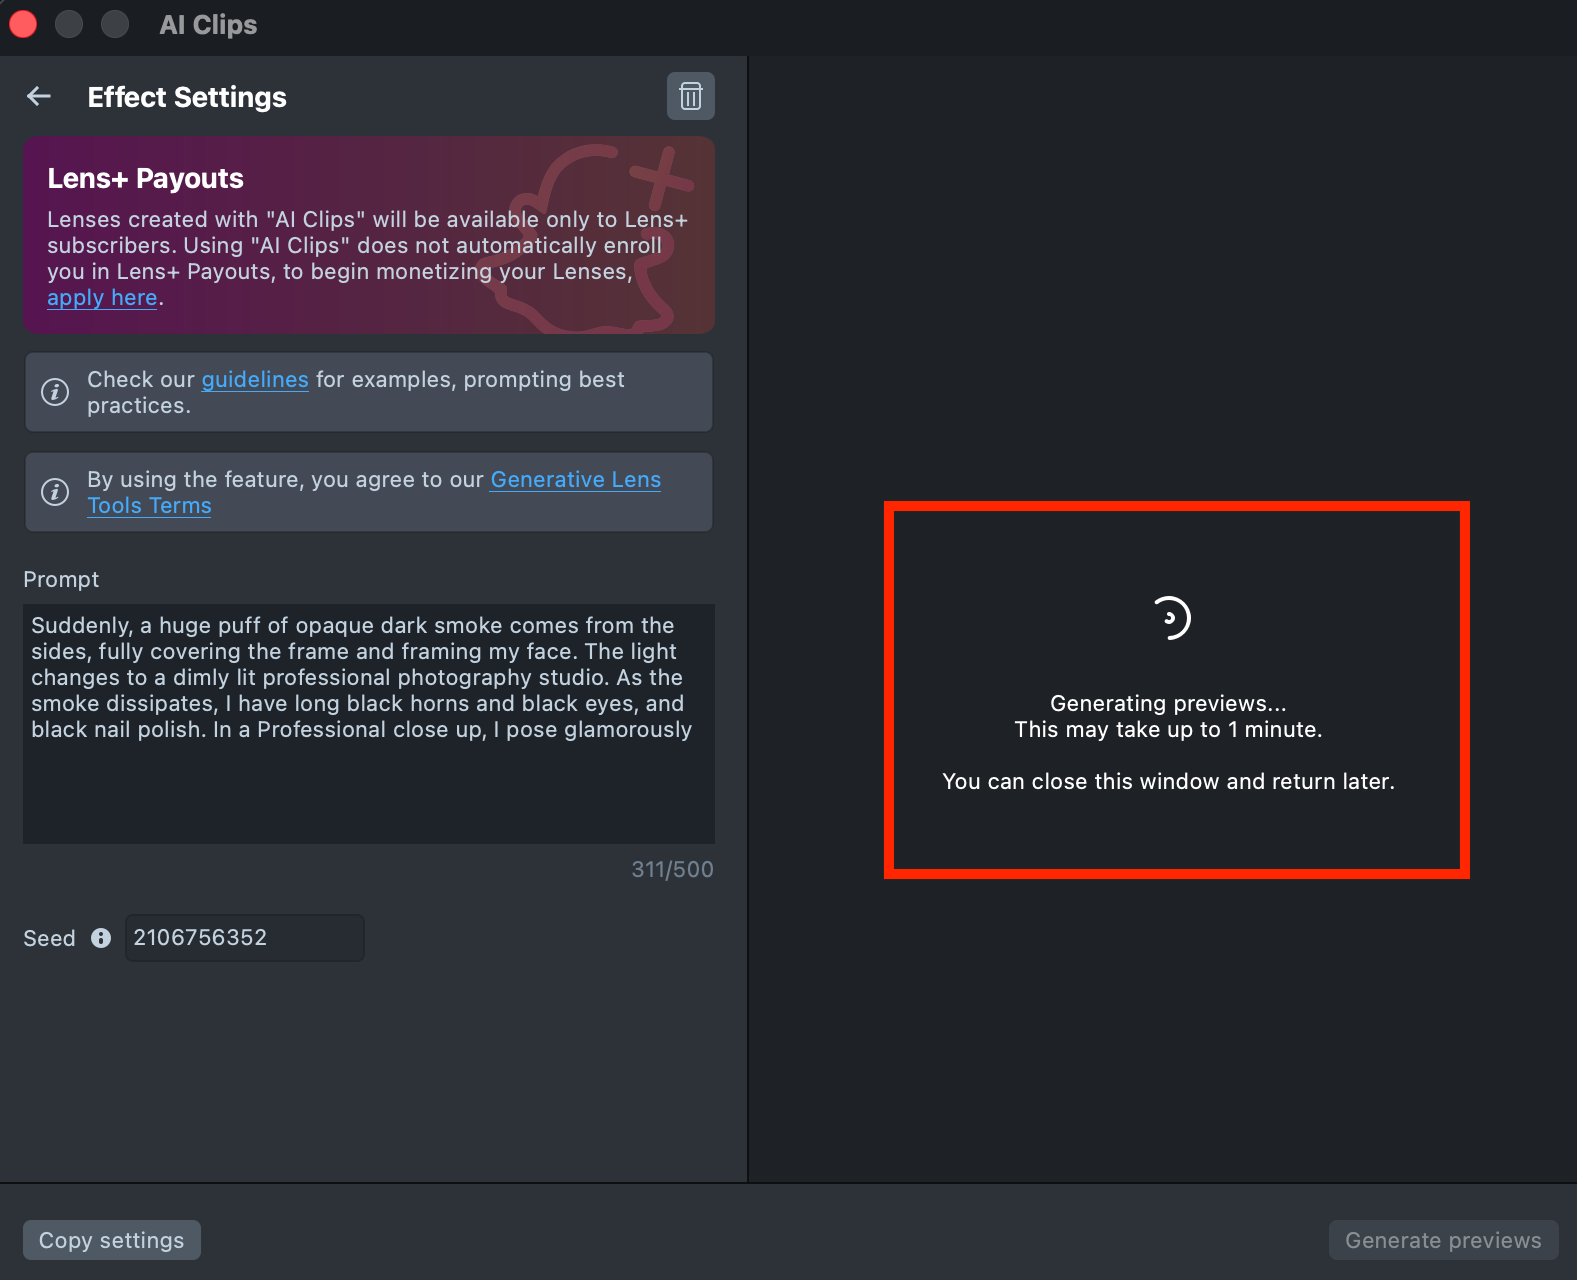
You’ll see a message indicating that preview generation has started. Feel free to close the plugin window or switch to another one - your preview will remain in the Gallery, showing its generation progress.
Generating the preview may take up to 1 minute, but you can close the plugin and return later.
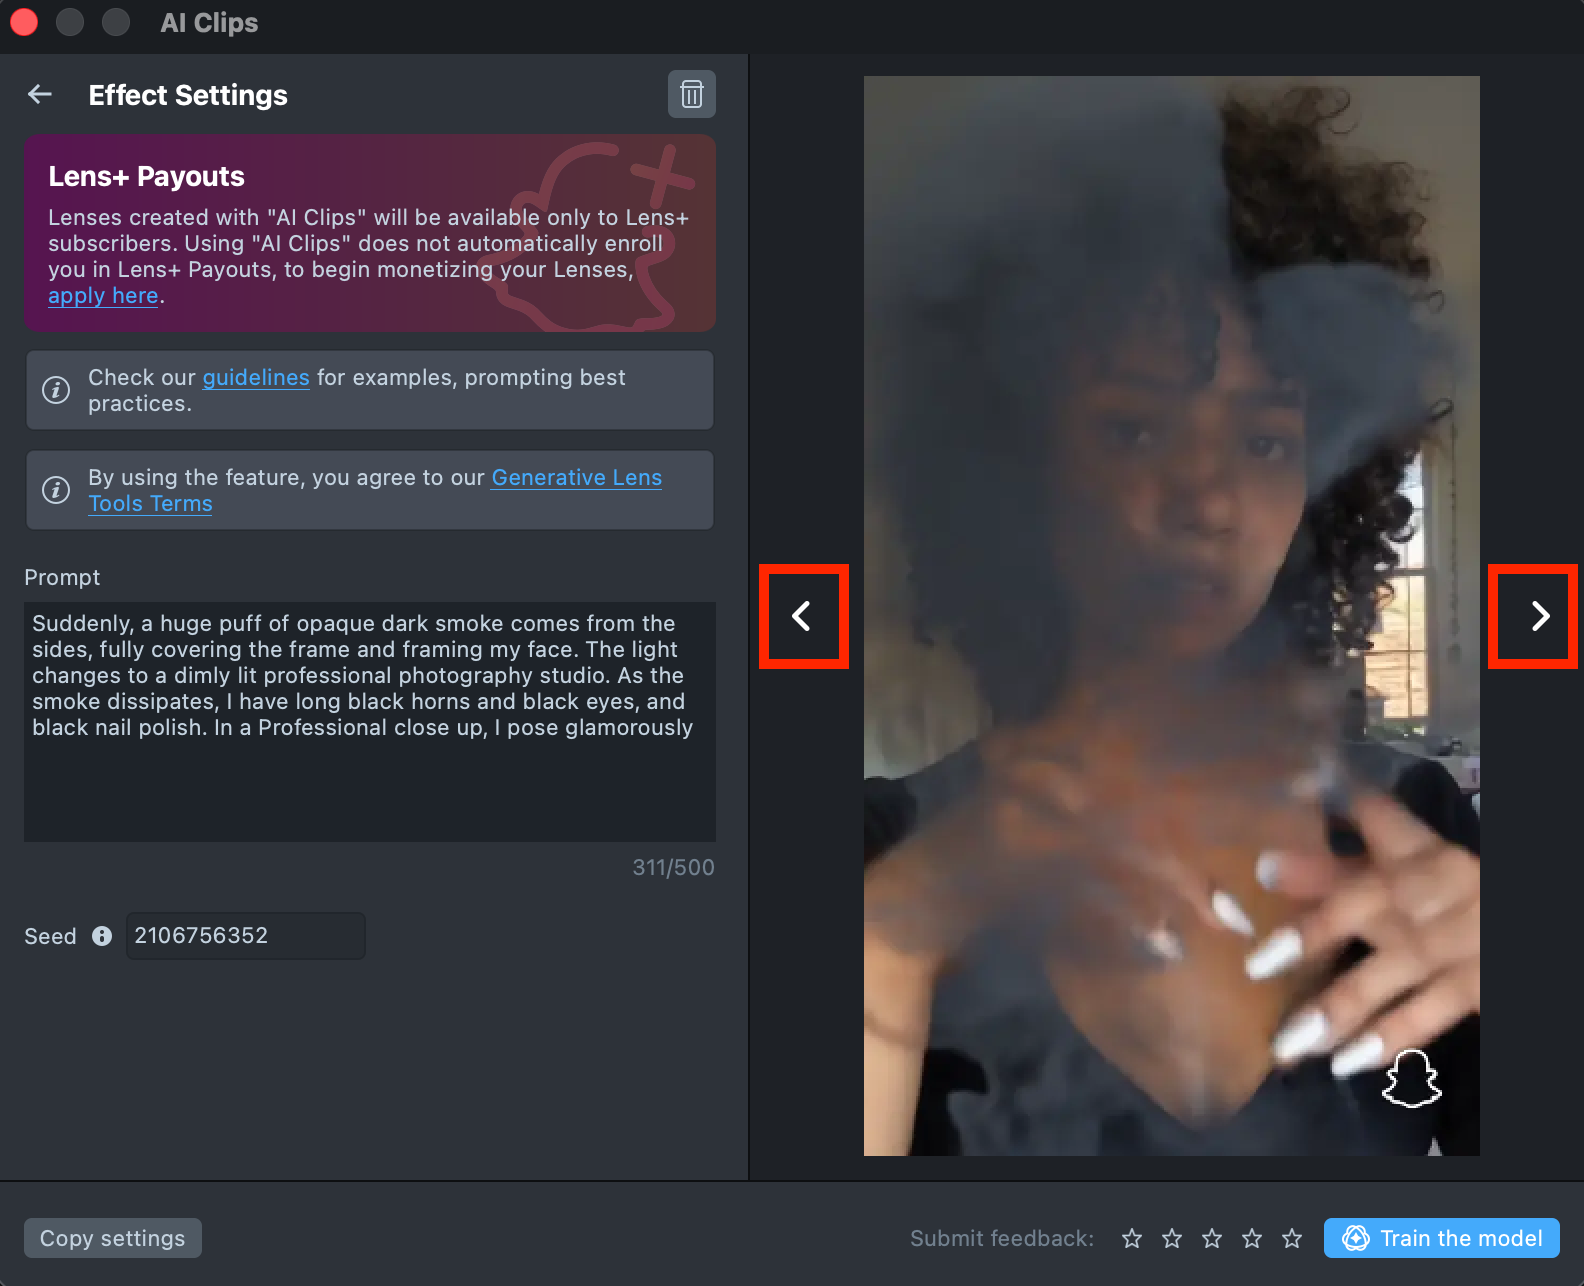
-
Once the preview has been generated, you can click its tile in the Gallery to open the details page. Here, you can use the arrows on the sides to preview the effect on different models.
- If the preview doesn’t match your expectations, click
Copy Settingsto adjust your prompt or seed.
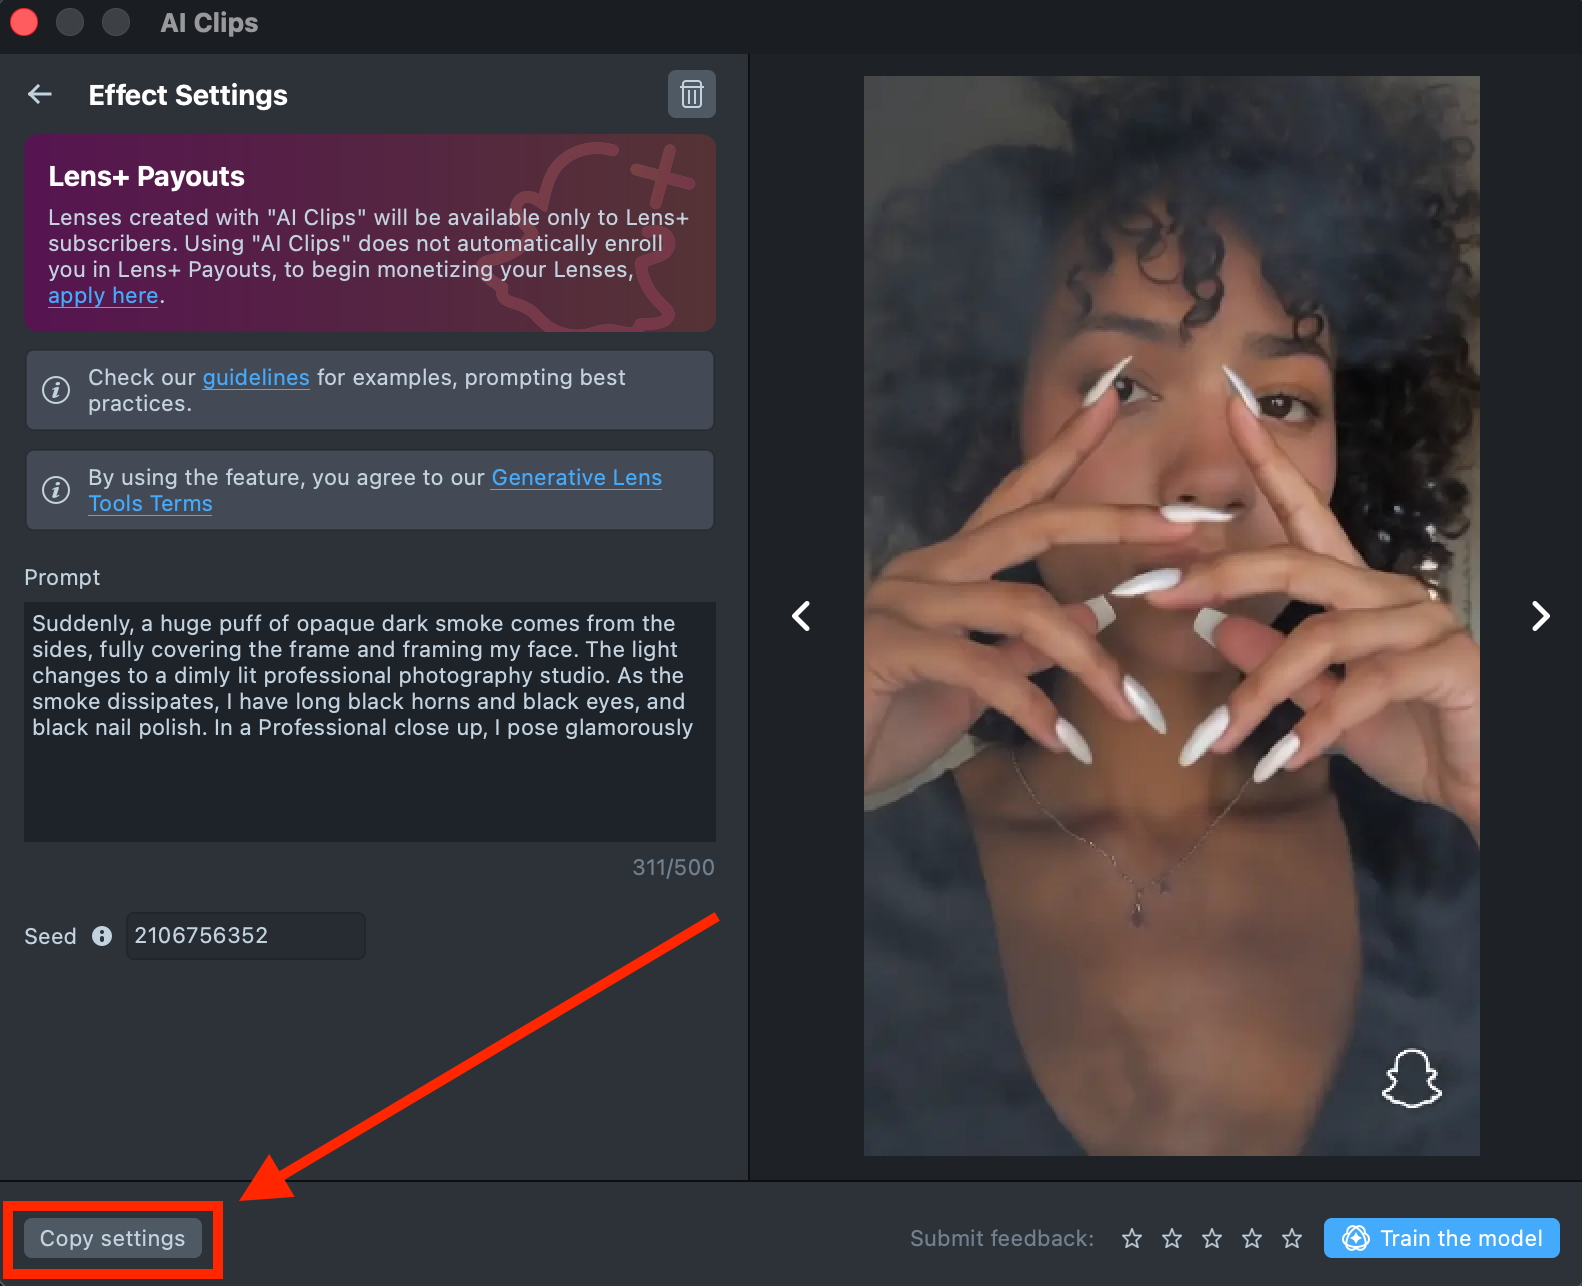
- You can make as many tweaks as needed until the result feels right - all changes will appear in the Gallery as a new effect, without altering the current one. This way, you can always go back and compare whether the updated effect looks better than the original.
- Optionally, you can rate the generated preview by clicking the stars. A rating of 1 star means the result didn’t meet your expectations, while 5 stars indicates a strong match. Your feedback helps improve future results.
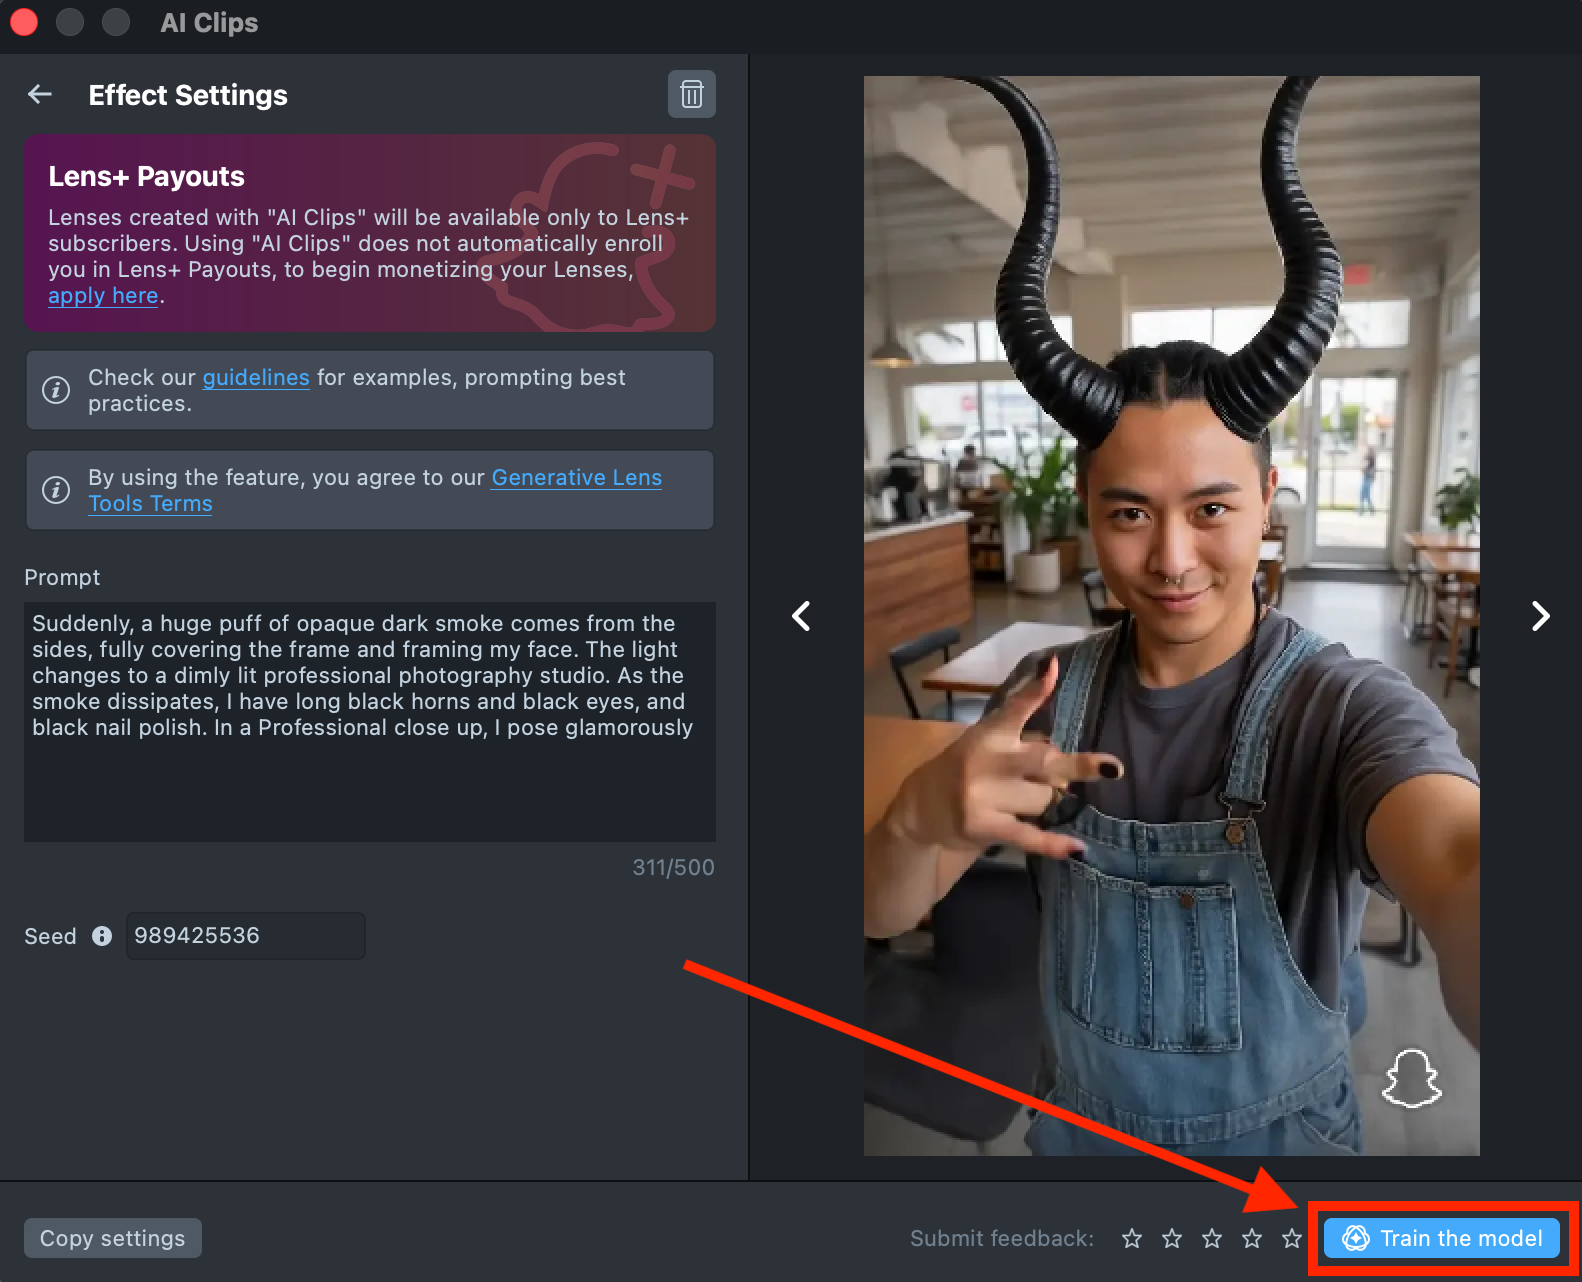
-
Happy with the preview? Click
Train the modelto start training your model. You’ll be able to track the training status directly in the Gallery.Training the model may take up to 1 minute, but you can close the plugin and return later.
A maximum of 1 model can be trained per 4 hours.
-
Once training is complete, you can import the effect directly from the Gallery by clicking the
Importbutton, or clickImport to projecton the details page to add it to your project.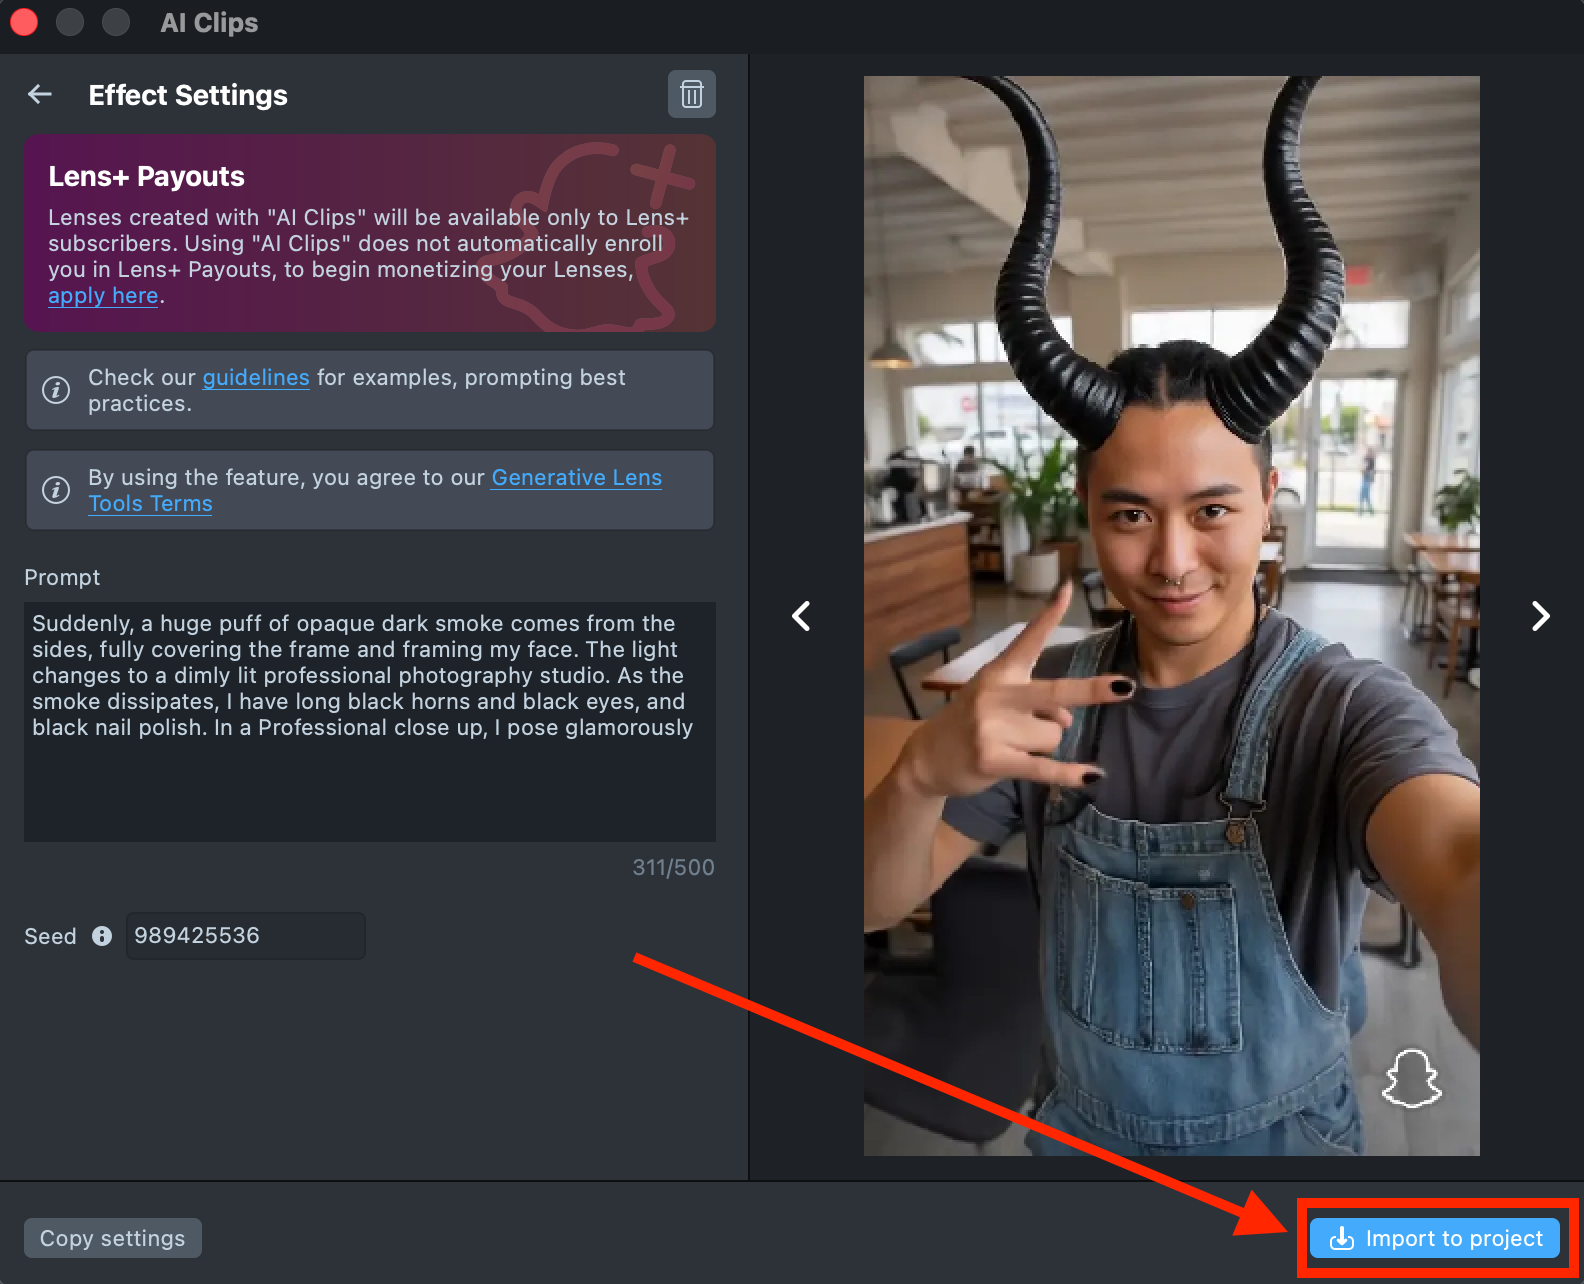
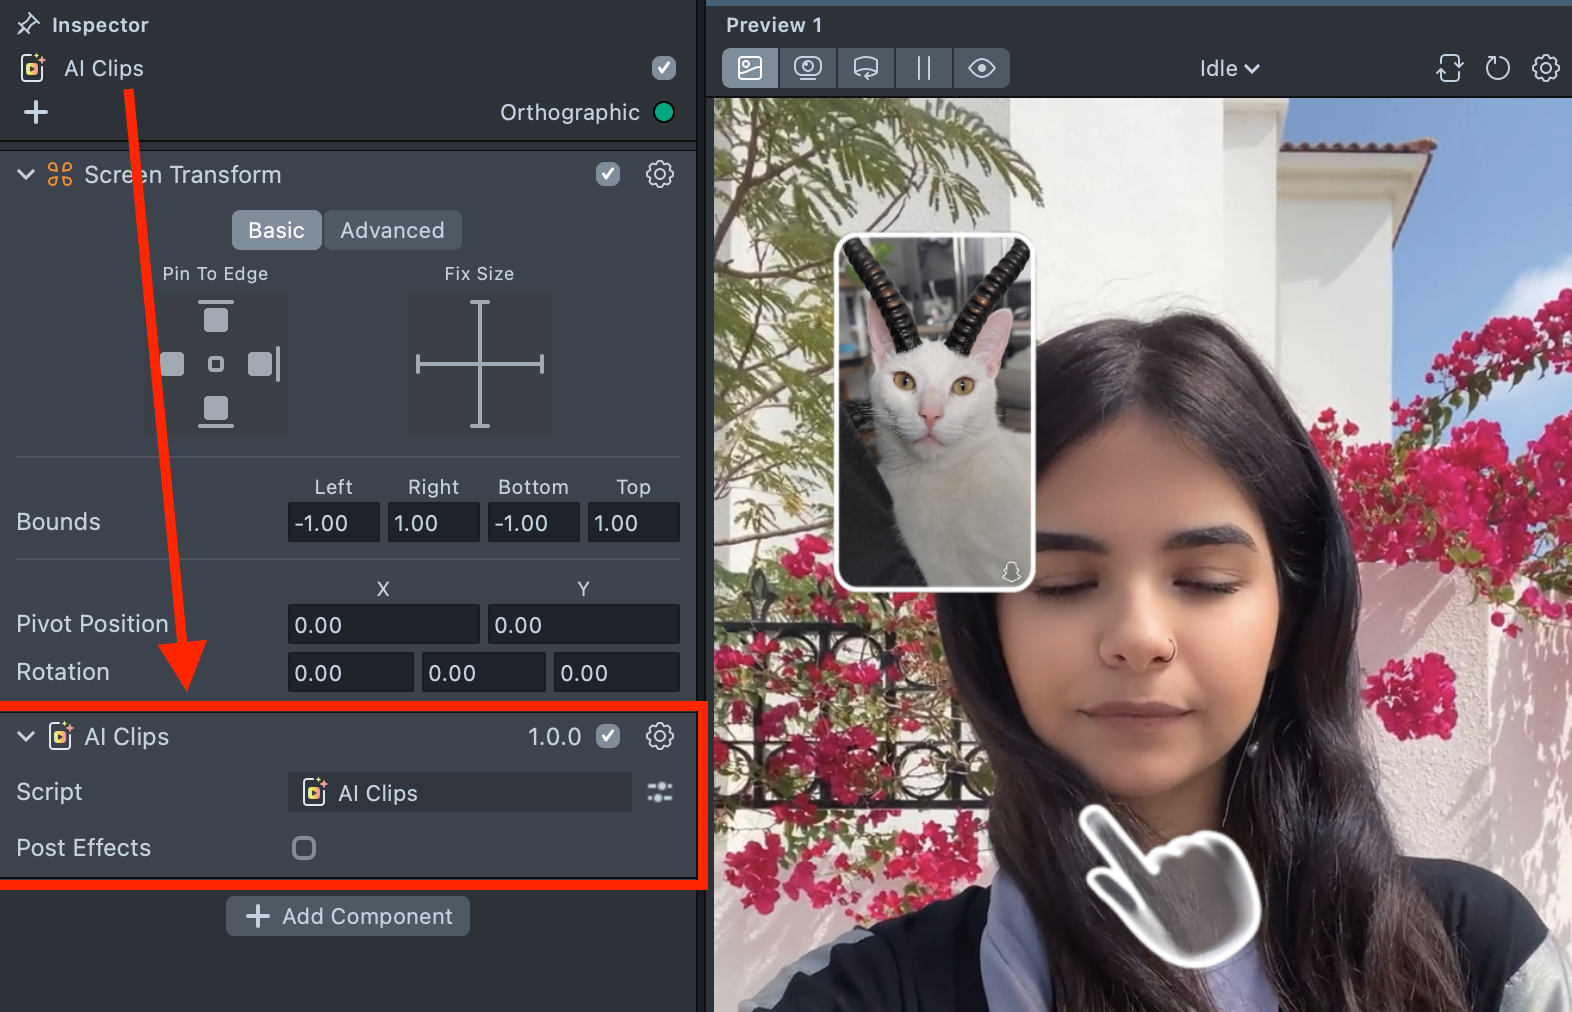
-
The imported component already includes all the necessary logic, a hint, and a default transition - essentially giving you a ready-to-use Lens. You can tap on the Preview screen or push the project to a device to see the Lens in action.
The Push to Device feature in Lens Studio sends a Lens to your device, but it will only open if your account has an active Lens+ subscription.
At the same time, the component allows you to enhance your Lens by adding post effects. Enable the
Post Effectscheckbox, then add the cameras containing your post effects. For a step-by-step example, refer to this guide.Do not add music, the Music Lyrics component, or the Face Animator component to your project. These components are not compatible with AI Clips and will prevent the Lens from being published.
Lens Studio Preview supports the default person only. To test with other people, click "Preview Lens" and try it on your device.
Best Practices for Writing Your Prompt
Getting Started
Quick Tip: Idea → Prompt → Generate → Refine. Start small, test often, improve in small steps.
Creating strong AI Clip prompts works best as a straightforward iterative process. Clear ideas and gradual refinement consistently produce the most stable and cinematic results.
Start with a clear idea. Think of a strong visual or emotional moment you want to see in Lens.
Write a focused prompt. Describe what happens in the video:
- the setup
- the main action
- the camera behavior
- the overall vibe
Medium-length prompts (around 40 words) usually perform best.
Generate and review. Test your prompt across multiple photos to compare results and identify what works best.
Refine gradually. Small prompt changes can significantly improve results. Adjust motion, framing, or the surprise element step by step.
Keep prompts clear and visual. Focus only on what should happen on screen. Use concrete visual language and explicitly describe camera movement (static, zoom, pan, dolly) so the scene remains readable.
Think Like a Director
Quick Tip: Write prompts that can work across varied input photos and still create a readable, engaging result.
Treat your prompt as a short script describing the entire video. You are directing what happens from the first frame to the final moment.
Consider the full sequence:
- How does the video start - most of input photos are selfies, still pose, or close-ups;
- What happens next - a reveal, smooth transition, or sudden action;
- How does it end - a reaction, transformation, or confident pose.
Prompts that describe a clear beginning, middle, and end produce more cinematic and consistent results. Also remember that users may upload many types of photos: close-up selfies, full-body shots, group photos, or even pets.
Write prompts that remain readable and engaging across varied inputs.
Prompt Structure
Clear structure helps the model interpret your idea accurately.
Recommended structure: Subject → Action or change → Camera behavior → Vibe
Example structure: I stand [location or mood]. Suddenly, [object/character/event] appears and [action]. The camera [movement]. The mood is [tone].
Keep descriptions direct and focused on what should happen in the video.
Prompt Length
Quick Tip: Medium-length prompts usually perform best: detailed enough to guide motion, short enough to allow creative interpretation.
Prompt length significantly affects results.
- Short prompts (< 15 words): Allow for highest ambiguity and unexpected results, however may lack context and produce inconsistent motion or storytelling
- Medium prompts (~35–55 words): Best balance of clarity, motion, and atmosphere
- Long prompts (> 80 words): Best for specific and robust concepts. More detailed prompts give more precise and less ambiguous results.
Subject Description
Quick Tip: Write in first person for flexibility—"make me dance" works on pets too.
You can describe the main subject using either first-person or third-person language. The system will always interpret the prompt as referring to the primary subject in the image—whether it’s a person, pet, or other character.
Phrases like "make me…" and "I…" as well as "the person…" or "a person…" all point to the main human subject of the scene and perform equally well. Using first-person phrasing can also make prompts more flexible—for example, "make me dance" will work for both people and animals.
Choose whichever phrasing feels most natural for your concept. Pay closer attention to describing the action, environment, and mood in detail.
Testing and Refinement
Quick Tip: If it breaks: simplify → regenerate → gradually add details back.
Testing multiple variations helps identify what works best.
Try multiple prompts. Test 2-3 prompt variations for the same idea.
Compare generations. Run one prompt across multiple photos to see which works best.
If results break or feel inconsistent:
- Simplify motion;
- Reduce number of objects;
- Reword the setup with more precision;
- Adjust camera movement;
- Use slightly more detailed prompts when needed.
Well-structured prompts with clear subject and camera direction produce the most stable results.
Known Limitations
Be aware of current model behaviors when designing prompts:
- Subject’s fine details may decrease at far camera distances;
- Complex surreal interactions may be limited;
- Some objects or subtle emotional cues may be ignored;
- Large camera moves or complex compositions can cause frame jumps and lack of continuity;
- Complex multi-step storytelling is not consistent and some elements might be ignored;
- Human-centric prompts tend to hallucinate humans on photos with no present.
If this occurs, simplify the scene or prioritize the most important elements earlier in the prompt.
Prompt Template Examples
Quick Tip: Visual clarity drives the scene. Describe what we see first, then add the mood.
These reusable templates and patterns can help you explore different creative directions. Feel free to change them or mix and match.
Interaction
Add a new element that interacts with the subject.
Focus on physical interaction, humor, or expressive reactions. The camera usually remains static or moves slightly.
[Subject’s pose or emotional state]. A [object/animal/person/element] enters the frame and begins to [clear physical interaction]. [Subject’s facial expression or gesture]. The camera [static/slight movement]. The vibe is [tone: playful, surreal, cinematic, humorous].
Example: Show me standing calmly while a giraffe leans down and licks my cheek, my hair. It tickles me and I laugh. The moment is absurd, but real. Slow-motion reaction shots, slight camera shake, natural lighting. Humor. Cinematic, playful, unforgettable.

Camera Reveal
Use camera movement to reveal unexpected context or scale.
Focus on cinematic reveal and expanded storytelling.
[Subject’s pose or emotional state]. The camera [movement: zooms out, pulls back, pans, rotates], revealing [unexpected situation or location]. [Subject’s reaction or stillness]. The mood feels [tone: cinematic, surreal, thrilling, calm, humorous].
Example: A person stands calmly. The camera slowly zooms out to reveal they are balancing on a tightrope over a deep canyon. The person remains still. The mood feels thrilling, surreal, and cinematic.
Special Effects and Transformations
Introduce visual effects that interact with the subject.
Focus on texture, material change, and visual transformation.
[Subject’s pose or emotional state]. A [material/effect: liquid, light, smoke, particles, texture] begins to [action: flow, spread, cover, form] across their [body/clothes/environment]. The surface [texture behavior: ripples, shines, crystallizes, dissolves], transforming into [final material or visual state]. [Subject reacts expression or stillness]. The camera [static or subtle movement], capturing the transformation. The vibe is [tone: cinematic, surreal, magical, dramatic].
Example: I am standing still. A reflective liquid metal pours from above, gradually covering me. The liquid splashes across my face, hair, and clothes, dripping in heavy layers. The surface ripples as it moves, forming polished chrome skin while preserving facial features. Light reflections shift across the metallic surface. Cinematic and surreal. I freeze in shocked disbelief, eyes wide and mouth slightly open, completely covered in liquid metal. The camera stays steady in a medium close-up, capturing the texture and genuine reaction.


Character Transformation
Transform the subject into another form or identity.
Focus on gradual change and visual surprise.
[Subject’s pose or emotional state]. A [trigger: smoke, light shift, mist, flash, shadow] enters the scene and begins to [action: surround, cover, distort]. As it clears, my [features: face, hair, eyes, outfit, body] gradually change into [new identity or form]. The lighting and atmosphere shift to [new environment or tone]. The camera [movement: close-up, pull back, steady shot] captures the final reveal. The mood feels [tone: dramatic, magical, cinematic, surreal].
Example: Suddenly, a huge puff of opaque dark smoke comes from the sides, fully covering the frame and framing my face. The light changes to a dimly lit professional photography studio. As the smoke dissipates, I have long black horns and black eyes, and black nail polish. In a professional close up, I pose glamorously.

Universal Storytelling Template
The camera shows [subject description], then [camera movement or transition], revealing [main transformation or scene], set in [environment or atmosphere].
Please consider that we have only 5 seconds for output, so the model will struggle with complex stories.
Example: The camera shows me holding a cup of tea, then slides, revealing a big cat quietly sleeping on my lap, set in a warm, cozy atmosphere.

Current Limitations
-
Do not add music, the Music Lyrics component, or the Face Animator component to your project. These components are not compatible with AI Clips and will prevent the Lens from being published.
-
Lens Studio Preview supports the default person only. To test with other people, click "Preview Lens" and try it on your device.