Combining Style Generator with Animated Selfie Attachments, Head Generator and Zoom Component
Introduction
In this tutorial, you’ll learn how to build a more advanced Lens by combining GenAI-powered components from the Style Generator plugin, Animated Selfie Attachments plugin, and Head Generator plugin, along with a Zoom Component triggered by the Open Mouth event.
The main principle is to render each effect into its own separate Render Target and then use that Render Target as the input for the next effect and its camera (in this tutorial, the first two effects share the same Render Target to optimize the Lens’s technical performance). If you’d like to refresh your knowledge before diving into the tutorial, refer to the Camera documentation.
You can watch the video tutorial for a guided overview, or continue with the detailed step-by-step guide below.
Step 1: Import Effects
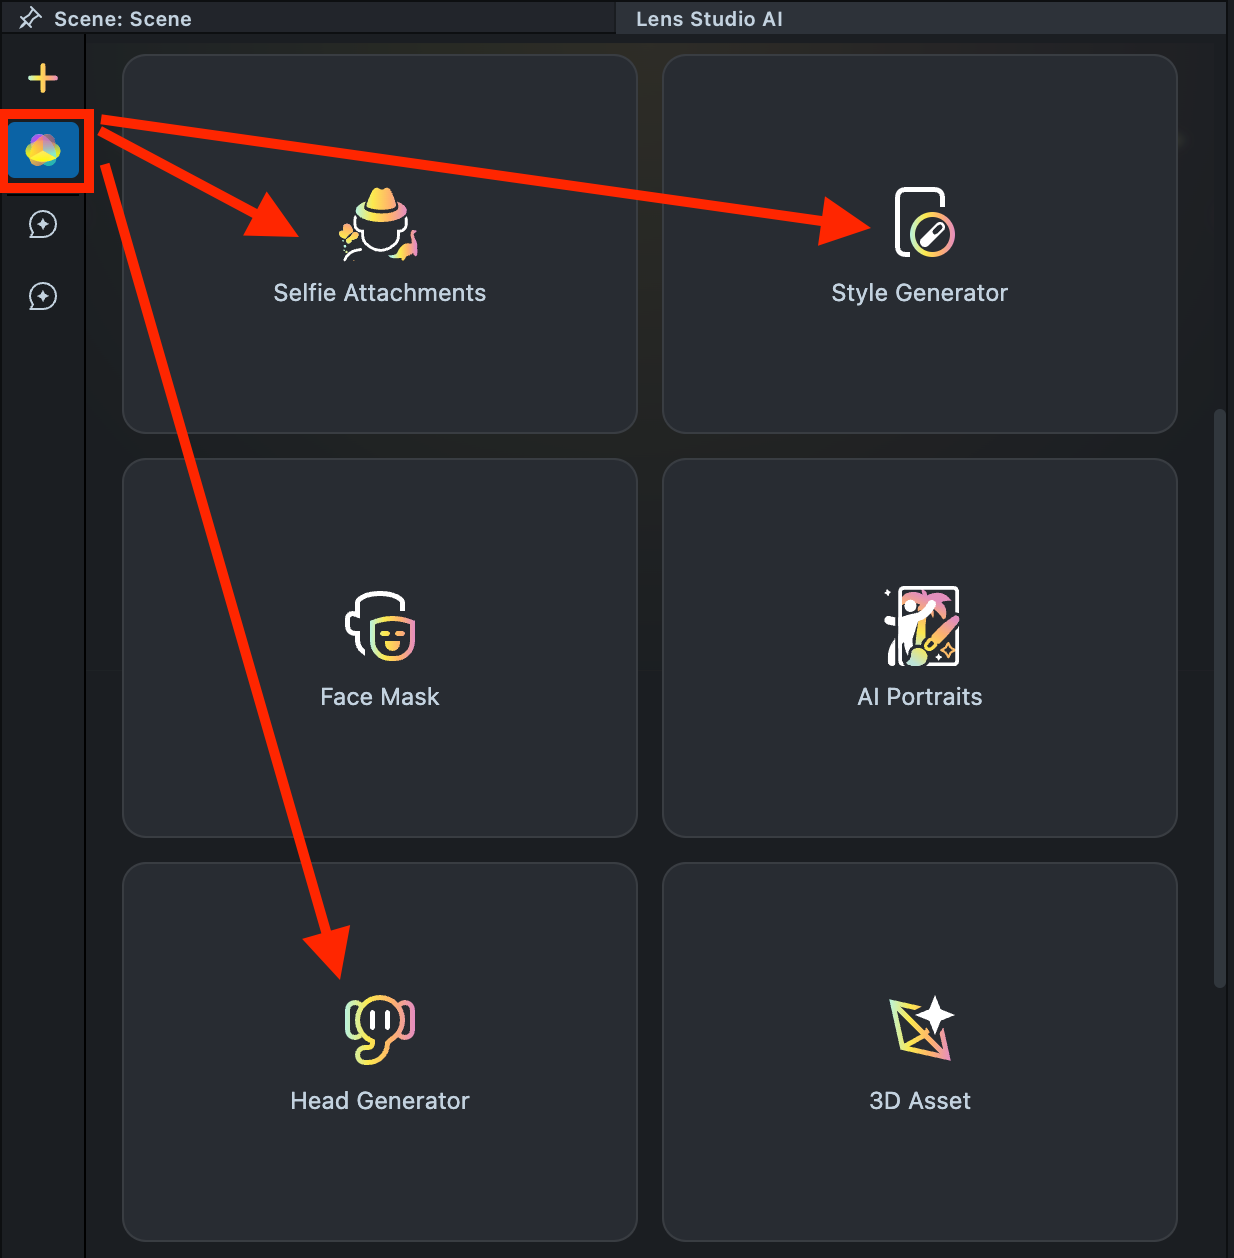
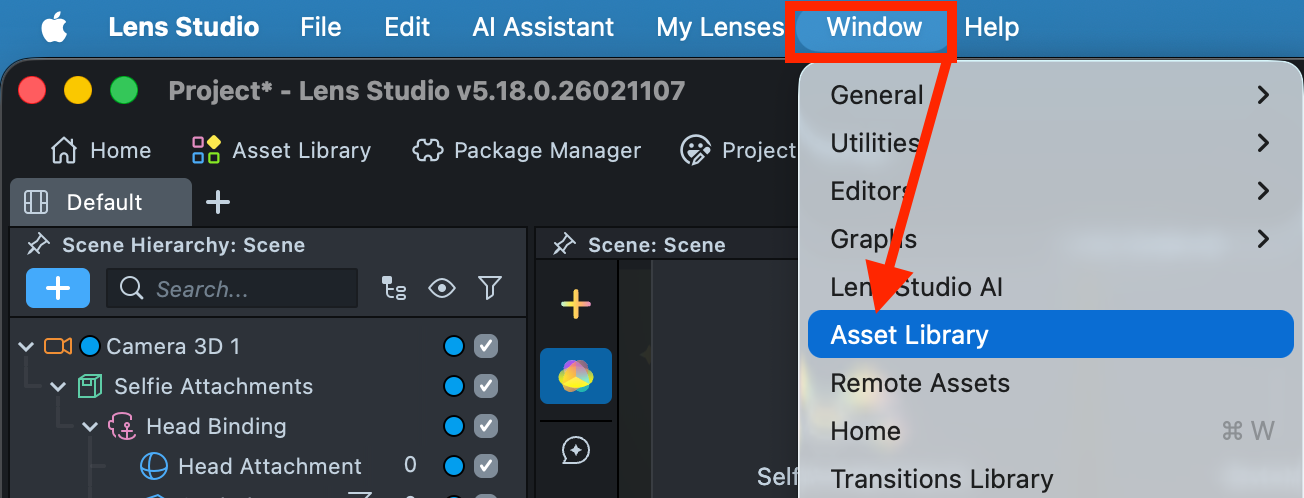
1.1. Navigate to the Lens Studio AI option in the top right corner of the Lens Studio. Then, click on the GenAI Home Page tab in the sidebar.

1.2. In the GenAI Home Page tab, locate the plugins we’ll be using.
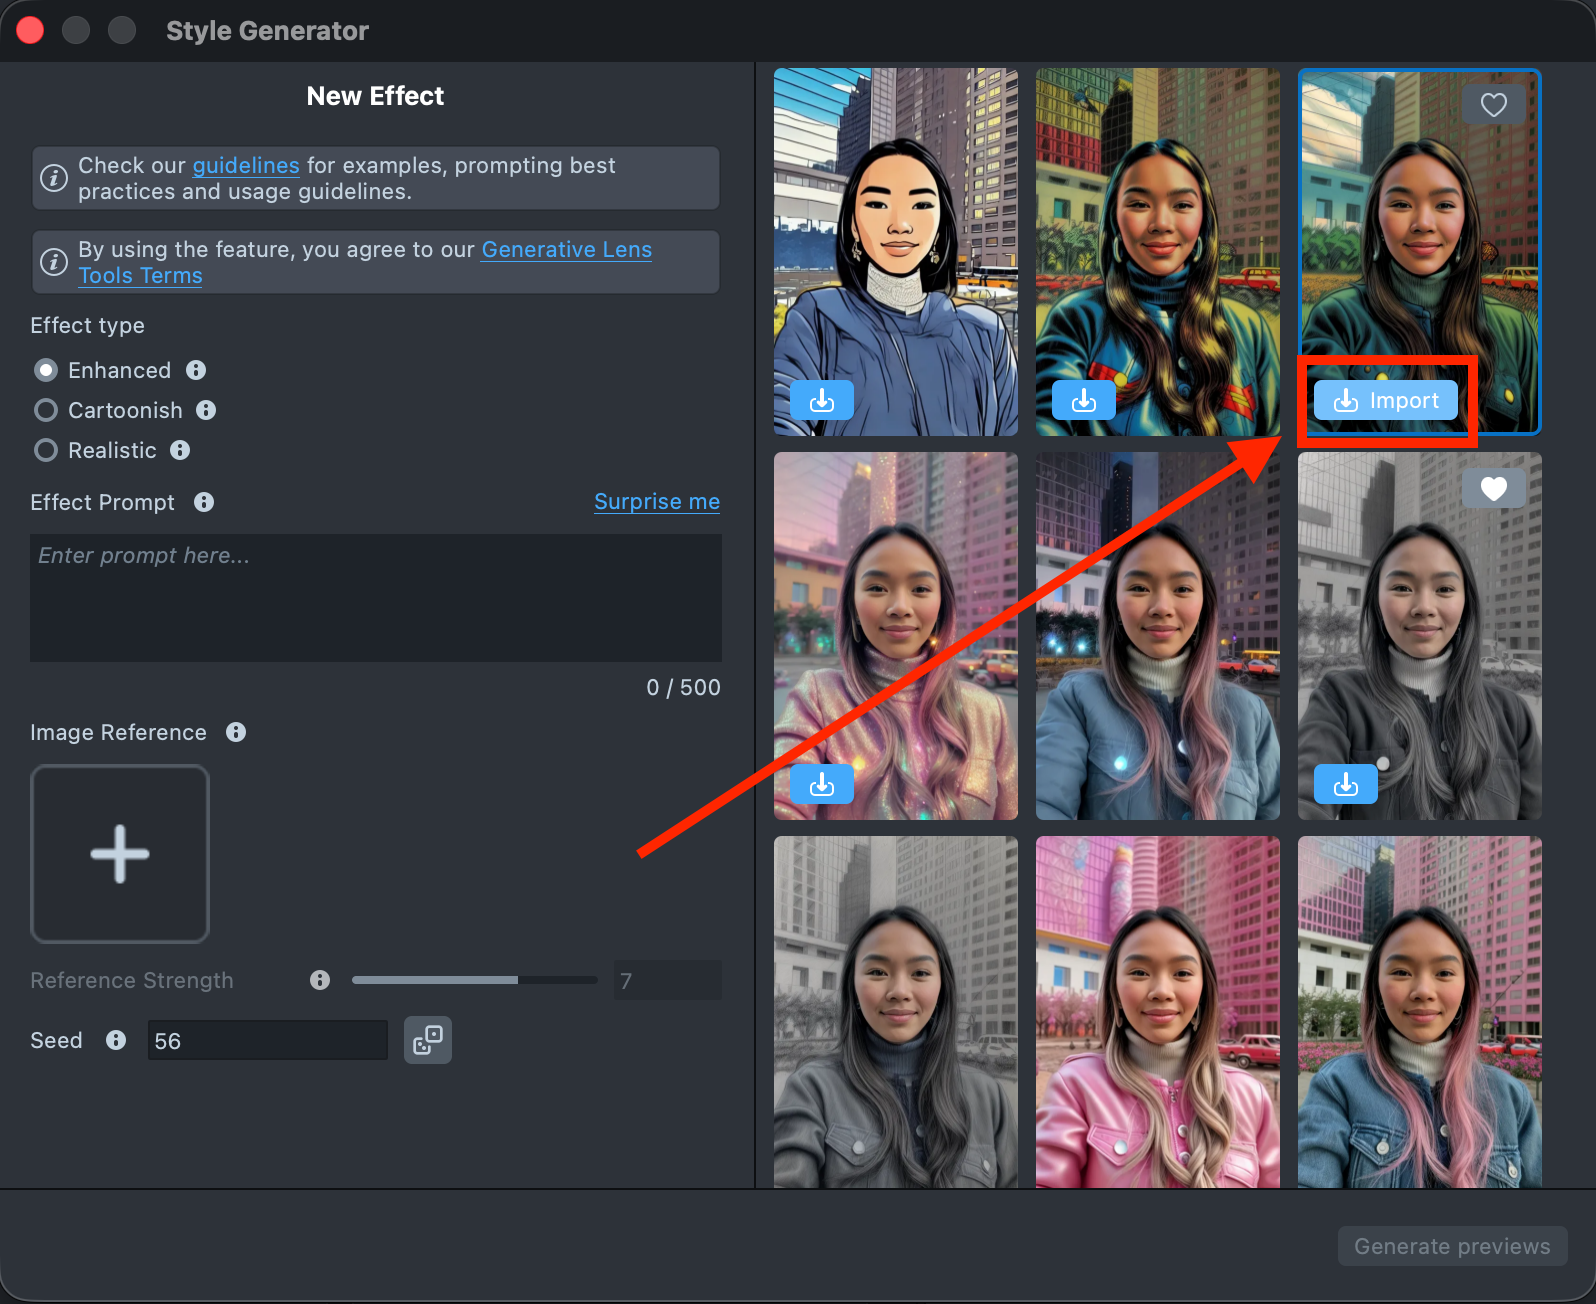
1.3. Open the Style Generator plugin and import a generated effect into your project. If you don’t have any generated effects yet, refer to the Style Generator web page to learn how to create one.
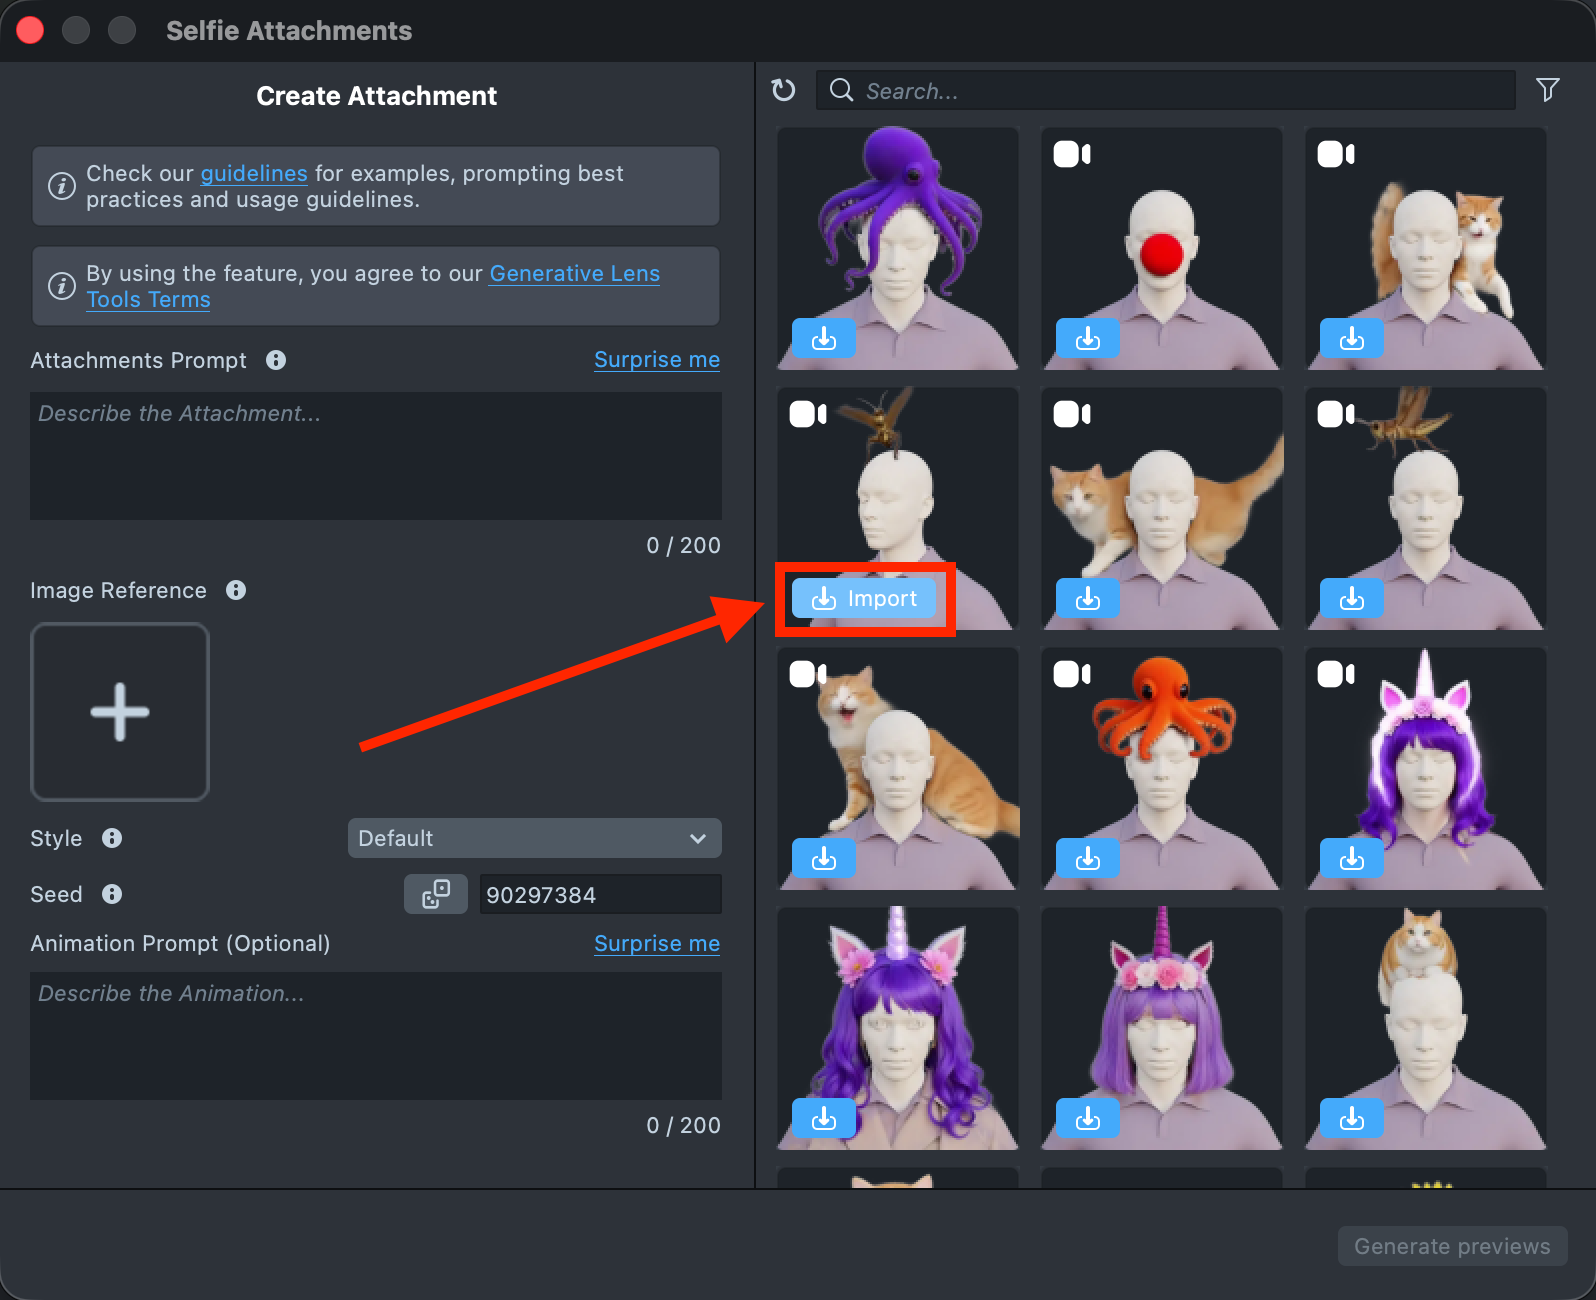
1.4. In the GenAI Home Page, find the Selfie Attachments and import a generated effect into your project.
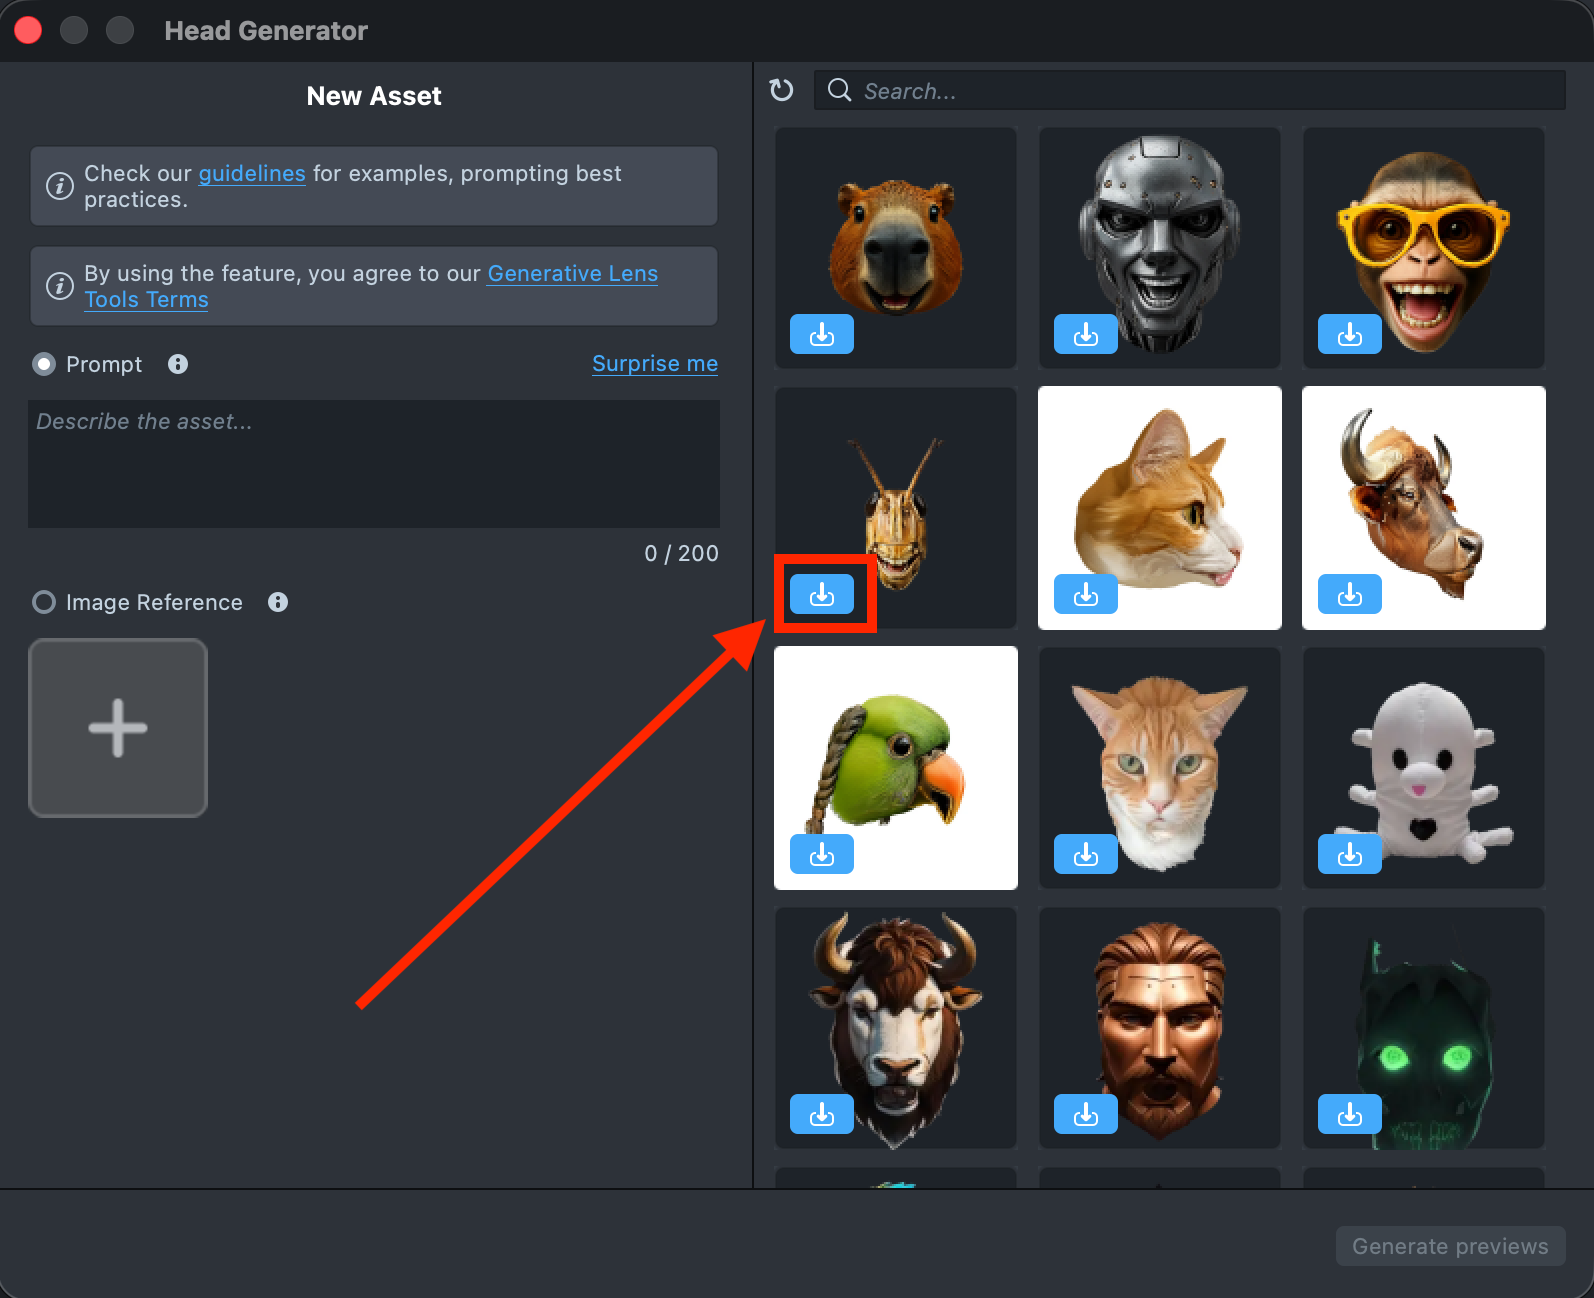
1.5. In the GenAI Home Page, find the Head Generator and import a generated effect into your project.
Step 2: Combine Components
2.1. Next, separate the Selfie Attachments and Head Generator effects into two different cameras.
You can duplicate the existing camera that contains both effects, then remove the unnecessary duplicated scene objects. Start by renaming the original camera to Camera 3D 1.
2.2. Right-click Camera 3D 1 and select Duplicate. This creates Camera 3D 2, which contains the same effects as the original camera.
2.3. Create a new Render Layer for Camera 3D 2.
2.4. Assign this new render layer to Camera 3D 2. Note that the layer must be reassigned in two places: in the top-right dropdown and in the Layers field.
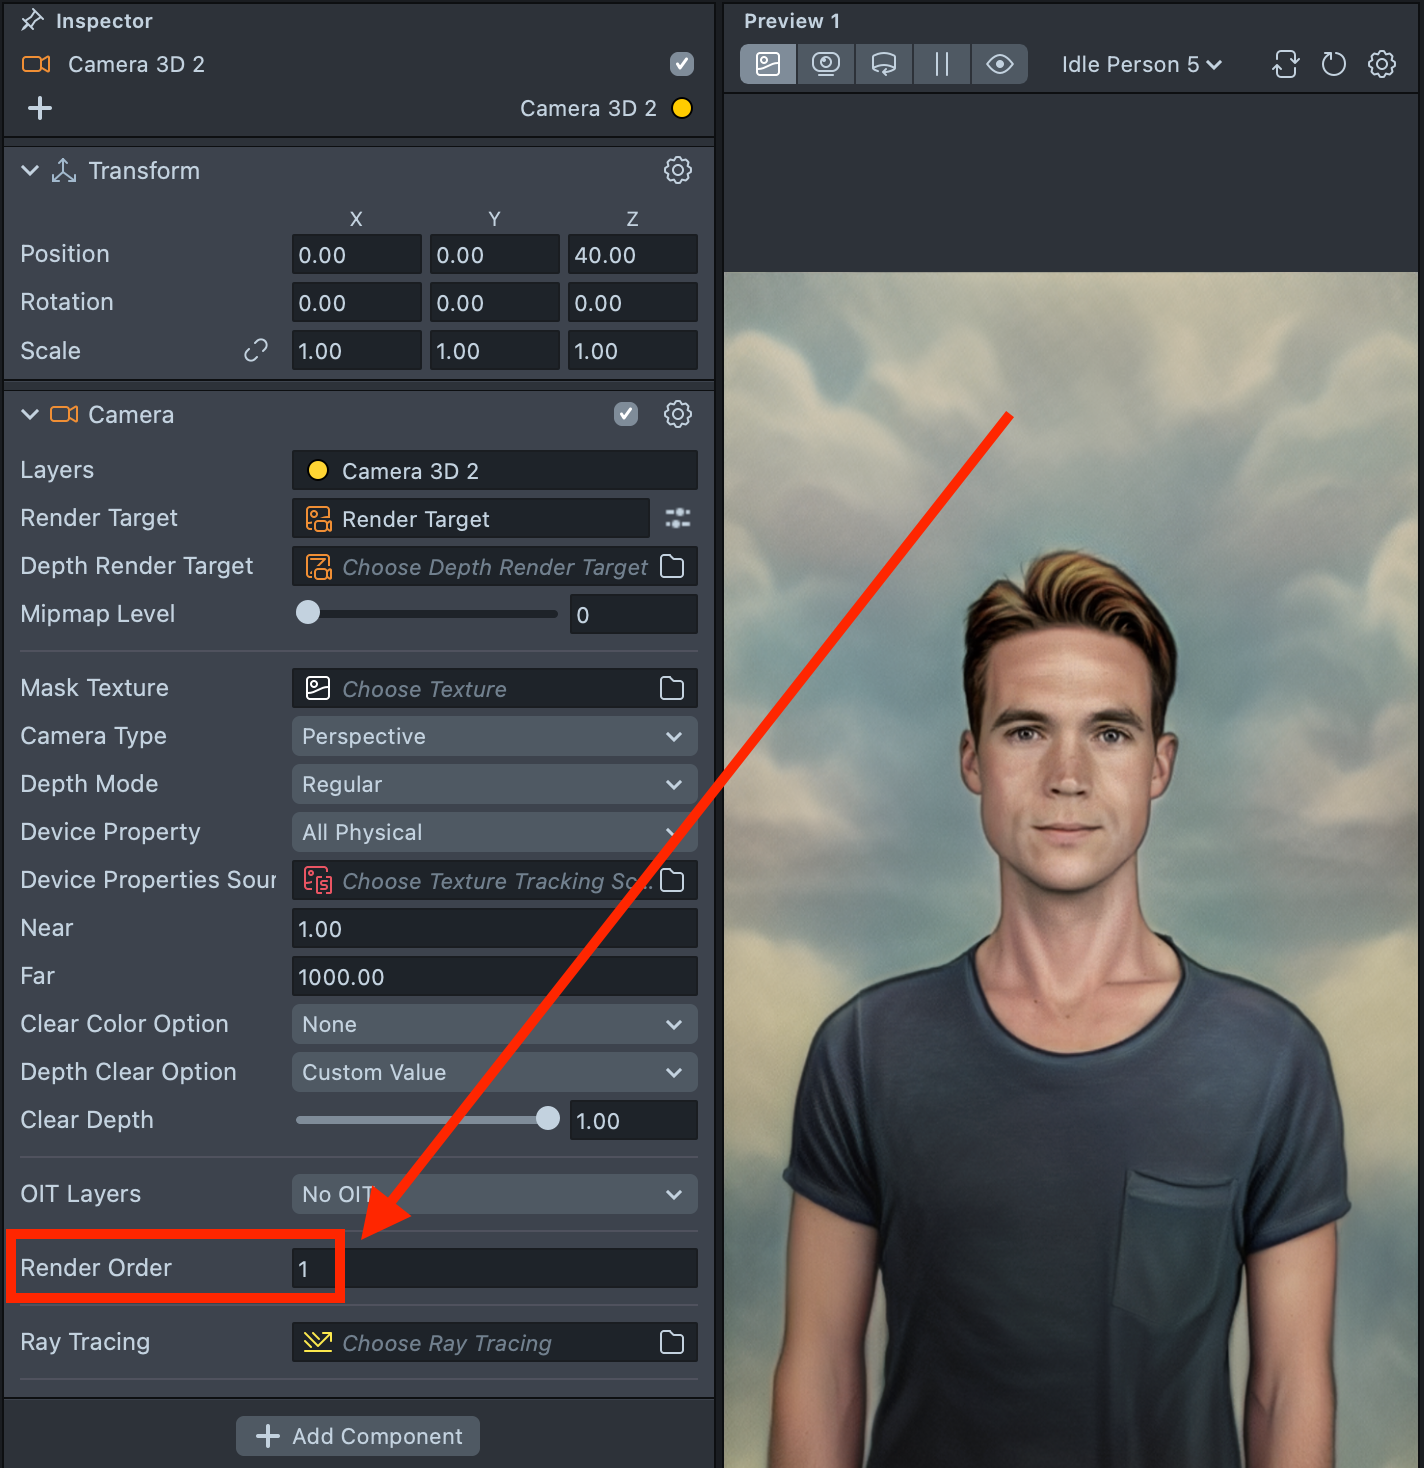
2.5. Set the Render Order to 1.
2.6. Create a new Render Target.
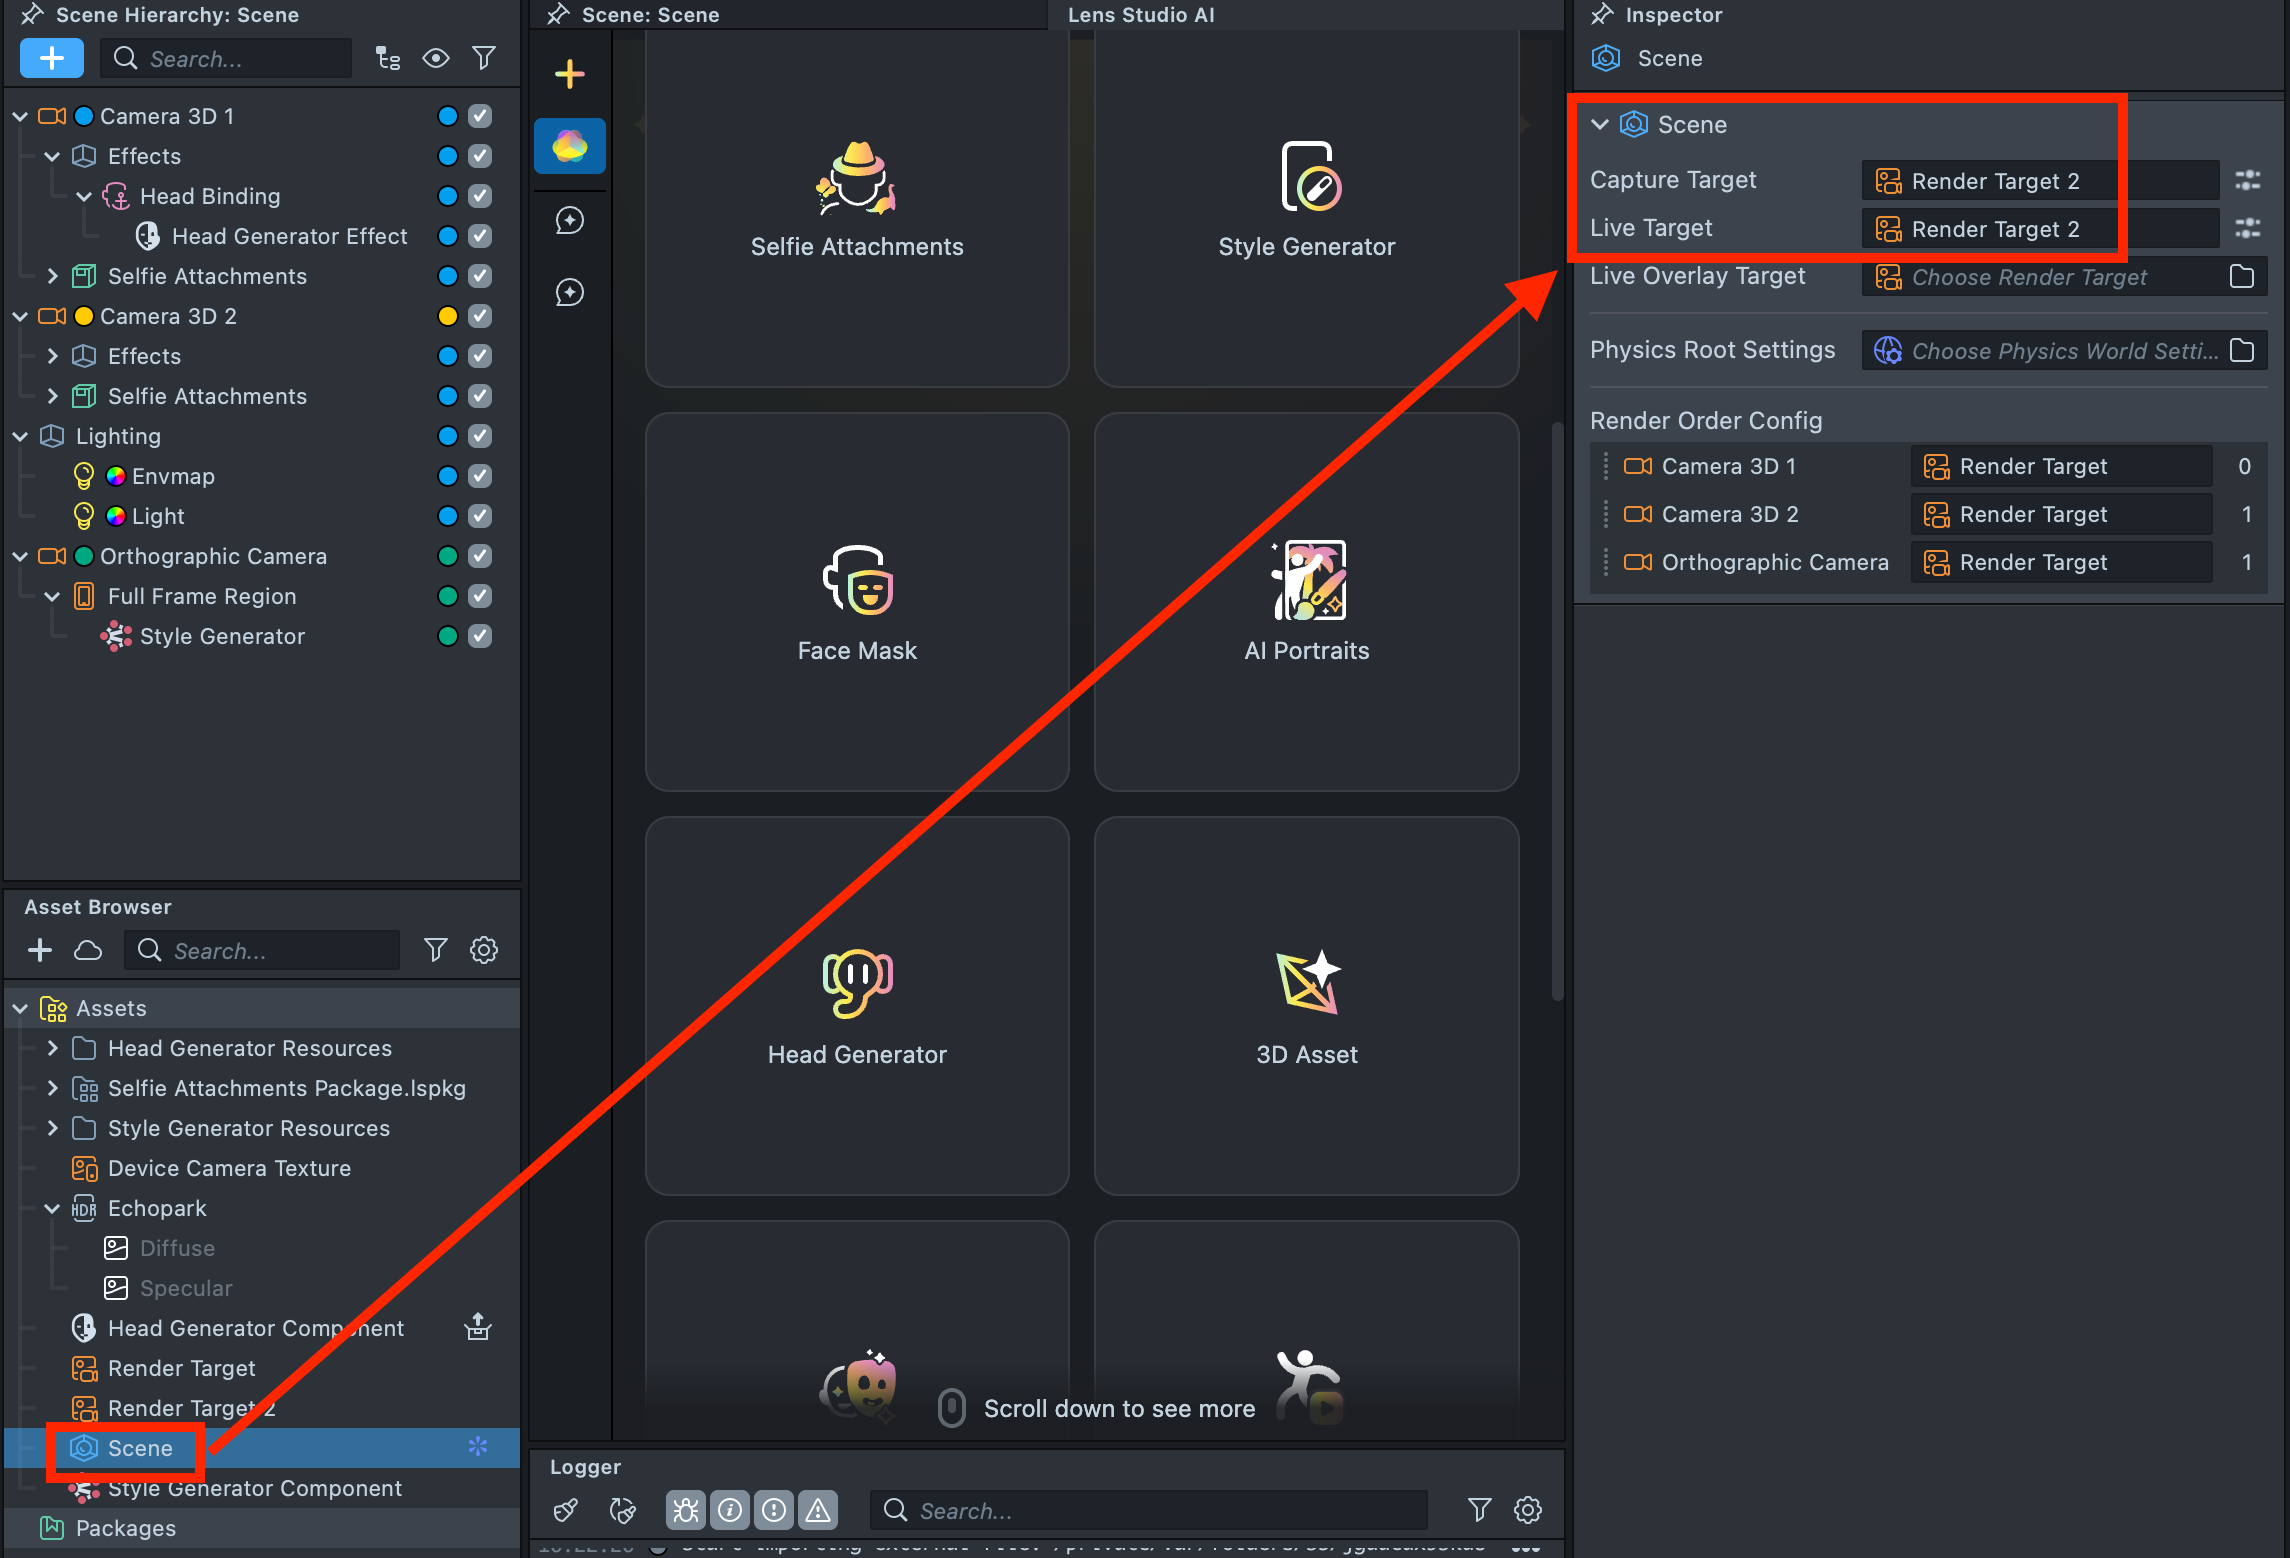
2.7. In the Scene settings, set this Render Target 2 as both the Capture Target and Live Target.
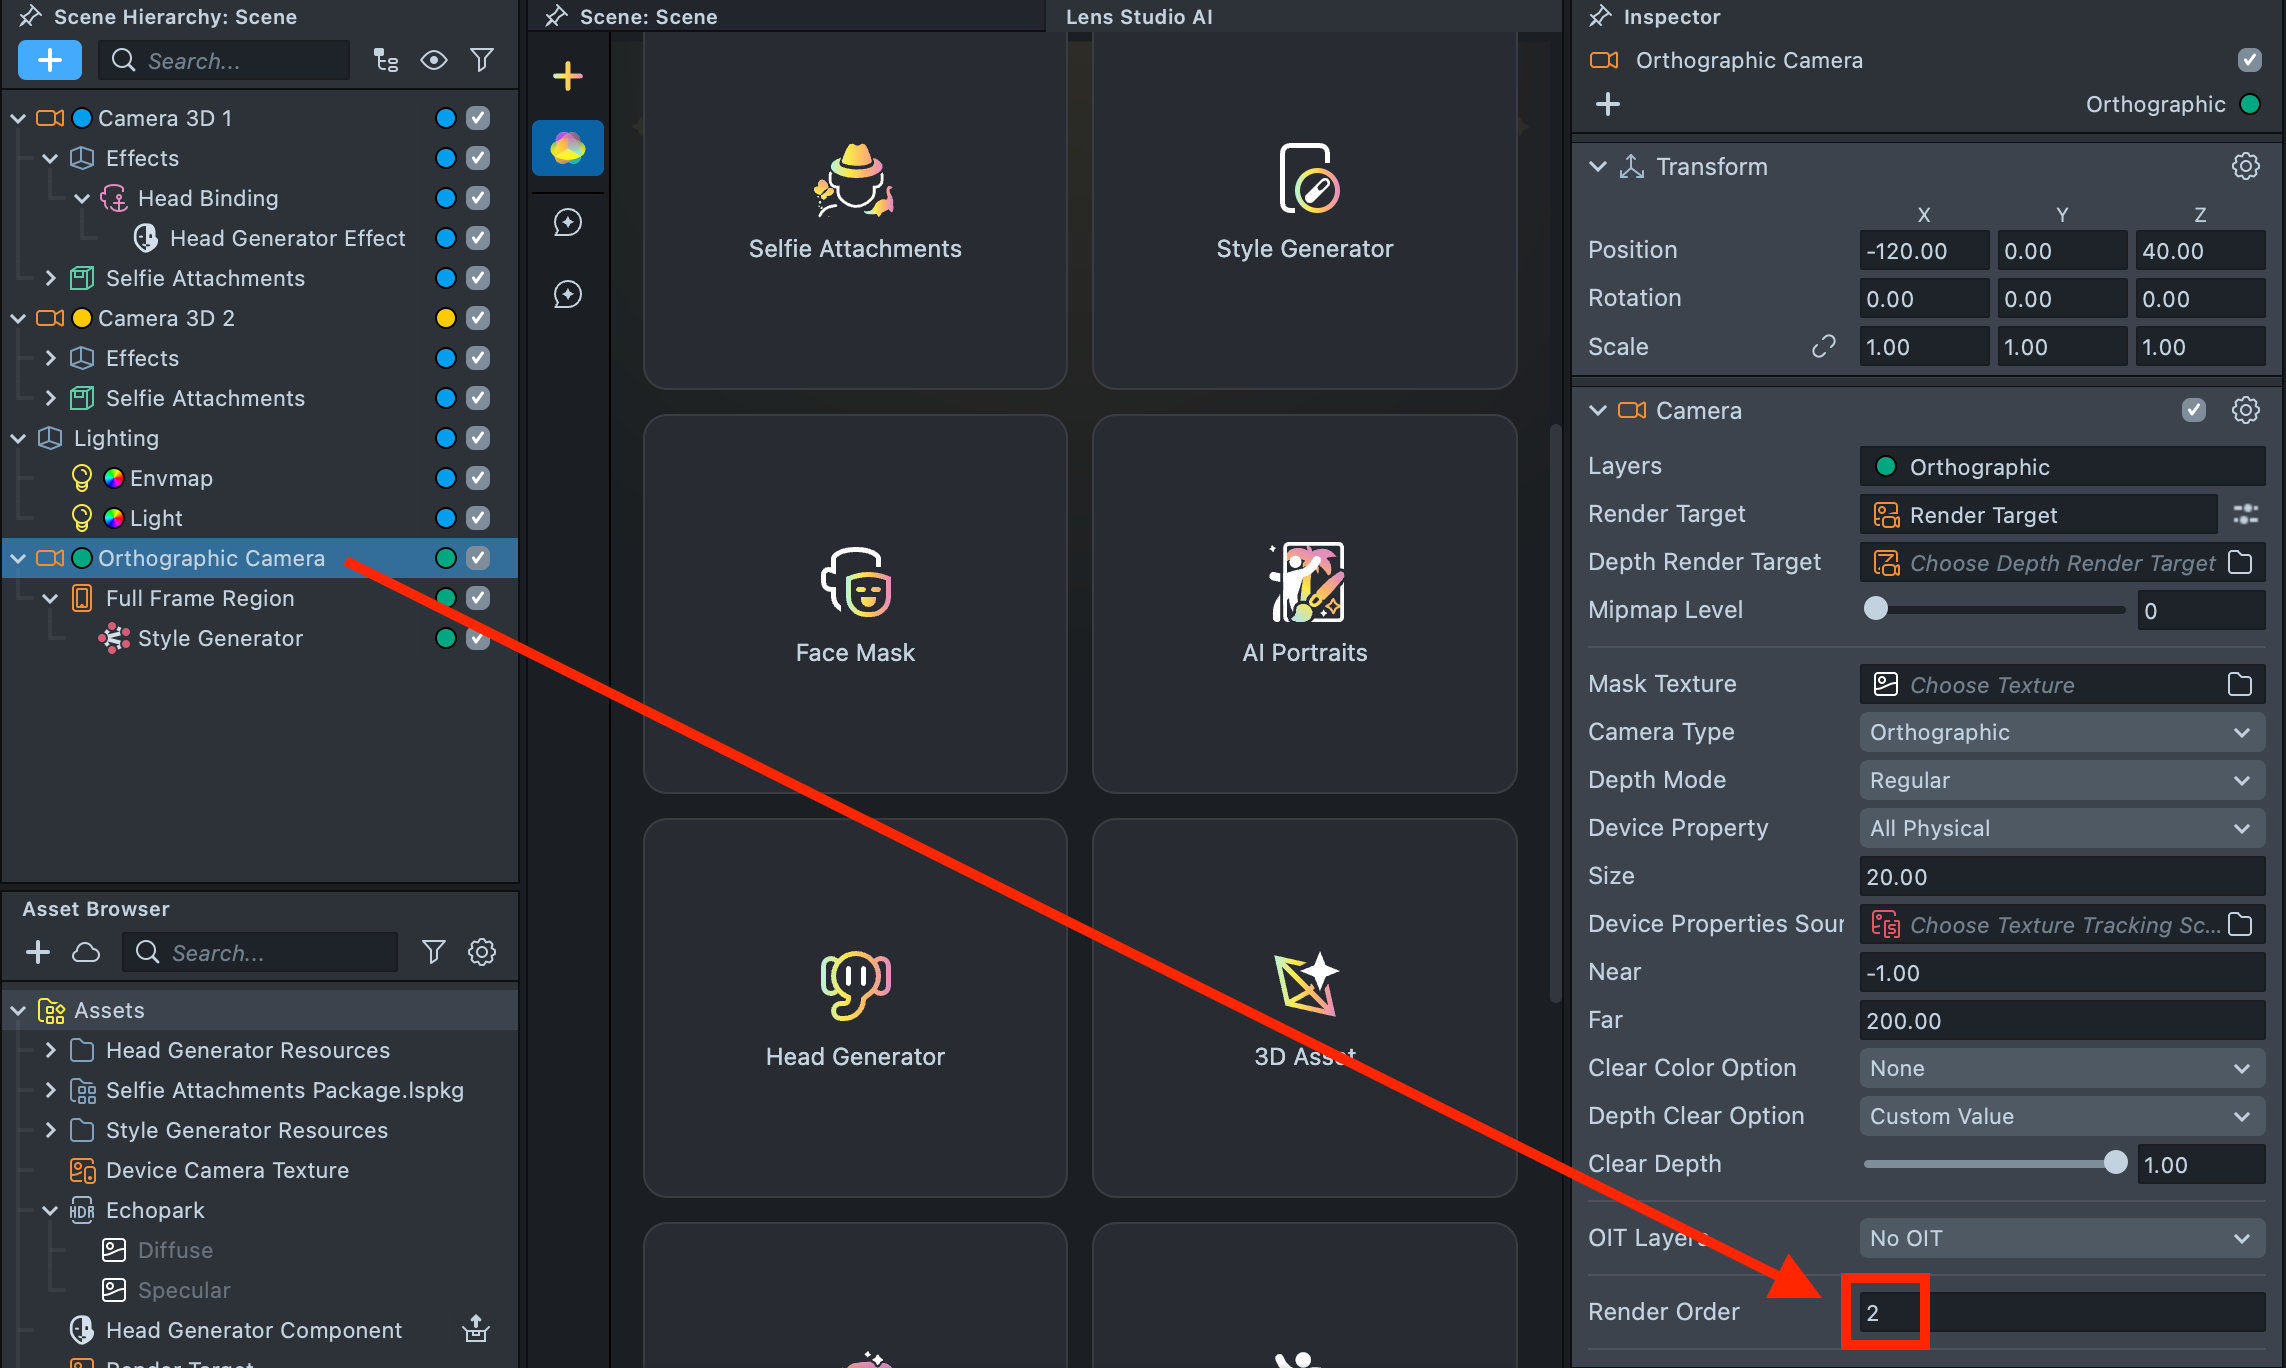
2.8. Select the Orthographic Camera and set its Render Order to 2.
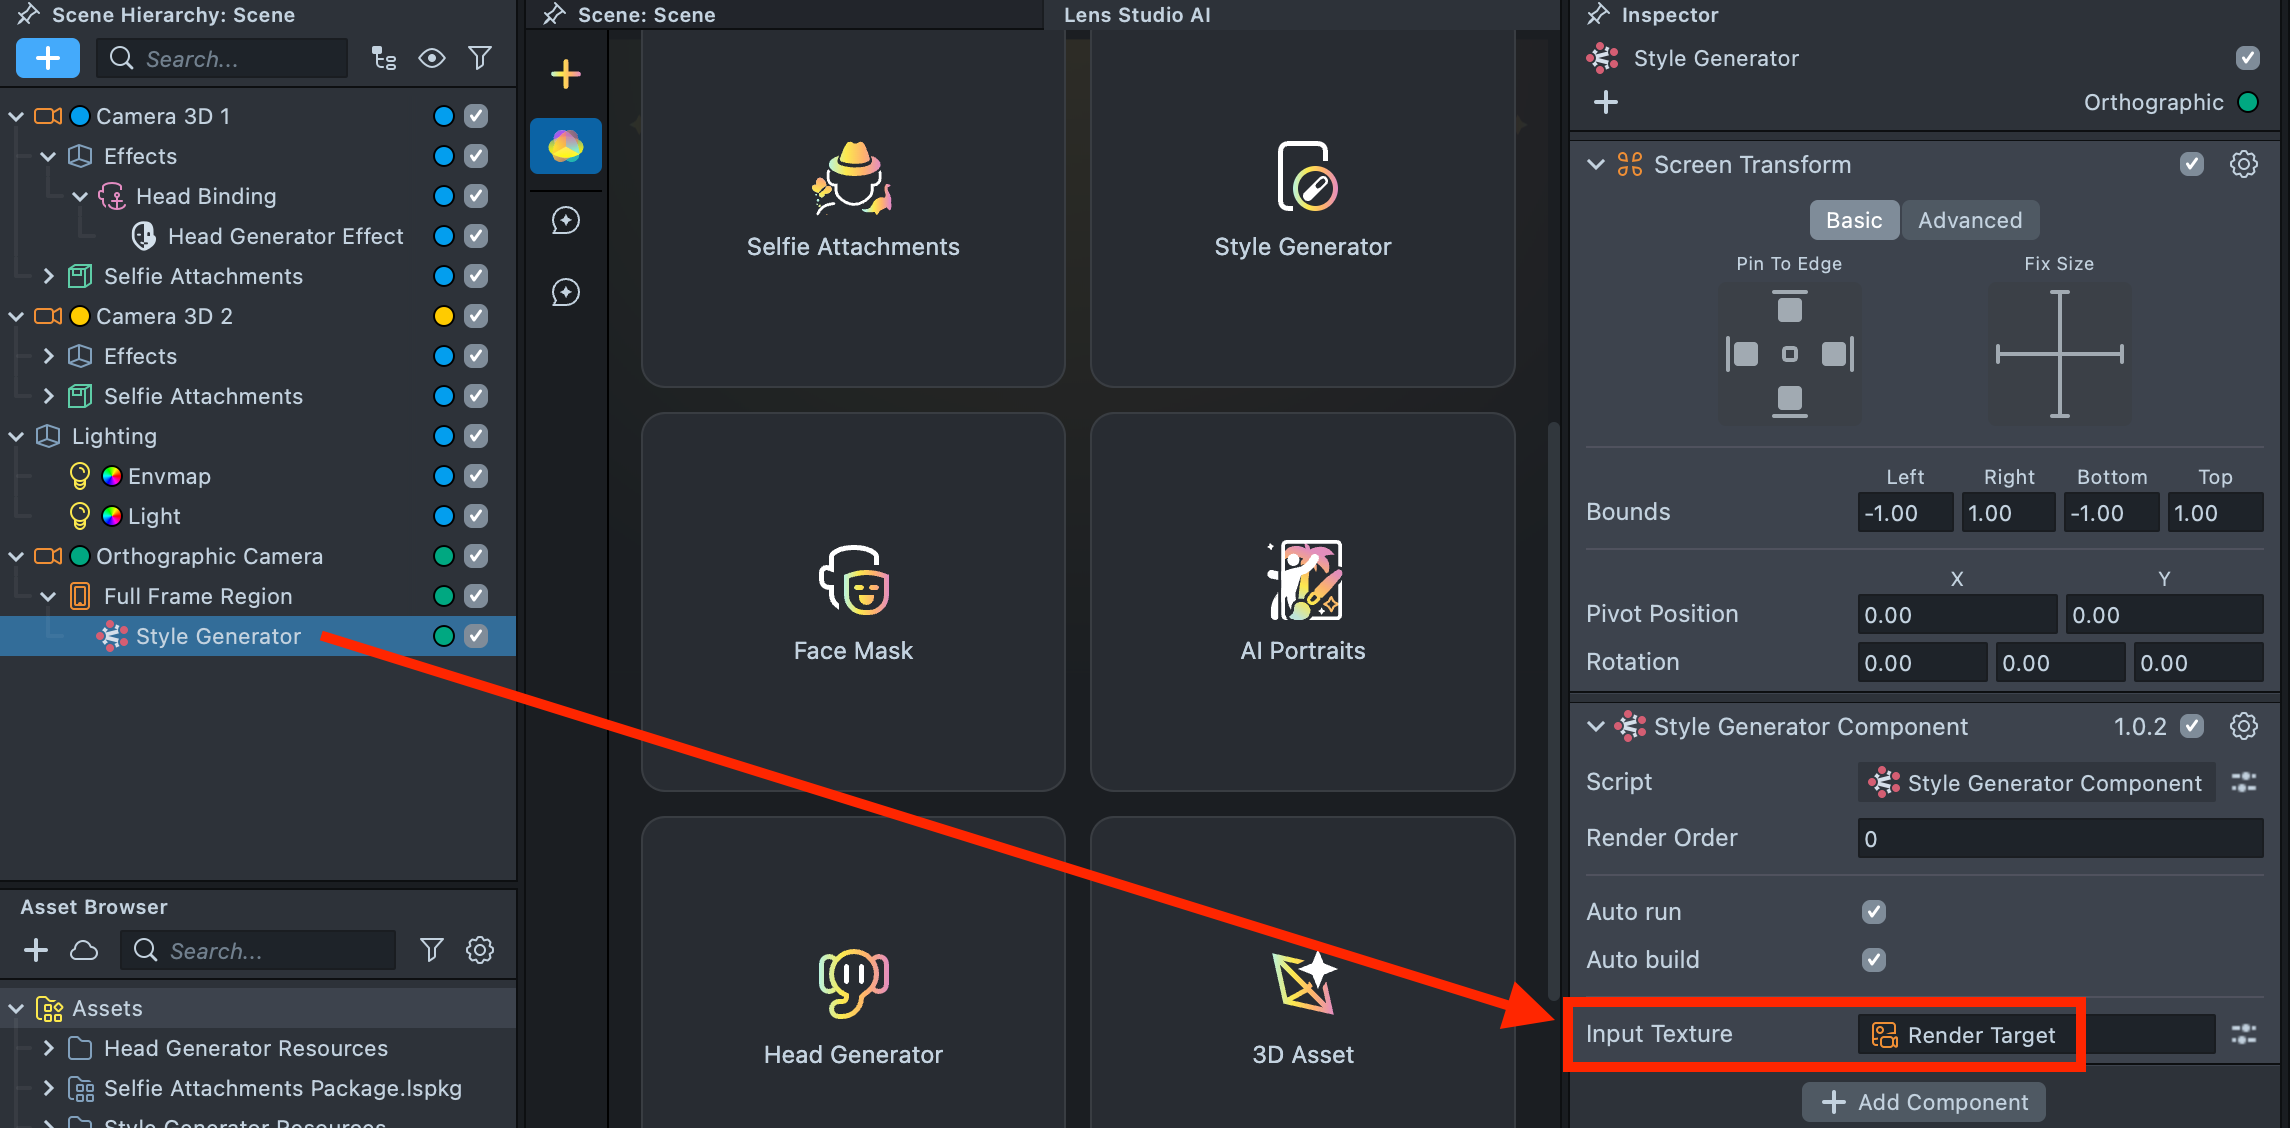
2.9. In the Scene Hierarchy, locate the Style Generator object. In the Inspector, replace the Input Texture with the Render Target.
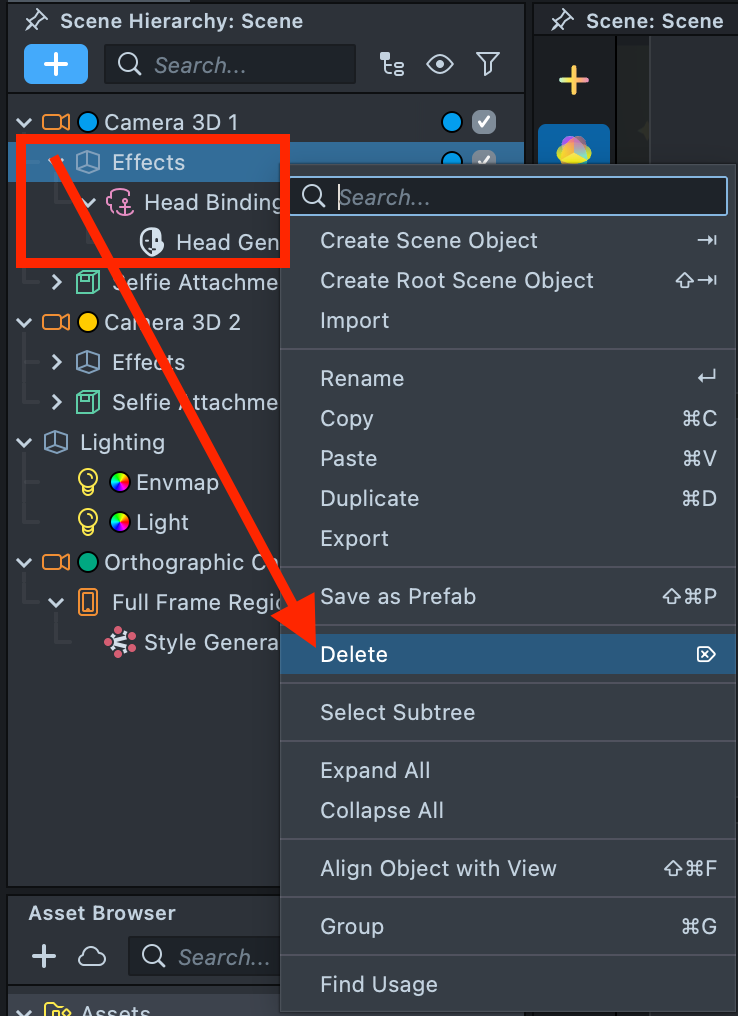
2.10. Remove the duplicate Head Generator from Camera 3D 1.
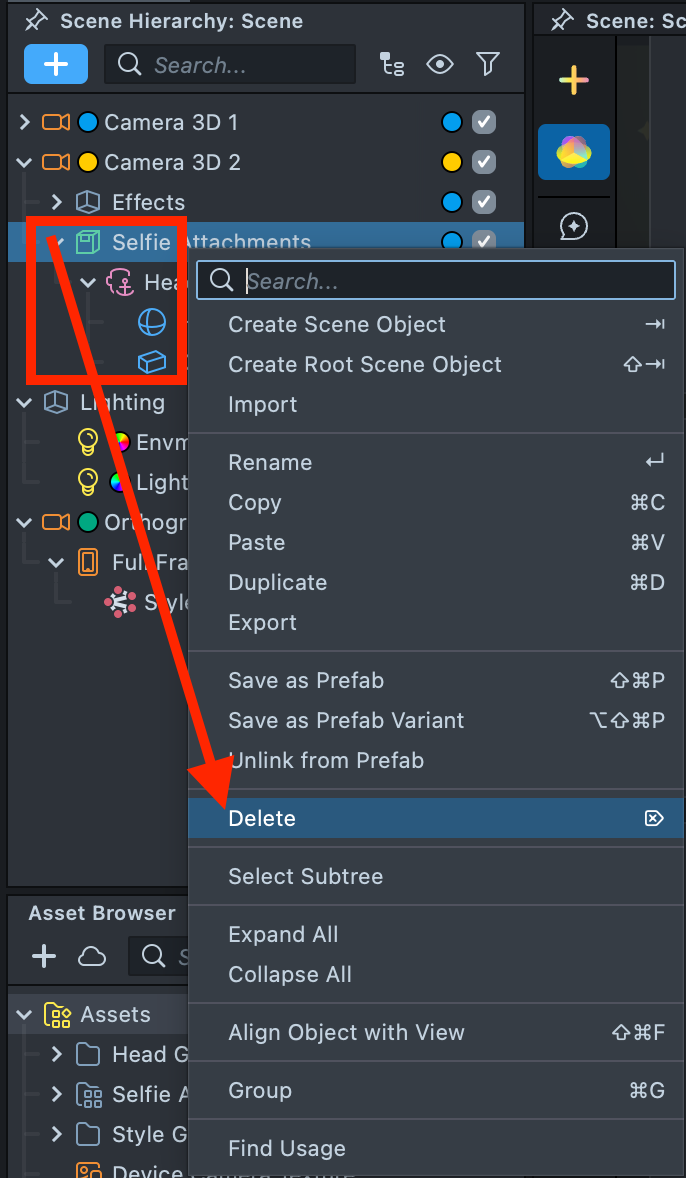
2.11. Remove the duplicate Selfie Attachments from Camera 3D 2. Now, Selfie Attachments should remain in Camera 3D 1, and Head Generator should remain in Camera 3D 2.
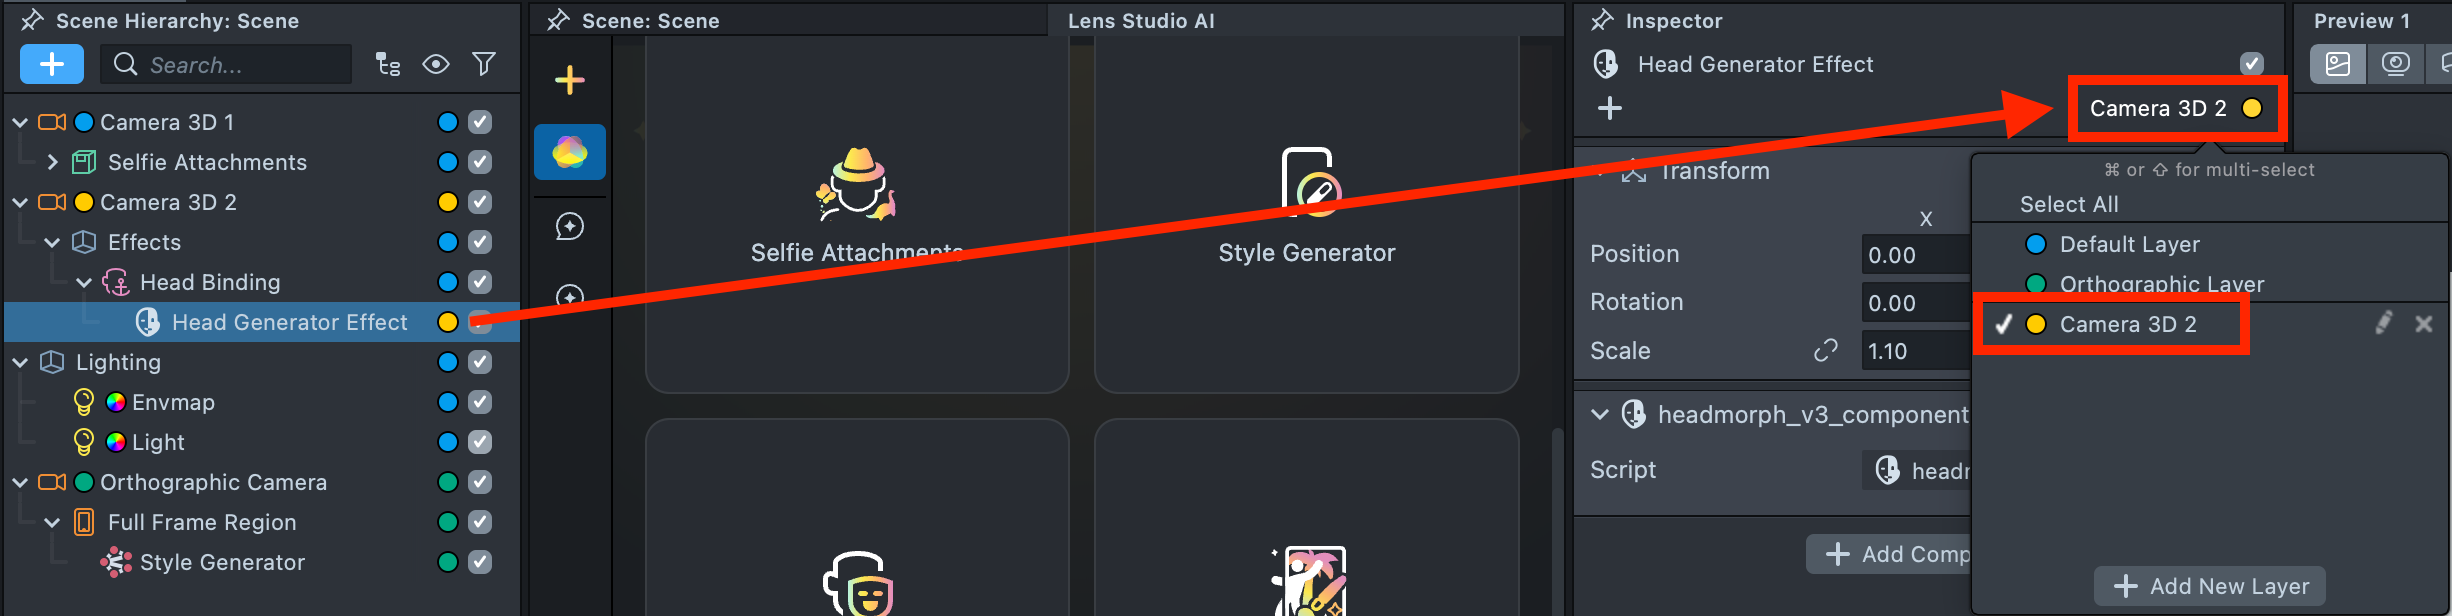
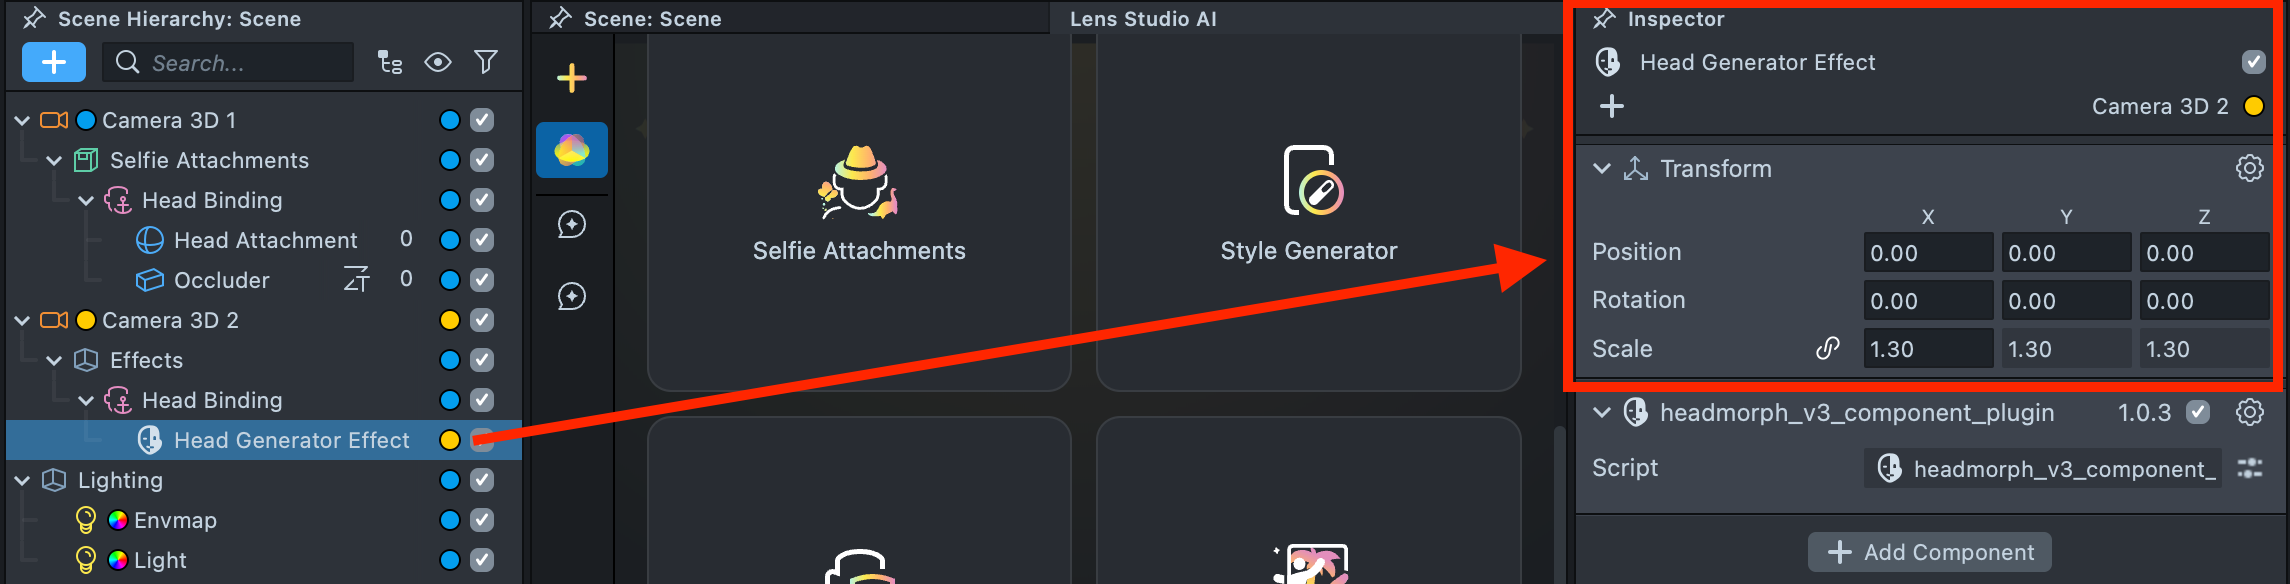
2.12. In the Scene Hierarchy, select the Head Generator effect. In the Inspector, assign the render layer used by Camera 3D 2.
2.13. In the Asset Browser, select Render Target 2. Under Clear Color Option, choose Texture, then set the Input Texture to the original Render Target.
2.14. Select the Orthographic Camera and set its Render Target to Render Target 2.

2.15. Let's review the setup. Select Scene in the Asset Browser, then examine your project configuration in the Inspector.

As shown in the configuration:
- The cameras containing Selfie Attachments and Head Generator render into the
Render Target. - The Orthographic Camera renders
Render Target 2. Because the originalRender Targetis assigned as the Input Texture ofRender Target 2(configured in #2.13), the Orthographic Camera can "see" the previously rendered effects and apply the Style Generator effect on top. - The Render Orders are set sequentially.
Render Target 2is assigned as both theCapture TargetandLive Target(configured in #2.7), ensuring that all effects are visible in the Preview panel.
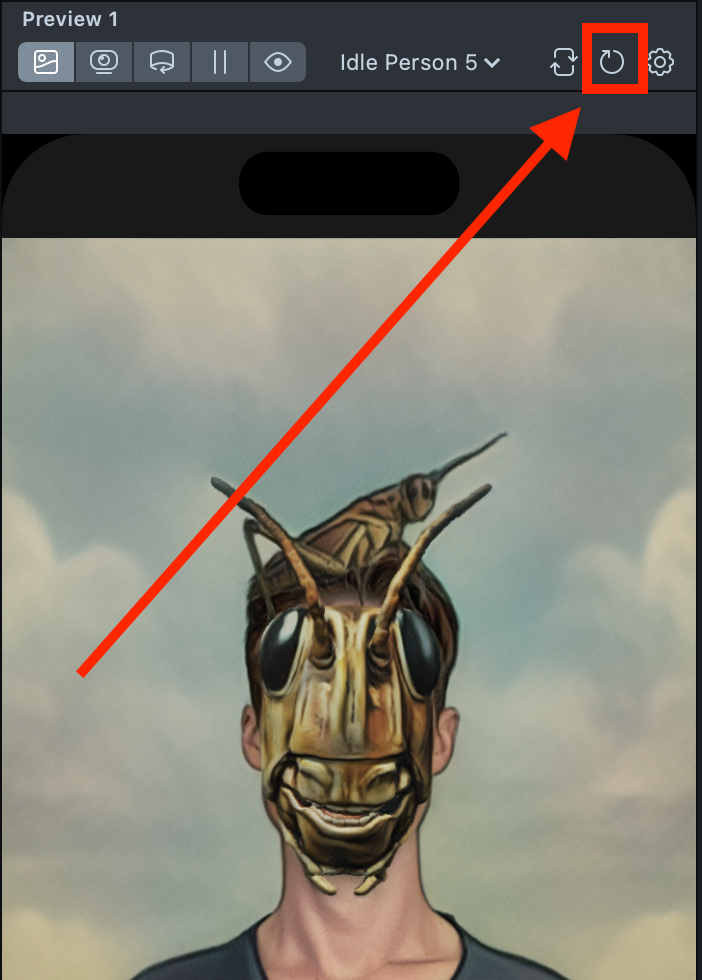
2.16. Click the Reset button to ensure the Preview reflects the correct result after applying all the changes made in the previous steps.
2.17. Adjust the scale of the Head Generator effect as needed to properly align it with the user’s head and your overall Lens design.
Step 3: Add a Zoom Effect
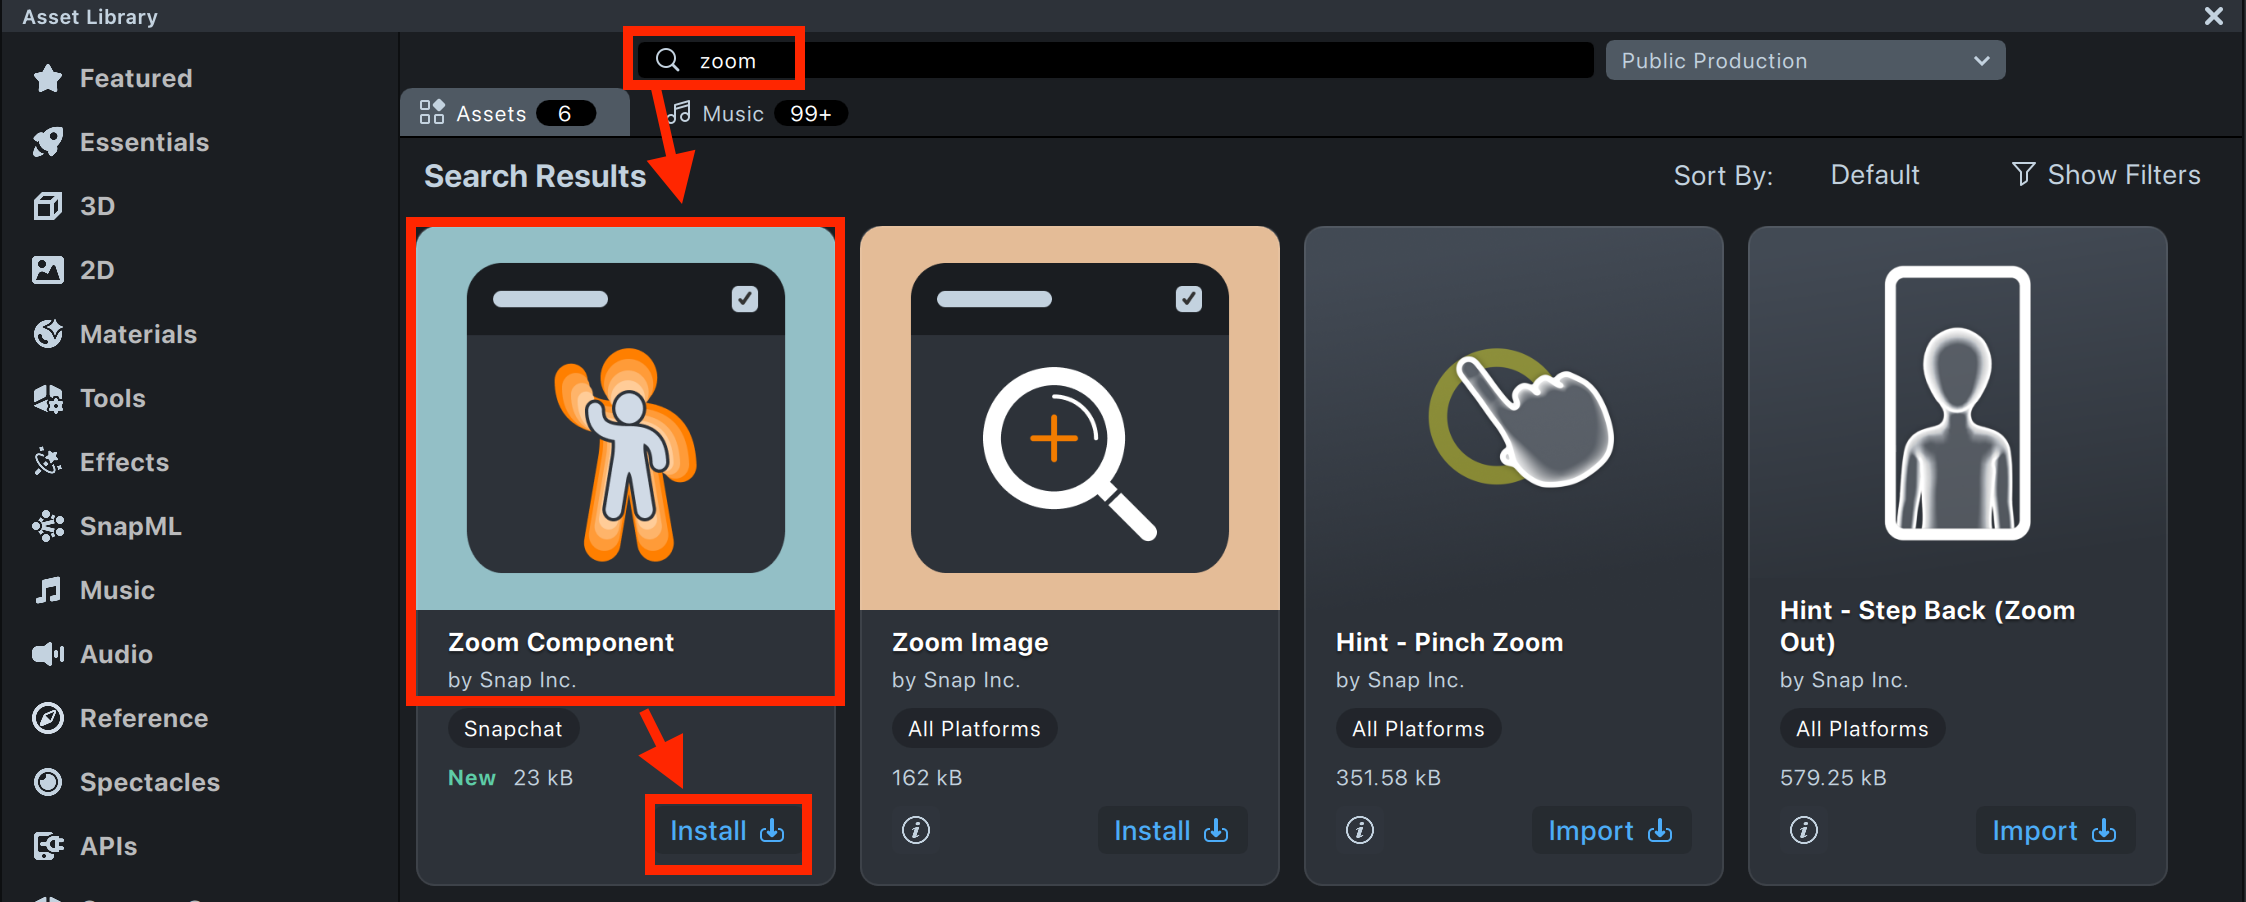
3.1. Open the Asset Library, search for Zoom Component, and click Install. The component will appear in both the Asset Browser and the Scene Hierarchy.
3.2. Drag the Zoom into the Orthographic Camera.
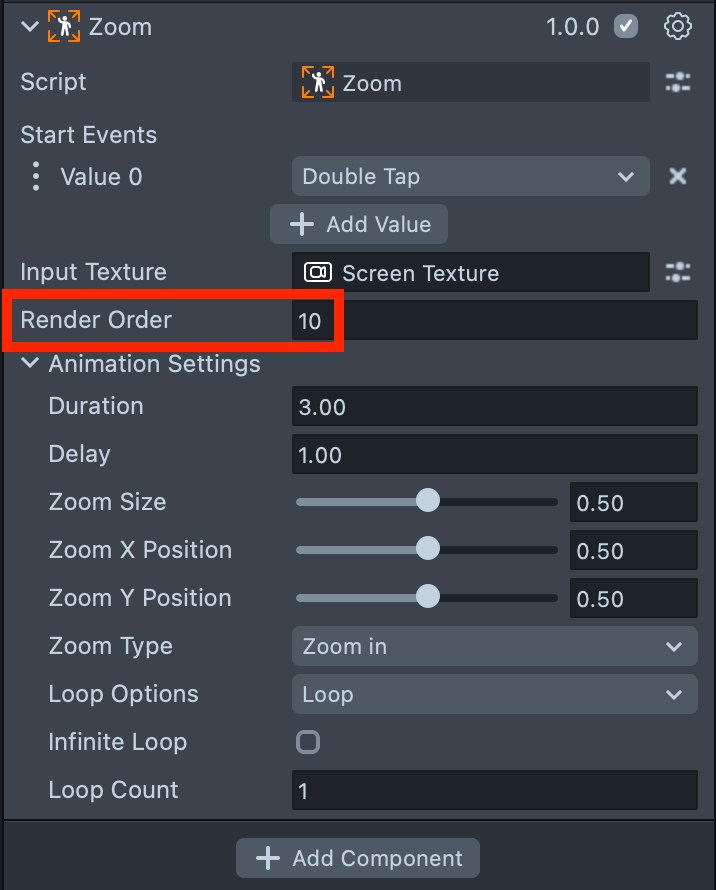
3.3. Set its Render Order to 10 to ensure it renders above the other effects.
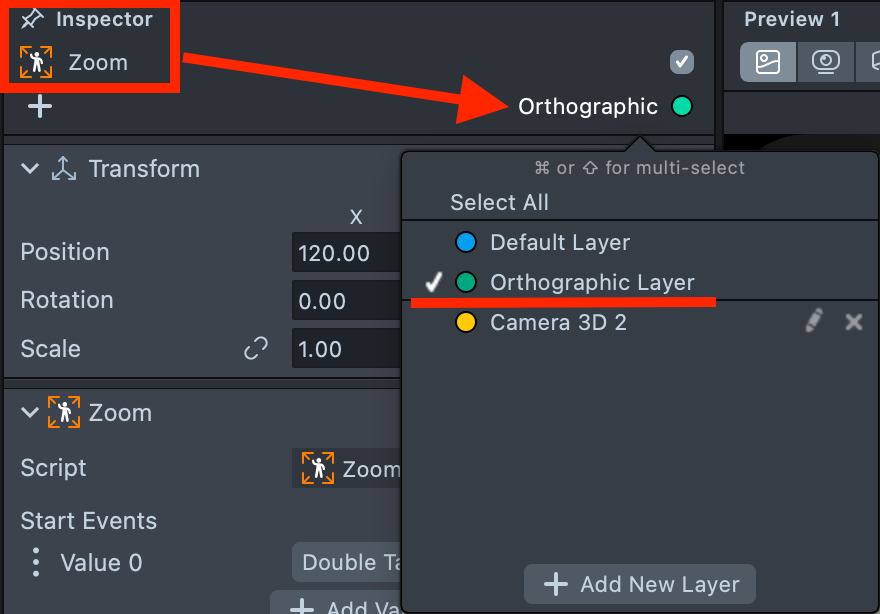
3.4. Assign it to the Orthographic render layer (since it is inside the Orthographic Camera).
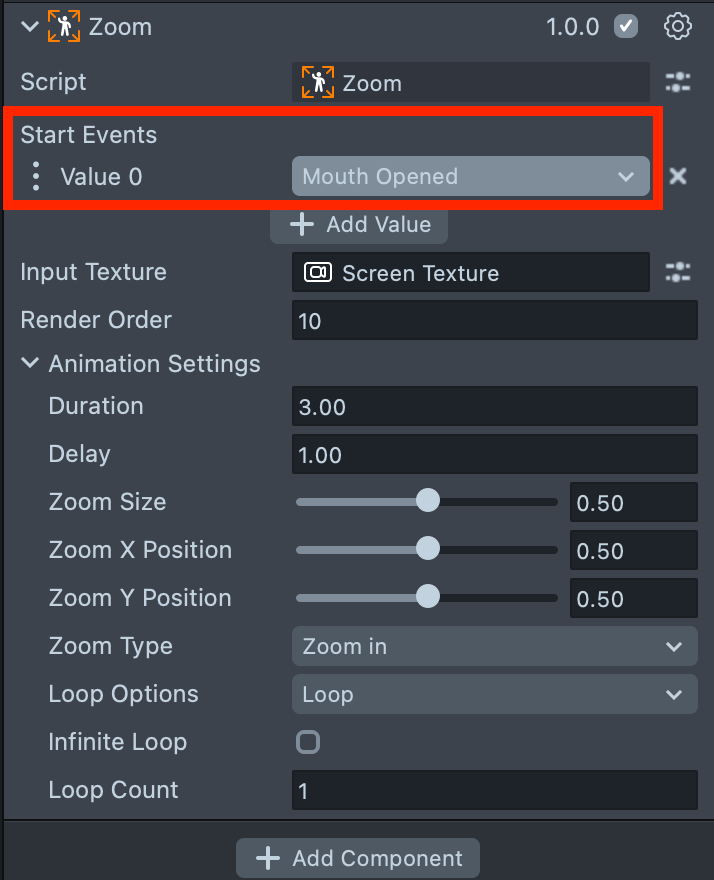
3.5. Set Start Events to Mouth Opened.
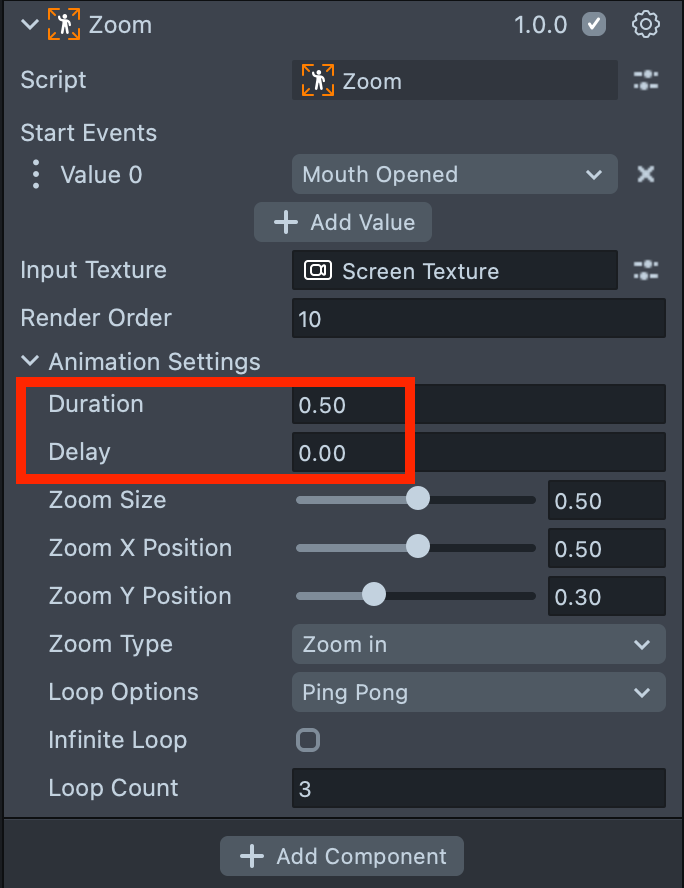
3.6. Adjust the Duration, Delay and other settings according to your preference.
3.7. Preview your Lens to test the final result. If necessary, restart the project to ensure all changes are applied correctly.
Summary
Your Lens is now complete and ready to be tested on a device.
In this tutorial, you learned that successfully combining multiple components requires a clear understanding of how cameras work, how Render Layers are configured, and most importantly - how Render Targets enable one camera to access and "see" the output of another.
To learn more about Render Targets, Render Layers, and camera configuration, see the Camera documentation.