Canvas
Canvas is a Component that creates a dedicated root within the ScreenTransform hierarchy to dynamically place 2D Components, like Text and Image, in 3D space. The Canvas Component is built to adapt to multiple tracking solutions, giving Developers the flexibility to add more 2D AR enabled content to their experiences.
Canvas Component is highly beneficial if you already know how to use Screen Transform. All you need to do is parent your ScreenTransform setup under the Canvas.
Adding a canvas
To add Canvas to your Scene, in the Objects panel, press + and choose Canvas.

Then, you can add any screen objects (i.e. objects with a ScreenTransform on it, meant for 2D screen space) as a child of the Canvas to have its ScreenTransform work properly. In other words, the Canvas will act as the "2D screen space" for its descendant.
The Canvas itself will act like any 3D object: allowing you to modify its transform freely.
Canvas Units
The Canvas Component also allows you to choose what units its child objects will use. By default, the Canvas will use World Units, which is how Lens Studio usuall works.
However, you can also set Canvas to use Pixels or Points (i.e. device independent pixels) instead. Learn more in the Pixel Accurate Rendering guide.

2D Content Beyond Screen Space
Since Canvas can be flexibly placed in the world, it will allow you to layout things in many different places in a 3D (i.e. real world) scene.
Canvas in World Space
For example, you can add Device Tracking to your camera, so that your Canvas shows up in world space.
You can modify the Canvas to change how it appears in the world. For example changing its pivot point, or the size of the Canvas. This is useful because your changes to the Canvas will automatically affect its child ScreenTransforms.
Canvas on a Marker
You might also use Canvas under an Image Marker. Since you can resize Canvas, this can allow you to have accurate scale under a ScreenTransform.
For example, you might have a hierarchy of objects under a Canvas.
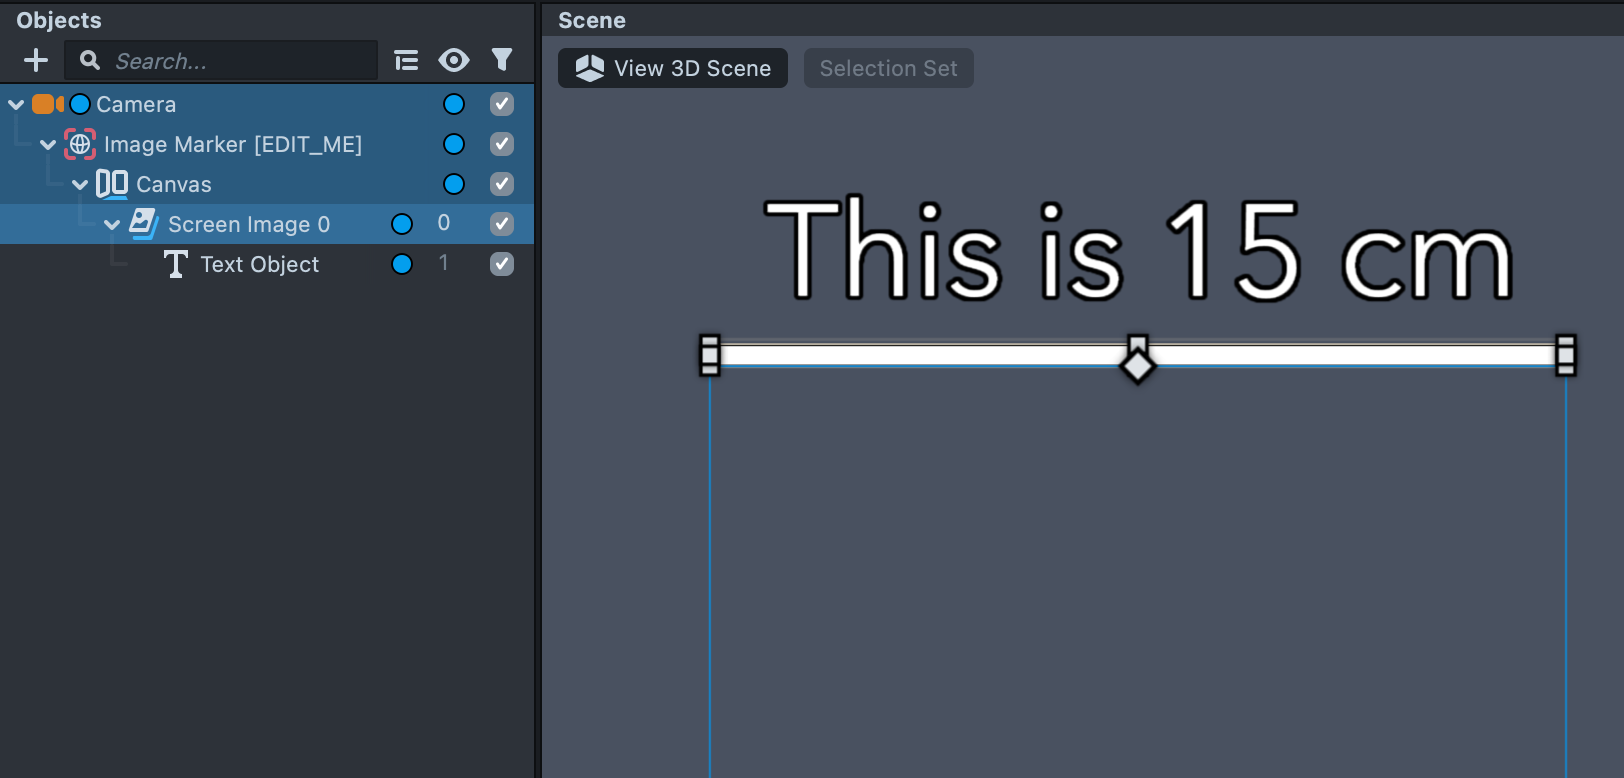
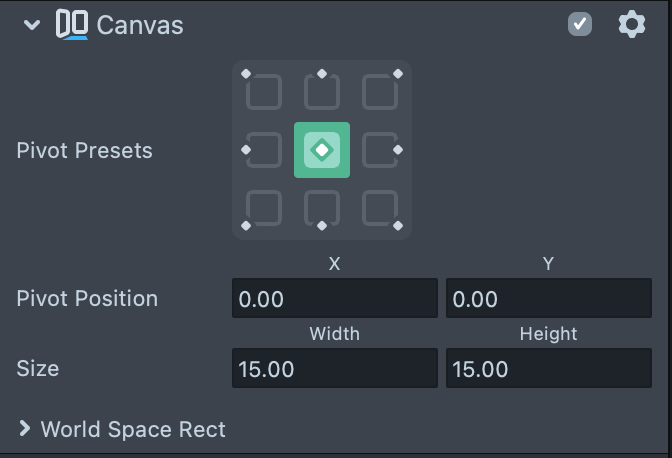
Then, set the Canvas to have a size of 15:
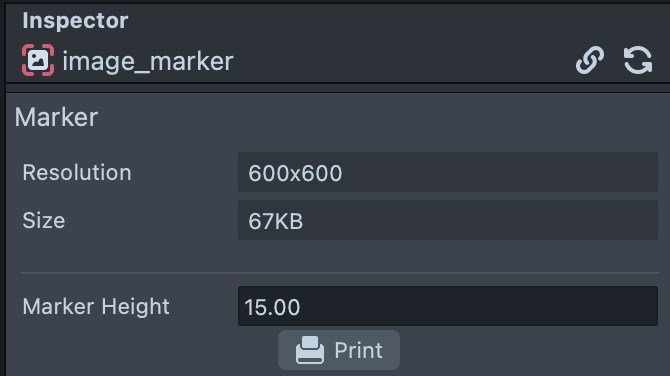
And set the Image Marker found in the Resources panel as 15 as well.
Interactions in Canvas
You can add interactivity to the Canvas, just as you would with any other object. For example we can add the Interaction component to the object, set the rendering Camera, and the Image component as the Mesh Visual, and the Image in your Canvas can respond to any touches on it.
Now, with the image listening to any touches, we can add a Manipulate component, such that users can manipulate the object by dragging their finger on the object!
Interaction component detects touches based on the rectangular bounding box from the perspective of the provided camera. This means that when you are looking at your Canvas at an angle, touches might be imprecise.
As with any other usage of Interaction components, touches will propagate through the entire scene. That is: you might touch multiple Interaction components at the same time if they are on top of each other from the given camera perspective.
Detecting touch interaction in Script
In some cases, you may want to manage how your Lens detects touches on your own rather than with the Interaction Component–for example detecting whether you are touching a subsection of your Mesh Visual.
When using ScreenTransform in an Orthographic Camera, the Lens can know which camera is viewing the object (since it is a child of it) and can thus check whether where you are touching on the screen is hitting a visual (i.e. using the method containsScreenPoint). However, since Canvas can exist anywhere (i.e. not under a Camera), you won’t be able to use this API and will instead get an error.
If you need to do this within Canvas, instead you would convert your touch position to a world position, then check where that world position is within the local point of a ScreenTransform.
// -----JS CODE-----
// @input Component.Camera camera
script.createEvent('TouchStartEvent').bind(function (data) {
  var touchPosition = data.getTouchPosition();

  // Get the distance of the object from the camera so we can calculate where the 2D screen point is in the 3D world space
  var dist = script.camera
    .getTransform()
    .getWorldPosition()
    .distance(script.getTransform().getWorldPosition());

  var worldSpacePos = script.camera.screenSpaceToWorldSpace(
    touchPosition,
    dist
  );

  var screenTransform = script
    .getSceneObject()
    .getComponent('Component.ScreenTransform');

  var localPoint = screenTransform.worldPointToLocalPoint(worldSpacePos);

  var within = checkWithin(localPoint);

  print(within);
});

// ScreenTransform position goes from -1 to 1
function checkWithin(pos) {
  return pos.x > -1 && pos.x < 1 && pos.y > -1 && pos.y < 1;
}
More Precise Touch Interactions
You can use the Physics raycasting and colliders to get a more accurate touch interaction. To do this, add a Physics Collider to your Mesh Visual. Then, add a script that uses a physics probe to check for collision:
//@input Component.Camera myCamera
//@input Physics.ColliderComponent myCollider

var myCollider = script.myCollider;
var myCamera = script.myCamera;
var camTran = myCamera.getTransform();
var probe = Physics.createRootProbe();

script.createEvent('TouchStartEvent').bind(function (eventData) {
  var origin = camTran.getWorldPosition();
  var end = myCamera.screenSpaceToWorldSpace(
    eventData.getTouchPosition(),
    10000
  );

  probe.rayCast(origin, end, function (hit) {
    if (hit != null) {
      if (hit.collider.isSame(myCollider)) {
        print('Hit!');
      }
    }
  });
});
Alternatively, you can use Behavior to raycast using simple triggers and responses.
The Fit Visual option of Physics Collider do NOT work inside Canvas. You will need to size your collider manually.i
Using Canvas
ScreenTransform provides many ways to layout things relative to each other since the boundaries of its position are normalized between -1 and 1. It’s incredibly useful for building UI systems. With Canvas, you can easily convert these 2D UI systems into the world to make a more immersive and contextual AR experience.
Some things you can try:
- Use the LayoutGrid found in the Configuration template to automatically layout many things in the world
- Use the TweenScreenTransform script to animate things in the world
- Create parallax effect, or pseudo 3D menu system to create a more dynamic AR experience
You can find examples of this in the Simple Canvas Template.