Person Normals and Depth Template
This template showcases the use of the built-in Body Depth and Body Normal texture. The template comes with several examples of ways to use these textures to relight, occlude, and collide with the body using these textures. This template is a great way to learn about using Graph materials to create various effects.
The Body Depth Texture provides information about the distance (in centimeters) from the camera to each pixel of the body. The Body Normal Texture represents the surface direction of each pixel of the body. There is no additional performance cost to using both at the same time.
There are multiple ways to get depth and normals within Lens Studio, depending on what you’re trying to do. The Body Normal and Depth Textures should not be confused with the Depth Render Target which exposes the Depth buffer of virtual objects in the Camera.
Guide
The template is divided between multiple sections under the Examples [TRY_CHILDREN] object in the Objects panel. Enable each example by ticking the checkbox to the right of each object. The examples are roughly ordered from simplest to most complicated.
Ensure that the example’s parent object is also enabled if you don’t see the example.
Normals Example in 2D
In these examples, the Personal Normals texture is used as an input for different Graph materials. These examples use the texture in 2D space, hence they are all under an Orthographic Camera.
Take a look at the Body Depth and Normals guide for an in depth explanation of using the features shown in this template.
Simple PBR using Normals
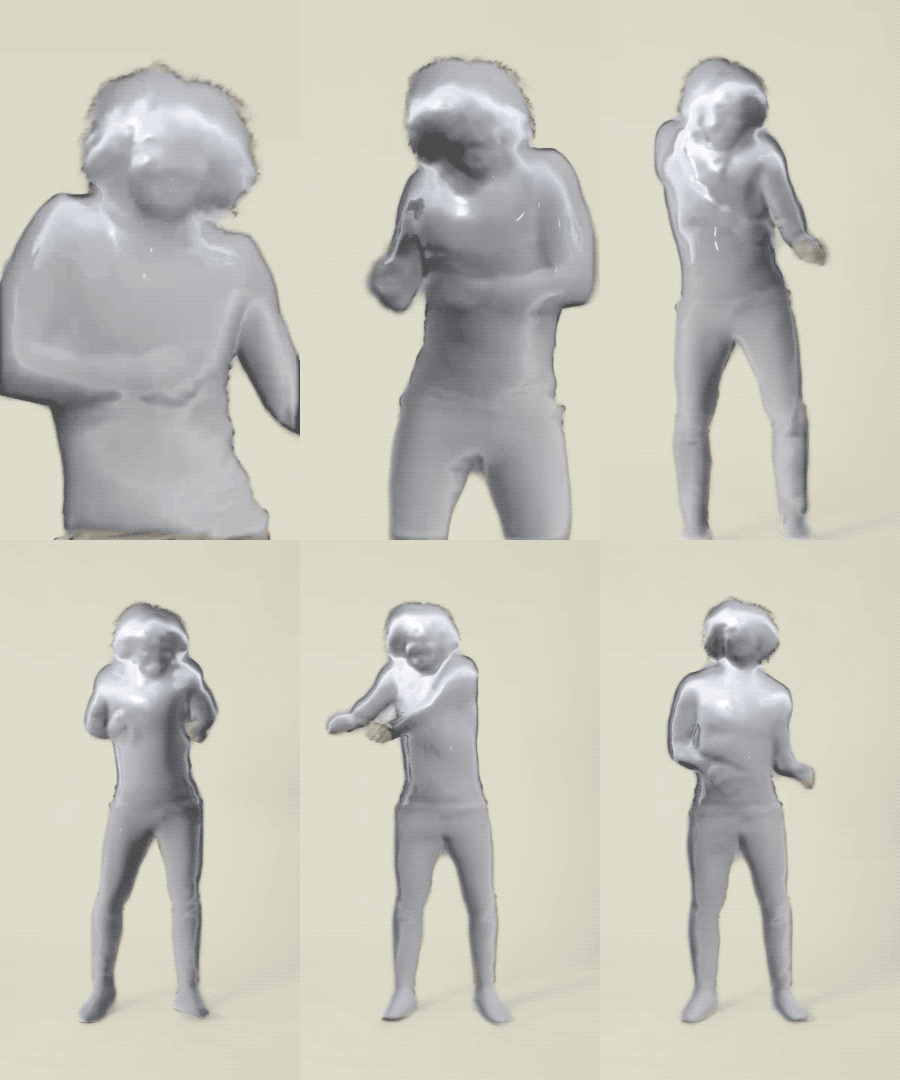
This example modifies the built in Simple PBR Graph materials with the Normal Texture. It’s a great example for learning how you can integrate the Normal Texture into your own materials.
To see how it works, open the related material in the Resources panel. In this case, open the Simple PBR using Normals by double clicking on it. Notice how a Texture 2D Parameter is added to provide an input for the Normal Texture. In addition, we set the Texture 2D Parameter node setting to be of type Normal Map so that the data is passed in correctly from the texture.
Then, we extract the Alpha channel of this texture as the Opacity of the PBR (such that parts of the screen which are NOT the body will not be shown in this material). In addition, we pass the values from the Normal texture into the Normal (Tangent Space) input of the PBR node.

Finally, in the Inspector panel, you will find that we filled this Parameter with the Body Normals Texture.
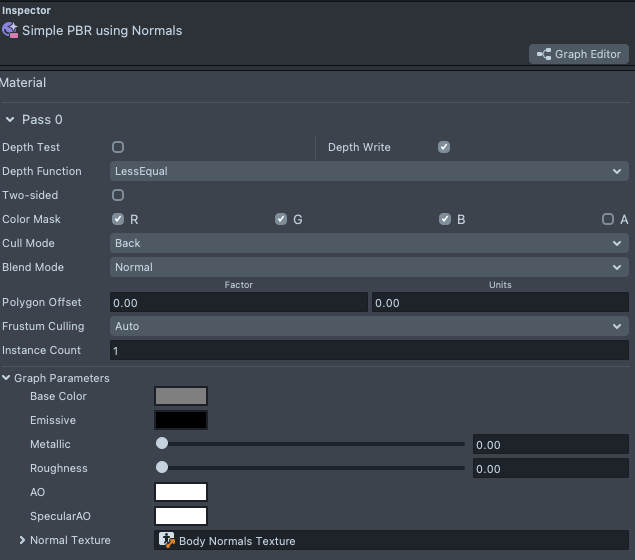
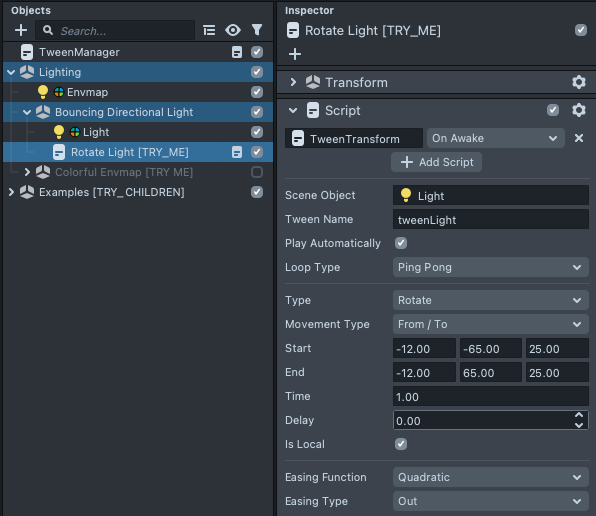
To make the effect more clear, the template moves the light in a ping-pong manner using Tween. Take a look at the script underneath the Bouncing Directional Light object.
Default Uber PBR with Segmentation
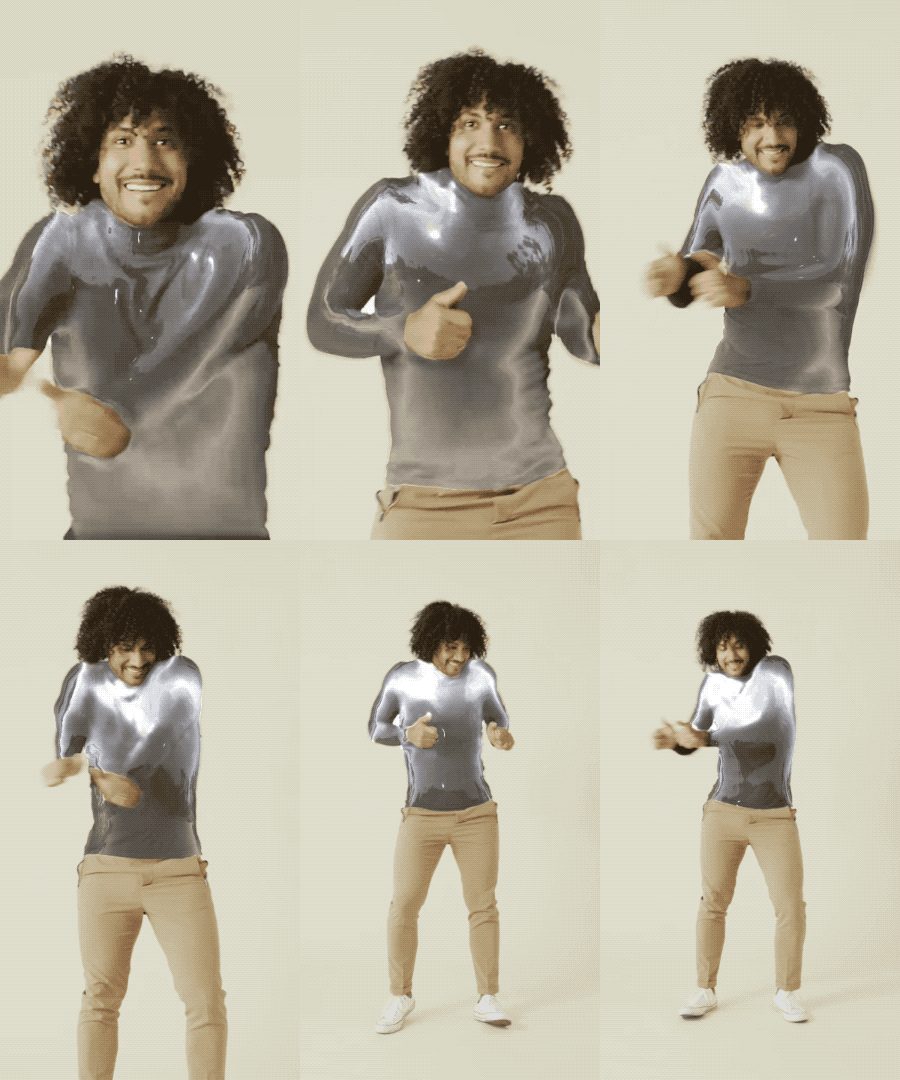
The default Uber PBR material provided in Lens Studio comes with a Normal Texture field that you can use to pass in the Normals data. In addition, this template also leverages the Opacity Texture option to only show the PBR effect only in certain parts of the Image. In this case, we only show it on the Upper Garment area, using the built in Upper Garment Segmentation.
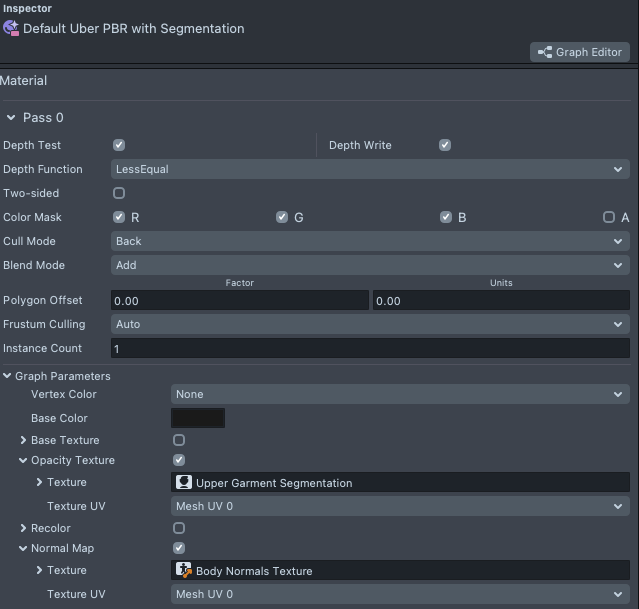
Default Uber PBR using Normal Alpha
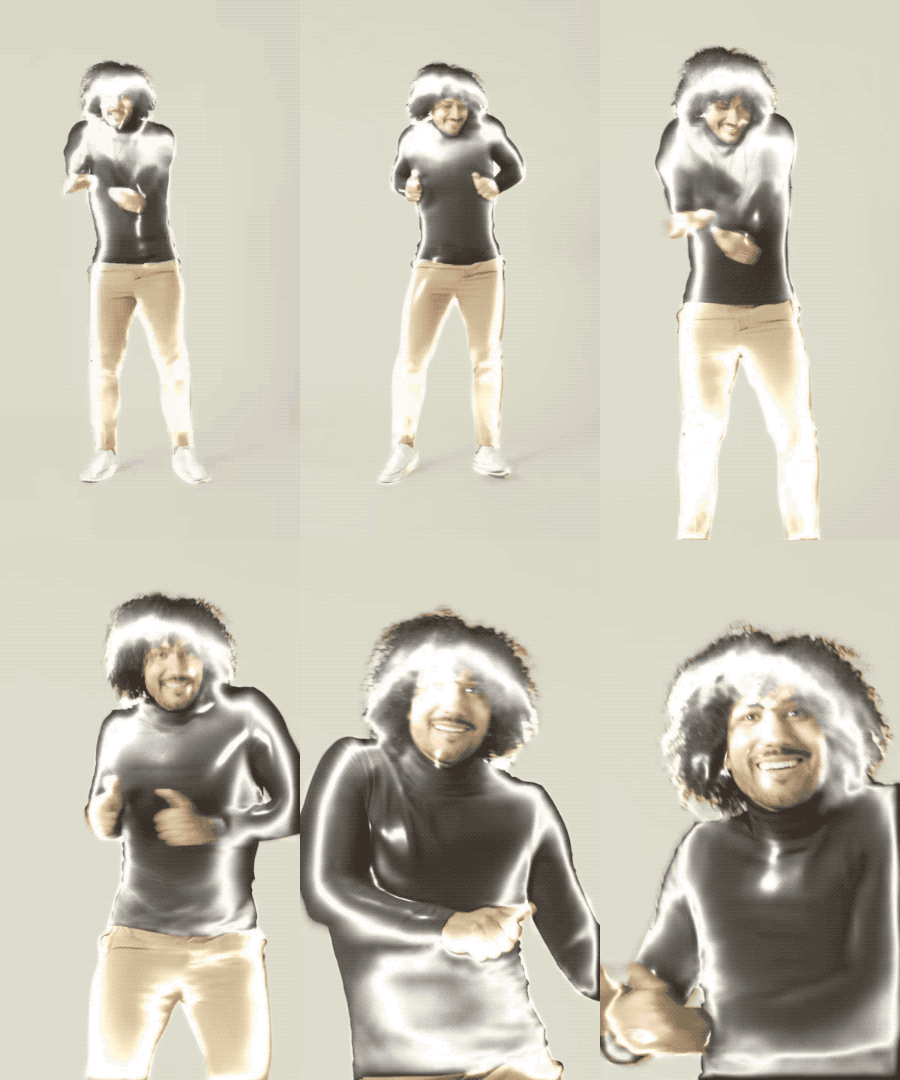
This example showcases a combination of the two previous examples. As mentioned above, the Normal Texture itself contains Alpha (or opacity) information around where the body is. Thus, it is possible to modify the built in Uber PBR material to leverage this information to show the effects only in the areas where the body is.
First, like before, we pass in the Body Normals Texture into the Opacity Texture field. But as in the first example, we need to tell the material to use the Alpha value of the texture as the opacity texture.
To do this: Double click on an Uber PBR material, find the Opacity node and double click it to open it. Then, add the Swizzle node in between the Texture 2D Sample and the If/Else node.

Then select the Swizzle node, and set it to Swizzle for a (alpha channel of the texture).
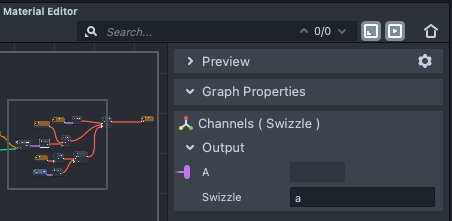
The swizzle node allows you to mix the part of a vector based on some string input. In this case we only need the alpha channel of the texture, so we type in a.
The template also comes with a rotating envmap that you can try to see how the Normals are affecting the result of lighting on the object. Try enabling the Colorful Envmap [TRY_ME] object.
![Image of Colorful Envmap [TRY_ME] object](/assets/images/Person-Normals-and-Depth-Template-Guide_22-34049da158d8465fdd97177d38df5a84.png)
Custom Examples
The next two materials demonstrate how you can apply this method in various other ways, without even using the built-in materials!
The Custom - Shaded Cartoon example uses the Cartoon material found in the Asset Library as the basis for the effect.
Take a look at the Person Normals and Depth Guide to see an explanation of how this material was made!
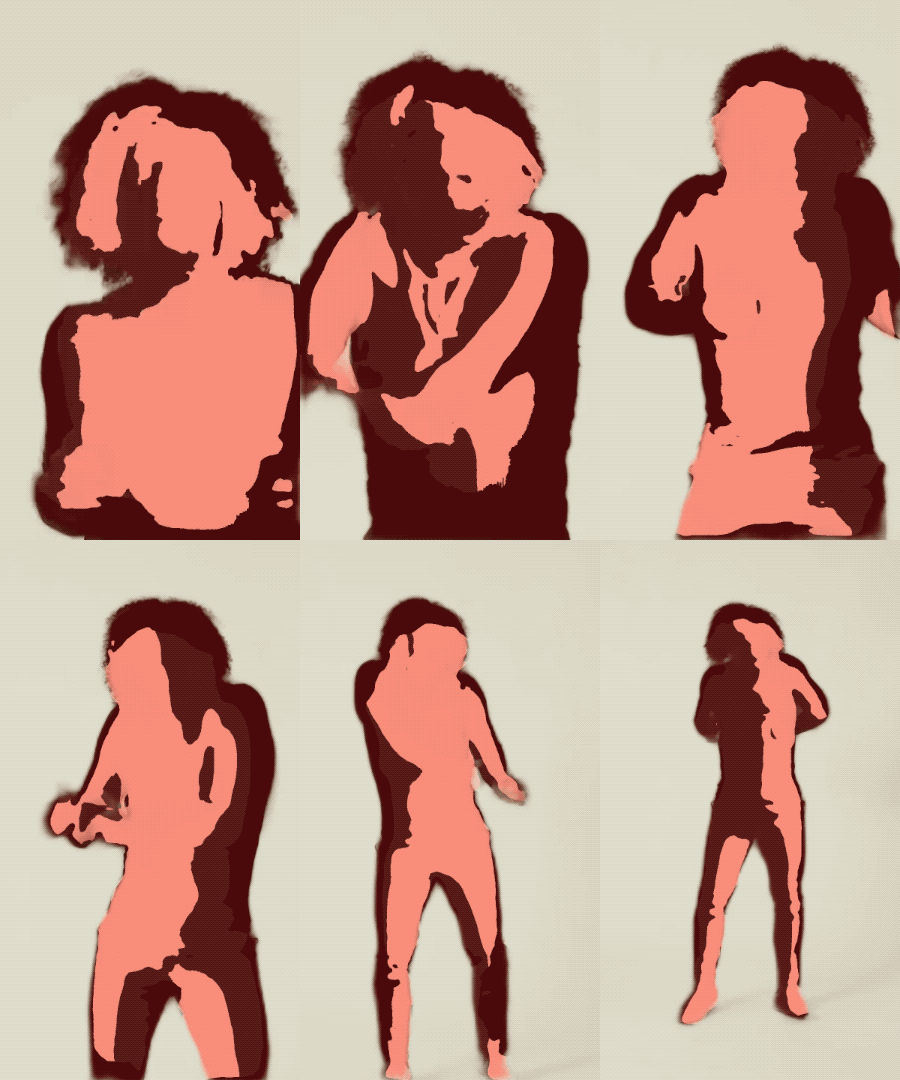
The Custom - Normals Relighting example shows how you can use the normals texture to modulate how light interacts with your object.
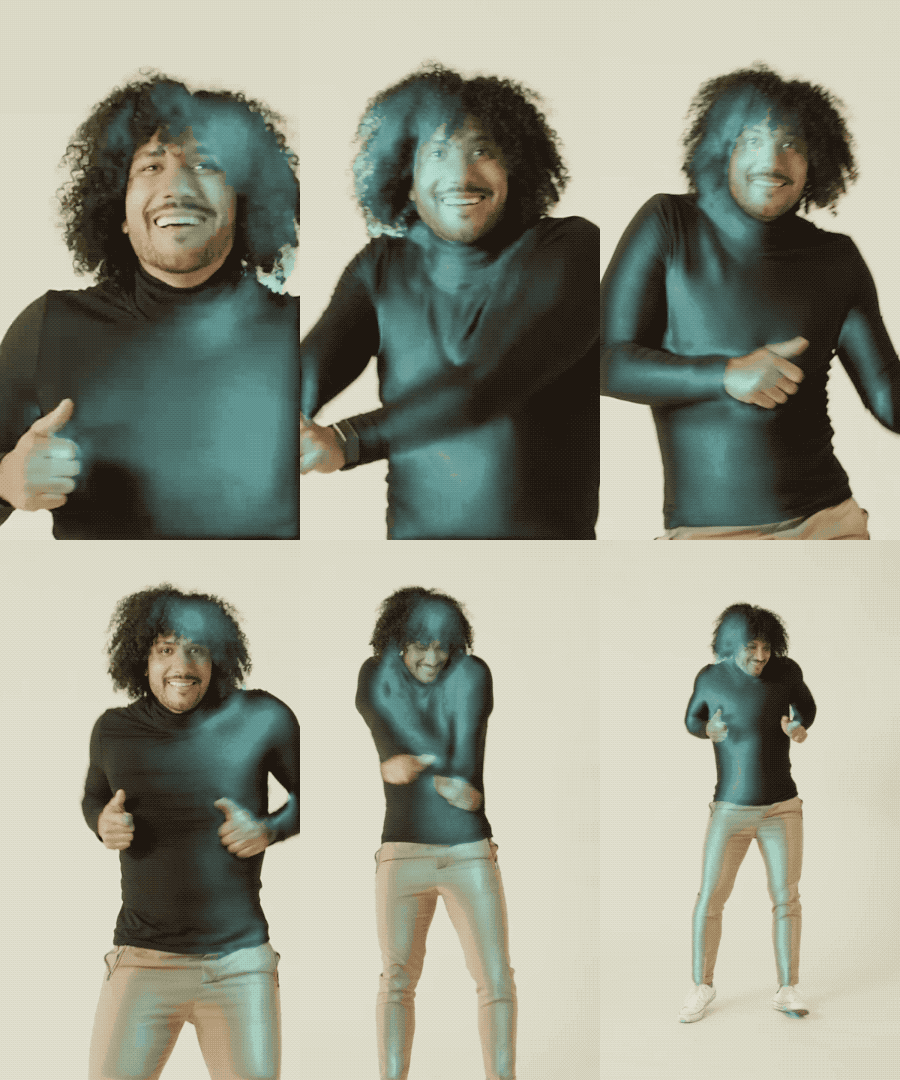
Try taking what you learned in the previous examples and seeing how they map to these two!
Depth Example in 2D
Next we can see how the Depth map can be used to create various effects. As with the Normals example, these examples use the texture in 2D space, hence they are all under an Orthographic Camera.
For every pixel, the Body Depth Texture provides the negative centimeters from the camera to the body. As with the Body Normals Texture, you will want to ensure that for any parameter that takes in the Body Depth Texture, you set the Texture 2D Parameter node settings to be of type Depth Map.
Simple Depth Remap
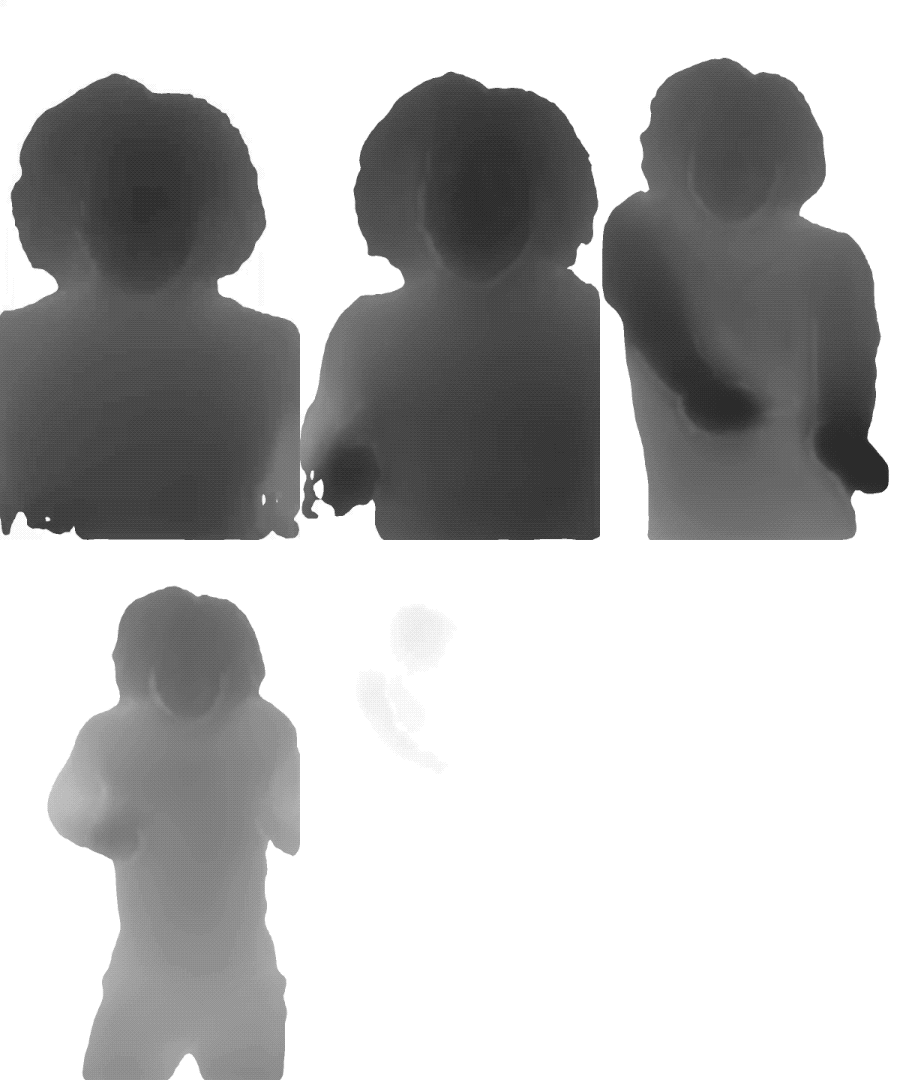
In this example, we use the Remap node to convert the values of depth into 0-1. This allows us to use the Depth texture as a black and white image where black pixels are closer to the camera.
Note that as mentioned above, we need to multiply the pixel values by -1 (since the texture provides negative centimeters from the camera).

Depth Slice
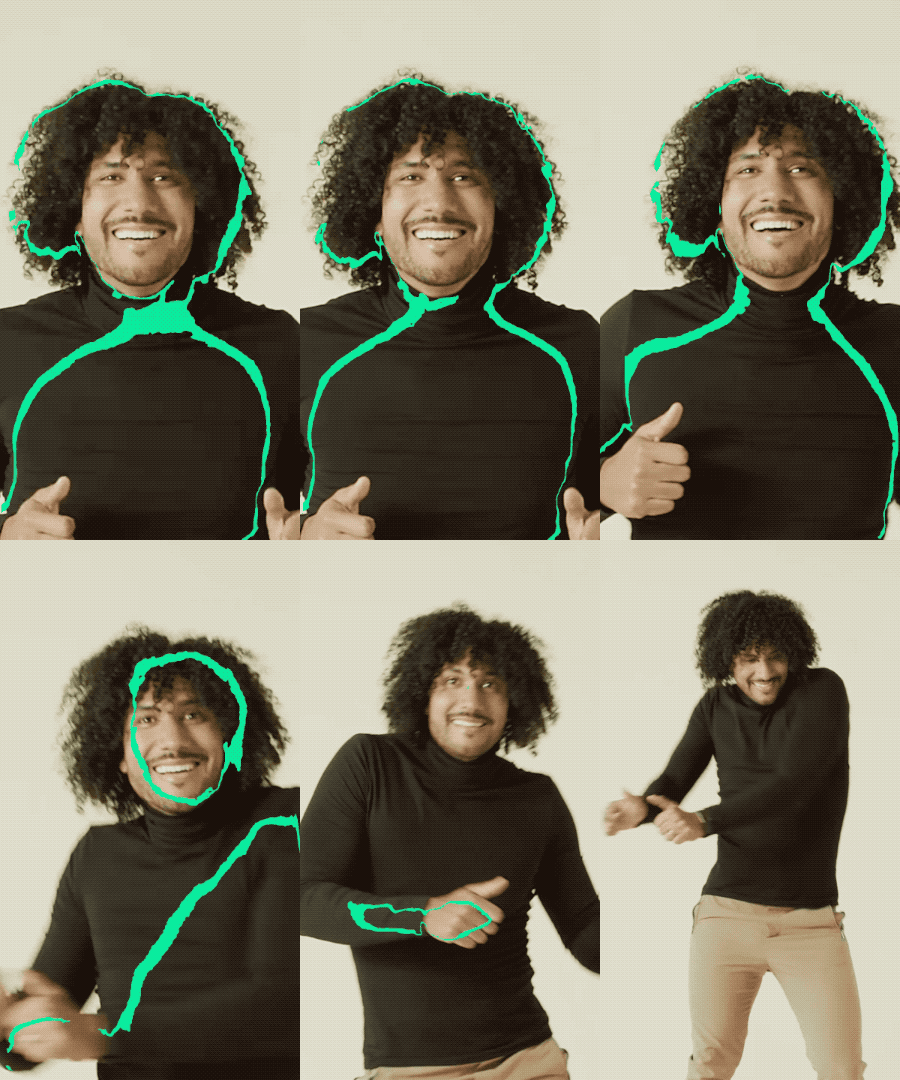
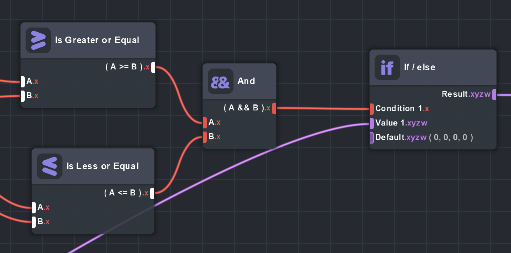
This example uses an If/Else node to only show colors between certain depths (i.e. depth value is greater than and less than some value).
Normals Arrow Visualized
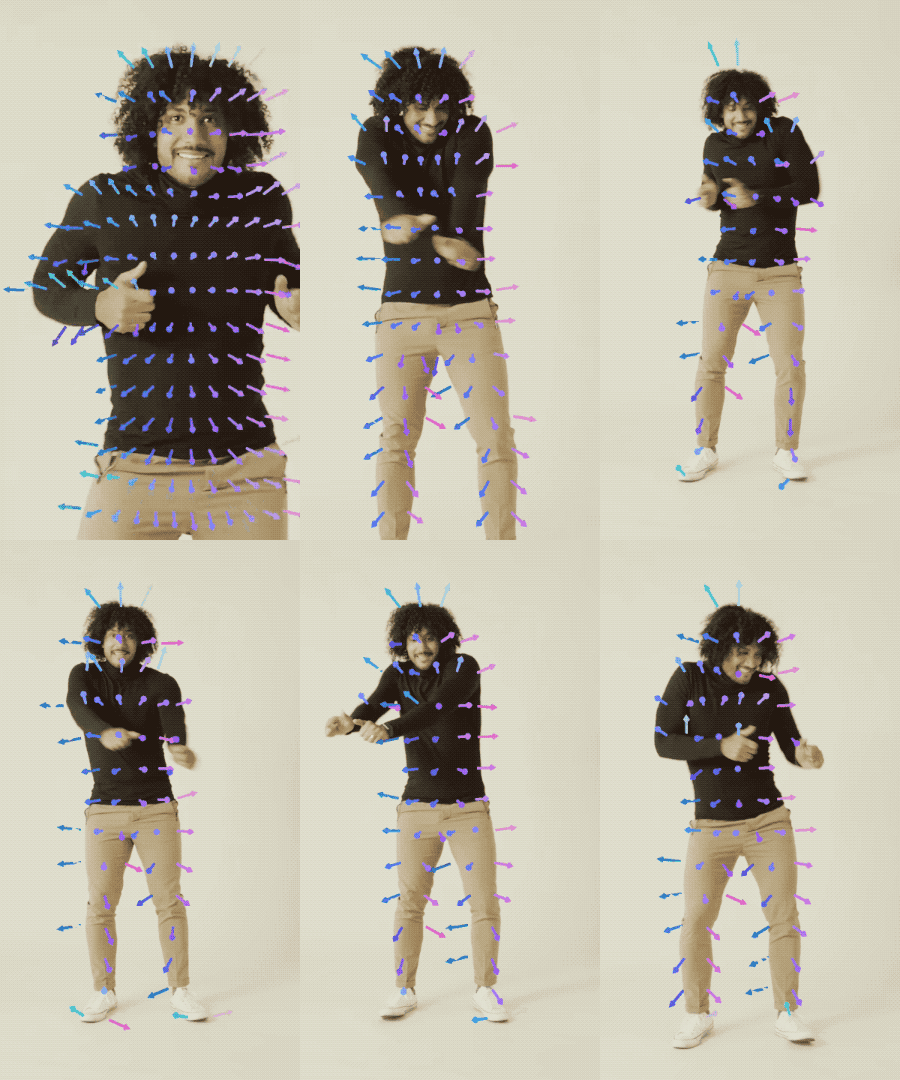
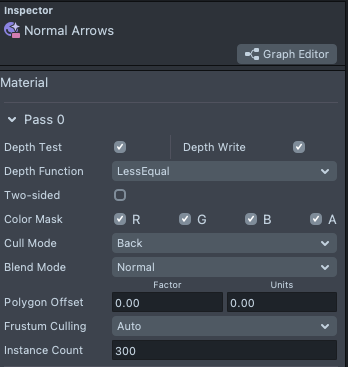
We can also use these textures in 3D as well. In the Normals Point Arrow example, we use material instancing to duplicate a mesh 300 times without having to have multiple objects in the scene. Notice the Instance Count field in the inspector panel.
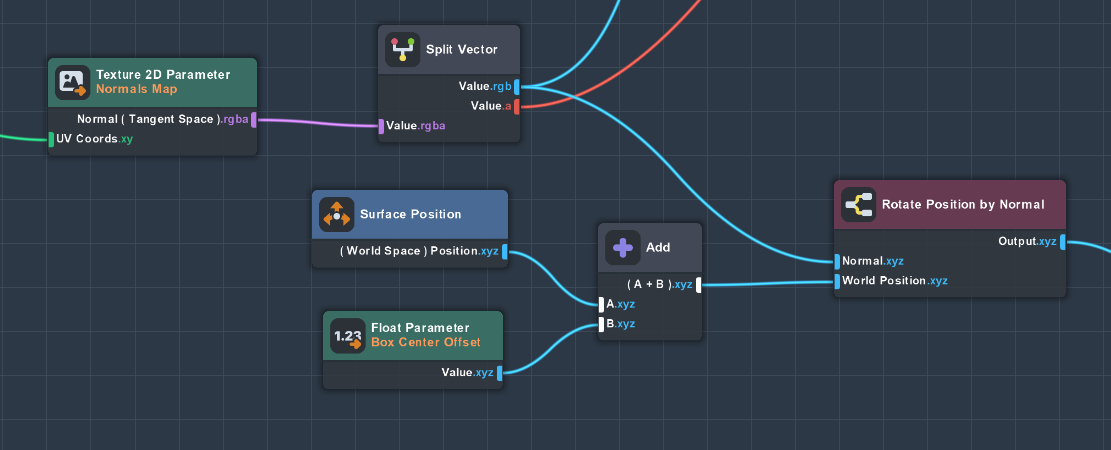
Then, we use the normals texture to orient each arrow so that they’re pointing in the direction of the normals of the body!
Combining Normals and Depth
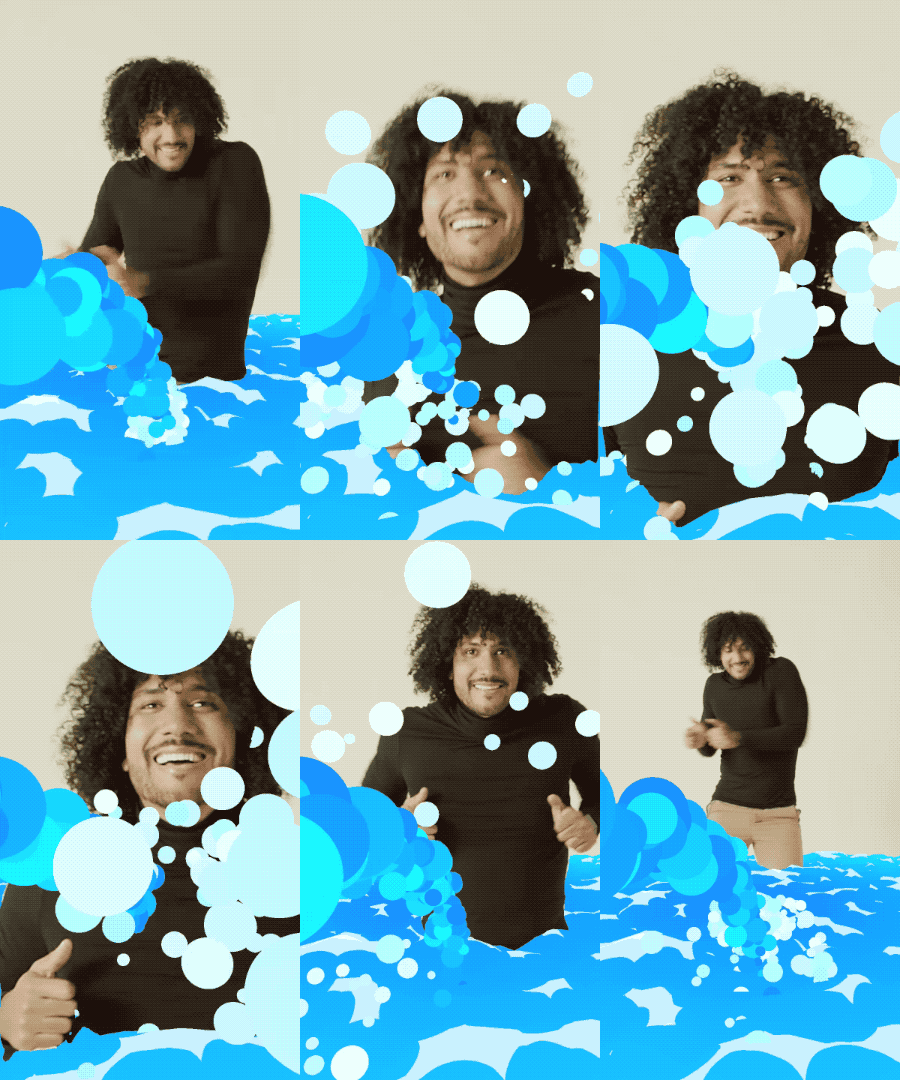
In this example we first use the Depth Texture as an occluder such that virtual objects can be “behind” the person. In the Camera - Depth Input object, you can see that the Camera settings has Depth Clear Option set to Custom Texture and the input for this is set to Body Depth Texture.
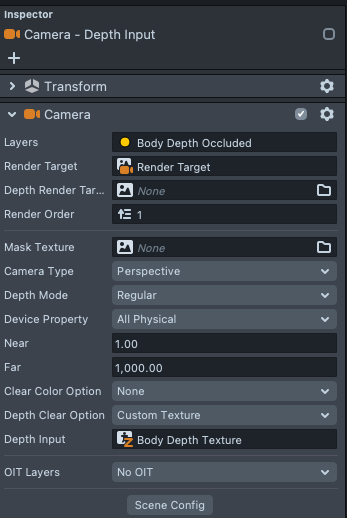
As a result, you can see that the user’s body can occlude different parts of the Cartoon Water Plane depending on where they are standing.
In addition, we pass in the Depth and Normals Texture to the VFX system so that our particles can collide against the body.
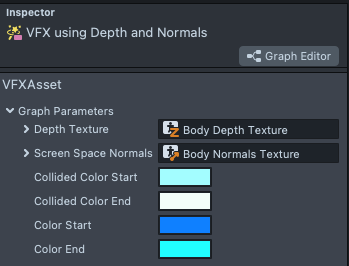
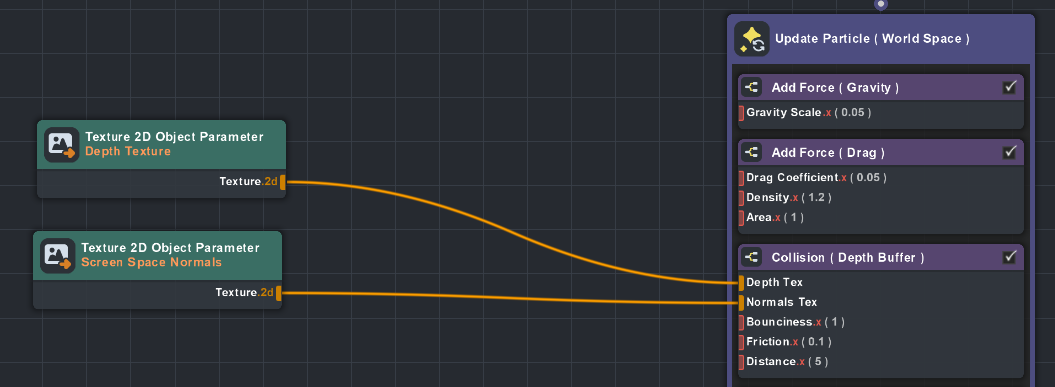
Double click on the VFX using Depth and Normals VFX in the Resources panel to open the VFX graph. Within this VFX, you can see that in the Update loop, we added a Collision (Depth Buffer) node, and passed in our two textures.
Multi Camera Effect Example
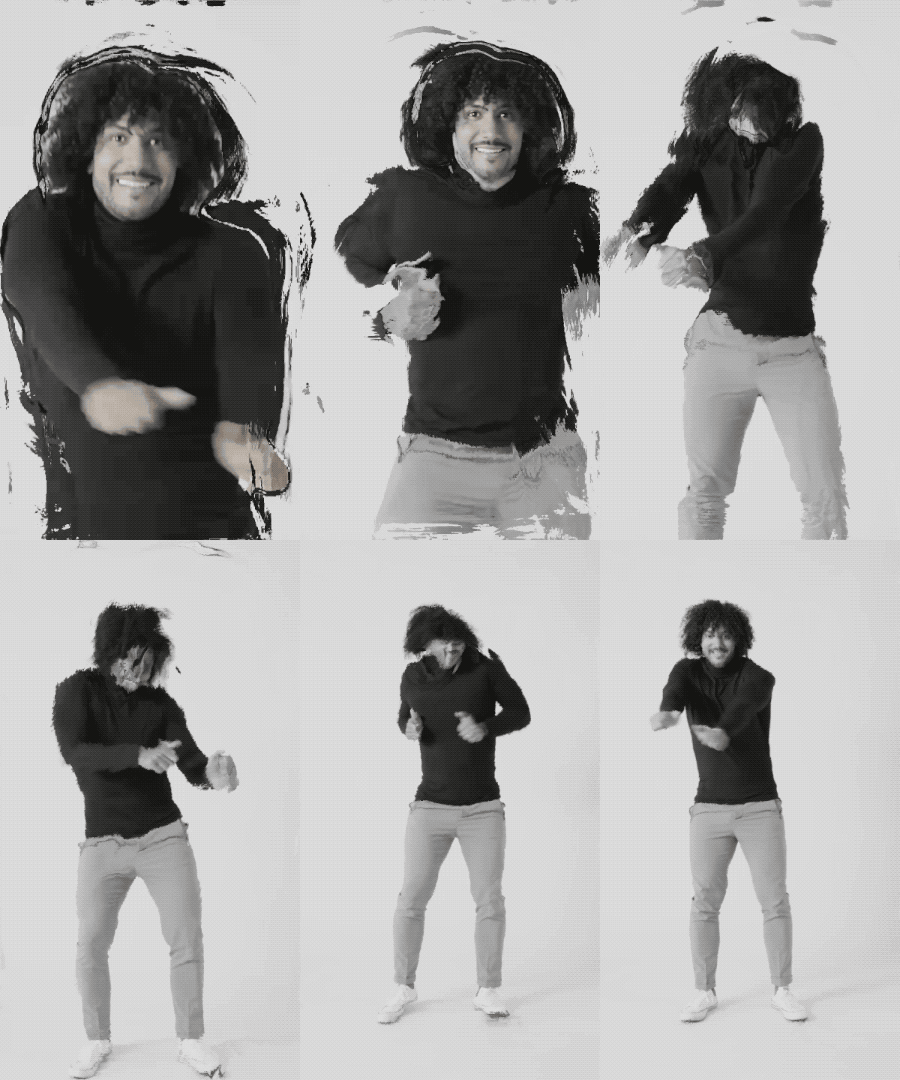
In this example, you can see a more complex example of using these textures. In this case, we use multiple cameras to create a feedback loop to generate ripples that make it look like we pass through a sheet of water.
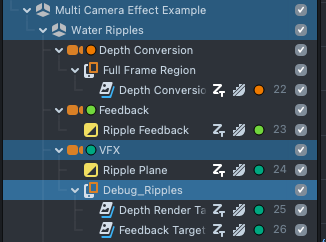
Try enabling the Debug_Ripples object to see the results of the different cameras.
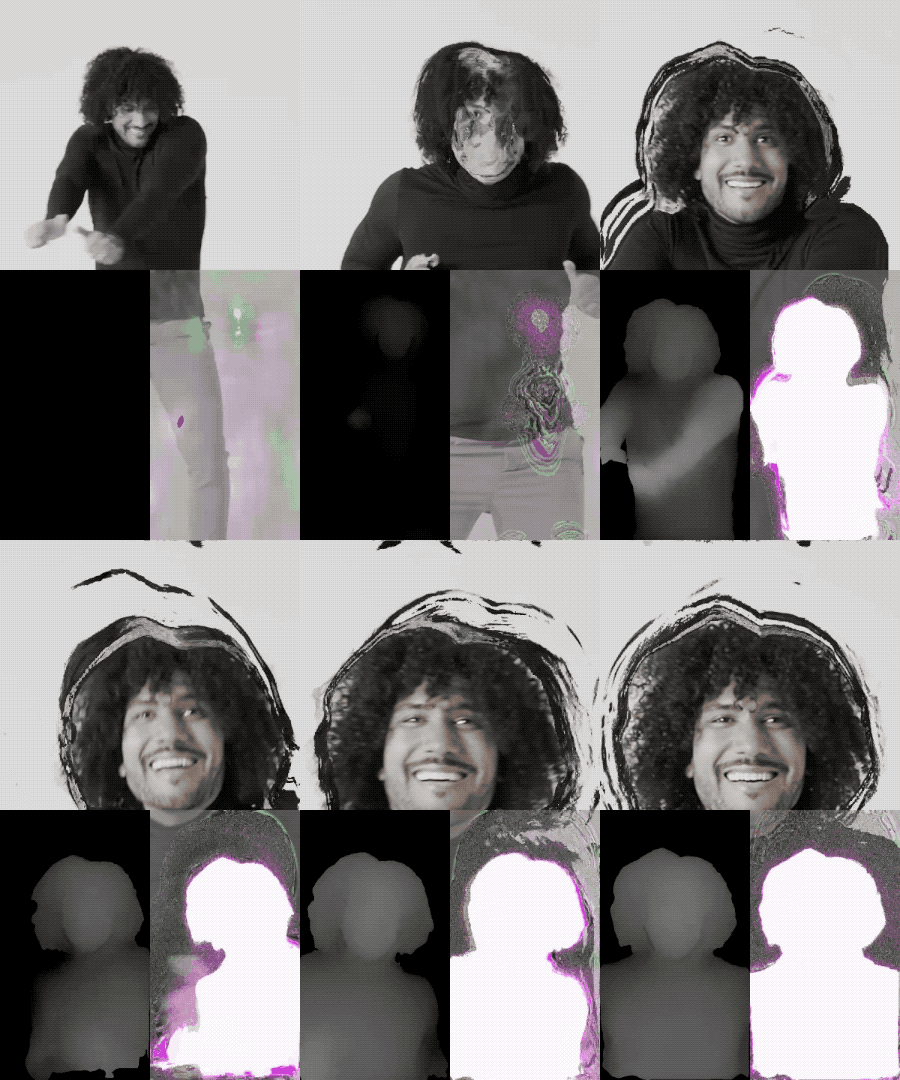
The Ripple Plane material, composites the final effect by taking in the result of Depth Conversion and Ripple Feedback.
Take a look at the Ripple Guide to learn more about the technique used to create this effect!
The Depth Conversion material is the same as the one you saw earlier! Try exploring the graphs based on what you already learned.
See another example usage of this technique in the Optical Flow example in the Asset Library.