Body Mesh
The Body Mesh Template allows you to apply effects to the body that automatically fits the Snapchatter. The template comes with both an example of applying textures to a Body Mesh, as well as using the body mesh as placeholders to drive effects, such as tapping to instantiate on parts of the body.
Guide
This is the documentation page for the Body Mesh Template in Lens Studio. In this guide we’ll cover:
- Sci-fi Suits - Using the Body Mesh UV and 3D Objects as references
- Growing Vine- Mapping 3D objects on top of the Body Mesh
- Move Along Body- Making a path along the Body Mesh for objects to follow
- Tap To Add- Tapping on the body to append objects to it
- Instantiate Objects - Instantiate one object all across the Body Mesh
Let’s get started!
See how you can simply attach things to the Body Mesh, as well as Download the Body Mesh 3D Model and UV reference in the Body Mesh Guide!
Sci-fi Suits
The Body Mesh Template comes with examples of 2 Body Mesh components in the scene. Each of them have a 3D belt object attached to the waist. Feel free to check it out and see how you can attach 3D objects to the body with the PinToMesh component.
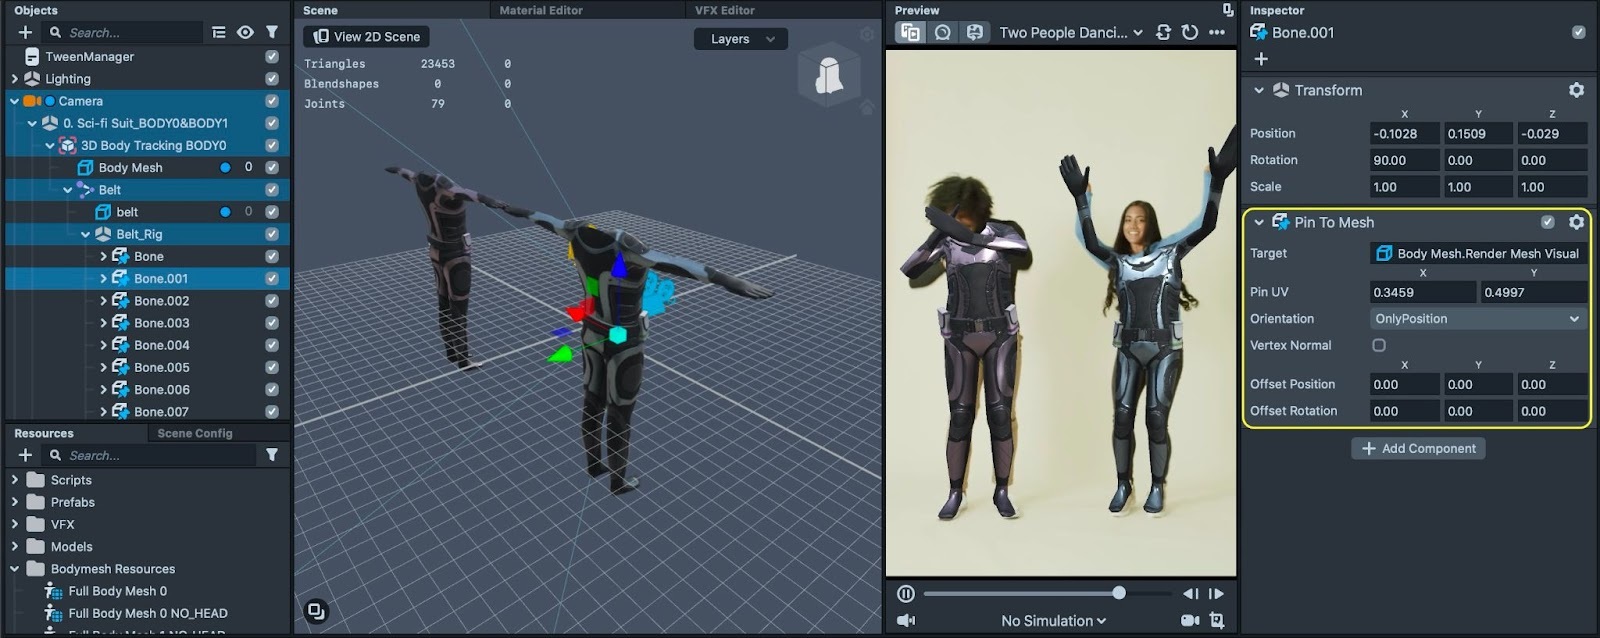
To check out more custom materials you can use with the Body Mesh, feel free to swap these materials with any inside the Materials folder titled Body_xx.
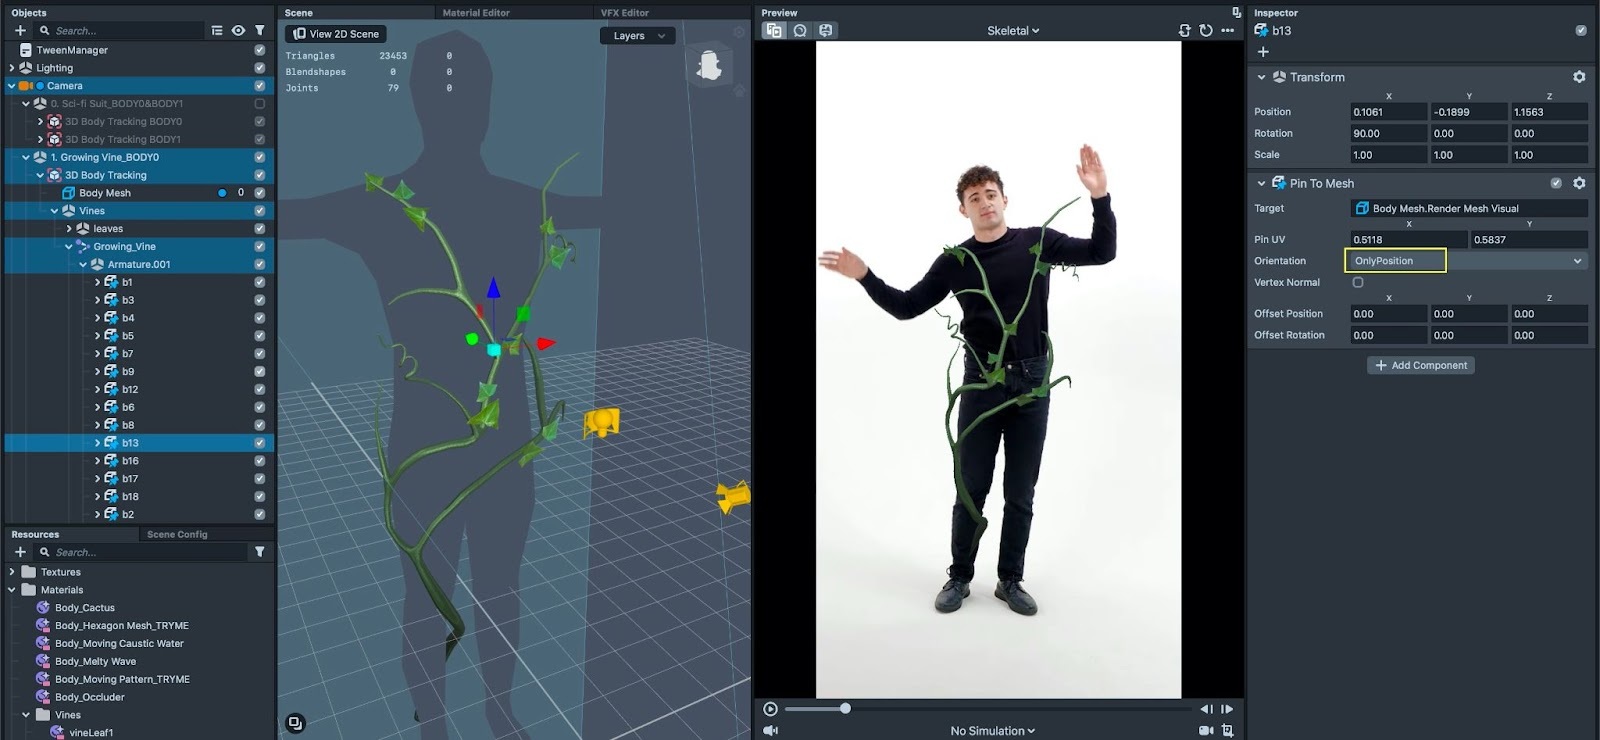
Growing Vine
Now we know we can use PinToMesh to attach objects to the body. We can use this with any rigged 3D objects to wrap them around the body!
To achieve this effect, we will have our object rigged inside a 3D program. To have an easier time pinning rotation to the body we can just set all the bones to have 0 rotation on them.
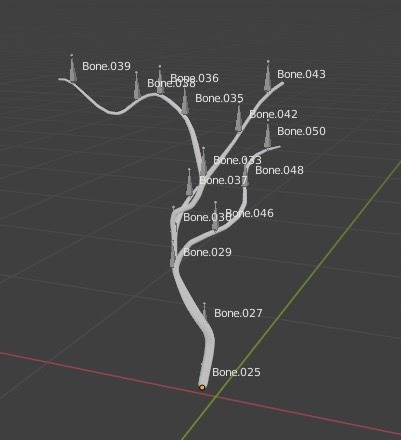
Then we’ll bring it to Lens Studio, and apply PinToMesh to all the bones, then drag them each to a desired position.
Make sure to set the Orientation property to OnlyPosition (because we set all the bones to vertical earlier). Then your object will ‘attach’ to the Body Mesh.
Move Along Body
This setup allows you to move an object along the Body Mesh with an adjustable path.
Under the PathParent object you’ll find a list of objects all with the PinToMesh property that’s attached to the Body Mesh.
The movement of fish in this example is controlled by the MoveAlongPinnedMesh script attached to the Move On Body object
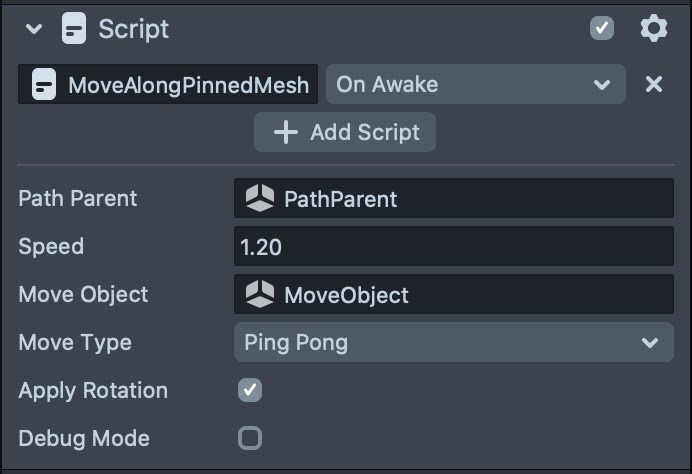
Try changing Move Type from Ping Pong to Loop or Move Once to experiment with different types of looping of the moving target.
Turn on Debug Mode to see all the target positions which are used to form the path for the moving target object.
Tap To Add
The Tap To Add example uses the TapToAdd script to let users add random objects from an array to the body mesh when they tap the mesh.
The TapToAdd script takes the uvSampler render target as a texture input, and gets the pixel color of the render target texture from UVSampler based on screen tapped position. The pixel color is determined by the material renderUV applied to the Body Mesh_GENERATE_UV object.
To see what the uvSampler render target looks like, we can quickly create a screen image with the uvSampler as a texture.
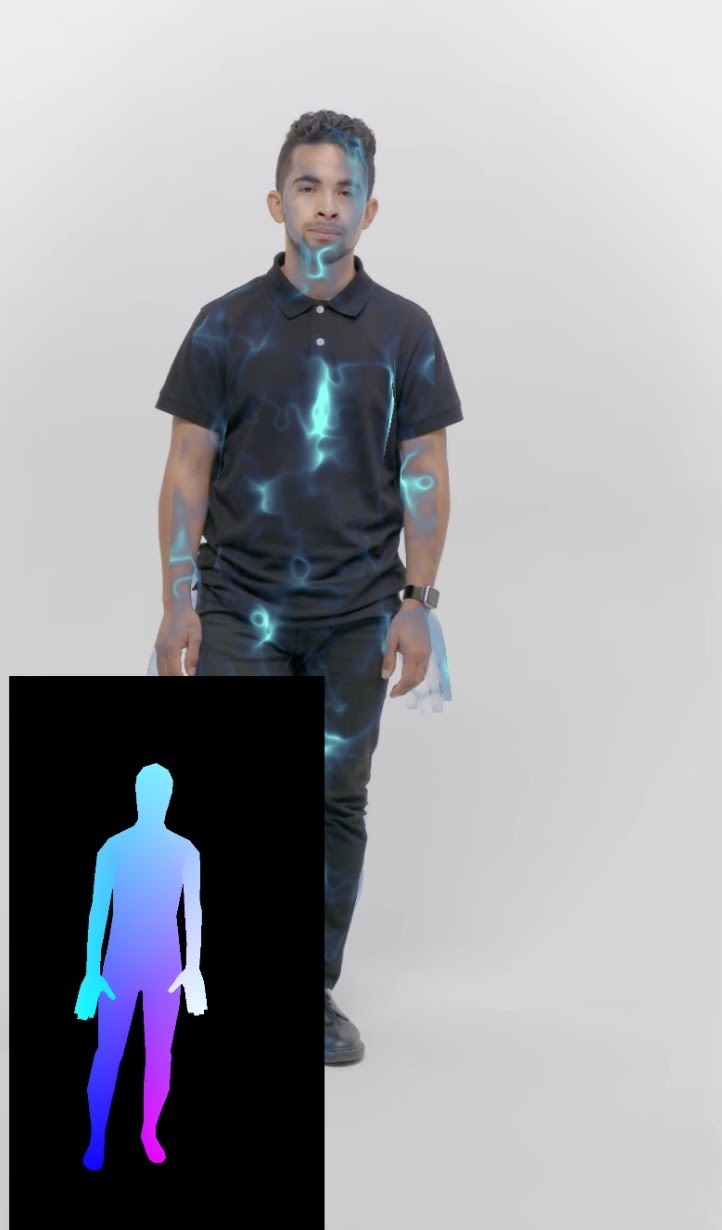
In addition, we can see in the renderUV material, the color is determined in a way that uv x position determines the red channel and y position determines the green channel of main color of the material.

Inside the uvSampler script, once it gets the pixel color of tapped position, it can then use this color to determine the UV position of the body, and use that with the PinToMesh component to attach objects to the body when tapped.

Right click to highlight the flower prefabs and you’ll see each of them have a PinToMesh component. The script will set their target to the TargetMesh variable (in this case it is the Body Mesh object) and set the pinned position to converted UV position on tap.
Try replacing prefabs in the PinAsset array to create your own items to be generated when body is tapped!
Instantiate Objects
The Instance example allows you to spawn instances of objects along the body based on predetermined UV positions with PinToMesh.
Everything under the InstanceObj_EDIT_ME object will be duplicated along the body. Try toggling different objects inside this object or add your own!

The InstantiateObjectsOnMesh script uses Reference Points under the ReferencePoints object to generate positions on the Body Mesh. It is categorized into front, back and inner (places in-between legs and arms and body) points.
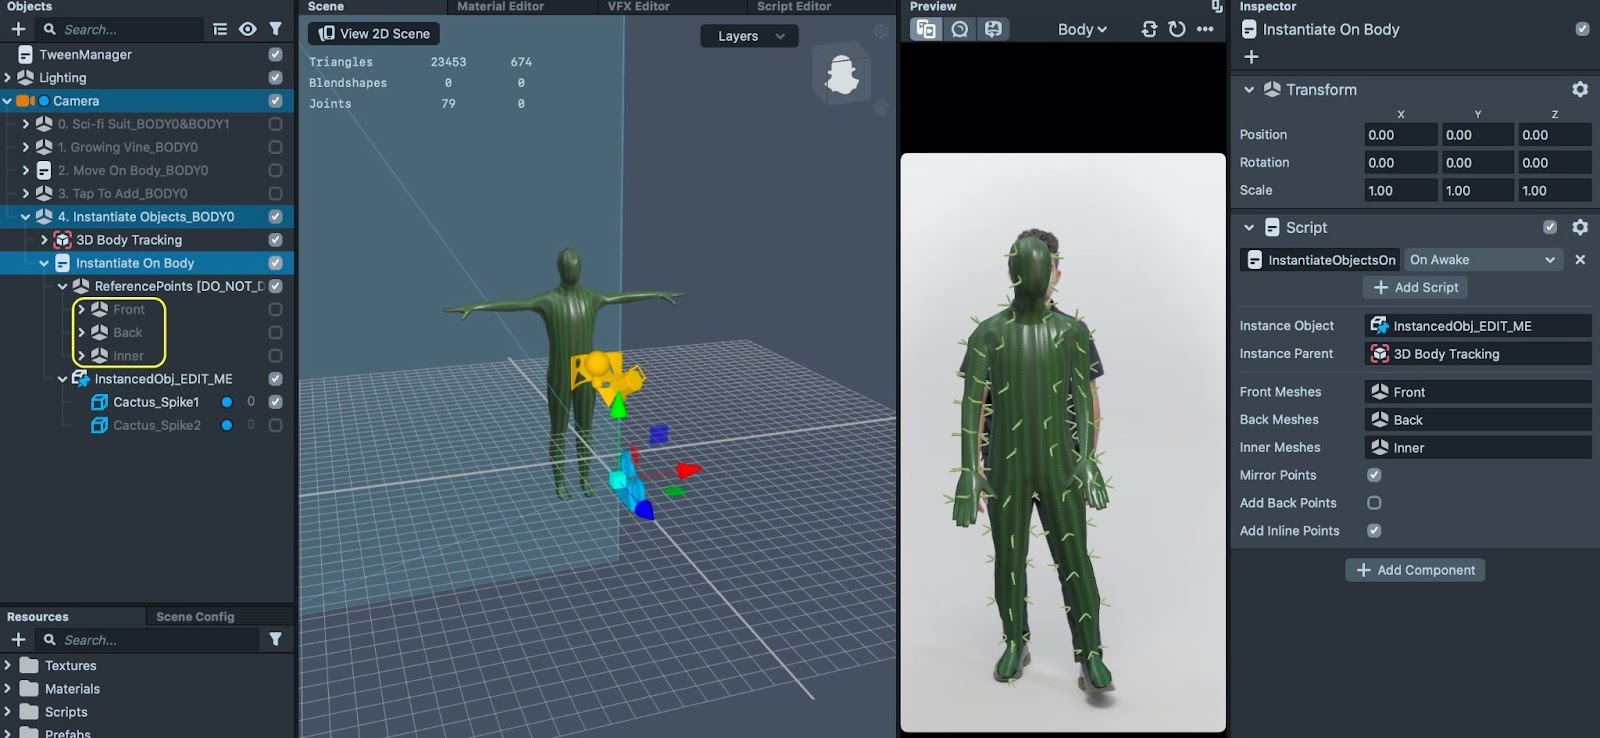
Feel free to toggle the MirrorPoints, AddInlinePoints and AddBackPoints variables to see how it changes the scene!
Previewing Your Lens
You’re now ready to preview your Lens! To preview your Lens in Snapchat, follow the Pairing to Snapchat guide.
Related Guides
Please refer to the guides below for additional information: