Maya, 3D Object Export
This guide will walk through how to export a 3D model to the FBX format, so that it can be imported into Lens Studio. For the purposes of this guide, we're using Autodesk's Maya 2016. That said, any 3D tool that can export to FBX should be able to export models that can be imported into Lens Studio.
Animation Settings
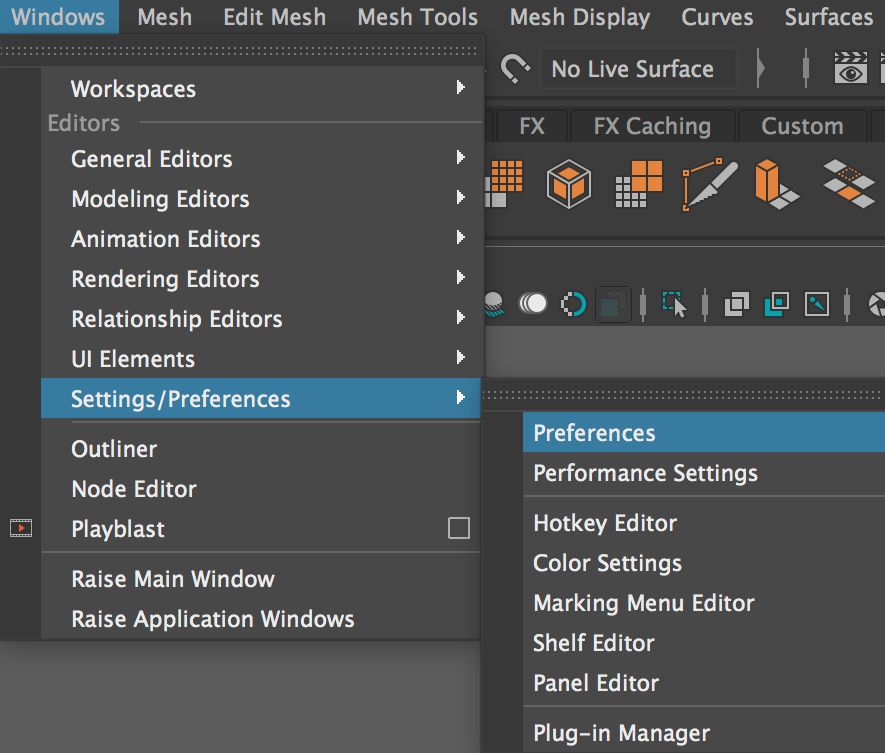
Before exporting to FBX we have to make sure that we are using the correct project settings so we can successfully import the 3D model into Lens Studio. To see the project settings, first select Windows -> Settings/Preferences -> Preferences from Maya's menu bar.
This will open the Preferences window. In the left side categories, select Settings.
Then, under Working Units select the Time drop down menu and select NTSC (30 fps). This will change the scene's frame rate to 30 FPS.
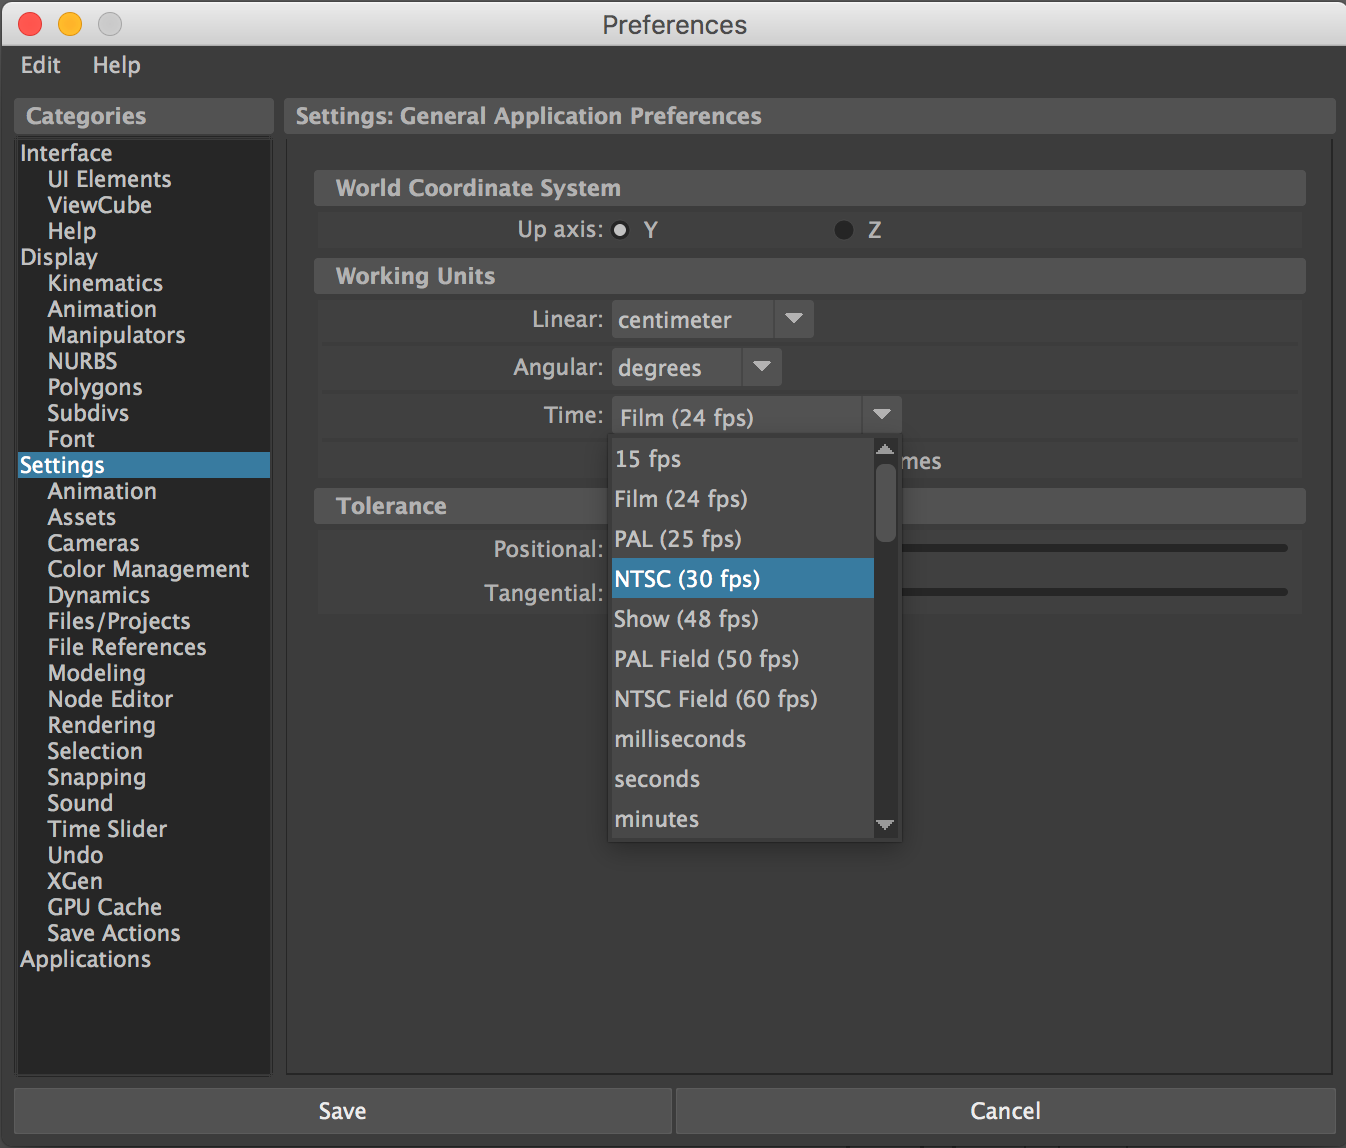
Finally, press the Save button.
Now we're ready to export the 3D model.
Export for Lens Studio
To export a FBX from Maya, first select the object(s) you wish to export in Maya's Outliner window. Then, select the square to the right of File -> Export Selection... from Maya's menu bar. This will open the Export Selections options window.
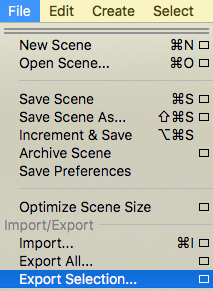
In the Export Selections options window, expand General Options. Then, select FBX in the File type dropdown.
Then, in the Export Selections options window, click the Export Selection button.
When exporting a FBX, Maya will bring up the FBX Exporter options window. Here, you're given a number of options for defining the type of FBX export.
Expand Embed Media and verify that the Embed Media checkbox is checked.
Triangulate, Tangents and Binormals
3D models imported into Lens Studio must be triangulated. In Maya, you can triangulate your mesh by checking Triangulate in the FBX Export settings under Geometry. Also check Tangents and Binormals.
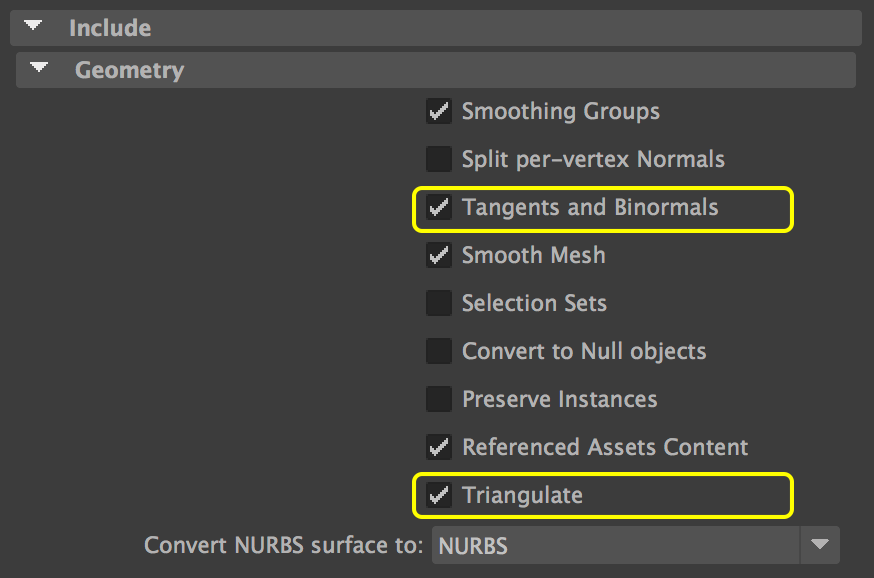
Split per-vertex Normals will be used to transfer hard edge information to Lens Studio. If your 3D model has hard edges please make sure to check the Split per-vertex Normals checkbox.
Animation Settings
If you want to export animation with your model, make sure the Animation checkbox is selected. In Maya 2016, the following settings should be selected under the Animation section of the FBX export settings before exporting:
Animationto unlock animation settingsDeformed Models,SkinsandBlend ShapesunderDeformed ModelsConstraintsandSkeleton DefinitionsunderConstraints
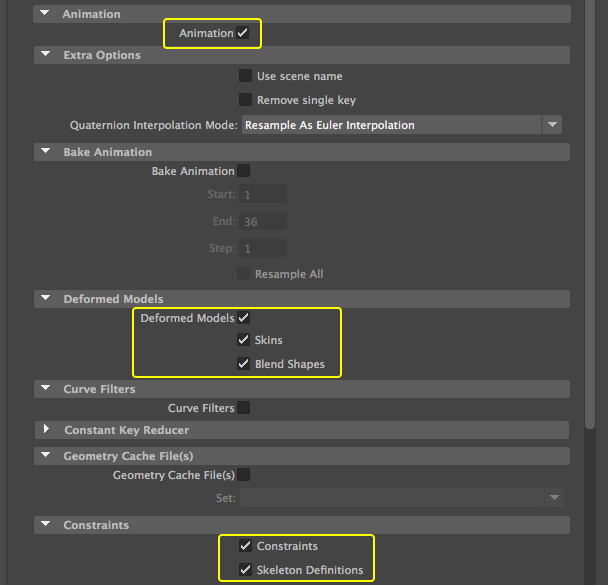
Below is a list of things to ensure when exporting your 3D assets to work best in Lens Studio and ultimately Snapchat.
• Your model has to be triangulated via the export dialog
• Tangent and Binormals must be enabled in the export dialog
• Your scene total of 3D assets should add up to less than 10,000 triangles (5,000 polys assuming your model is built with quads). This will allow your model to display smoothly across the widest variety of Android and iPhone devices
• In general, stay under 100 joints for your animation rig. Additionally, while the engine does support Blend Shape animation, try to avoid using it. If Blend Shapes are required, use sparingly and pay close attention to your frame rate performance
• Lens Studio supports up to a 4 bones per vertex limit. If the influence is greater than 4 then there will be problems in your rigged model when imported into Lens Studio
You should now be ready to export. In the FBX Exporter options window select the Export button.
You now have an exported FBX file that's ready to be imported into Lens Studio. For information on importing 3D models into Lens Studio, review the 3D Object Import guide.
Preparing Multiple Animation Layers
If your 3D model does not have multiple animations you can skip this section.
These animations should be in separate Animation Layers in Maya so that Lens Studio recognizes each individual animation.
Animation layers hold keyframe data of the animation in your scene. For example, the model we are exporting has an Idle animation and a Jump animation. In Maya, these separate animations both exist in the BaseAnimation layer by default. We need to assign each individual animation to different animation layers.
Before creating our animation layers, we have to make note of the frame ranges that correspond to each animation.
For example:
- The Idle animation takes up frames 1 - 95
- The Jump animation takes up frames 95 - 200
Then, open the Outliner window by selecting Windows -> Outliner from Maya’s menu bar.
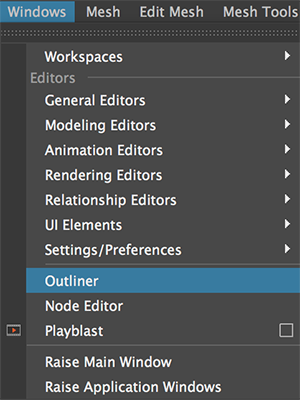
Next, select all the joints and controllers that contains animations (keyframes), in the Outliner window.
You can collapse a hierarchy in Maya by holding Shift and clicking the + button.
Next, we need to bake the animation. Baking the animation will automatically create an animation layer for you.
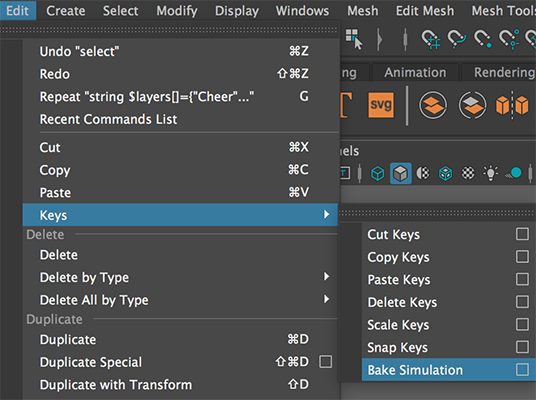
Select the square to the right of Edit -> Keys -> Bake Simulation from Maya’s menu bar. This will open the Bake Simulation Options window.
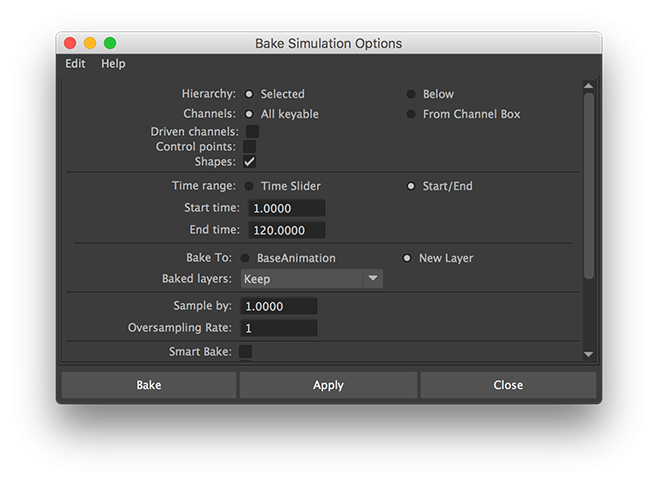
In the Bake Simulation Options window, set the Time Range to Start / End to unlock the time range settings. Now in the Start Time field specify the time that your animation starts and in the End Time field specify the time when your animation ends.
For example if the Idle animation starts at frame 1 and ends at frame 95, we have to put 1 in the Start Time field and 95 in the End Time field.
Next, make sure the Bake To is set to New Layer and that the Baked Layers drop down menu is set to Keep.
Now we are ready to bake the animation by clicking on the Bake button in the Bake Simulation Options window.
You should now have a newly baked animation in the Anim tab in Maya.
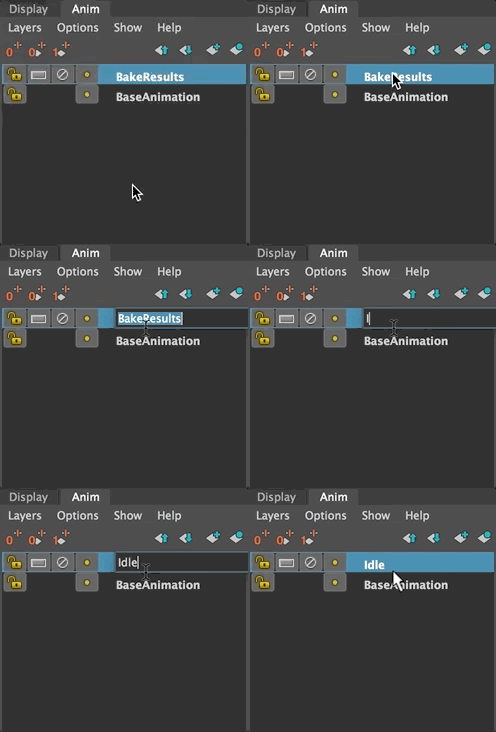
After baking all of the animations and creating anim layers for them, we need to make sure all of our animations start at frame 0 in the timeline.
When animation plays in the Lens Studio it will be playing the animation from frame 0.
In order to move all the keyframes of animation layers to start at frame 0, first select all the joints and controllers that contain animations in the Outliner window.
Then we need to Mute all of the Animation Layers besides the animation layer that we want to move to frame 0.
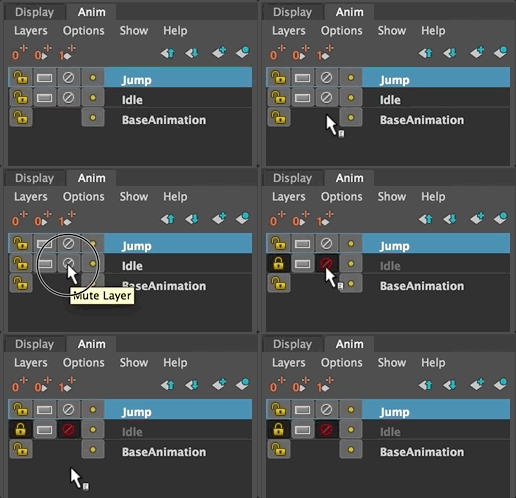
Next, we can select all of the keyframes that are showing in Maya’s Timeline by holding the Shift key. Then, click and drag from the start time of your animation to the end time of the animation in the Timeline panel.

Finally, move the keyframes to frame 0 by clicking and dragging the selection to frame 0 in the Timeline.
Repeat the same process above so that all anim layers start at frame 0. For information on playing back your animations, please refer to the Animation Player guide.