Asset Library Publishing Guide
This guide walks you through preparing assets for the Lens Studio Asset Library—from how to structure your resources to exporting and submitting them. Following these guidelines improves the chance your asset is approved and useful to other creators.
In this guide:
Resource guidelines
Use the guidance below to confirm that your submission is reusable, clear, and aligned with Asset Library quality.
What we look for in every submission
- Versatile building blocks: A good asset supports more than one type of Lens—creators should be able to apply it in different ways across their ideas. For example:
- Texture packs: Provide several different example use cases.
- Materials: Provide customizable inputs so others can fine-tune your materials to fit their needs.
- 3D assets: Allow for several variations or animations that inspire and enable creators on their projects.
- Reusable: Think building block, not finished scene—package work so others can import it without untangling a whole project. For example:
- What to submit: Do not submit an entire Lens Studio project. Publish a focused asset package, custom component, installable package, or plugin that creators can import or install into their own projects.
- How it fits other projects: Content must integrate well with other work—not dependent on a specific full-scene setup that only works as a standalone Lens.
- Documentation: Assume the reader is new to Lens Studio—your asset might be one of the first things they try in the editor, or the first time they use a workflow your asset depends on. Other creators should be able to pick up your asset without guessing. For example:
- Language: All instructional text (asset and prefab names, in-editor descriptions, comments, JSDoc, and any separate documentation) must be in English. If you include instructions or labels in another language, you must provide the same guidance in English.
- Descriptions: Provide a detailed package Description, submission blurb, and any README or separate documentation so people know what they are getting.
- In-editor clarity: Use clear names and parameter descriptions for assets, prefabs, and parameters.
- Code and behavior: Add comments or JSDoc where behavior needs explanation.
- External references: Link to guides, templates, or examples when setup is non-trivial.
Resource type guidelines
Scripts and custom components
- Scripts and custom components must compile in Lens Studio with no errors before you submit.
- Putting comments or JSDoc annotations is a great way to help others use what you've built.
- Make sure your script is versioned and attributed.
- If you use third-party scripts or script modules, ensure the license allows this. If unsure, tell us when submitting.
Textures
- Keep texture files as small as possible.
- If you are creating a texture pack, add textures to the Asset Browser, place them in a folder, and create a package (see Asset export).
Materials
- All materials used in the asset should be Graph materials. See the Material Editor guides for more information.
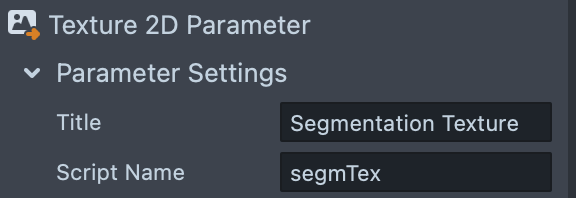
- All material parameters should have meaningful Title and Script Name values.

- Keep the material graph readable and not tangled; use subgraphs or code nodes where possible.
- Add a comment node when needed to group nodes and explain what they do.

- Use Sticky Note for longer multi-line comments.

VFX assets
Good VFX assets benefit from the same practices as good materials, plus a few extras:
- Use the fewest particles needed for your goal. Avoid publishing VFX assets with more than 50,000 max particles.

- Use subgraphs and code nodes directly on the Spawn, Update, and Output containers to keep the graph clean and readable.
- See VFX Graph Optimization for tips on keeping VFX systems running smoothly.
3D assets
Follow these general directions before bringing your 3D model into Lens Studio:
- Try to keep models under 100,000 triangles, or 60,000 triangles for meshes with joints/skinning, for best performance.
- Name meshes and bones descriptively; merge meshes that can be merged to simplify.
- Place the pivot at the object center (or another point that supports manipulating the object in the Scene Panel).
- Reset or apply all transforms when possible.
- Ensure normals face the correct direction.
- Meshes need a UV map and texture for use in Lens Studio.
- For extra detail, prefer a normal map texture.
- If the object is animated, do not use the Legacy Import option. Use an Animation Player component (not the deprecated animation mixer).
- For animation, set your tool’s time unit to 30 FPS and export the full range of animation frames.
Ways to Export
Asset Library accepts two broad paths:
- Asset export: Reusable asset packages (scene hierarchies and resources as
.lspkg). Best for prefabs, textures, materials, and bundled folders you want others to import into a project. - Installable content export: Items installed into Lens Studio itself—custom components, installable packages, and plugins (for example
.lscor a zipped plugin folder).
Pick the path that matches how creators should consume your work, then follow the subsection below.
Asset export
Asset packages are the most convenient way to distribute reusable building blocks. Even if you submit single asset files, we prefer you import them into Lens Studio yourself and follow the steps below to package them.
Name
Pick a descriptive and somewhat unique name for your asset. It should be clear and describe the asset well.
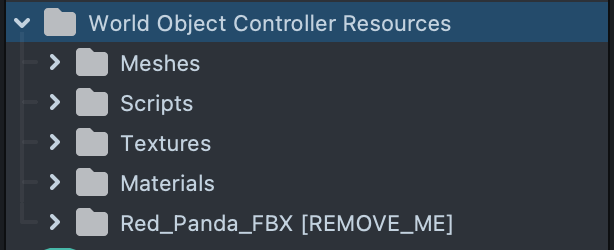
Resource organization
The easiest approach is Organize Folder Structure (right-click in the Asset Browser), then place all folders under a parent folder that matches your asset name. For example:
Scene organization
When applicable, parent all scene objects that belong to your asset under one object and give it a descriptive name.
Then drag that scene object into the Asset Browser to create a prefab.
Append a placement hint to the prefab name when it helps users, for example __PLACE_IN_SCENE, __PLACE_IN_ORTHO_CAM, __PLACE_UNDER_MAIN_CAM, and similar.
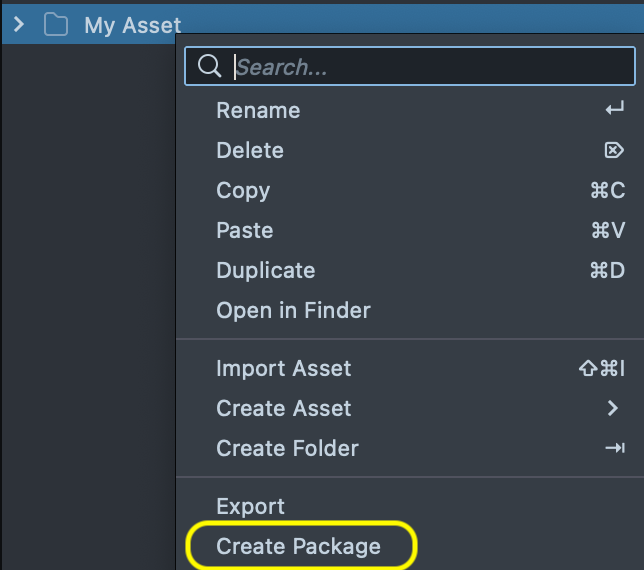
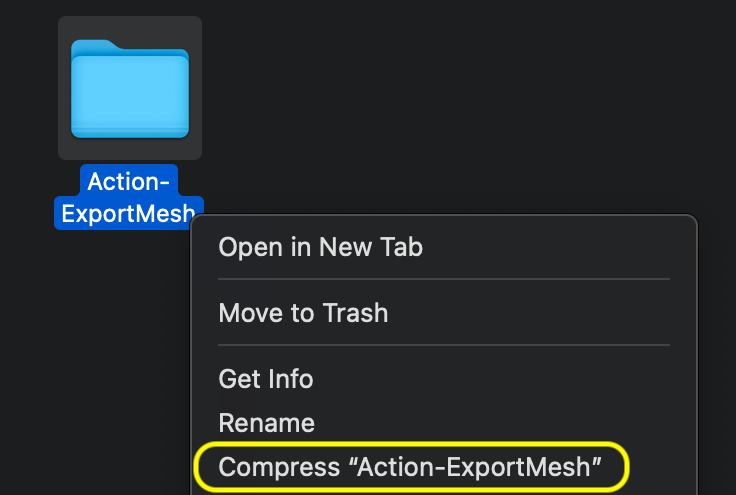
Create package
Right-click the main folder in the Asset Browser and choose Create Package.
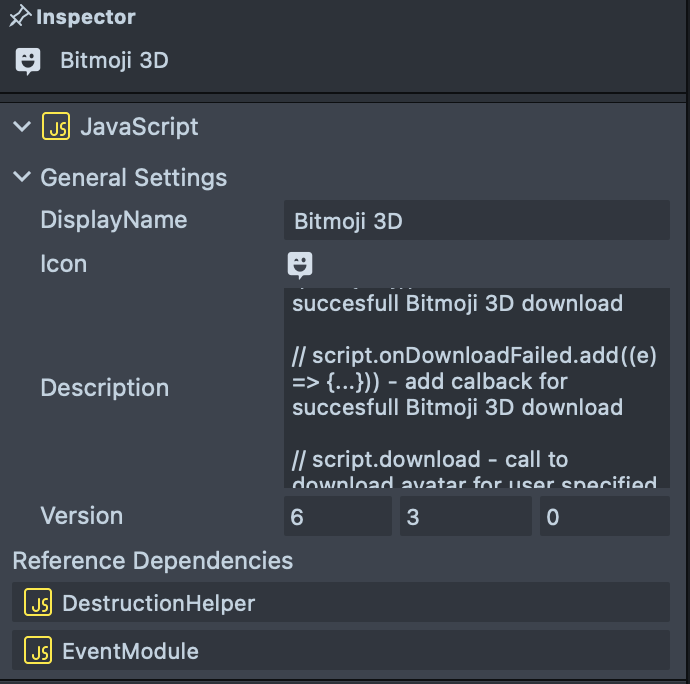
Select the package in the Asset Browser, rename it, and fill Description, Icon, and Version in the Inspector so others understand what they are getting.

Export package
Right-click the asset package in the Inspector and choose Export. Choose whether the package is Editable or not—we generally recommend allowing editing for flexibility.
Installable content export
Lens Studio supports content that installs into the editor rather than importing into a single project: Custom Components, Installable Packages, and Plugins.
Custom Components
Custom Components are components built from a script and include the resources the script needs, so developers can ship script and assets together.
When you export a custom component, referenced resources are packaged automatically. Fill in the required fields on the script component in the Asset Inspector.
Right-click and choose Export. Pick Editable or Locked depending on whether users should be able to customize your component.
Installable Packages
Installable editor packages (for example .lsc) add content to Lens Studio itself rather than to one project file. Export them with the appropriate editor workflow, then verify in a new project before you submit.
Plugins
See the Plugins development guides. When the plugin is ready, zip the plugin folder.
When submitting, make sure the plugin name matches the asset name exactly, and optionally show how users should open the plugin in the asset thumbnail:
Submitting
Prepare Submission
-
Open a new project in Lens Studio and verify your asset imports correctly before you submit.
-
Log in to My Lenses with the Snapchat account you want to publish under.
- Note: Anything you submit to the Lens Studio Asset Library is published under that account's name.
-
Open Asset Library Assets in the left sidebar.

-
Click Create Asset on the top right.
Submission Fields
Asset
In the Asset section, click Upload Asset and select your .lspkg, .lsc, or .zip file.
Thumbnail
In the Thumbnail section, click Upload Photo and select your preview image.
- Purpose: This is the preview users see first. Make it engaging, faithful to the asset, and aligned with a colorful Asset Library look.
- Format: Export as a 512×512 pixel PNG, preferably on a transparent background.
- Layout: Leave some space around the subject so UI elements do not crowd the artwork.
Reference thumbnails (right-click an image → Save Image As):
Description
Provide a short description of your asset, for example:
"World Object Controller allows you to add a 3D object to the world that the user can walk towards and around. This tool gives you access to manipulation control which allows the user to move, scale and rotate the object."
You may add words that help people find your asset. If it has several elements, list their names for search.
Add useful links for context (guides, templates, and similar).
Category
Pick the most relevant category. Use the correct category for installable content when applicable.
External link
This can be a Lens Studio guide that covers the essential components used in your Lens, or your own resource link.
Version
Set Min Version to the Lens Studio version you used to create the asset. Prefer the latest Lens Studio when you can.
If you are unsure about Max Version, leave it empty.
Questions
If you have questions about the submission process, contact Lens Studio support.