Importing 3D Animations
You can drag your 3D files (fbx, gltf, etc.) into the Scene Hierarchy panel to bring your 3D model into the scene.
In the import dialog, you can set various settings as to how you want your files to be imported. In order to use Animation Player, make sure to disable the Legacy Importer option.
| GLTF | FBX |
|---|---|
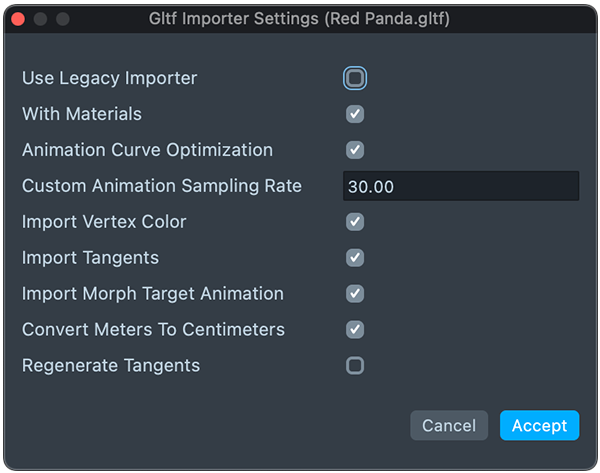 | 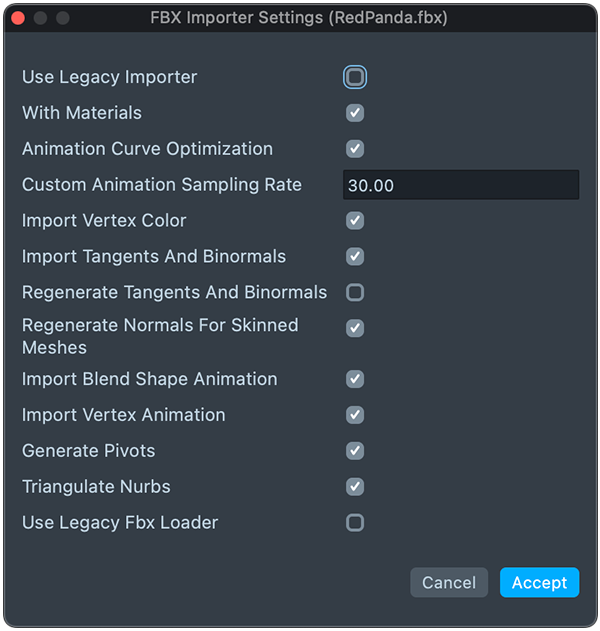 |
Take a look at the 3D importing guide to learn more about importing 3D files in Lens Studio.
Lens Studio units are in CM, whereas other softwares may use a different unit. For example, in Blender, the default unit is in meters. Thus you should be mindful of which unit you are using when importing assets.
Inspecting your Imported Files
In your Scene Hierarchy panel, you will now see your object, bones, as well as a scene object containing the Animation Player component.
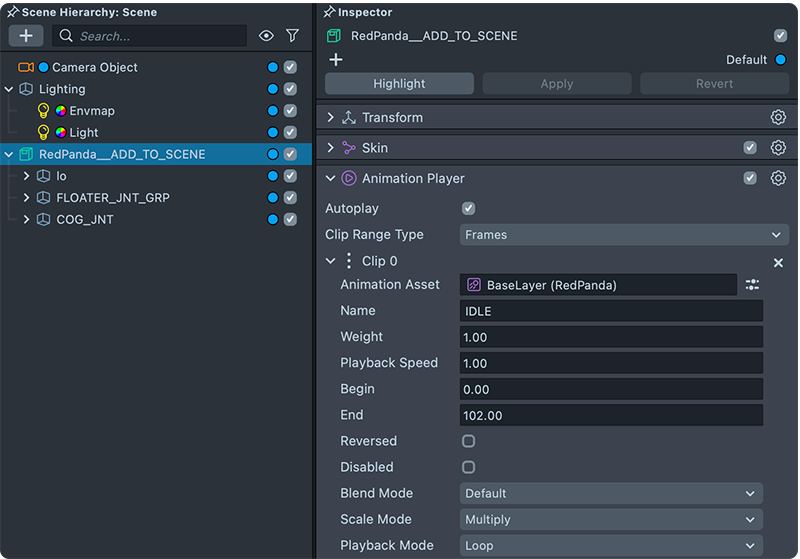
By default, the Animation Player is set to Autoplay, you can turn this off and trigger this manually as in an event.
Animation Clip
In the Animation Player, you’ll notice that there’s a list of Animation Clips. You can press the + Add Value button to add additional Animation Clips
Animation Clips are segments and settings for using the Animation Asset. For example, you can have an Animation Clip only play between 0-1s of an Animation Asset.
Animation Asset
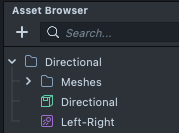
In the Asset Browser, you can find the Animation Asset which is referenced by the Animation Player.
Adding Additional Animation Assets
Animation Clips are connected to Scene Objects by name. This means that it’s possible to bring in new 3D models which contain only animation of objects, and apply them to an existing 3D model.
Importing Another 3D file
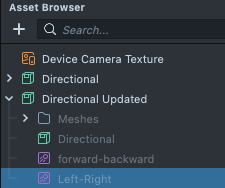
You can drag files into the Asset Browser of Lens Studio to import them only, and not add them to the scene. For example, we can drag in a file containing our animation, which we will add to our existing Animation Player.
Adding the Animation Asset to the Animation Player
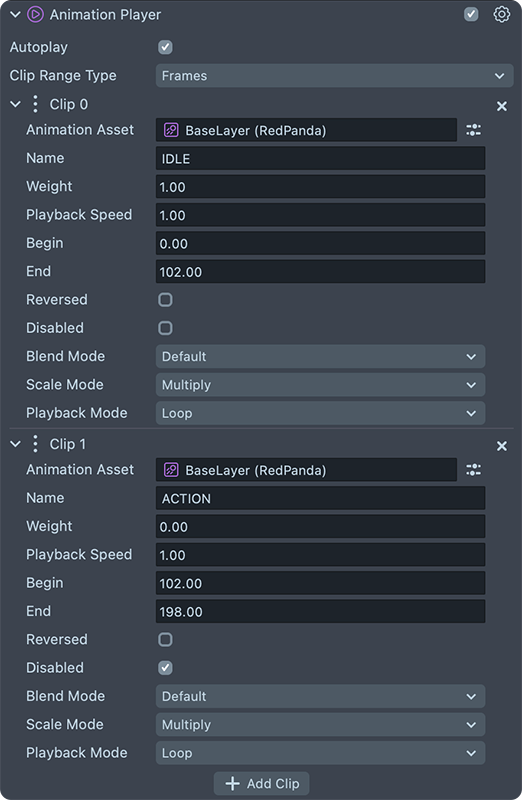
We can select the Animation Player from earlier, and press + Add Value. In the Animation Asset field, you can select the newly added Animation Asset.
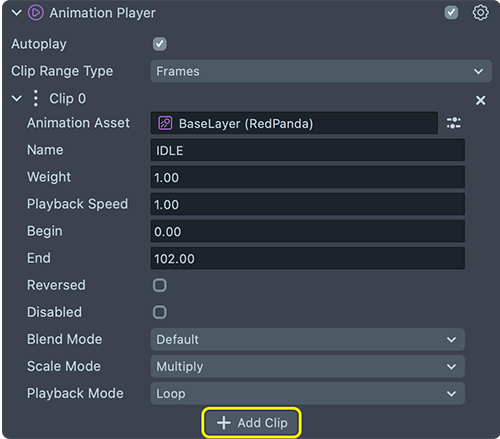
Don’t forget to modify the Begin, and End value in seconds to match your new asset.
Blending multiple Animation Clips
Notice that each clip also has a Weight parameter, as well as a Blend Mode parameter. This means that multiple clips can influence the mesh.
That is: if the last clip in the Animation Player has a weight of 1.0 and is set to Blend Mode of Default, you will only be able to see the last animation clip.
For example: in the gif below we have two animations. One that move the tube forward and backward, and another that’s left and right. However, we can only see the tube move forward and backward.
However, if you set two clips with a weight of 0.5 each,, and have the Blend Mode be Additive, then the two clips will blend together.
For example: here we blend the forward-backward, as well as left-right, which results in the tube bending diagonally.
You can toggle the Disabled checkbox to stop the clip from affecting the Mesh.