Audio Classification
The Audio Classification asset enables you to classify audio input from the device's microphone into one or several classifications among a total of 112 classes.
Some of the top classes returned in the model include:
- Human Sounds
- Music Sounds
- Animal Sounds
- Natural Sounds
- Sounds of Things
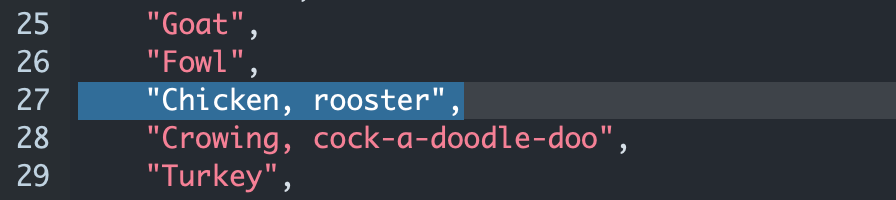
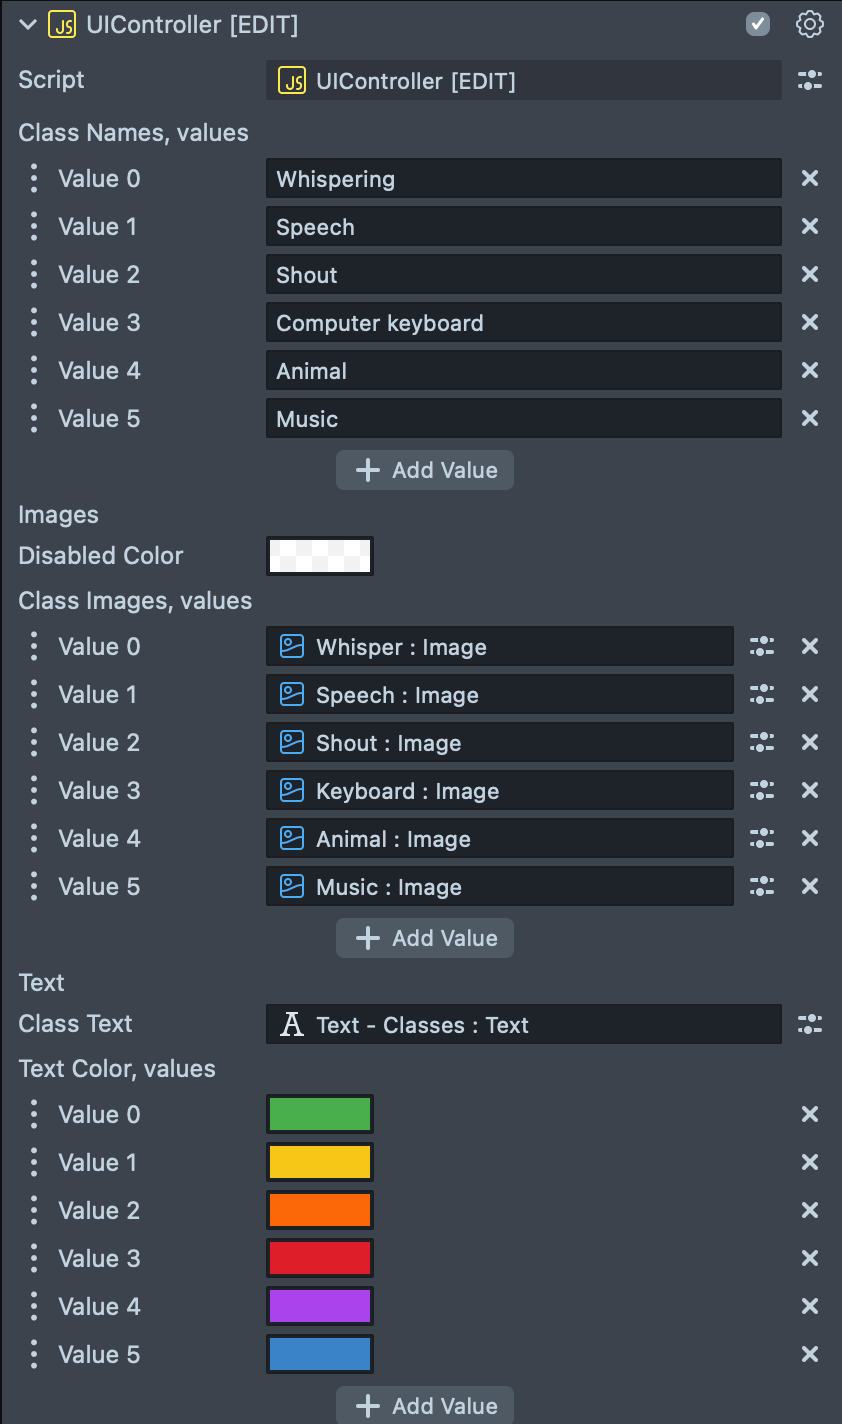
You can find the list of available classes in the Labels.js file. As shown in the image below, your behavior script example will utilize these classes.
Guide
Importing the Audio Classification Asset
Audio Classification is available in Lens Studio via the Asset Library. To get started:
- Import the Audio Classification asset from the Asset Library into your project.
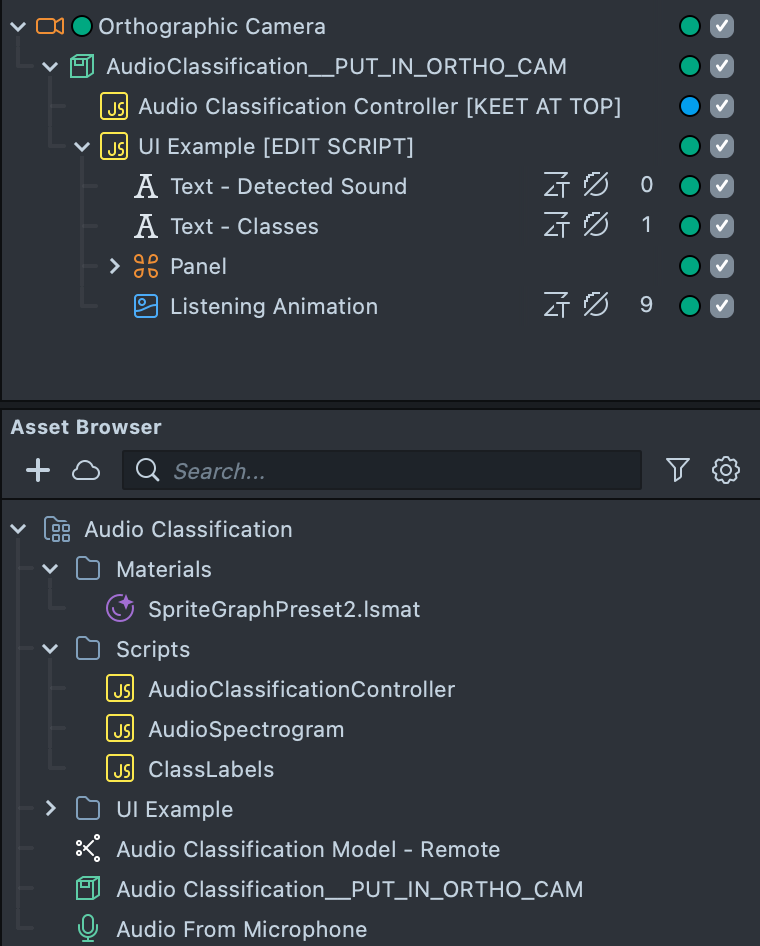
- Once imported, locate the imported asset package Audio Classification in the Asset Browser.
- Find the main prefab Audio Classification__PUT_IN_ORTHO_CAM and drag the Prefab into your
Scene Hierarchyunder an Orthographic camera. If you don't have an Orthographic camera, you can add one by clicking the+button in theScene Hierarchyand typing inOrthographic Camera, then selecting it.
Audio Spectrogram Script
The AudioSpectrogram script reads data from the audio track and generates a spectrogram from the captured audio samples when the Lens is running.
To modify spectrogram settings, enable the Advanced checkbox.
Audio Classification Controller
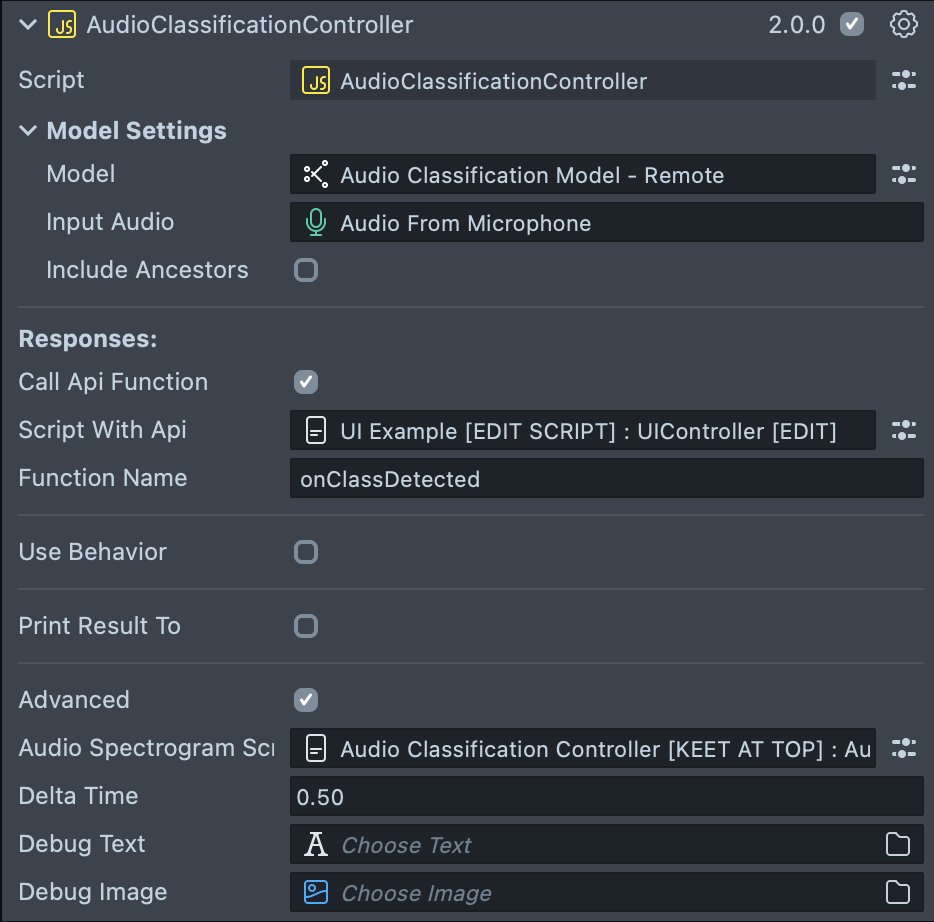
The AudioClassificationController script configures and runs the Machine Learning (ML) model by passing the spectrogram data as input. This script powers the main experience of the asset and allows you to set up different responses based on the detected audio classes.
Audio Classification Controller Inputs
Listed below are the inputs used in the AudioClassificationController script:
| Name | Description |
|---|---|
| Model Settings | Configure ML model settings and inputs. |
| Model | ML model asset. In this asset, the model is remote and preconfigured by the VoiceML team. It takes a float array of size 64*64*1 as input and outputs an array of size 1*1*112. |
| Input Audio | Audio track to read data from, either Microphone Audio or an Audio File. |
| Labels | Script component containing the Labels.js file, which provides the script.api.labels object property. |
| Extended | When enabled, detected classes are extended with their ancestor (parent) classes (for example, for ‘Guitar’, the extended result might include "Plucked string instrument", "Musical instrument", "Music"). |
| Responses | Set up responses triggered when a certain class is detected. The Use Behavior and Prefix fields help define a custom response. |
| Use Behavior | Triggers a custom behavior when a specific class is detected. |
| Prefix | A string added to the detected class name (forming prefix + className). This can be left empty. |
| Print Result To | When enabled, prints the result array of classes to the assigned Text Component. |
| Class Text | The Text Component where the detection result is displayed. |
| Placeholder Text | The text to display if no classes are detected. |
| Call Api Function | When enabled, allows you to call an API function from your custom script, with the detected class names array as parameters. |
| Script With Api | The Script Component that contains your custom script. |
| Function Name | The name of the API function to be called. |
You can plug in different audio files for testing, but remember to set Input Audio to Audio From Microphone before publishing your Lens.
Example Script with API
// Example script with API
script.onClassDetected = function (classes) {
  print('Result : ' + classes.join(','));
};
The asset includes an extended script named UIController that controls the color of several screen images based on the detected class and adjusts the text color accordingly.
Use Behavior Script to Trigger Custom Responses
The Audio Classification Controller automatically sends custom triggers based on detected audio classes. You can set up a Behavior script to react to these triggers—performing actions such as showing or hiding a Face Image—without writing any additional code.
Step 1: Prepare and Clean Up the Scene
- Remove the UI Example objects from the
Scene Hierarchysince you will replace them with interactive elements. - In the
Scene Hierarchypanel, click the + button, navigate to the Face category, and select Face Image. - Optional: Browse the Asset Library to choose the images or assets you want to use and import them into your project if needed, then drag them into the Material of Face Image to replace the default image.
Step 2: Configure the Audio Classification Controller
- Select the Audio Classification Controller object in your
Scene Hierarchy. - In the Inspector under the Responses section:
- Check the Use Behavior option. This tells the controller to send custom trigger messages.
- In the Prefix field, enter a string that will prefix your audio class names. For example, entering
AUDIO_DETECTION_means that when the classifier detects a class (such as "Chicken"), it will send a custom trigger namedAUDIO_DETECTION_Chicken, rooster.
The list of available audio classes can be found in the provided ClassLabels.js file. The controller automatically appends the corresponding class label to the prefix.
Step 3: Set Up the Behavior Script
- In the
Scene Hierarchy, click the + button, navigate to Scripts, and select Behavior. A new Scene Object with the Behavior script attached will be created. - In the Behavior script’s Inspector:
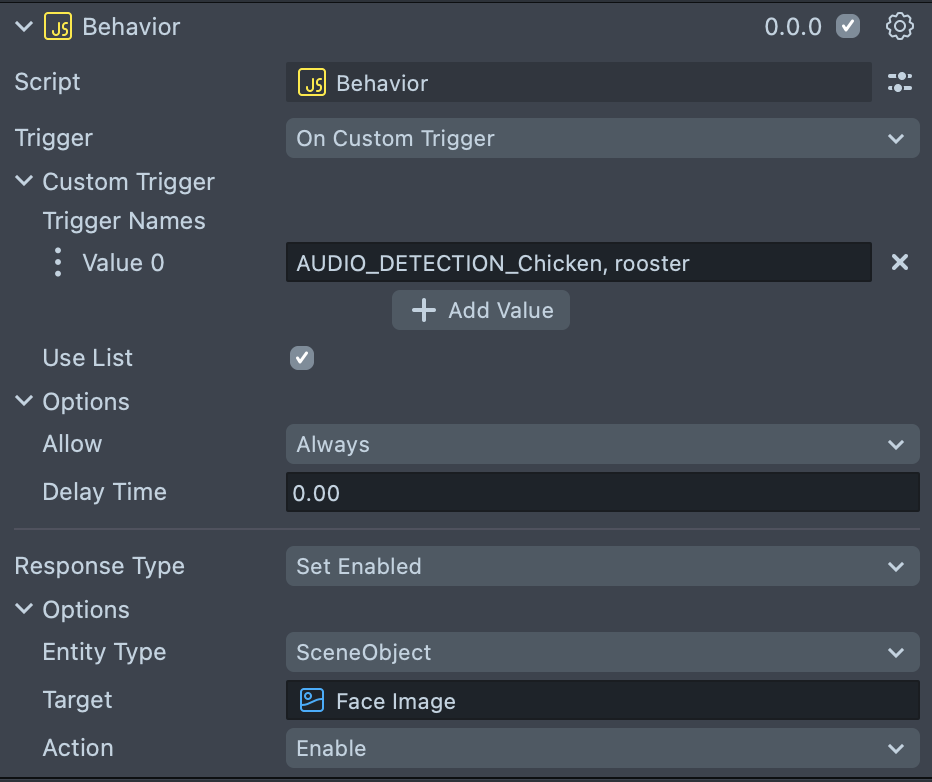
- Set the Triggering Event Type to On Custom Trigger.
- In the fields that appear, enter the exact name of the custom trigger you want to respond to. For example, if you expect the Audio Classification Controller to trigger
AUDIO_DETECTION_Chicken, roosterwhen it detects the "Chicken, rooster" sound, enterAUDIO_DETECTION_Chicken, roosterhere. (If you expect multiple custom triggers, you can enable list mode and add each expected trigger.) - Next, set up the desired Action (for example, toggling the visibility of your Face Image or swapping to a different image) that should occur when the trigger is received.
Step 4: Finalize and Test Your Setup
- Review your
Scene Hierarchyand disable the Face Image object to ensure it starts hidden. - Run your scene. When the audio classification controller detects an audio class that matches one of the labels (with the prefix included), it automatically calls:
- For example, if a “Chicken” sound is detected and the prefix is
AUDIO_DETECTION_, the controller sendsAUDIO_DETECTION_Chicken, rooster.
- For example, if a “Chicken” sound is detected and the prefix is
- The Behavior script is configured to listen for that custom trigger and will then perform the pre-configured action.
Previewing Your Lens
You’re now ready to preview your Lens! To test your Lens on Snapchat, follow the Pairing to Snapchat guide.