2D Animation
Lens Studio allows you to import a sequence of textures or animated GIFs for 2D animations. The texture sequence is converted to an optimized sprite sheet and can be used as a texture asset in your project. Playback can be controlled by enabling Always Play or scripting when and how often the animation plays.
Importing 2D Animations
Lens Studio supports both image sequence and GIF importing for 2D animations.
Importing GIFs
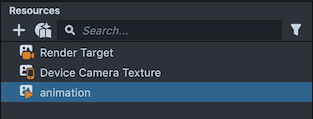
Simply drag and drop your GIF file into the Resources panel. Lens Studio will automatically create a new animated texture resource from the GIF in the Resources panel.
Importing Image Sequences
Since your Lens will be used on a mobile device, it is important that the content is optimized.
- Images should be saved in JPEG format, unless they contain transparency, in which case you need to use PNG
- Avoid duplicated frames
- Try to keep the resolution of your frames as low as possible
Go to the Resources panel and click "+" button -> Texture -> 2D Animation From Files and select the image sequence you want to use for your animation. An image sequence is a series of separate image files that make up an animation.

Configuring Animation Sprite Sheets
Once you select all your images in the image sequence, a new window will pop up that allows you to configure the resulting sprite sheet(s) of your animation. The window has a number of parameters described below.
Files count
Files count configures the number of sprite sheets your animation frames will be distributed across. If you have 100 frames and you use 2 as the Files count, each sprite sheet texture will have 50 frames.
A lower number will give better performance, but will display the frames at a lower resolution because each sprite sheet texture is capped at a maximum size.
Single texture maximum size
This configures the maximum resolution of each sprite sheet that will be generated for the animation.
A single texture size should never be greater than 2048 x 2048 pixels.
Animation density
Generally, this will be left at the default Keep every 1 frame, but it can be used to uniformly decrease the number of frames used in the animation.
For example, if Keep is selected and 5 is entered, every fifth frame will be used in the animation. If instead Remove is selected and 4 is entered, every fourth frame will be removed from the animation.
Crop
This specifies the region of each frame that will be used in the animation. This is useful for cutting off empty space around the edges of sprites. If Autodetect is enabled, Lens Studio will automatically find an optimal region to use.
Format Settings
Sprite Sheets should be saved in JPEG format unless they contain transparency, For optimization purposes, only export as PNG if your images contain transparency.
The quality of the file (0 - 100) controls the strength of compression. Lower quality means more compression and a smaller file size.
OK
Clicking OK will automatically create a new animation resource derived from the image sequence in the Resources panel.
Configuring the 2D Animation Resource
Select the newly imported animation resource. In the Inspector panel you will see the animation settings for your animation resource. You can preview the animation in the Inspector panel by clicking the Play button.
Always Play
Always Play sets the animation to repeat indefinitely. For simple animation playback, enable this.
If you want it to only play at certain times, you can write a customized script. You can find more info below.
Reverse
Reverse plays the animation backwards.
Ping Pong
Ping pong alternates between playing the animation forward and backward.
You can check multiple boxes. For example, Always Play and Reverse will play your animation backwards indefinitely.
Using 2D animation as Texture
Now your 2D animation can be used the same way as other 2D static images in Lens Studio.
One common use case will be using the animated texture on an Image or Screen Image object. Adding a new Screen Image is detailed in the Image guide. This imported animation can now be used in the Texture field of a newly created Screen Image.
Scripting Animation Playback
For more complex animation control beyond Always Play you'll have to write a script.
An example script for animation playback is shown below. It should be added to the Image or Screen Image object. Bind it to the event when you want the animation to play. For more information about scripting, refer to the Scripting Overview Guide.
var myAnimation = script
  .getSceneObject()
  .getFirstComponent('Component.SpriteVisual');
var loops = 1;
var offset = 0.0;
myAnimation.getMaterial(0).getPass(0).baseTex.control.play(loops, offset);
Set loops to -1 to tell the animation to loop indefinitely. Any other number represents the number of times the animation should loop. For more information about scripting a 2D animation, see the AnimatedTextureFileProvider scripting API reference.