Footwear Try-On
With the Foot Tracking Custom Component, Lens Developers can create unique AR Try-On experiences that can be tracked on a user foot. The Footwear Try-On Template offers a quick way for you to get started with Footwear based Try-On experiences.
This template was originally called Foot Tracking.
Template Walkthrough
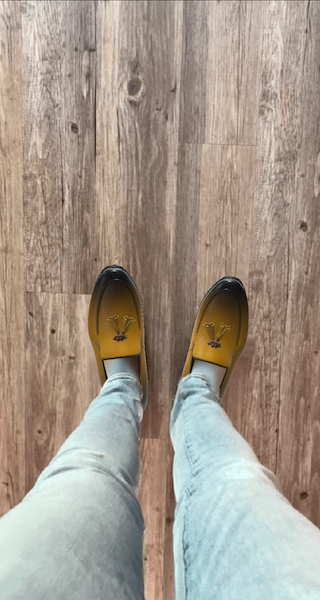
This template introduces you to creating a Footwear Try-On Lens, which allows you to attach objects to a user’s foot. This template demonstrates how you can track human feet and attach shoes to them and add control how it’s composed in the scene with feet removal and lower garment occlusion.
Project Structure
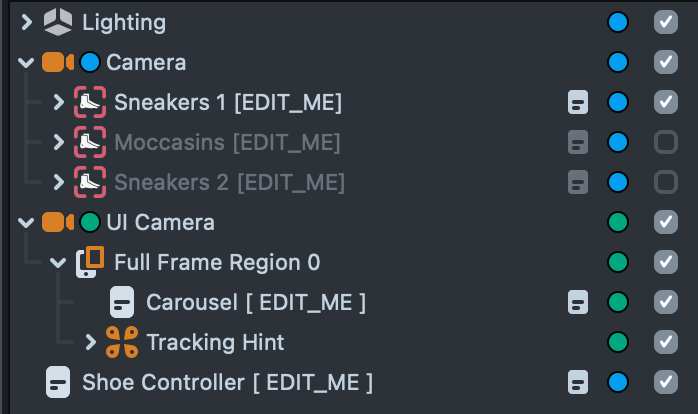
The Footwear Try-On Template project contains three main objects that provide the Try-On experience:
- Foot Tracking: Custom Component that handles how the shoe object attaches and tracks to a user’s foot.
- Carousel: A UI object to let users switch between multiple 3D shoe designs
- Shoe Controller script: main logic for this example to tie in the carousel with the foot tracking components.
Shoes are the core objects of interest in this template. However, you can replace this shoe with any object you want. You can track your own object to the feet just by replacing the objects labeled [REPLACE_ME] in the Objects panel with your own.
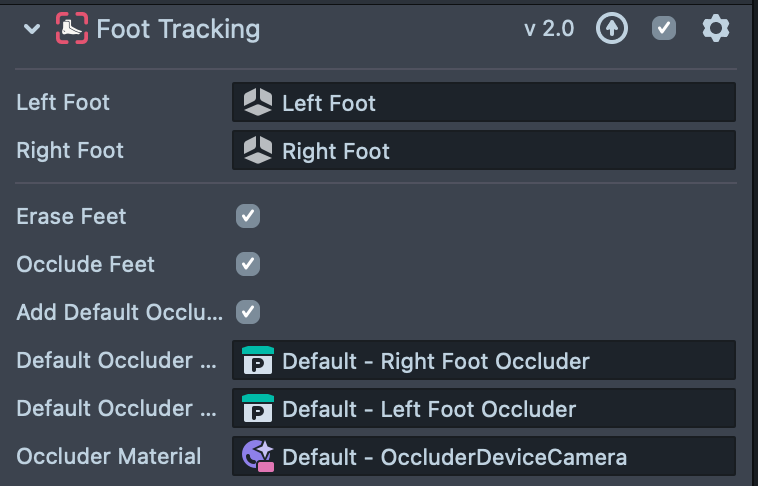
Foot Tracking Custom Component
The Foot Tracking Component can attach any Scene Object to be transformed with tracked feet.
The Foot Tracking component in the template is already assigned to the shoes. In case you’re working on your own project, you can install it from the asset library. See Adding Foot Tracking to Existing Projects.
- Left Foot: Scene object to be attached to tracked left foot
- Right Foot: Scene object to be attached to tracked right foot
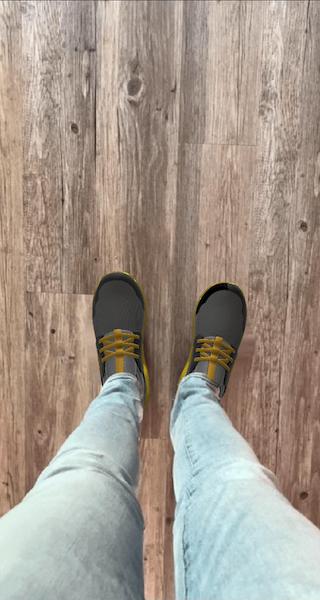
- Erase Shoes: When on, will attempt to erase the current footwear/socks from the original camera feed. This is useful for designing shoes with tighter feet, or to accommodate for cases where the user is wearing shoes bigger than the virtual ones.
This may affect Lens performance.
| Before | After |
|---|---|
 | 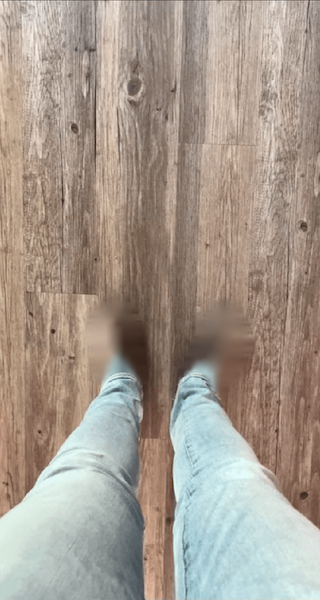 |
- Occlude Feet: When on, will attempt to use the lower garment to occlude the 3D mesh of the footwear.
This may affect lens performance
| Before | After |
|---|---|
 |  |
- Add Default Occluder: Component will add to the scene occluder mesh that represent the tracked feet.
- See the Placing the Shoes section on how to use this.
- Default Occluder Right/Left: Replace the default occluder with a custom mesh to represent the feet.
- Occluder Material: The material applied to the feet occluders.
Shoe Selection Carousel
The Carousel component allows you to switch easily between different garments. You can add/remove/modify garments by modifying the Icons list in the Inspector.
In order to add/remove items from the carousel:
-
Add a Shoe Tracking component to the Shoe Scene Object list on the Shoe Controller object.
-
Add an icon to represent the shoe on the carousel, in the Carousel object.
The Carousel is optional - if you have one pair of shoes or want to use other logic to change shoes, you can remove the Carousel object from the project.
Adding Foot Tracking to Existing Projects
Now that you have an idea on how the Footwear Try-On template works, you can also add Footwear Tracking to your existing Lens Studio Projects. In this next section, you will learn how to set up Footwear Tracking from scratch, using a similar structure as shown in the template above.
If you are new to working with 3D models in Lens Studio, please visit the 3D object import guide to see how you can bring in your own model.
In order to get started, you will need the following items to create your Footwear Try On:
- Set up a new foot tracking component.
- A 3D model of a shoe or another 3D model.
Set up new Foot Tracking Component
-
Open a new or existing project in Lens Studio version 4.34.0 or greater.
-
Left-click on the Asset Library button, located above the Objects panel.
-
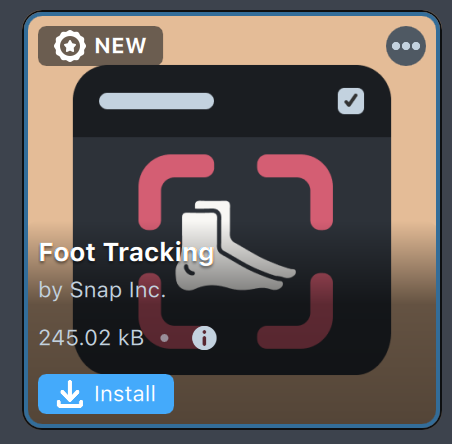
In the Asset Library Search Bar, type in
Foot Tracking. The Foot Tracking Custom Component should be visible in the Asset Library. -
Left-click on the Install button
-
Create a new SceneObject under a camera by right-clicking the Camera in the Objects panel and Select
Create Scene Objectin the dropdown menu. -
In the Inspector panel, left-click on + Add Component and select Foot Tracking.
-
When adding a new component, Left and Right foot will need to be assigned to the Left and Right Shoe Scene objects. Add left and right foot Scene Objects to their respective places on the component. If you’re not sure how to set up a left and right shoe, see the next session below.
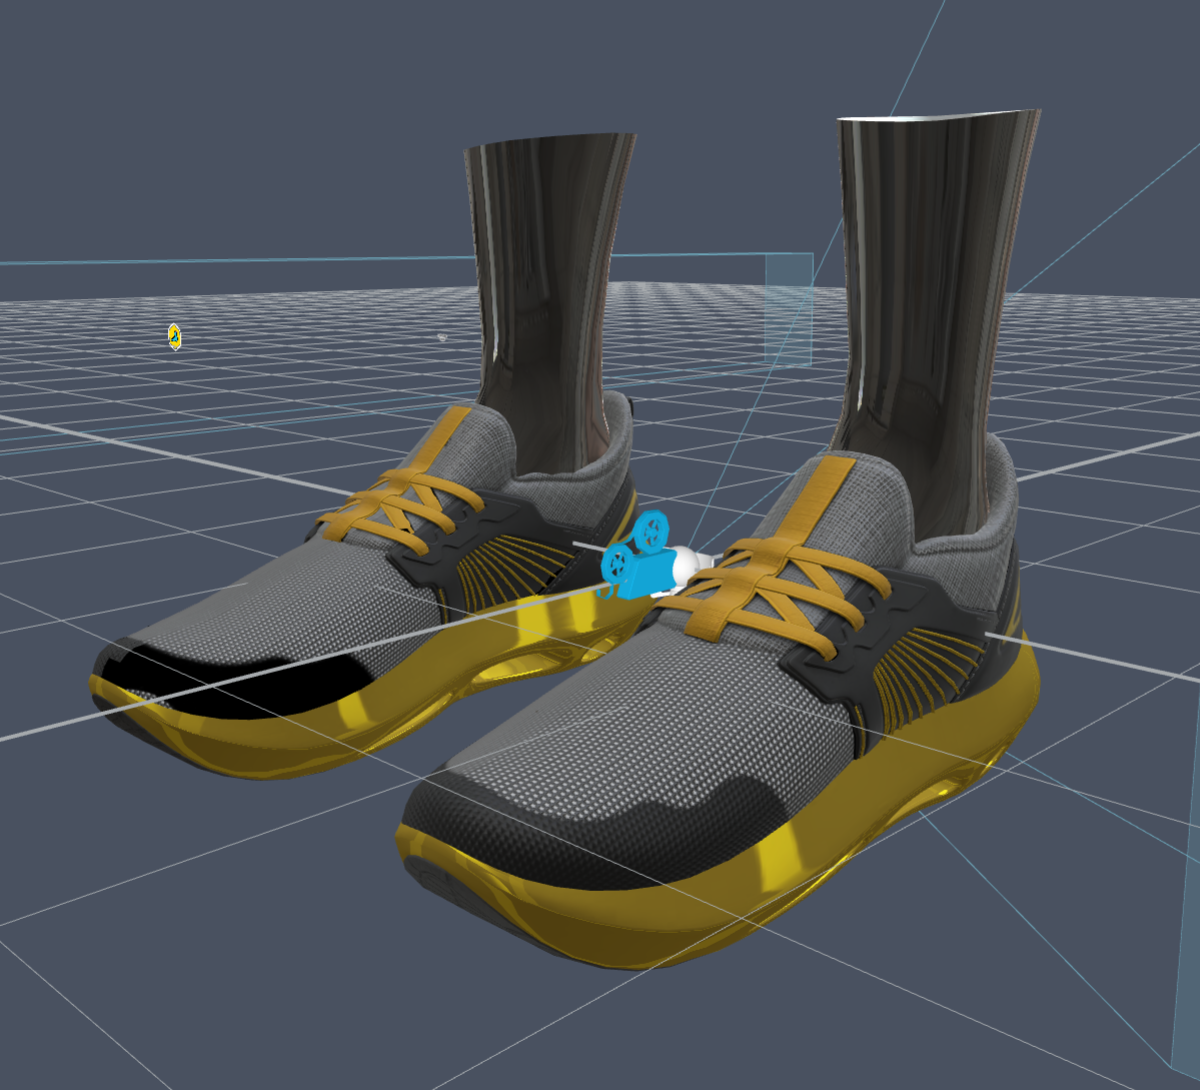
Placing the shoes
The Foot Tracking Component will allow the shoe 3D object to be placed on top of the user’s real foot each frame. To make sure the shoe is in the correct position, it has to be set up correctly in relation to each foot tracking point.
At the end of the section, you should be able to produce two SceneObjects, one for each foot. This is the objects to attach at to the Foot Tracking component above.
This can be done in two ways:
In Lens Studio
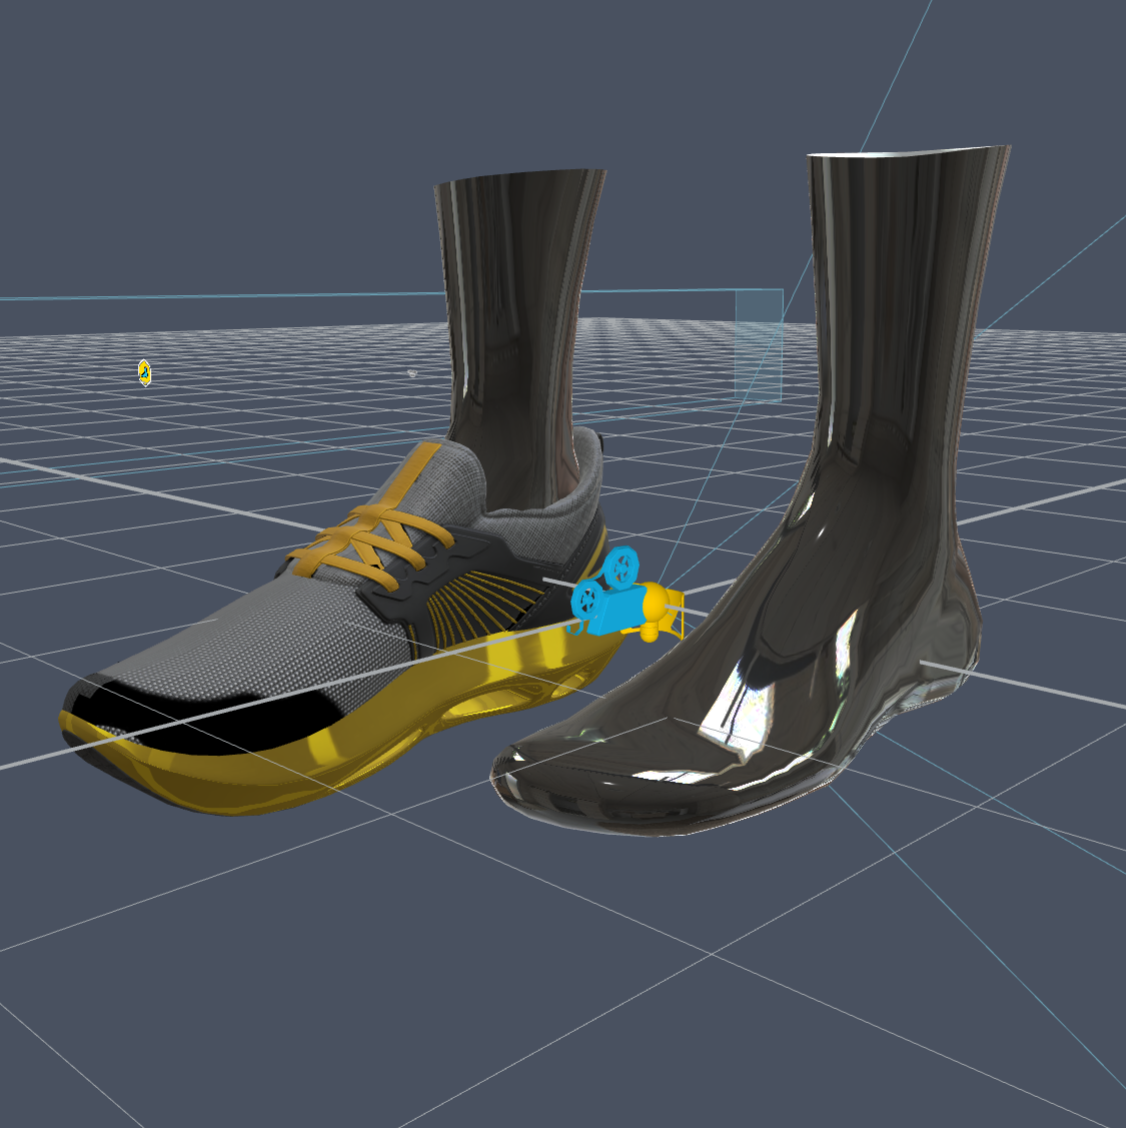
With the Add Default Occluder on in the Foot Tracking Component, align your shoe model with that occluder mesh that represents the tracked feet. The shoe should completely cover the occluder in a similar way to how a shoe would cover a foot.
You don’t have to use the default occluder in your project, but it provides the best reference for where your 3D model will be placed on a user's foot.
External 3D Software
If you’re comfortable with working in an external 3D package, you can download the reference feet model, and import it with your shoes in the same scene.
-
Import the reference feet occluder to your favorite 3D package.
-
Do not modify the reference feet model from their imported transform. Your shoes will most likely not fit the feet reference model.
-
Adjust the position, scale and rotation for both the left and right shoes to match the feet reference model. It should cover the occluder similar to how it should cover the actual foot. Before exporting your shoe model, all transforms should be reset on the mesh, so its:
- Position is
(0, 0, 0) - Rotation is
(0, 0, 0) - Scale is
(1, 1, 1)
- Position is
-
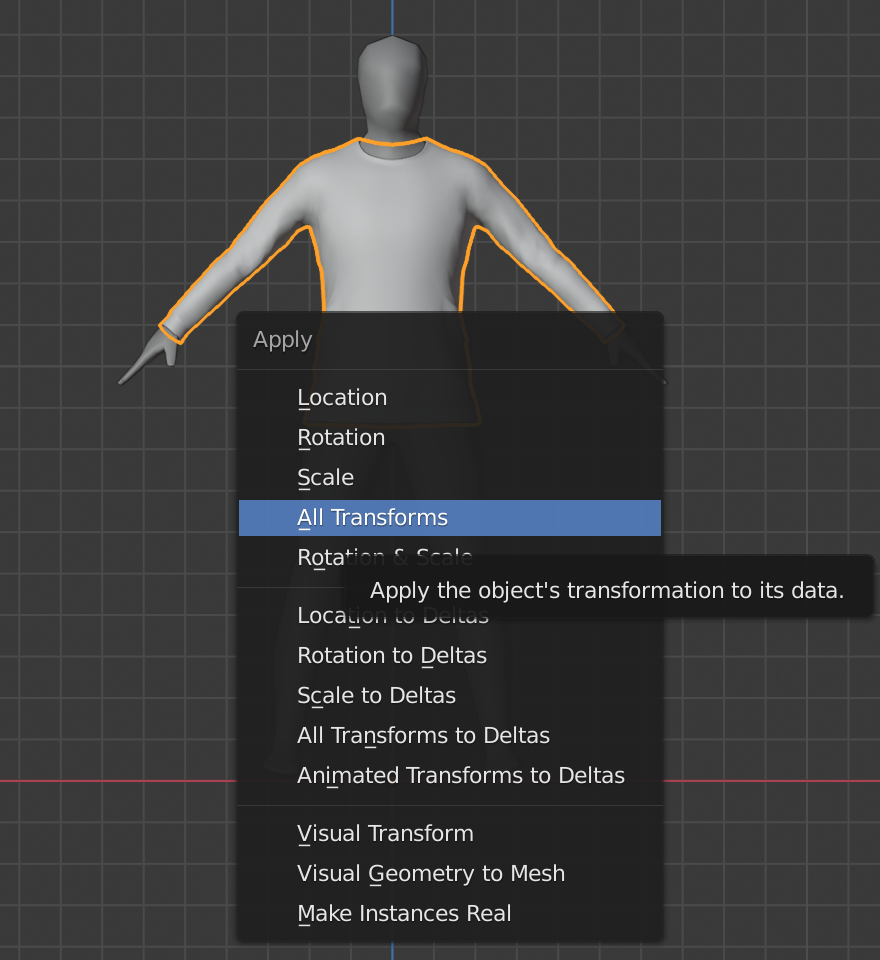
To reset all transforms in Blender, press Ctrl + A, then click All Transforms.
-
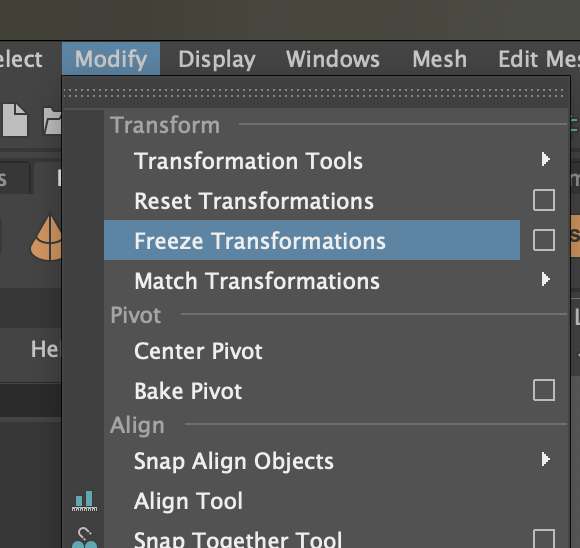
To reset all transforms in Maya, select the 3D object, click Modify, then click Freeze Transformations.
-
To reset the transform in Cinema4D. Select your object in the Objects panel, then in the Attribute panel, select the Coord. tab and press the Freeze All button.
-
Optional: You can use a custom foot occluder model instead of the Lens studio, or modify it after you placed your shoes correctly. If you do make a custom mesh to be used as an occluder, make sure to export it along with the shoe mode.
-
Export your shoe model
- Please refer to the 3D model export guide on how to export your model from third-party content platforms.
- You can also visit the External Body Mesh guide to learn more about configuring your clothing based models for export into Lens Studio.
-
Import your newly exported models into Lens Studio, and follow the steps above In Lens Studio.
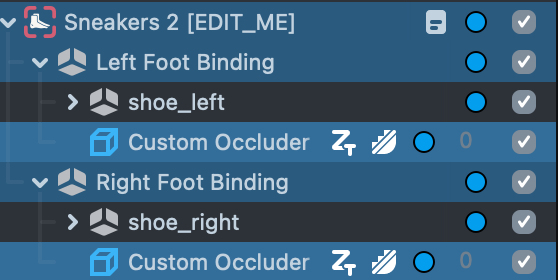
Setting up custom occluder
If you use the default foot occluder, you do not need to set up a custom occluder and can move on to the next section.
When you import the foot mesh with the shoe, turn off Add Default Occluder in the Foot Tracking Component.
-
Place the foot mesh object inside each SceneObject you assigned for the left and right foot.
-
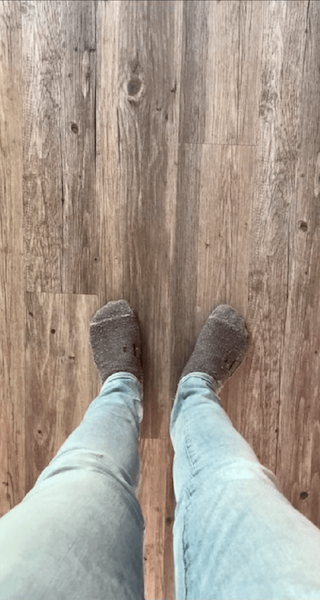
It’s recommended to use
occluderDeviceCameraMaterial for the occluder if you have theErase Shoesoption enabled. This will show the user feet where the occluder renders, as seen in the example below. You can copy it from the default occluder material.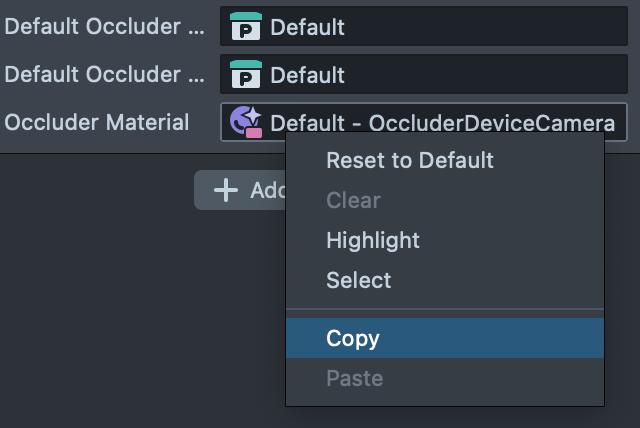
If you don’t use the Default Feet Occluder with Erase Shoe enabled, you should use the camera occluder material. This material will remove the erased part where your foot should be.
| Before | After |
|---|---|
 |  |
Foot Tracking Component API
The Garment Transfer component (V6) exposes the following API which can be used to control it from a script.
| Name | Type | Description |
|---|---|---|
setShoes(leftShoe, rightShoe) | Function(SceneObject, SceneObject) | Sets SceneObjects for left and right feet to be tracked |
isTracking | Function() | Returns True if at least one foot is tracked in current frame |
leftFoot | Property | Set or Get the left foot SceneObject |
rightFoot | Property | Set or Get the right foot SceneObject |
eraseFeet | Property | Set or Get if feet removal is active (boolean) |
occludeFeet | Property | Set or Get if occlusion is active (boolean) |
setEraserLayer | LayerSet | Set render layer for feet eraser |
setOccluderLayer | LayerSet | Set render layer for occluder |
feetFoundEvent | Event | Add callback function to trigger when feet start to track |
feetLostEvent | Event | Add callback function to trigger when feet no longer track |
onTrackingUpdate | Event | add/remove callback function to execute after feet update frame |
Example script:
/**
 * Using the component from a script
 */

/* link the following input to a Foot Tracking custom component */
// @input ScriptComponent footTracking
// @input SceneObject newRightShoe
// @input SceneObject newLeftShoe

/* set left and right foot Scene Objects */
script.footTracking.rightFoot = script.newRightShoe;
script.footTracking.leftFoot = script.newLeftShoe;

/* turn on feet eraser and occlusion */
script.eraseFeet = true;
script.occludeFeet = true;

/* Add callback to trigger when feet start to track */
script.footTracking.feetFoundEvent.add(function () {
  // Do something when feet found
});

/* Add callback to trigger when feet start to track */
script.footTracking.onTrackingUpdate.add(function () {
  // This is called after everytime feet position is updated
});
Previewing Your Lens
You’re now ready to preview your Lens! To preview your Lens in Snapchat, follow the Pairing to Snapchat guide.
What's Next?
Now that you have learned about how to create your own Footwear Try-On Lenses, take a look at some of the other AR Try-On examples.
- Check out the Developing Fashion Lenses for Virtual Try-On using Lens Studio course on how to make your own Fashion Lens.
- Wristwear Try-On
- Cloth Simulation Try-On
- Earring Try-On
- Garment Transfer
Related Guides
Please refer to the guides below for additional information: