Necklace Try-On
The Necklace Try-On Template offers a quick way for you to get started with Necklace based AR Try-On Lens experiences and how you can add some additional features to enhance the user experience.
With Necklaces being a popular fashion accessory, this AR Try-On experience offers a way for users to visualize how necklaces will match their style.
Overview
The Necklace Try-On Template features 3 examples demonstrating different ways to approach necklace try on with and without physics.

There are two approaches in this project for binding objects to the body, the External body mesh and Body Tracking. Let us first broadly outline these two approaches to tracking and then see how they are implemented along with other features in this template.
Body Tracking
The Neck Binding script will bind its children Scene Objects to the neck using Body Tracking with additional smoothing for optimal results, the Neck Binding script will also add neck and chest colliders, and out of body occlusion. This is the predominant approach in this template for its reduced jitter at close ranges. Simply add any object as a child to the Neck Binding script's scene object, and the script will take care of the rest.
External Mesh Setup
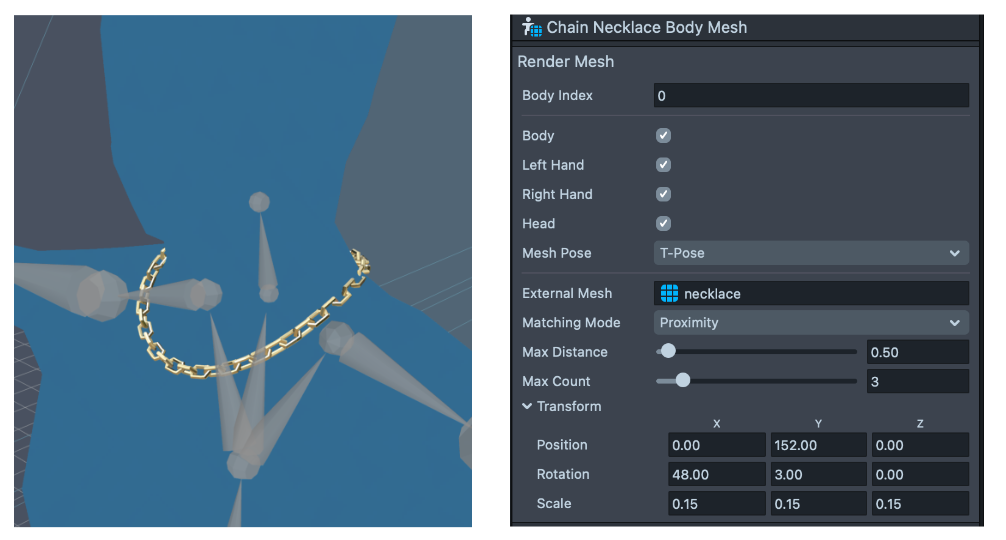
Although the previously mentioned body tracking approach is generally recommended, users can also prepare necklaces through an external mesh in the scenario where a user desires the necklace model to deform and match the body's contours.
To prepare necklace models to use either body tracking or external meshes, refer to Lens Studio's body mesh reference models (available in T pose and A pose in the Body Mesh documentation), to ensure that your models follow the contours of the neck / shoulders. To use it as an external mesh, attach it to a full body mesh as an External Mesh and position / rotate accordingly.
The difference between the two approaches is the Body Tracking will attach the 3d object to smoothly track a single point on the neck while the external mesh will pin the 3d object to a body mesh so that you can predetermine the position where the necklace will sit on the body. It is worth noting that external body mesh is harder to set up with physics.
for more information on how to use external meshes and accessing the reference body mesh files see the Lens Studio documentation.
Template Walkthrough
Example 1. Basic necklace setups
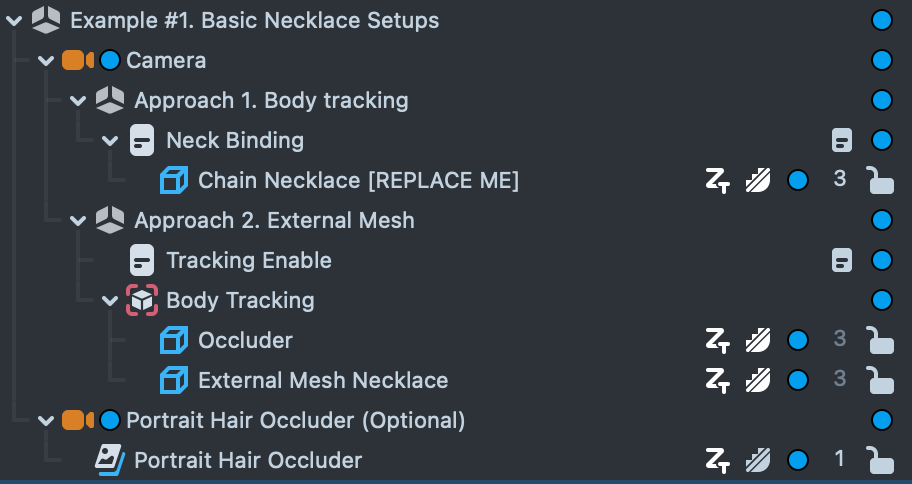
This example leverages the two above mentioned approaches with a basic chain necklace within the first camera.
In Approach 1, we created a script called Neck Binding which does all the heavy lifting of setting body tracking, adding chest and neck colliders, a body occluder and setting the hierarchy - all necessary to bind the necklace to the neck. We used this script for Example #2 and Example #3 as well.
Approach 2 uses an external mesh that sits within the body tracking object and similarly leverages a full body mesh as an occluder.
Lastly, an optional portrait hair occluder camera uses 2d hair segmentation to render longer hair over necklaces, where they overlap and ensure that protruding parts of the necklace are occluded
Example 2. AR Try On
This example features three necklaces, using the above mentioned body tracking approach. It features three cameras, the first responsible for the necklaces. The second camera - Hair occluder, as above, renders longer hair over necklaces as a 2D image. The third camera is responsible for the UI carousel and UI logic.
The three necklaces sit under the Necklaces Scene Object which holds the Neck Binding script.
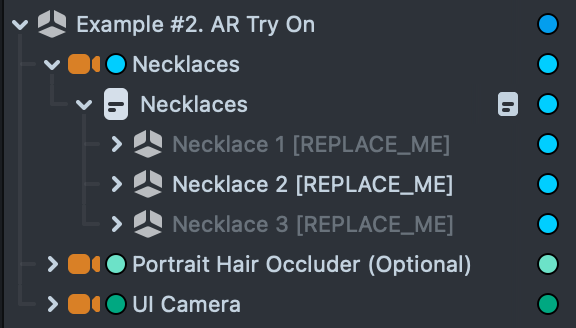
Each necklace resides within the Necklaces scene object, which tracks the Neck Attachment Point using the Smooth Tracking script - all of this automatically set up bu the Neck Binding script. You can simply add another necklace under the Neck Binding script's scene object and position it appropriately to track the neck.
Necklace 1

The first necklace is a simple static model (consisting of multiple meshes grouped together) similar to the first example. The gemstones in this necklace are using the Gemstone Rendering custom component for high fidelity. Read more about Gem Rendering in the following documentation
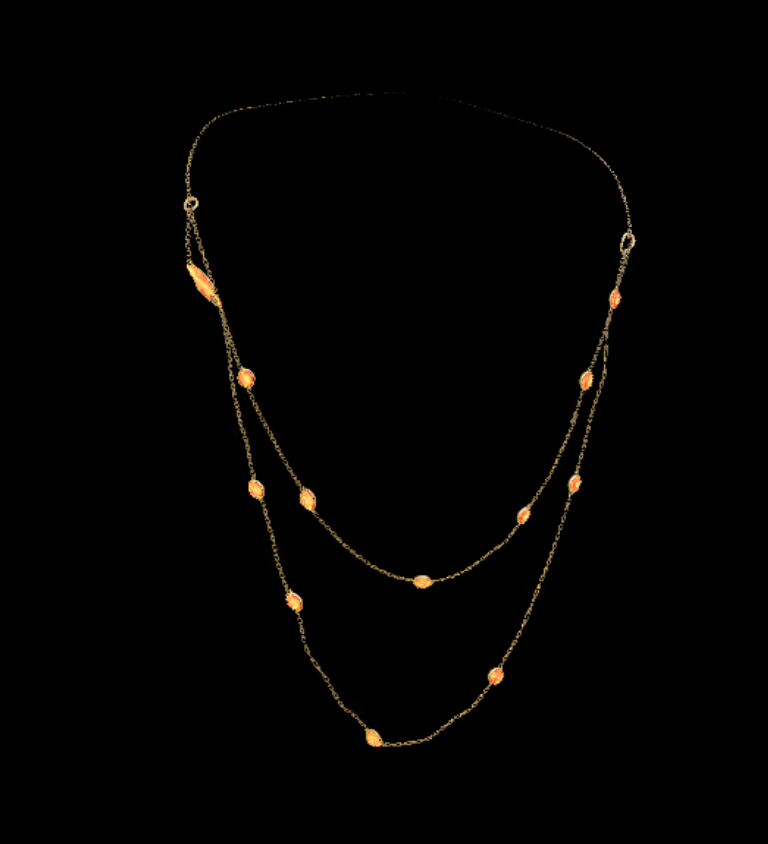
Necklace 2

The second necklace is similar to the first, but uses chain physics. The two diamond stems on the sides, are meshes located in the Main Sections section.
The two green gemstones, located in the Gems scene object, are pinned to the main sections using pin to mesh on their parent scene objects. They then are passed to the Chain custom component (at the top of the example), causing them to dangle from their single constraint points. For further reading about how to set reliable physics using the Chain script, see more with the Earring Try-On project - Earring Try-On
The two yellow gemstones are configured to use the Gemstone Rendering custom component.
Necklace 3.
The third necklace, like the previous, uses a combination of body tracking and chain physics.
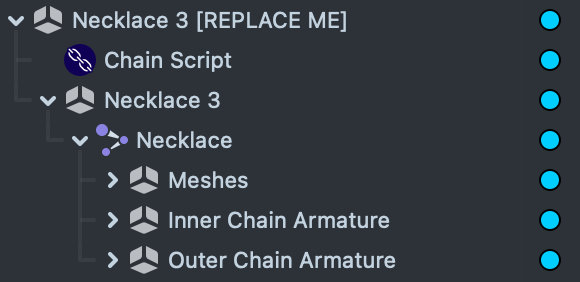
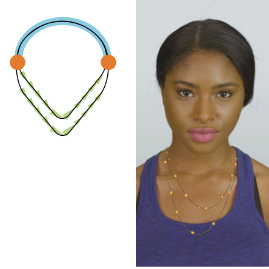
The back section (ch_external), found under the 'Meshes' Scene Object, indicated in blue in the image below, is not rigged, while the other meshes, rigged by the inner and outer armatures, indicated in green in the image below, have chain physics applied to them in the 'Chain' Scene Object.
The bones from the front of the necklace are fed to the Chain custom component and have the Anchor both ends option selected in the custom component UI, constraining the necklace at both of its ends, indicated in orange in the image below. The necklace makes use of two body collider primitives that the Neck Binding script creates, allowing it to sit on the body and not overlap with the neck, by colliding with the physics bodies along the necklace.
The direction of the front section rigging allows it to function as a chain connected from one end of the back section to the other, as marked in green arrows in the image below.
This setup doesn't require a rigged model. For your own necklace, you can use a chain of adjacent meshes and feed them in a nested hierarchy into the Chain custom component, specifying only their parent joint.
Previewing Your Lens
You're now ready to preview your Lens experience in Snapchat! To do so follow the Pairing to Snapchat guide.
What's Next?
Now that you have learned about how to create your own Wristwear Try-On Lenses, take a look at some of the other AR Try-On examples.
- Check out the Developing Fashion Lenses for Virtual Try-On using Lens Studio course on how to make your own Fashion Lens.
- Earring Try-On
- Cloth Simulation Try-On
- Wristwear Try-On
- Garment Transfer
Related Guides
Please see the guides below for additional information: