Try-On Template
The Try-On Template allows you to create a set of outfits that can be switched by swiping through the carousel on screen or using a hands-free user interface that can be used while far away from the camera.
Outfits automatically deform to any body without needing to be rigged using the External Mesh feature of the Body Mesh tracking system. This template comes with a few sample outfits that you can replace.
In this guide you will learn how to:
- Easily bring in a 3D mesh into Lens Studio and have it deform according to the movements and shape of the person (this does not require a rigged model).
- Quickly set up a carousel picker for clothes options.
- Use hands free buttons to scroll through the available options.
Scene and Resources overview
Open the project and take a look at the Objects panel. You can see a 3D Body Tracking Component with a few child scene objects that are outfits.
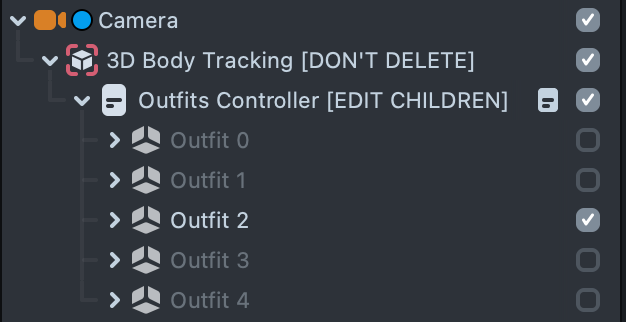
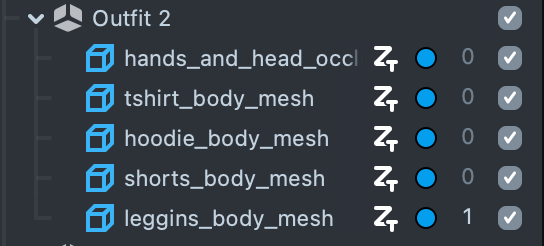
Each outfit consists of several Render Mesh Visuals that are used to visualize garment meshes and optionally an occluder that can use a full or partial Body Mesh to occlude your outfits.
Please refer to this guide to create a new garment 3D model in a 3D editor.
And then you may refer to the instructions on this page to configure imported models to track the user body.
After doing this you should have a pair of meshes in the resources panel:

Where tshirt_mesh: represents the imported garment mesh.
And tshirt_body_mesh: represents a Body Mesh that is using garment mesh as an External Mesh setting.
If you take a look at the Resources panel, you can see example meshes that follow a similar naming pattern:

Creating new Outfit
Let’s see how we can create a new Outfit object:
-
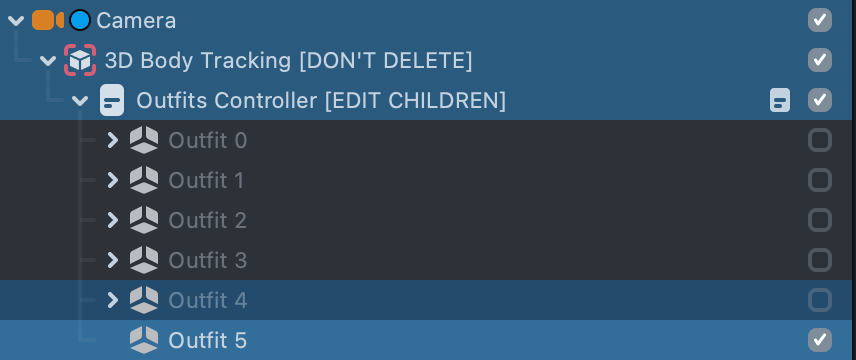
Create a new sceneObject under the Outfit Controller and (optionally) call it Outfit 5
Make sure it has a local position at (0, 0, 0) in the Inspector panel.
2. Add Garment Render Mesh Visuals by copying existing ones (Mac: cmd+D, Windows: ctrl+D) or creating new Render Mesh Visuals.
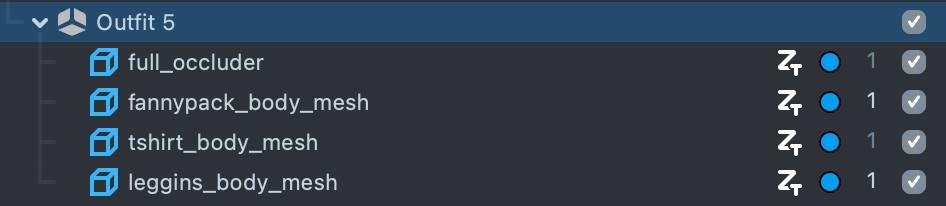
Add an occluder that matches your outfit well by enabling different submeshes
3. Tweak garment visuals as needed:
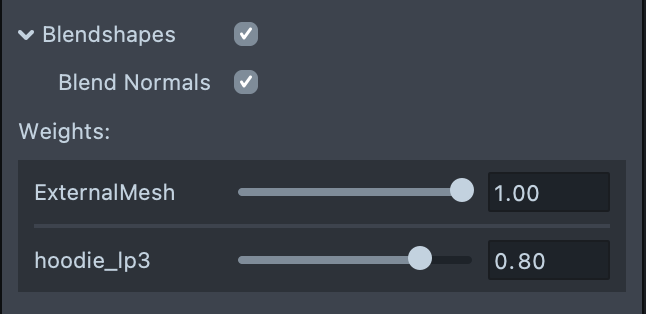
Swap materials by clicking on the material field of the Render Mesh Visualin the Inspector panel (additional materials are available for certain meshes).Optionally change the ExternalMesh blendshape or other available blendshapes weights. For example, you can try changing the blendshape weight on the hoodie_body_mesh to open or close zipper.
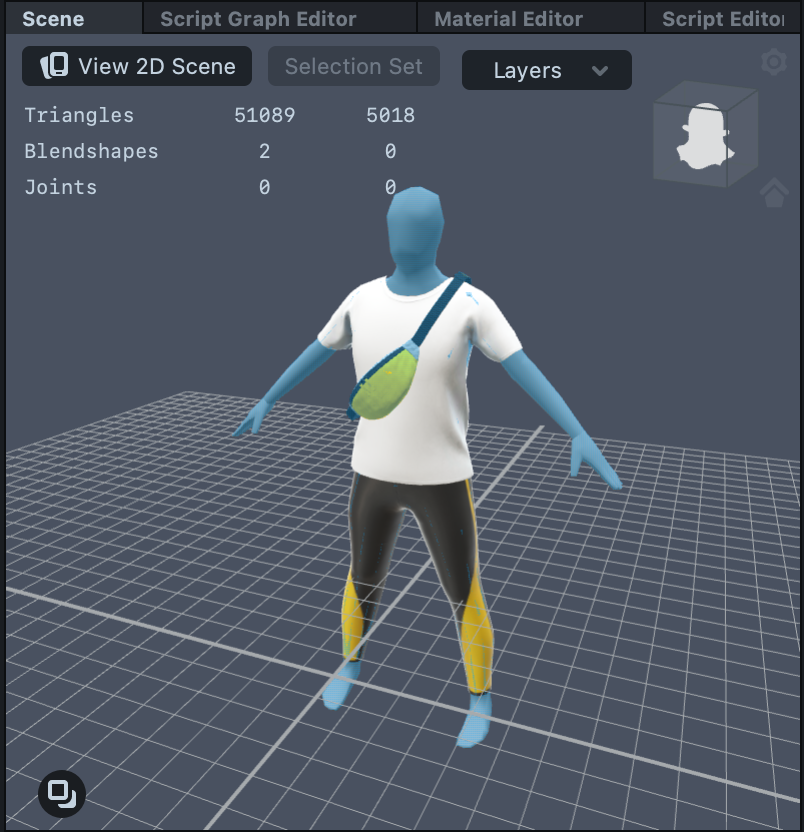
At this point we should see something like this in the Scene Panel:
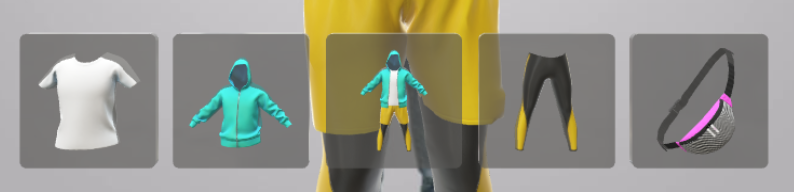
Adding Carousel Items
Once we have an outfit created it can be added as an option to the Carousel 3D.
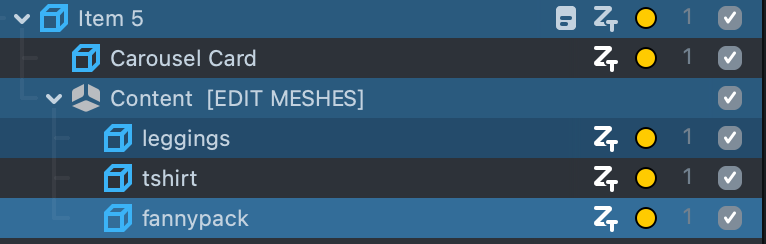
To do so duplicate an Item [COPY ME] sceneObject and enable it.
Then create Render Mesh Visuals with the original meshes that correspond to the Outfit created previously SceneObject.
For the carousel, don't use the Full Body Meshes, but instead the source meshes. For example leggings instead of leggings_body_mesh.
Once you refresh the Preview Panel the children meshes will be auto aligned to fit the card.
Now we have a new outfit and a new carousel item!
Helper Scripts
Enable By Index is a helper script that provides an enableByIndex api function, that allows to enable child of a Parent scene object by index and disable all else.

The Body Tracking Detector script controls the current state of 3D body Tracking and calls a custom Behavior trigger when state changes.
![]()
- **Body Tracking:**current 3D body tracking component.
An additional 3D Body Tracking component is used (with the same body index) under the UI camera to fully separate UI Functionality from the garment set up.
- Tracking Camera: camera that this 3D body tracking is parented to.
- In View Distance: distance to the camera passing which would switch the tracking state.
Body UI Button: A script that allows adding callbacks to the button placed in 3D space and allows certain scene objects to interact with it. Allows you to set up a pressed time that is required in order to trigger attached callbacks.
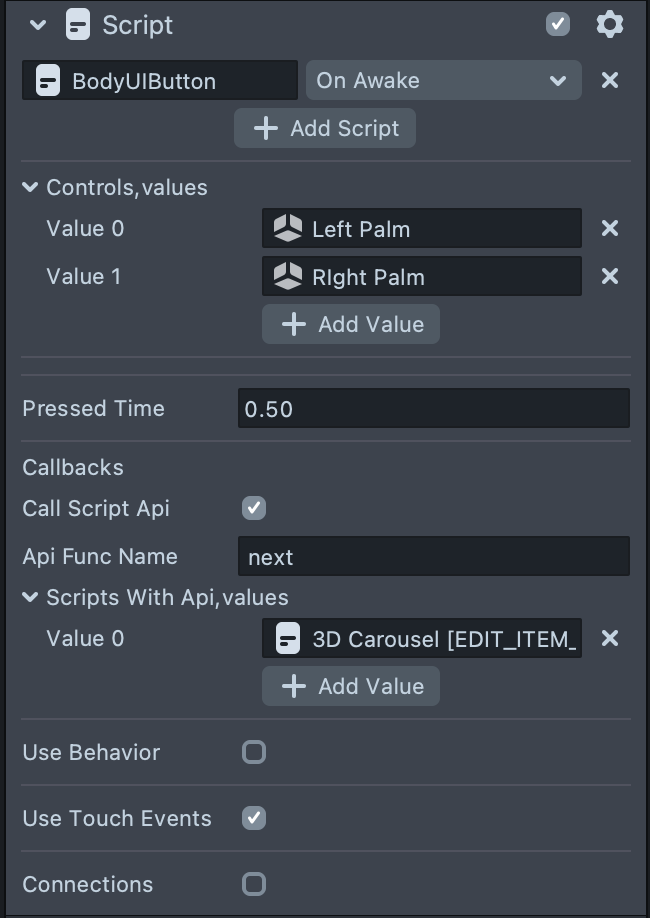
- Controls: array of scene objects that can interact with the button.
- Pressed Time: time that button needs to be held in order to confirm interaction. Used to avoid accidental triggering.
- Callbacks: this section allows to set up a response that will happen once the button is tapped.
- Call Script Api: when enabled allows to set a script component and an api function name that should be called when the button is triggered.
- Api Func Name: a function name.
- Scripts With Api: array of script components.
- Use Behavior: when enabled - allows to call a custom behavior trigger.
- On Tapped: a list of custom behavior Trigger names that will be called when the button is tapped.
- Enable Touch Events: allows you to use Touch Events to control the button. Useful for debugging in Lens Studio.
- Connections: a section with references to the required components.
- Camera: camera that renders BodyUIButton.
- Percentage Visual: a mesh visual with a special material that allows to visualize a time that is needed to tap the button.
- Collision Sphere: a mesh visual that is using default Lens Studio Sphere Mesh, used to calculate the interactions with the Control scene objects.
Body UI Placer: a script that allows placing the sceneObject that is attached to relative to the tracked body at the position. This is useful for placing objects such that they are convenient to reach with Left and Right hands.
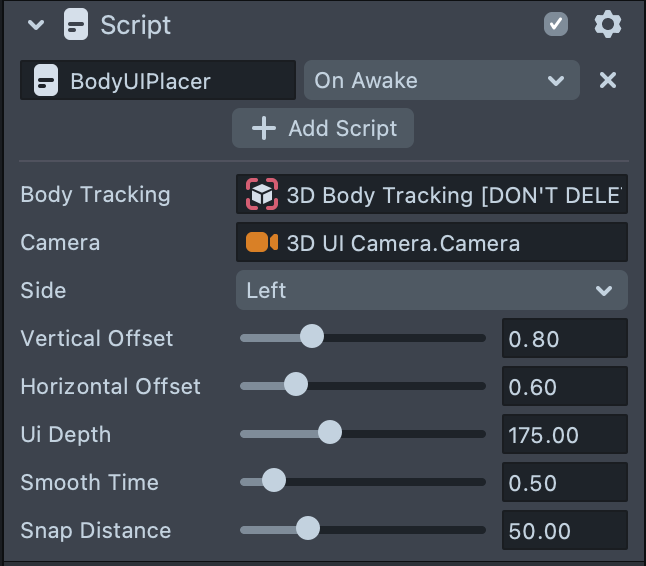
- Body Tracking : The 3D body tracking component you want to place UI relative to
- Camera: Camera that the 3D body tracking is using
- Side: Place the UI on the Left or Right side of the sceneObject.
- Vertical Offset: An offset that decides how high to place the UI relative to the neck based on the length of the forearm
- Horizontal Offset: An offset that decides how far to place the UI along the desired Side from the neck based on the length of the upper arm.
- UIDepth: The depth at which to place the UI in the scene relative to the specified camera
- SmoothTime: How long the UI takes to reach its target destination. Higher values result in smoother movement
- Snap Distance: The threshold distance at which the UI is snapped to a new position instead of smoothed.
Carousel 3D: allows to create a carousel of 3D objects.
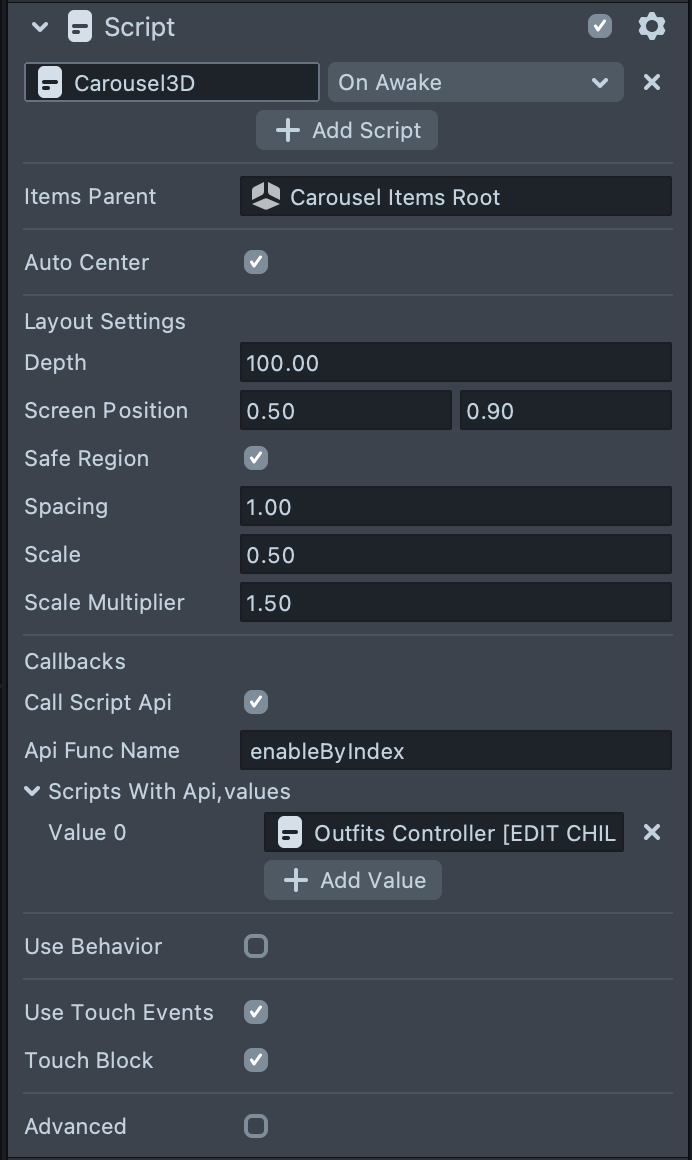
- Items Parent: a parent scene object of the carousel items.
- Auto Center: sets the start index to be the center of the carousel.
- Start Index: allows to set start index if autocenter is disabled.
- Depth: the distance from the camera to place carousel scene objects.
- Screen Position: the screen attachment point of the carousel center.
- Safe Region: if enabled - remaps the screen position to the Safe Render Region.
- Spacing: relative spacing between the carousel items.
- Scale: scale of the carousel items.
- Scale Multiplier: the multiplier applied to the selected item scale.
- Callbacks: this section allows to set up a response that will happen once the carousel item is selected.
- Call Script Api: when enabled allows to set a script component and an api function name that should be called when the item is selected.
- Api Func Name: a function name to call.
- Scripts With Api: array of script components.
- Use Behavior: when enabled - allows to call a custom behavior trigger.
- On Tapped: a list of custom behavior Trigger names that will be called when the button is tapped.
- Enable Touch Events: allows you to use Touch Events to control the carousel (by swiping or tapping).
- Touch Block: enables touch blocking.
AlignChildrenMeshes: aligns all the children of the Content scene object to fit into the default box bounds. No matter how big they are or their offset - just place them relatively to each other and script will create a nice carousel item.
Previewing Your Lens
You’re now ready to preview your Lens! To preview your Lens in Snapchat, follow the Pairing to Snapchat guide.
Related Guides
Please refer to the guides below for additional information: