Garment Transfer
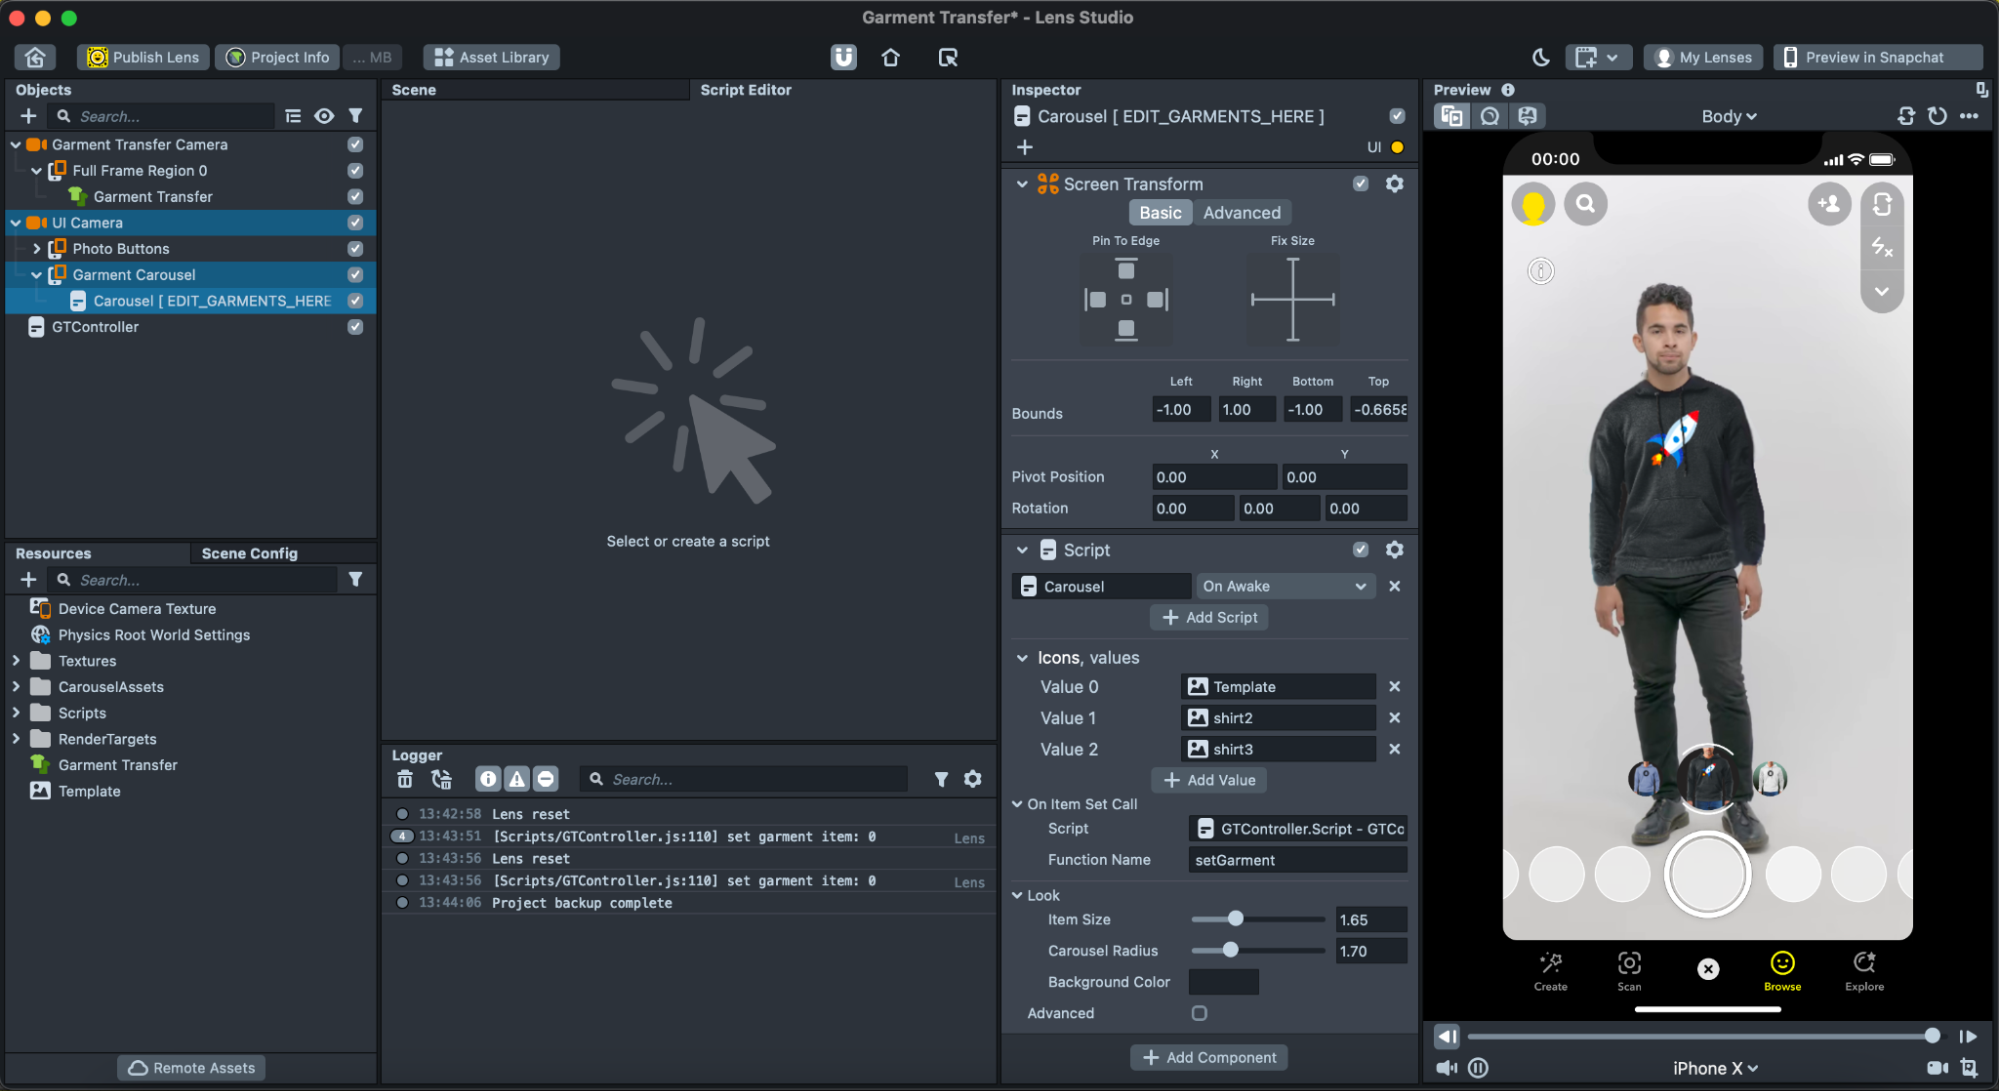
With the Garment Transfer Custom Component, Lens Developers can utilize an image of an upper body garment that is transferred in real-time on a person in AR. The Garment Transfer Template offers a quick way for you to get started with the Garment Transfer Custom Component and provides a starting point for photorealistic Try-On experiences.
Template Walkthrough
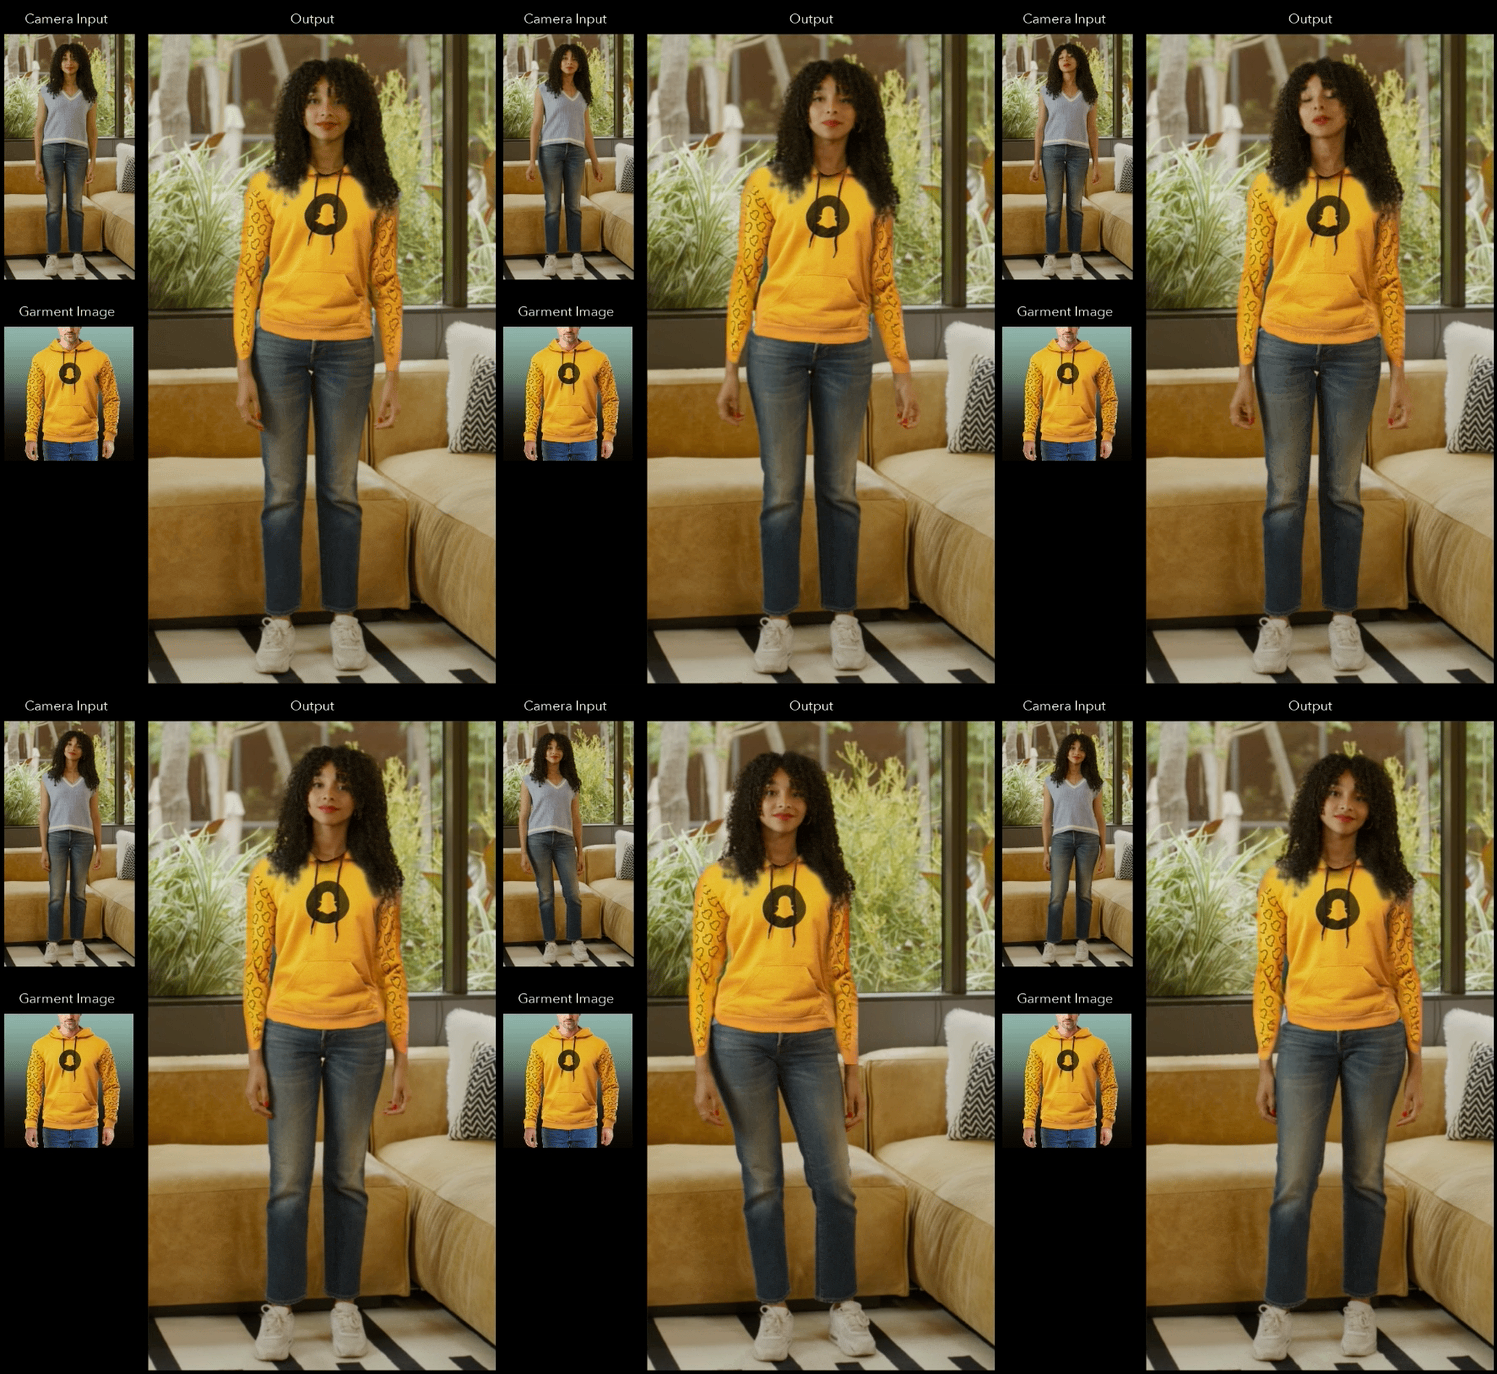
This template introduces you to creating a Garment Transfer Try-On Lens, which allows you to use an image, whether static or animated, of an upper body garment, such as a t-shirt or sweatshirt, and transfer it to a live video output.
The template project contains three main objects that provide the Try-On experience:
- Garment Transfer: Custom Component that handles how the garment in the reference image is transferred to a target.
- Carousel: A UI object to let users switch between multiple reference images
- GTController: A script object that handles switching between different run modes, how content is swapped in once selected in the Carousel, and how to enable a "Run on Tap" event to trigger when a new garment is processed.
Garment Transfer Custom Component
The Garment Transfer Custom Component handles how the garment transfer will work and will output a final image of a person wearing the desired garment. To add the custom component to an existing or a new project, just place it under a Screen Transform under an Orthographic Camera, as shown in the hierarchy below.
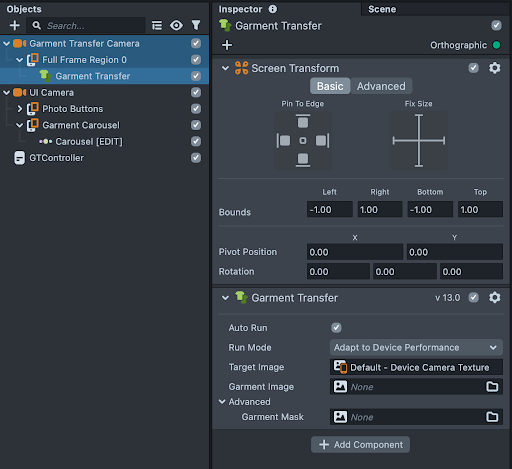
This component has the following inputs:
- Auto Run: When enabled, the component will run every frame and provide a real-time video experience. When disabled, the component will have to be run manually from a script.
- You can learn more about scripting with Garment Transfer in the Full API section below.
- Run Mode:
- Adapt to device performance: Runs the highest end Garment Transfer experience supported by the device.
- Optimize Speed: Always use the lighter version of Garment Transfer.
- Target Image: The image or video which the garment will be applied to. Target Image will default to Device Camera Texture, meaning what the camera currently sees will be used.
- Garment Image: A reference image of a person wearing the desired garment to be rendered.
- You can learn more about selecting a good garment image in the Best Practices section below.
- Garment Mask: A custom reference image mask of the Garment image input.
- You can learn more about it in the garment mask segmentation section
Adding Garment Transfer to an existing or a new project
Adding Garment Transfer Custom Component to an existing or a new project is fairly simple following these steps:
- Install the Garment Transfer Custom Component from the Asset Library.

- Create a new ScreenTransform object from the Objects panel.

- Add the Garment Transfer component to the newly created SceneObject.

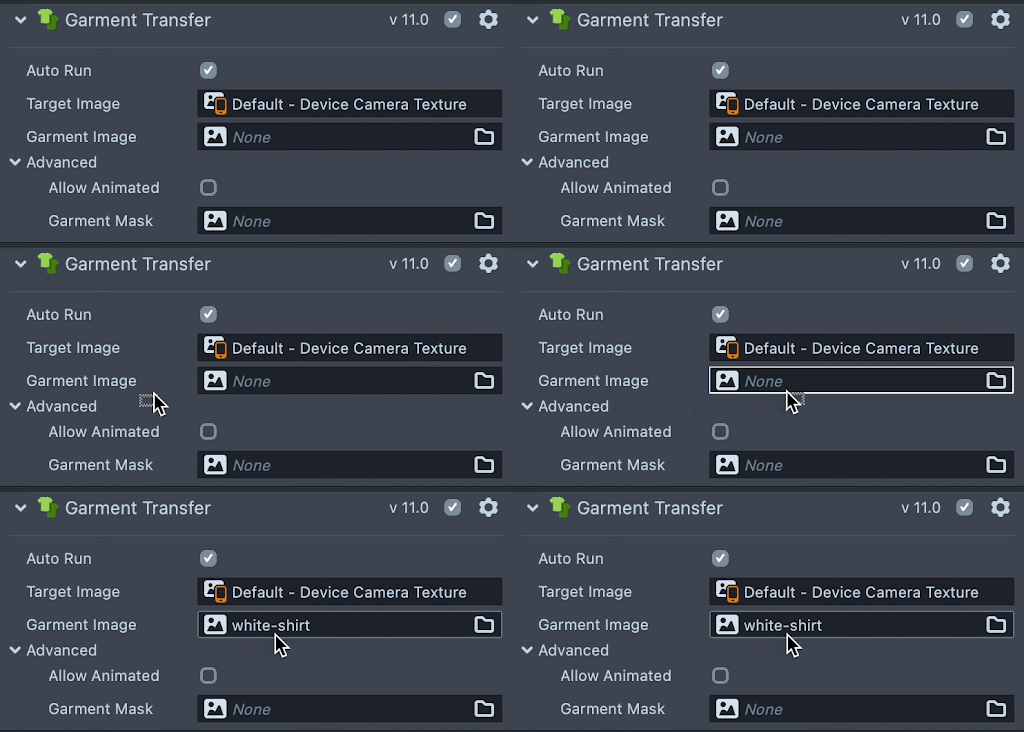
- Set the Garment Image input to a reference garment image of your liking.

Garment Selection Carousel
The Carousel component allows you to switch easily between different garments. You can add, remove, and modify garments by modifying the Icons list in the Inspector panel.
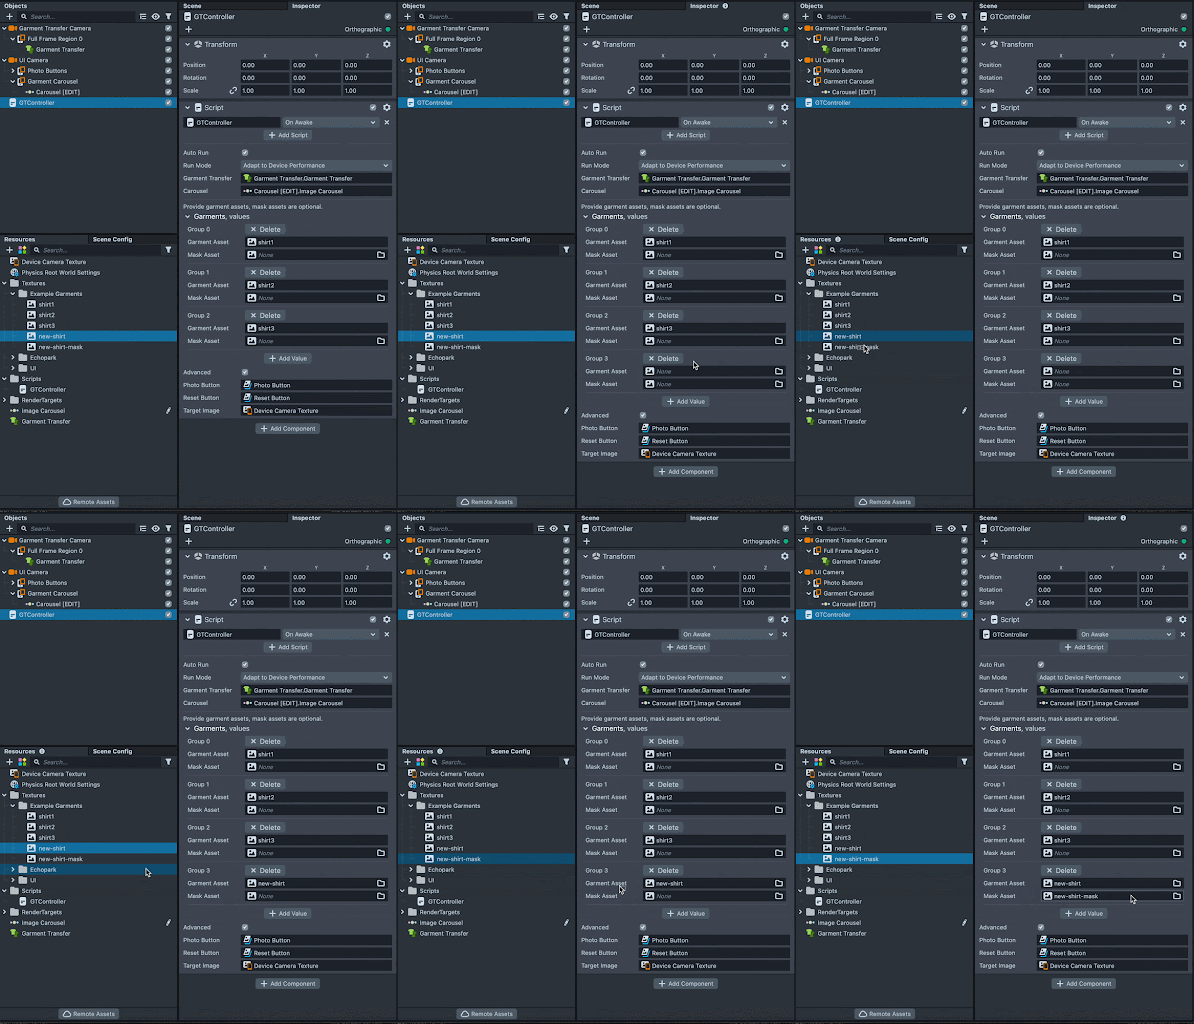
If only one garment is needed, you can remove the Carousel object and set the garment image directly in the Garment Transfer Component.
GTController Script
The GTController.js script is the main controller of the Lens. Its main functions are:
- Allows switching between different Run Modes (see Performance Considerations section below).
- Set the garment image in the Garment Transfer custom component when a new garment is selected in the carousel.
- Implement Run on Tap mode interaction and call Garment Transfer API to process the garment once on tap.
- Garment Masks (Advanced option) - Support a segmentation Mask per garment (see below - Custom Garment Segmentation Mask)
Changing Run Mode
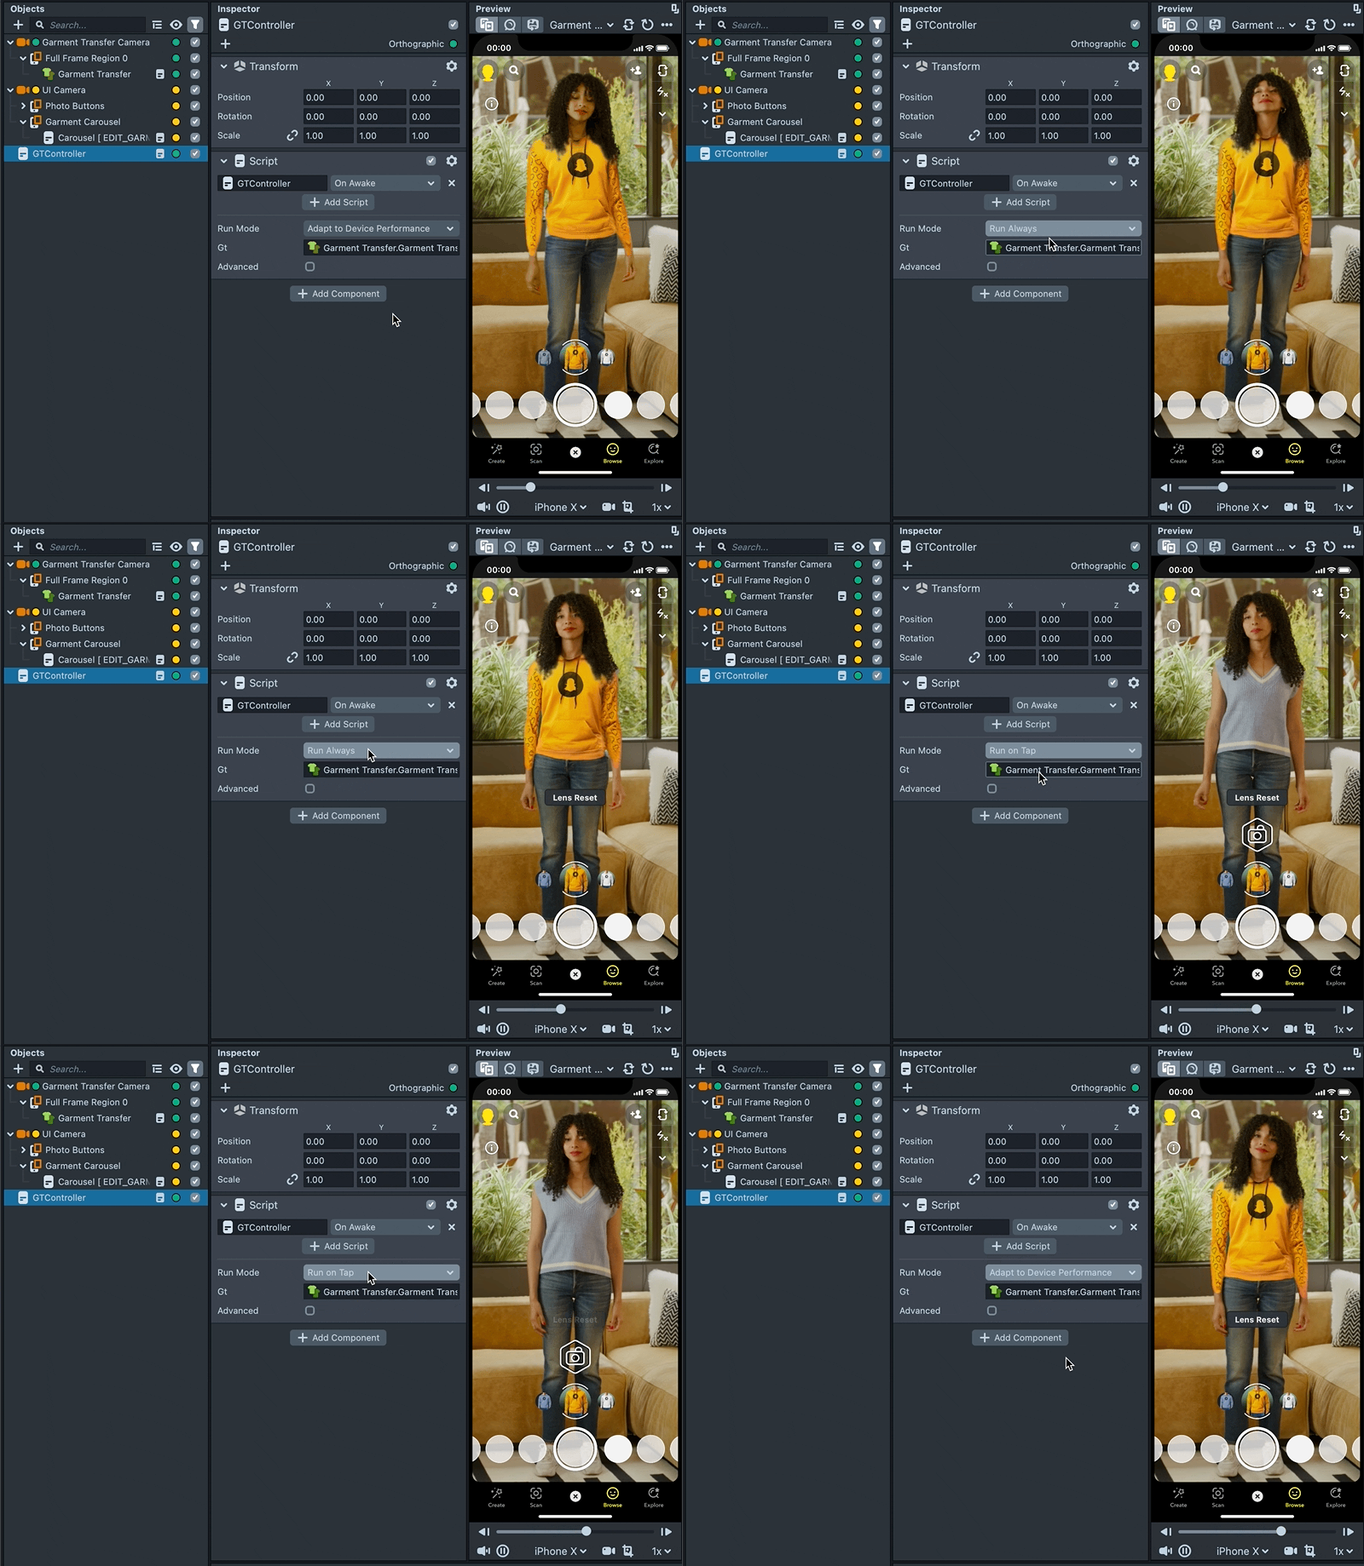
By default, the Lens will adapt to running your model in real-time or on demand depending on the device it is running on. This is recommended as it will try to optimize the Lens for your users.
To change this, select the GTController script, and choose one of the options:
- Adapt to Device Performance (Recommended): Depending on the device, the style transfer will run in Real-time or On Tap.
- Full live video quality is supported on mid to high-end iPhones.
- Fast live is mostly supported on high-end Androids.
- Fallback tap mode is for all other devices (exist only for the Template)
- Speed over Quality: Garment transfer will choose to use lighter runtime models even for devices that can support the full quality live version. )
- Run on Tap: The user will have to click to take a photo and garment transfer will process once on the captured frame (for low-end devices)
Custom Garment Segmentation Mask
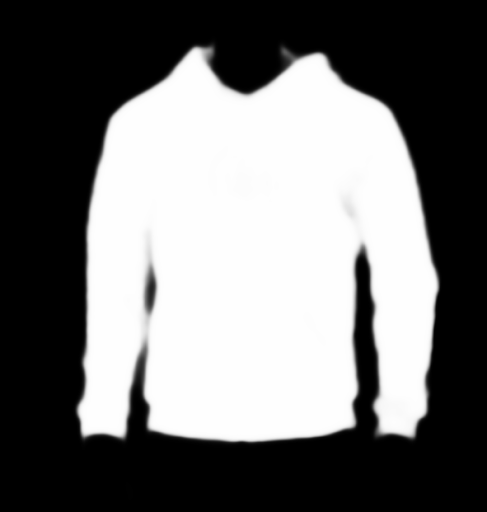
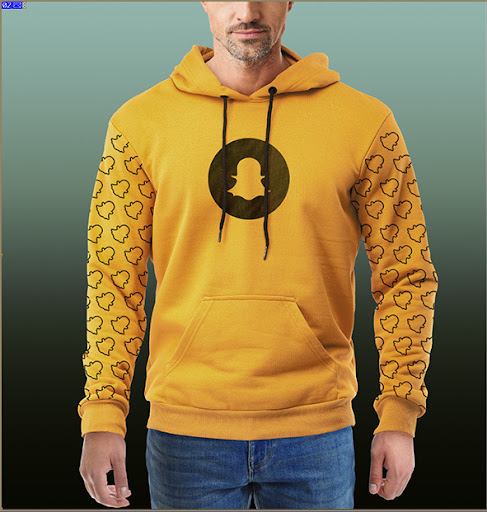
In certain instances, the automated mask generated for a garment image may not be precise. In such cases, it is recommend utilizing a manually customized segmentation mask, referred to as the Garment Mask. The input mask should be white where the area where the garment exists, and black elsewhere:
Current Limitations
- Garment Transfer currently supports only one person in the target image. When using Garment Transfer with two or more people visible, the garment will attempt to apply to multiple targets, and place different parts of the garment on different people.
- Garment Transfer renders the target image and the new garment on top, so any effect applied to the person before applying garment transfer will be hidden by garment transfer’s output.
- See Adding Additional Effects section below for details on how to overcome this limitation.
- Garment type is limited to close fit long-sleeve or short-sleeve shirts.
Garment Transfer Component API
The Garment Transfer component exposes the following API which can be used to control it from a script.
| Name | Type | Description |
|---|---|---|
enabled | boolean | Enable/Disable processing and output |
autoRun | boolean | Enable/Disable processing every frame |
runMode | Int (combobox) | 0 - Adapt to Device Performance (Recommended): Adapt to device performance depending on the device’s hardware, the Garment transfer will run in full real-time or fallback real-time live. 1 - Optimize Speed: When possible, run full real-time models and not the lighter models. |
targetImage | Texture | The image to apply the garment to |
garmentImage | Texture | Garment reference image |
garmentMask | Texture | Custom garment mask for target image |
run() | Function | Run processing once (when autoRun is set to false) |
refreshGarment() | Function | Refresh reference garment. Usually the garment image will be processed when a new garment image is assigned. Call this method if you want to reprocess the garment image without reassigning it. Useful when using a video as the garment image. |
isReady() | Function | Returns boolean, true if the component is ready for generating results. |
onLoadingFinished | Function | Callback function to set. This function is called once all models are ready. |
Example script:
/**
 * Using the component from a script
 */

/* link the following input to a Garment Transfer custom component */
// @input ScriptComponent gt

// @input Texture inputVideo
// @input Texture garmentImage

/* set target video and garment image */
script.gt.targetImage = script.inputVideo;
script.gt.garmentImage = script.garmentImage;

/* run live (generate output every frame) */
script.gt.enabled = true;
script.gt.autoRun = true; // enable auto run

/* run once */
script.gt.autoRun = false; // disable auto run
script.gt.enabled = false; // hide previous output if exists
script.gt.run(); // run transfer once
script.gt.enabled = true; // show the output

/* force refresh of garmentImage without reassigning (when using a video as a garmentImage) */
script.gt.refreshGarment();
Adding Additional Effects
Garment Transfer CC renders the result as a full screen image. For this reason any effect that will be rendered prior to it will be covered by Garment Transfer’s output. To overcome this, render other effects after Garment Transfer CC. In cases where other effects must be rendered before Garment Transfer, you need to set the “Target Image” input field to a Render Target that contains the effects (replacing the default “Device Camera Texture”).
Since the Garment Transfer is not a lightweight effect, it is recommended to add only effects with a small runtime cost.
A working project that has this set up with additional face effects can be downloaded from here.
Animation: Garment image of an animation is allowed and rendered accordingly. The animation on the garment should keep the same exact silhouette, body semantics, and the garment shouldn’t move. Otherwise, a call for refreshGarment() is required.

Choosing a good garment image
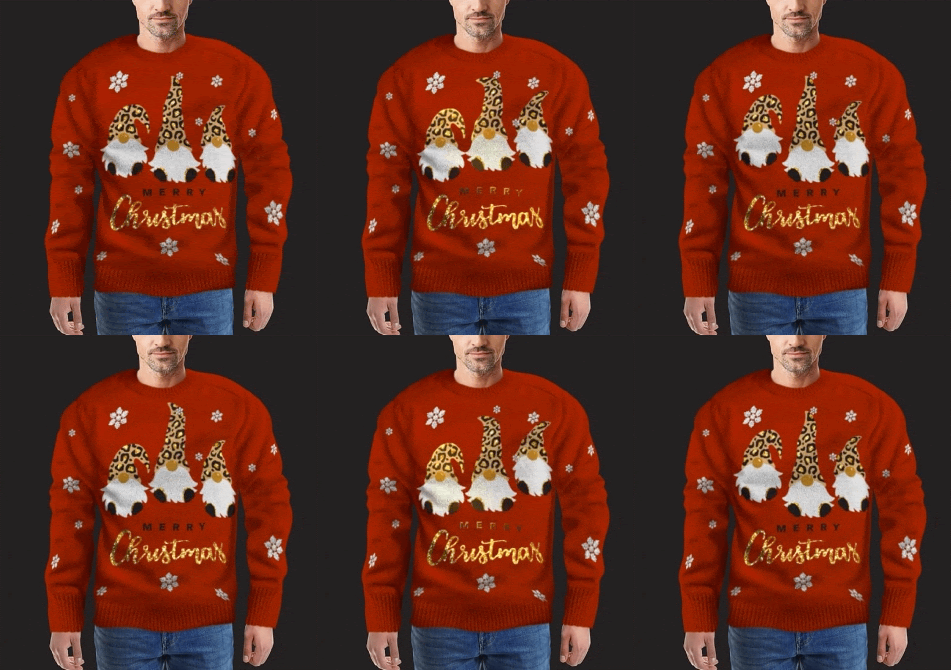
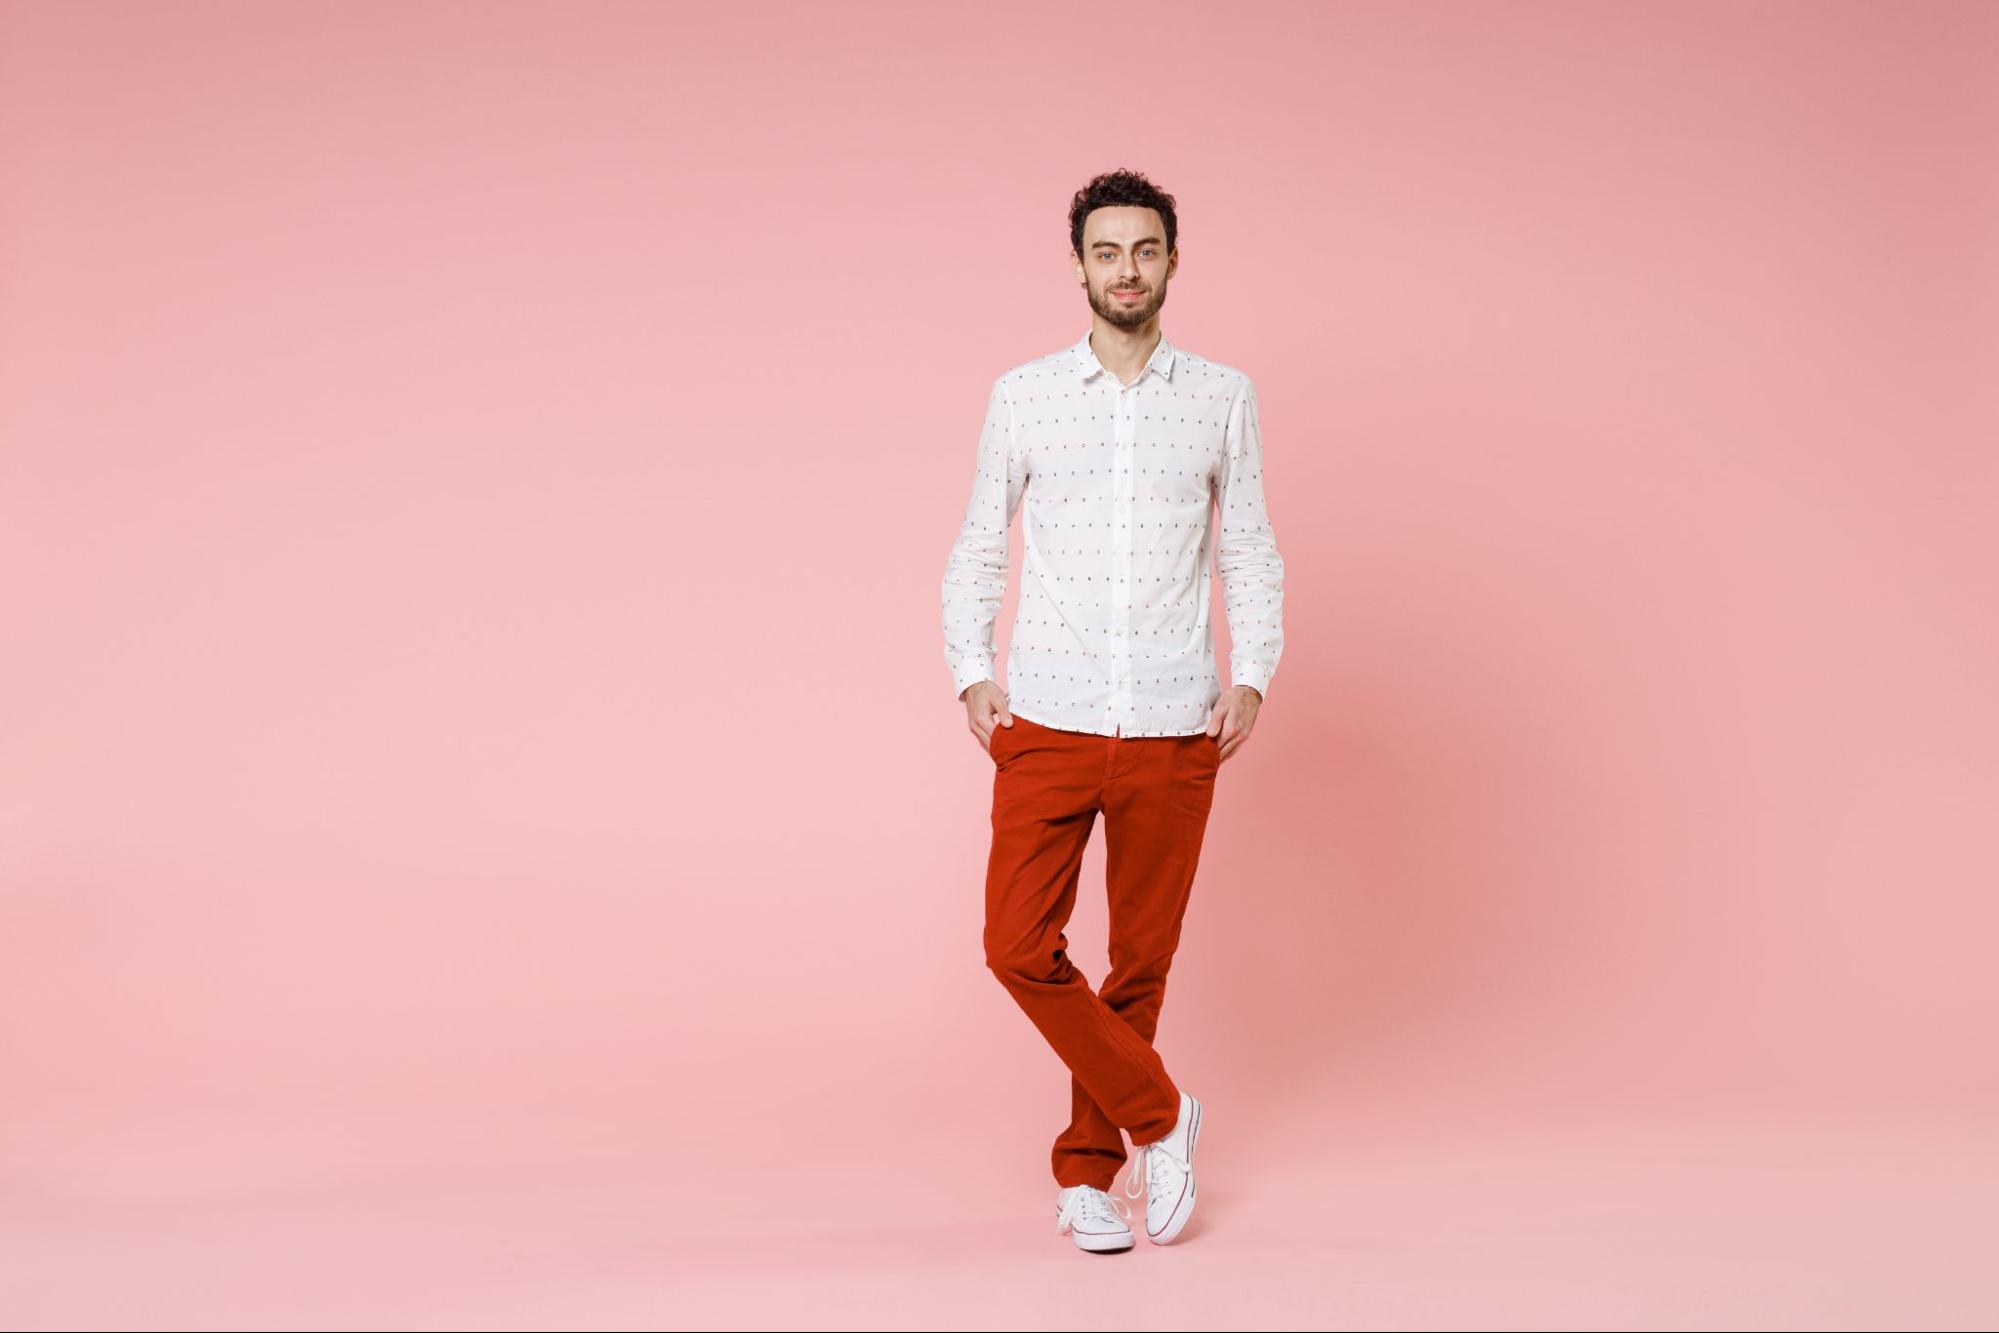
The garment image should feature a person, male or female, wearing the desired garment. The person in the image should face the camera and have their hands to the sides, not covering any parts of the garment. In the next section, you can see examples of both supported garment images, and unsupported images.
Supported Garment Images

Unsupported Garment Images
| Image | Issues |
|---|---|
 | Image should have a person wearing a shirt,only a shirt will not work. |
 | Hands cover the shirt. |
 | Garment type is not supported,loose fit onbody, Hair covers the garment. |
 | Body not facing the camera, hands cover the garment, upper garment is not fully visible, bottom is trimmed. |
 | Person not facing the camera, hands cover the garment. |
Create your own custom hoodie using photoshop by following our Custom Garment Creation With Photoshop Guide.
Previewing Your Lens
You’re now ready to preview your Lens! To preview your Lens in Snapchat, follow the Pairing to Snapchat guide.
What's Next?
Now that you have learned about how to create your own Garment Transfer Lens, take a look at some of the other Fashion related Lens experiences:
- Check out the Developing Fashion Lenses for Virtual Try-On using Lens Studio course on how to make your own Fashion Lens.
- Footwear Try-On
- Cloth Simulation Try-On
- Earring Try-On
- Wristwear Try-On
Related Guides
To learn more about Custom Components and Try-On Lenses, you can visit the following:
Custom Garment Creation With Photoshop Template Guide
This section will showcase how you can create your own custom hoodie to be used with the Garment Transfer Custom Component and Template. This Photoshop template will walk you through making a hooded sweatshirt with custom graphics that can then be used for your Garment Transfer Lens Experience.
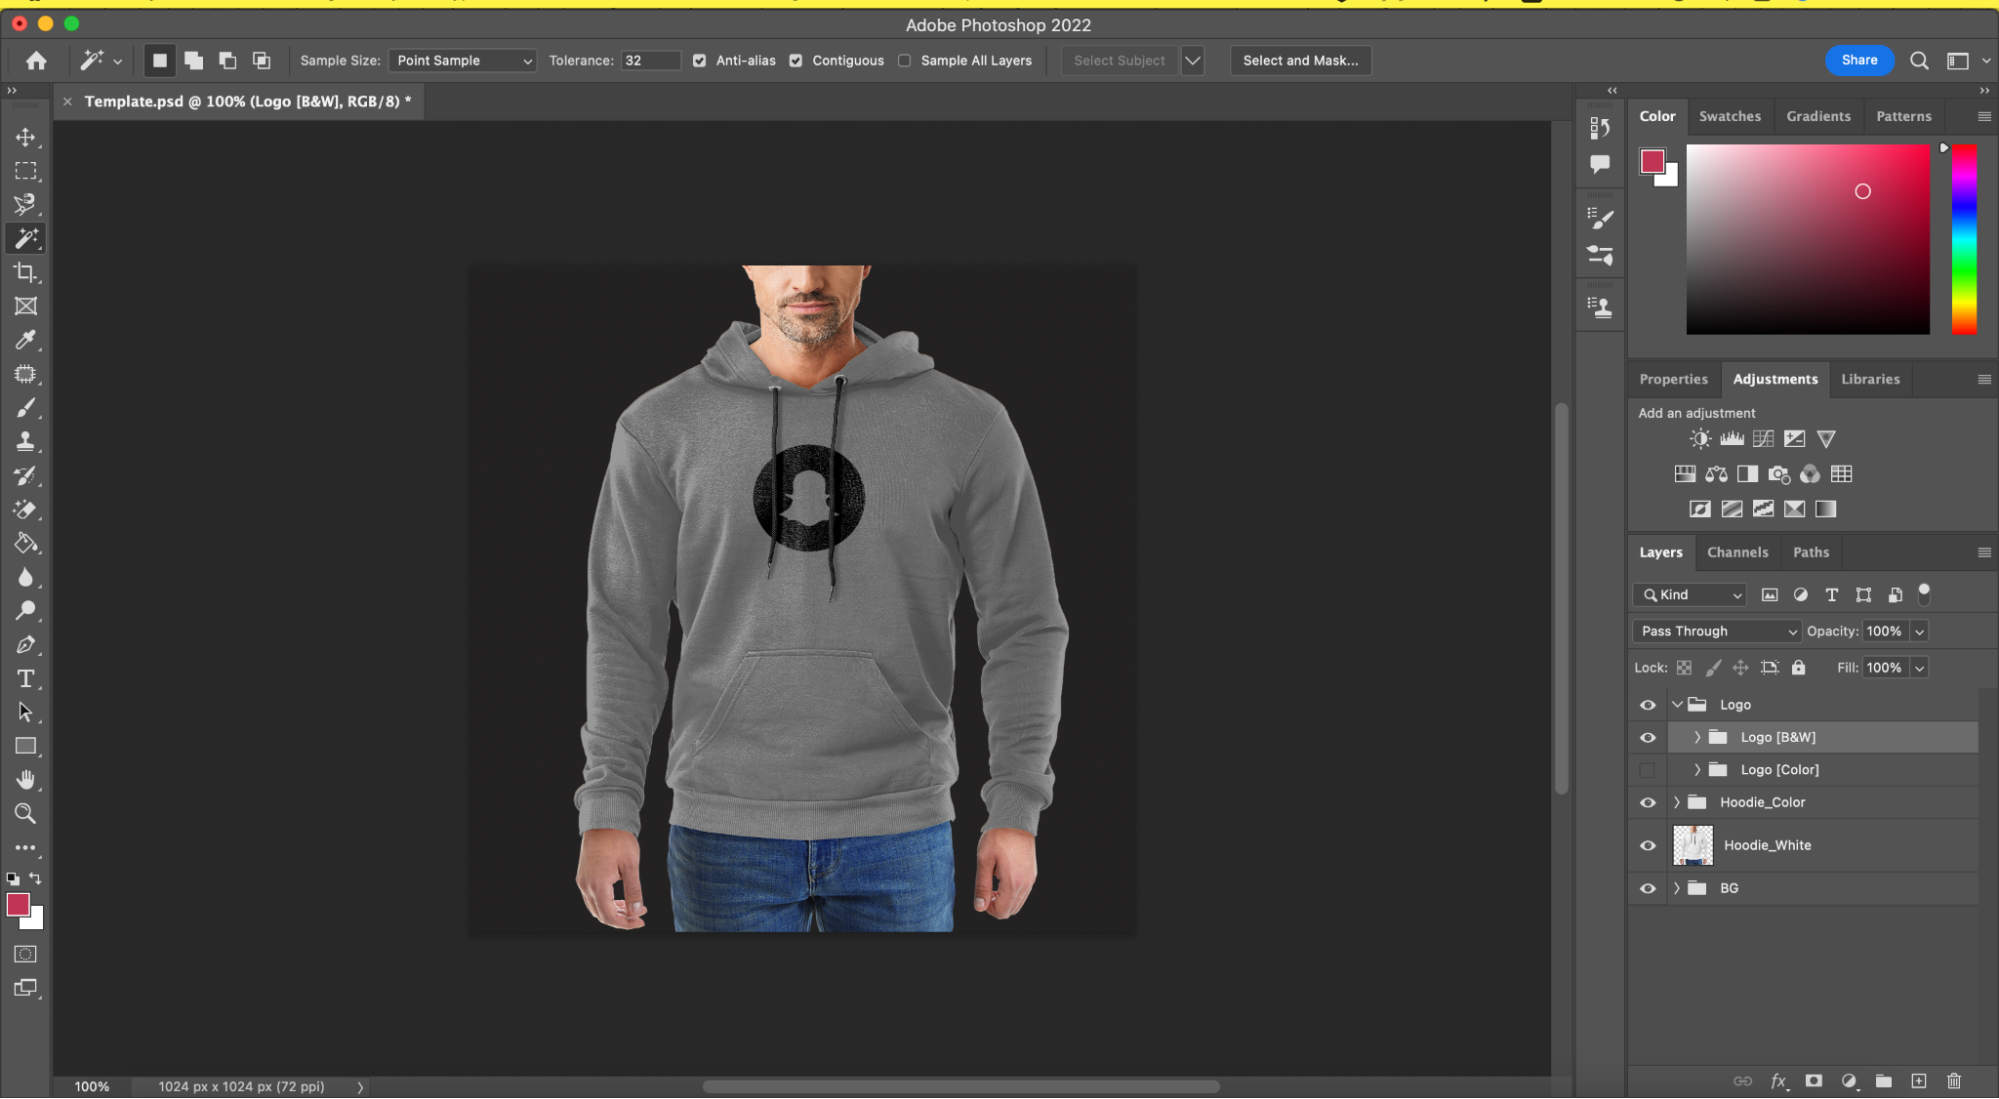
You can download the Photoshop template in the provided link
Prerequisites
- Basic familiarity with Photoshop and Smart Object Editing
Design Your Garment
Using the provided template, you can also edit or design a custom graphic to give your personalize style to the hoodie to best fit to your needs.
There are two layers which you can edit that contain the graphics / logo:
- Logo [B&W]: Optimized for black and white graphics.
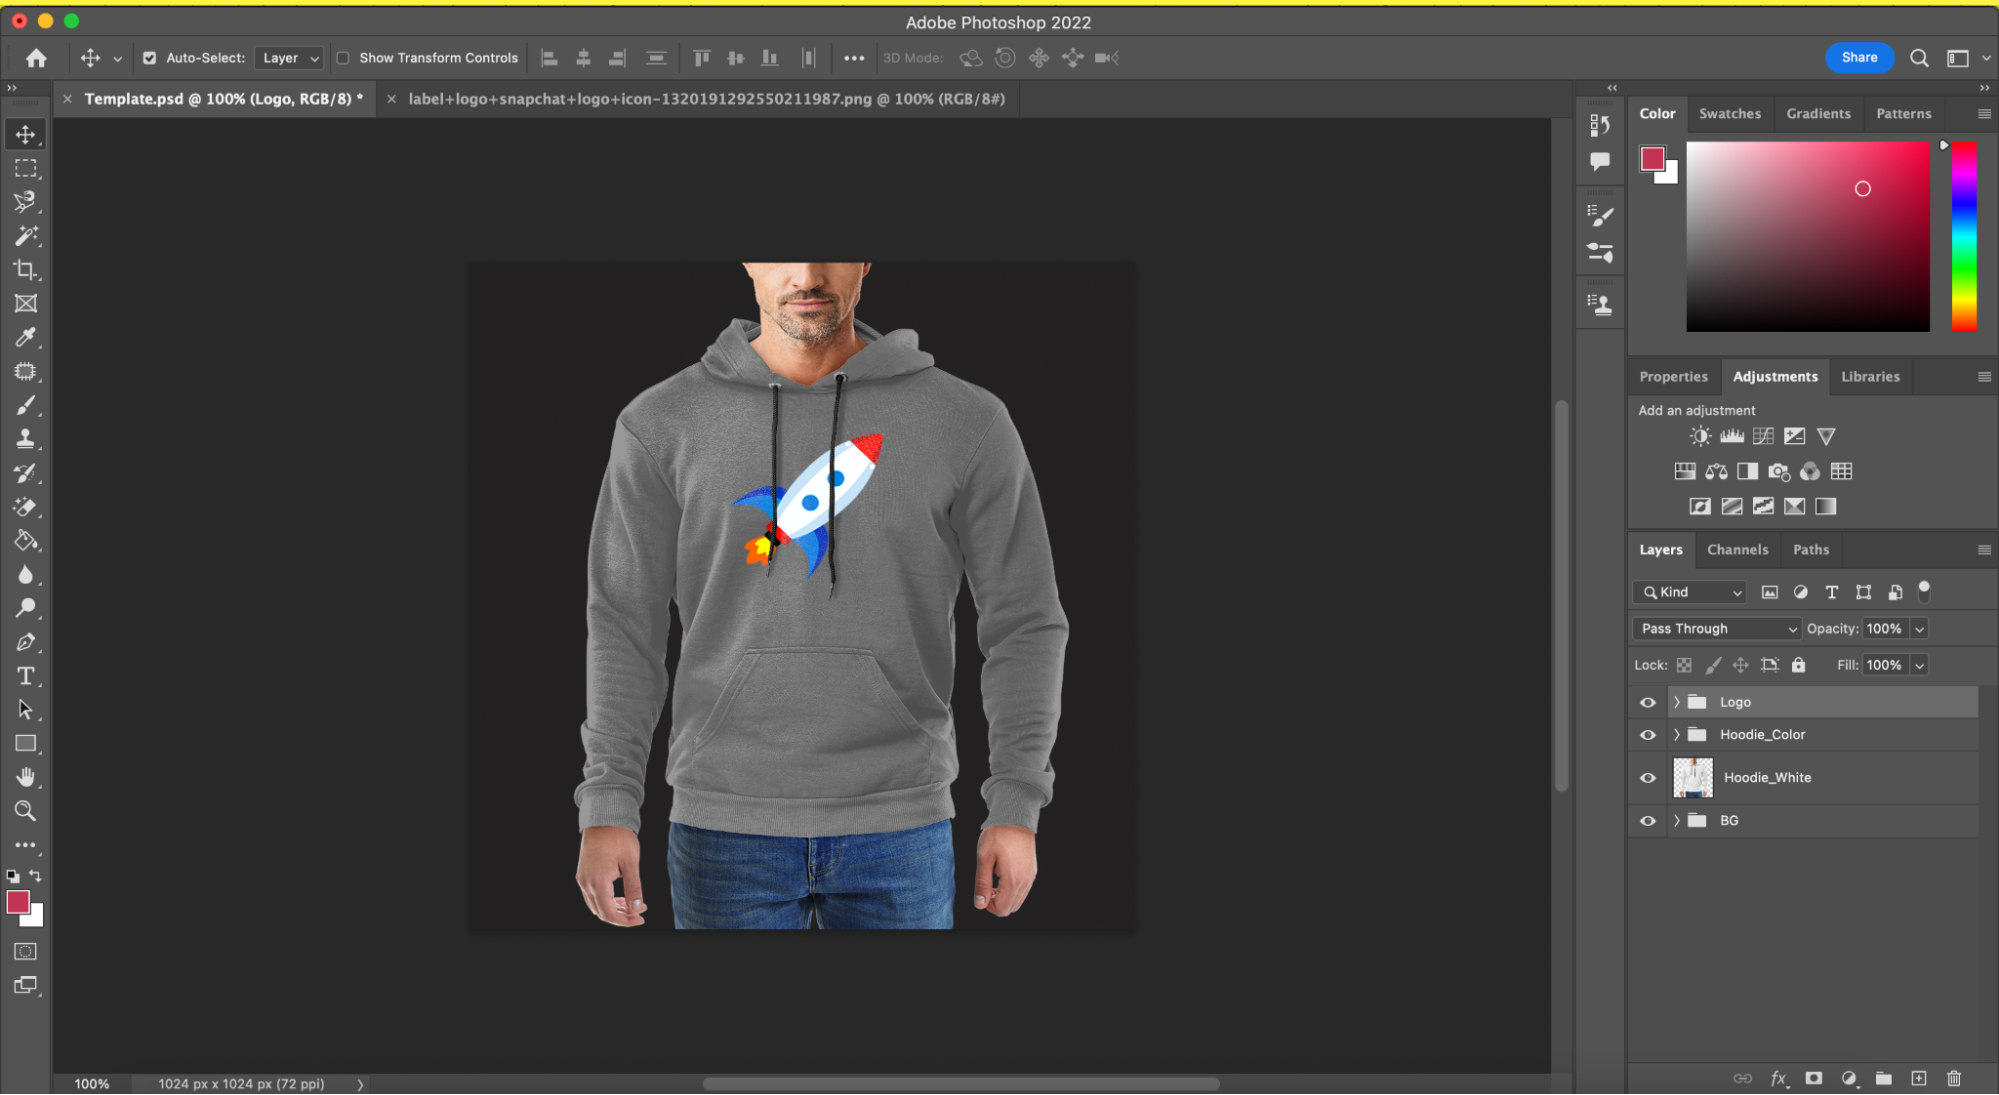
- Logo [Color]: Optimized for any colorful Logos/Graphics.
Shown below is an example of the 🚀 (rocketship) emoji that has been set up in the Logo [Color] layer:
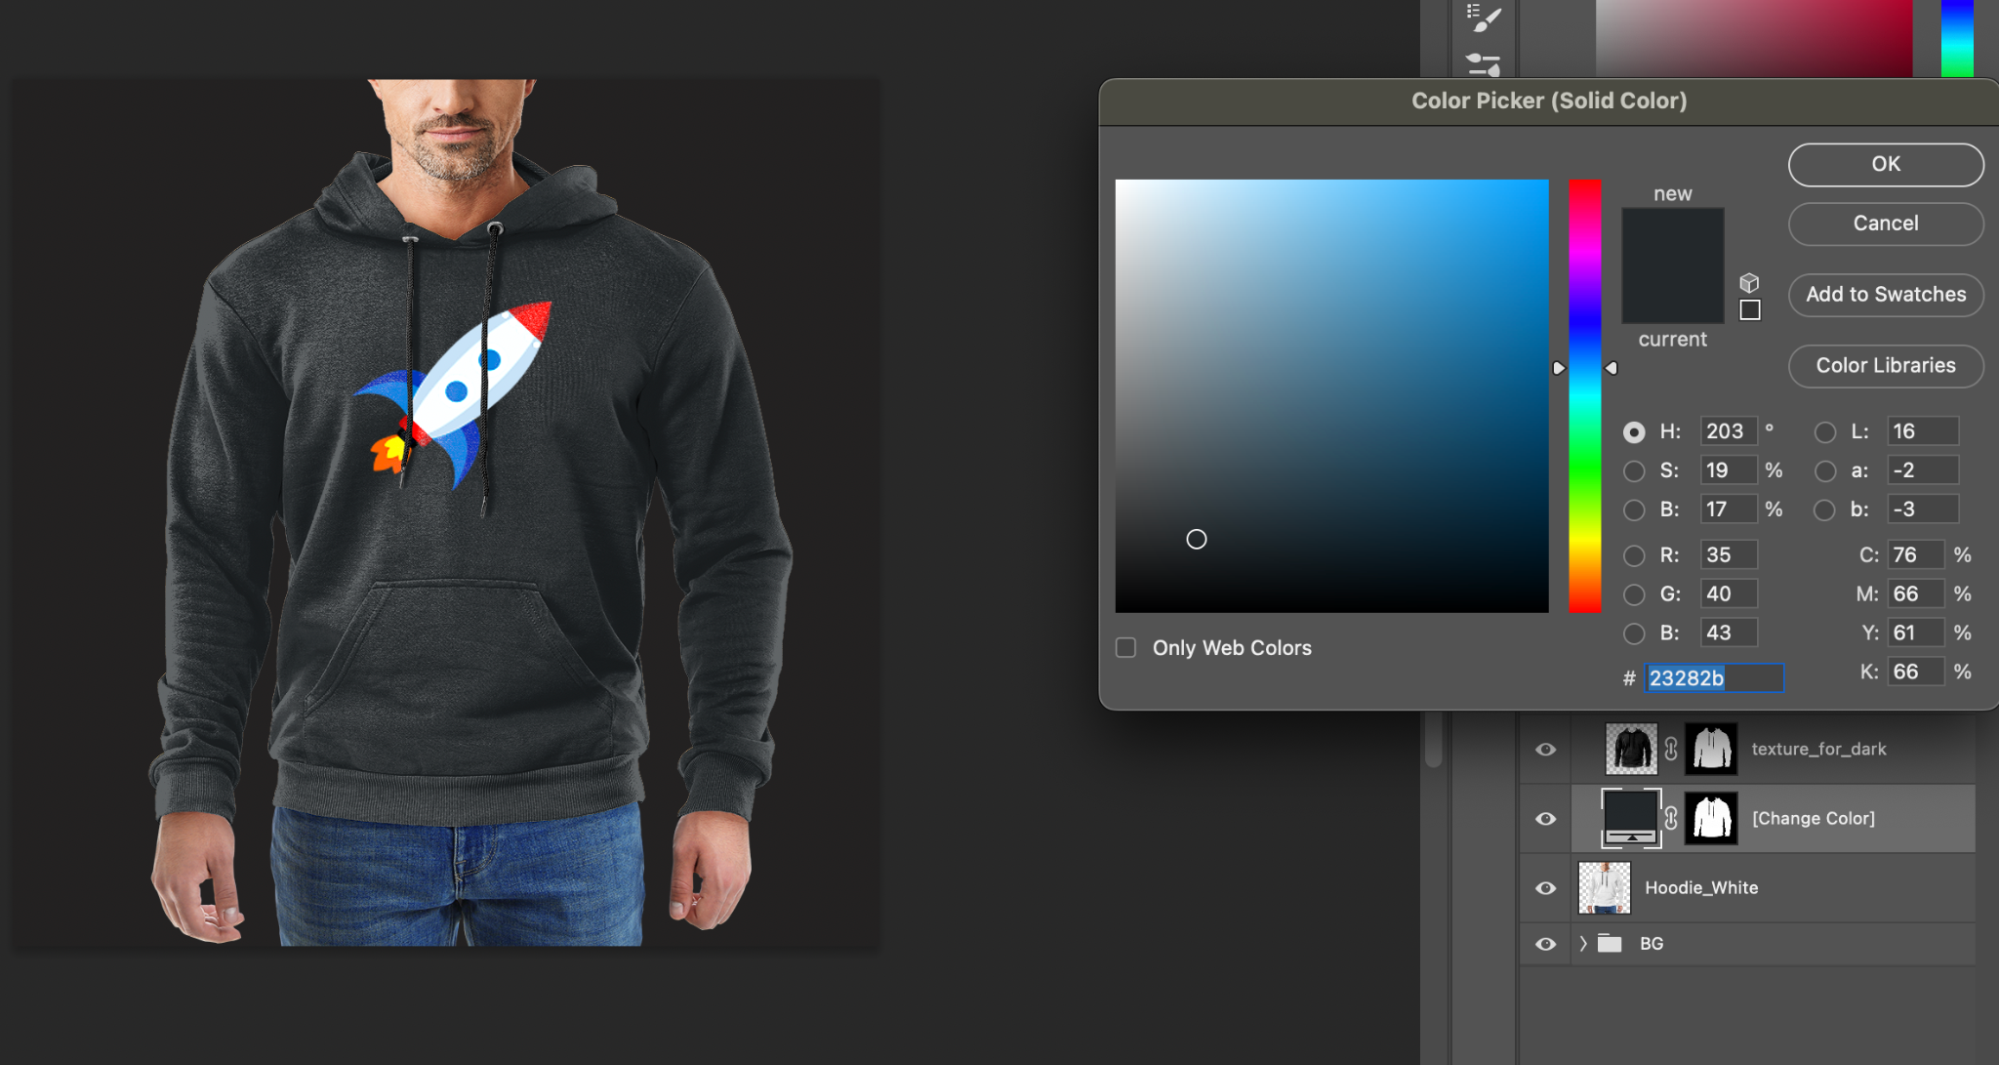
Change the Color of your Garment
You can easily change the garment color by modifying the color adjustment, located under the Change Color layer. Shown below is an example of how to change the color to a black shirt.
Using your Garment design with the Garment Transfer Custom Component
Once you are satisfied with your creation, you can export the file out as a JPEG. You can then import it into Lens Studio to use it for the Garment Transfer Carousel as shown below. The preview will update automatically and you will be able to see your creation once added to the Carousel.
