FBX, 3D Object Import
Lens Studio supports the import of 3D models in the FBX format. This guide covers how to import an FBX file into a Lens Studio project.
For information on creating a FBX to import, visit the 3D Object Export guide.
Lens Studio does support the OBJ file format; however, this format lacks support for animation. We recommend, if you're creating your own models, to use FBX. The OBJ format is great to use when downloading models from sources like Sketchfab and Google Poly. Please refer to the OBJ, 3D Object Import guide for more information.
Adding the FBX Object
There are three ways to add an FBX resource to your project:
- From the Application Menu
- From the
ResourcesPanel - Dragging and Dropping
From the Application Menu
Select File -> Import... from the menu bar in Lens Studio.
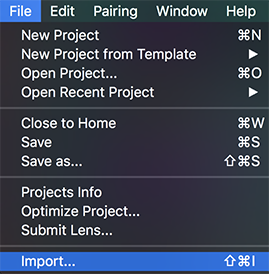
Find the FBX file on your computer, and select Open.
From the Resources Panel
In the Resources panel, select + -> Import Files.
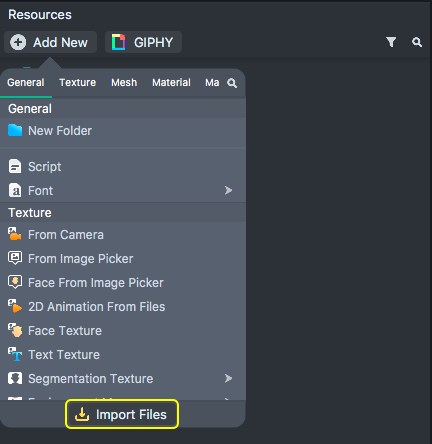
Find the FBX file on your computer, and select Open.
Dragging and Dropping
You can drag and drop FBX files from your computer directly into the Resources panel or the Objects panel.
If you drag into the Objects panel, your FBX will automatically be added to your scene. If you drag into the Resources panel, however, your object will only be added as a resource.
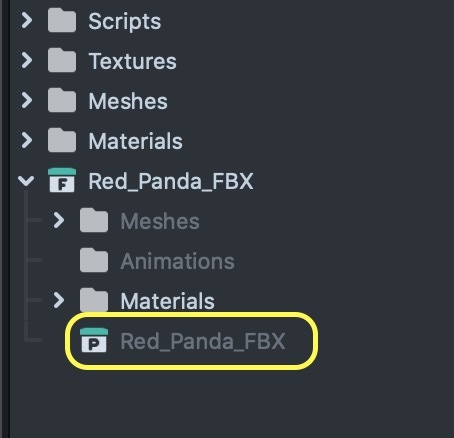
To add your model into the scene, open the new folder created by the FBX import, and drag the prefab from the Resources panel into your scene, or Objects panel.
Import Options
Once you add an FBX file to your project, you'll be presented with a panel of FBX Import Options. You can customize these options to configure the imported FBX resource.
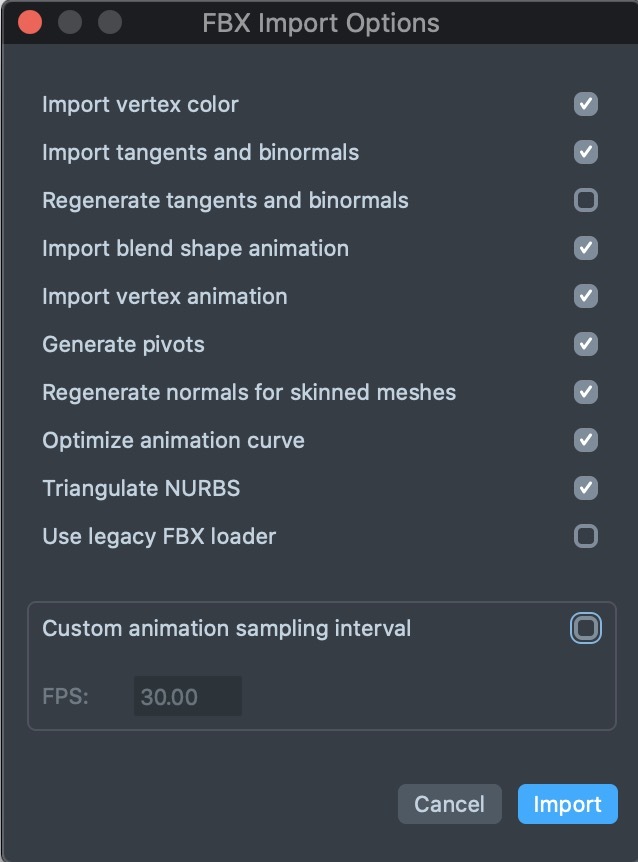
- **Import vertex color:**If enabled, includes vertex color information
- **Import tangents and binormals:**If enabled, includes tangent and binormal information
- **Regenerates tangents and binormals:**If enabled, Lens Studio will generate new tangent and binormal information
- **Import blend shape animation:**If enabled, includes blend shape animation. For more information on playing back mesh animations, visit the guide on Playing 3D Animation
- Import vertex animation: If enabled, includes vertex animation. For more information on Vertex Animation, visit the Vertex Animation guide. For more information on playing back mesh animations, visit the guide on Playing 3D Animation
- **Generate pivots:**If enabled, includes Scene Objects in the hierarchy that recreate the model's transform pivots. Otherwise, all model pivots will be placed at the world origin
- Regenerate normals for skinned meshes: If enabled, the normals of the model's skinned meshes will be recalculated
- **Triangulate NURBS:**If enabled, nurbs surfaces and curves in this object will be triangulated
- **Use legacy FBX loader:**If enabled, object will be loaded with an older version of fbx loader.
- **Custom animation sampling interval:**If enabled, allows definition of a custom animation frame rate
- **FPS:**The custom frame rate of the imported animation (defaults to 30 frames per second)
Scene Object
Once the FBX is imported into Lens Studio, you should see it listed in your Objects panel as a new object added to the scene.
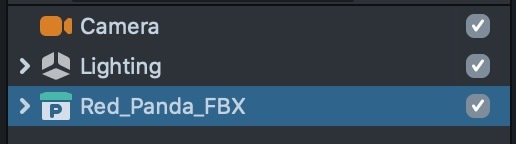
It will also appear in your Scene panel, where it can be manipulated.

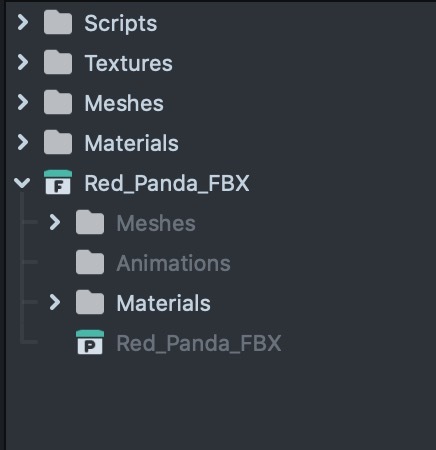
Resources
Your model's resources (meshes, textures, materials, and animations) will now be available in the Resources panel.
If your FBX fails to import, check the Logger panel for an import error message. For more information, review the 3D Object Export guide.