Marker with Snapcode
The Marker with Snapcode template lets you unlock a Lens via its Snapcode and immediately track your content to it; then, switching to tracking your image when it’s visible. This template is great for creating Lenses that overlay content onto existing images such as a poster or mural.
This template was originally released as part of Lens Studio 1.0. Since then, significant improvement has been made to Lens Studio to provide better ways of achieving the same result as this template. You can download the legacy template from the Asset Library.
Since you won't get a Snapcode until you've submitted your Lens, you can download this example Snapcode to use as a placeholder in your image.
It is not recommended to utilize the Marker with Snapcode template for a sponsored experience because it is not guaranteed that the user will have the target marker readily available. For brands, the Marker with Snapcode template is instead recommended for print campaigns with Lenses that are unlockable via Snapcode.
Tutorial
Guide
Exporting 3D Content
The Animated Object Template assumes that you have a 3D animated object which you'll be importing into Lens Studio. First you must export your object to be Lens Studio ready. To do this, follow the 3D Object Export guide.
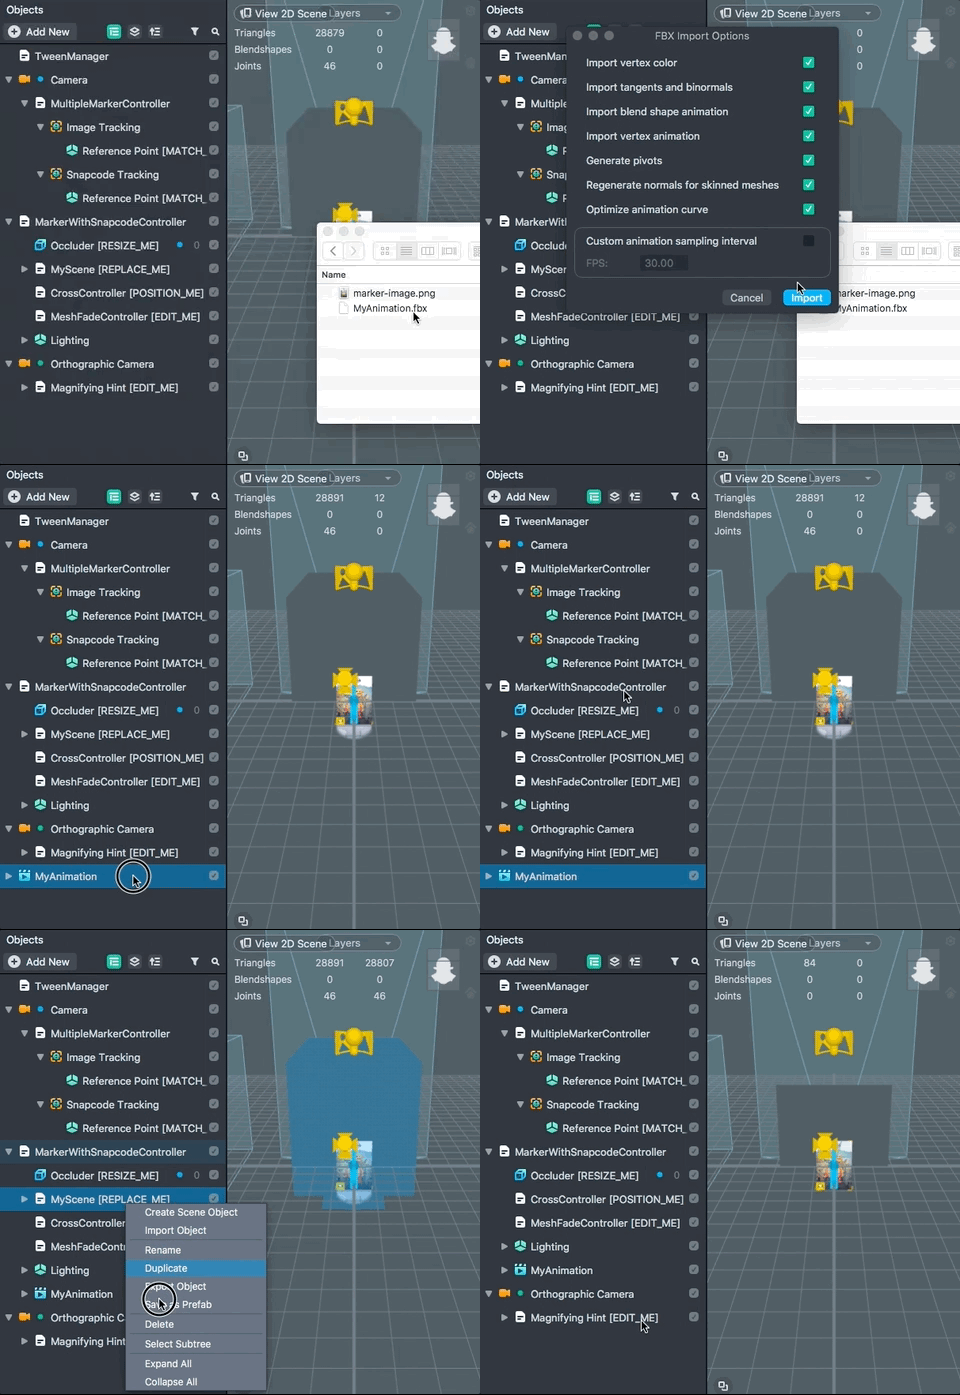
Importing 3D Content
Once you have your 3D object exported, follow the 3D Object Import guide to import your 3D object into Lens Studio.
Placing Your Content
Once your content is imported, in the Objects panel, drag your content underneath the MarkerWithSnapcodeController. Then remove the object MyScene [REPLACE_ME].
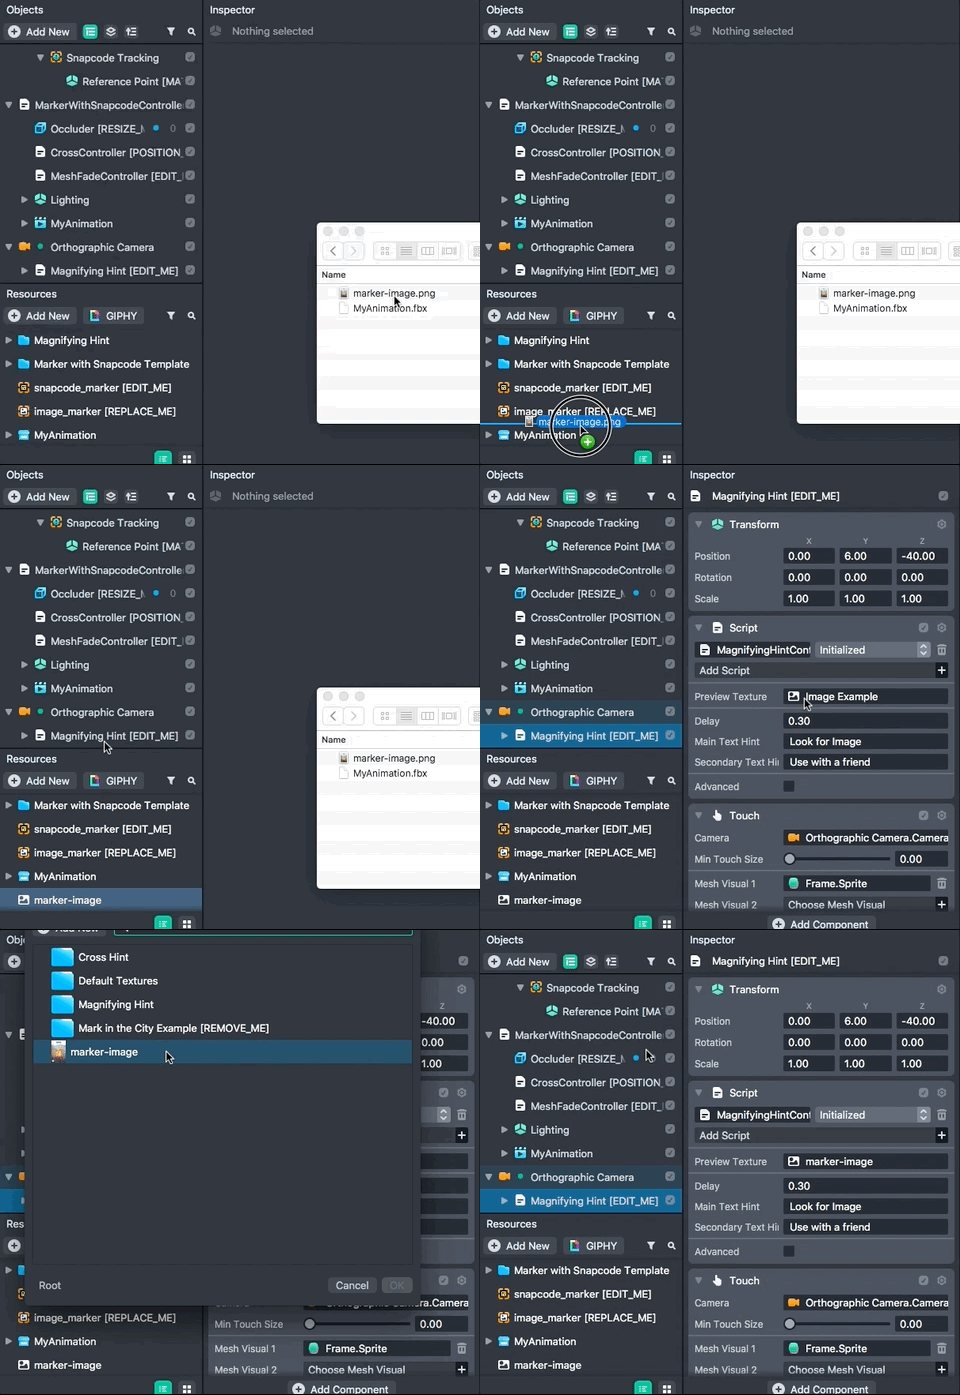
Importing your Image as a Visual Hint
Since we’re using marker tracking, your content will not show up when your marker is not visible. To help your user find the right image, we provide a simple UI to let the user know what they need to do.
To do this, import your image by dragging and dropping your image from your computer to the Resources panel. Then, in the Objects panel, select Magnifying Hint [EDIT_ME] and select the Preview Texture field. In the popup window, select your newly imported image.
Importing your Image as a Marker
Now, we need to tell the Lens what image to look for. In your Resources panel, click + -> Image Marker. Then in the file selection window, choose your image.
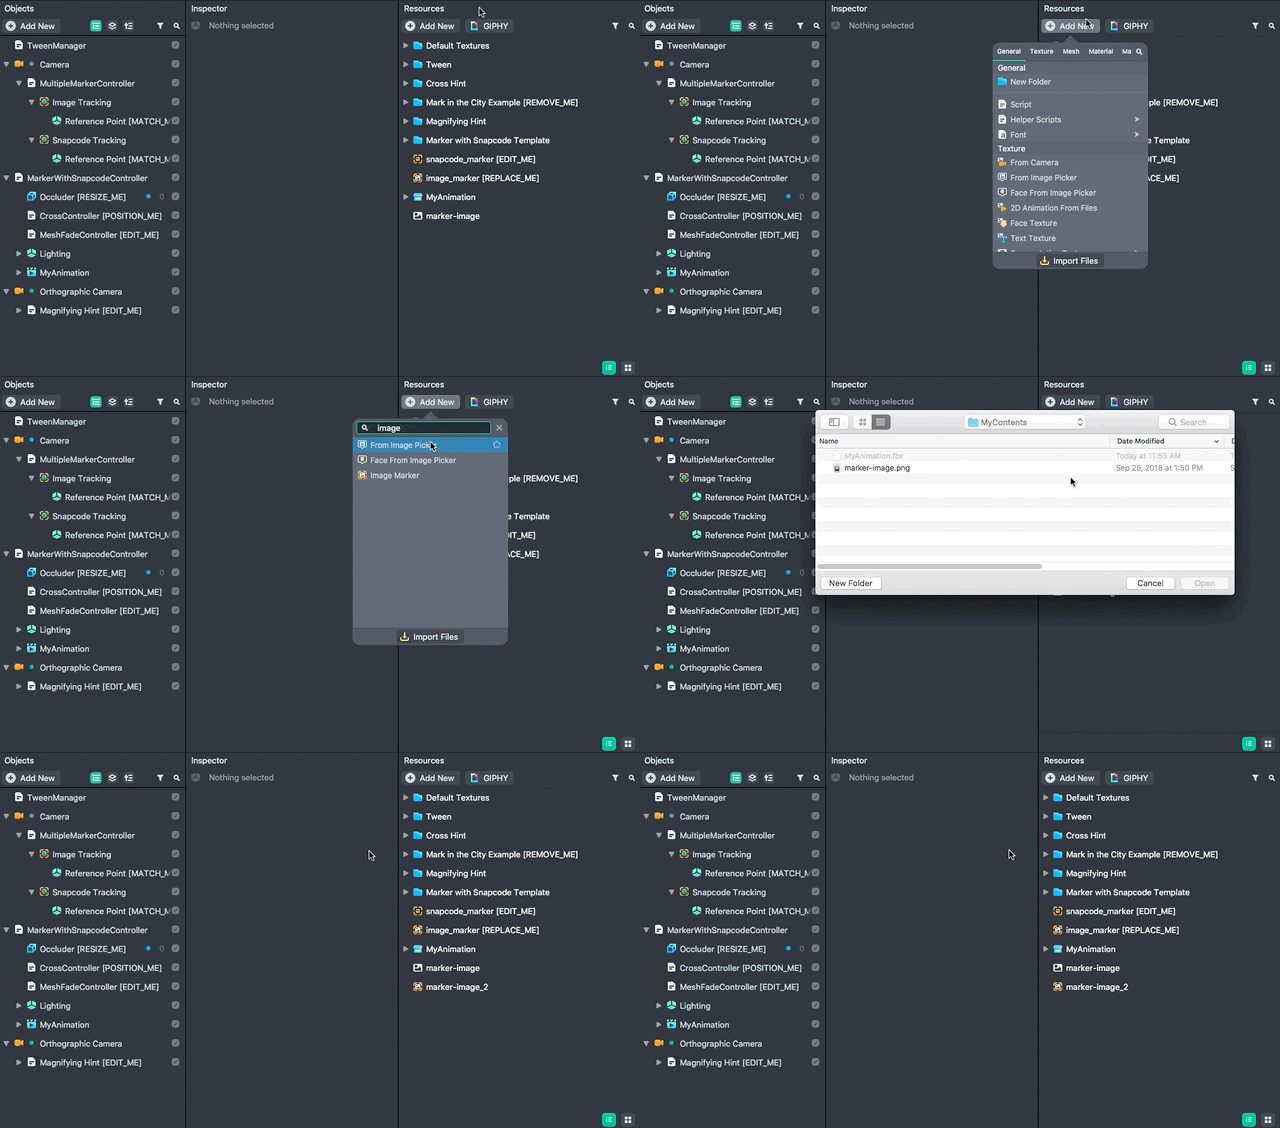
Your image should be high resolution, but below 2048 x 2048
Tracking your Image Marker
To use the new marker you created, in the Objects panel, select Image Tracking. Then, in the Inspector panel, select the Marker field, and choose your new Image Marker in the popup.
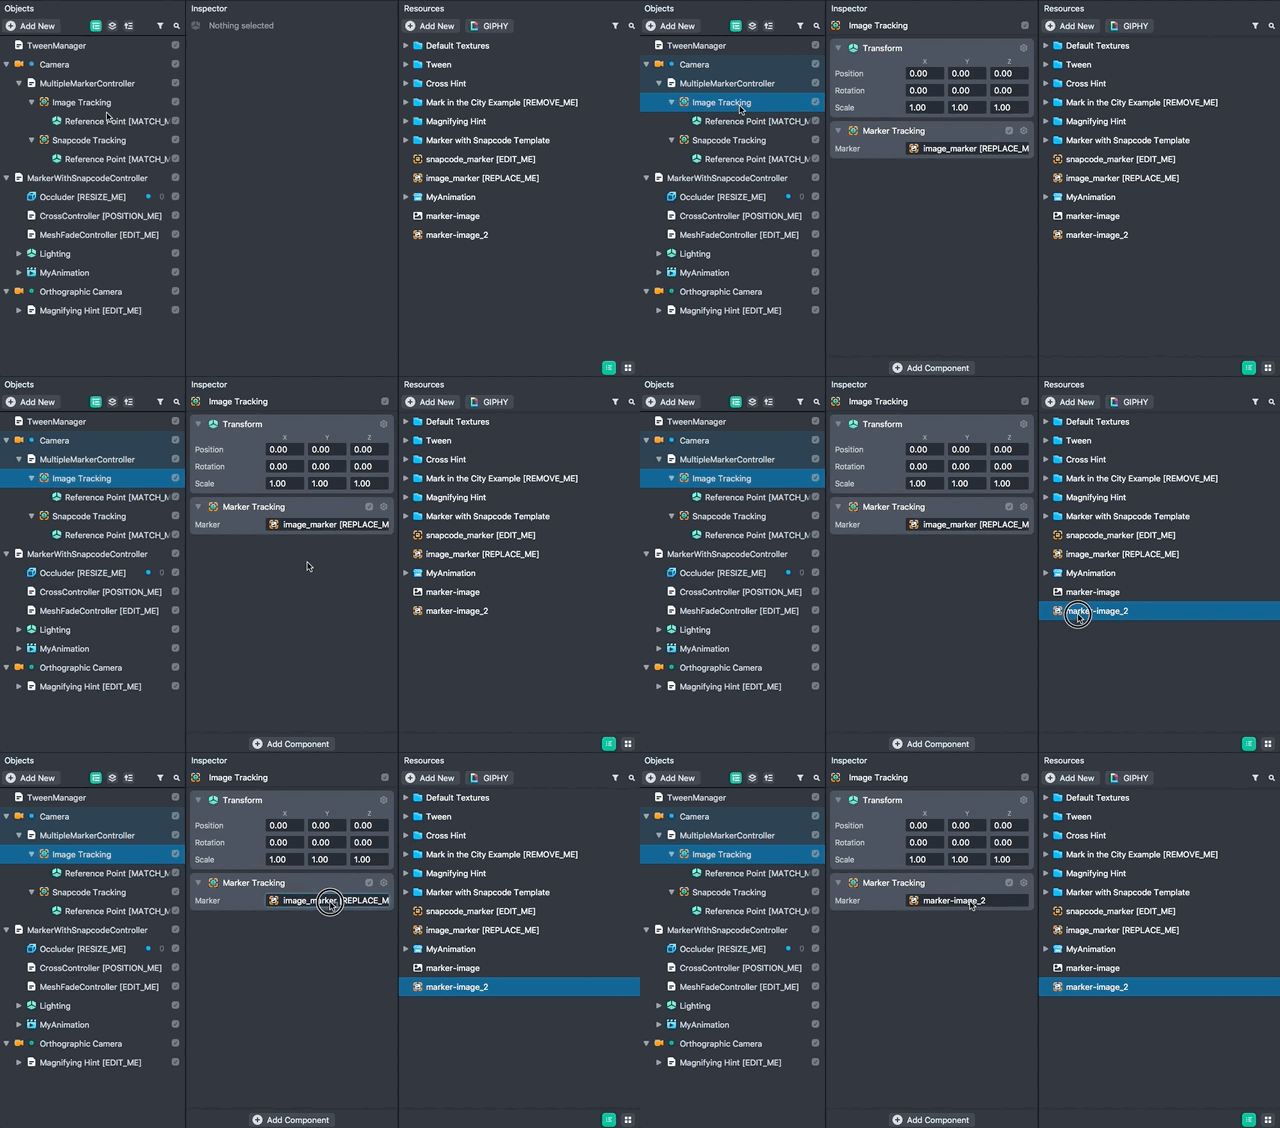
Setting Up Your Markers
Since we are tracking two different markers, it is crucial that their relationship in the real world is reflected in Lens Studio so that your content will seamlessly track across the two markers.
Select Snapcode Marker [EDIT_ME] in the Resources panel, and in the Inspector panel, type in the height of your Snapcode in centimeters.
Similarly, select your marker in the Resources panel, and in the Inspector panel, type in the height of your image in centimeters.
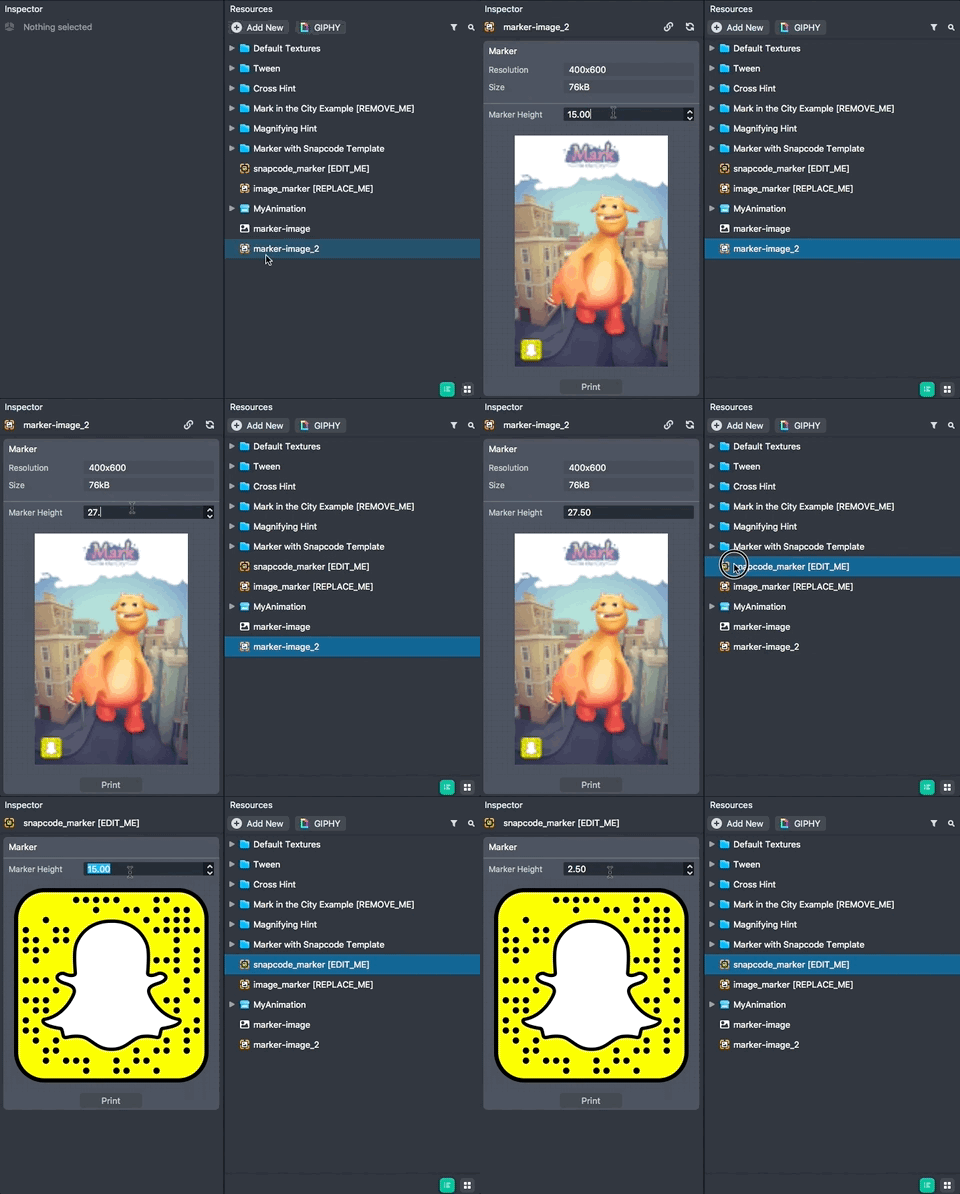
Finally, in the Objects panel select Snapcode Tracking, and in the Scene panel, use the move widget to position your Snapcode relationally to your image.
Setting Up Reference Points
Additionally, we will need to track our content to a common reference point so the Lens knows how to position our content in relation to each marker.
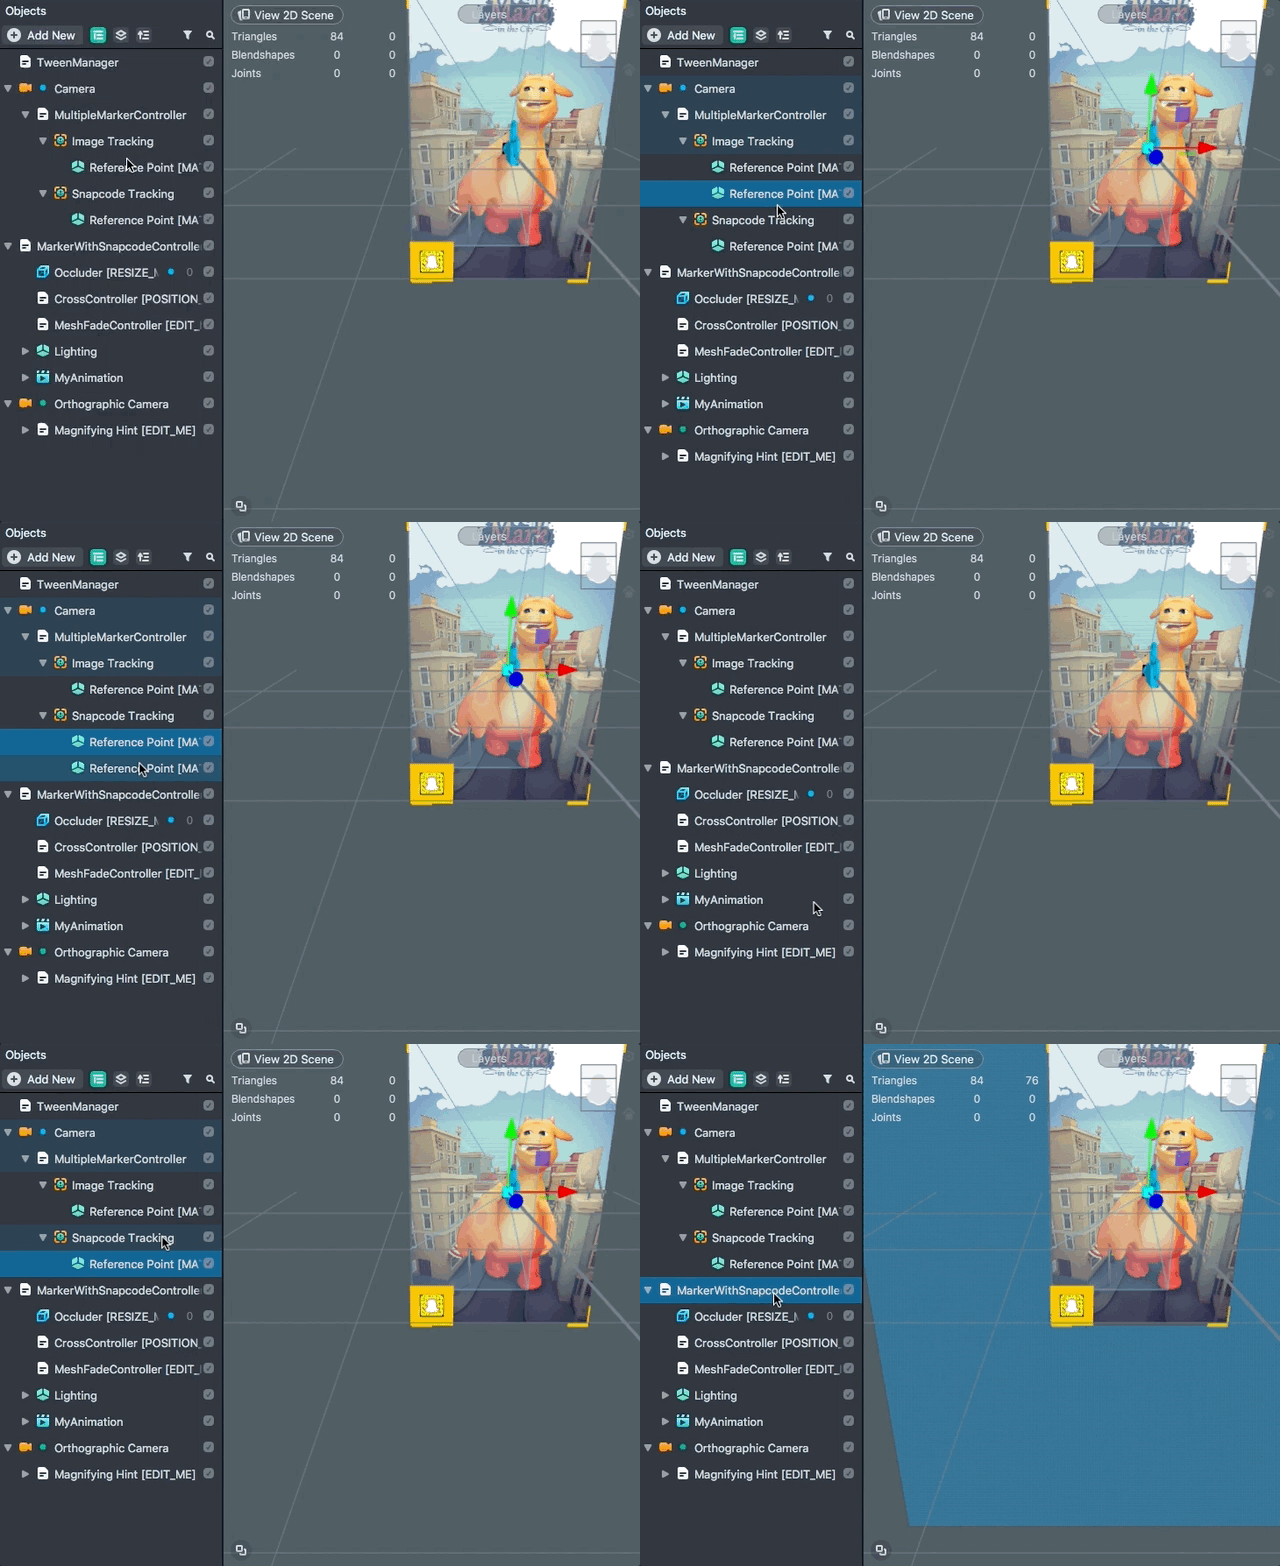
To do this, we need three objects that all have the same world position. Since, by default, the Reference Point under Image Tracking is in the same position as MarkerWithSnapcodeController (world origin), all we need to do is copy this position to Snapcode Tracking. To do this: right-click the Reference Point under Image Tracking and select Duplicate. Then, drag the duplicated object under Snapcode Tracking. Finally, remove the original Reference Point under Snapcode Tracking.
Setting Up Cross Hint
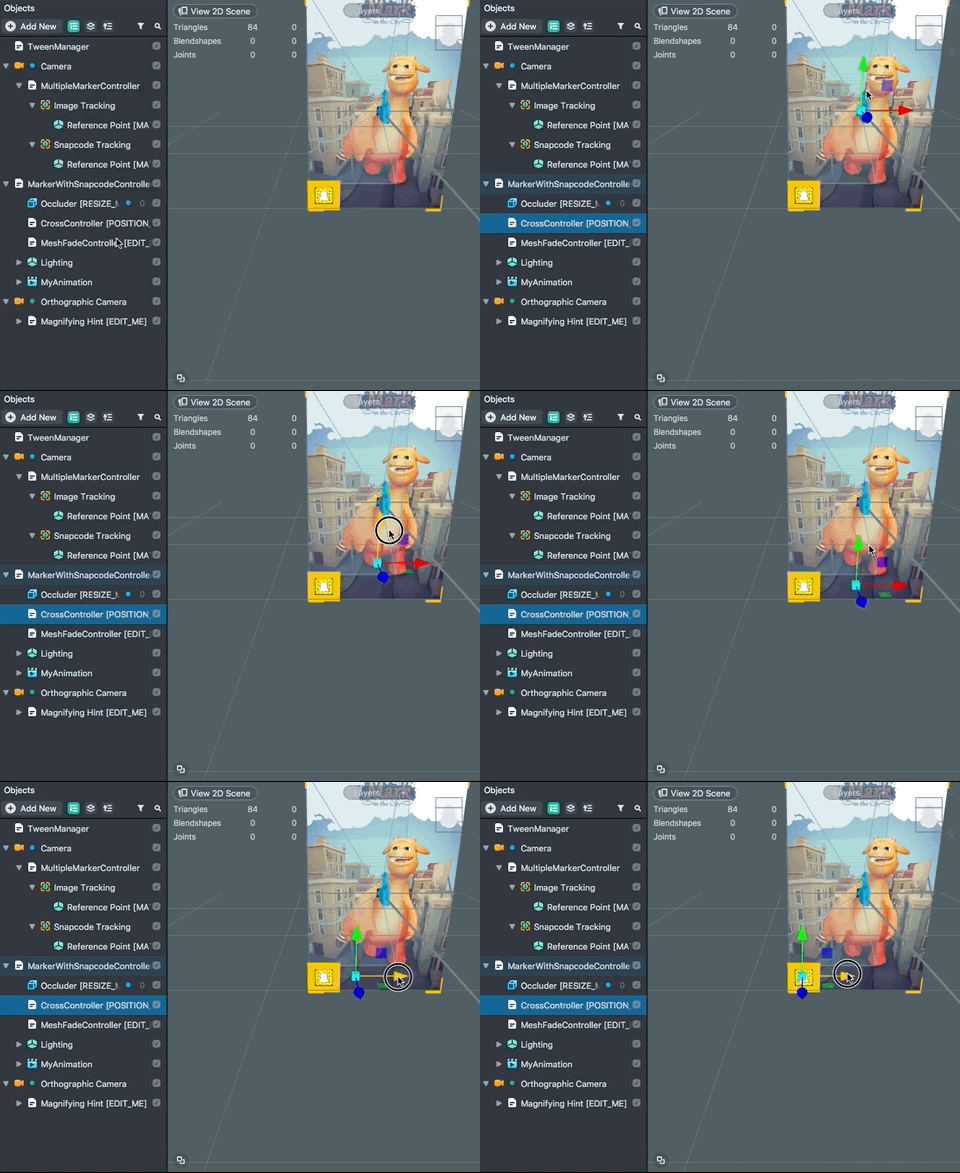
We provide a multi-colored cross animation that plays to help users understand that a marker has been found. You can set this animation to animate from a certain point. Usually this is where your Snapcode is.
In the Objects panel, select CrossController [POSITION_ME], and in the Scene panel, use the move widget to move this object in the x and y coordinate to where your Snapcode Tracking object is.
Setting Up an Occluder
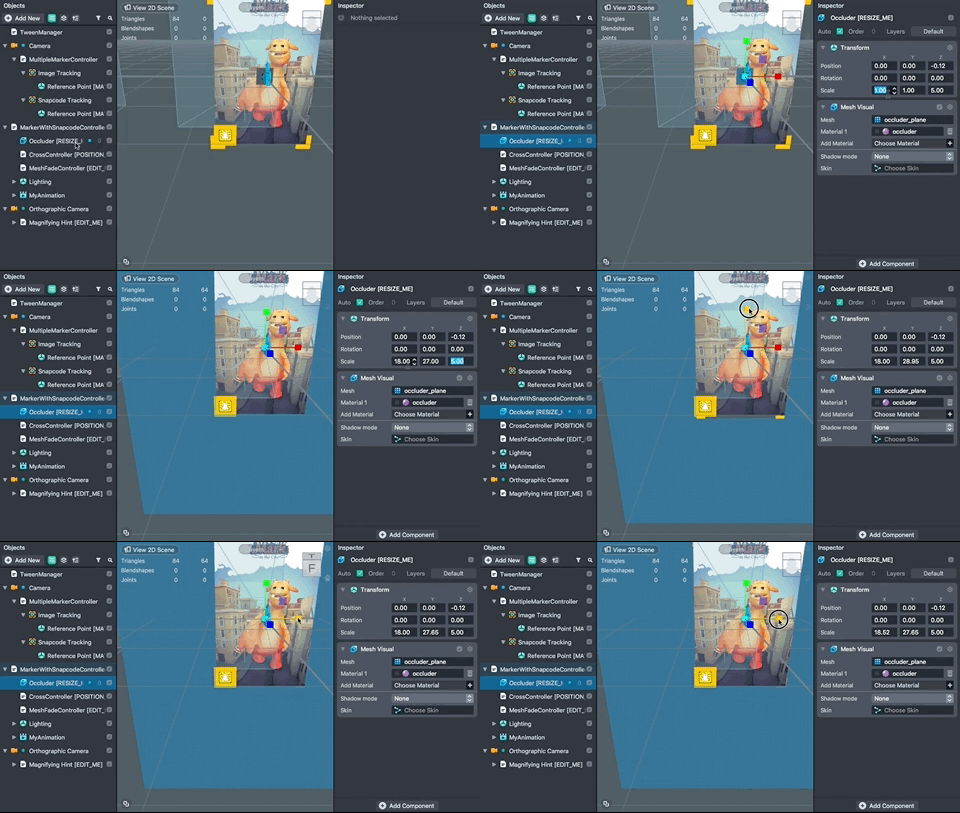
We provide a rectangle occluder to help you occlude anything outside your image. In the Objects panel, select Occluder, and in the Inspector panel, modify the x and y scale to the size of your image in centimeters. You can fine tune the occluder using the scale widget in the Scene panel.
This occluder is a regular mesh with an occluder material which has a rectangular hole cut out in the middle. If your image is not rectangular, feel free to replace it with your own custom occluder mesh.
Fading in Your Content
In most cases you will want to transition your content in so that it feels like it’s coming from the marker rather than instantly popping into place.
To do this, in the Resources panel, select the materials that your content uses that you want to fade in. Then, in the Inspector panel, tick the box labeled Fizzle. Finally, in your Objects panel, select MeshFadeController and under Fade Materials, press Add Value and add the materials which you want to fade in.
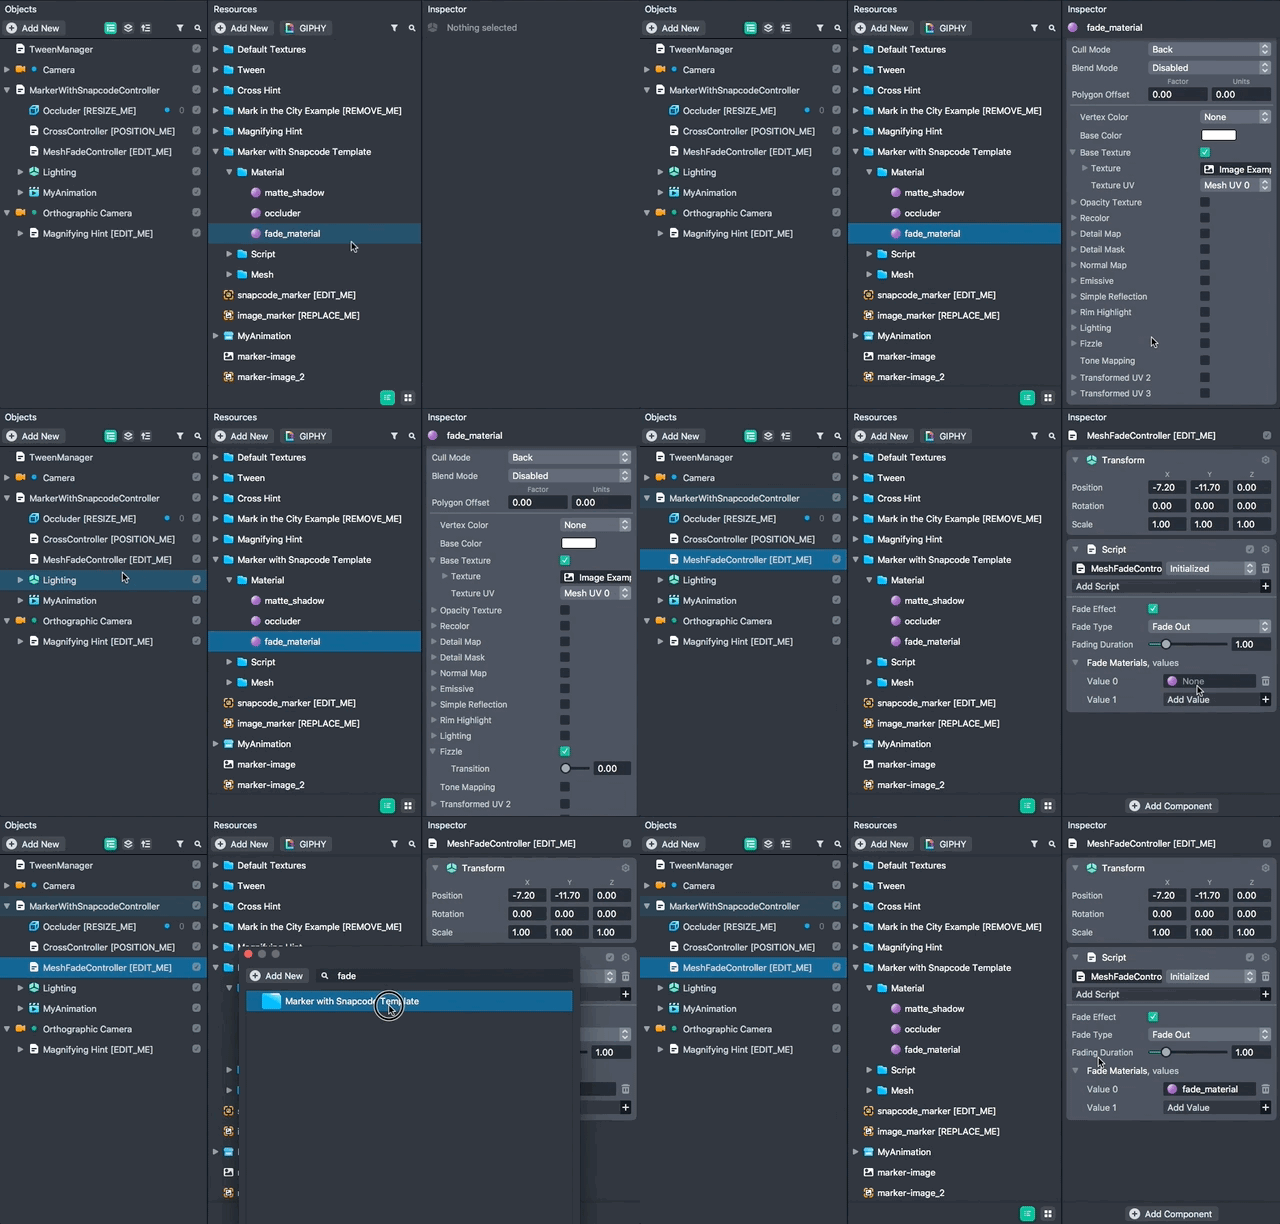
You can choose whether your object fades in or fades out in the Fade Type drop down.
Previewing Your Lens
You're now ready to preview your Lens. To preview your Lens in Snapchat, follow the Pairing to Snapchat guide.
Submitting Your Lens
For information on submitting your Lens, follow the below guides:
Script Interface
MarkerWithSnapcodeController.js
In some cases you may want to specify how your content should play. To do this, you can add a global function which the template will call based on the status of the marker tracker. One way to do this is to create a script on an object and set the script to run on Initialized. This template includes an example script which is attached to the MyScene object (found in the Resources panel under Mark in the City Example [REMOVE_ME] -> Scripts -> MySceneController.js).
global.onSceneEnabled- This function, if it exists, will be called when a marker is foundglobal.onSceneWillDisable- This function, if it exists, will be called when a marker is lostglobal.onSceneDisabled- This function, if it exists, will be called one frame after global.onSceneWillDisable is called
Related Guides
Please refer to the guides below for additional information: