Marker
The Marker Template allows you to specify an image that is recognized and tracked by the Snapchat camera. Unlike the other tracking techniques in the Device Tracking component, marker tracking detects and tracks the features in a specific user defined image. The template shows you how to utilize marker tracking to create a 3D experience tightly tracked to a marker image. It also includes different effects that can be triggered when the marker is recognized, tapped and more.
It is not recommended to utilize the Marker template for a sponsored experience because it is not guaranteed that the user will have the target marker readily available. For brands, the Marker template is instead recommended for print campaigns with a Lens that is unlockable via Snapcode.
Tutorial
Guide
Designing an Image Marker
When picking an image for your marker, keep the following guidelines in mind to make sure that it will have smooth and accurate tracking. For more information, refer to the Marker Tracking guide.
- Make sure your image has a lot of detail and contrast.
- Avoid repetitive patterns.
- Avoid low resolution images.
- Use a
PNGorJPGwith a resolution of 2048 x 2048 or less,
Here are some examples of bad markers:

Here are some examples of good markers:
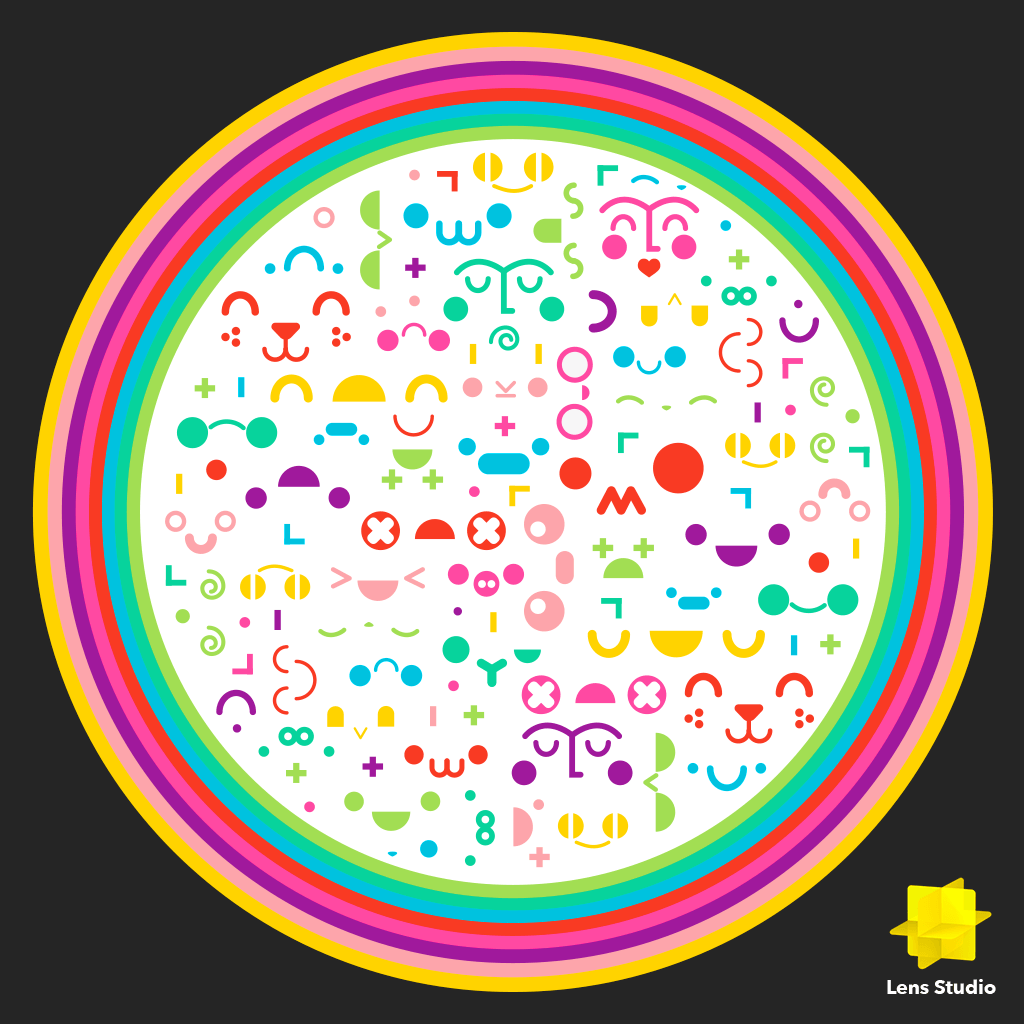
Adding an Image Marker
After designing an image marker, you need to import the marker into Lens Studio. To do this, in the Resources Panel select + -> Image Marker.
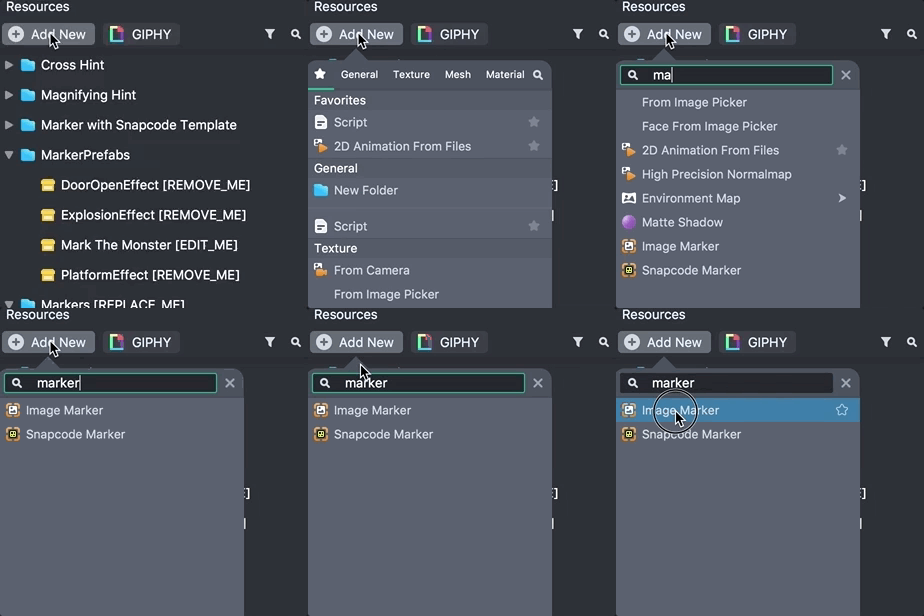
Then, select the image file that you want to use as your image marker.
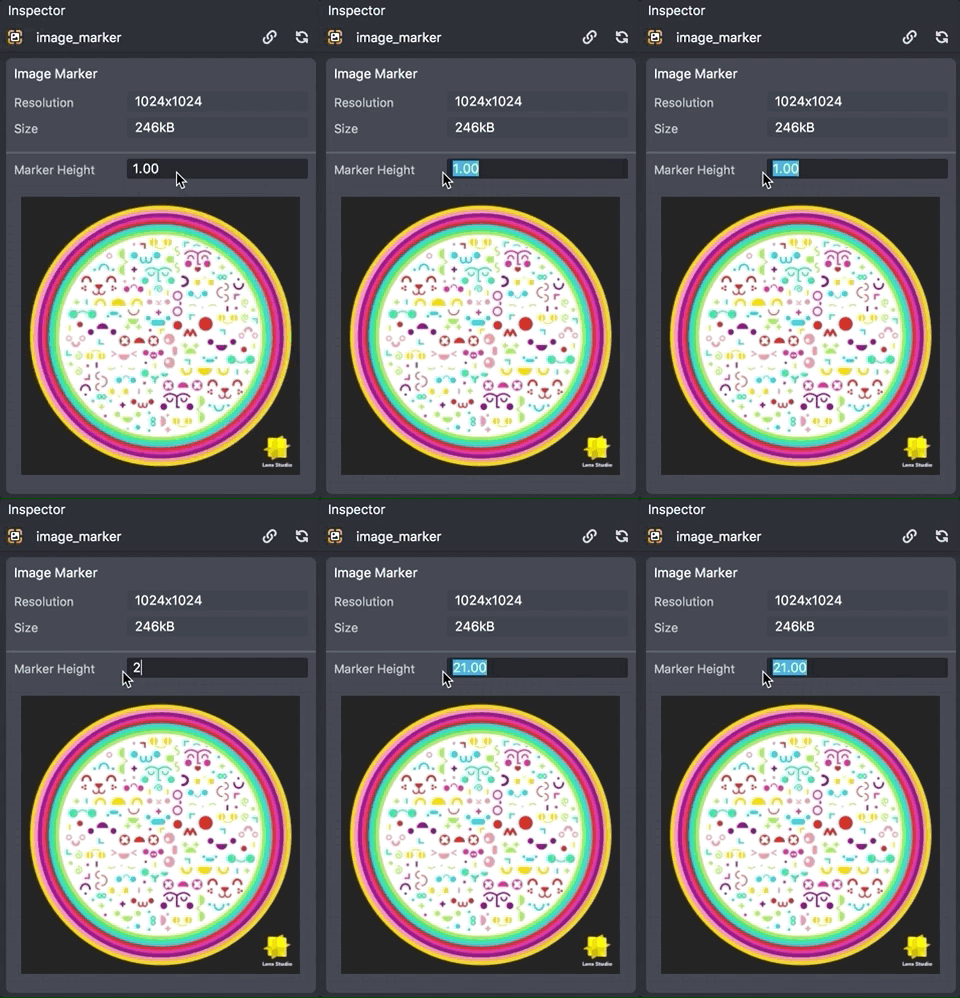
You’ll now have an image marker resource in your Resources panel. Select your marker and in the Inspector panel, tune the height of your image in centimeters if you want the size of your marker in the Scene panel to accurately reflect the size of your marker in physical space.
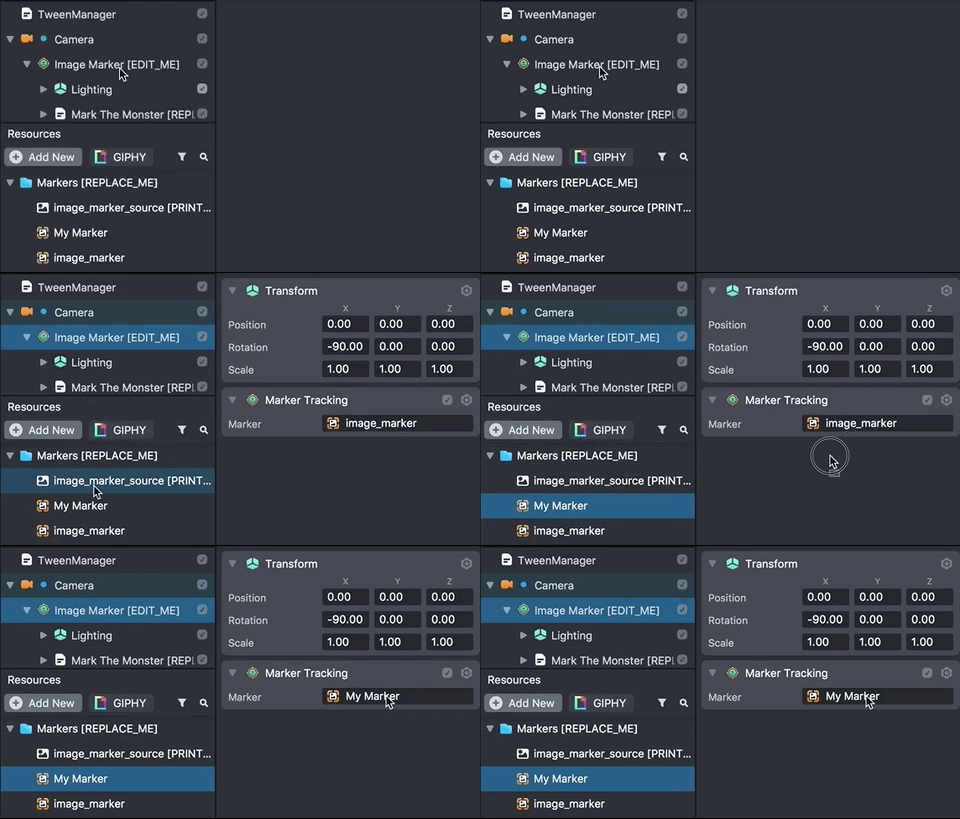
To replace the marker in the template, locate the object named Image Marker [EDIT_ME] in the Objects panel and assign your newly created image marker to the Marker field of the Marker Tracking component.
Adding a Snapcode Marker
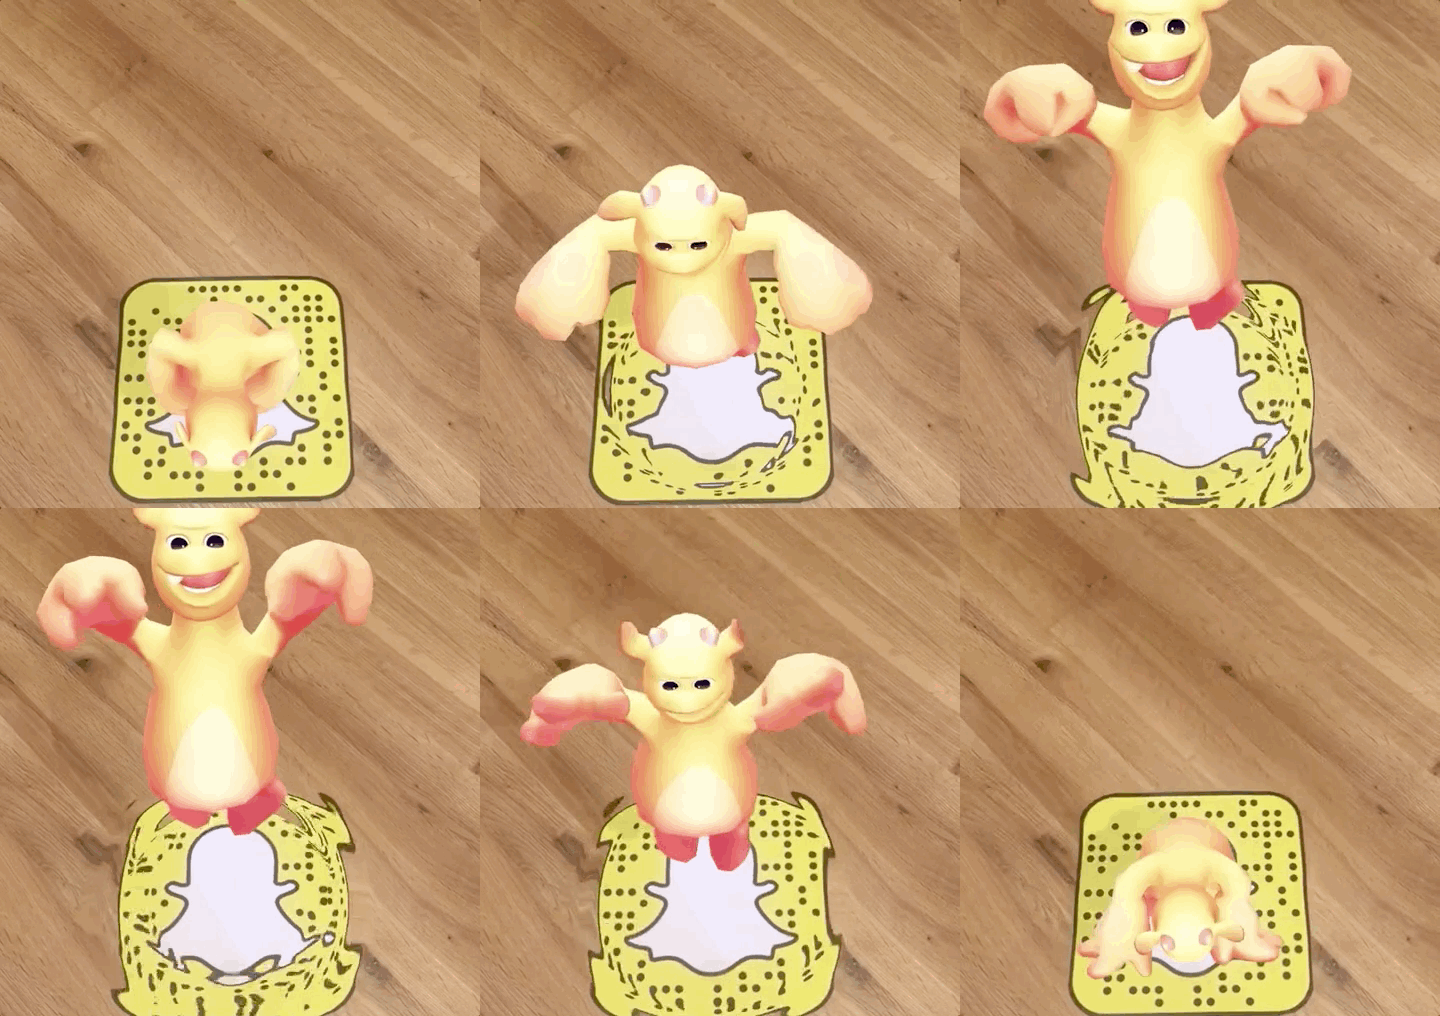
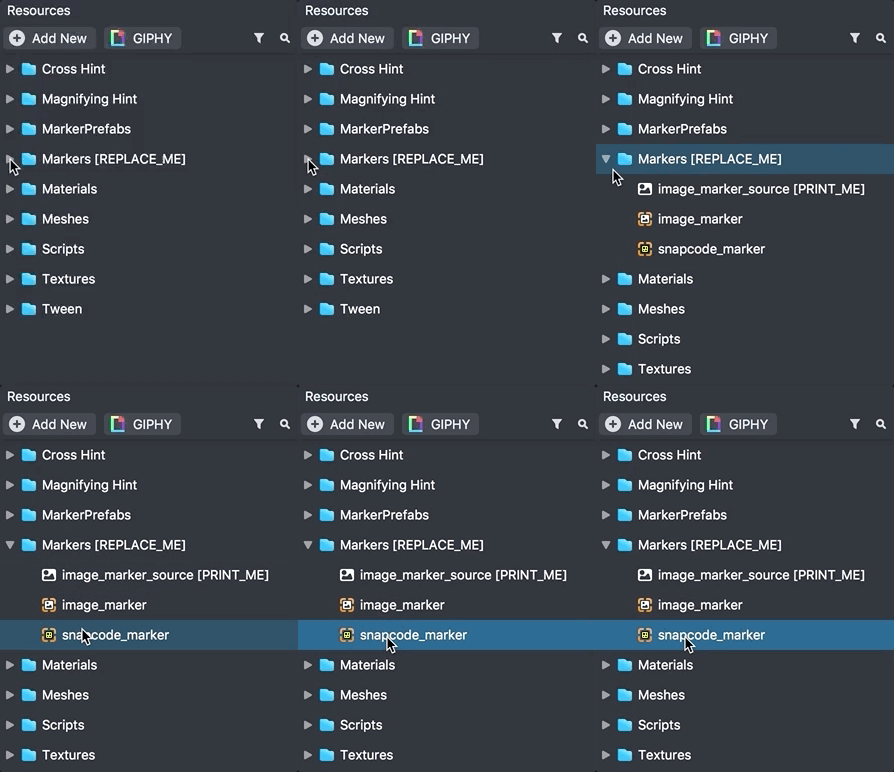
With a Snapcode Marker you can detect and track any Snapcode. This allows you to create an experience that works on all Snapcodes. This template comes with a Snapcode Marker included as a resource. In the Resources panel, in the Markers [REPLACE_ME] folder, you’ll see the snapcode_marker resource.
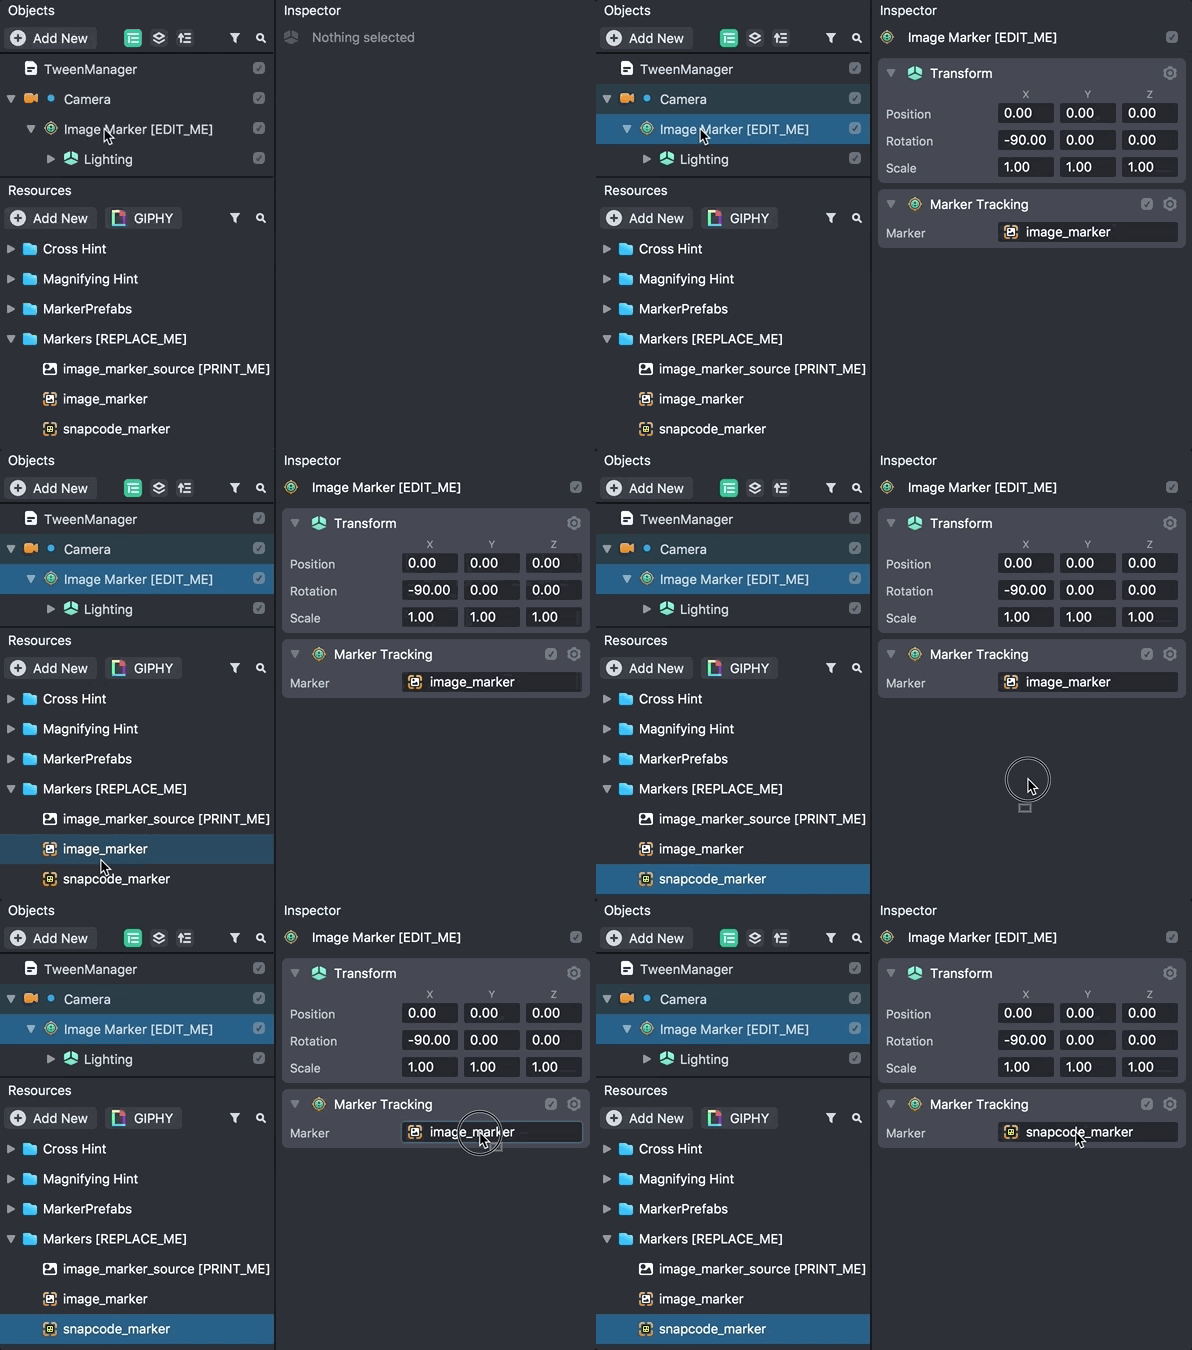
In the Objects panel, locate the object named Image Marker [EDIT_ME] and select it. Then, assign the snapcode_marker resource to the Marker field of the Marker Tracking component.
Attach Content to the Image Marker
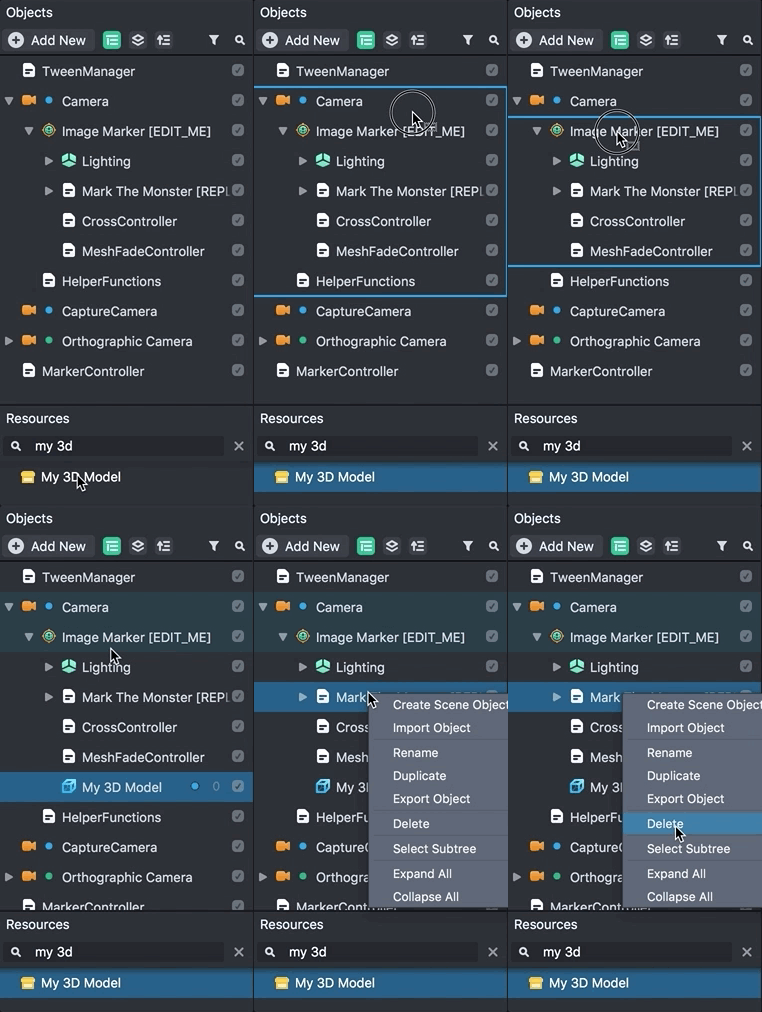
Drag and drop your custom content to be a child of the Image Marker [EDIT_ME] object in the Scene panel. Any object (including 2D Images) can be added as a child of the Image Marker [EDIT_ME] object to have them be tightly tracked to the marker image. If you're new to Lens Studio check out the Static Object or Animated Object templates for adding 3D content to Lens Studio.
Once your custom content is added, you can delete the template’s placeholder content labeled with [REPLACE_ME].
Changing the Marker Hint Image
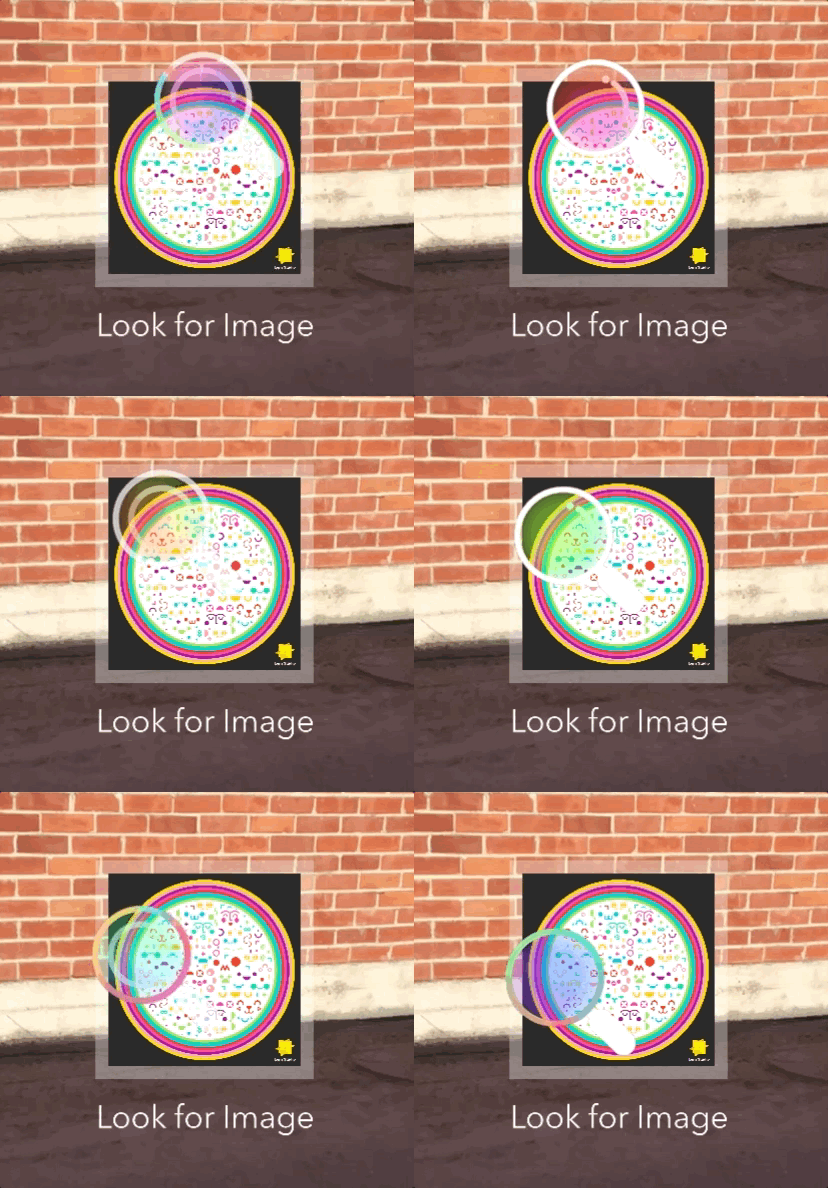
The marker template includes a visual hint which helps users find the marker. You can change the Marker preview texture by selecting the Magnifying Hint [EDIT_ME] object in the Objects panel. Then set the Preview Texture input in the MagnifyingHintController script to your marker’s source image.
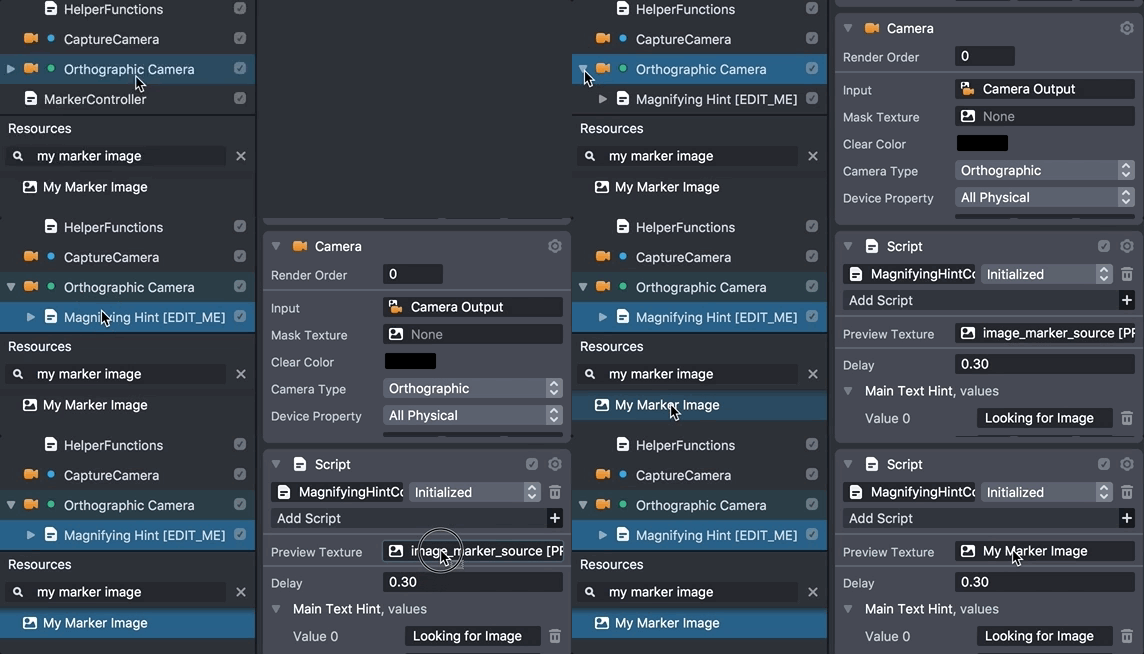
To set the Preview Texture, you’ll need to import your source image used to create the marker (PNG or JPG) into the Resources panel. To save disk space, this preview texture can be lower resolution than the image used to create the marker.
Adding Fade Effect to 3D Meshes
The template comes with the mesh fade effect which automatically fades in the 3D meshes when the marker is recognized.
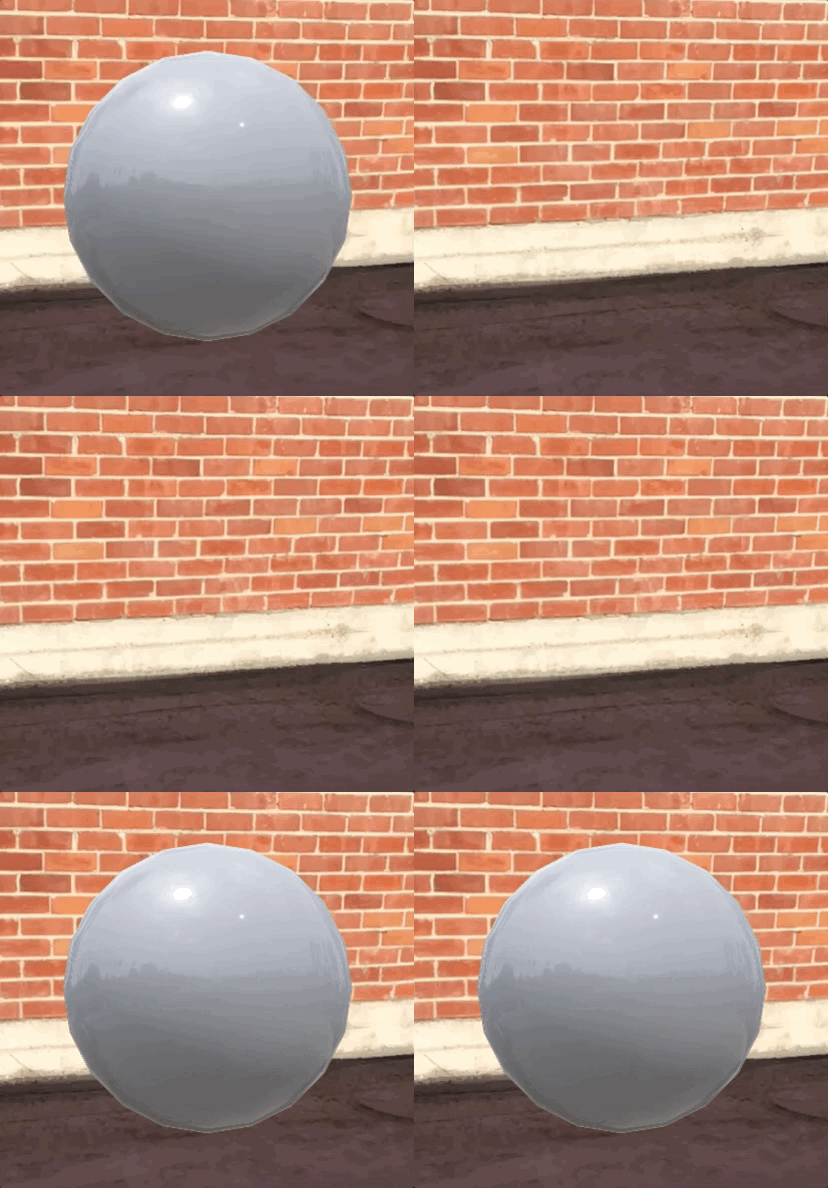
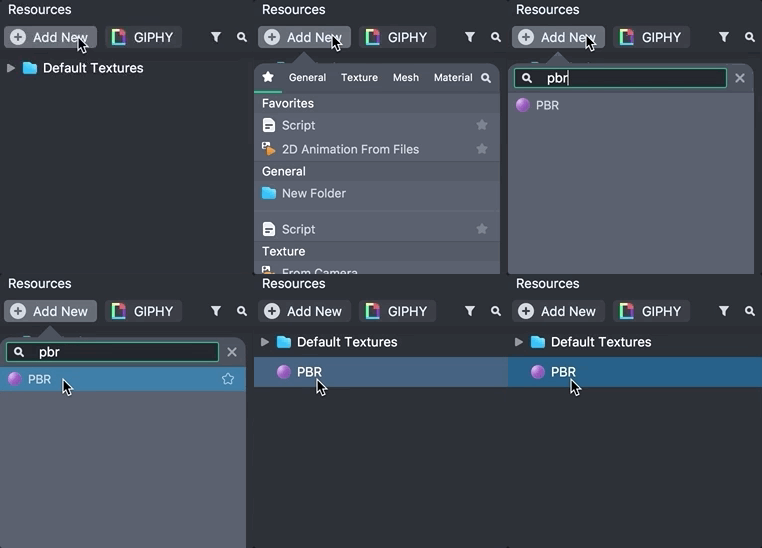
To utilize the fade effect you first need to create a new material or select an existing material from the Resources panel.
With the material selected, make sure the Fizzle checkbox is checked in the Inspector Panel.
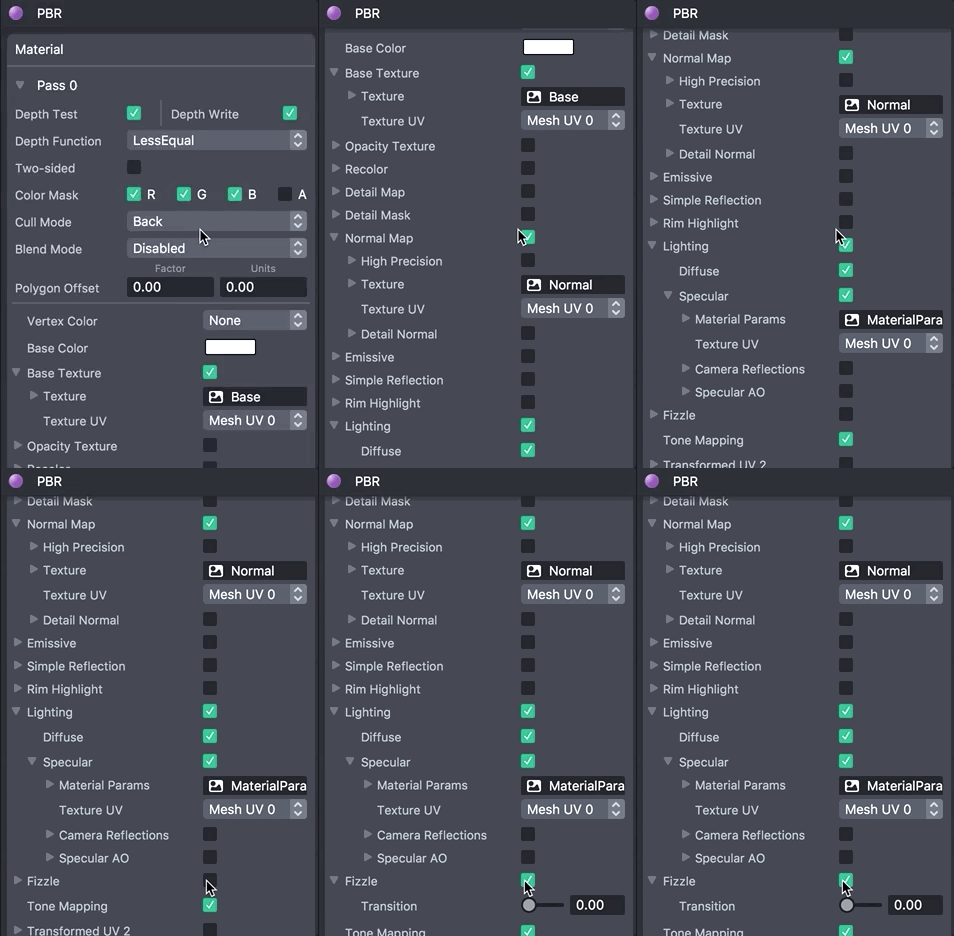
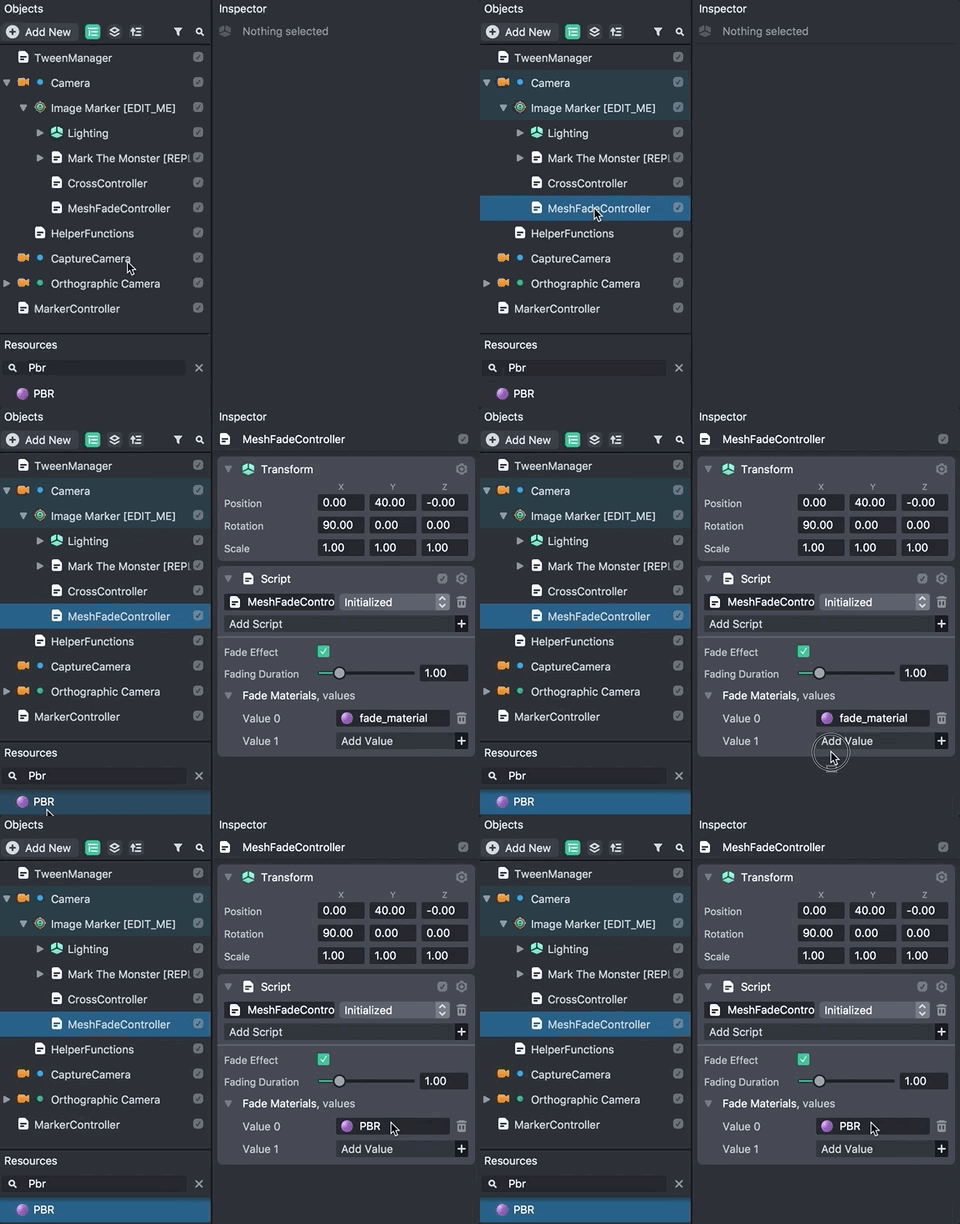
Now, find the MeshFadeController object in the Objects panel. With the MeshFadeController object selected, add your fizzle enabled materials to the Fade Materials field.
Multiple materials can be added here and the fade will trigger all of them.
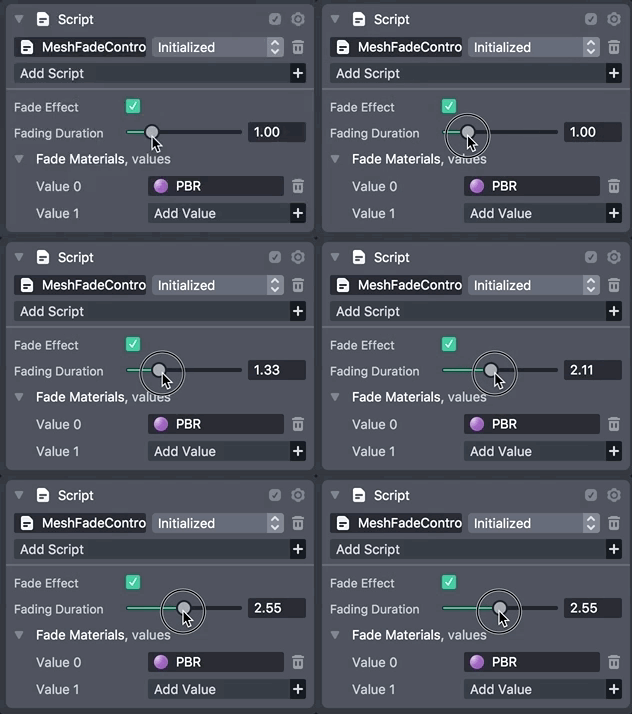
Tune the Fade Duration to the time you want your 3D content to fade in.
Using a Marker Prefab
This template comes with different effects that you can use as starting points for creating fun marker based experiences. These effects are included in the project as prefabs. A prefab is a copy of a scene object (and its children) as a Resource.
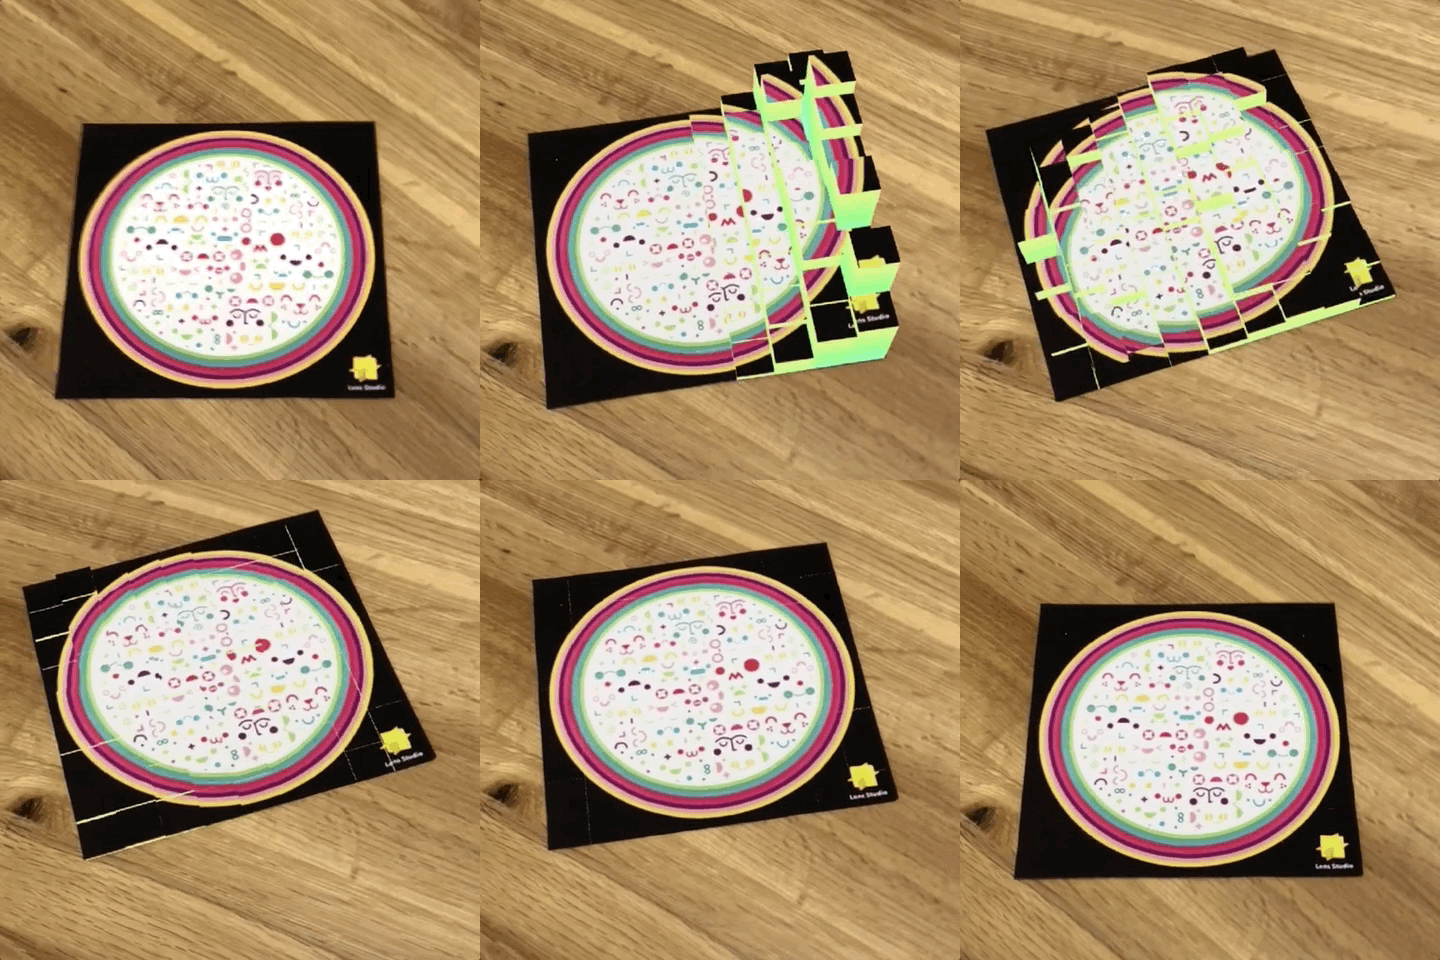
To add any of the of the prefab effects to the scene, drag a prefab from the MarkerPrefabs folder in the Resources panel to be a child of the Image Marker [EDIT_ME] object in the Objects panel.
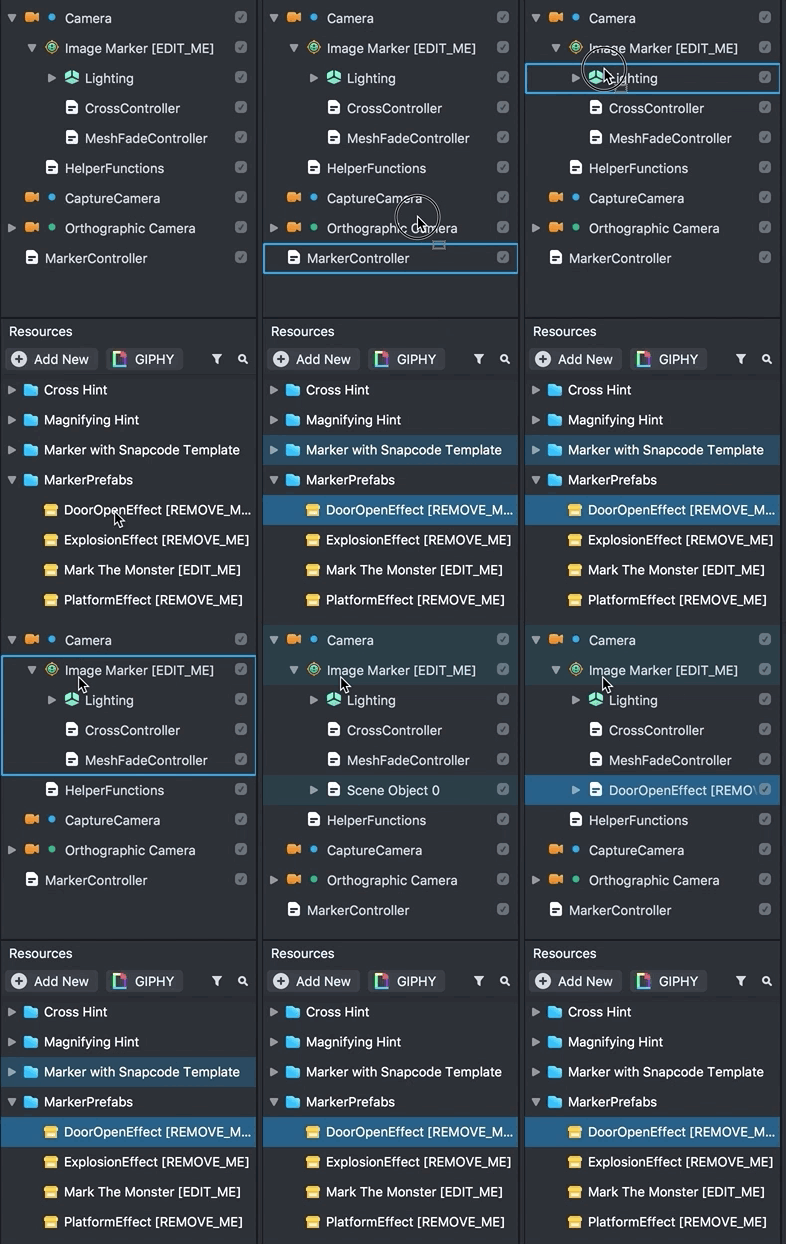
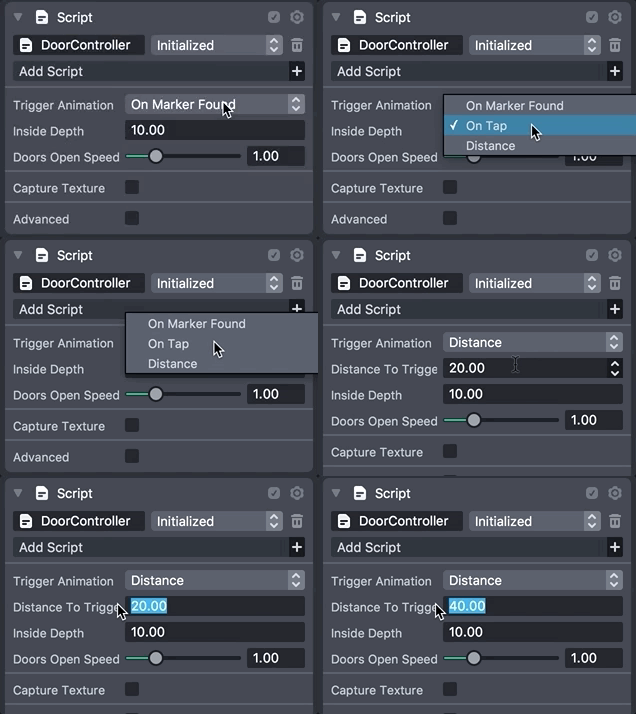
These effects are easily customized by selecting them in the Objects panel and adjusting their settings in the Inspector panel. First, you can specify when the effects are triggered via the Trigger Animation drop down. The trigger event types are:
- On Marker Found - Triggered when the image marker is recognized.
- On Tap - Triggered when the user taps the screen.
- **Distance -**Triggered when the user is within a tunable distance of the marker.
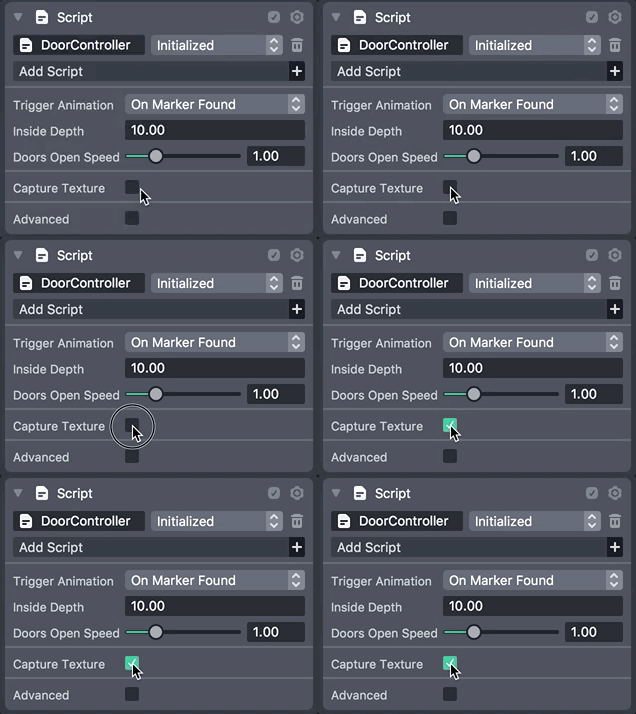
Additionally, there is a checkbox called Capture Texture on all marker effect prefabs. When enabled, the camera’s view will be projected onto the model’s UV’s. This allows you to accurately texture the 3D model (e.g. doors opening) with a live camera capture.
We recommend looking at the innards of the various marker effect prefabs if you are looking to create your own custom marker based effect.
Scripting the Marker Found and Lost Events
The MarkerController script handles when a marker is found and also when a marker is lost. This script will go through each object under the Image Marker [EDIT_ME] object and look for script components. If found, it will attempt to call the script.api.onMarkerFound function when the marker is found and script.api.onMarkerLost function when the marker is lost. As an example, we’ve added a script to the Mark The Monster [REMOVE_ME] object that plays a sound effect when the marker is found and stops playing it when marker is lost. Additionally, as an example, we've added a script to play the Mark animation and make sure that the audio and the animation are synced together.
Follow the below script examples to create your own custom interactions for when a marker is found or lost.
script.api.onMarkerFound
This function is triggered when the marker is found as long as it is on an object that is a child of the Image Marker [EDIT_ME] object. Example script below:
// @input Component.AudioComponent markerFoundSound
script.api.onMarkerFound = function () {
  script.markerFoundSound.play(1);
};
script.api.onMarkerLost
This function is triggered when the marker is lost as long as it is on an object that is a child of the Image Marker [EDIT_ME] object. Example script below:
// @input Component.AudioComponent markerLostSound
script.api.onMarkerLost = function () {
  script.markerLostSound.stop(true);
};
Previewing Your Lens
You're now ready to preview your Lens experience. To preview your Lens in Snapchat, follow the Pairing to Snapchat guide.
Submitting Your Lens
For information on submitting your Lens, follow the below guides:
Related Guides
Please refer to the guides below for additional information: