Disappearing Effects
With the ML Eraser Custom Component, Lens Developers can build unique AR experiences powered SnapML to alter and remove real world content in real-time. The Disappearing Effects Template showcases how ML Eraser can be used to build creative effects, such as head slicing for front-facing Lens experiences, and different effects with Body Segmentation.
ML Eraser offers a real-time GAN-based inpainting which improves the realism of the results, in comparison to classic approaches (such as the current shader in LS). This GAN-based approach can learn the texture and complete different regions in a convincing manner, while traditional approaches are smooth and blurry.
ML Eraser Component
The ML Eraser Component contains various inputs that can be modified manually or via a script. It can be introduced to a project by dragging it from the resources panel onto a new Scene Object.
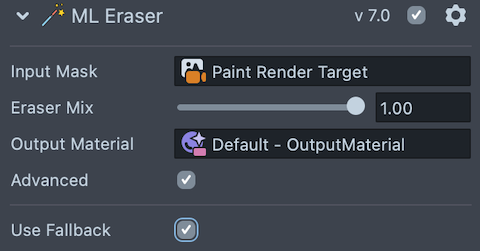
- Input Mask: The mask texture to be inpainted.
- Eraser Mix: Controls the opacity of the inpainting while blending with the Input Mask.
- Output Material: The material created from the Custom Component.
- Use fallback: Allows for a fallback option that uses a shader instead of the ML inpainting neural network. In this case we use a naive solution which is more blurry.
Template Walkthrough
The Disappearing Effects Template showcases how ML Eraser can be used to build creative effects, such as head slicing effect for front-facing Lens experiences, and different effects with Body Segmentation.
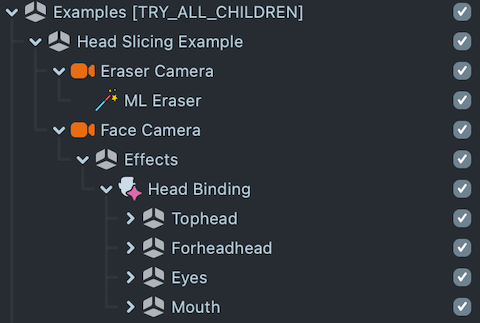
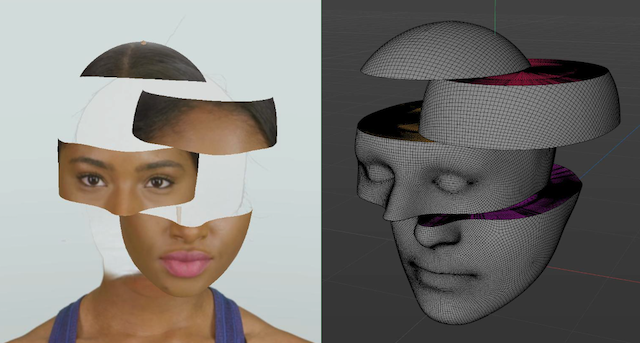
Front-Facing Head Slicing Example
In this example, you can use Portrait Head segmentation and ML Eraser to create an effect that looks like the user's head is sliced.
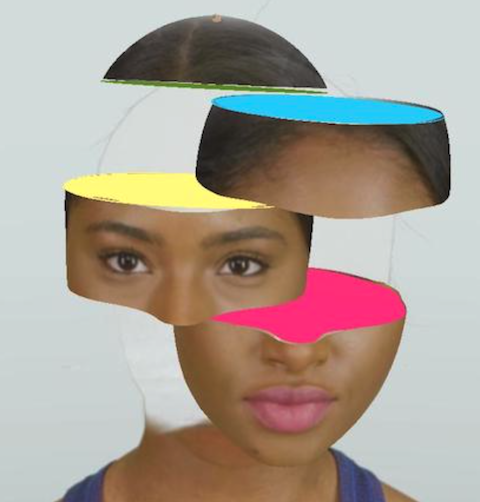
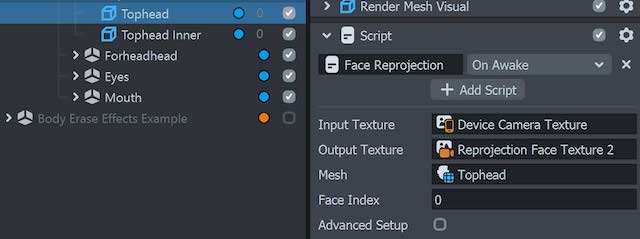
Each slice has two custom meshes; one for the outer mesh called sliced hed mesh and the other for the inner mesh face. The first mesh will always has a “Face Projection” script attached to it in order to function properly
-
You can play around with the inner surface material to edit the appearance of effect.
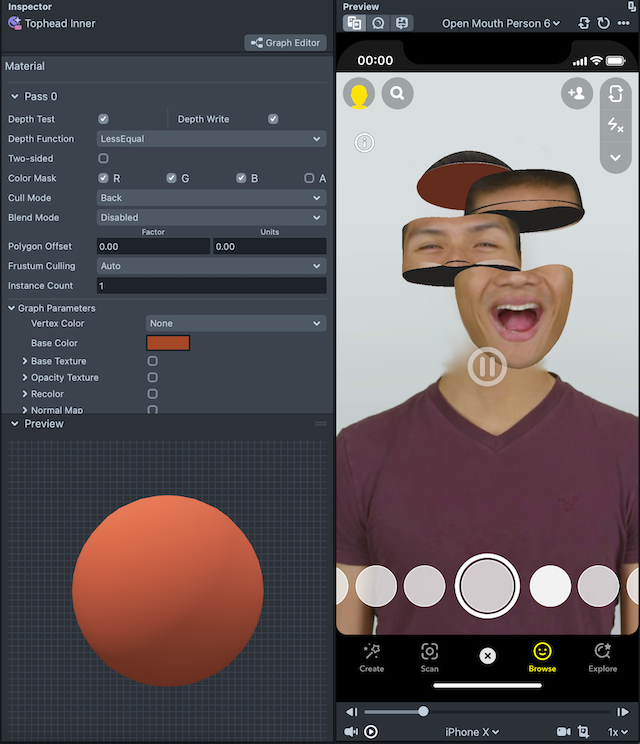
-
You can change each slice’s position by updating the scene object position.
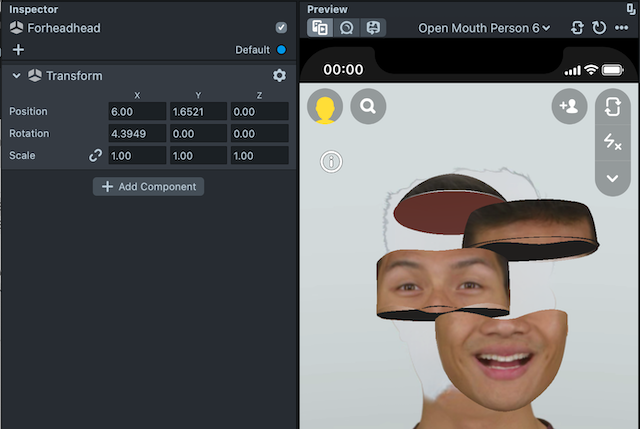
-
You can move or hide the inner mesh and keep the outer one.
Do not disable the Erase Camera in the Objects panel. Content will not work properly if the camera is disabled.
Back-Facing ML Eraser Examples
Included in the Disappearing Effects Template are a few examples that showcase how ML Eraser works with back-facing Lenses.
If you enable the ML Environment Matching features, the following example effects will automatically be applied to all your objects instead of just a body mesh.
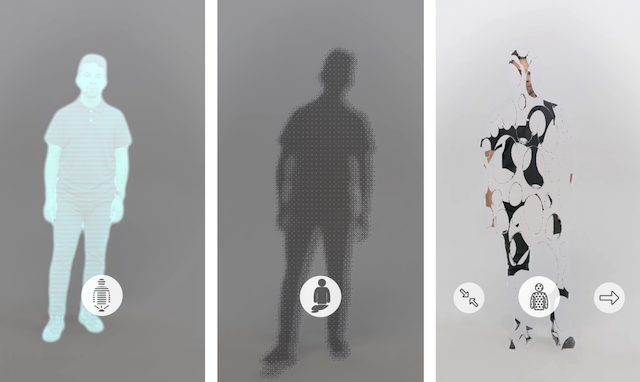
Body Erase Effects Examples
In these examples, you can use Lens Studio's Body Segmentation feature and ML Eraser to erase a user's body from the scene.
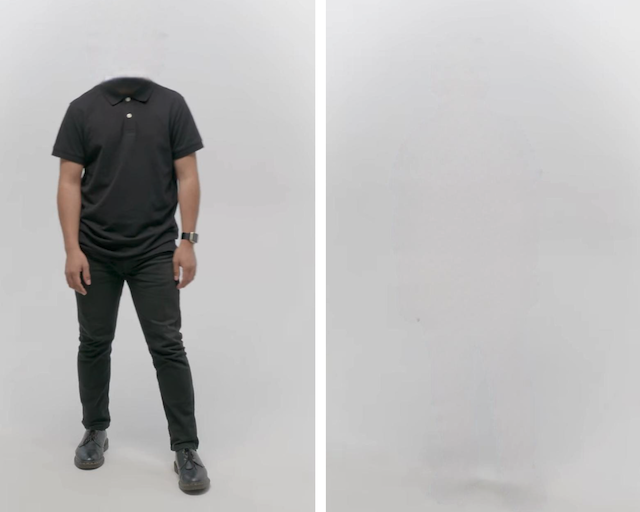
The Template includes three separate examples showcasing how Body Segmentation and ML Eraser can work together:
If you have the Head Slicing Example enabled, you will need to disable it first before enabling the Body Erase Effect Example.
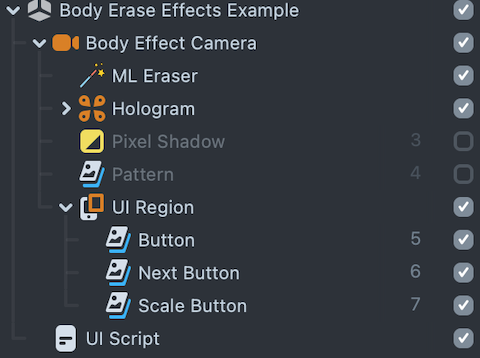
Each of these examples are contained within Scene Objects and controlled by the UI, located in the UI Region. they leverage the UI Script in order to utilize the UI logic.
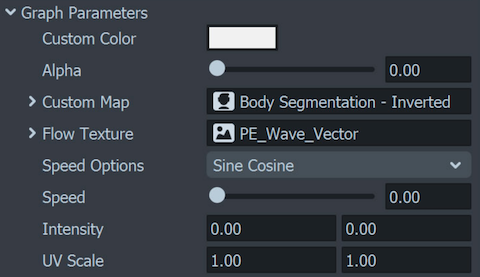
Pattern
In the Pattern example, you will see how a screen image is using a material driven by an inverted body segmentation to create a mask texture and a pattern mask being used as a noise texture.
The UI Script allows users to navigate through different pattern options and change their scale through changing the Pattern material properties.
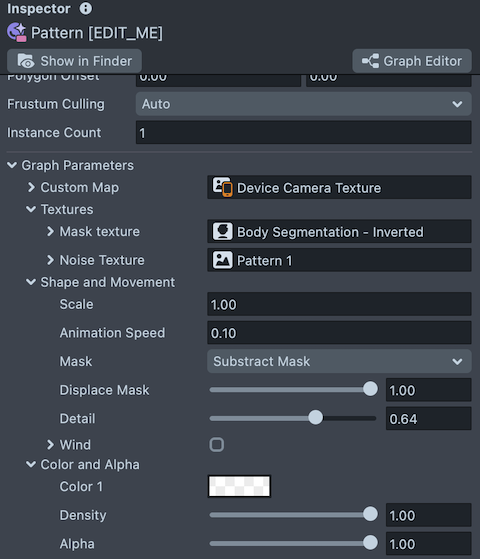
You can see how adjusting the Pattern material parameters can affect the animation visuals.
You can also animate a static mask image or use an animated black and white image as a mask if you do not want to use the default mask.
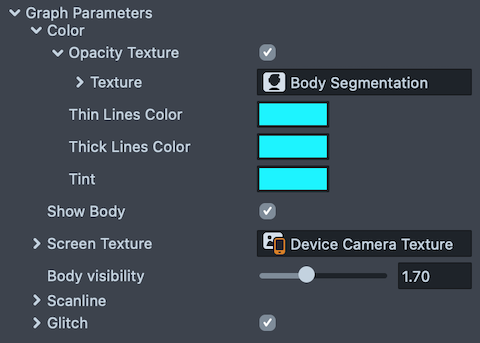
Hologram
With the Hologram example, you can create a more sci-fi style effect on the erased body using a custom Hologram Material with body segmentation as an opacity texture.
The Hologram Material contains various parameters that can be tweaked to change the animation, line colour, body visibility and glitch effects.
Pixel Shadow
The Pixel Shadow example leverages body segmentation to create a mask for the ML Eraser component, resulting in a semi-transparent shadow visual.
The example also contains a dithering post effect as an overlay, to create a more pixelated appearance. Both are implemented as post effects.
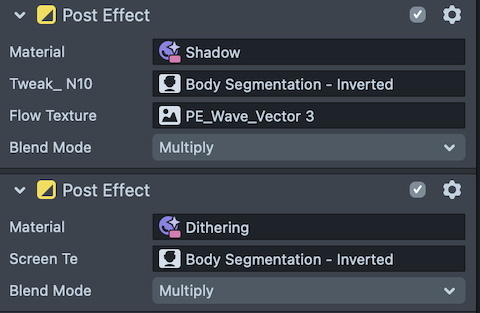
You can see how enabling, disabling and tweaking the dithering post effect will change the final visual.
In shadow effect material, you can play with material parameters in the inspector panel to colorize, animate and distort the erased body.
Previewing Your Lens
You’re now ready to preview your Lens. To preview your Lens in Snapchat, follow the Pairing to Snapchat guide.
What's Next?
Now that you have learned about how to create different types of disappearing effects with ML Eraser, take a look at some of the other Templates that use ML Eraser.