Portrait Relighting
Portrait relighting introduces the ability to change the light and background of input photos, as well as adding custom lighting to photos. This allows for users to place themselves into virtual environments and enhance the photorealism of 3D assets.
Portrait Relightening feature is implemented as a custom component that creates a Post Effect object in scene that reacts to the scene lighting.
Installing the Portrait Relighting Custom Component
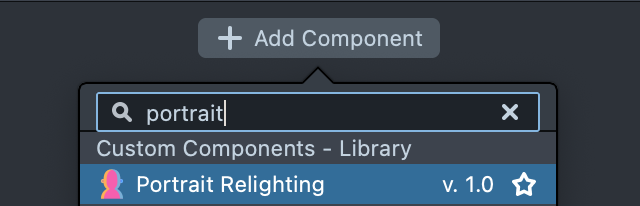
You can find the Portrait Relighting Component in Lens Studio Asset Library.

Click on the Install button to make it available in your Lens Studio project.
Adding to Scene
In a new Lens Studio project, create a new Scene Object or new Screen Transform.
With the newly created object selected, click on the Add Component button in the Inspector Panel and select Portrait Relighting.
Make sure that the Create Visual checkbox is checked and that the Render Order is set to 1.
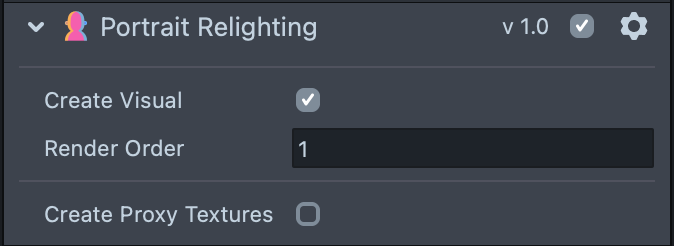
By default, when the Create Visual checkbox is checked, the Portrait Relighting component will automatically generate a Post Effect component in the scene. Material used for this Post Effect will react to the lights in the scene.
Please note that this component is meant to be used on the portrait camera view only, please make sure to have a Person preview image or video selected.
Adjusting Lights
A new lens studio project usually has default lighting set-up that looks like this:
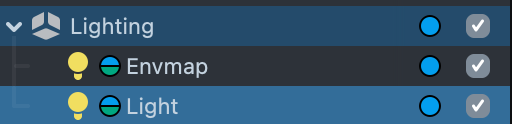
You can make some adjustments to make your Portrait Relighting effect look better.
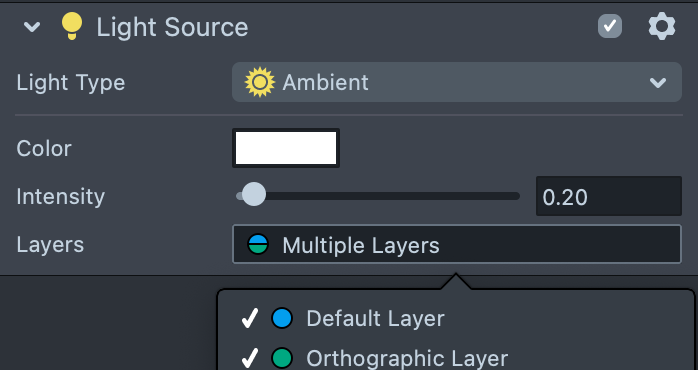
Select the Light Scene Object. Rename it to Ambient Light. In the Inspector Panel, change the Light Type from Directional to Ambient and adjust the Intensity slider to 0.2. Feel free to play with the Color and Intensity parameters to see how the effect responds to the Light settings.
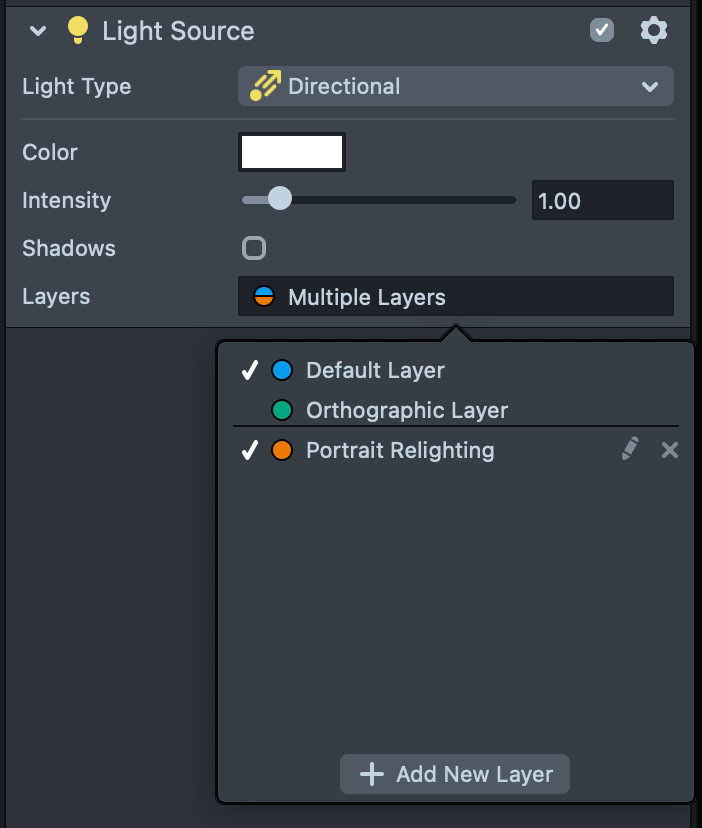
Make sure the Layers setting of the Light components is set to include the same Render Layer that your Portrait Relighting component is on. This can be easily verified by looking at circular color indicators on the right-hand side of the Inspector Panel.
Currently the Portrait Relighting Component supports Envmap, Ambient, Point and Directional types of light sources. Spotlight is NOT supported.
You can experiment with adding more light sources to get different results:
- Click on the
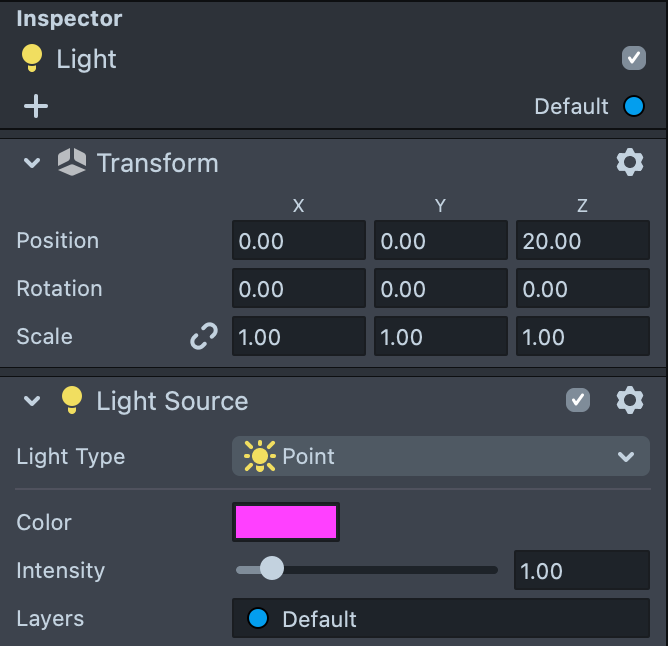
+button in the Objects Panel and selectLight. Rename this new light toPoint Light. - In the Inspector Panel, set the
Light TypetoPoint, set the position to0, 0, 20, and change the color parameter to the color of your liking.
Try experimenting with the placement of the Point Light. In the Scene Panel, click on the Point Light. If the Move Tool doesn’t appear, press the W button on your keyboard to turn it on. Play around with moving the Point Light on the X (red) and Y (green) axes. Notice how the lighting changes in the Preview Panel.
Creating and Using Proxy Textures
The Portrait Relighting Component is built upon a ML model that produces several output textures which can be used to build custom materials. They are:
- Albedo: A full screen texture with normalized light values
- Normals: A full screen normals texture
- Opacity: A full screen portrait segmentation texture
The Create Proxy Textures setting allows you to plug in textures into the Portrait Relighting Component. The easiest way to do this is to use Proxy Textures (empty textures).
You can also assign textures through scripting by assigning control property of one texture to another: destinationTexture.control = sourceTexture.control
Let’s go through the steps to add Proxy Textures to the Portrait Relighting Component:
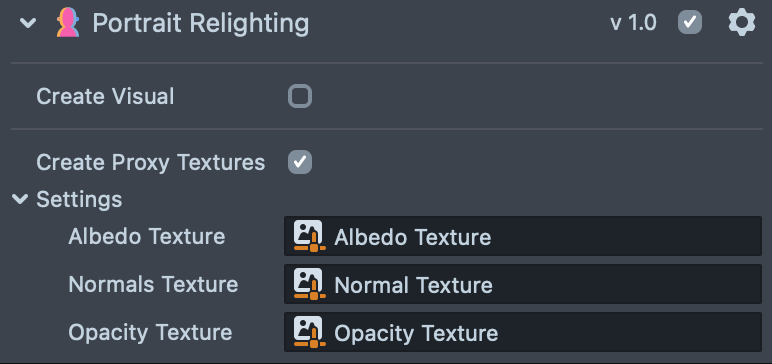
- Select the Scene Object with the Portrait Relighting Component and enable the
Create Texturescheckbox. - In the Resources Panel, click the + button and type in
Proxy Texture. Press Enter to add a Proxy Texture to the Resources Panel. - Rename this Proxy Texture to Albedo Texture.
- Repeat steps 2 and 3 two more times, and name the new Proxy Textures Normal Texture and “Opacity Texture”, respectively.
- Select the Portrait Relighting Custom Component in the Inspector Panel. Drag and drop the newly created Proxy Textures from the Resources Panel into the corresponding inputs in the Inspector Panel.
Now you can use these textures in your own materials as usual.
Building Example Material
You can start by building a simple material using the Proxy Textures that we created previously.
First, select the Portrait Relighting Component and disable Create Visual.
You should now see that the Portrait Relighting effect is no longer visible in the Preview Panel. Now you will set up a custom Post Effect where we will input the Albedo, Normal, and Opacity Proxy Textures:
- In the Resources Panel, click the + button, type in
Empty Material, and Add an Empty Material into your project. - Double click on the newly created Empty Material to open up the Material Editor. There should only be one node in the graph, the Shader node.
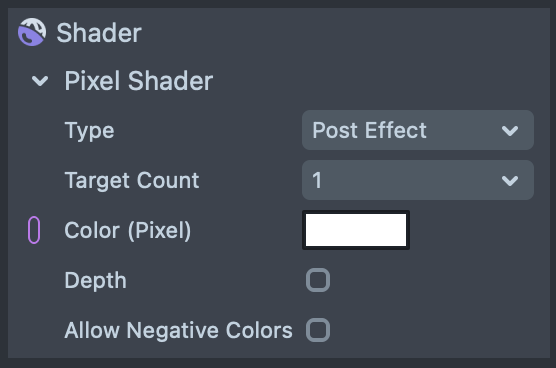
- Select
Shadernode and open the Material Editor Inspector - Change Type from
3DtoPost Effect.
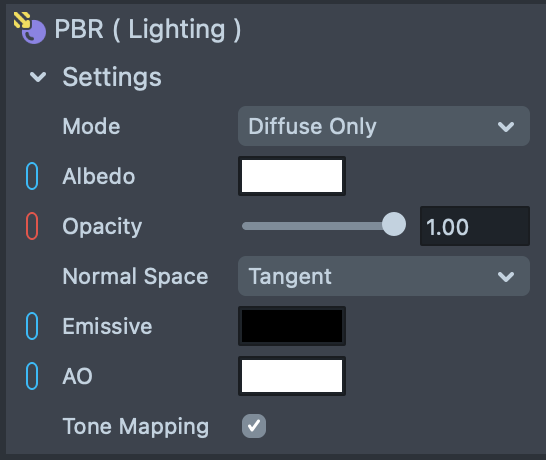
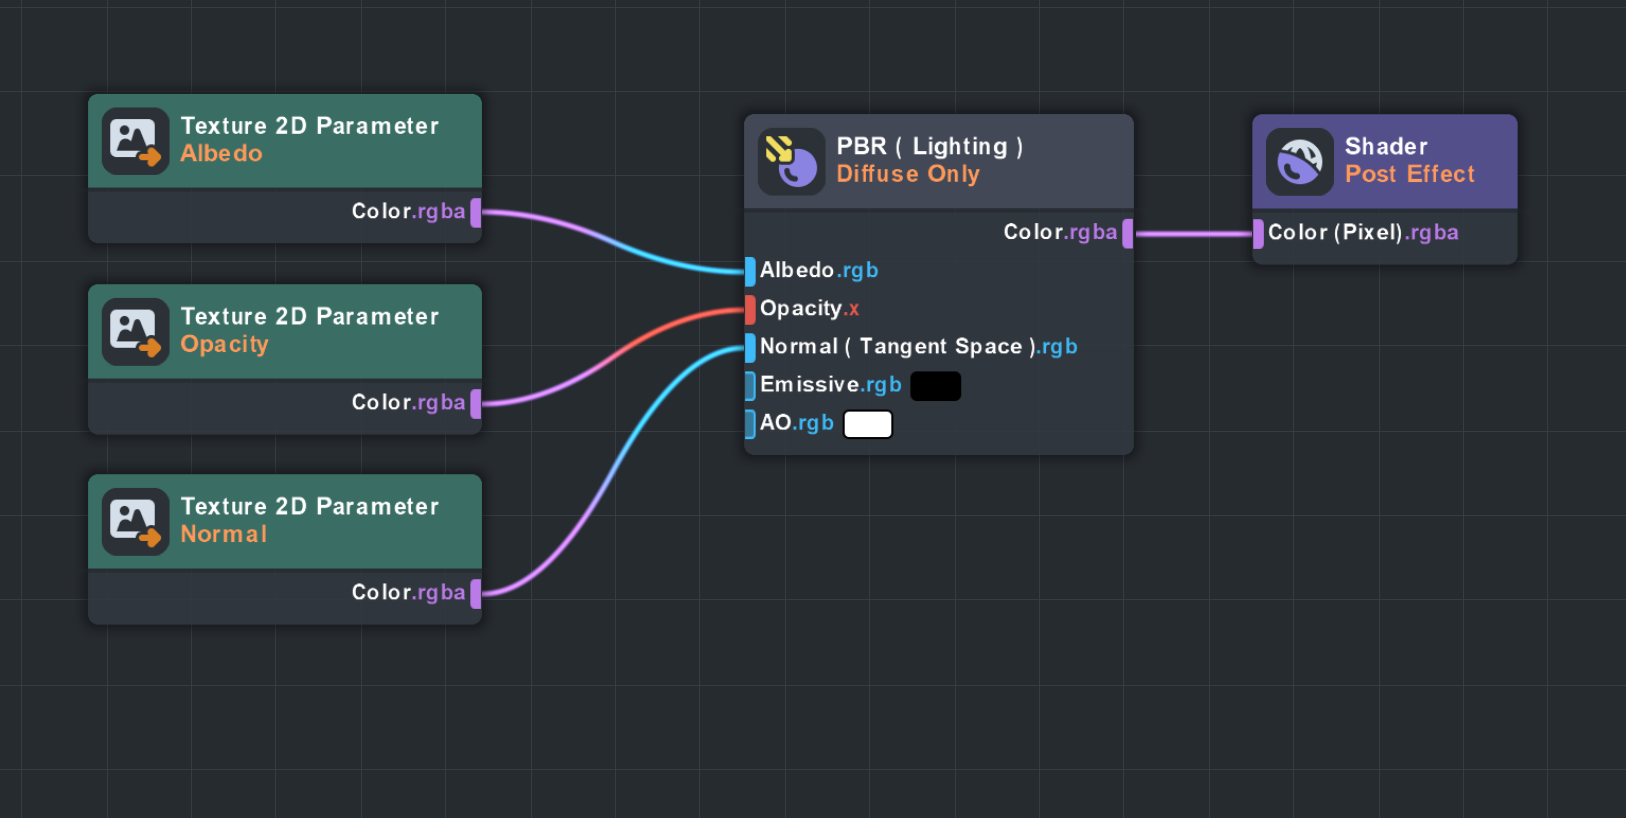
- Right click on some empty space in the Material Editor, click on
Add Node, type inPBRand press Enter. - Click on the new PBR node. In the Preview Panel set Mode from
Diffuse and SpeculartoDiffuse Only.
- Add three Texture 2D Parameter Nodes. Using the Preview Panel, rename the Nodes to
Albedo,Opacity, andNormal, respectively. - Connect the Texture 2D Parameter nodes to their corresponding slots in the PBR Node.
Now that the Post Effect Material is complete, you can apply this Material to our Scene.
- In the Objects Panel, right click on the Camera and create a new Scene Object.
- Rename the new Scene Object to Relighting Post Effect.
- With Relighting Post Effect selected, click on + Add Component in the Inspector Panel and add a new “Post Effect”.
- Drag and drop the Portrait Relighting Material into the Material slot on the Post Effect Component.
Congrats! You now have a Post Effect Material that uses the Proxy Textures generated by the Portrait Relighting Component. Use this Material as a jumping-off point for more advanced effects.
Check out Asset Library for more examples!
Please note that this Post Effect is a 2D Full Screen effect, and in order to overlay it with different 2D and 3D objects you will need to create multiple cameras. The next section will provide an example of setting up a complex scene with 3D head attachments and different types of Light sources.
Template Walkthrough
In the previous sections, You have already walked you through creating a Portrait Relighting effect from scratch. Now, let’s take a look at the examples found in the Portrait Relighting Template.
Lighting Examples
From the Lens Studio homepage, double click on the Portrait Relighting Template.
Once the Template has loaded. Look in the Objects Panel and navigate to the Examples [TOGGLE] Scene Object. These examples show how to create lighting setups that range from simple to complex. Feel free to explore these examples by enabling one at a time.
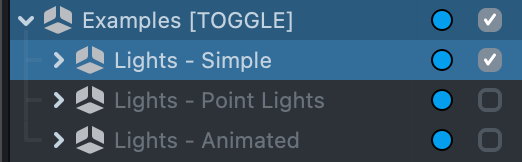
There are three examples to explore. The first example, titled Lights - Simple, demonstrates how to create a simple lighting setup using an Environment Map and an Ambient Light. Try adjusting the Envmap [EDIT ME] Light Source with a new Environment Map:
- Make sure that
Envmap [EDIT ME]is selected in the Objects Panel - Add a different Diffuse and Specular map to the Light Source component of the
Envmap [EDIT ME]by dragging and dropping a newDiffandSpecularfile found in the Resources Panel > Environment Maps. - Adjust the Rotation slider. Notice how the lighting changes when you do so.
Now, let’s add a new Directional Light to this example. Look at the [ADD LIGHT] Scene Object in the Objects Panel for instructions on how to do so.
-
Create a new Scene Object that is a child of the
Lights - SimpleScene Object. -
Rename the new Scene Object to
Directional Light. -
With
Directional Lightselected, click on + Add Component in the Inspector Panel. Add a new “Light Source”. -
Change Light Type to
Directional. -
Click on the Layers dropdown and make sure that the
Portrait RelightingLayer is selected.
The second example, Lights - Point Lights provides a simple example of manipulating the on the screen using the Manipulate Component. Experiment with this example by dragging the colored circles on the screen to change the location of the Point Lights. Let’s try creating a new light source with this example.
- Select one of the
Point LightScene Objects in the Objects Panel. These are found in theExamples [TOGGLE]hierarchy under theLights - Point Lightsexample. - Right click on the selected
Point Lightand click on Duplicate. - With the new Point Light selected, change the position of the light to
X: 0, Y: 0, Z: 16. - In the Light Source component, change the “Color” to green.
- In the Resources Panel, navigate to the Materials folder, Right-click on the “Unlit - Blue” and select “Duplicate”.
- Rename this new Material to Unlit - Green.
- Select Unlit - Green, and change the “Base Color” to a green color.
- In the Objects Panel, click on the Sphere child of the new Point Light.
- Drag and drop the Unlit - Green Material into the “Material 1” slot on the Render Mesh Visual component.
You should now have three interactable colored lights affecting the scene.
The last example, Lights - Animated, includes several lights as well as two scripts that allow users to interact with the lighting:
- The
RotateEnvmap.jsscript sets the rotation of an Envmap light source, as well as transforms a Material’s UV coordinates. In the case of this template, the speed and intensity of this effect is controlled by a Tween script. - The
SwitchEnvmap.jsscript changes the Envmap every time the screen is tapped.
Template Walkthrough – 3D Content
Along with the lighting examples, the Portrait Relighting Component can also be used in conjunction with various 3D/2D objects. The following section will describe how to explore the 3D assets that are included in the Portrait Relighting Template, as well as how to add your own custom content.
In the Objects Panel, enable the 3D Objects [ENABLE] Scene Object, which is a child of the Camera Scene Object. You should see a sequin hat, collar, and makeup appear on the subject in the Preview Panel.
Since the Portrait Relighting Custom Component only outputs 2D images, we need multiple Cameras to handle the rendering of 3D assets. One Perspective Camera for the 3D assets, and one Orthographic Camera for the Portrait Relighting Custom Component. In order to keep the lighting consistent, make sure that the position of both Cameras are equal.