Photoshop Texturing
Material is a resource in Lens Studio that can be applied to a 3D model to control and customize its visual look. Lens Studio has some preset materials that you can add to your 3D model to change the way your model looks.
Here are some of Lens Studio's preset materials:
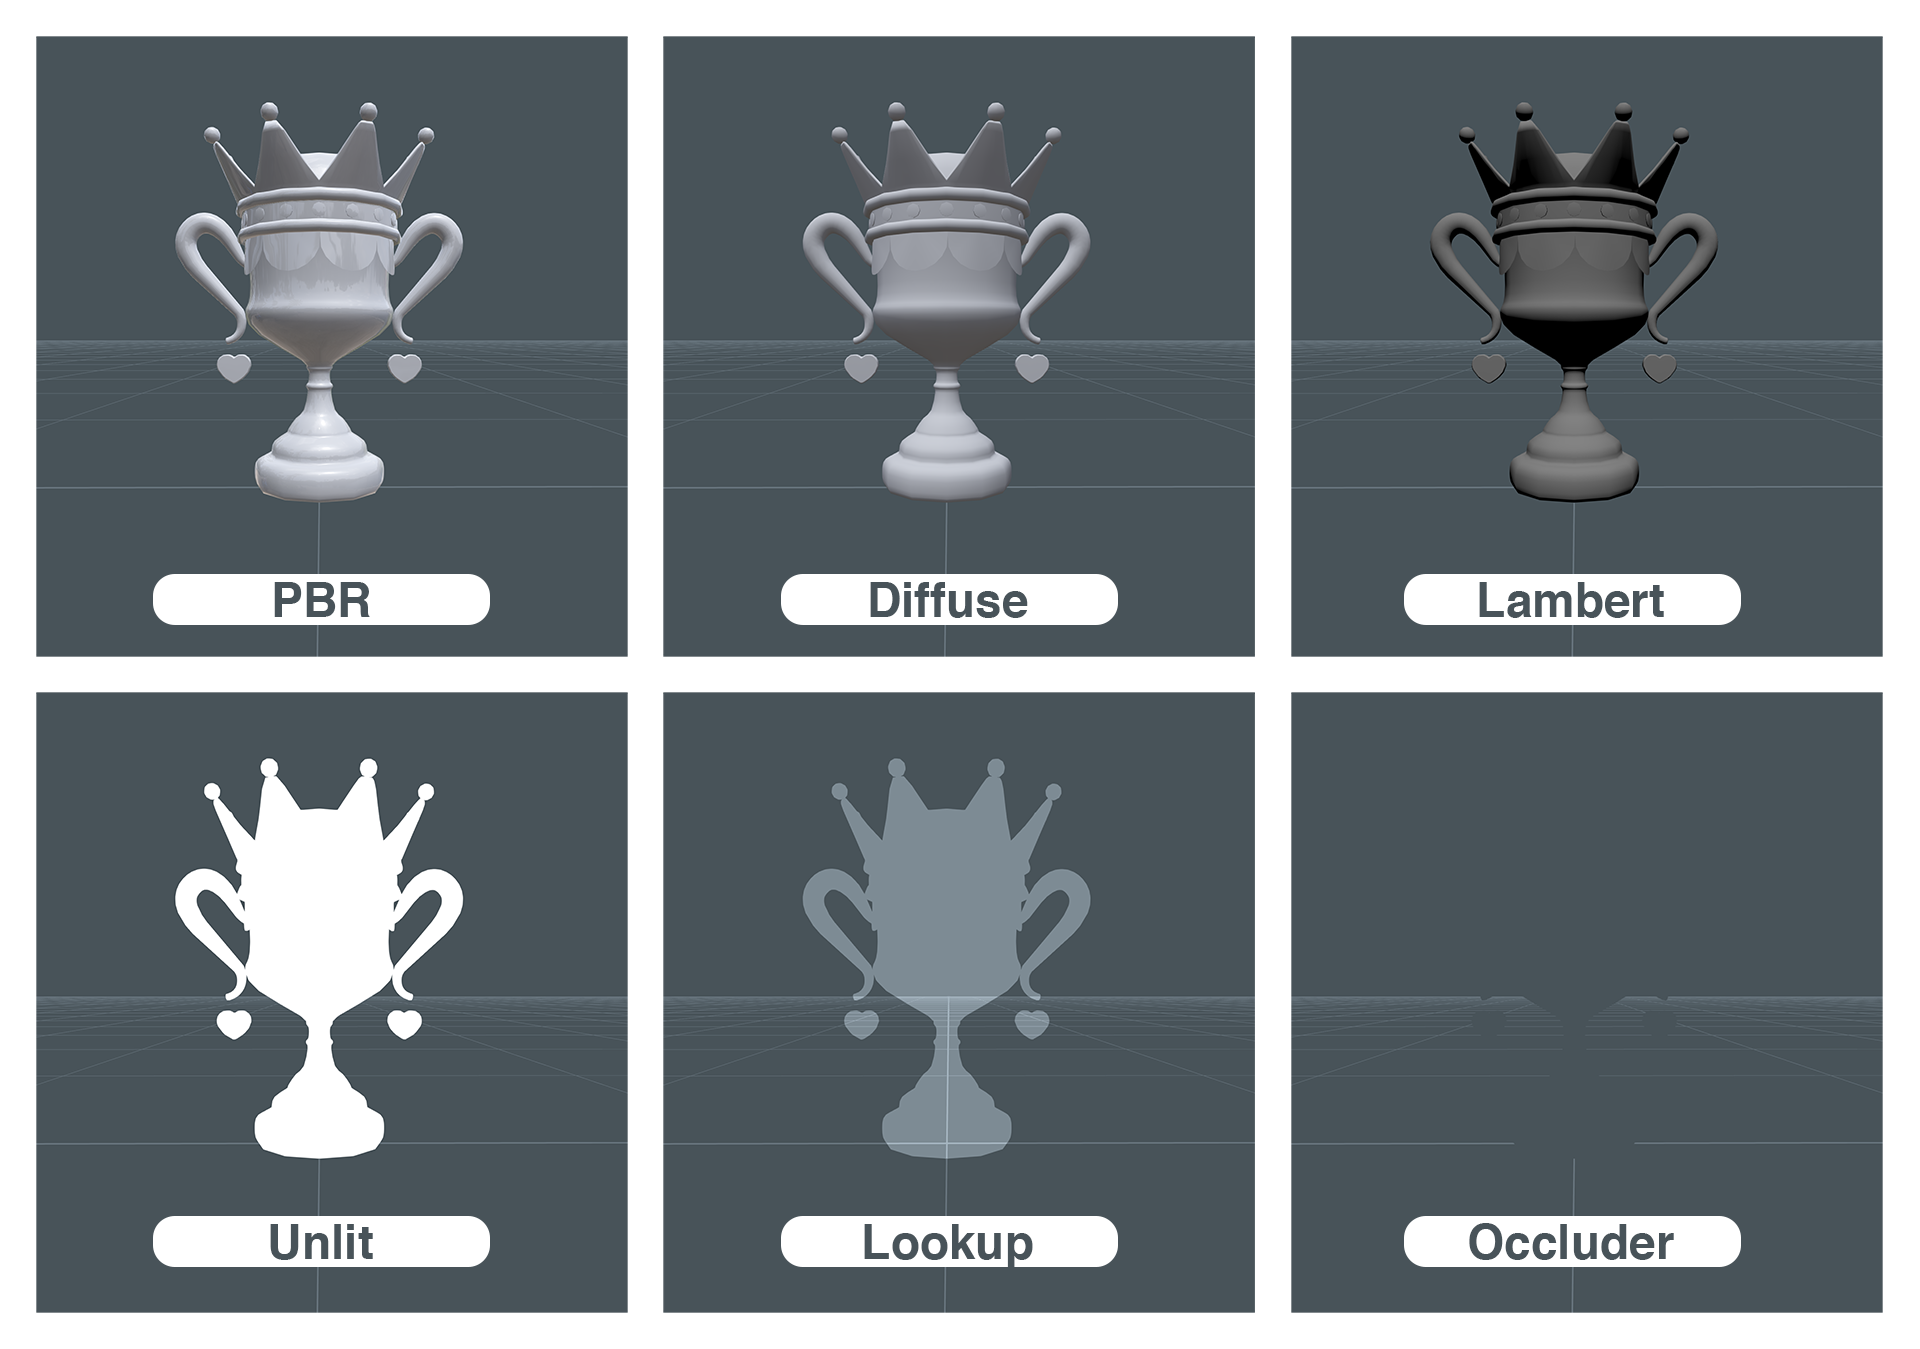
If you want to learn more about Lens Studio's materials, follow the Materials guide.
Most materials have texture inputs that you can use to change the way it looks. You can paint these texture(s) in 3D painting software like, Allegorithmic's Substance Painter, Adobe Photoshop and more.
This guide will walk you through the process of painting a 3D model’s textures with Photoshop. For the purpose of this guide, we’re using Adobe Photoshop CC 2018.
Importing 3D Models in Adobe Photoshop
You can use Adobe Photoshop to paint and edit the textures used by a 3D model. In order to paint your texture in Photoshop you need to have a UV mapped model. Also you need to export your 3D model in the .OBJ format to make sure that you can successfully import your 3D model into Photoshop.
To start painting, we have to change Photoshop’s 2D workspace into the 3D workspace. To do this, select Window -> Workspace -> 3D.
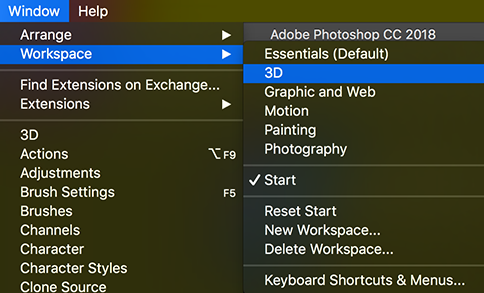
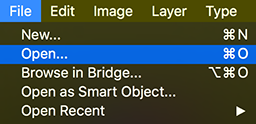
This will enable the 3D features of Photoshop. Then, we can import the 3D model by selecting File -> Open... from Photoshop’s menu and then select your .OBJ file.
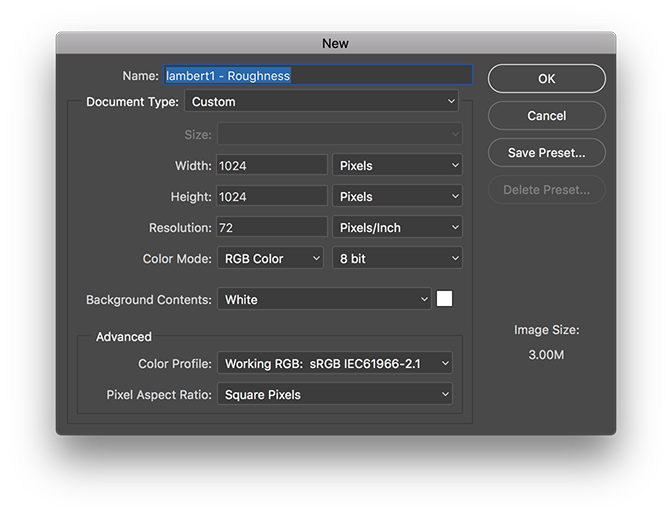
The New window will open. In this window we need to change both the Width and Height to 1024 and then click the OK button.

Dimensions of the width and height must be a power of 2.
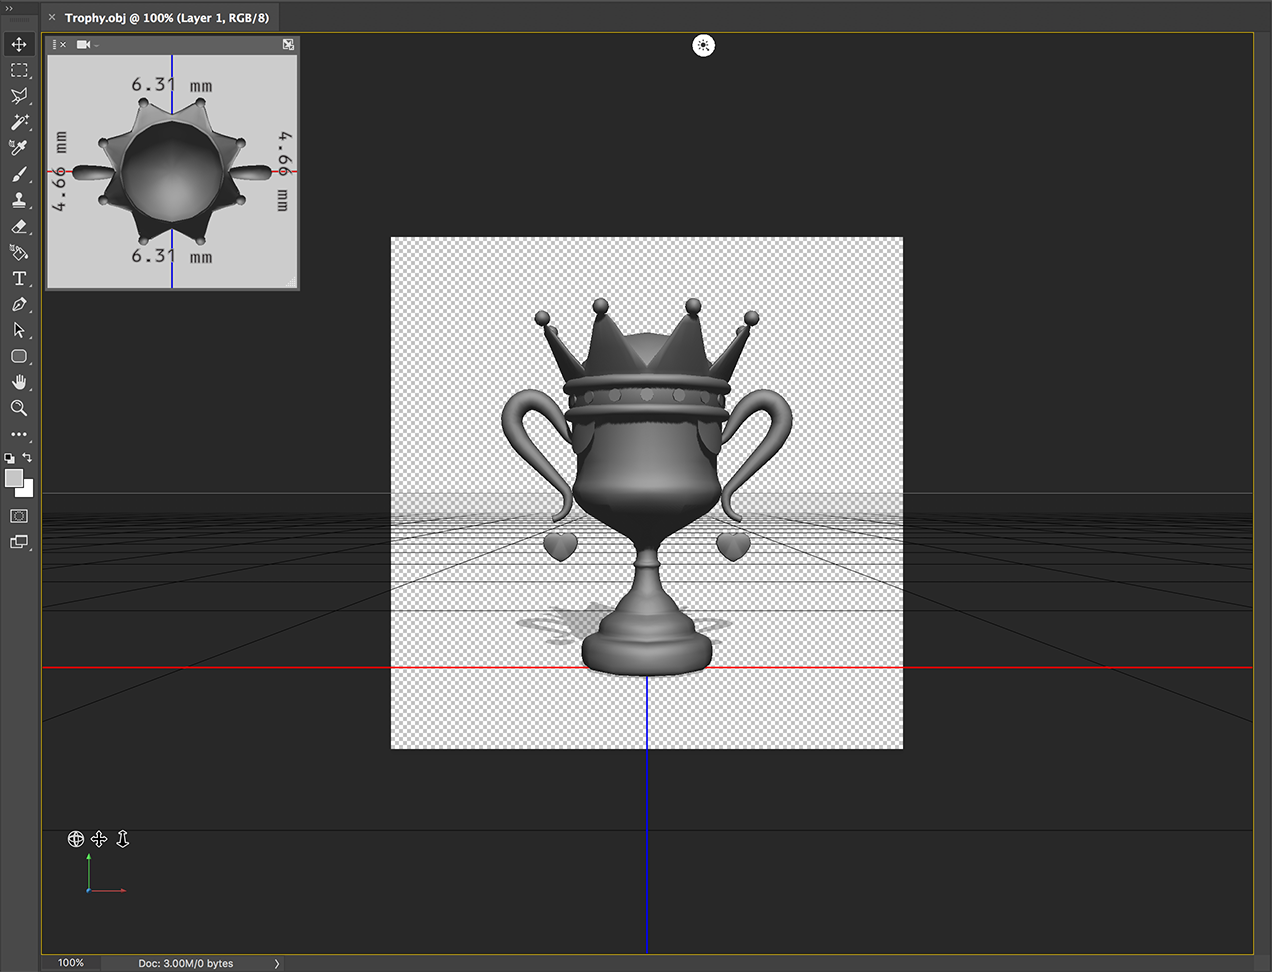
Now we have our model successfully imported in Photoshop.
Diffuse, Lambert or Unlit Texturing using Photoshop
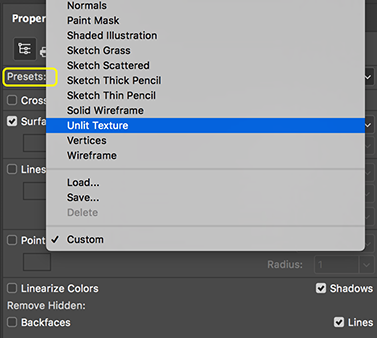
In the Properties panel we can specify what kind of material we are using. If you want to paint an Unlit material, click on the Presets drop down and select Unlit Texture. If you want Lambert or Diffuse material, change the Presets to Default.
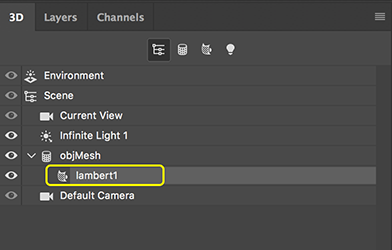
Then, in the 3D panel, select your mesh. Now, you can select the brush tool and start painting on the surface of the model.
You can change the 3D model’s texture size by going to the Layers panel, then double clicking on the diffuse texture. This will open up your texture. Then, select Image -> Image Size…. This will open the Image Size window. In this window you can change the Width and Height of the texture.
PBR Texturing Using Photoshop
Lens Studio supports high quality PBR (Physically Based Rendering). PBR materials in Lens Studio need the following three texture inputs.
Base Texture
Defines the overall color of the material.
Normal Map
Normal maps allow you to fake the illusion of depth and detail on a 3D model without actually adding any 3D polygons.
Normal maps uses RGB information that corresponds to X, Y and Z in 3D space.
Material Params
Material Params is a unique texture to our engine. It is a single texture that uses RGB channels to represents Metallic, Roughness and Ambient Occlusion. In the Material Params texture the Red channel represents Metallic, the Green channel represents Roughness and the Blue channel represents Ambient Occlusion.
The Metallic input controls how metal-like your surface will be. The Roughness controls how rough the material is. The Ambient Occlusion controls how dark the 3D model’s creases, holes and surfaces are.
To start painting texture(s), in the Photoshop's 3D panel, select the mesh that you want to paint.

Then select the brush tool by pressing B on the keyboard.
Now, we can start painting the Diffuse which is the Base Texture in Lens Studio.
To paint the Roughness texture we have to change the target texture into Roughness. In order to do this, after selecting the brush tool, go to Properties panel and click the Paint On drop down menu. Then, select Roughness.
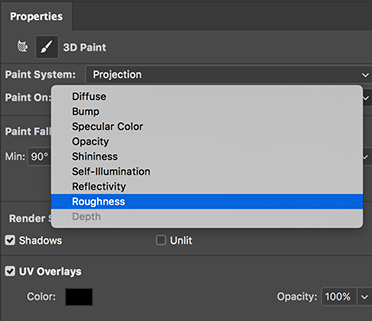
Then, when you start painting, a new window will open to create a roughness texture. Change both the Width and Height to 1024 and then, select OK.
Now you will be able to paint the Roughness texture.
In order to paint the Metallic texture, after selecting the brush tool, go to the Properties panel and click the Paint On drop down menu. Then, select Reflectivity. Reflectivity in Photoshop represents Metallic in Lens Studio.
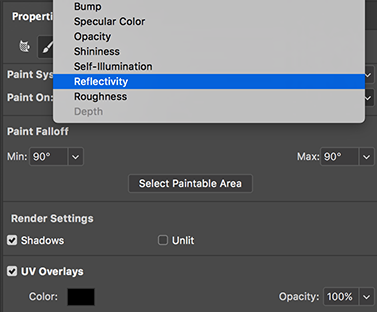
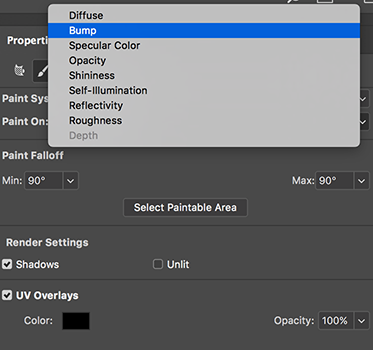
Currently, Photoshop does not support Normal Map painting but we can use the Bump texture and change it to normal map after. To paint the Bump map, after selecting the brush tool go to the Properties panel and click the Paint On drop down menu. Then, select Bump.
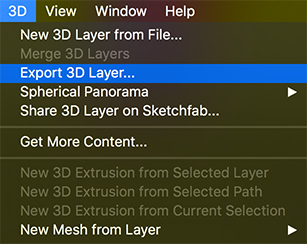
When you are done painting the texture(s), we have to export the textures to the PNG file format by selecting 3D -> Export 3D Layer… from Photoshop’s menu.
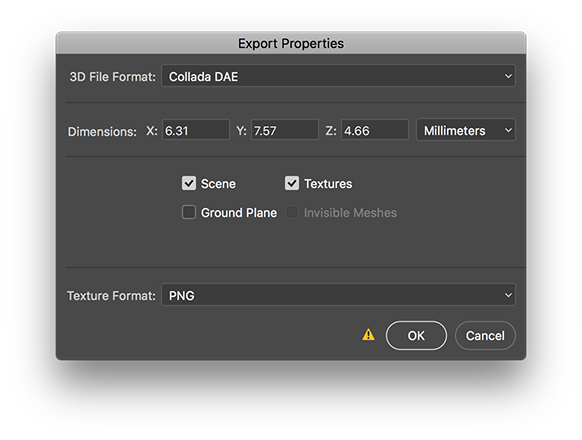
This will open up the Export Properties window. In this window, make sure both Scene and Textures are selected. Then, change the Texture Format to PNG and click the OK button.
Once the export is done, we need to convert the bump map to a normal map and also create an ambient occlusion map based on the normal map.
Create a Normal Map using Photoshop
To create a Normal map, from Photoshop’s menu, select File -> Open… and select the Bump texture that you just exported from Photoshop. After you opened the Bump texture in Photoshop, select Filter -> 3D -> Generate Normal Map from Photoshop’s menu.
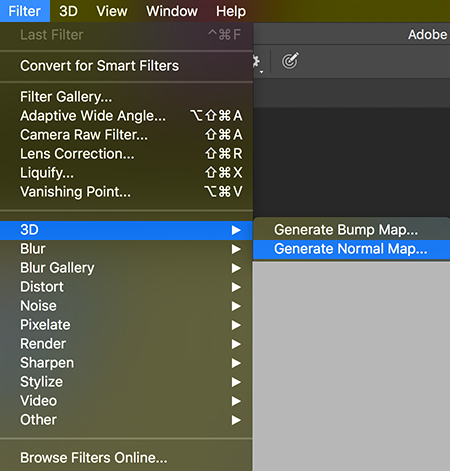
This will open the Generate Normal Map window. In this window you can customize the look of the normal map.
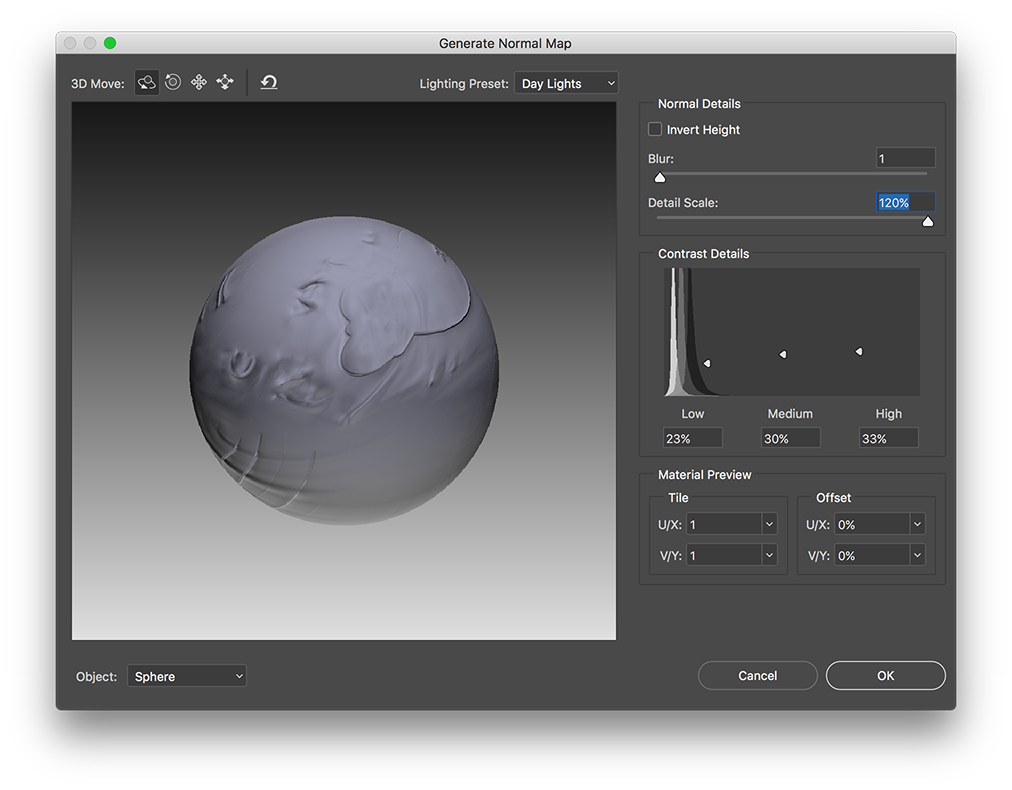
When you are happy with the result click OK and then save the image as a PNG by selecting File -> Save from Photoshop’s menu.
Create Ambient Occlusion Map using Photoshop
To create an Ambient Occlusion map, open the normal map file that we just created. Then, select Image -> Adjustments -> Black & White from Photoshop’s menu. This will turn the image into a black and white image.
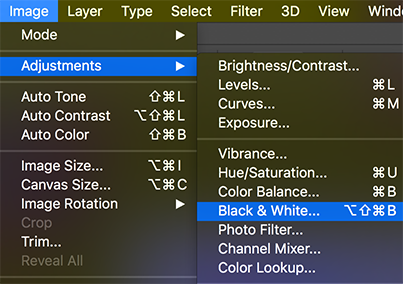
Then we have to add more contrast to the image so we have a pure white color as the background.
Ambient occlusion multiplies the texture on the 3D model to make the edges darker. Make sure the background of the Ambient Occlusion texture is pure white to ensure that it won't change the look of the Base Texture or color of the 3D model.
In order to do this, select Image -> Adjustments -> Brightness/Contrast....
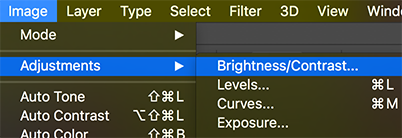
In this window, tweak both the Brightness and Contrast sliders until you have a good contrast for your texture.
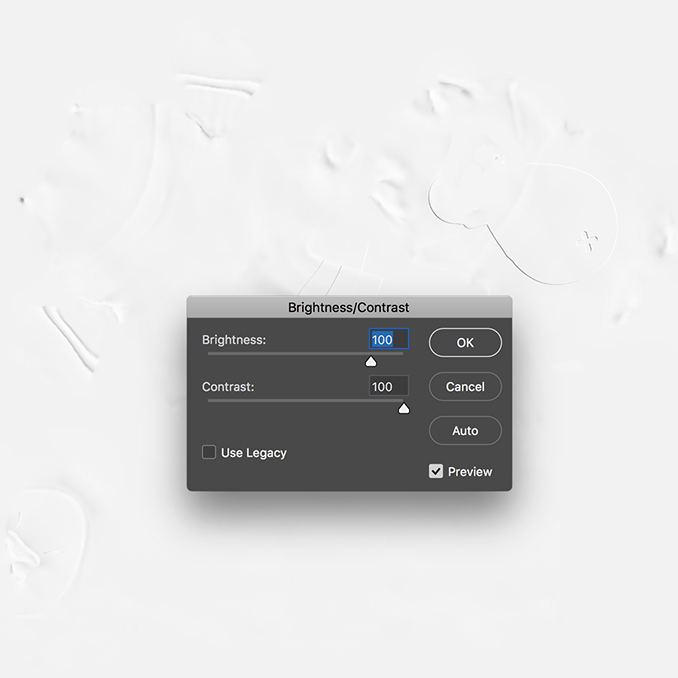
When you are happy with the result click OK and then, save the document as a PNG by selecting the File -> Save As... from Photoshop’s menu.
Create a Material Params Texture
To create a Material Params texture, we need to create a new document in Photoshop by selecting File -> New… from Photoshop’s menu. Make sure the Color Mode drop down is set to RGB Color then select the Create button.
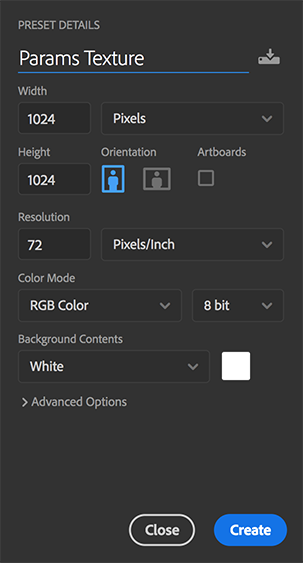
The Material Params texture is a single texture that uses RGB channel information to represent R for Metallic, G for Roughness and B for Ambient Occlusion.
We need to import our Metallic, Roughness and Ambient Occlusion textures into the new document. This can be done by selecting the textures and dragging then dropping them into the blank document that we just created in Photoshop.
Now we should have three Layers in our Photoshop’s document.
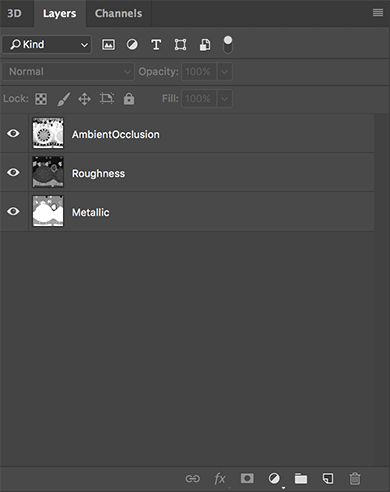
To set the Metallic layer to only to be shown in the Red Channel we have to right click on the Metallic layer and select Blending Options….
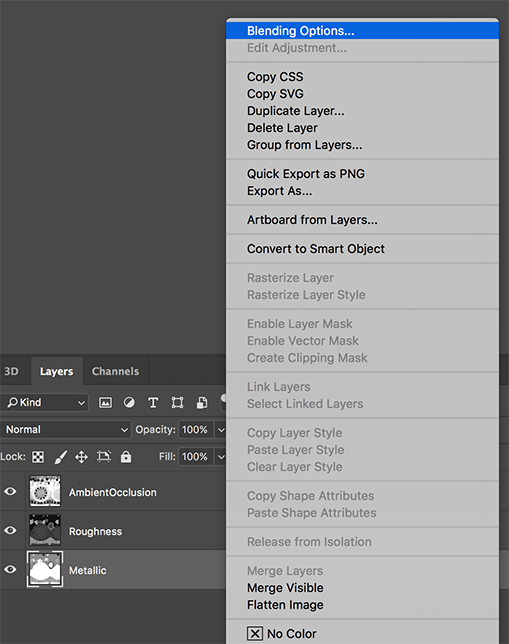
This will open the Layer Style window. In this window, under the Advanced Blending options find Channels. Keep R checked and then un-check both G and B. Then, click the OK button.
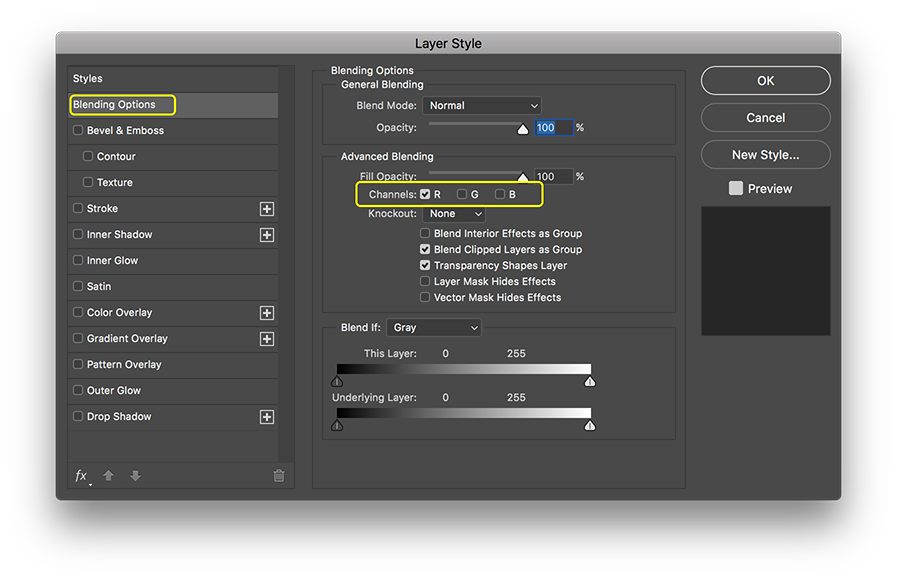
Now you have the Metallic layer set to the Red Channel.
Repeat the same process for Roughness by setting it to the Green channel, and then for Ambient Occlusion by setting it to the Blue channel.
After setting all the layer channels, save the document as a PNG by selecting File -> Save As... from Photoshop’s menu.
Now we should have the Base Color Texture, Normal Texture and Materials Params Texture that we can import into Lens Studio.
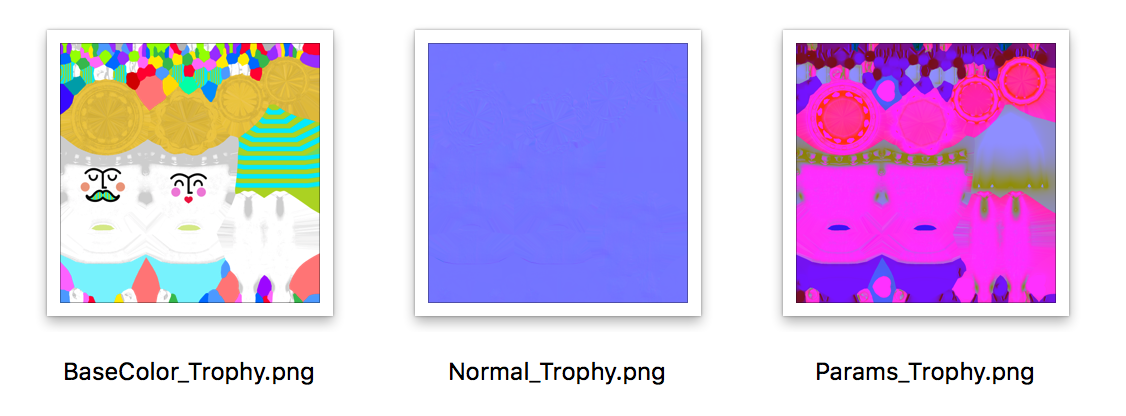
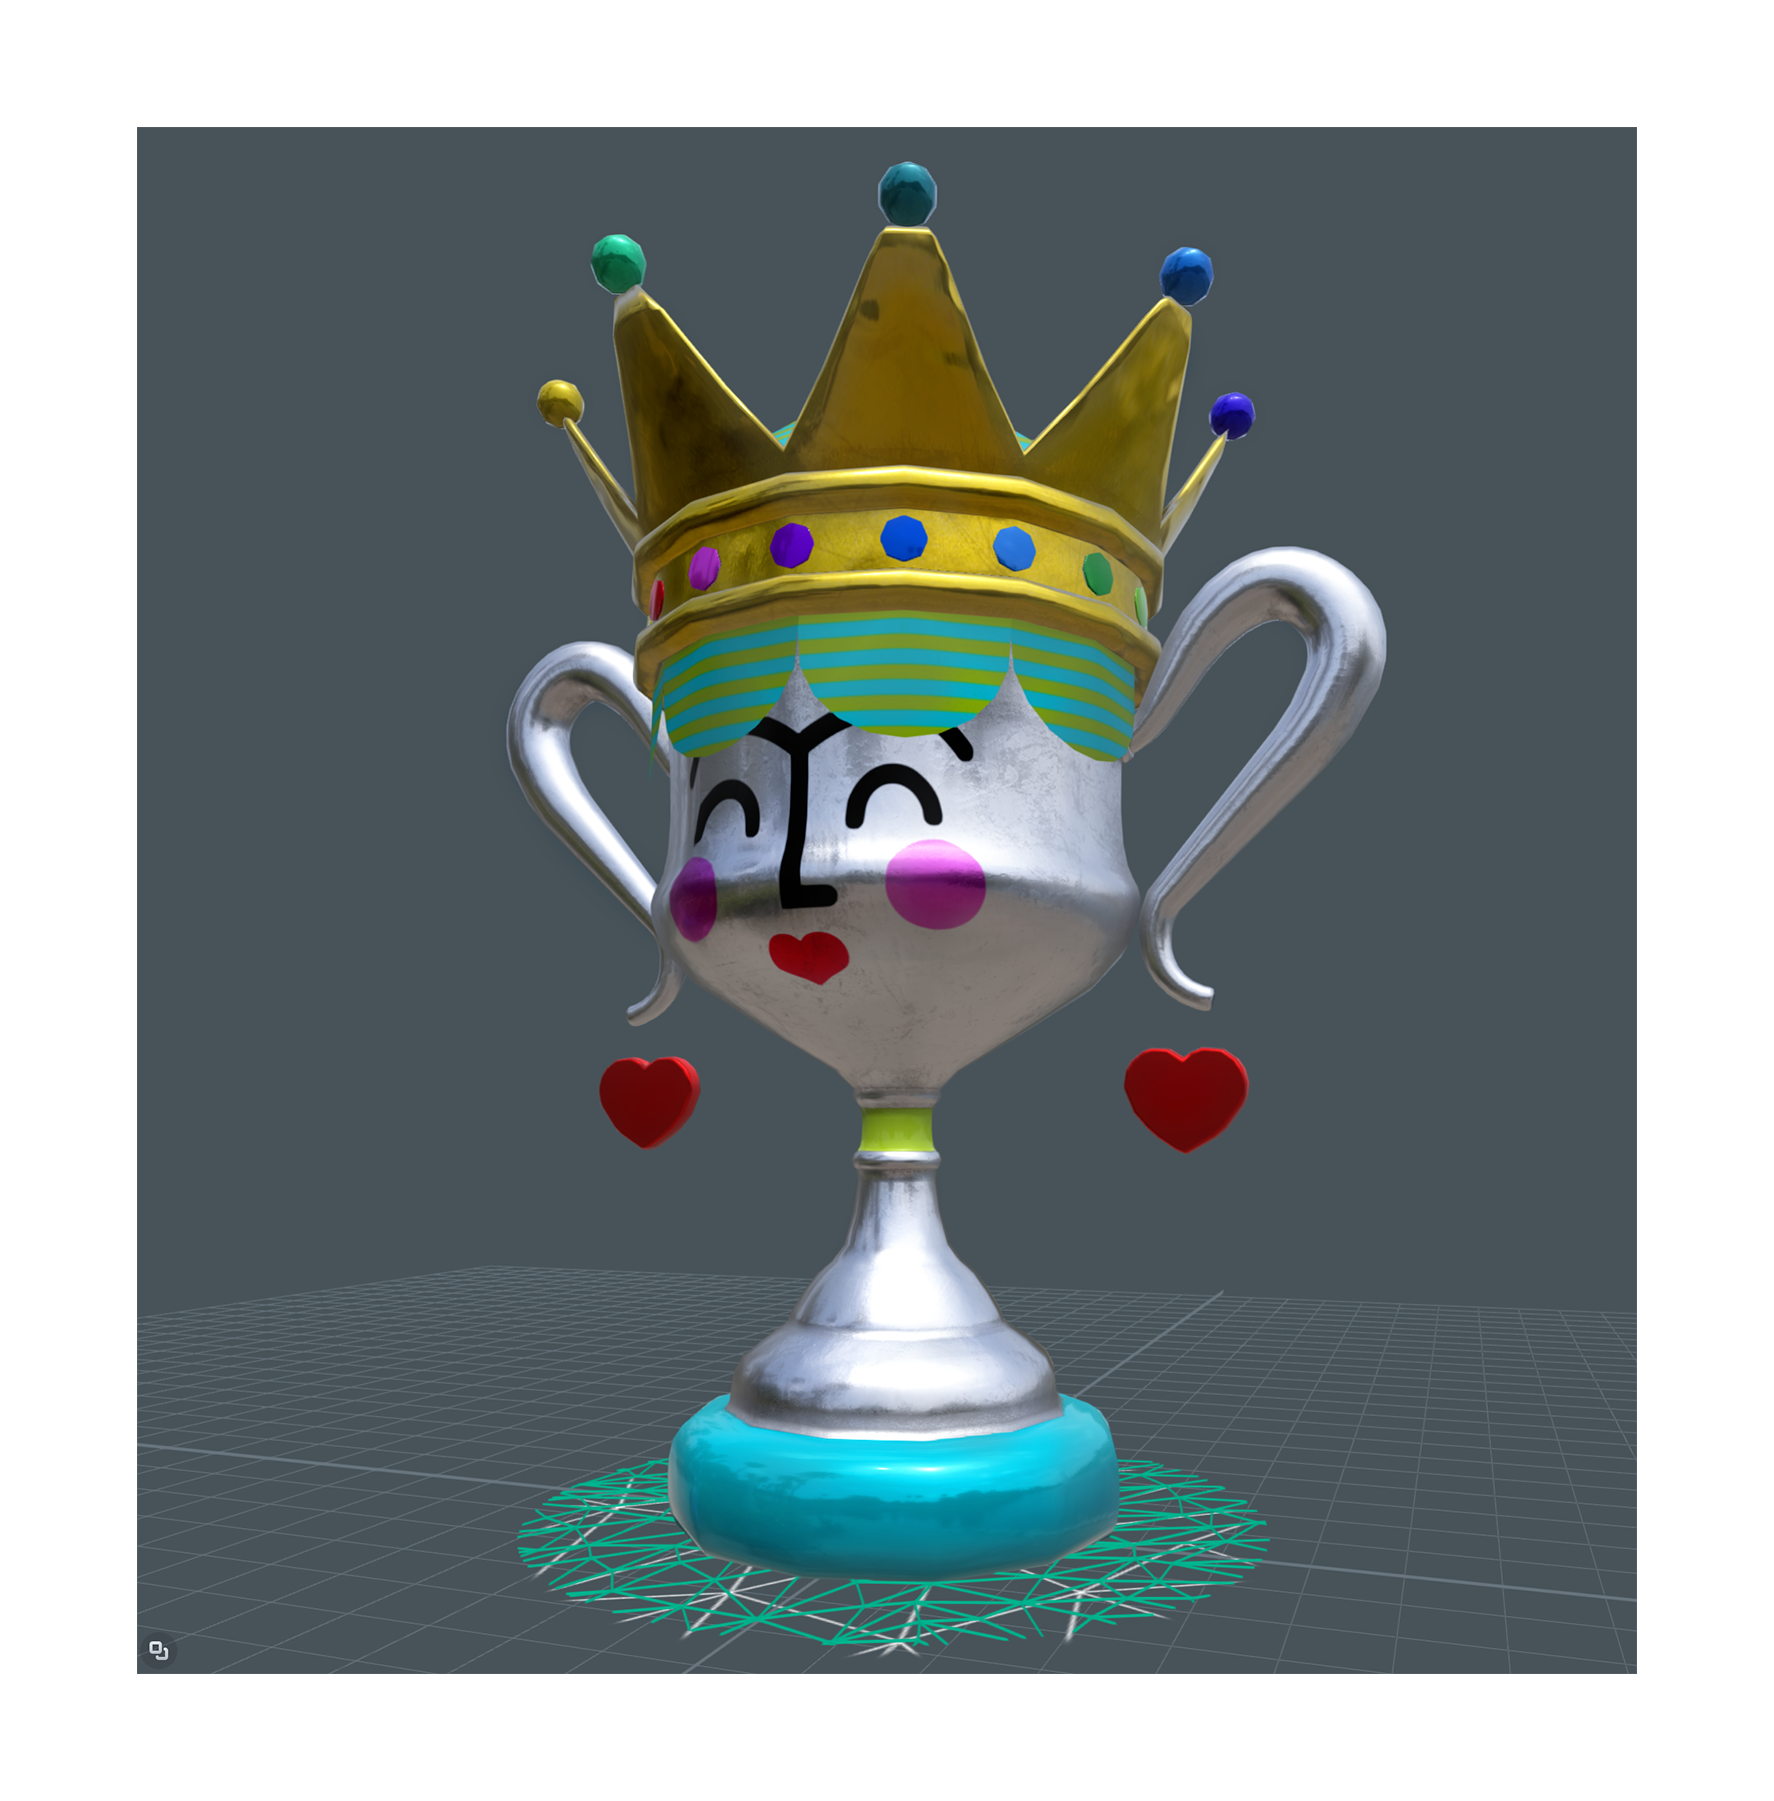
If you want to learn more about importing 3d models and textures into Lens Studio, follow the 3D Object Import guide.