Overview
A material is a container for one or more shaders, referred to as “passes.” These shaders described how something should be rendered, such as how an object's color, how a flat plane might display a certain texture, how a color filter might effect the look of the Lens and more!

Take a look at how you can create your own shaders/passes in the Material Editor overview.
How Materials and Shaders are represented
In the Asset Browser panel, materials and passes can be distinguished by their icons. For example, “uber” is a pass used in “Uber PBR,” which is a material.
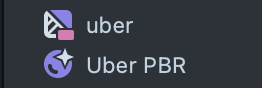
Double clicking on a pass in the Asset Browser opens the Shader Graph. Double clicking on a material in the Asset Browser opens the Inspector panel.
To add a pass to a material, click “+ Add Pass” in the material’s Inspector panel.

Materials can also be imported from the Asset Library or exported and imported as an .lsmat from a current Lens Studio project.
Creating and Using Built-in Materials
In many cases, you can use the built-in materials to display your content, without worrying about passes. For example, if you just wanted to display an image, without caring about lighting, you can use the built in "Unlit" material. Or, if you want to care about lighting (e.g. on a 3D object), you can use the "PBR" material.
This guide provides instruction on the process of creating and editing basic materials for 3D objects in Lens Studio, as well as an overview of the default material types available in Lens Studio.
When adding default materials, Lens Studio will automatically add the associated shader.
Adding a Material
There are three ways to add a Material to a Lens Studio project:
- Creating a new Material
- Importing a Material from a FBX file
- Importing a Material from an existing Lens Studio project
The following sections cover each of these methods.
Creating a New Material
You can create a new Material from the Asset Browser panel.
First, in the Asset Browser panel, click +.
Select Material, then select a material type (for example, "Diffuse").
You can create a new Graph Material this way by selecting any material with "Graph" in the name (for example, "Graph PBR").
See the Material Editor guides for more information on editing Graph Materials.
Importing a Material from an FBX File
When you import a 3D Object (FBX) into your project, any materials included in the FBX definition will be automatically imported as well.
Once your FBX is imported, you should see the Material under your 3D Object in Asset Browser panel.

For more information on importing and exporting 3D objects, visit the 3D Object Import and 3D Object Export guide.
Importing a Material from an Existing Lens StudioProject
In the Asset Browser panel, select + From Files, or drag the .lsmat file into Asset Browser panel.
Navigate to the material file from your previous project and select it.
Select Open.
You should see the selected Material in your Asset Browser panel.
Material Types
There are a number of default Material types built into Lens Studio.
Diffuse
A basic shaded material. It makes use of scene lights to smoothly shade the mesh, and supports environmental maps as well.

Unlit
A flat, unshaded material. Supports texture but does not use any lighting information to shade the object.

Occluder
This material can be applied to an object to occlude, or mask, other objects.

For more information on how to create your own occluder objects, visit the Occluder guide.
PBR
This is a physically based rendering material that simulates the way light works in the real world.

To read more about how to set up PBR materials in Lens Studio, please visit the Substance Texturing guide.
Matte Shadow
This material is applied to objects that receive shadows, and render only as the received shadow. This is useful when you would like to ground other objects in your scene, adding an extra level of realism.

For more information on how to cast and receive shadows in a Lens, visit the Light and Shadow guide.
Default Material Properties
The following breakdown provides information on the properties shared by Lens Studio's materials.
Depth Test
Enables depth-sorting.
Depth Write
Enables writing to the depth buffer.
Depth Function
The comparison method used to sort the depth buffer. Defaults to LessEqual.
Two-sided
Whether the material renders on both sides of a mesh face.
Color Mask
Enables toggling visibility of selected color channel mask of this material
Cull Mode
Whether the material culls front or back faces, default to back.
Blend Mode
The material's blend mode. Available options:
- Disabled
- Normal
- Multiply
- Add
- Premultiplied Alpha
- Glass
- Colored Glass
- Alpha Test
- Alpha To Coverage
- Screen
- Min
- Max
Polygon Offset
Changes the position that each polygon gets drawn.
Frustum Culling
Determines if vertices not on screen would be drawn. Leave as Auto for best performance.
Instance Count
Determines amount of instances of this material being drawn in the scene.
Vertex Color
Specifies the purpose for which vertex color will be used. Requires vertex color to be supplied by the mesh.
Base Color
Specifies the base color (albedo) of the material if the base texture is disabled. Multiplied with the base texture otherwise.
Base Texture
The texture used as a color (albedo) source.
| Texture | The texture used as a color (albedo) source. |
| Texture UV | Specifies the UV set used for sampling this texture. |
Opacity Texture
Enables use of a separate texture as the alpha source for blending. If disabled, the Base Color's alpha channel is used for opacity.
| Texture | The texture used as an opacity source. |
| Texture UV | Specifies the UV set used for sampling this texture. |
Recolor
Allows recolor of the material by channel.
Detail Map
Add a secondary texture that overlays on top of the main textures
| Texture | The texture used for detail map. |
| Texture UV | Specifies the UV set used for sampling this texture. |
Detail Mask
Controls opacity of the detail map.
| Texture | The texture used for detail mask. |
| Texture UV | Specifies the UV set used for sampling this texture. |
Normal Map
Enables the normal map texture and normal mapping.
| Texture | The texture used as a normal source. |
| Texture UV | Specifies the UV set used for sampling this texture. |
Emissive
Enables the emissive texture.
| Texture | The texture used as an emissive color source. |
| Texture UV | Specifies the UV set used for sampling this texture. |
| Color | The color of the emissive. |
| Intensity | Multiplies the existing emissive color. |
Simple Reflection
Replaces the default PBR environment mapping with a simple lookup from a regular texture (no hdr, no roughness, no fresnel, etc.). It can even be used with unlit materials. The reflection lookup technically assumes a spherical environment map, which is a circular shaped texture.
| Texture | The texture to use as a reflection map. |
| Intensity | The strength of the reflection effect. |
| Modulation Map | Modulates reflections based on a texture input |
Rim Highlight
Enables rim highlighting, aka Fresnel.
| Color | Specifies the color of the rim highlight. |
| Intensity | Factor multiplied with Color. |
| Exponent | Controls the tightness of the rim highlight. |
| Invert | Allows inverse of the rim highlight. |
| Rim Color Texture | Allows the use of a texture to modulate the rim highlight color. |
Lighting
Enables direct and indirect (ambient) lighting. Disabling this creates an unlit (flat) shader.
| Diffuse | Enables direct and indirect diffuse lighting. Can be disabled as an optimization on pure metals. |
| Specular | Enables direct and indirect specular lighting (specular highlights and reflections), disabling this would produce a material only lit diffusely. |
| Metallic | 1 means metal, 0 means non-metal. Multiplies the metallic (R) channel of the Materials Params texture if enabled. |
| Roughness | 1 means completely rough, 0 means smooth and shinny. Multiplies the roughness (G) channel of the Materials Params texture if enabled. If roughness is 1 and metallic is 0, it is more efficient to disable Specular. |
| Material Params | Texture input with special colored channels, R - metallic, G - smoothness, B - ambient occlusion |
| Camera Reflections | Use the live camera feed as the source of environment map, this replaces users' environment map. Adjust its Roughness for blurring of the envmap. |
| Specular AO | Allows AO to influence indirect specular lighting (reflections) |
| Baked Shadows | Will use the baked shadow texture to shadow one or more light |
Fizzle
Allows the material to fizzle in and out based on a noise function, driven by the Transition parameter, 0 is fully visible and 1 fully invisible.
| Transition | The strength of the Fizzle effect |
Tone Mapping
Normally all materials are rendered with HDR tone mapping enabled so they fit into the 3D scene correctly, however, for some uses like UI elements or materials specific blend modes, you might want to turn off tone mapping.
Transformed UV
Allows Tiling and Animation of textures, be sure to set the Texture UV to the correct Transformed UV accordingly.
For more information on creating textures such as Material Params, visit the Texturing guide.
Vertex Color Material
If your model has vertex color information that you'd like to use as the base color of its material, you can create a custom material that does so in a few steps.
Create a new Material.
On the new Material, disable the Base Texture property, set Vertex Color property to Base Color.