Volumetric Cloud
The Volumetric Cloud sample project will walk you through Volumetric Cloud rendering in Lens Studio. In order to rendering realistic clouds in this sample project, a technique called raymarching is used in Lens Studio. At a high level, raymarching works by projecting rays out from a camera, and stepping forward, or "marching” along the direction of the ray.
The Volumetric Cloud sample project relies heavily on raymarching and signed distance field concepts which are outside the scope of this document. While it’s not necessary to understand raymarching to use the project, if you want more information about how these techniques work, check out the external resources linked to at the bottom of this guide.
Examples
This sample project comes with several examples that you can explore individually to see applications of Volumetric Cloud technique.
In the Scene Hierarchy panel, check and uncheck the check boxes of each example to activate the various examples.
Basic Procedural Shapes
This example shows you how to procedurally draw shapes with analytical functions. The functions that are being showcased are using signed distance functions.
In the cloud material, it first start by applying any translation or rotation to the raymarching point. Then, it will apply distortion. This helps give the clouds their characteristic puffy shape. Lastly, it will then calculate the actual shape of our cloud using SDF functions.
For this example, you will use formulas to procedurally draw the shape of a Torus, Box, and Frame, and you will also use a Gradient node to morph between shapes. Finally, this data is sent to the Raymarching Cloud Code Node to calculate the final lighting and color.
If you feel adventurous, this graph material is very flexible. It works like puzzle pieces; you can try to modify and connect each block to achieve all kinds of shape combinations.
You can change the shape of the cloud by changing the sign distance function in the graph. Check out the Raymarching section of the Code Node Guide for a helpful list of SDF shapes.
Volumetric Cloud can be lit by three different types of lights: Directional, Ambient, and Point Light. A good rule of thumb is to use as few lights as possible; observing each light carefully before adding another one can help you with the lens performance. Each light added creates an extra loop the Volumetric Cloud shader has to calculate.
Environment Light and Spot Light are not currently supported.
Depth Sorting
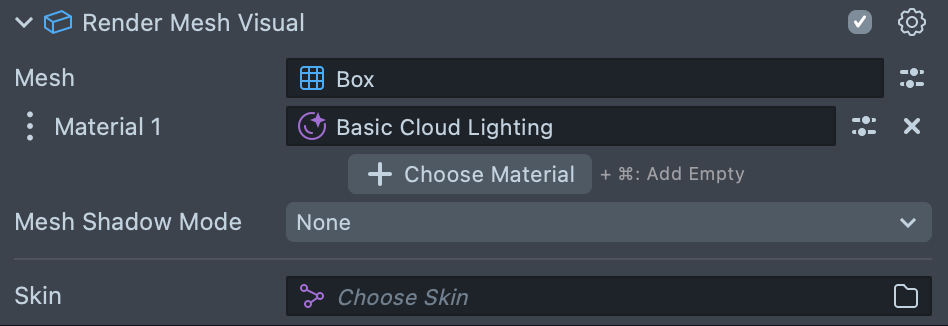
This example demonstrates how to create clouds around other 3D objects. The material used here is a simplified version of the Basic Cloud Lighting material with the Texture shape block removed and left only the controls for drawing Procedural Primitives shapes.
You can add your own 3D object to the cloud by placing it in the scene and setting its layer to “depth”. You can also set the material Blend Mode of the 3D object you would like to use for depth sorting to be Disabled. You may also enable the Depth Write.
Continuing with the same raymarching method, the project has combined three spheres into a cartoony cloud-like shape. While the cloud is drawn onto a box mesh, it doesn’t have any information of how each point in the cloud relates to another 3D object in the scene. Studio can only sort them as if its sorting a box mesh with the moon:
In order to render the moon in the cloud, you will need to know the depth values in the scene for 3D objects, which is stored in a Depth Render Target. This texture is assigned to both the main camera and the material texture input under the Enable Scene Depth checkbox.
Besides using the standard raymarching technique, the next step is to perform an additional check using the Depth Render Target to find where those 3D objects are in the scene.
The following step is to compare them with where the cloud is in relation to the camera. If there’s a 3D object in between the camera and the cloud, the raymarching stops and returns what has been accumulated; otherwise, it continues to draw the rest of the cloud normally.
Finally, the Depth Test is set to disabled to allow the cloud material to take control of blending everything together.
Shown below is the final result:
More about the use cases of Depth Render Target, you can visit the documentation about the Depth Render Target.
Signed Distance Field (SDF) Texture Shapes
The basic shape of a cloud can also be stored in a texture as a distance field. While marching along the ray, the shader will look up the SDF texture at each step and samples the color and density. The material used here is a simplified version of the Basic Cloud Lighting, we removed the Procedural Primitives block and left only controls for drawing Texture shapes.
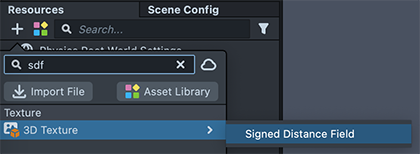
You can create your own SDF textures from any mesh with Lens Studio 4. Before you do so, make sure the 3D mesh you intend to use is solid and merged into one piece. After importing it into the Studio, navigate to Resource panel > + > 3D Texture > Signed Distance Field.
To learn more, please out the Signed Distance Field Generator.
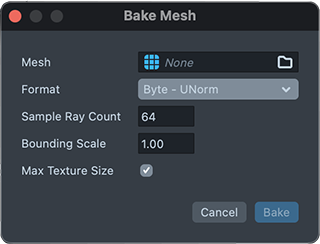
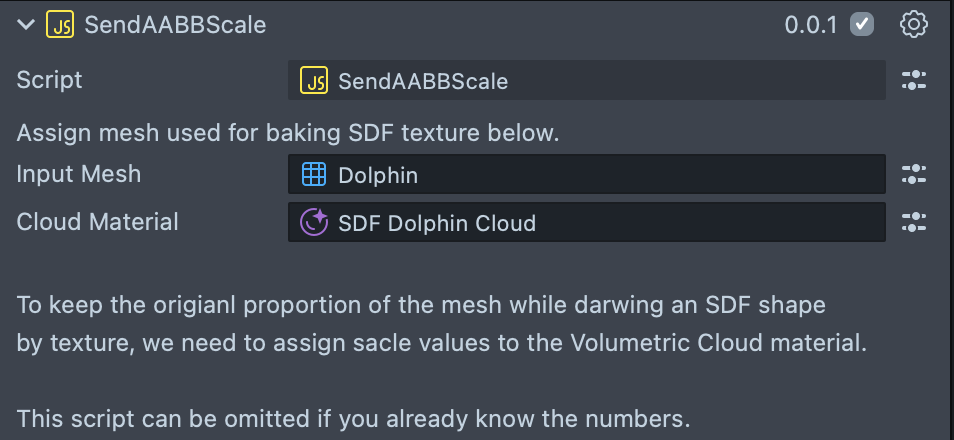
Since the project is using a default box mesh to render the cloud, there is no way to access the bounding box values of the original mesh used to bake the SDF texture. The Dolphin example shows how to send the scale values from a script to make sure the cloud renders proportionally to the original mesh. If you already know the bounding box values of the original mesh, you can omit the script and instead fill in the numbers directly under Bounding Box Scale on the material, as demonstrated by the Heart and Dino example. You can also remove the original mesh from the project to keep the project lighter.
Advanced Example
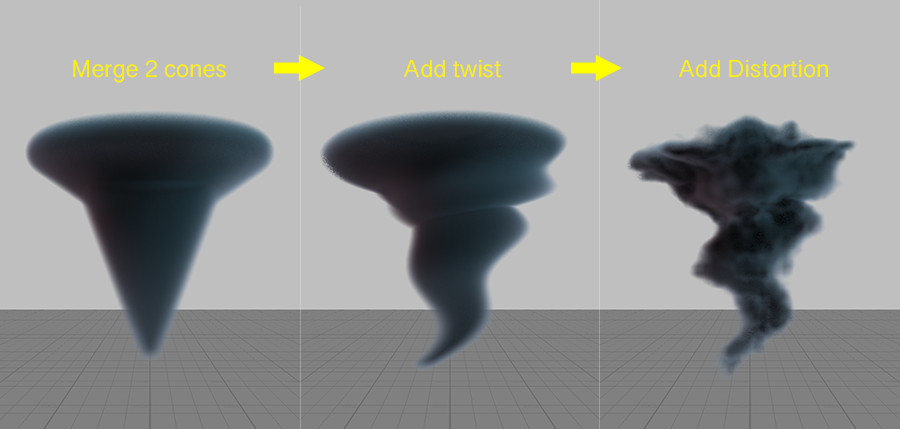
This more advanced example demonstrates using 2 base shapes to create a tornado. With a bit of help of animated rotation, distortion, and a twist, you can bring volumetric cloud rendering to the next level.
We combine 2 procedurally drawn cone shapes to make the basic funnel shape of a tornado. With the twist function connected after the Distortion block, we can ensure the swirl will not impact the 3D noise pattern.
Finally, this tornado material has added a few more nodes under the main Raymarching Cloud code node. Specifically, the Surface Position is being used to drive the seed of the simplex noise. The code node multiplies this noise with the point light color to output the final lightning effect.
The flying cow and debris were made by using the GPU Particles with the mesh instancing. Check our 3D Mesh Particle example or the Rocket Particle asset for more use cases.
Volumetric Cloud Structure
Mesh
The mesh used here is a container to draw the volume into. A default box mesh is the best option for Volumetric Cloud since it only has 12 triangles, whereas a sphere has 760; a box will be cheaper to render. Note that you can use a Box even when using an SDF texture as an input. The shape of this mesh is not related to the shape of the final cloud, so there’s no need to change it into a different mesh to match your creation.
Material
UI Parameters
- Base Color: Specifies the base color of the cloud, it multiplies with the final color blending.
- Cloud Density: The density multiplier of the cloud. The final density is determined by several factors: distortion noise texture(if enabled), distance from the camera to the point position, and Cloud Density multiplier.
- Enable Dithering: Makes clouds look smoother. To remove the artifacts of each step sample and reduce the look of “slides,” we add a random value to the entry start point of the ray.
- Volume Steps: The number of marching steps used for drawing the cloud. Higher numbers will give you better overall quality, but also have an impact on the lens FPS.
- Lighting
- Enable Shadow: Volumetric shadows are done by raymarching from the sampled point towards the light source. Disabling this can help with the lens fps performance. If disabled, light color and intensity will still be multiplied to the cloud color output.
- Shadow Steps: Marching steps for lighting the cloud, the greater the number will give you better overall accuracy but also have an impact on the lens fps performance. It is encouraged that users trying to achieve a desired look with as few lights as possible will help with the performance.
- Point Light Radius: The range point light will cover. Note that this affects all the point lights in your scene, instead of individual point lights.
- Enable Shadow: Volumetric shadows are done by raymarching from the sampled point towards the light source. Disabling this can help with the lens fps performance. If disabled, light color and intensity will still be multiplied to the cloud color output.
- Procedural Shape: Draws procedural cloud shapes.
- Animation Speed: The greater the value the faster one shape morphs to another.
- Morph Shape: When Animation Speed is at 0.0, you can scroll through each shape with this slider.
- SDF Texture: 3D texture which stores distance values. The shader will use these values to draw the base shape of the cloud. The texture wrap mode is usually set to ClampToEdge.
-
Scale: The scaler for the SDF texture cloud.
-
Offset: The offset of the SDF texture UV.
-
Bounding Box Scale: When an SDF textures’s original mesh bounding box is not a perfect cube, this parameter can help to set your SDF cloud proportionally back to the original scale. You could utilize the Send AABB Scale Script to set them automatically, or if you already know the values, simply fill in the numbers and delete the script along with the original mesh from your project for optimization. See the Dolphin example.
-
Check here to learn how to create your own SDF Texture: Signed Distance Field Generator.
- Boolean
- Mode: Mode used to combine Procedural and SDF Texture cloud shapes. This will only work when both Procedural Shape and SDF Texture are enabled.
- Flip Inputs : Inverse Procedural and SDF Texture cloud shape input. For example, while the Mode is set to Subtraction by default, the result returns
max(- Procedural shape, SDF Texture shape). With Flip Inputs enabled, it will returnmax(-SDF Texture shape, Procedural shape).
In the Material Editor, the Rotation Translation and Scale code node is placed before the Distortion code node by default, the volumetric cloud base shape (Procedural or SDF Texture) will rotate, scale and transform with the distortion noise pattern, it will appear more obvious when the rotation is animated.
You can also copy and reuse this code node after the Distortion to adjust individual base shapes if rotation is not a concern.
-
Rotation Axis: Rotates the entire volumetric cloud. Note to avoid using 0.0 in all 3 of the inputs; if you want to set the rotation back to zero, simply assign 0.0 to the Rotation Degrees.
-
Rotation Degrees: Angles rotated about the given axis.
-
Offset: Offset value of the cloud. Applies upstream to all Procedural shape, SDF Texture shape and Distortion.
-
Scale: Scaler for the overall cloud.
-
Distortion
- 3D Noise Texture: 3D noise texture for creating an FBM (Fractal Brownian Motion) noise. The shader will use this noise texture to generate distortion on top of the base cloud shape. Texture wrap mode should be set to Repeat.
- Texture Scale: The size of the noise texture; a smaller number creates a larger pattern. Usually you want all 3 axes to be the same value.
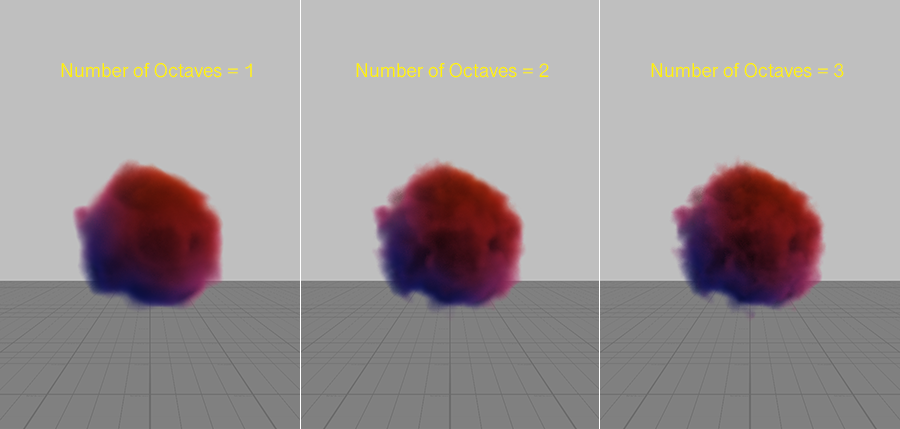
- Number of Octaves: Iterations that determine the amount of smaller detail in the noise; larger numbers will create finer details of noise, but will have an impact on the lens performance. 1 will be good for most use cases. Before deciding to use higher iterations, try to use different 3d noise textures or play with the Texture Scale to achieve desired large to small detail distribution.
Looking for more 3D noise options? Go to the Asset Library and search for the 3D Texture Noise Pack.
- Amplitude: Controls how protruded the noise pattern looks on the cloud.
- Speed: Controls how fast the noise pattern pans based on the Direction input.
- Direction: Panning direction of the noise pattern.
- Enable Scene Depth: Enable this to correctly sort any 3D mesh with the cloud. the same Depth Render Target texture should be assigned under the camera, any object under the same render layer will be “seen” and rendered on to the Depth Render Target. Without depth sorting, 3D objects will be clipped by the box mesh.
Remember to set the material Blend Mode of the object you would like to use for depth sorting to be Disabled. When the Blend Mode is not Disabled, the object will not appear in the depth resolve. If the object did appear in depth and it has transparency, then early z discard will mean there would be no fragments behind the object from which it could blend with.
Pass
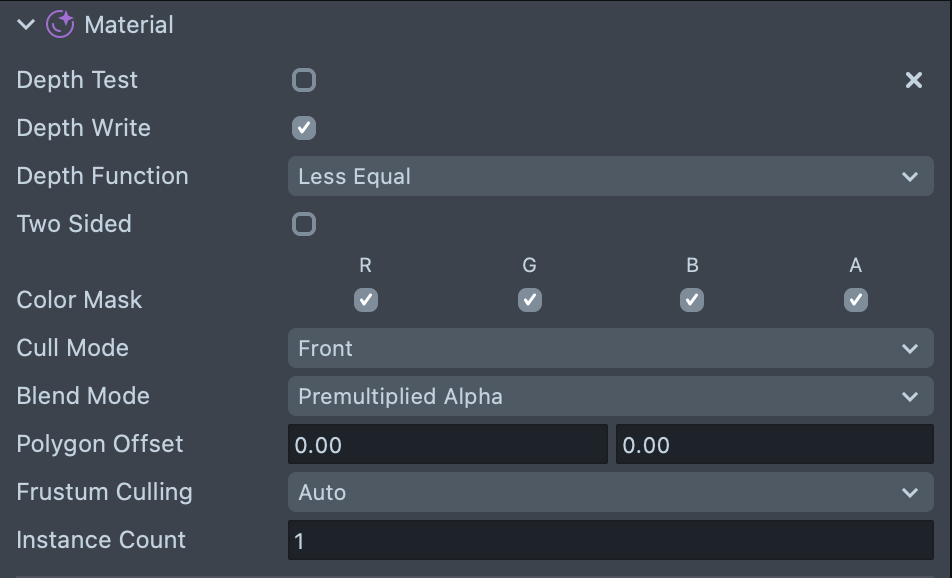
- Depth Test: Disabled. The Volumetric Cloud material sorts objects by comparing the distance from the camera to the Depth Render Target object position in local space. The shader only renders clouds when it’s in front of objects “seen” in the Depth Render Target.
- Cull Mode: Front. We only render the back faces of the box mesh to allow the camera to go inside of the volume. If the Cull Mode is set to Back, the entire cloud will be clipped when the camera is inside of the mesh.
- Blend Mode: Premultiplied Alpha. It multiplies the diffuse color with its opacity. By doing so, it avoid the dark edges around the cloud and keep its vibrancy.
Troubleshooting
Why is the depth sorting not working?
- For the material assigned to the 3D object you want to sort with the cloud:
- Blend Mode needs to be set to
Disabled. - Depth Write and Depth Test need to be
Enabledso the Depth Render Target can collect depth information of the 3D object.
- Blend Mode needs to be set to
- The Depth Render Target has to be assigned both to the Camera and the Volumetric Cloud material; check if the 3D object is drawn in the debug image.
- Make sure Enable Scene Depth is
Enabledunder the Volumetric Cloud material. - Check the render order of your scene objects, they need to render before the Volumetric Could. The numbers should be smaller.
Can I sort an object with transparency with the cloud?
Blend mode has to be disabled for your 3D object. When the Blend Mode is not set to Disabled, Studio will do manual depth sorting with transparent objects. Currently Volumetric Cloud will not work with objects with transparency. The workaround is to use the Discard node in your material graph or set the Blend Mode to Alpha Test or Alpha to Coverage.
Can I make an animated cloud using Body Mesh or Red Panda?
SDF generators can only bake a non-animated mesh to a SDF texture. Therefore the volumetric cloud SDF Texture cloud is limited. However, you can always animate procedurally drawn shapes like shown in the Advanced Example. For more examples, checkout Inigo Quilez’s work linked below.
Why is the Lens FPS so low?
There are several factors can have impact on the Lens performance:
- The Volumetric cloud is too close (filling the entire frame of the camera).
- Number of Octaves is too high, a value of
1is usually good for most cases. - Volume Steps or Shadow Steps value is too high. Higher the steps numbers causes a greater loop count, and the cloud can become heavier.
- Consider if you need to use the shadow. When Enable Shadow is checked, it means the shader will go through another loop to approximate how much light each point in the cloud blocks. More steps will make the lens heavier.
- Do you have more than 2 scene objects with cloud materials assigned? Try to combine them all into 1 with booleans. You can find how to do this in several examples under the material graph.
What’s Next?
For more information about related topics, here is a list of external resources that might help you to learn more about basic raymarching and volumetric clouds.