Ocean Tool
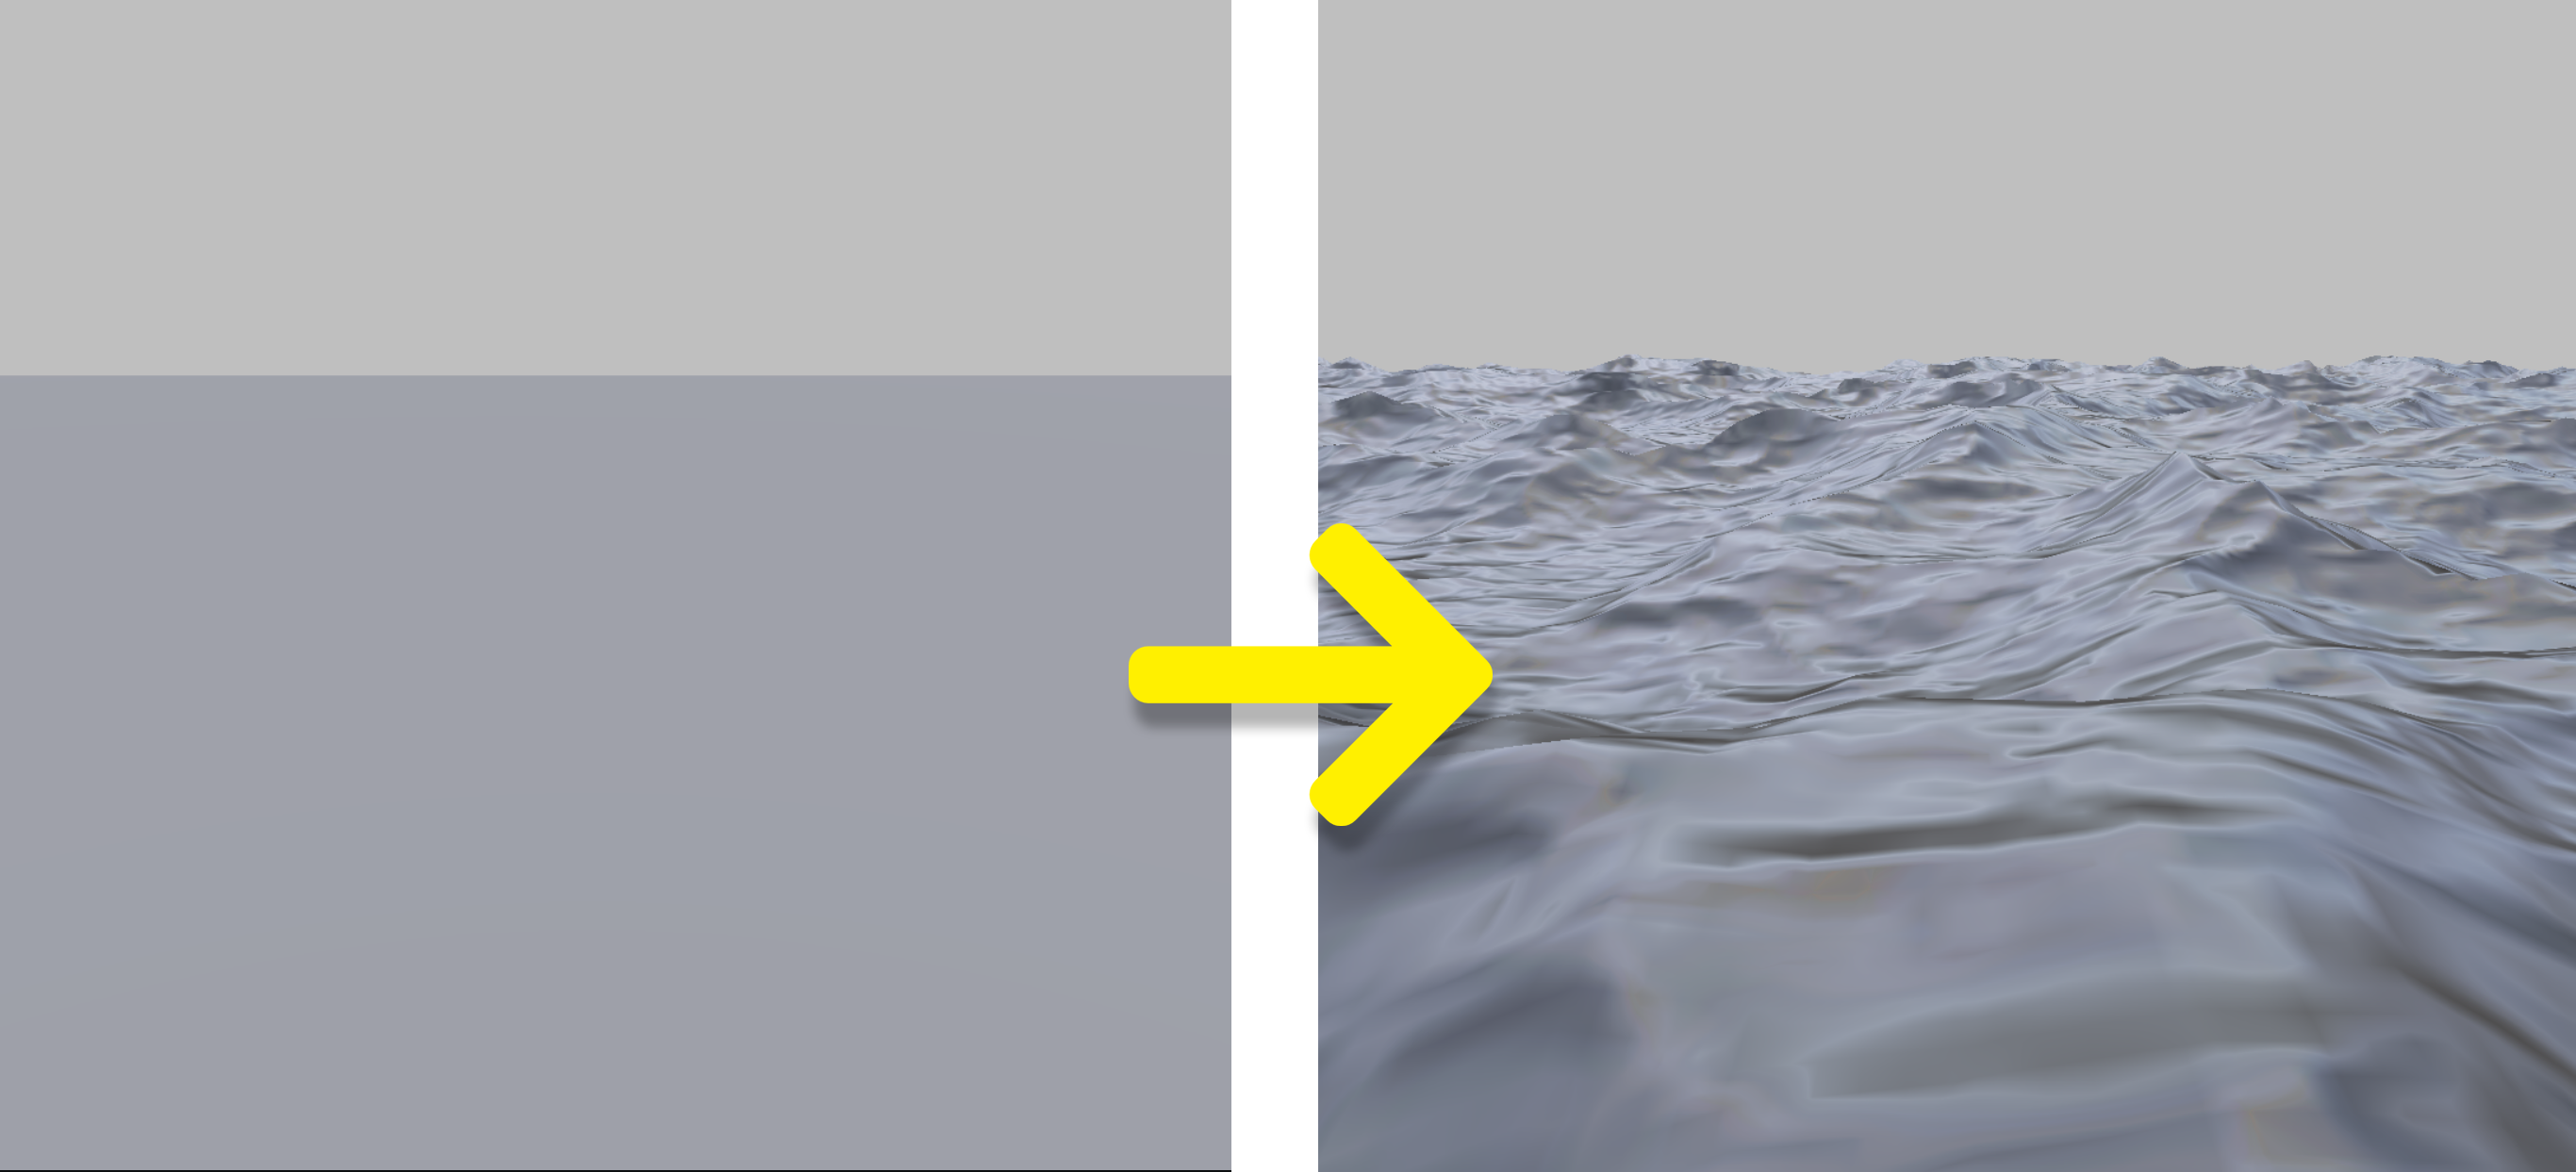
The Ocean Tool brings a realistic ocean to your Lens! This tool offers a range of features, including a dynamic wave simulation system, interaction using touch input, body segmentation to submerge the user, and objects floating on the water's surface. Additionally, you can create an immersive split-view waterline that shows the underwater environment and the surface above, just like when you are diving in real life!

This Ocean Tool asset can be found on the Asset Library for Lens Studio 5.4.0+.
How It Works
- The
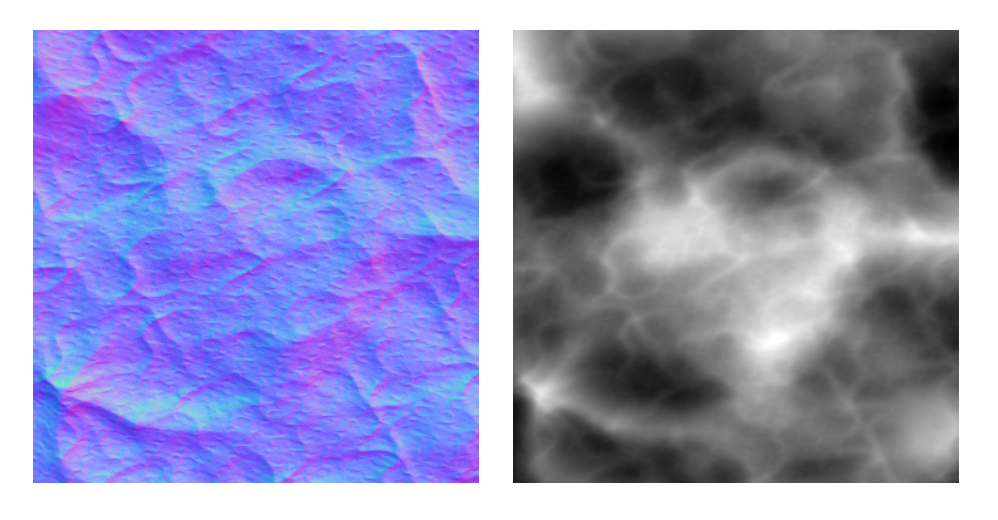
Ocean Surface Propertiesmaterial creates a noise and normal texture and draws them to theOcean NormalandOcean Heightmaprender targets. WhenTouch Inputis enabled under the Ocean Tool script, an additional fluid normal texture is also applied to theOcean Normalrender target.
- The
Ocean Toolscript assignsOcean HeightmapandOcean Normalrender targets to theOcean Surface shader. This shader then uses the heightmap to adjust its position in the vertex shader, and applies the normal texture in a PBR node for lighting.
- When
Float Objectsis enabled, the Ocean Tool script also assigns theOcean Heightmapto all shaders associated with the scene objects listed in theObjects For Floatarray. The shaders then adjust each object’s height to match the ocean.
- When
Split Viewis enabled, a screen space mask is drawn to distinguish areas above and below the water; ifWater Lineis enabled, it draws a line between the ocean’s surface and depths. The world ocean position is retrieved from the depth render target, allowing the identification of where the camera's near plane intersects the ocean and sampling of theOcean Heightmapalong the intersection.
- Enabling
Touch Inputallows the user to push the water around by tapping on the screen. This creates an additional displacement texture which is sent to theOcean Surface,Split View, and all materials assigned to meshes under theFloat Objects.
Tips
Try adding Device Tracking component under the camera with world tracking, and switch to interactive preview or the Back Camera. You can also experiment with different environment map textures or rotate the environment map to give the ocean a different look.
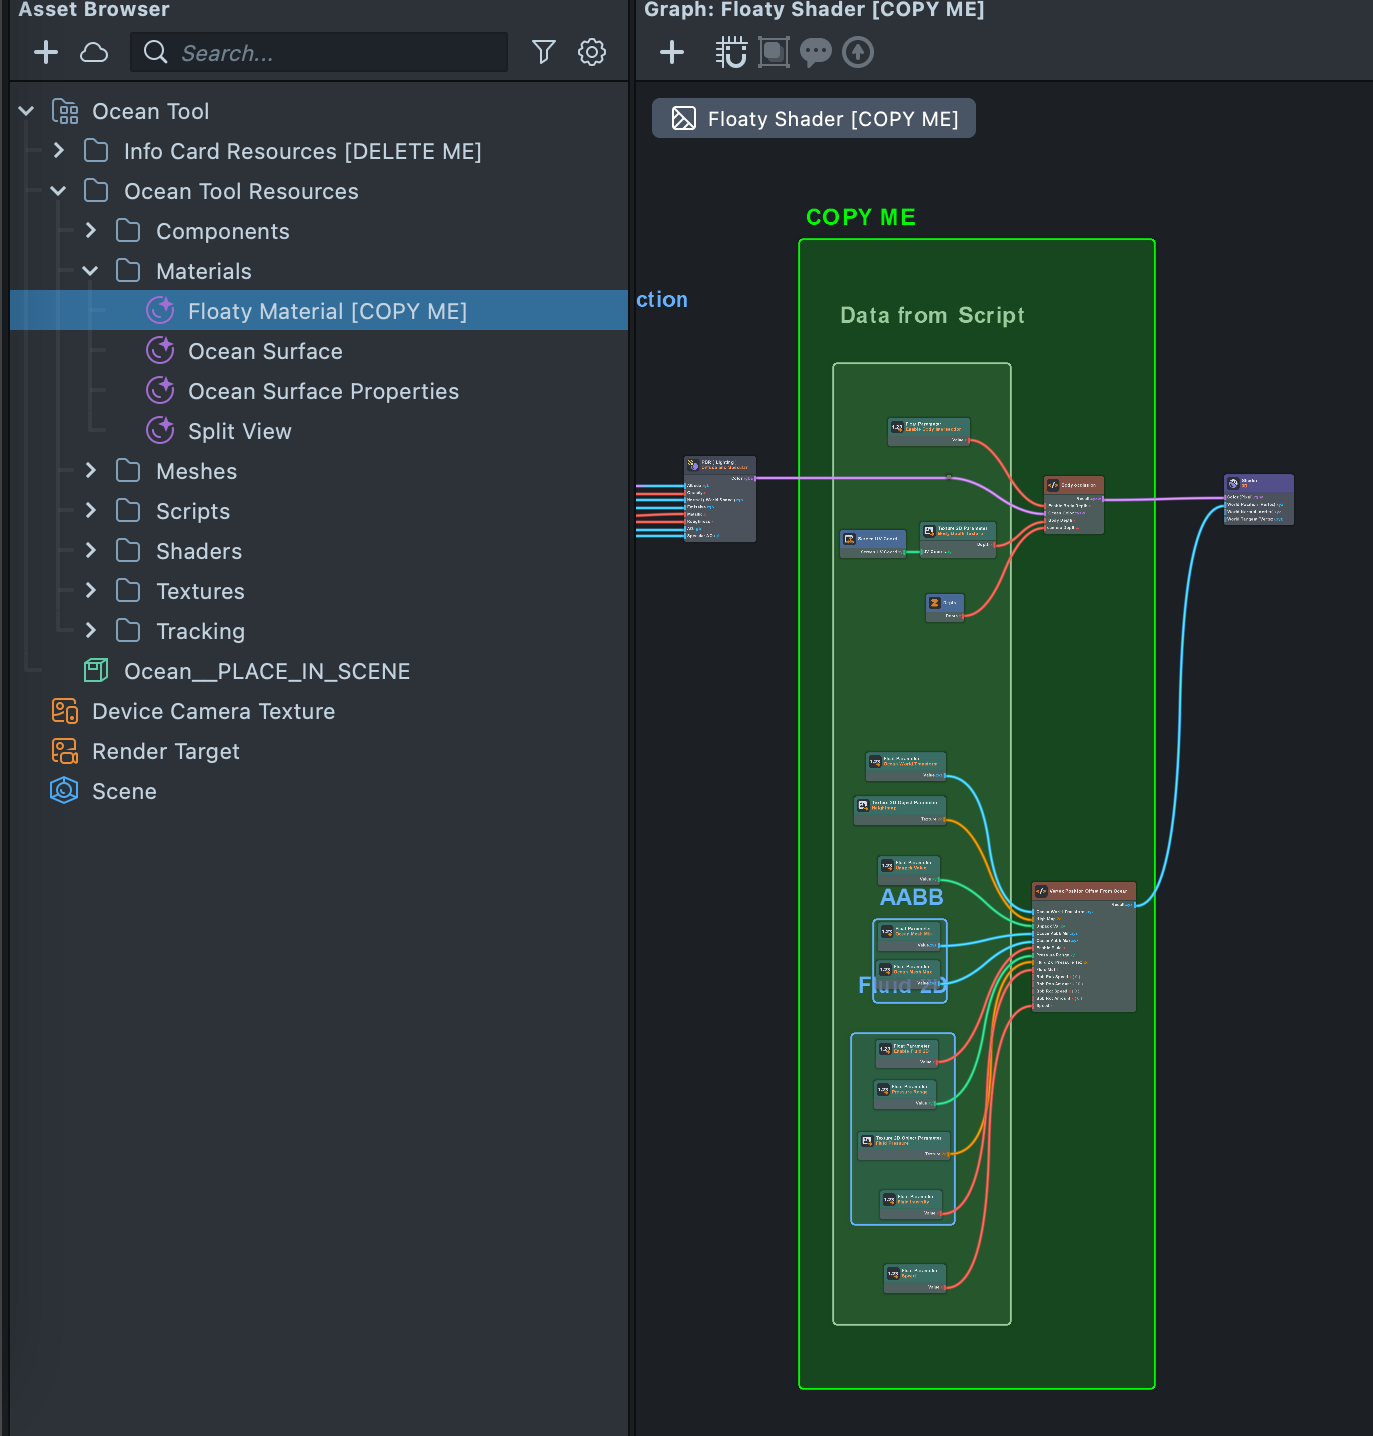
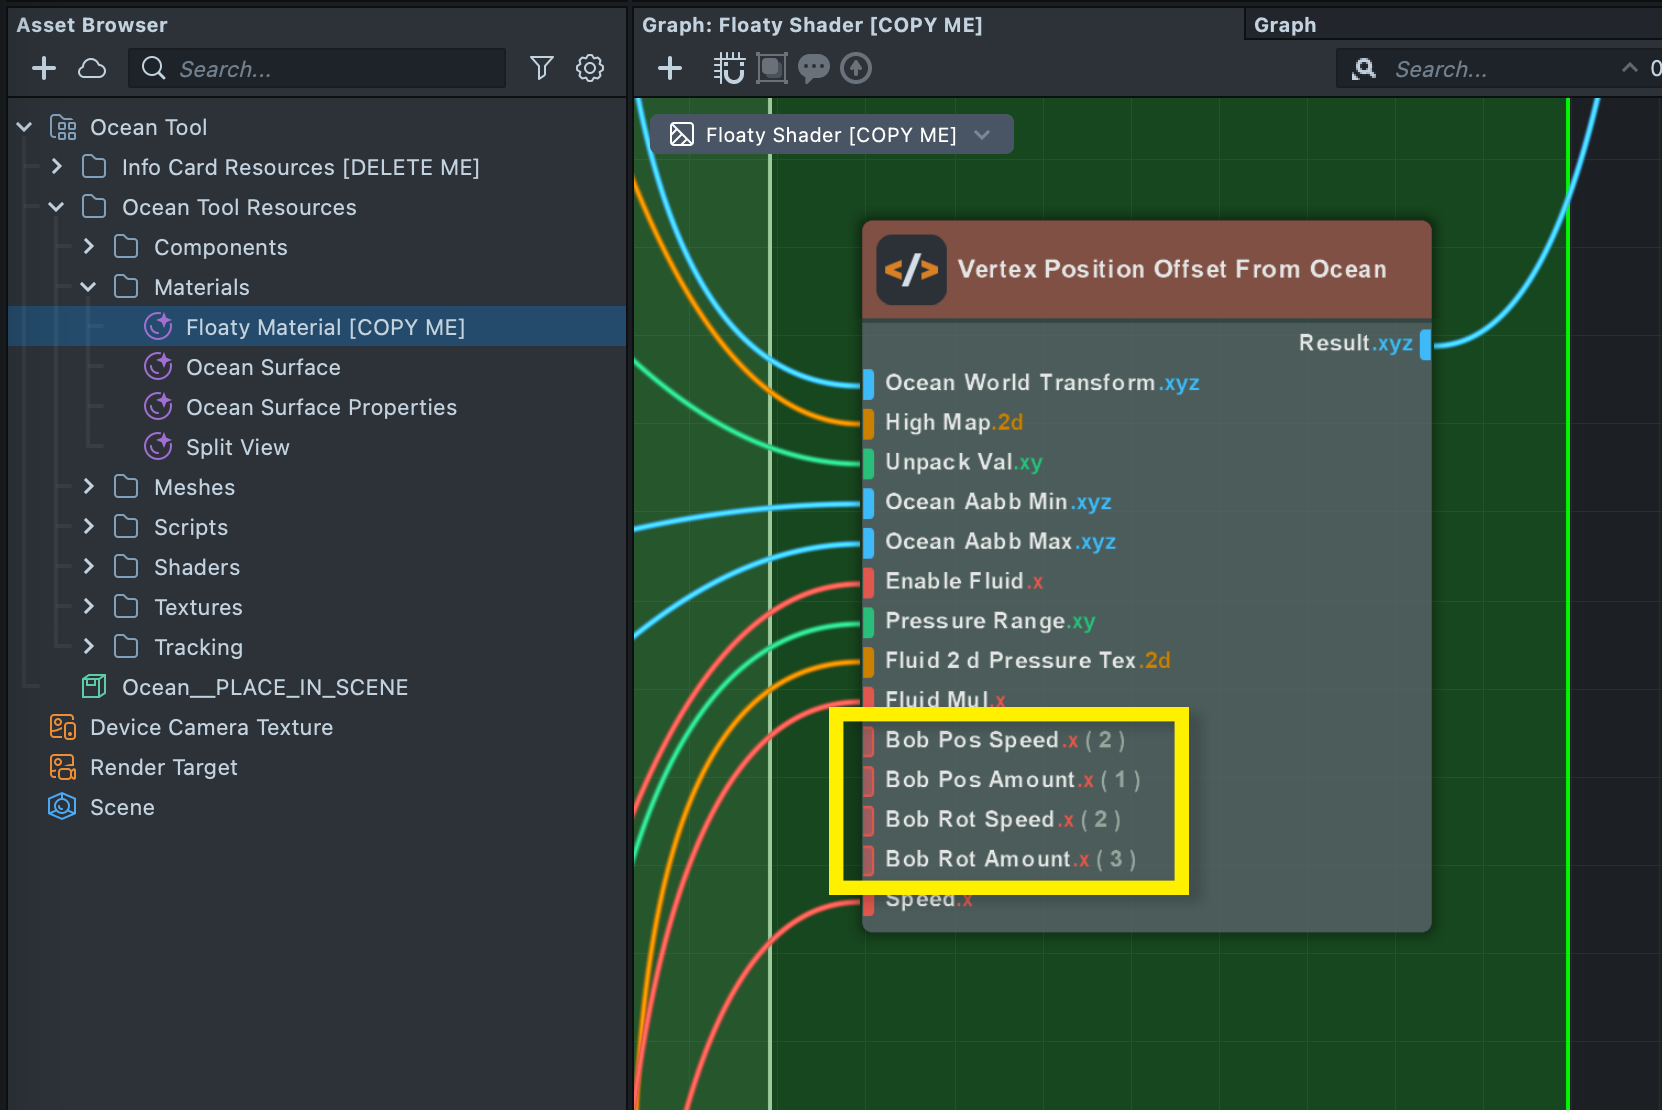
To make more objects float, you will need a specific graph setup to receive corresponding uniform values; duplicate the Floaty Material [COPY ME] example asset to start. If you are using a custom material, you could simply copy the part of the graph that gets values from the script, and use it in your own shader.
Controls
All available controls are under the Ocean Tool Script:
| Group | Parameter | Description | ||
|---|---|---|---|---|
| Ocean Camera | Assign the main camera for the project. This controls the main near plane and is used to calculate world space touch position when Touch Input is enabled. | |||
| Ocean Mesh | The mesh for the ocean plane; a higher poly count creates more details on the surface and split line. | |||
| Infinite Ocean | When enabled, the ocean plane will be set to the Ocean Camera position, and ocean surface UVs scroll depending on camera position. This option is only useful when world device tracking is used, as it prevents moving out of the ocean plane, and creates an illusion of an infinite world. | |||
| Transform | Ocean Height | The height of the water surface. | ||
| Ocean Scale | Overall scale of the ocean plane. A good value to start with will be around 2 - 15 with the given default ocean mesh. | |||
| Color | Enable Foam | Adds noise onto the crest of the ocean. | ||
| Foam Scale | The noise scale of the foam pattern. The larger the number the more the pattern repeats (visually appears smaller). | |||
| Crest | The color of the highest point on a wave. | |||
| Middle | The color of the middle point on a wave. | |||
| Trough | The color of the lowest point on a wave. | |||
| Reflection Texture | Water reflection, usually a screen texture. | |||
| Distortion Texture | Surface reflection distortion; the R and G channel of this texture will be used as a UV offset to distort the reflection texture like a flow map. | |||
| Distortion Scale | Size of the distortion texture. | |||
| Distortion Intensity | Distortion weight. | |||
| Displacement | Amplitude | The maximum vertical distance the ocean oscillates from its lowest (resting) point. | ||
| Choppiness | Higher numbers create smaller and rougher waves. | |||
| Normal Steps | Detail level of the generated normal map. | |||
| Noise Steps | Detail level of the generated displacement map. | |||
| Noise Scale | Size of the wave pattern. | |||
| Speed | Speed of the wave animation. | |||
| Animation Offset | Frame offset of the ocean animation. | |||
| Body Intersection | Body Depth Texture | When enabled, it compares view space body depth with view space ocean depth, and sorts the body intersection accordingly. When disabled, the camera texture will always be in the background. | ||
| Float Objects | Objects For Float | The script sets material parameters to objects assigned below to control their vertex position, it offsets the position based on wave height at where the object is in space. | ||
| Split View | Split View | Calculate where the camera near plan intersects with the ocean surface; multiplies color onto the screen texture when it’s below the water level. | ||
| Camera Near | Camera near clipping plane; determines where the split will be drawn. | |||
| Underwater Blur | Blur factor of the underwater section. | |||
| Underwater Tint | Color that will be multiplied onto the screen texture underwater. | |||
| Water Line | Water Line | Draws a line along the water split surface. | ||
| Line Thickness | Thickness of the water line. | |||
| Line Tint | Color of the water line. | |||
| Depth Target | The depth value of the ocean surface will be drawn here, the shader utilized this info to retrieve the world position of the ocean to calculate its intersection with the camera’s near plane. | |||
| Touch Input | Touch Input | Enable touch interaction input. An additional texture will be added to the ocean displacement calculation, based on world space touch position. | ||
| Fluid Intensity | Touch input value multiplier. | |||
| Advanced | Heightmap Quality | Resolution level of the displacement map. | ||
| Normal Quality | Resolution level of the normal map. |
Optimization
Performance impacts
While the ocean may run perfectly in Lens Studio, you might encounter performance issues when viewing the results on different devices. This table offers an overview of how each setting can impact your Lens FPS, along with suggestions for optimizing them. The rule of thumb is to start with the lowest setting and gradually add features back in.
| Impact | Ocean Script Parameter | Impact Notes | ||
|---|---|---|---|---|
| 🟠 Medium | Ocean Mesh | Using a plane with a lower poly count helps reduce lens size and FPS. | ||
| 🟢 Low | Infinite Ocean | You might not need this at all if camera tracking is not used. | ||
| 🟢 Low | Ocean Scale | If the ocean plane scale is larger, you might need to amp up other parameters to compensate for the texture detail. This parameter itself might not have much impact on the performance, but the compensations you make might (e.g. increasing the texture quality). | ||
| 🟢 Low | Enable Foam | Foam is created by simplex FBM noise. It adds a fine touch on the crest of the waves; if this doesn’t improve the visual quality of the ocean in your project, you may want to leave it disabled. | ||
| 🟠 Medium | Normal Steps | How many loop steps to draw the normal map; it’s best to find the lowest number with acceptable visual quality. | ||
| 🟠 Medium | Noise Steps | Same as above. | ||
| 🔴 High | Body Depth Texture | Body Depth Texture has a big impact on FPS on some Android devices; disable if not used or create a device blacklist. | ||
| 🟢 Low | Float Objects | Extra materials and scene objects in the project can all contribute to larger Lens size. | ||
| 🟢 Low | Split View | Depth Render Target and an extra post effect will be used. This should be disabled if your camera never sees what’s below the ocean surface and device tracking is not used. | ||
| 🔴 High | Touch Input | An advanced feature that draws fluid touch position onto multiple render targets in the background. | ||
| 🟢 Low | Heightmap Quality | Resolution of the displacement map. Consider setting it to Low if the visual quality is acceptable. | ||
| 🟢 Low | Normal Quality | Same as above. |
Troubleshooting
General
Nothing happens when I import the asset?
- Check if the
Ocean Cameraunder theOcean Tool Scriptis assigned to the camera you are currently viewing. - Ensure that your Capture Target under the
Asset Browser -> Sceneis the same as the render target used for the camera - Check the Logger window to see if there are any error hints.
Ocean color is not consistent on device compared to what I see in Lens Studio.
It’s most likely because the reflection is reading from the screen texture. In Lens Studio, the reflection color you see comes from the preview video or image. However, in real environments, the color can vary dramatically. Try using a static image for the Reflection Texture input under the Ocean Tool Script instead. Doing this may result in the loss of dynamic lighting, meaning the ocean surface will no longer reflect based on your real environment, but it can help ensure the color stays consistent.
How can I redefine the color based on the ocean height?
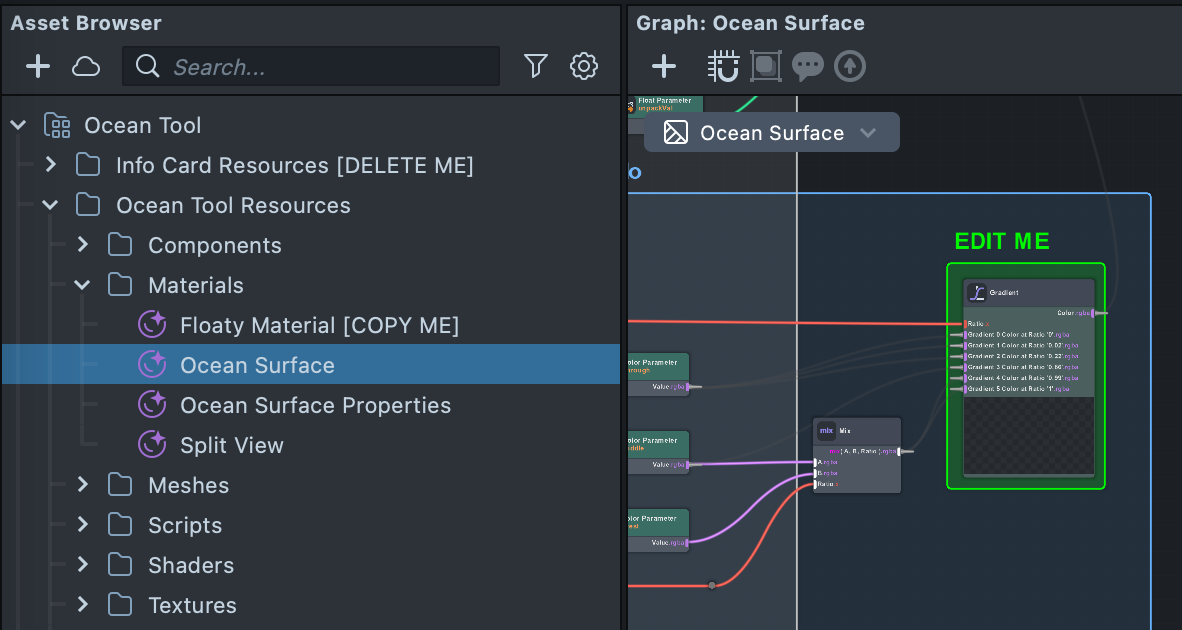
The ocean height color is controlled using a Gradient node in the Ocean Surface material, located in the Albedo section and highlighted with a green comment box.
Floating Objects
The floating object doesn’t follow the ocean wave.
If the mesh's pivot point is not centered, you will need to adjust it in a third-party app and then reimport the mesh into Lens Studio. This tool adjusts the 3D mesh to flow on top of the ocean by setting its vertex position to match the height of the ocean surface. Therefore, avoid modifying the Y transform of your 3D object to fit the water height, as this can interfere with the vertex animation. To control how deep your floating object sinks into the water, set its Y transform to 0, or close to 0, based on your preference.
How can I make my floating objects bob more/less?
Go to the shader graph assigned onto your floating object; the custom code node titled Vertex Position Offset From Ocean highlighted with a green comment box has additional speed and amount controls.
Split Line
I can’t see the split line, it zooms past the camera view too fast.
Try pushing back your Camera Near value, or widen your camera FOV; it’s likely the camera is too close when the ocean plane is too large.
The edge of the split view ocean plane looks low poly.
Consider setting the Camera Near further away, adjusting Line Thickness to hide the edge, or lowering the Ocean Scale.
How can I get a black and white split mask from the split view?
Go to Split View shader, under the custom code node you can output the split value. This texture can be useful if you want to use this mask as an occluder.