Depth Render Target
This guide offers an overview of the Depth Render Target and explains several useful examples of effects created with it.
The Screen Space Normals and Depth Collision VFX examples described below are available in the Lens Studio Asset Library!
Depth Render Target is a specific texture resource in Lens Studio that enables the retrieval of a Camera’s depth stencil buffer. This unique texture contains high-precision floating point depth information of rendered geometry.
Similar to a regular texture, a Depth Render Target can be assigned to any material and sampled from Material Editor. Depth Render Targets enable powerful effects such as screen space normals, custom occlusion, fog, and depth-based particle collision.

Creating a Depth Render Target
To create a Depth Render Target, follow these steps:
- In the Asset Browser panel, left-click the
+button. - Type "Depth Render Target" to filter your selection.
- Alternatively, go to the Texture tab and select Depth Render Target.
- On a Camera, assign the Depth Render Target to the new input field labeled "Depth Render Target," which is located below the regular color Render Target assignment.
Depth Values & Depth Visualization
With the Depth Render Target added and attached to the camera, the Depth Render Target will contain depth information from objects rendered by that camera. To view this texture in a meaningful way, you will need to take a few extra steps.
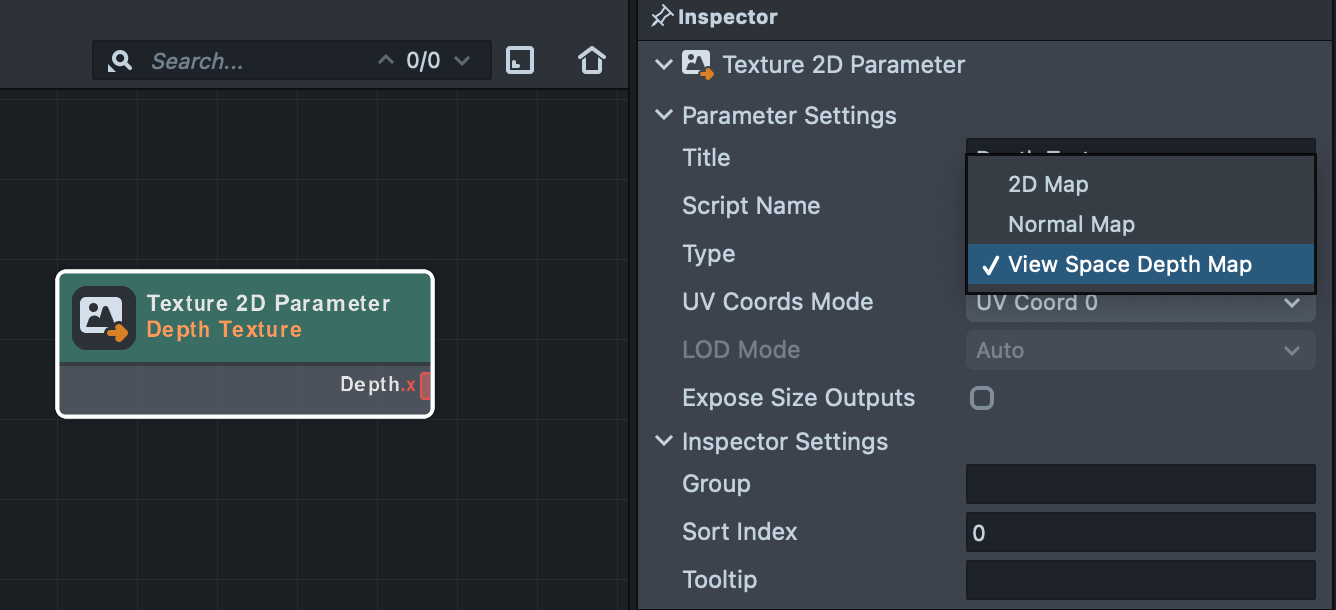
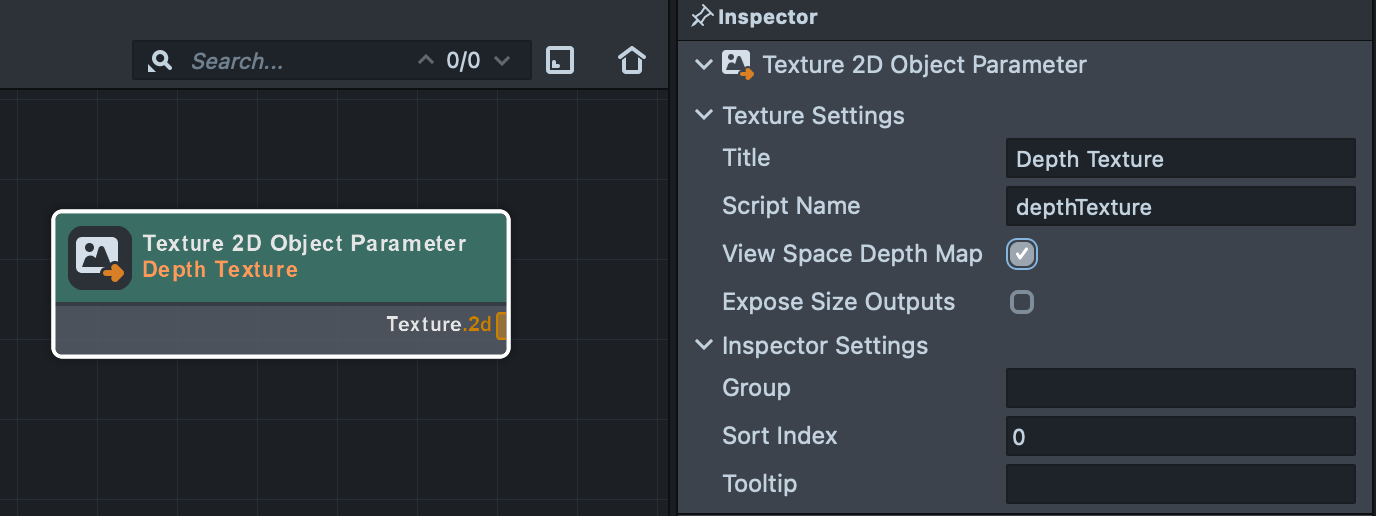
To use this texture in shaders, you will need to change the texture parameter type to View Space Depth Map. This will return a depth sample in view space. Leaving this unchecked returns a depth value in screen space.
For Texture 2D Parameters, this is done with a dropdown menu on the Type field. For Texture 2D Object Parameters, it is a checkbox for View Space Depth Map.
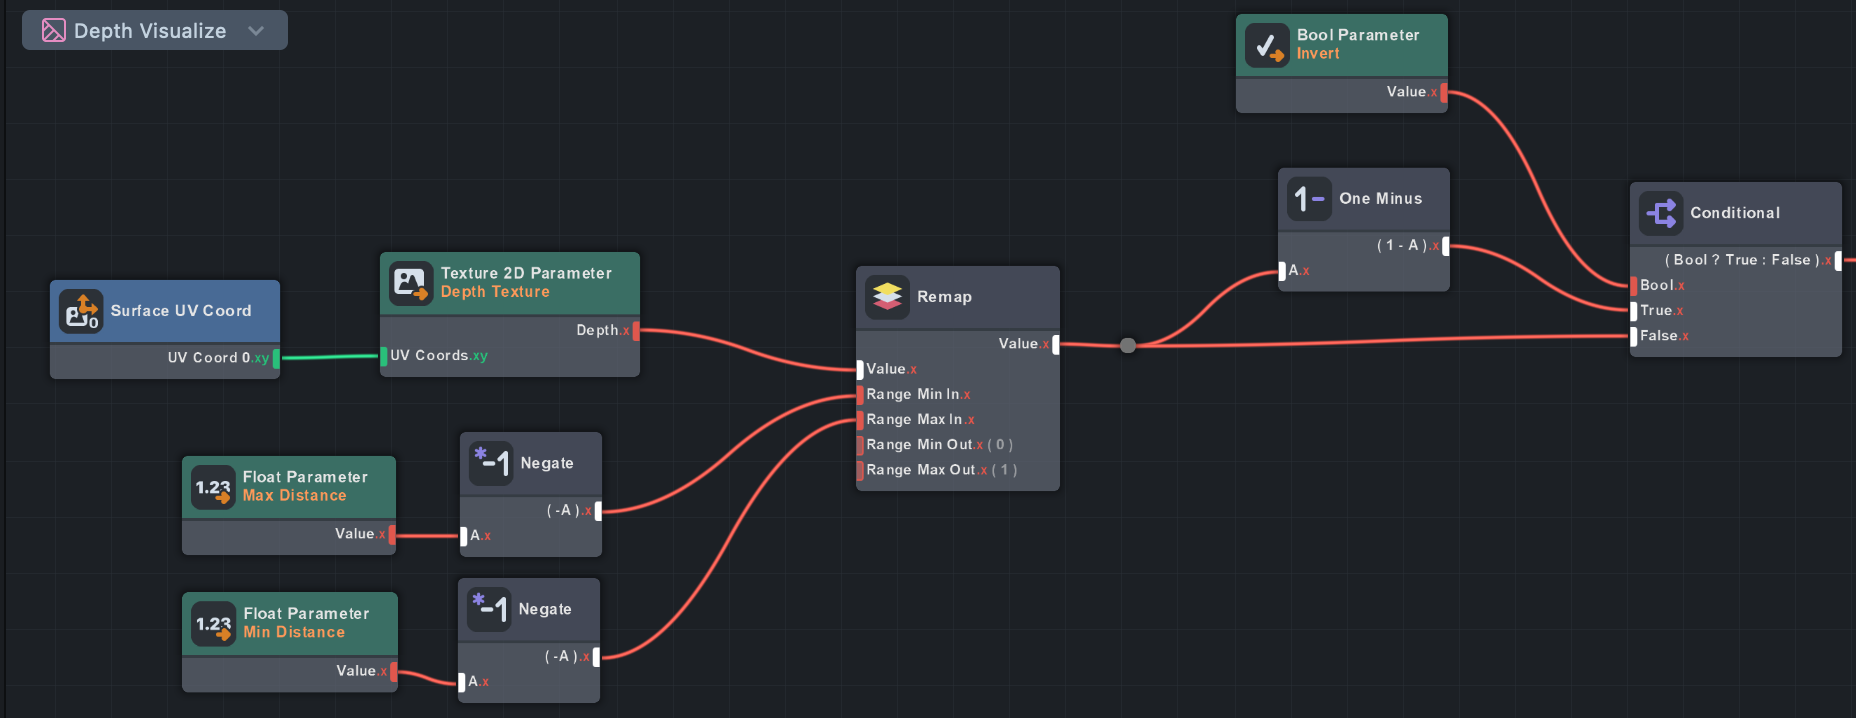
Next, you will need to remap the depth values into a range that is visible.
View Space depth values are returned in the range (-far plane, -near plane). In OpenGL, the camera faces the negative Z axis, so sampled depth values are negative. These values can be put into a range suitable for viewing with some simple math:
Visualized Depth Value = -Sampled Depth Value / (Camera Far Plane - Camera Near Plane)
Visualize Depth material example could be found in the Screen Space Normals example.
Screen Space Normals
Screen Space Normals example is available in Lens Studio Asset Library. Import asset and drag the included prefab to Scene panel.
One of the many use cases for the Depth Render Target is to generate screen space normals. This technique involves reading the depth buffer and reconstructing normals using partial derivatives of neighboring pixels. You might want to do this to generate normals for lighting objects with complex deforming geometry that would be too difficult to compute in a vertex shader. Another reason is to allow objects to sample normals in the scene such as with particle collision to determine which direction the particle should bounce.

While there Screen Space Normals asset is a ready-to-go example, this guide showcases how this technique works outside of a script-only setup. The methods and shaders used are the same as the Asset Library tool, but this section shows what’s going on under the hood while demonstrating an important step needed with using Depth Render Targets.
The Screen Space Normals technique can be broken down into three steps:
- In a separate pass, generate normals from the depth buffer.
- Optionally, blur the resulting normals texture.
- Apply the normals texture to materials or VFX to achieve an effect.
Take a look at the Depth to Normals Mat, to see exactly how depth values are converted to normals.
This technique produces faceted normals, so usually some kind of blur is desired to smooth them out. Snap has implemented a fast two-pass blur with an extra feature: the blur has less of an effect if there is a large difference in depth between the center pixel and the offset sample.This helps prevent normals from smoothing across objects that are separated in space, which could otherwise produce a plastic-wrap effect. The Depth Threshold value controls the sensitivity of this effect on the Bilateral Blur material.
Finally, the resulting normals texture are applied to a slightly modified PBR material for the 3D object. Visualization scene object provides a preview of what the final normals texture looks like.
The One Frame Delay
When using this technique with animated objects you might notice there is a slight lag in the normals texture. This is a byproduct of using the Depth Render Target in additional passes and layers. Since we use a forward renderer, depth is generated at the same time as the color image, so any processing of the depth target will occur after both depth and color are generated. By the time the extra passes are done, the color image is already 1 frame behind.
The one frame delay effect is only noticeable when applied as lighting on fast moving objects. For things like collisions, it’s typically not an issue.
Currently, the only way around this is to render a depth-only pre-pass. The depth from this pass can be used before the final color is resolved in the main camera. This is provided as an option for the Screen Space Normals asset in the Asset Library, so be sure to check that out if you need to solve this problem : enable a Fix Delay checkbox on the ScreenSpaceNormals script.
Depth Collision VFX
The Depth Collision VFX example uses the same technique to generate normals from a Depth Render Target. It uses normals for lighting materials on the 3D objects, and uses the normals and depth for rain particle collisions.
The Depth Collision VFX asset is available in Lens Studio Asset Library. Import asset and drag the included prefab to Scene panel.
The Depth Collision VFX asset uses the Collision (Depth Buffer) subgraph in the Update stage to compute particle collisions. This subgraph can be found in the VFX subgraph library.
Collisions are tracked in a custom attribute called collisionCount. When collisionCount is greater than 0, a number of changes occur to the particle: it gets larger, it switches to a flipbook texture of a water splash, and it starts counting an offset for the flipbook texture frame time.
For more information on particle collisions, check out the VFX Collisions guide.