External Body Mesh Creation
This guide explains how to prepare meshes to be used as an External Mesh. Automatic fitting for external meshes to the base mesh happens based on vertex proximity or UV coordinate matching. You can edit your external mesh in any 3D tool (e.g. Blender, Maya, Cinema4D etc) to ensure it will fit correctly. To prepare a mesh for use as an external mesh with proximity matching you simply need to align it with a reference mesh in the reference pose, no rigging is required!
You can download the reference models here and import the ones you need into your 3D editor.
Two rest poses are available in the reference model pack and for use as an external mesh (T-pose, and A-pose). Modeling your external mesh to match the A-pose usually results in better deformation since the fitting is configured based on the vertex proximity. In additoin, an A-pose ensures reduced stretching of the clothes under arms and better fitting on the legs.
Preparing the mesh
Import the reference Model FBX file to the 3D editor of your choice:
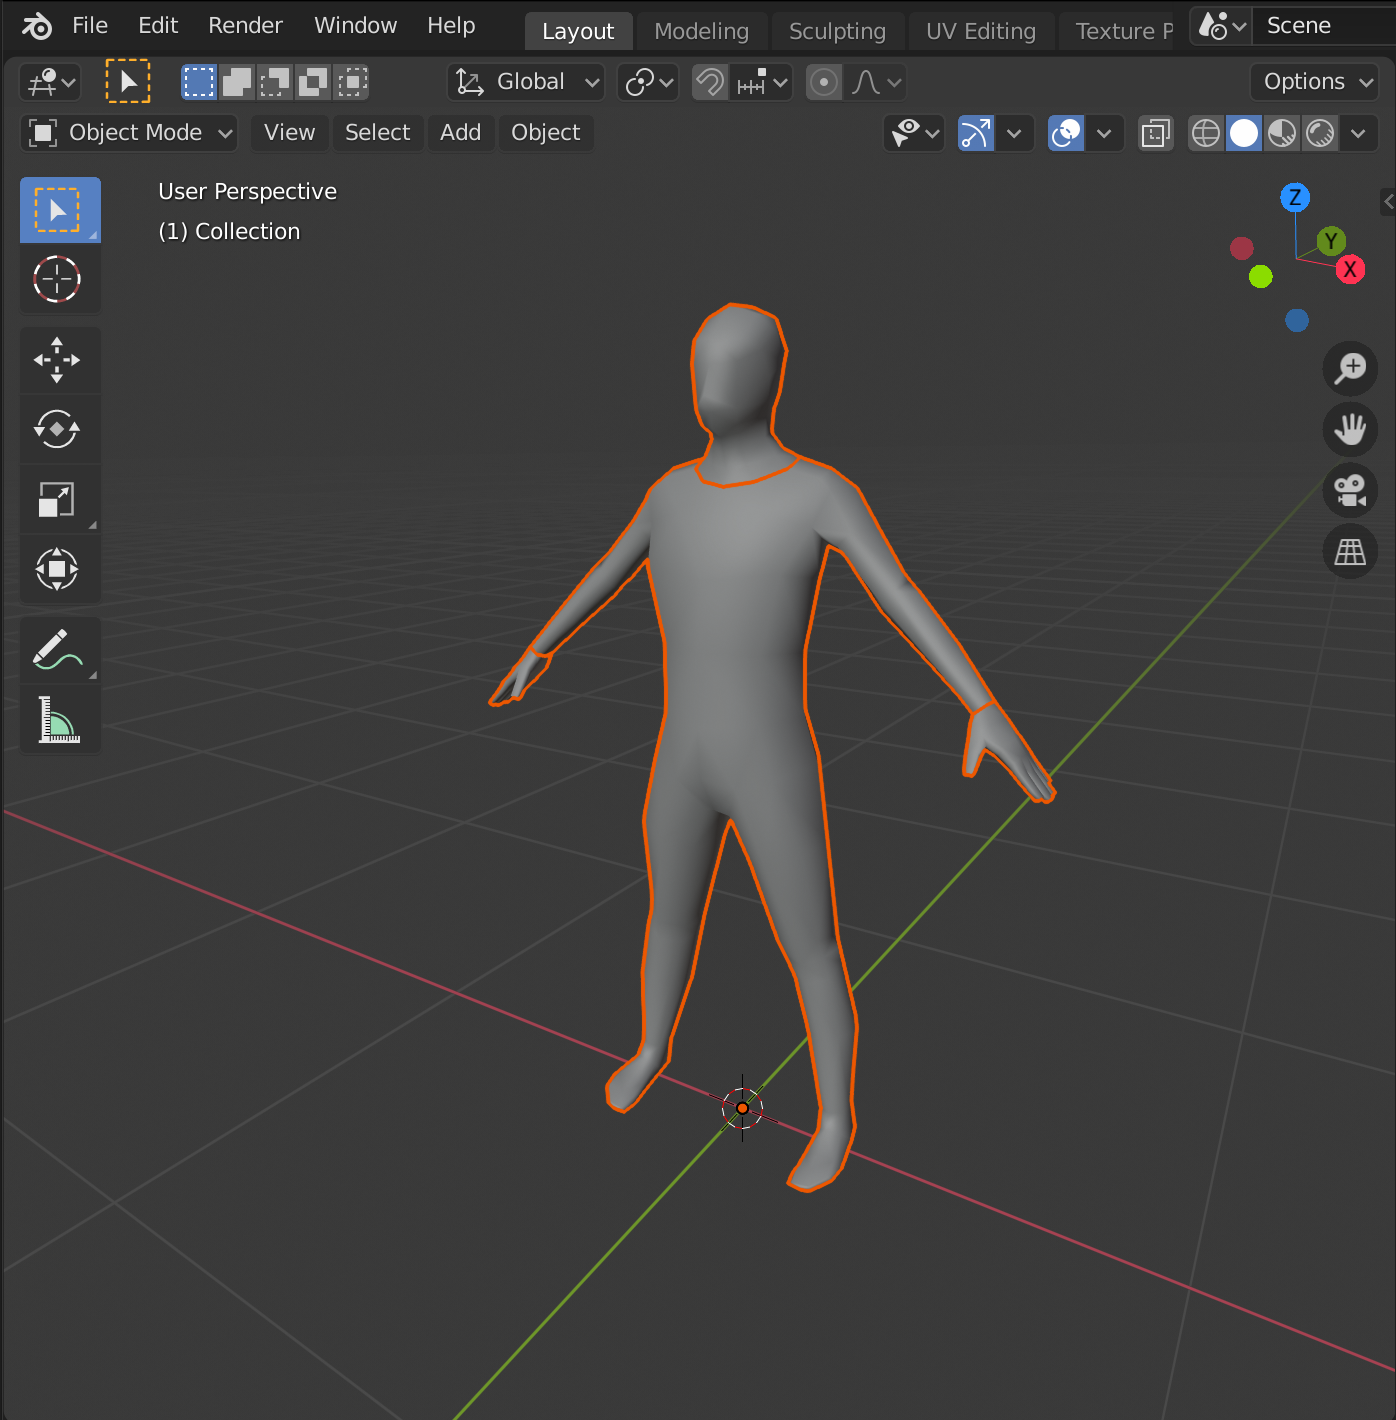
Then create a 3D model or alter an existing 3D model to fit and align to the reference model.
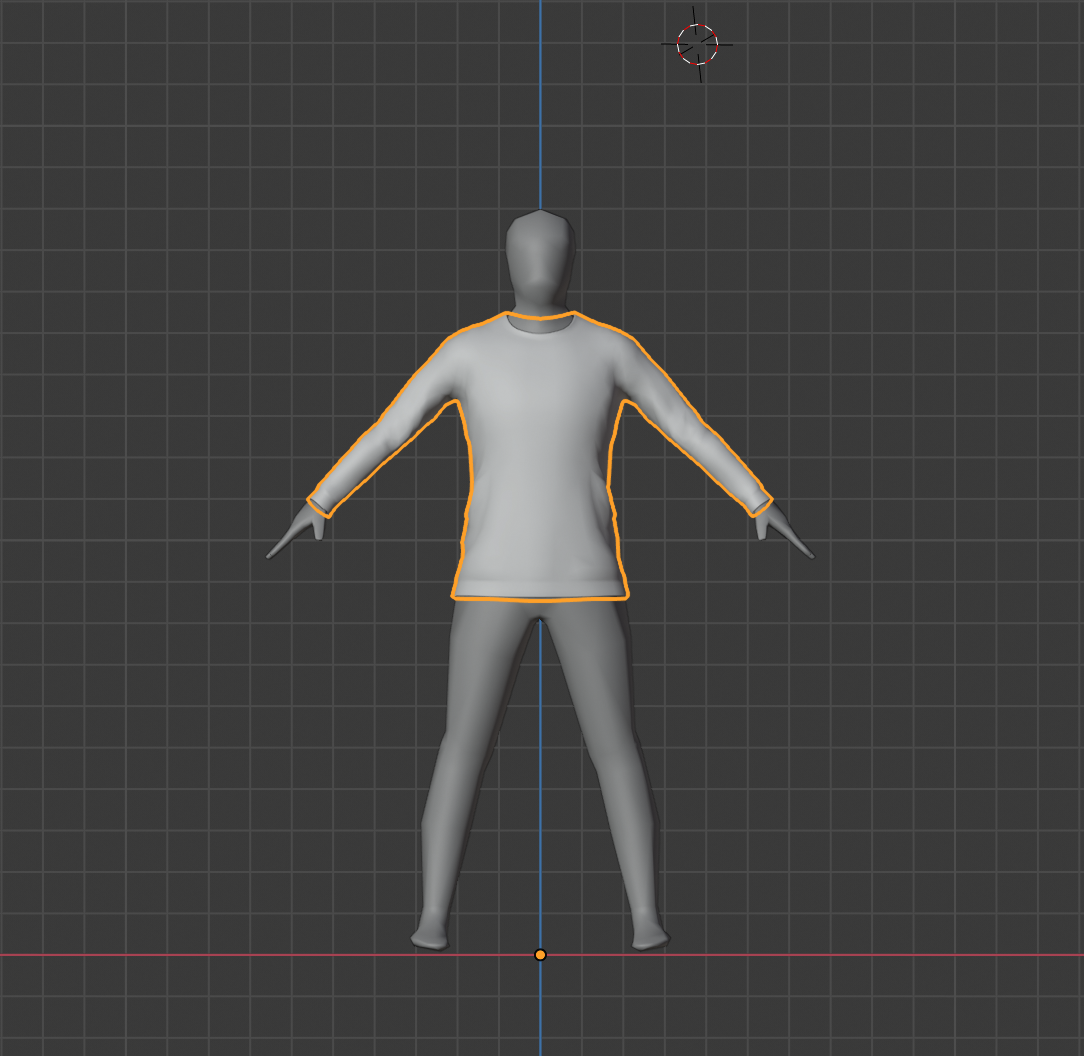
For best results using vertex proximity matching, make sure that the mesh you are fitting to the body aligns well to the reference body meshes. Ideally the mesh should fit around the base mesh and not intersect it at any point. Clothes that have to be worn together should also be modeled so they don’t intersect, For example, a hoodie should fit loosely around a t-shirt. For more precise fittings for items such as gloves, use UV matching.
You can add blendshapes to an external mesh. For example this could be used for opening/closing a jacket or adjusting the length of a sleeve
There are some additional steps to take before exporting an external mesh to Lens Studio to minimize further setup.
If you are using Proximity Matching all transforms should be reset on the mesh, so its:
- Position is (0, 0, 0)
- Rotation is (0, 0, 0)
- Scale is (1, 1, 1)
To reset all transforms in Blender, press Ctrl + A, then click All Transforms.
![]()
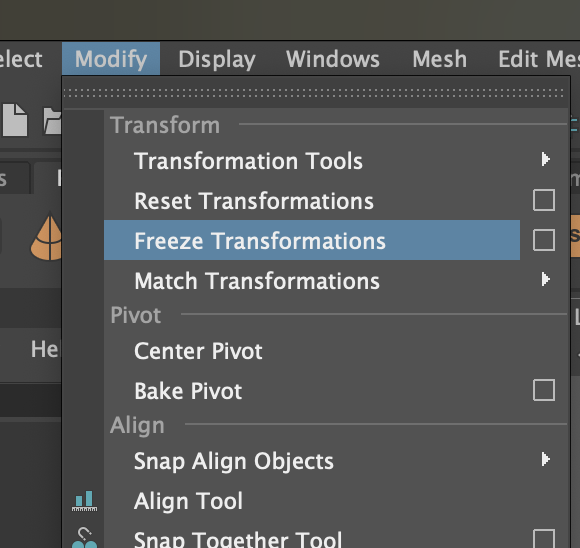
To reset all transforms in Maya, select the 3D object, click Modify, then click Freeze Transformations.
To reset the transform in Cinema4D. Select your object in the Scene Hierarchy panel, then in the Attribute panel, select the Coord. tab and press the Freeze All button.
Before resetting or freezing transforms, it is important to make sure that the object's pivot is at the same point as the reference body's pivot. As you can see in the image below, the pivot of the object is at the same position (0,0,0) as the pivot of the reference body.
Exporting The Mesh
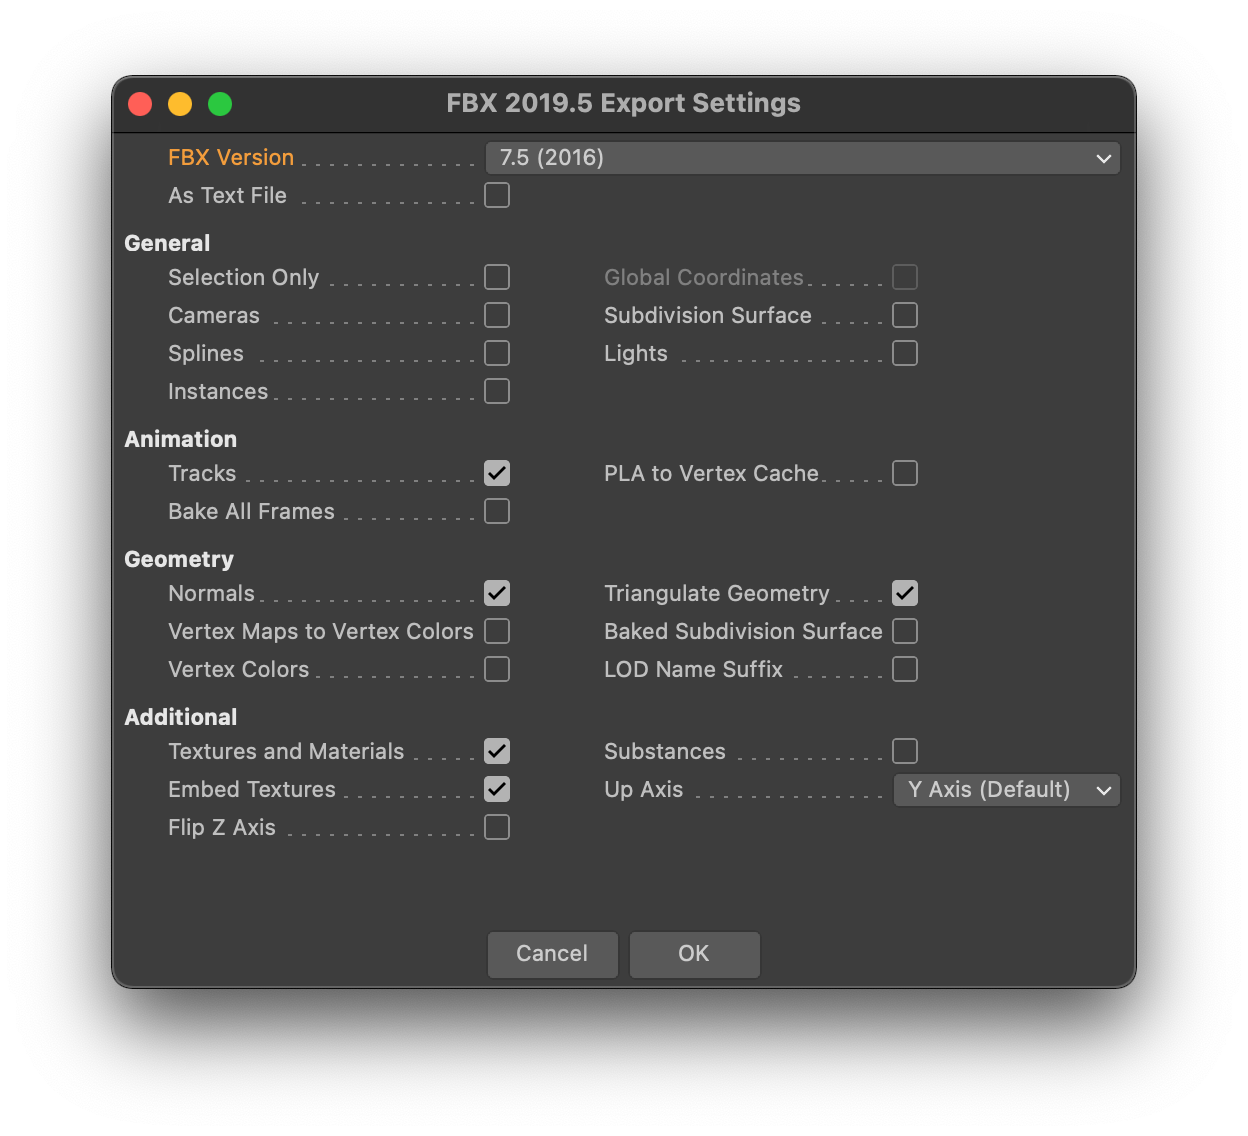
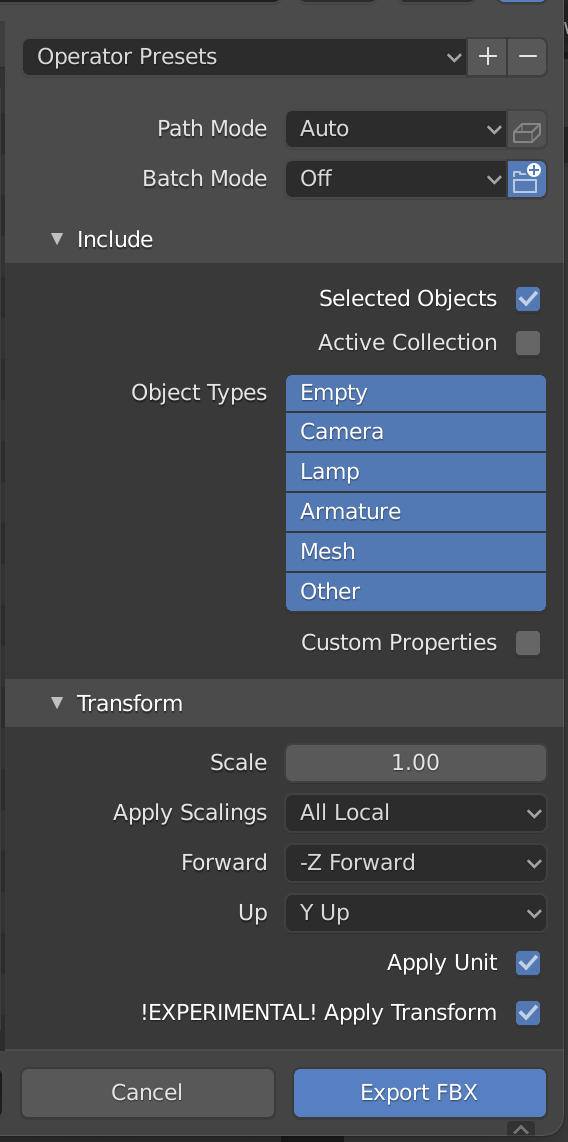
The best way to bring an external mesh into Lens studio is to export it as an FBX file. See the export settings below and refer to the full guide on exporting for lens studio for more information.
Blender
With the object you wish to use as an external mesh selected click File -> Export-> FBX.
Recommended FBX Settings:
Scale:1Apply TransformForward: - Z forwardUp: Y up
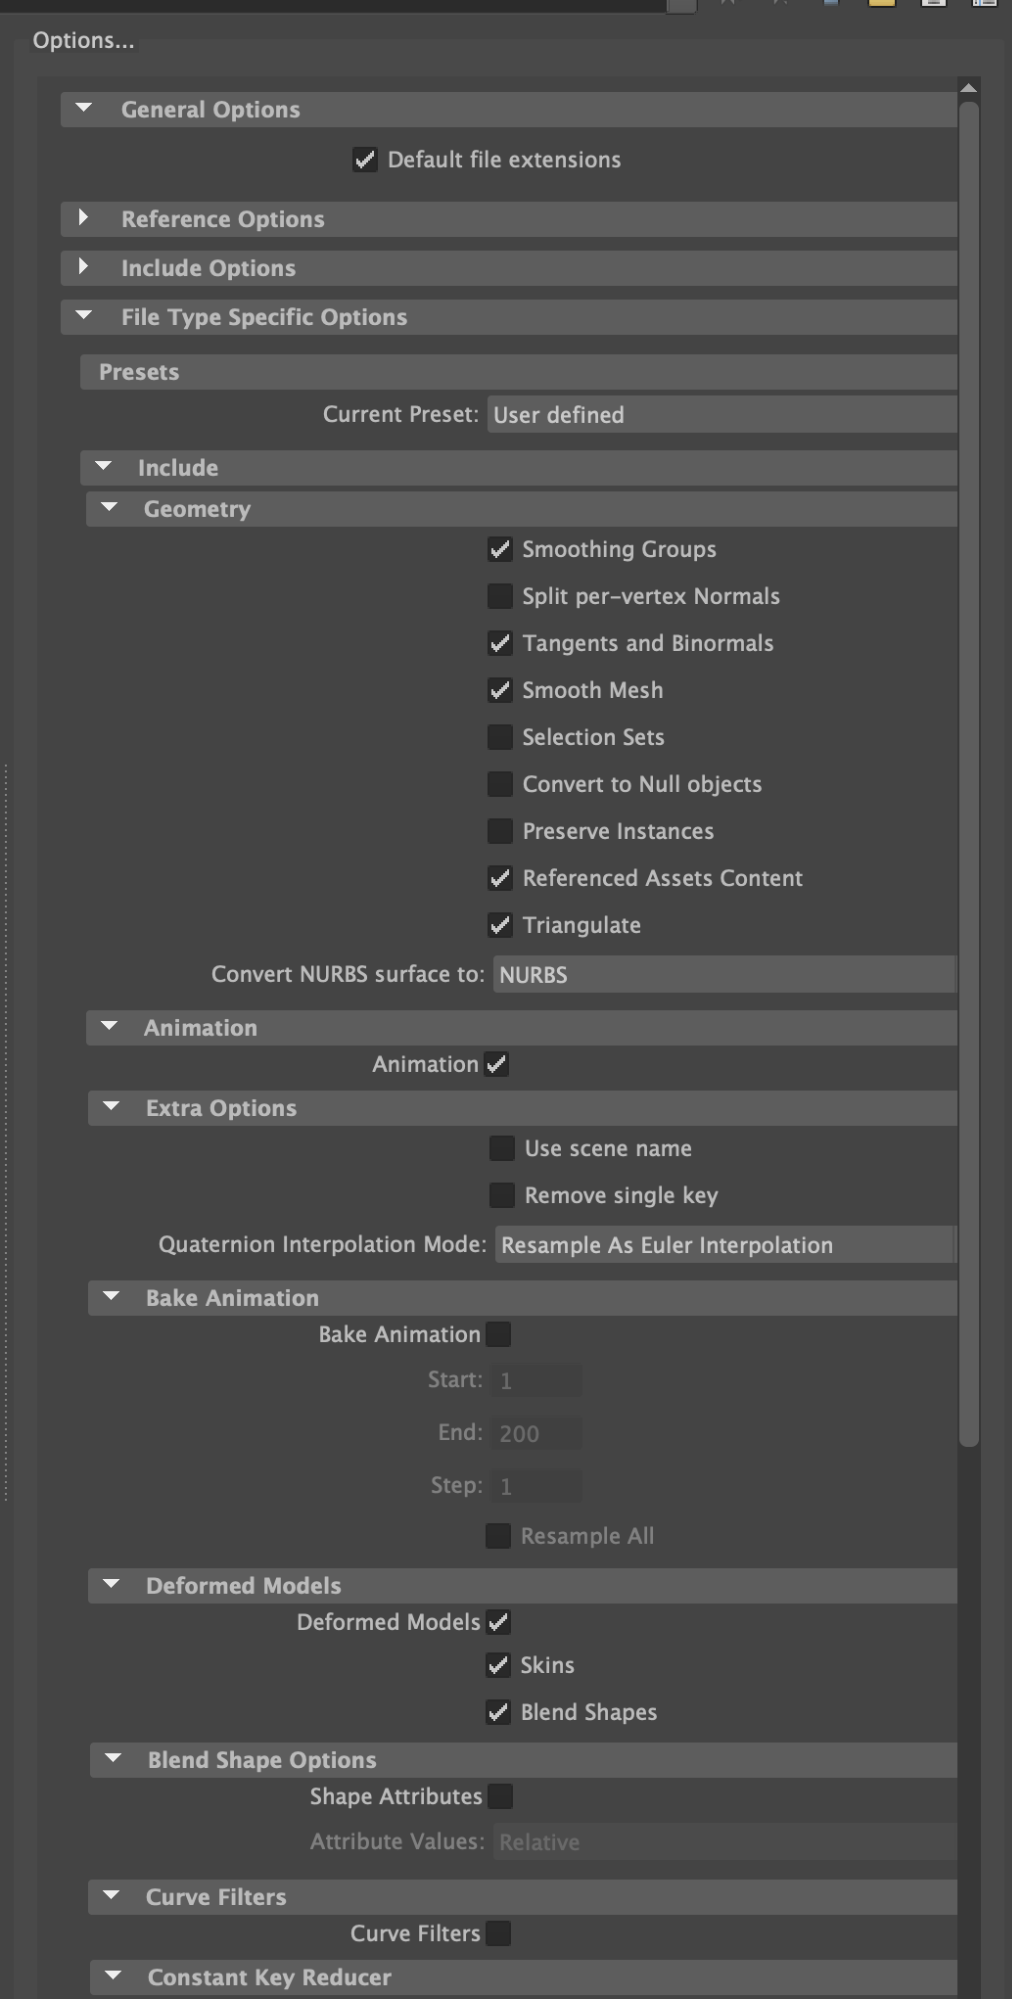
Maya
With the object you wish to use as an external mesh selected click File -> Export Selection
Recommended FBX Settings:
Cinema4D
Recommended FBX Settings: