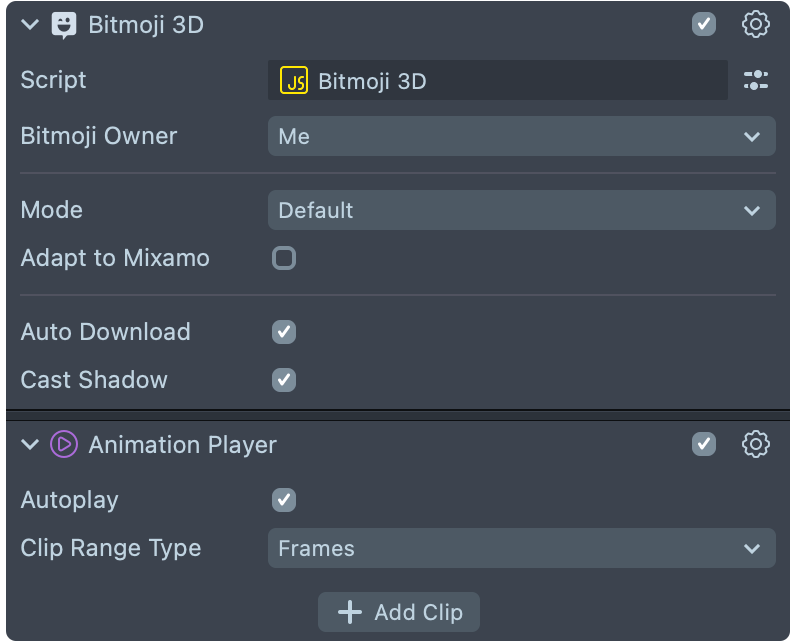
Animating Bitmoji 3D
There are numerous ways how to animate Bitmoji 3D avatar:
- You may utilize 3D softwares such as Autodesk Maya or Blender 3D.
- You may leverage animation libraries such as Mixamo or Character Animation Library.
- Go further and animate Bitmoji head separately from body with Bitmoji Face Animator or drive them with user expressions using Bitmoji Head component.
Quick Links
Autodesk Maya
We provide a full Maya rig that features advanced controls, allowing you to create high-quality animations for Bitmoji avatars. This is the exact setup our team uses internally! We also provide a converter script required to process animations for optimal performance in Lens Studio.
Animate Avatar
- Download the Maya Rig and the Converter
- Copy the rig to your Maya project folder and open Maya
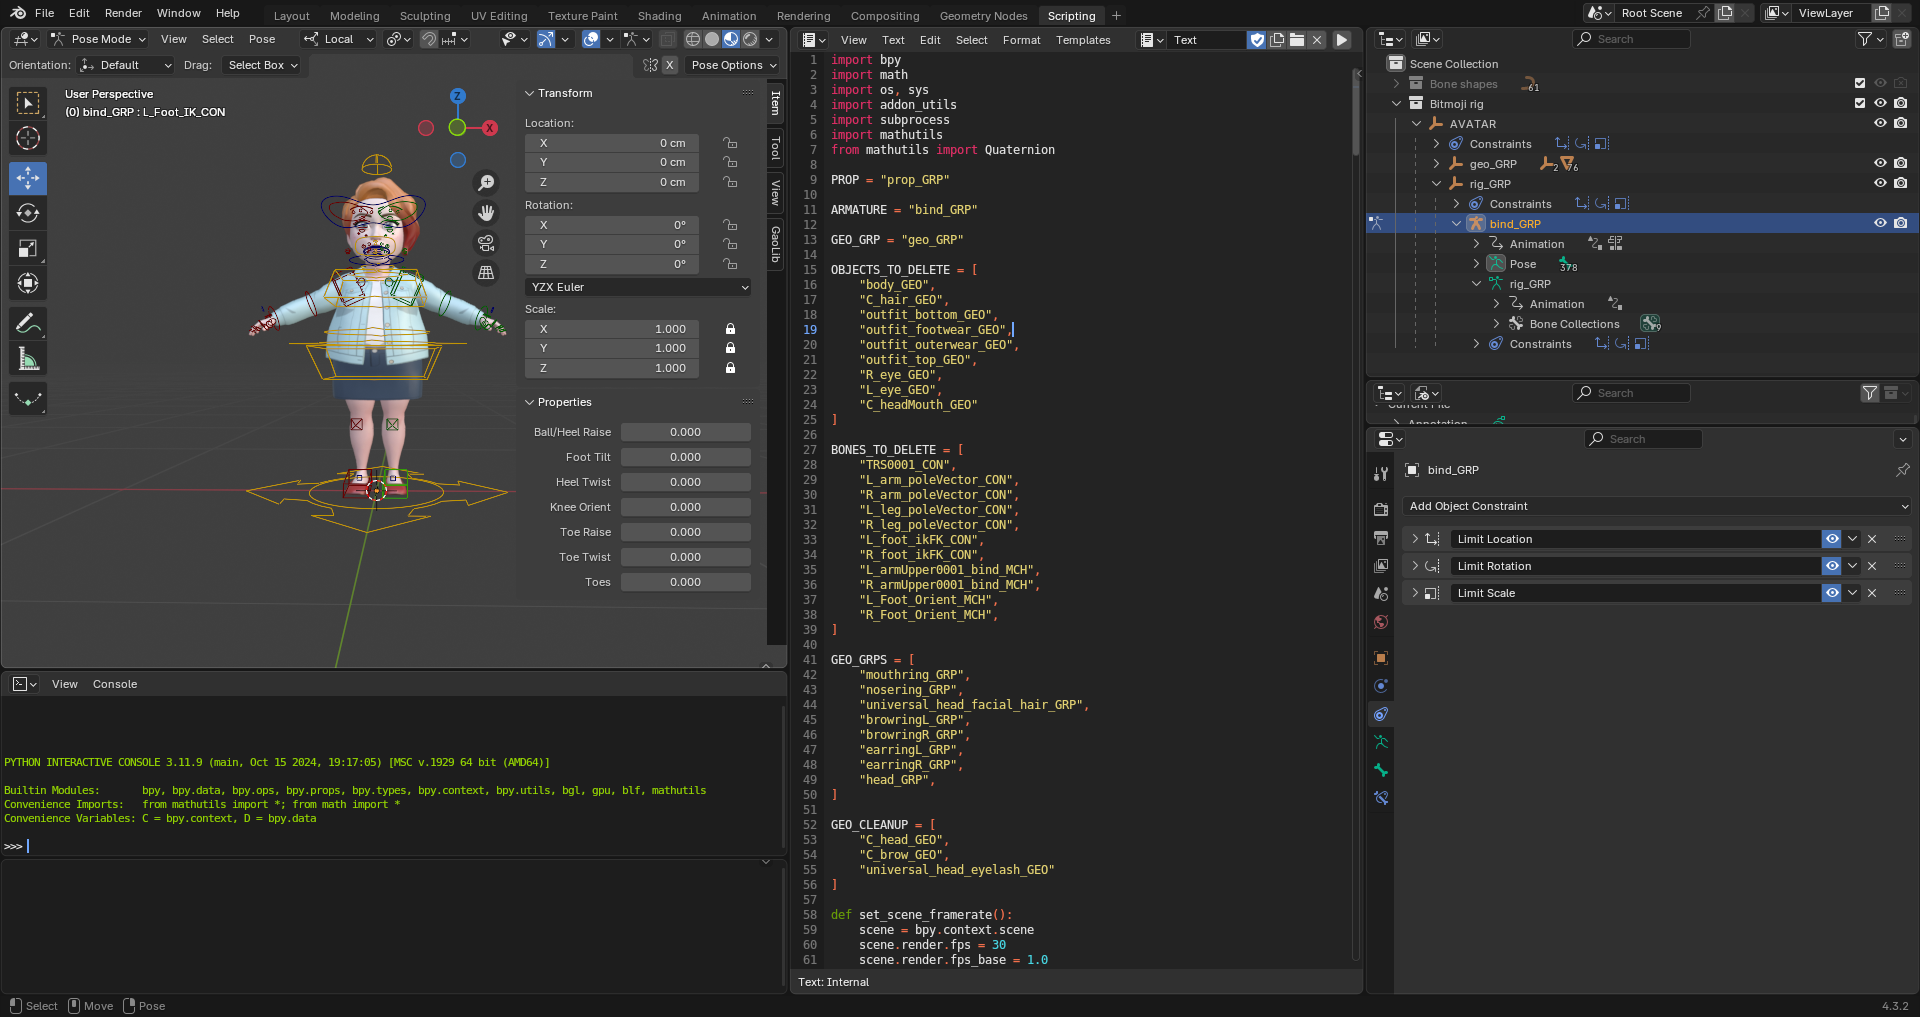
- Go to
File>Reference Editor
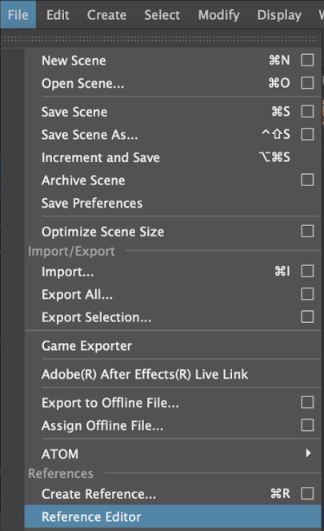
The Reference Editor in Maya is like a control center for managing files you've brought into your scene from outside sources.
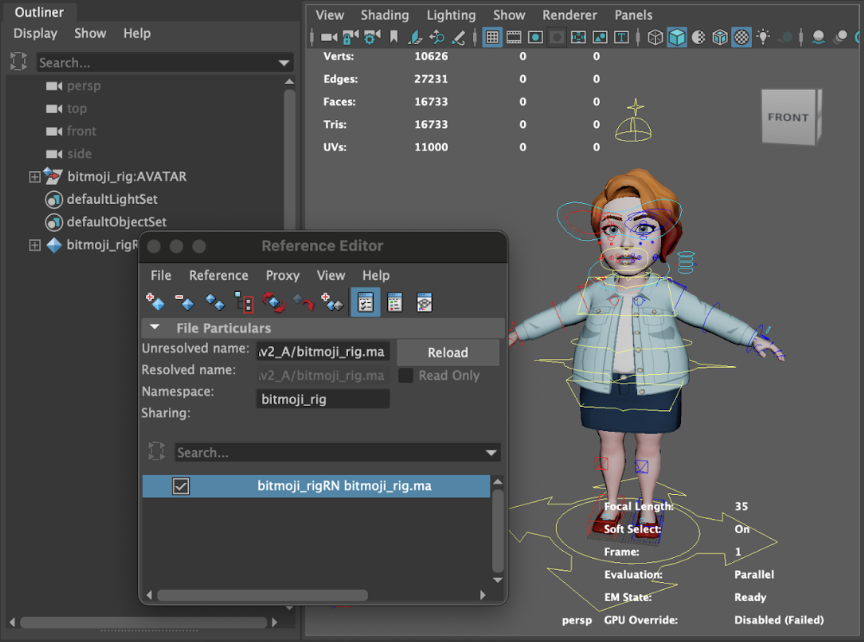
- Locate your
bitmoji_rig.mafile. The Bitmoji Rig should be loaded in your viewport:
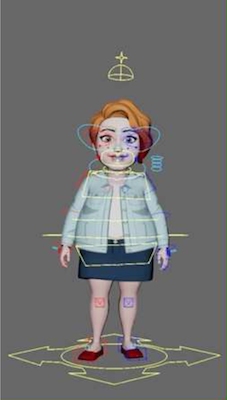
- Make sure to set the scene to 30 FPS
![]()
- Have fun animating!
Install Converter
This section explains how to install a converter depending on your system
MacOS
-
Open Terminal
-
Navigate to your Maya application file, for example
cd /Applications/Autodesk/Maya2022/Maya.app/Contents/bin -
Run the following command to install a library
sudo ./mayapy -m pip install "pygltflib" -
Make the FBX2glTF and MACFACT converter executable by running the following commands:
chmod -R +x /Users/USER/Downloads/bitmoji_animation_converter/converter/FBX2glTFchmod -R +x /Users/USER/Downloads/bitmoji_animation_converter/converter/macfact -
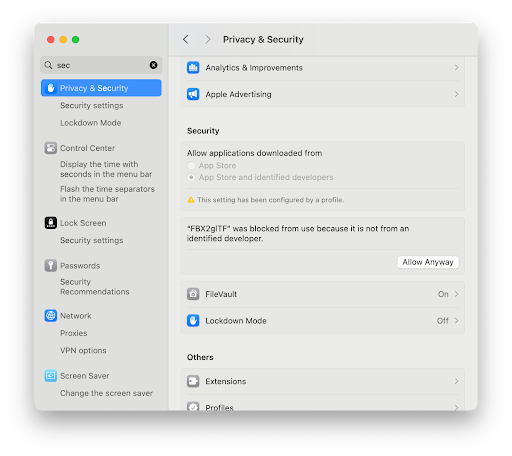
Enable FBX2glTF and MACFACT in "Privacy & Security" Settings:
Windows:
Open Maya Script Editor (Windows > General Editors > Script Editor). Then open and run the window_installer.py from
the bitmoji_animation_converter folder to install the required libraries.
Export Animation
- Open Maya Script Editor by navigating to
Windows>General Editors>Script Editor - Open
launch_bitmoji_export.pyfile in the converter folder - Run the Script!
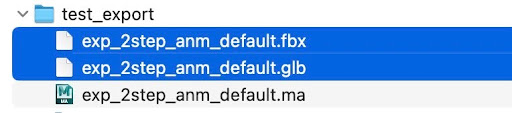
Two files will be generated next to your Maya file:
As this task will be performed repeatedly in different projects, scenes, and animations, utilizing Maya's Shelf Button function enhances efficiency. Simply select the script text and drag it to the shelf!
- Animation FBX file containing keys on the skeleton & face blendshapes
filename.fbx - Optimized animation GLB file with dummy geometry for smaller size & blendshape keys copied to all possible geometry files (beard, lashes, etc)
filename.glb
Import to Lens Studio
Import .glb file into Lens Studio, with Use Legacy Importer and Convert Meters to Centimeters disabled.
Blender
Bitmoji Export Tools are MacOS and Windows compatible and built in Blender v4.3.2.
Video Overview
Download
Download Blender Export Tools and rig here.

Animate Avatar
-
In order to use export tools on MacOS Blender will need to be launched from terminal:
Example MacOS command in Terminal:
/Applications/Blender.app/Contents/MacOS/blender
-
Open
Bitmoji_blender_rig.blendor load it into your scene.blender_export_toolsscript is preloaded to scene. -
Animate avatar:
- Use Translate only on specified controls (
TRS,COG,C_spine0001_CON,face, andIK).
-
Do not alter
AVATAR,geo_GRP,rig_GRP, orbind_GRP. -
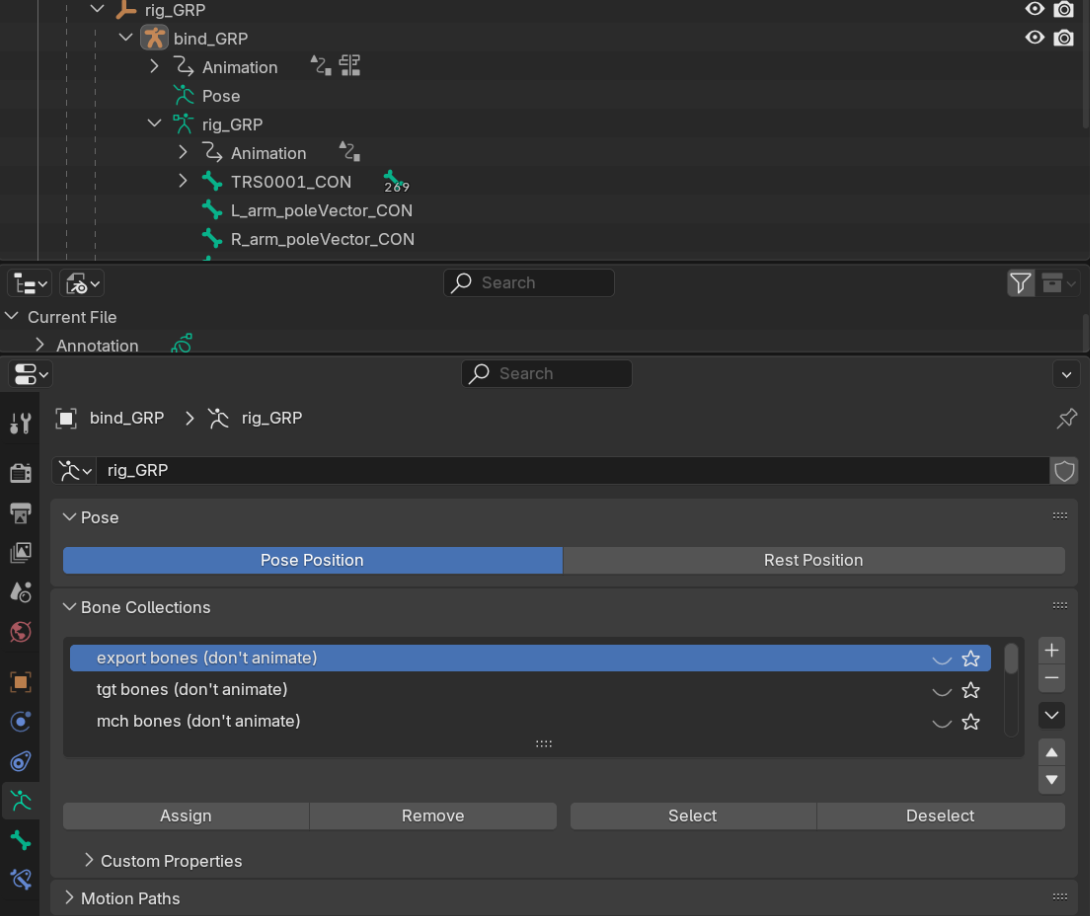
Use
bind_GRPbone collections to show/hide rig controls.
- Place props (additional objects) in an Empty named
prop_GRP. Use mesh objects bound to bones or armatures with standard bones.

- Use Translate only on specified controls (
-
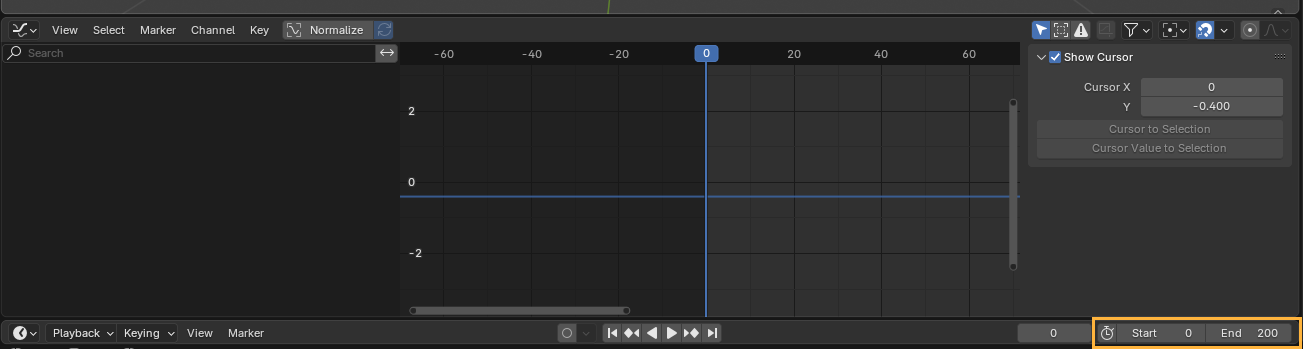
Set your scene timeline range to the desired number of frames.
Animation must be at least 2 frames long [0-2].
- Save your scene.
Export Animation
-
Navigate to the scripting workspace

-
If the script is not already available in the text editor, copy the full contents of
blender_export_tools.pyinto the text editor.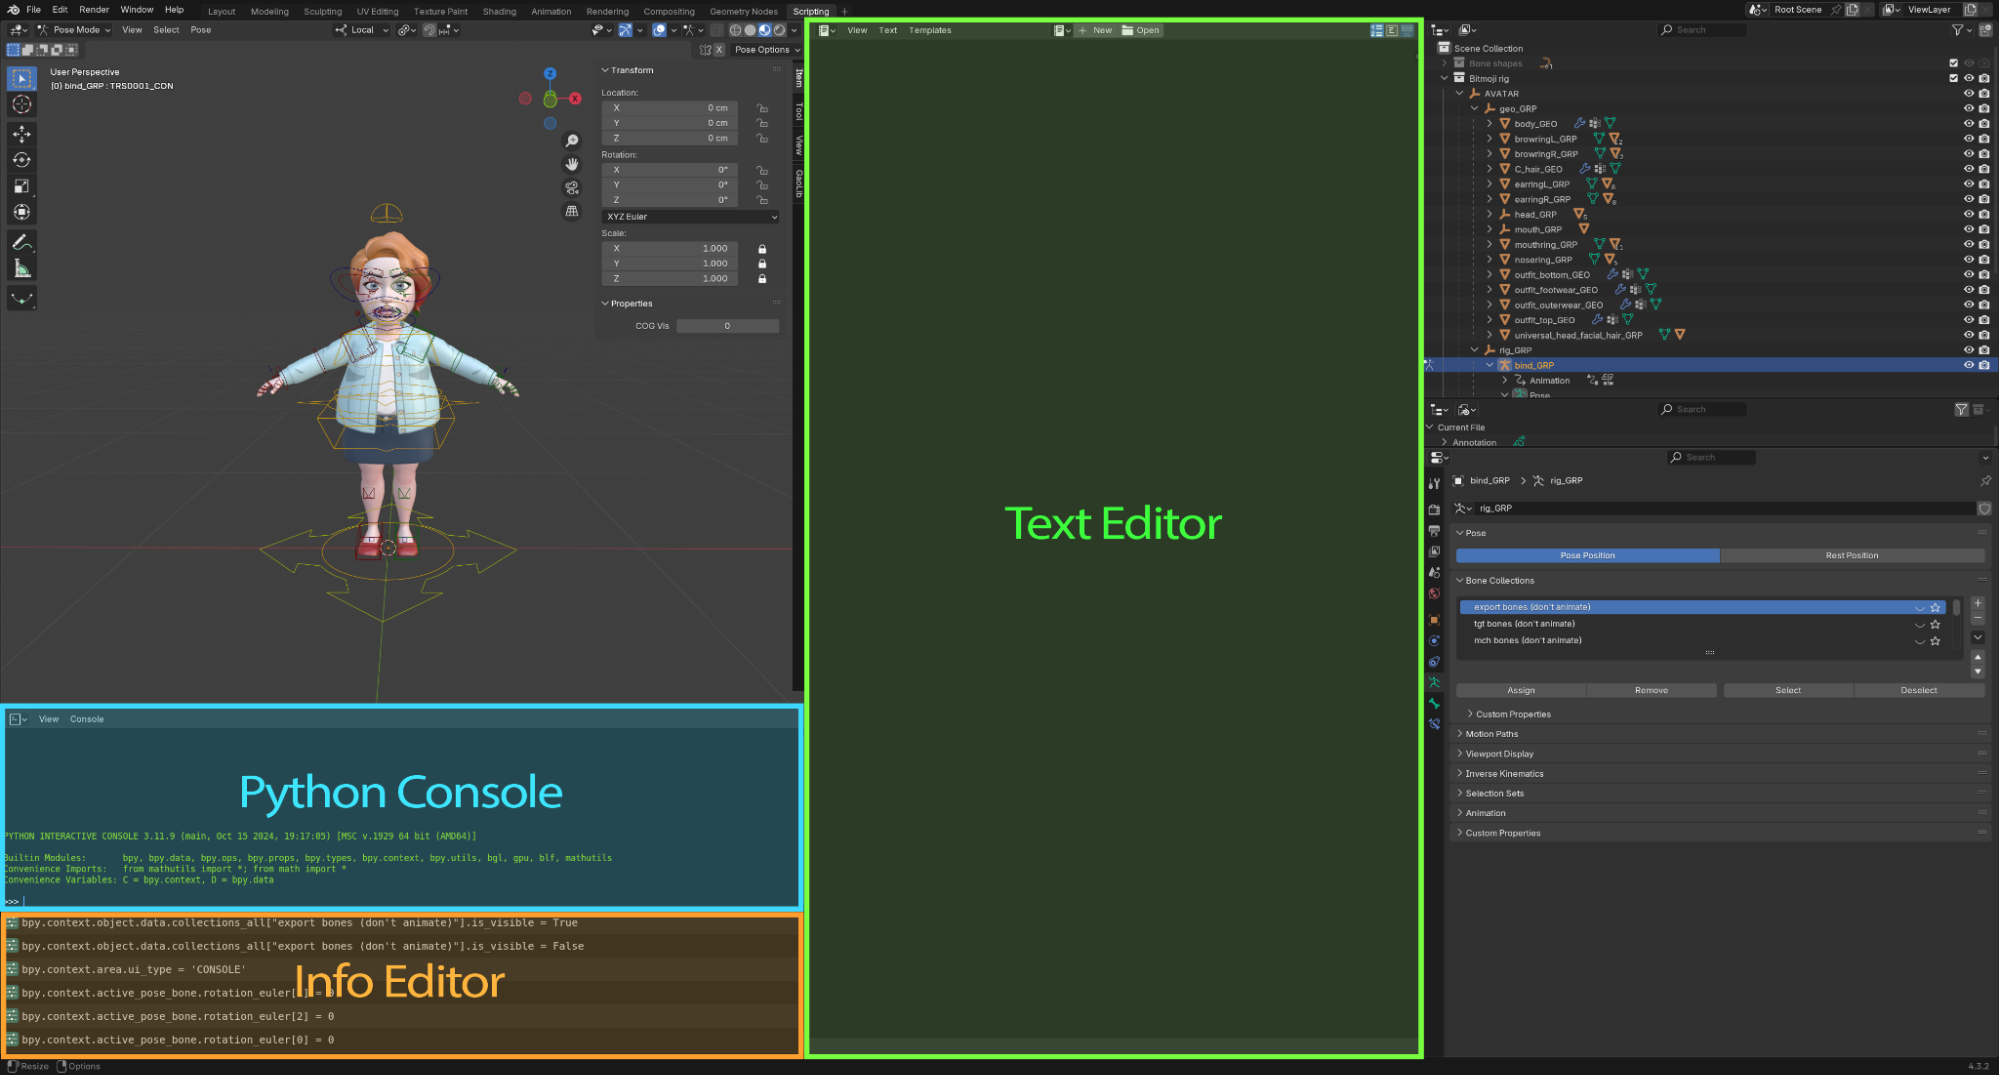
If working on Windows OS open the System Console to monitor export progress and errors:
Windows: Window > Toggle System Console.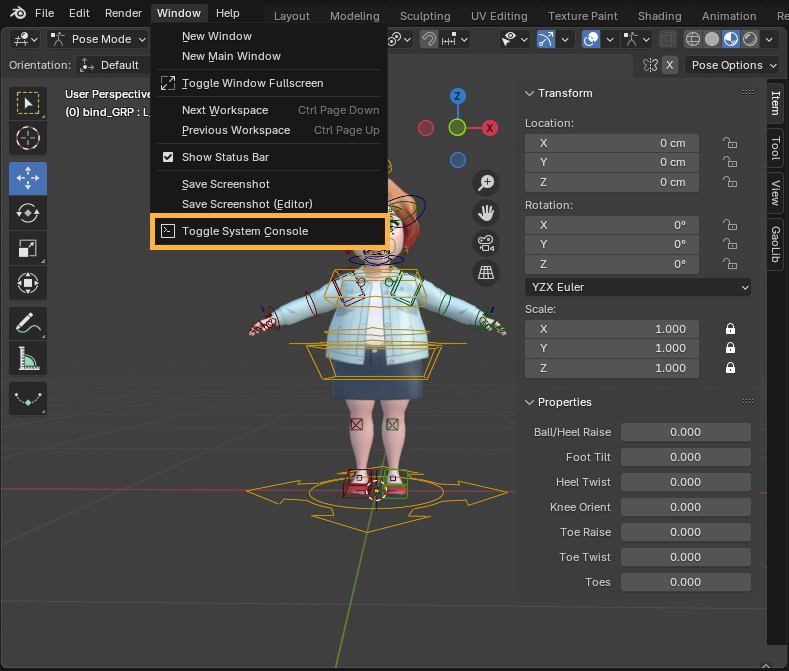
-
Run the script with the play button, blender will lock up, but report to the system console or terminal until the export is complete.

As a result you should obtain:
filename.fbx: Animation for Bitmoji.filename_prop.fbx: Animation for props, if any.
Mixamo Animation Library
Another way of creating animations for Bitmoji is through a service like Mixamo.
Please don't forget to upload the custom model provided below!
- Download .fbx file created for Mixamo
- On the Mixamo website click on the
Upload Characterbutton and upload the.fbxfile.
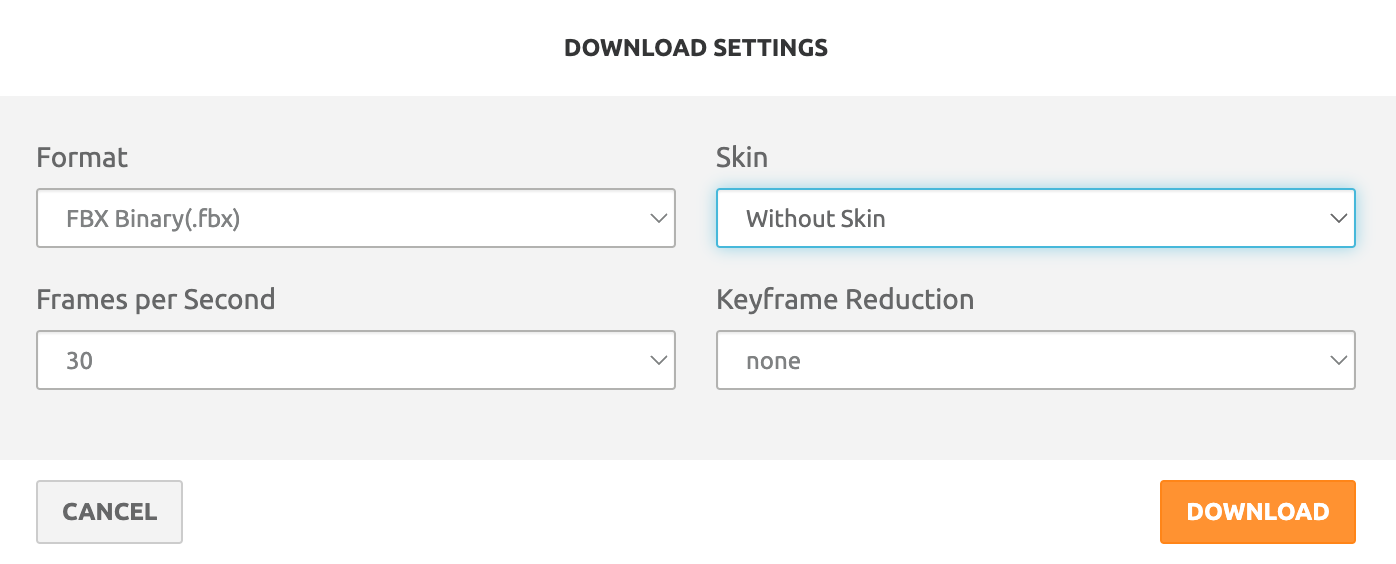
- Once you've selected the animation - adjust settings and click
Download. Select.fbxformat andwithorwithout skinoption (we will use Bitmoji 3D model obtained in runtime).
Please note that static poses (animations with a length of 1 frame) are not imported correctly at the moment.
Lens Studio Setup
-
Drag and drop the .fbx or .glb files with animation into the
Asset Browserto import it into Lens Studio. -
Create a new scene object, and add Bitmoji 3D component to it. If your animation uses Mixamo like rig, toggle the
Enable Adapt to Mixamocheckbox.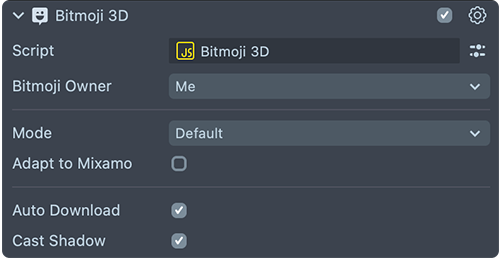
-
Add Animation Player component to the same scene object
-
Click
Add Clipand add theAnimation Assetthat came in from your imported FBX with your animation.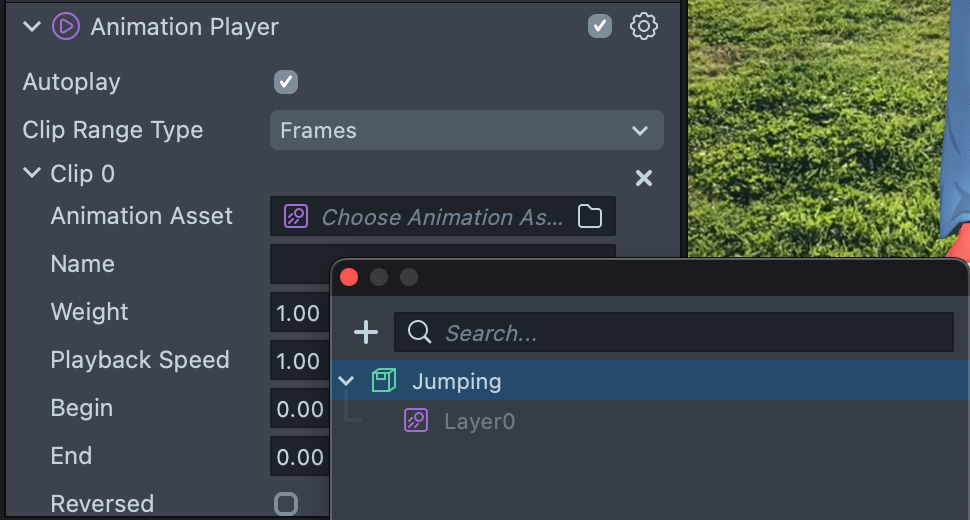
-
At this point you should see your animation playing!
-
For more advanced animation control and blending check out
Animation State Managerasset in the Asset LibraryYou might have to change the scale of your parent object depending on your animation.
Tips and Tricks
To make sure your animation works well, make sure to:
- Set the Animation Player blend mode to
Defaultinstead ofAdditive. - Set the object with
Animation Playercomponent to have an appropriate scale.
Playing the Animation
Take a look at the Animation Player guide to learn about playing animation automatically, programmatically, and more! Or check out the Animation State Manager custom component from Asset Library for easy animation control and blending!